how_to_install_hard-wired_pendant_light

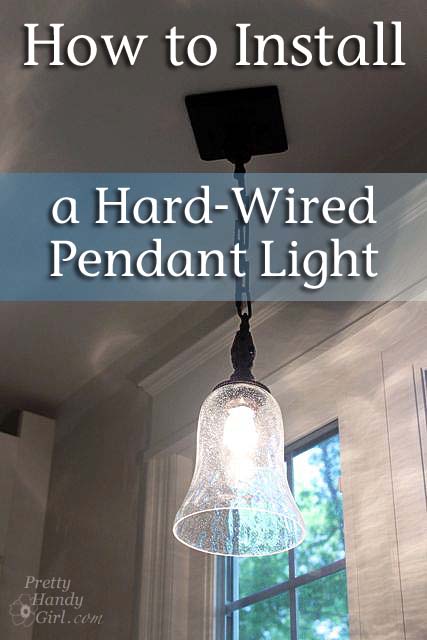
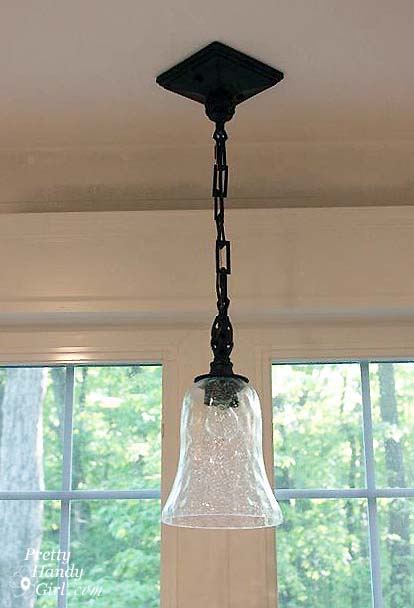
You may have noticed that pretty little seedy glass pendant light over our sink from my video the other day. It was a breeze to install, so I want to share with you the tutorial.

(I’ve included affiliate links for your convenience. I earn a small percentage from a purchase using these links. There is no additional cost to you. You can read more about affiliate links here.)

And now it’s tutorial time!

Materials:

Instructions:

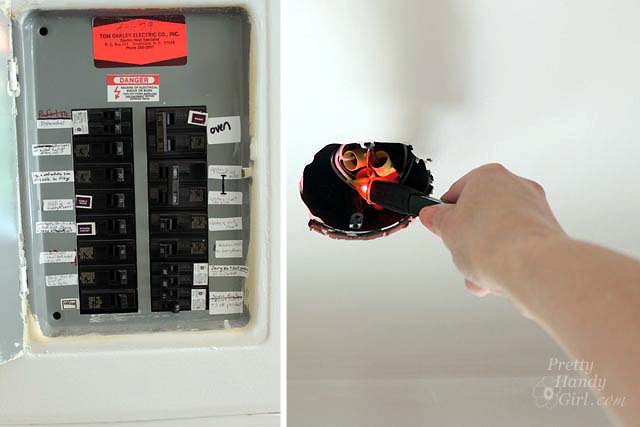
Safety First! Turn off the power to the light fixture circuit. If there is no light fixture installed, check the power with a voltage tester. (I had to flip 6 circuits before I found the one that fed power to that junction box! And you know, I updated the labeling in our circuit breaker once I found it. This is required by code.)

turn_off_power_check_wires

Modifying the Height of a Light Fixture:

Use a ruler to measure how low you want your pendant light to hang. If you need to, put a piece of painter’s tape at that mark to give yourself a visual reference spot to see if you like that height. (Or corral a partner into holding the light fixture for you while you make up your mind.)

uttermost_pendant_light

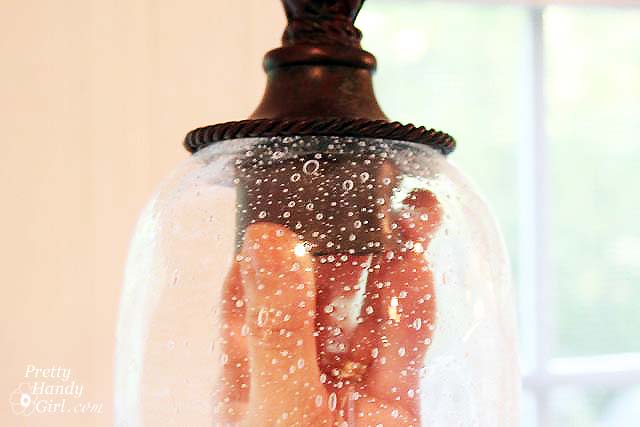
Lay your tape measure on the counter and stretch the light fixture out next to the ruler (be sure to set the glass shade on to gauge the full height.)

figure_link_to_remove

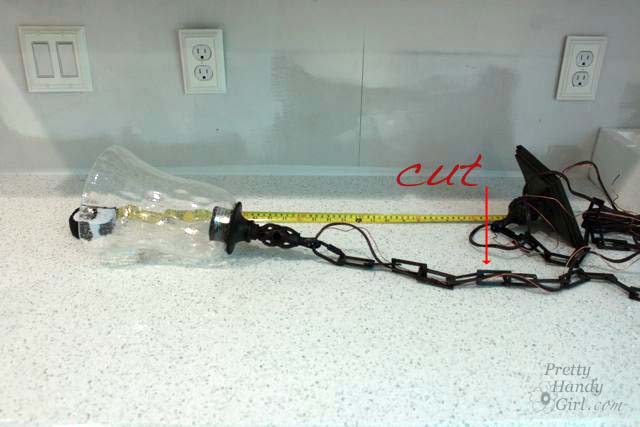
Assess where to separate the chain to reach the desired height.

remove_chain_light_links

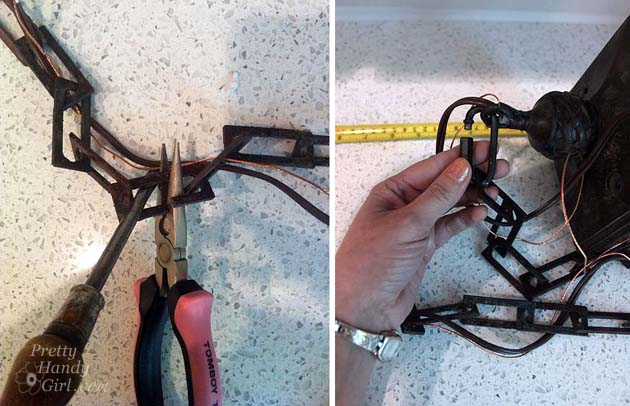
You can separate chain links by using two screwdrivers and rotating them in opposite directions as shown below:

Read more

drywall_up

I’d rather not say that I’m seeing the light at the end of this long renovation tunnel (for fear of jinxing myself.) But, I definitely have caught a glimpse of the finish line. Last week my kitchen designer emailed me to let me know that my cabinets will be arriving soon and could she schedule us for installation on March 25th? I seriously might have let a four letter word escape my lips as I read her email. I mean, yes I’m happy, but there is no way I feel ready! There’s still so much to get done before the cabinet installation.

Read more

how_to_install_recessed_can_lights

Kitchen progress is definitely moving along (hooray!!!) We now have recessed lighting in our ceiling and it really helps even out the lighting in the kitchen. Plus getting rid of the semi-flush light fixtures makes the ceiling feel taller.

We debated about installing new construction recessed lighting:

Install Recessed Lightsor remodel type recessed lights:

remodel_recessed_light

We could have installed either because our ceiling was already full of holes. Ultimately, we decided to install the old work (or remodeling type) lights because they clamp tightly to the sheet rock for less vibration. They also have a built in junction box with easy to wire connectors. (Did I mention that my son’s bedroom is right over the kitchen and there is a lot of jumping and bouncing that goes on up there!)

My electrician let me pal around and help him install the recessed cans after he ran the wiring. You know I took careful notes so I could share with you how to install your own recessed lighting fixtures. Read more

building_permit_office

When and Why You Should Get a Permit

Have you heard the horror stories about filing for a permit and the subsequent inspections? Did you hear the tale about the inspector that made the electrician pull everything out and start over? Have you been warned not to file a permit because you might “open a can of worms”? What exactly is a rough-in? And why do people say “pull a permit” instead of file for a permit? Don’t let misinformation put you and your family at risk. I have the answers to these questions and why you would want to file for a permit before starting your next home improvement project.

Last week I drove downtown to file for a building and electrical permit with Wake County, NC, but found out we are in the Raleigh City Jurisdiction for building permits (but that’s another story for another day.) Before I went to the permit office, I asked Barry Mooneyham, Chief Code Official of Wake County if I could have a little of his time to ask him some questions. It was a very informative 3o minutes, which completely changed my perspective on permits. I left his office with a new found appreciation and understanding of permits and inspectors.

Before I get to Mr. Mooneyham’s answers, I want to answer a recent question that some of my readers posted on Facebook:

Facebook_shot_pull_permit

Laura, Alyssa & Holly, thanks for asking. I was unsure of the origin on the term “pulling a permit” myself, so I did a little research.

Why do people call it “pulling a permit” instead of filing for a permit?

  • The joke answer: Ever try getting a building permit? It is like trying to pull a tooth!
  • The possible real answer:  It’s called “pulling” a permit because the people in the office have to “pull” the paper work out of a filing cabinet.

Having “pulled a permit” last week I can tell you that it really wasn’t hard. I did print out the paperwork online before heading downtown. This was invaluable because I was able to answer all the questions ahead of time. Some of the information that was required for the permit is: Read more

Are you ready to get toasty today? Today is the day that I’ll be showing you how to install the WarmlyYours TempZone radiant floor heat. Can I tell you a little secret? I was terrified! I was so fearful of breaking the heating wire, that I handled this roll with kid gloves. And I yelled at ANYONE who dared step on the mats in shoes. I realize now that I may have been paranoid and overreacted a little. I was just so anxious to have warm floors that I protected our radiant floor elements like a Mama bear of her cubs.

Remember on Wednesday how I told you how I had chosen WarmlyYours radiant heating systems because of their awesome warranty? Well, I also read feedback about their customer service and it ROCKS as well! That service starts with the ordering process.  I was in contact with a representative from WarmlyYours who helped answer ALL of my questions (of which I had many.) She reviewed my room layout and suggested the TempZone Cut & Turn Rolls which is one long mesh roll with the heating element woven and evenly spaced throughout the roll. I was doubtful and wasn’t sure how the roll would fit through the doorway and “roll” around our laundry room. But, she reassured me that they would send me detailed plans for installation. And that a DIYer like myself should have no problem with the installation.

Within a week, I received my custom TempZone roll with a layout just for MY space.

Not just a standard layout, but a custom plan for my exact room dimensions and usage. I was extremely impressed to say the least, because the plan was very detailed showing the exact location of the cuts I needed to make in the mesh mat (not the wire.) Having this map saved me hours of brain-twisting planning at the least.

Before installation, I read the instruction manual in its entirety (highly recommended.) Remember, I was a little nervous and didn’t want to do anything to damage the heating mat. I even made sure I was hopped up on caffeine so I could absorb every nugget of the lesson.

I also prepared the floors by installing cork underlayment (as detailed in this tutorial.) Are you ready for the tutorial to install radiant mats? It wasn’t as difficult as I anticipated and this part went fairly quickly. Let’s roll! Read more