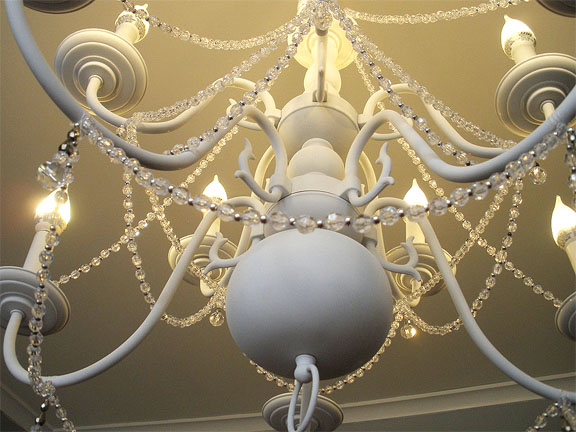
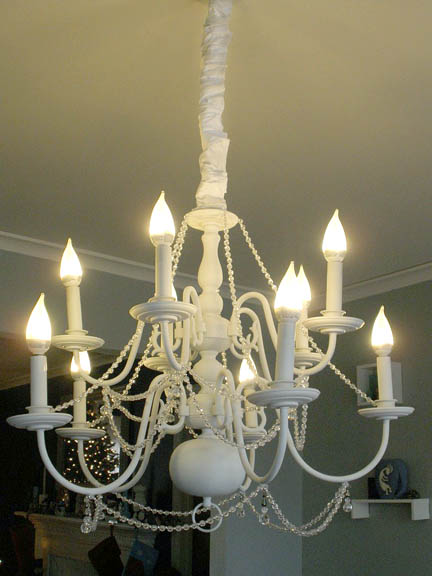
Welcome to our second Wednesday in 2012! Today I have a special guest for you: Bri from The Modern Parsonage is here to show you how she created that truly fabulous chandelier you see up there. But, before we get to the tutorial, let me tell you a little about this handy gal (and her partner in DIY crime!) Bri and her husband moved into a home that was previously a Pastor’s family home. They dove head first into the process of renovating the home to be more modern and fitting for the hip couple of professors that they are.

The Modern Parsonage showcases the renovation process, from idea to finished product, tossing in snapshots of design inspiration and everyday life.You can follow them as they transform their home one room (floor to ceiling) at a time. Check out their Staircase renovation, bathroom update, and installing flooring projects.

Okay, take it away Bri!

Let me begin by saying that I started this project thinking I needed a ton of prep work, money, and time to transform a boring, brass light fixture into a show-stopping (if I do say so myself) chandelier. O ye of little faith, I say to my former self. This is a beginner’s project and requires so little skill that I would go so far as to call it a fool-proof way to jazz up even the most tired light or lamp for significantly less than the cost of a new fixture. (Read: under $75)

Start with a cheap chandelier. I found one on my local Craigslist for $25, but I would recommend scouring your hand-me-down shop of choice since these brass fixtures are often the standard for apartments or new builds.

Next, I did some research online and adopted a few misconstrued beliefs that I will now dispel. First, it is perfectly fine to spray paint the plastic-protected electrical cord that runs up the chain. I was not aware of that and wasted quite a bit of time figuring out creative ways to protect the cord while spraying the chain. Second, either fully remove the plastic “candles” or spray paint them the same color as the fixture. I did not know that these were removable and you can still see the tape lines from where I thought I had to cover parts of the plastic. Learn from my mistakes, people.

After you have chosen a diamond-in-the-rough light, acquire the necessary resources. You will need:

  • A drop cloth
  • A place to hang your light (I hung mine in the basement, but you can just as easily use a tree if the weather is nice)
  • Two cans of the spray paint of your choice (it is always better to have extra on hand because spray paint has tricky drying times and you don’t want to run out in the middle of the project). I used matte white and it was just the cheap Ace Hardware brand.
  • A ventilator or mask. Always necessary when messing about with spray paint.
  • 220 grit Sandpaper
  • Deglosser. (This is only if you want to be super thorough. I wiped my chandelier down with just soap and water and the paint adhesion was still great.)
  • Beading of your choice. I used roughly 750 beads and got them at Michael’s, but it all depends on your taste.
  • White string (I got DandyLine brand and it is super strong).

For the optional chain cover:

  • Fabric of your choice (double the length of chain you want to cover and 7 inches wide).
  • Fabric glue
  • Iron-on Velcro
  • Thread
  • Also, an iron, that’s pretty important.

Now it’s time to get down to brass tacks. Get it? Because it’s a brass light? Anyway, lightly run your sandpaper over the fixture. Do not press too hard or the metal will scratch. The goal here is to rough up the surface so that the paint can form a strong bond. Next, give it a good once over with a damp cloth (soap and water will do, deglosser if you’re thorough) to remove any dust, grease, or grime. Let the light dry completely.

Don your mask. You will look beautiful, I promise, but more importantly, your lungs will thank you. Find a good spot to hang your light and start spraying.

As you can see, I tried to bundle up the electrical cord in the plastic bag, but that caused a lot of problems, including bare spots of brass. I also taped off the tops of the “candles” instead of just removing them and covering the exposed wire. So yeah, just don’t repeat my follies.

Spray painting is best in short, quick bursts. Long, sweeping motions are not your friend. It will take many, many thin coats so don’t be surprised if you have to use the entirety of two cans.

Once you have your desired level of coverage, let the light dry overnight. When the paint is fully cured, the real fun starts – beadwork. This part takes creativity and is really up to you. I did a lot of window-shopping for fancy-pants lights and finally decided I wanted a chandelier adorned with clear beads and small silver accents, embellished with teardrop crystals for extra pizzazz. I would say this is the longest part of the process; it took me about four hours to get all the beads strung and hung on the light.

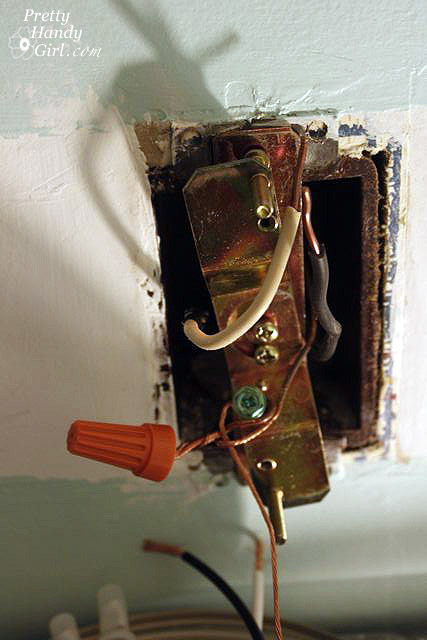
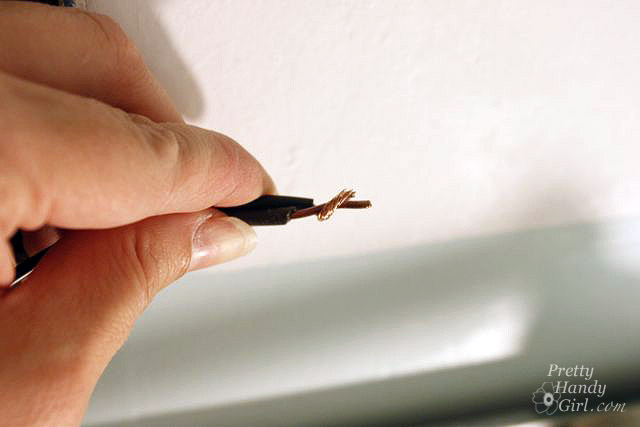
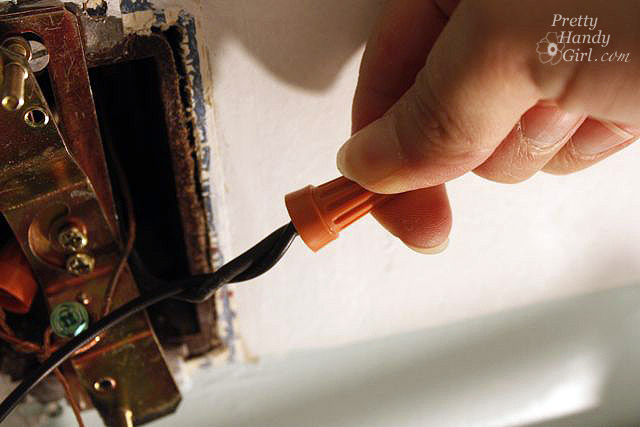
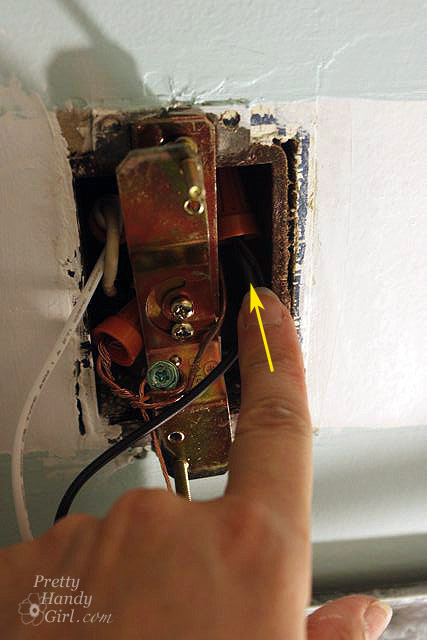
With the hard part done, re-install or switch out your fixture (remember, black wire connects to black wire and white to white!).

At this point, if you’re happy with your light as is, you’re done! If you’re like me and have an awful chain and unpainted electrical cord, you may want to consider DIYing a chain cover. Much cheaper, totally easy, and no sewing machine required.

Begin with your fabric swatch and fold over about a 1/4 inch on each side, ironing the edges.

Apply a small line of fabric glue inside the seams to create a permanent hem. When the glue dries (15 minutes to a half hour), sew a running stitch on both long seams. I know this sounds complicated, but trust me, if I can do it, so can you. Pass the needle in and out of the fabric down the edges, knotting each end. (It allows you to scrunch the fabric, which is important.) Gently pull the knotted ends and push the fabric together to your desired length.

Once the scrunching is done, grab your iron-on Velcro and press it on. Run the iron over the whole cord cover to ensure a strong bond. Now all you have to do is wrap it around your chandelier chain, making sure the seam is on the least visible side, and admire!

Isn’t that chandelier beautiful?! I know people would pay a lot of money to bring that chic lady home. Thank you so much Bri from the Modern Parsonage for letting us into her home for the tutorial.

Would you like to be a guest on Pretty Handy Girl? Read my open invitation here.

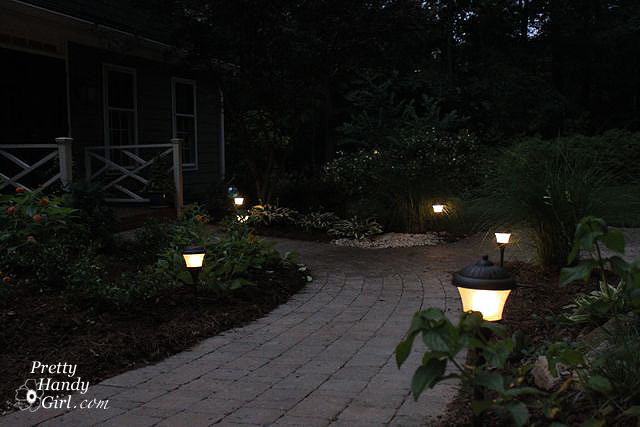
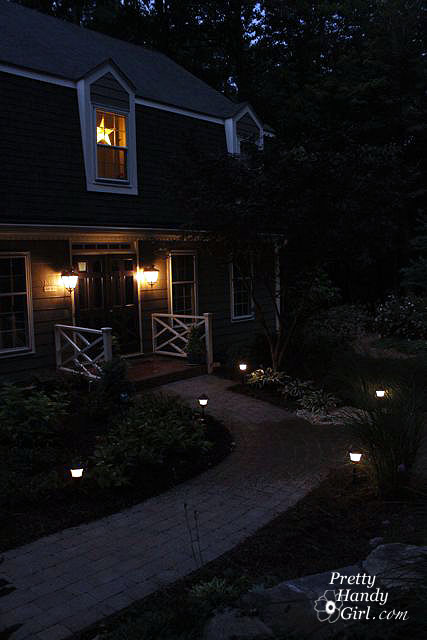
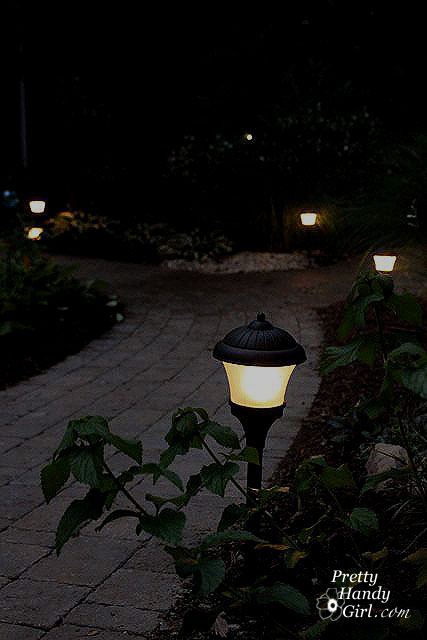
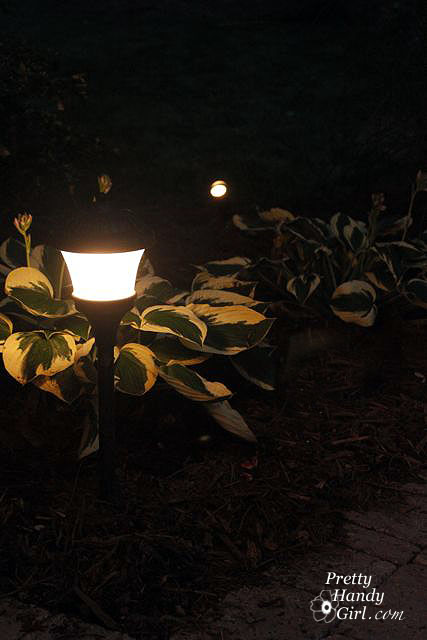
Installing low-voltage landscape lights has been on my “Want To Do” list for years now. I even bought some lights on clearance three years ago! Now that they are installed I’m kicking myself for waiting so long. They look so inviting.

Materials:
(contains affiliate links)

  • Hammer
  • Drill
  • Screwdriver
  • Pliers
  • Wire strippers and cutter
  • 3M Heavy Duty all-weather duct tape
  • Landscape lights (it might be wise to purchase one extra, you’ll see why later)
  • Transformer for Outdoor Lighting
  • Low voltage landscape wiring (I used 100 feet of 14 gauge, but check the directions for your lights)

In order to figure out what size transformer you need, you should add up all the wattage on the bulbs your lights use. This is a simple equation, for example, if your lights use 9 watt bulbs, then multiply 9 time the number of light fixtures you have. I ended up buying a Portfolio Outdoor 200W Magnetic Transformer for Outdoor Lighting. The transformer senses darkness and turns on the lights at dusk. I prefer this instead of a timer, especially because it will not need to be reprogrammed as the days vary in length throughout the year. The only downside is that they will come on during hurricanes, tornados and big bad dark thunderstorms. Then again, that isn’t necessarily a bad thing.

Matchy-Matchy. How to unify two colored lights:

Well, of course once I got ready to install our lights, I realized I needed more. Because the lights I bought were on clearance, they were no longer available in the stores. So, what’s a girl to do? I got eBaying and creative!

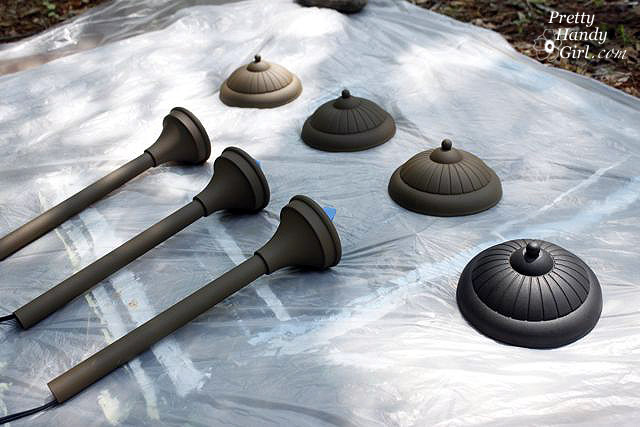
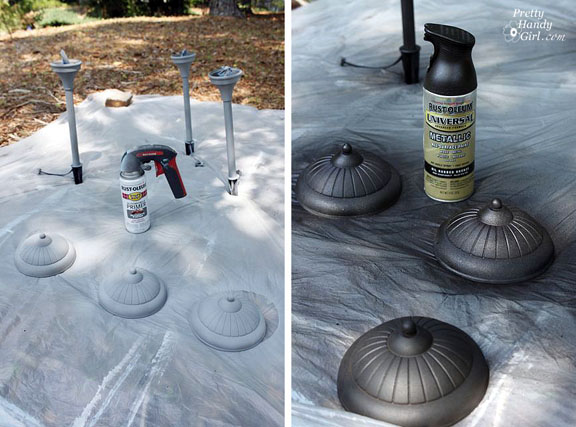
I was able to buy similar lights from an eBay seller. The fact that they were a different color was not going to dissuade me! Not when I have a can of spray paint in my arsenal. That and a can of automotive primer was all it took to turn those brown lights black (well, Oil Rubbed Bronze to be exact.)

After the paint dried, I began laying out my lights along the front path.

I decided to stagger them for maximum illumination along the path and to avoid creating an airport runway look (aka symmetrical.) I don’t know if you believe in UFOs, but I’m not taking any chances.

Installing the transformer:

*Be sure to read all the directions that come with your transformer. The following tutorial is based on the Portfolio transformer I purchased. Your directions may vary.

You will need to locate your transformer near an outdoor GFCI outlet. Luckily I had my electrician install an outlet last year. (Yes, there are some things that I will leave to a professional. Adding new wiring is one of them.)

Measure up 18″ from the ground (or the height recommended in your directions) and use the template that came with your transformer to drill two pilot holes for the mounting screws. Insert the anchors and tap them gently into the pilot holes.

Screw the mounting screws in, leave them extended partially to accept the holes on the back of the transformer.

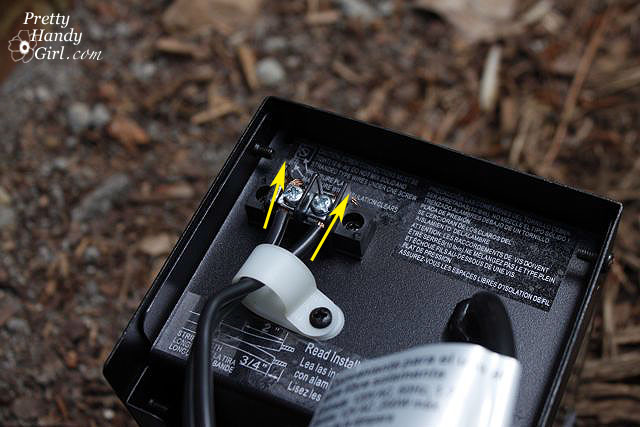
Split the end of your low voltage wire. Then strip a small amount off the ends using your wire cutters. Slip the wires through the holes on the transformer and tighten the screws over the wire.

Play with the amount the screws extend until the transformer fits flush against the wall. Leave the transformer unplugged.

Installing the lights:

*Be sure to read all the directions that come with your low voltage lighting. The following tutorial is based on the Malibu lights I purchased. Your directions may vary.

Dig a narrow trench along the path to the location of each light. Aim for 8 – 12″ deep, the deeper the better so you don’t accidentally chop your wire while digging or planting.

Because the wires are low voltage you won’t be harmed. However, if you accidentally cut your wire, you will have to re-install your lights all over again! NOT COOL!

Run the wire into the trench until you reach  your first light. The directions that came with the transformer explain that you want your first light to be at or further than 10′ from the transformer. You can cheat this by making your wire loop or arc to take up more length on the wire before your first light. But, make sure your light isn’t so close to the transformer that it would be read by the photo sensor (the same holds true for having your transformer too close to your house lights.) Make a loop around your light. This protects the wire from being too taut and will hopefully prevent all your lights from being uprooted should someone accidentally (or intentionally) play soccer with one them. I can’t imagine that happening in our yard!

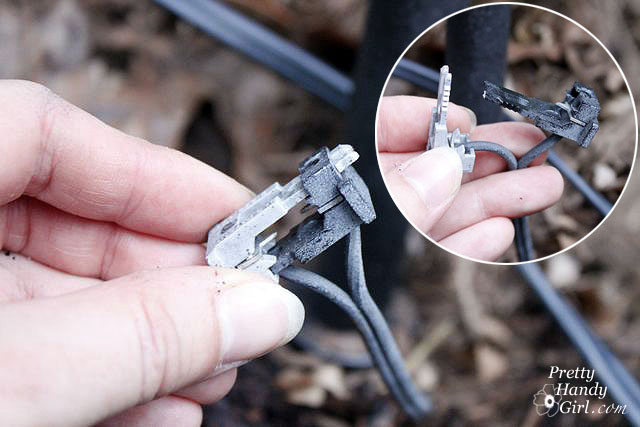
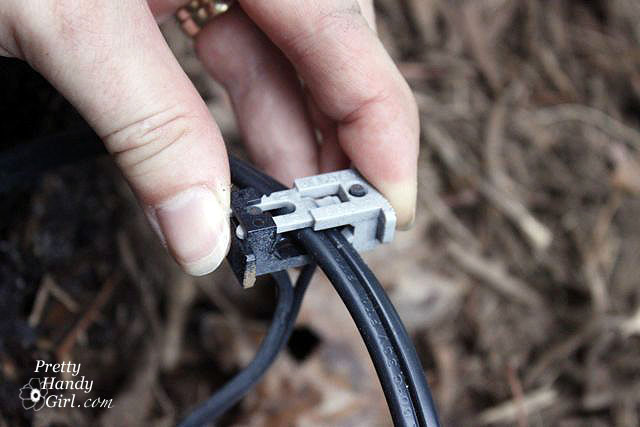
Open the connector on your light.

Insert the wire into the connector. Then press the connector back together firmly.

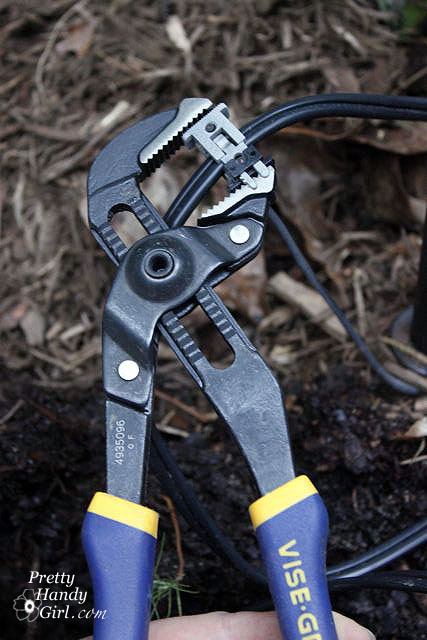
Unless you have super human hand strength, you may wish to use pliers (I used my Irwin Groove Lock Pliers) to press them together. You need to insure that the metal prongs pierce through the wire insulation and make contact with the wire inside. Later, if one of your lights doesn’t work, you’ll know that it could be that the connection isn’t tight enough.

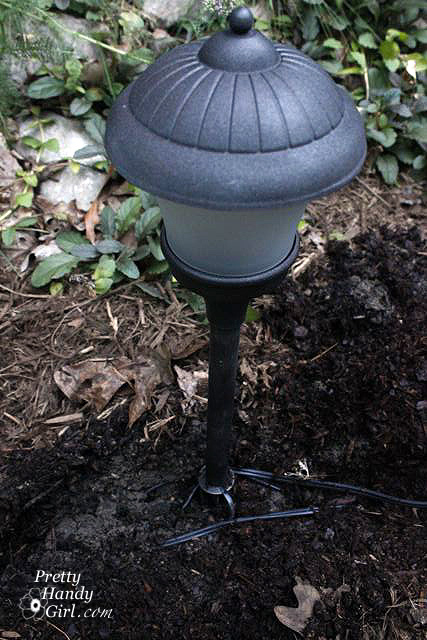
Insert the stake of your light into the ground. Don’t fully bury it yet. Trust me on this one. It’ll save you from re-enacting The Diggingest Dog should your lights fail to work properly!

Repeat for the remaining lights.  When you reach the end, you may wish to “cap” off the end of the wire with duct tape. This is not required, but I decided it was best to protect the wire from any source that might short it out.

Plug in your transformer and adjust the settings to turn your lights on. Do they work? Then clap yourself on the back! If not, you need to go back and check all those connections. Good think you listened to me and didn’t bury them, right?!

Let me tell you a little antidote about a girl, let’s call her “Whitney”, who buried all the connections, turned on the transformer and got all excited because the lights worked. Only to come back 30 minutes later to an error message on the transformer and no working lights. Needless to say, she had to dig up every single light and press all the connections tight again. Then she tested the lights only to be disappointed yet again. She was so frustrated, that she went inside and went directly to bed. The next day she spent too much time on hold with the customer service numbers for the transformer and the light manufacturer. They weren’t much help. “Yes, I read the directions. Yes, I checked the connections. Yes, yes. YES!… Okay thanks (or no thanks!)” But, she knew she was smarter than the average bear, so she systematically removed one light at a time and then turned on the transformer. Finally upon removing the last light and plugging in the transformer she found that they suddenly worked. I’m not sure why (errr, I mean she wasn’t sure why that last light caused the problem), so she decided to discard the last light.

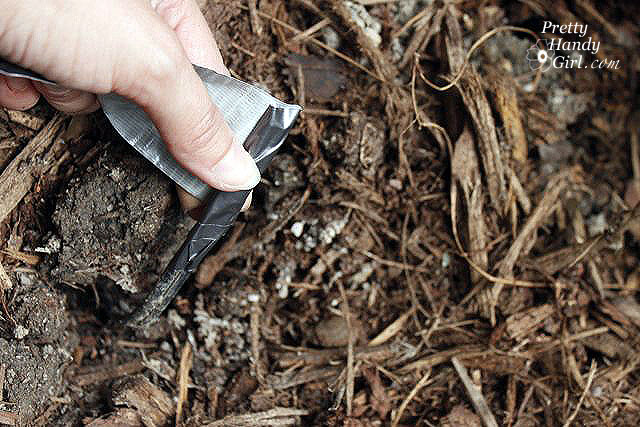
For good measure once all the lights are working, wrap the connectors in Scotch Heavy Duty All-Weather duct tape to keep them sealed and connected. Call it overkill, but I didn’t want to end up like Whitney.

It doesn’t have to be pretty to be function. Just ask Pretty Handsome Guy, since this does remind me a LOT of that post he wrote for me.

NOW, you can bury the light stakes, check that they are level and then fill the holes with dirt and pack it down.

And that is it! This is a relatively easy install. It may require a little bit of patience if the lights don’t work at first (or second.) But, if all goes perfectly, this is a half a day project.

Landscape lighting can improve your curb appeal, and also the value of your home. They are also great for deterring thieves. But, I like them because they light up my beautiful plants. And, because, it is very relaxing sitting outside after dark in the glow of the lights with a drink in hand. What more reason could you need for installing landscape lights?

What do you think? Do you like? Is this a project you think you could attempt yourself? I bet you could.


Disclaimer: I was not paid by Portfolio or Malibu to write this post. Those are the brands I purchased with my own money. The 3M All Weather Duct Tape was sent to me by 3M to use. As were the Irwin Groove Lock Pliers. I was not compensated in any way by them. Nor was I swayed to write positive things about their products. There, I think that covers everything.


Changing Out a Light Fixture

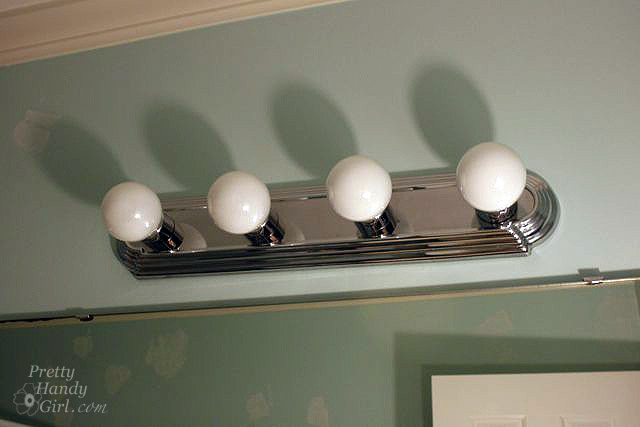
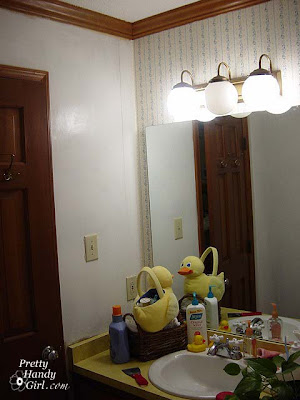
Have you had it with those ugly Hollywood light fixtures? The ones where the bulbs are lined up in a straight line staring you in the face? Did you know that you don’t have to live with them? Even if you live in an apartment, you can switch light fixtures out fairly easily. (Be sure to keep the old fixture and all the parts so you can re-install it before you move out.)

Light fixtures range in price from $20 to well over $200. Sometimes you can luck out and find some nice light fixtures on Craig’s List or eBay for less.

I hope you can benefit from this tutorial. I think you’ll agree, it is neither difficult nor challenging changing out a light fixture.

Instructions:

Before beginning the installation you MUST turn off the power to your fixture.


Changing Out a Light Fixture

Required Safety Instruction:
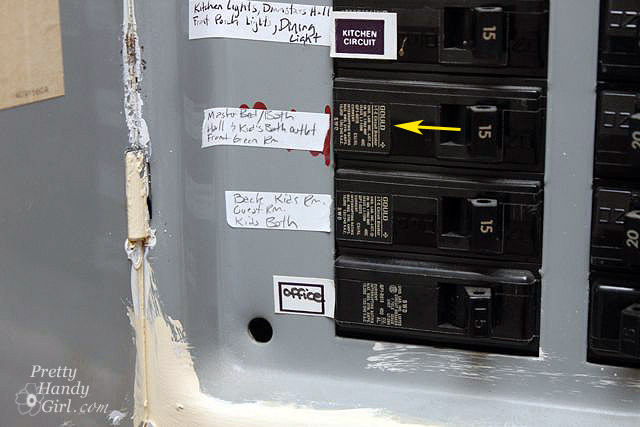
Turn off the power to the light fixture you are working on. I highly recommend turning on the light you will be working on, then shut off the circuit at your circuit breaker and check to see that the light has gone out. Also note that just because the light fixture power is turned off, it doesn’t necessarily mean that other outlets or lights in the same room are on the same circuit. Always check for the presence of power before you work on it.

Tools:

(I’ve included affiliate links for your convenience. I earn a small percentage from a purchase using these links. There is no additional cost to you. You can read more about affiliate links here.)

Unpack your new (or slightly used) light fixture. Read through the directions as some steps may vary from this installation tutorial.

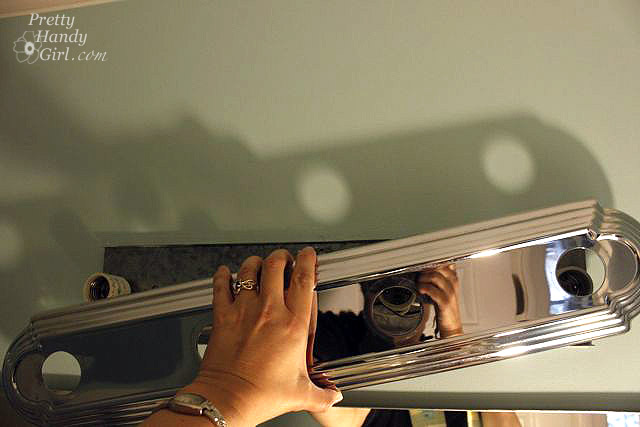
Begin by unscrewing the light bulbs and then remove the collars around the light bulb sockets.

Changing Out a Light Fixture

Locate any other screws that might be holding the fixture in place. This fixture simply popped off.

Changing Out a Light Fixture

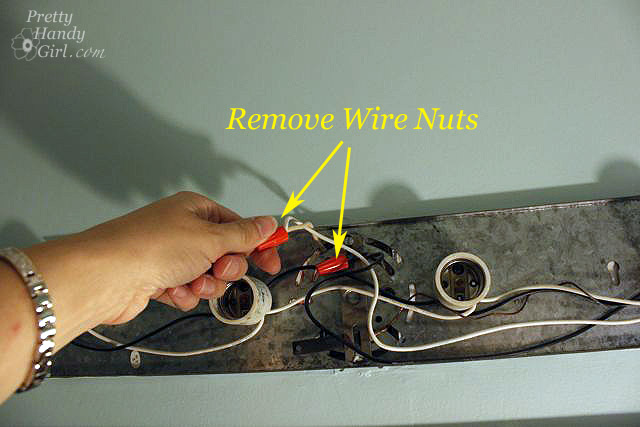
Untwist the wire nuts holding the wires together.

Changing Out a Light Fixture

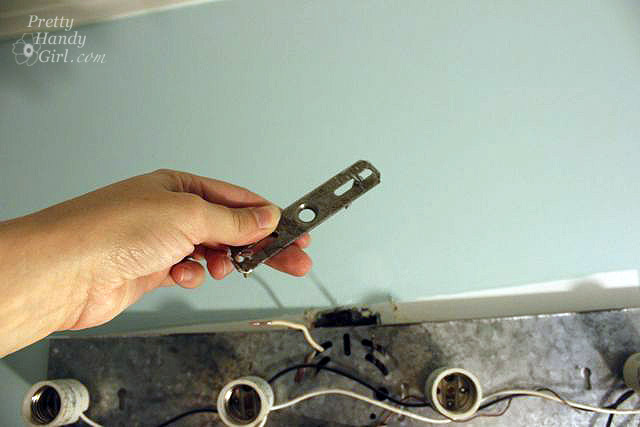
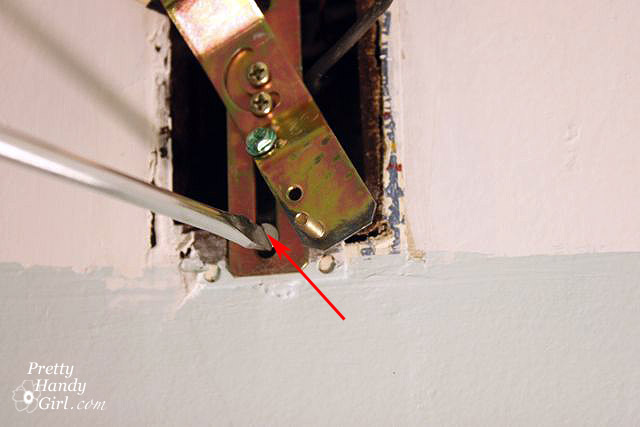
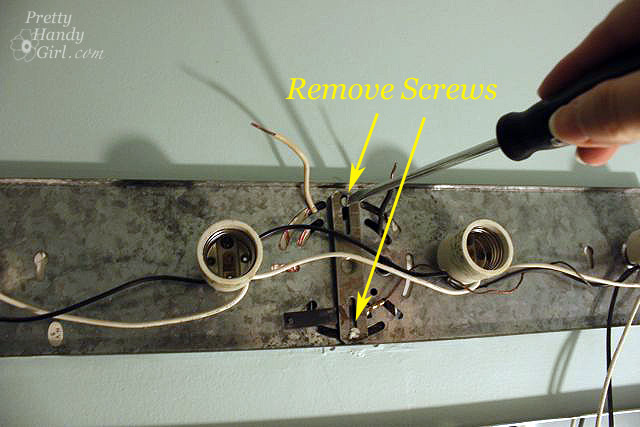
Once all the wires are disconnected, unscrew the two screws holding the mounting bracket.

Changing Out a Light Fixture

Remove the mounting bracket…

Changing Out a Light Fixture

…and now you should be able to remove the light fixture. Laugh at any hidden colors and wallpaper beneath the fixture. (Toile! Ah, not so bad.)

Changing Out a Light Fixture

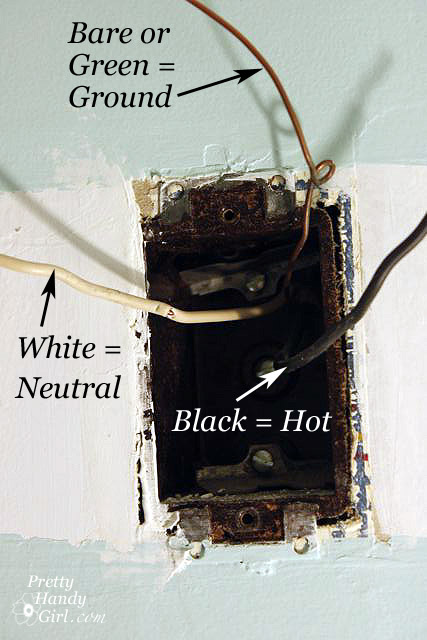
You should be left with just the junction box and three wires protruding from the box. The bare or green wire is your ground wire. The white is your neutral wire and the black is your hot wire.

Changing Out a Light Fixture

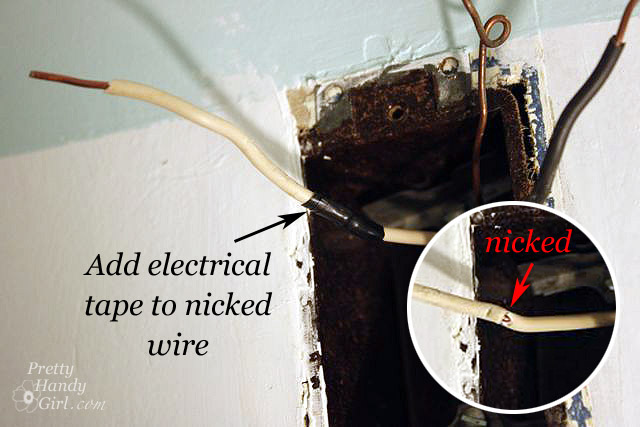
If you were eagle eyed, you might have noticed a small nick in the insulation of the neutral wire. This could cause a short, so I wrapped some electrical tape around the nick.

Changing Out a Light Fixture

Install the new mounting bracket that came with your fixture (if you bought a used one, you may have to use the old mounting bracket from the Hollywood Strip). Attach the screws through the bracket and into the junction box.

Changing Out a Light Fixture

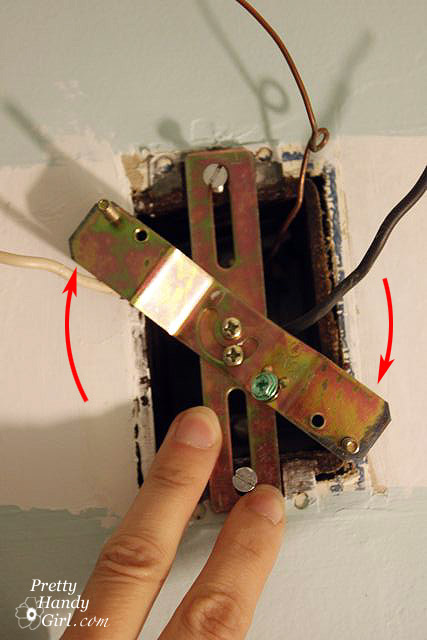
The mounting bracket that came with my fixture has a rotating bar that can swing 180 degrees. Position this bar so the fixture will hang level.)

Changing Out a Light Fixture

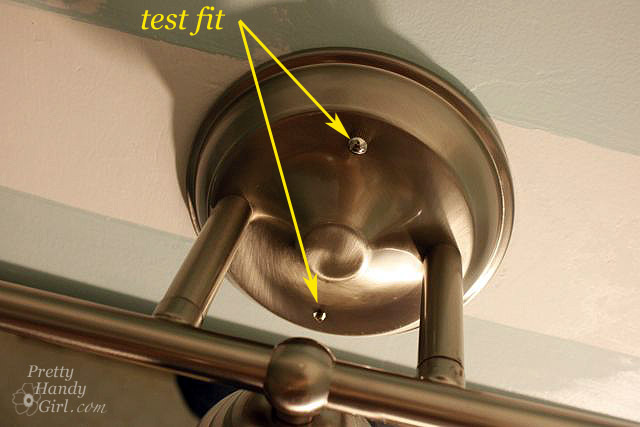
Test fit your fixture and adjust the depth of the mounting screws (the “no head” screws on the mounting bracket) and the angle of the swinging bracket arm. Once the bracket is level and fits snugly with only a small portion of the headless screws poking through; remove the light fixture and tighten the screw in the middle of the mounting bracket to secure the rotating bar.

Changing Out a Light Fixture

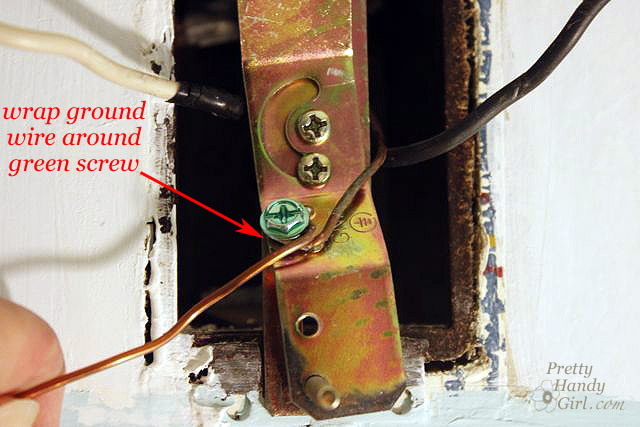
Wrap the ground wire from the junction box around the green or bare screw on the mounting bracket.

Changing Out a Light Fixture

Connect the ground wire from the light fixture to the ground wire from the junction box. Twist them together and secure them with a wire nut.

Changing Out a Light Fixture

Twist the black wires from the junction box and the light fixture together.

Changing Out a Light Fixture

Twist a wire nut on to secure them.

Changing Out a Light Fixture

Repeat the same process to connect the white wires.

Changing Out a Light Fixture

Gently fold and tuck the wires back into the junction box. Try to position the white wires on the opposite side as the black wires.

Changing Out a Light Fixture

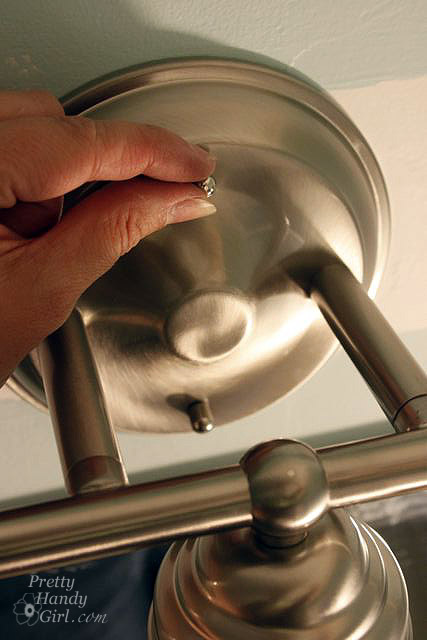
Place your light fixture onto the headless screws and secure the fixture by screwing on the small ball caps.

Changing Out a Light Fixture

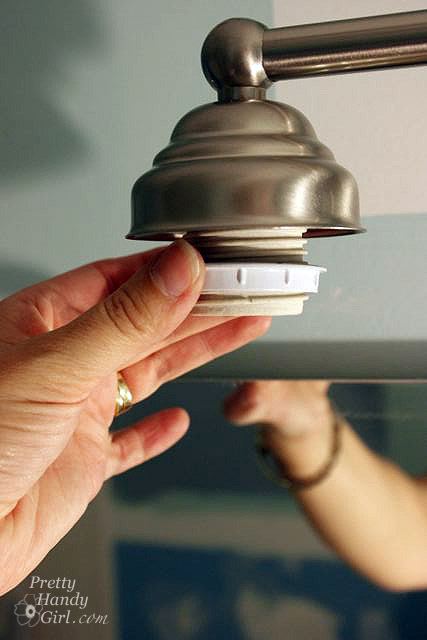
Remove the shade ring from the light bulb sockets.

Changing Out a Light Fixture

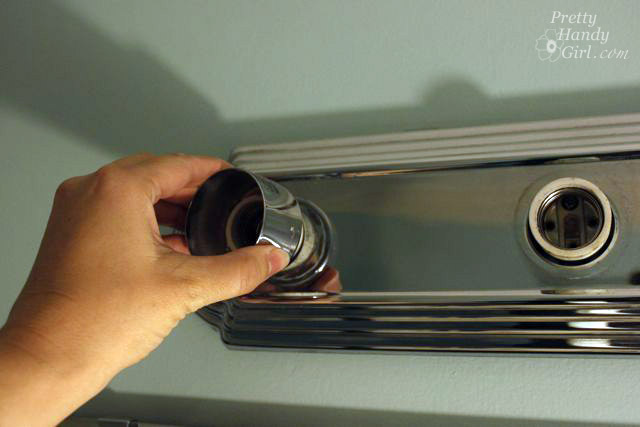
Slip the glass shades onto the socket and then screw the collar back on to hold the glass light shades.

Changing Out a Light Fixture

Repeat for the remaining light sockets.

Changing Out a Light Fixture

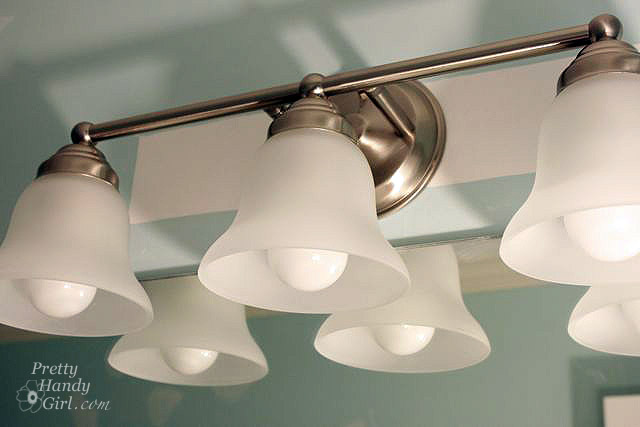
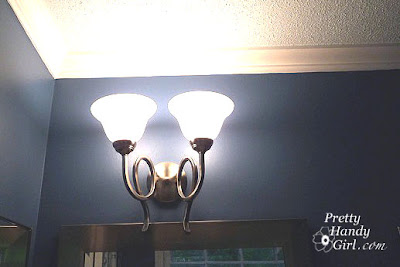
Many vanity light fixtures are reversible.

Changing Out a Light Fixture

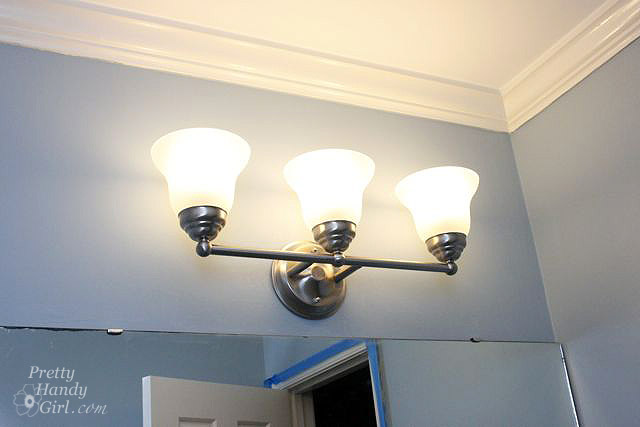
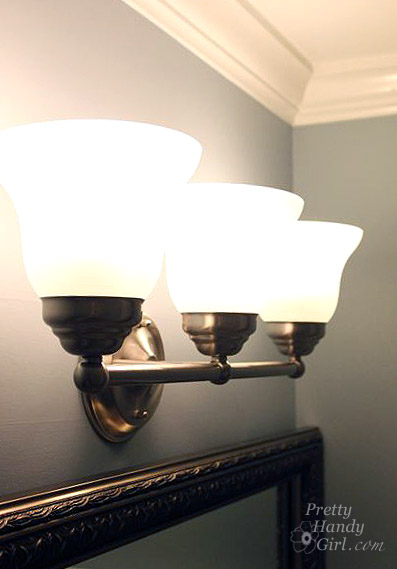
I decided to rehang my fixture facing up for less direct light and to avoid bumping into the mirror frame.

Changing Out a Light Fixture

What do you think? Do you like the new look? Do you think you will try it yourself?  I hope so, it was easy!

Changing Out a Light Fixture


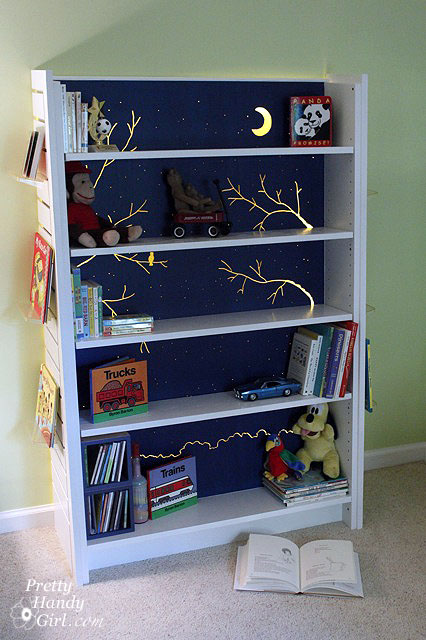
I promised to show you how I lit my son’s bookcase. It really isn’t anything fancy.

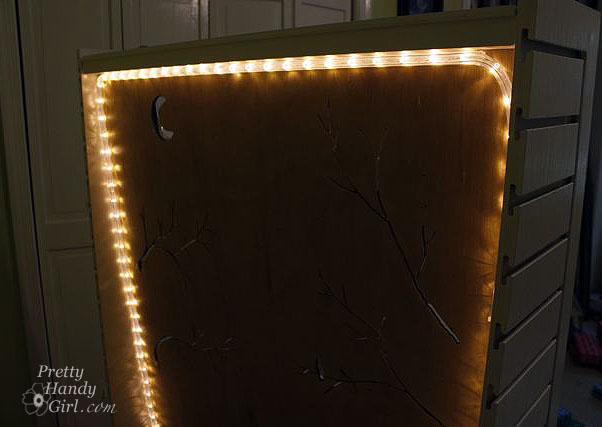
But, a promise is a promise. Here is the view of the back of the bookcase:

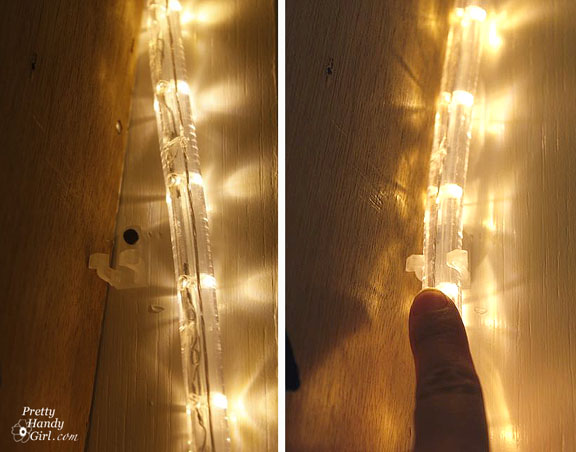
I purchased the LED rope lights at Home Depot. They came with little snap in holders. You simply drive a screw into the mounting hole. Then snap the rope light into the holder.

On the top edge, I used a long channel strip (sold separately near the rope lights. It has a self adhesive backing. Then you firmly press the rope light into the channel. This took some serious strength, but I finally got the length of the rope light inside the channel.

Finally, I plugged the light into a timer.

The lights are set to come on at bedtime and turn off shortly before sunrise.

That’s it! And this is probably the shortest tutorial I ever wrote.

So, I’ll share a few pictures from my sister’s flower garden in California. Check out all the pollen on the back legs of this bee! They are the orange masses hanging from his legs.

The bees were loving the agapanthus as well.

The pink blossoms are from a lemon tree that grows in their back courtyard. Sadly none of them were ripe while I was there. I can only imagine how fresh and sweet lemonade from those fresh picked lemons would taste. Mmmmm!
Be back later this week with more DIY tutorials!

Earlier in the “Falling in Love with Your Home”series, we talked about increasing natural light. Today I will be expanding on the topic, but this time I’m talking about the man-made type of lighting!

As I mentioned in my previous post, in the quest to fall in love with our home, we have painted almost every room in our home, but I have also replaced almost all of the light fixtures as well!

There is no excuse for putting up with dated, dim, or just plain ugly light fixtures! (Although, I will accept “but, I have 25 foot ceilings” as an excuse.)

I know that sounds like it would cost a fortune, but honestly the average cost I’ve paid per light fixture is $30. I’ve paid as little as $5 and at most I paid $125 for the drum shade pendant in my office.

My sources for lighting are: Craig’s List, Habitat ReStore, Overstock.com, eBay and friends! A new source you might also try is DiggersList.com, it is kind of like a Craig’s List for building supplies.

One day’s haul from the Habitat ReStore!
$20 Semi-flush light fixture from Craig’s List.

And, you do not to spend money hiring an electrician. Removing and rewiring a light fixture should not stop you “Dead in Your Tracks.” Sorry, bad pun, I know. But, seriously, it isn’t rocket science. As long as you are safe and Turn Off the power (flip the circuit breaker) that your fixture is on, you should be able to replace your own light fixture.

Here is a good instructional video for replacing a ceiling light fixture:


Note: They mention you will need a helper in the video. I’ve only needed help when removing a heavy fixture (for example a ceiling fan.)

Still a little scared? Well, think of it this way, all you are doing is unscrewing screws, paying attention to how the light that you are removing is installed. Then repeat the same set up when installing the new. Easy peasy. Oh, and I don’t use the circuit tester (although I should). I turn the light on before I flip the circuit breaker. That way I can see when it is off.

To view another tutorial from Pretty Handy Girl for replacing wall mounted fixtures, CLICK HERE.

Now let the lighting parade begin:

In our foyer I wanted an open glass hanging fixture to light up the small space.
Before: Foyer Brass Light

But, I hated the brass light so much that I settled on a Costco semi-flush light that I paid $45 for.
Interim Foyer Light

Little did I know that I would find the perfect fixture a year later at our Habitat ReStore. A little Oil Rubbed Bronze spray paint and I was in love with my new foyer light.

$10 Spray-painted Habitat Light Fixture. Tutorial HERE

We have all seen the hideous Hollywood style strip lights in a bathroom. That is exactly what we had in our master bathroom. I ended up finding this temporary fixture on Craig’s List.

Brushed Nickel wall mounted sconce from Craig’s List.

You have to love to hate this dated 1970’s fixture. Antique Brass and globes as big as duckpin bowling balls make for an interesting bathroom fixture.

An inexpensive wall mounted light fixture from Lowe’s really brought this bathroom into this decade (not to mention some paint and other updates. Details HERE.)
This shiny brass chandelier was the last of our light fixtures to be converted. I knew what I wanted here, but couldn’t find an affordable black chandelier.
Before: Dining Room Shiny Brass Chandelier
As luck would have it, I saw this baby hanging from a friend’s ceiling and remarked how much I liked it. Right there and then he told me I could have it. I’m only kicking myself for not installing it months sooner!
After: Black Chandelier
(FREE because it wasn’t a friend’s style! I know – seriously – don’t hate me.
Because I would if your friend gave it to you for free!)

When we moved into our home, the light fixture over the kitchen table was a dim 60 watt bulb fixture that really left me craving more light.

Before: Kitchen Brass & Glass Pendant Light

Okay, I really hesitated to post this next picture, but I refuse to hide any of my flaws from y’all. Well okay, maybe just a few.

I bought this light fixture off of Craig’s List hoping to improve the light on our table. BIG MISTAKE! It was such a harsh and direct light that I turned around and sold it a month later.

Interim Light: Modern Glass & Brushed Nickel.
“Ummm, Mr. Spielberg, I have something you might be interested to see in my kitchen.”
WHAT WAS I THINKING?

A few keystrokes on the keyboard brought me to this little gem for our kitchen. I just love the quaintness of this light fixture that I found on Overstock.com. Small, whimsical, yet not too cutesy. To center the chandelier over our kitchen table, I installed a ceiling toggle style hook and sewed a swag cover to hide the chain.

After: Rustic Bronze and Silver Leaf Chandelier $65 from Overstock.com

Chandeliers aren’t just for your dining areas. I’ve seen them in laundry rooms, bedrooms, and even mudrooms!

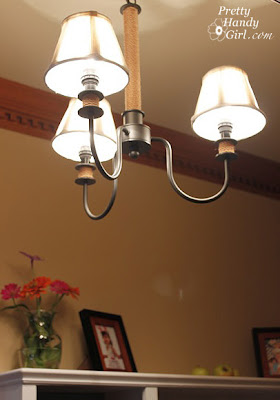
Black iron & rope 3-arm Chandelier.
Renee’s $10 Habitat ReStore light that we installed in her mudroom.

Don’t neglect your exterior lighting. These wall mounted lights were so small and looked very weathered.

Before: Dirty Brass & Shiny Black Exterior Lights

I finally found some beautiful old world lanterns at Lowe’s for $24 each! SCORE!

After: Copper Wall Mounted Exterior Lights. Installation Tutorial HERE.

Light fixtures don’t have to be hard wired. Some ambient lighting in our home comes from plug-in style lighting. Like these pendant lamps I made from minnow (fish) traps:

They started life as a $5 fisherman’s trap.
And now they have a new life on our screened porch.
$3 Thrift Store Lantern retrofitted with a plug in light kit.
Perfect for reading stories in Pretty Handsome Son #1’s bed.

I saved my favorite light for last. This star light hangs in our upstair’s hallway. The light is on a timer and gives off just enough illumnation for our little late night sleepwalkers.
Paper star light plugs into nearby outlet and is set on a timer.

So how about your home? Do you have any light fixtures you detest? Have you scoured Craig’s List? Be sure to check weekly for new postings.