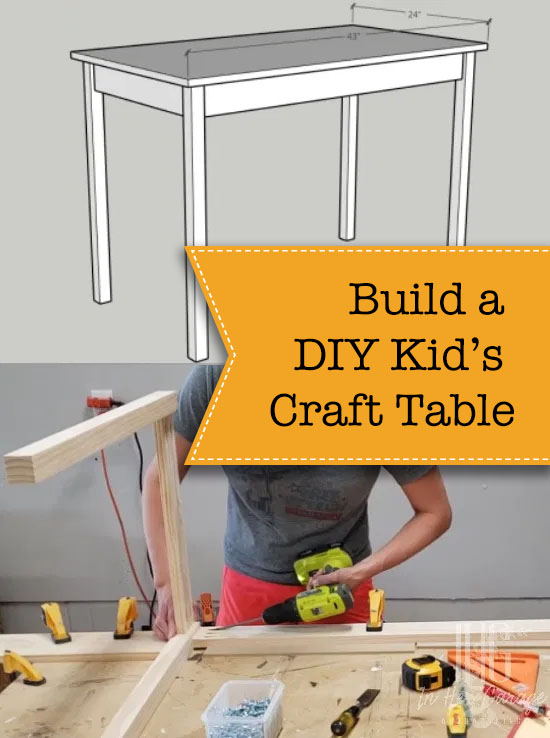
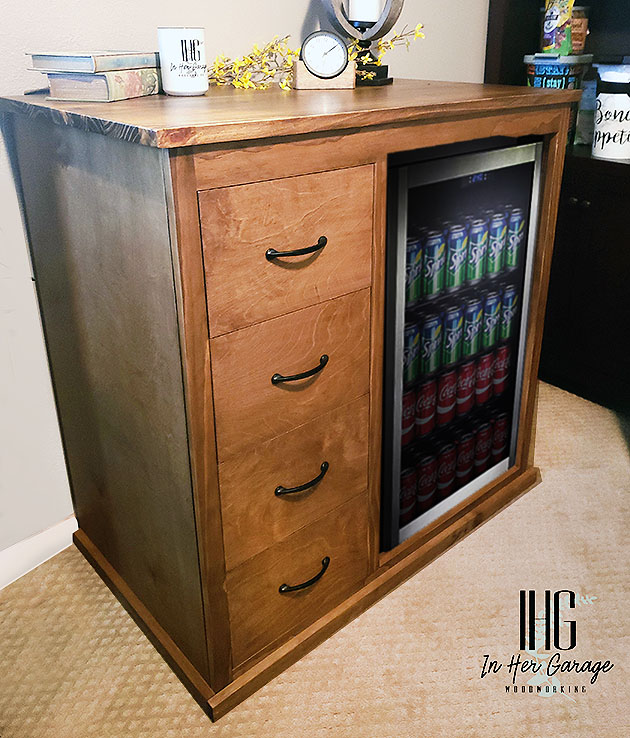
I built this side table as part of the bedroom furniture set for my daughter’s new room. It may look a little complicated, but can be built with a circular saw or a table saw. Let’s make this DIY Modern Boho Side Table!
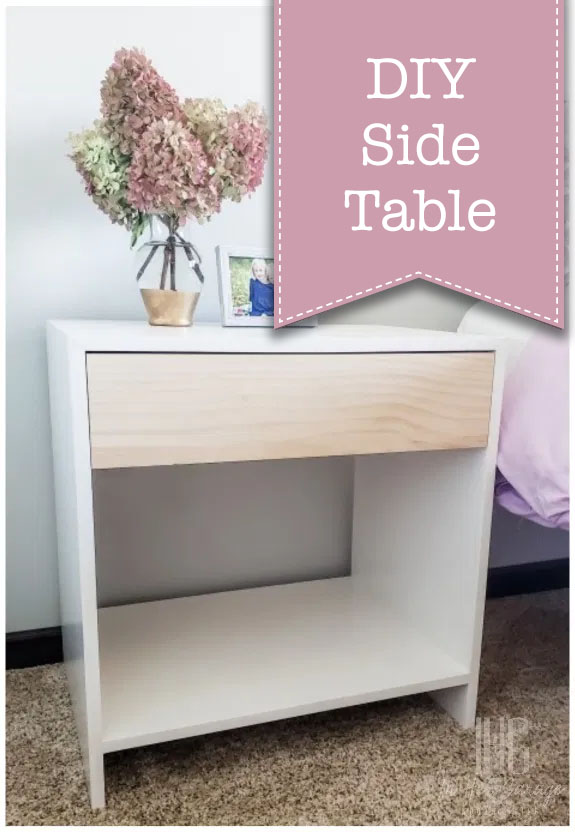
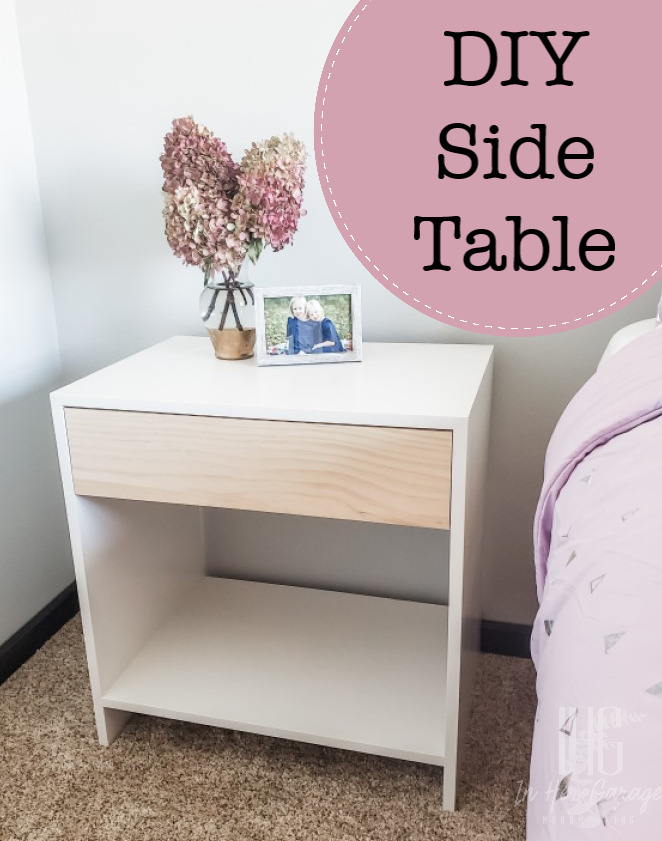
DIY Modern Boho Side Table
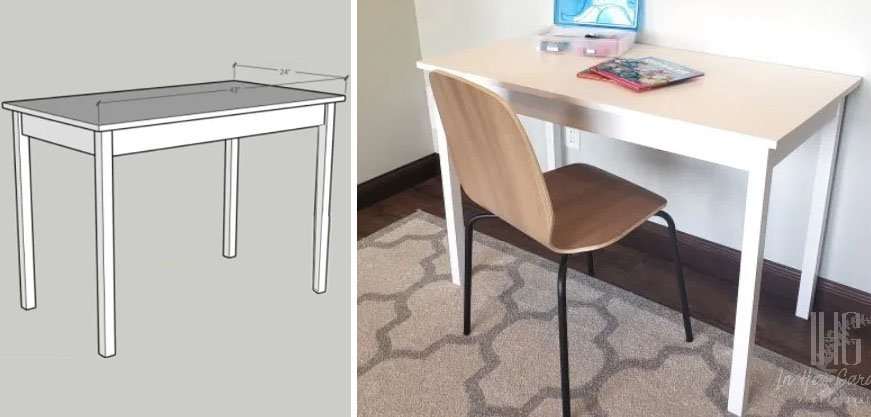
Hello again! This is Kristen from In Her Garage and I am going to show you how I built this simple DIY side table (or nightstand). I built this as part of the bedroom furniture set for my daughter’s new room. We decided that we liked the Boho furniture trend and think it complements the bedding she picked out.
This side table is small but can be customized to your desires. It measures 24″w x 24″h x 17″d and is made from birch plywood. The side table incorporates beveled edges (which I think gives it a crisp and clean look). It may look a little complicated, but these corners can be achieved using a circular saw or a table saw. Let’s get making!
How to Build a Side Table
Materials:
(I’ve included affiliate links for your convenience. I earn a small percentage from a purchase using these links. There is no additional cost to you. You can read more about affiliate links here.)
- 1- 3/4″ x 4′ x 8′
- 1 roll birch iron-on edge banding
- 1- 16″ bottom mount drawer slide
- Wood glue
- Wood putty
- Painter’s tape
- Paint/stain
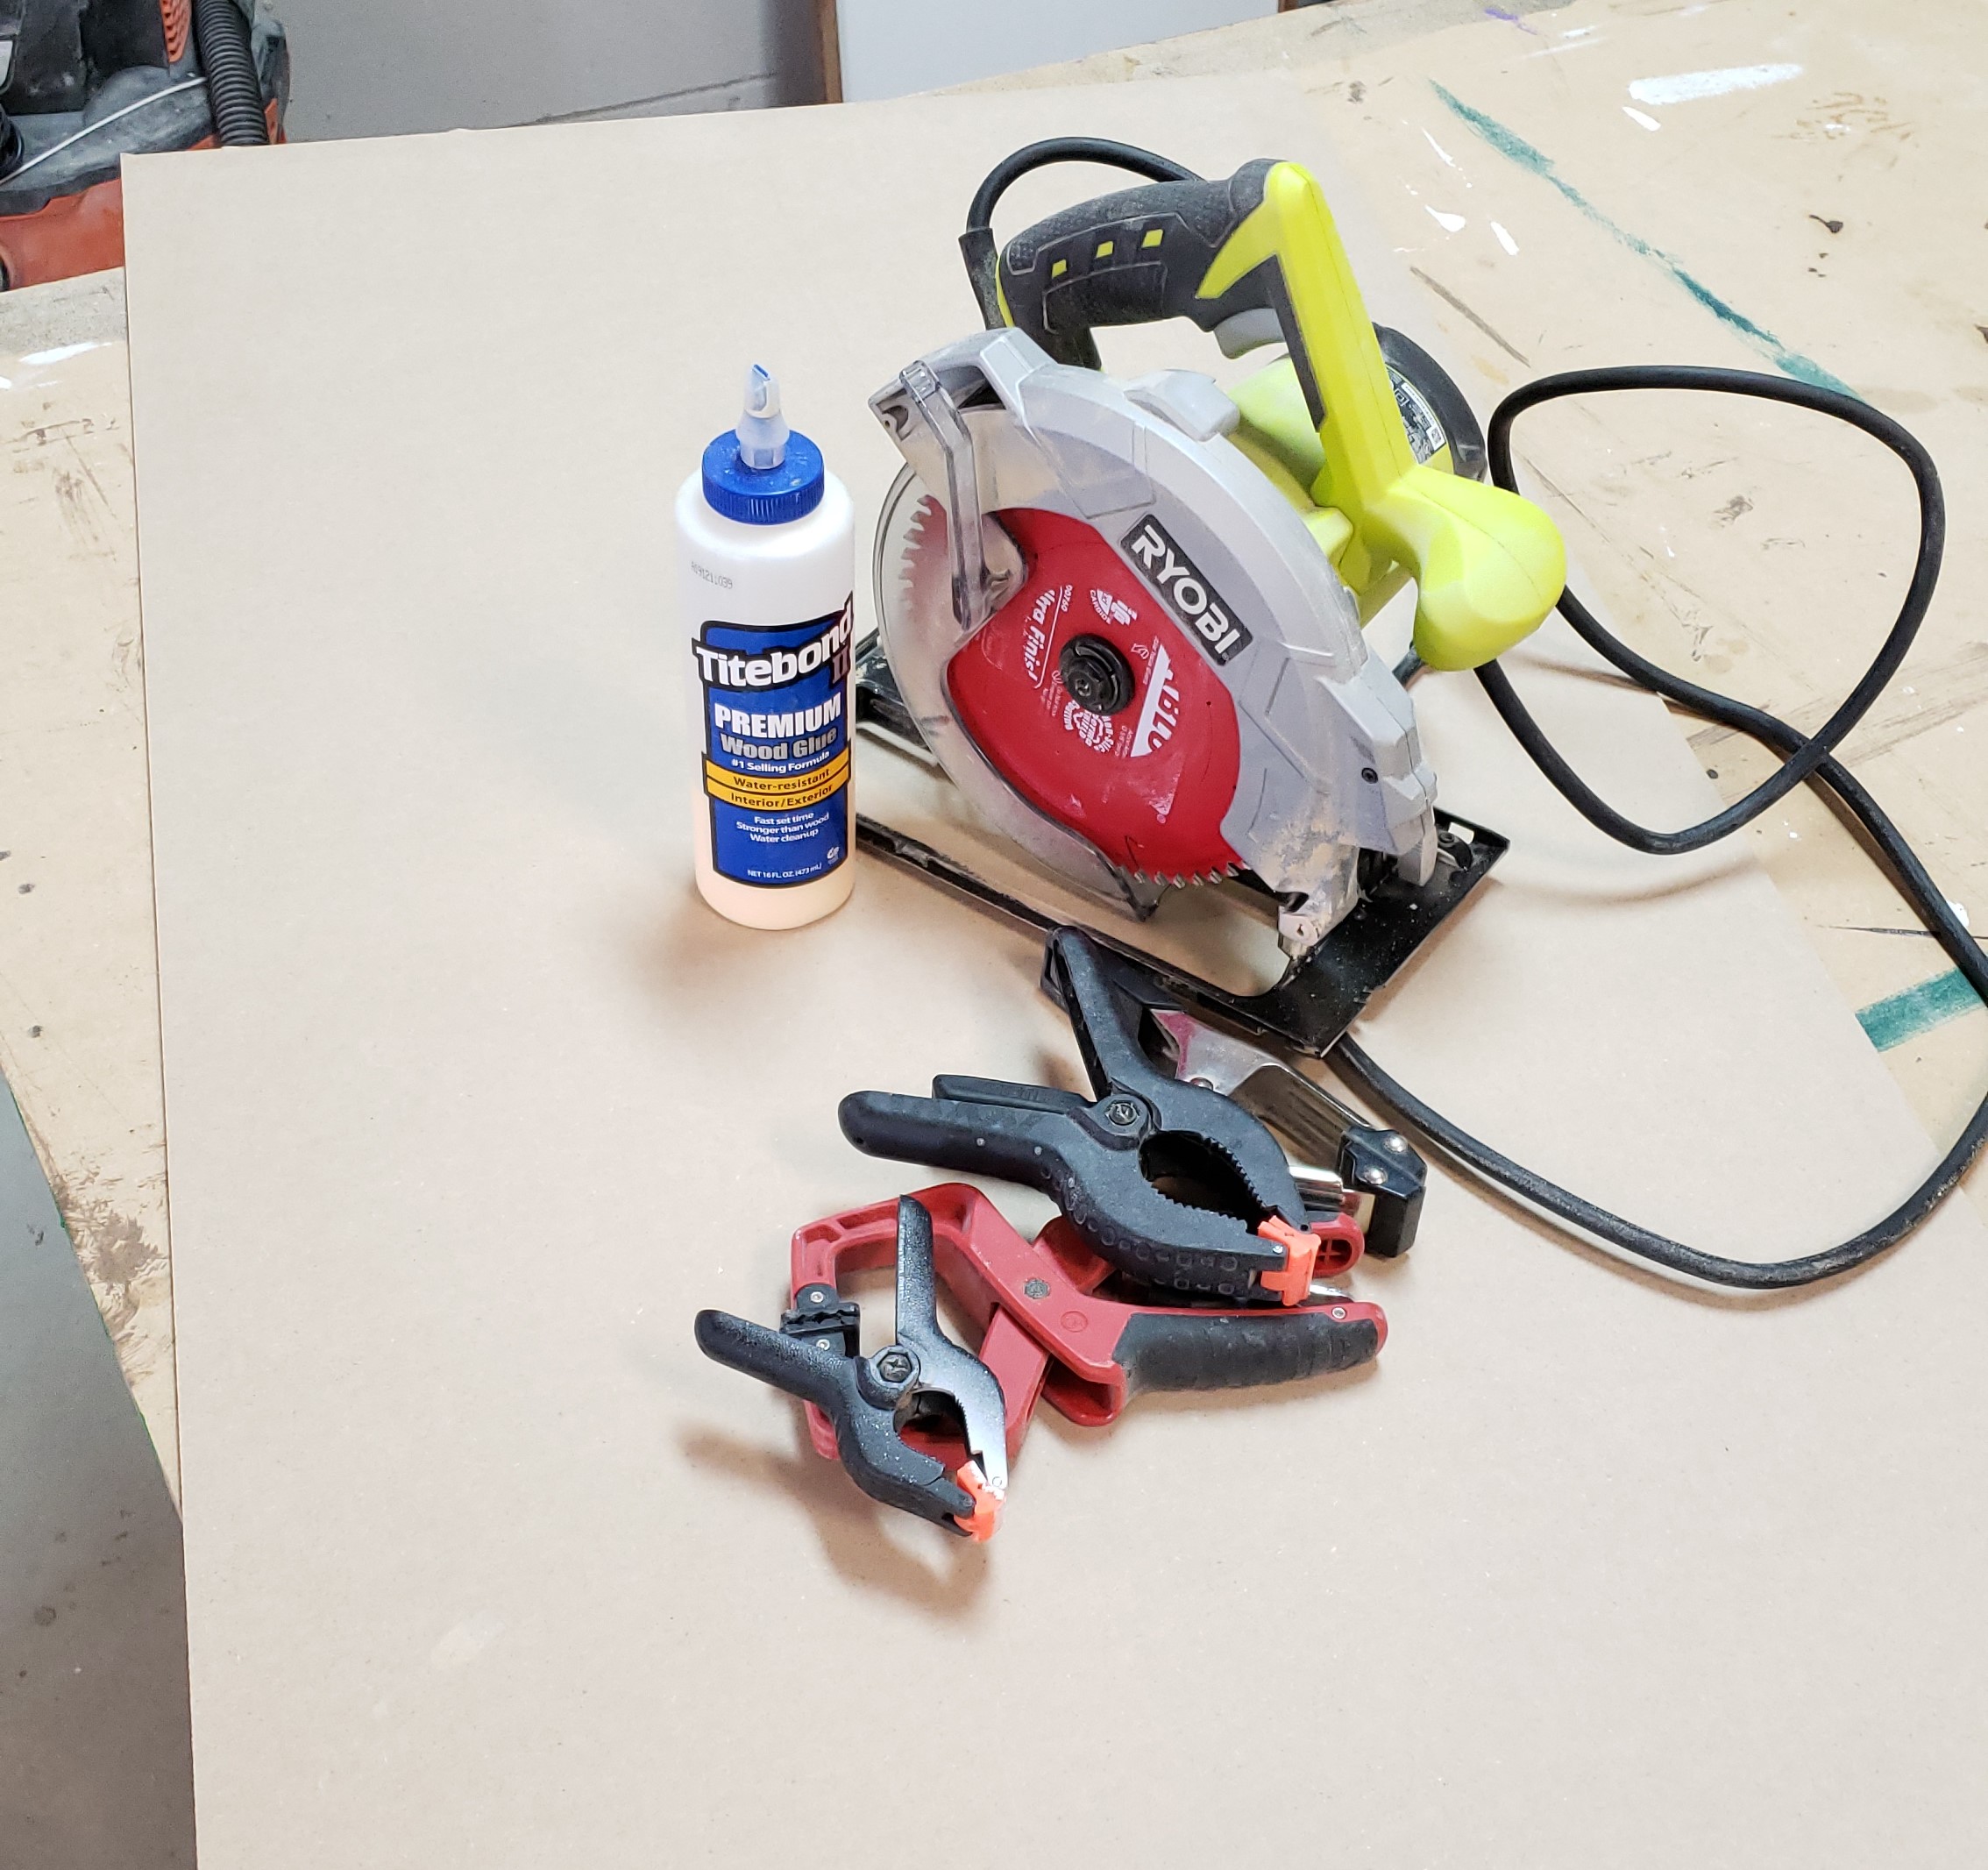
Tools:
- Circular saw or table saw
- Kreg jig
- Brad nailer
- Self-centering drill bit (optional but super helpful)
- Drill
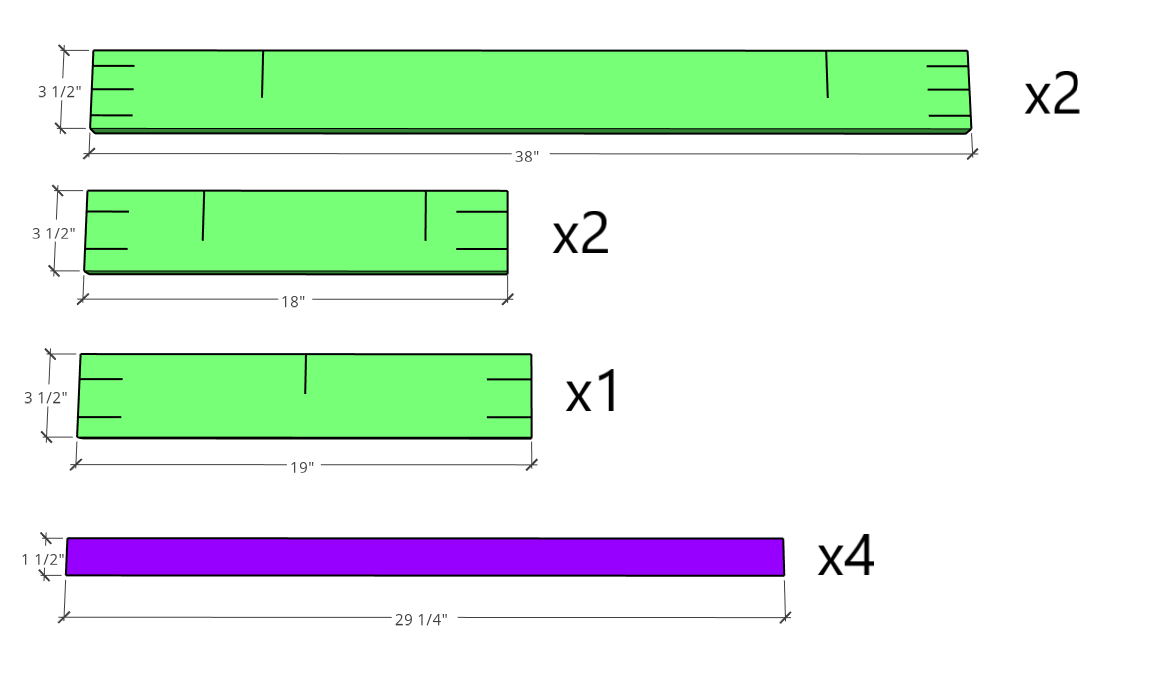
Cut list:
- 2- 3/4″ x 24″ x 17″ – with a 45° bevel along one short edge (sides)
- 1- 3/4″ x 24″ x 17″ – with two 45° bevels along both short edges (top)
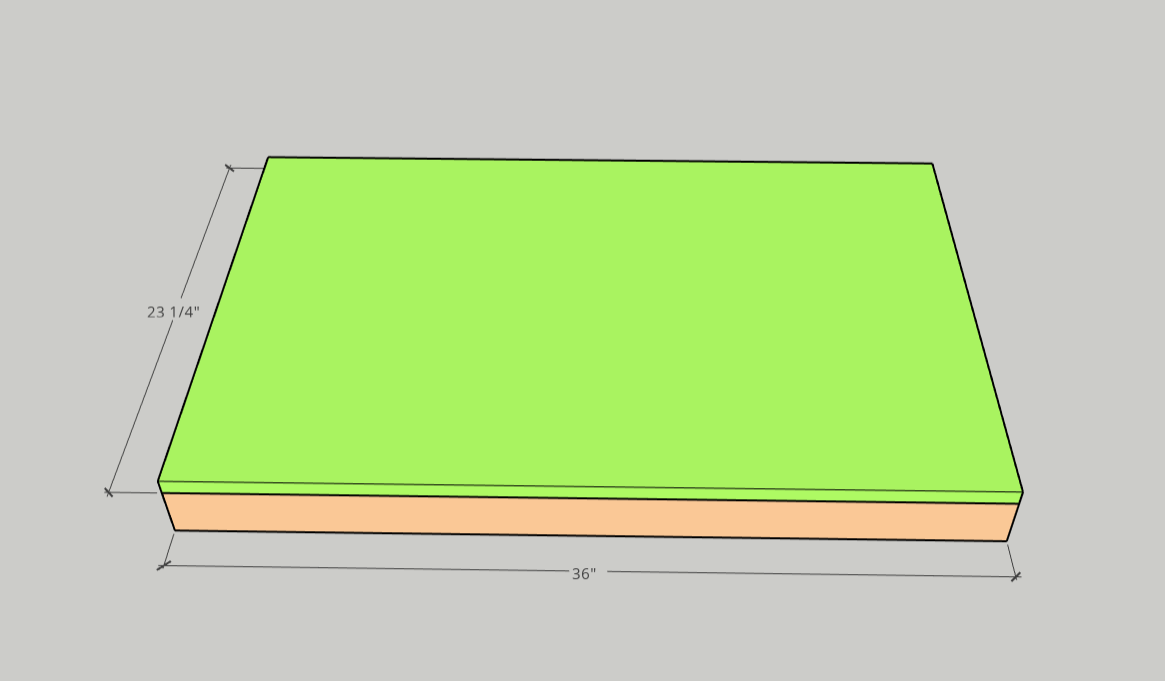
- 1- 3/4″ x 22 ½” x 17″ (bottom shelf)
- 1- 3/4″ x 22 ¼ ” x 5″ (drawer face)
Instructions:
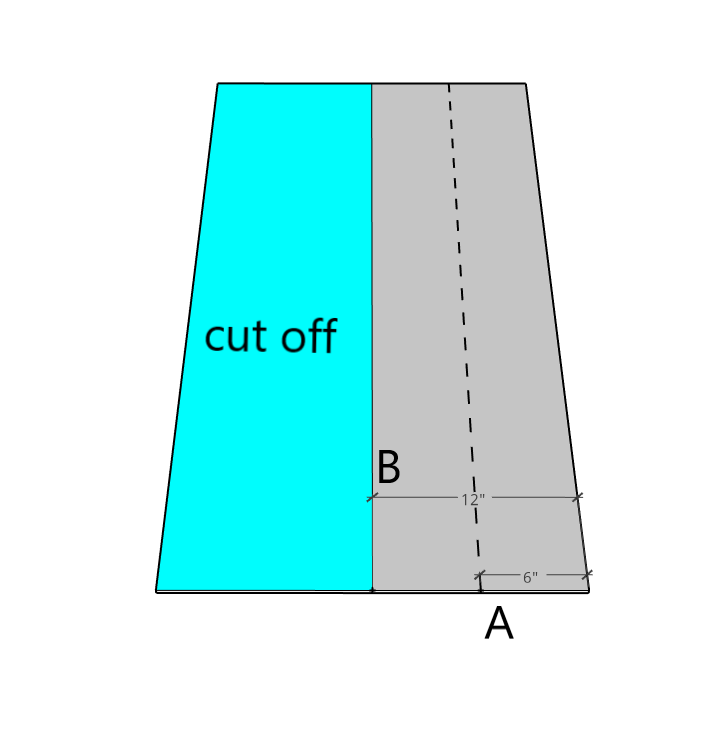
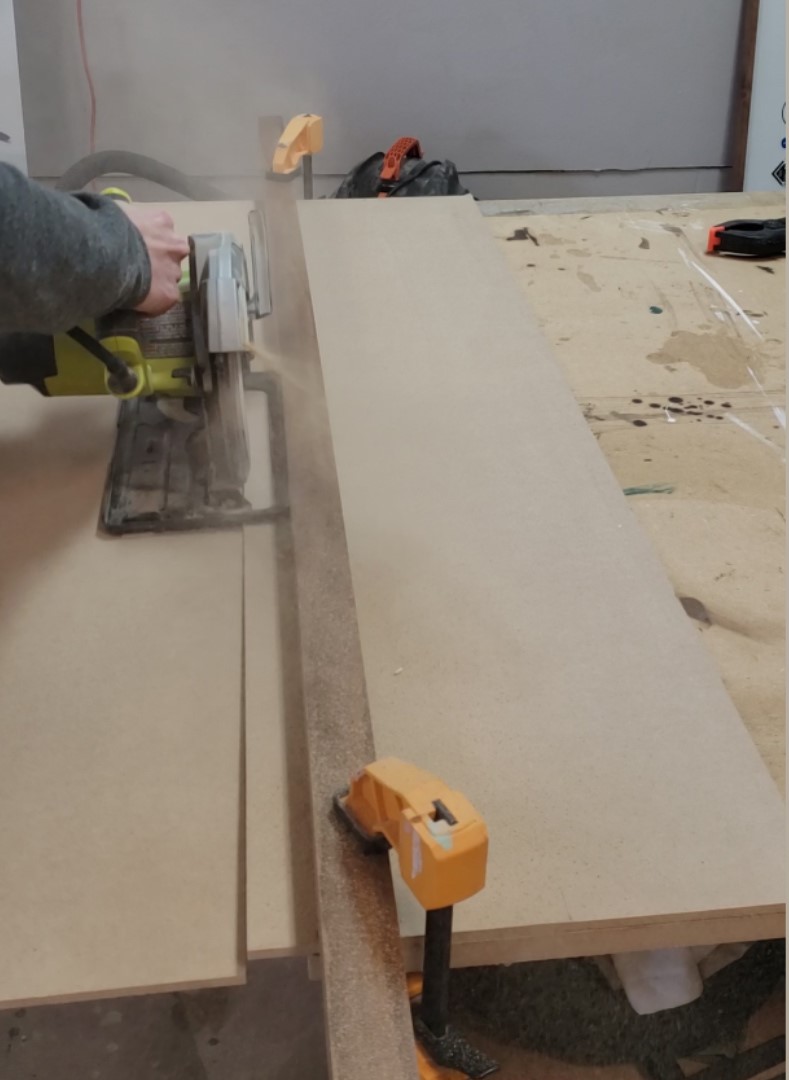
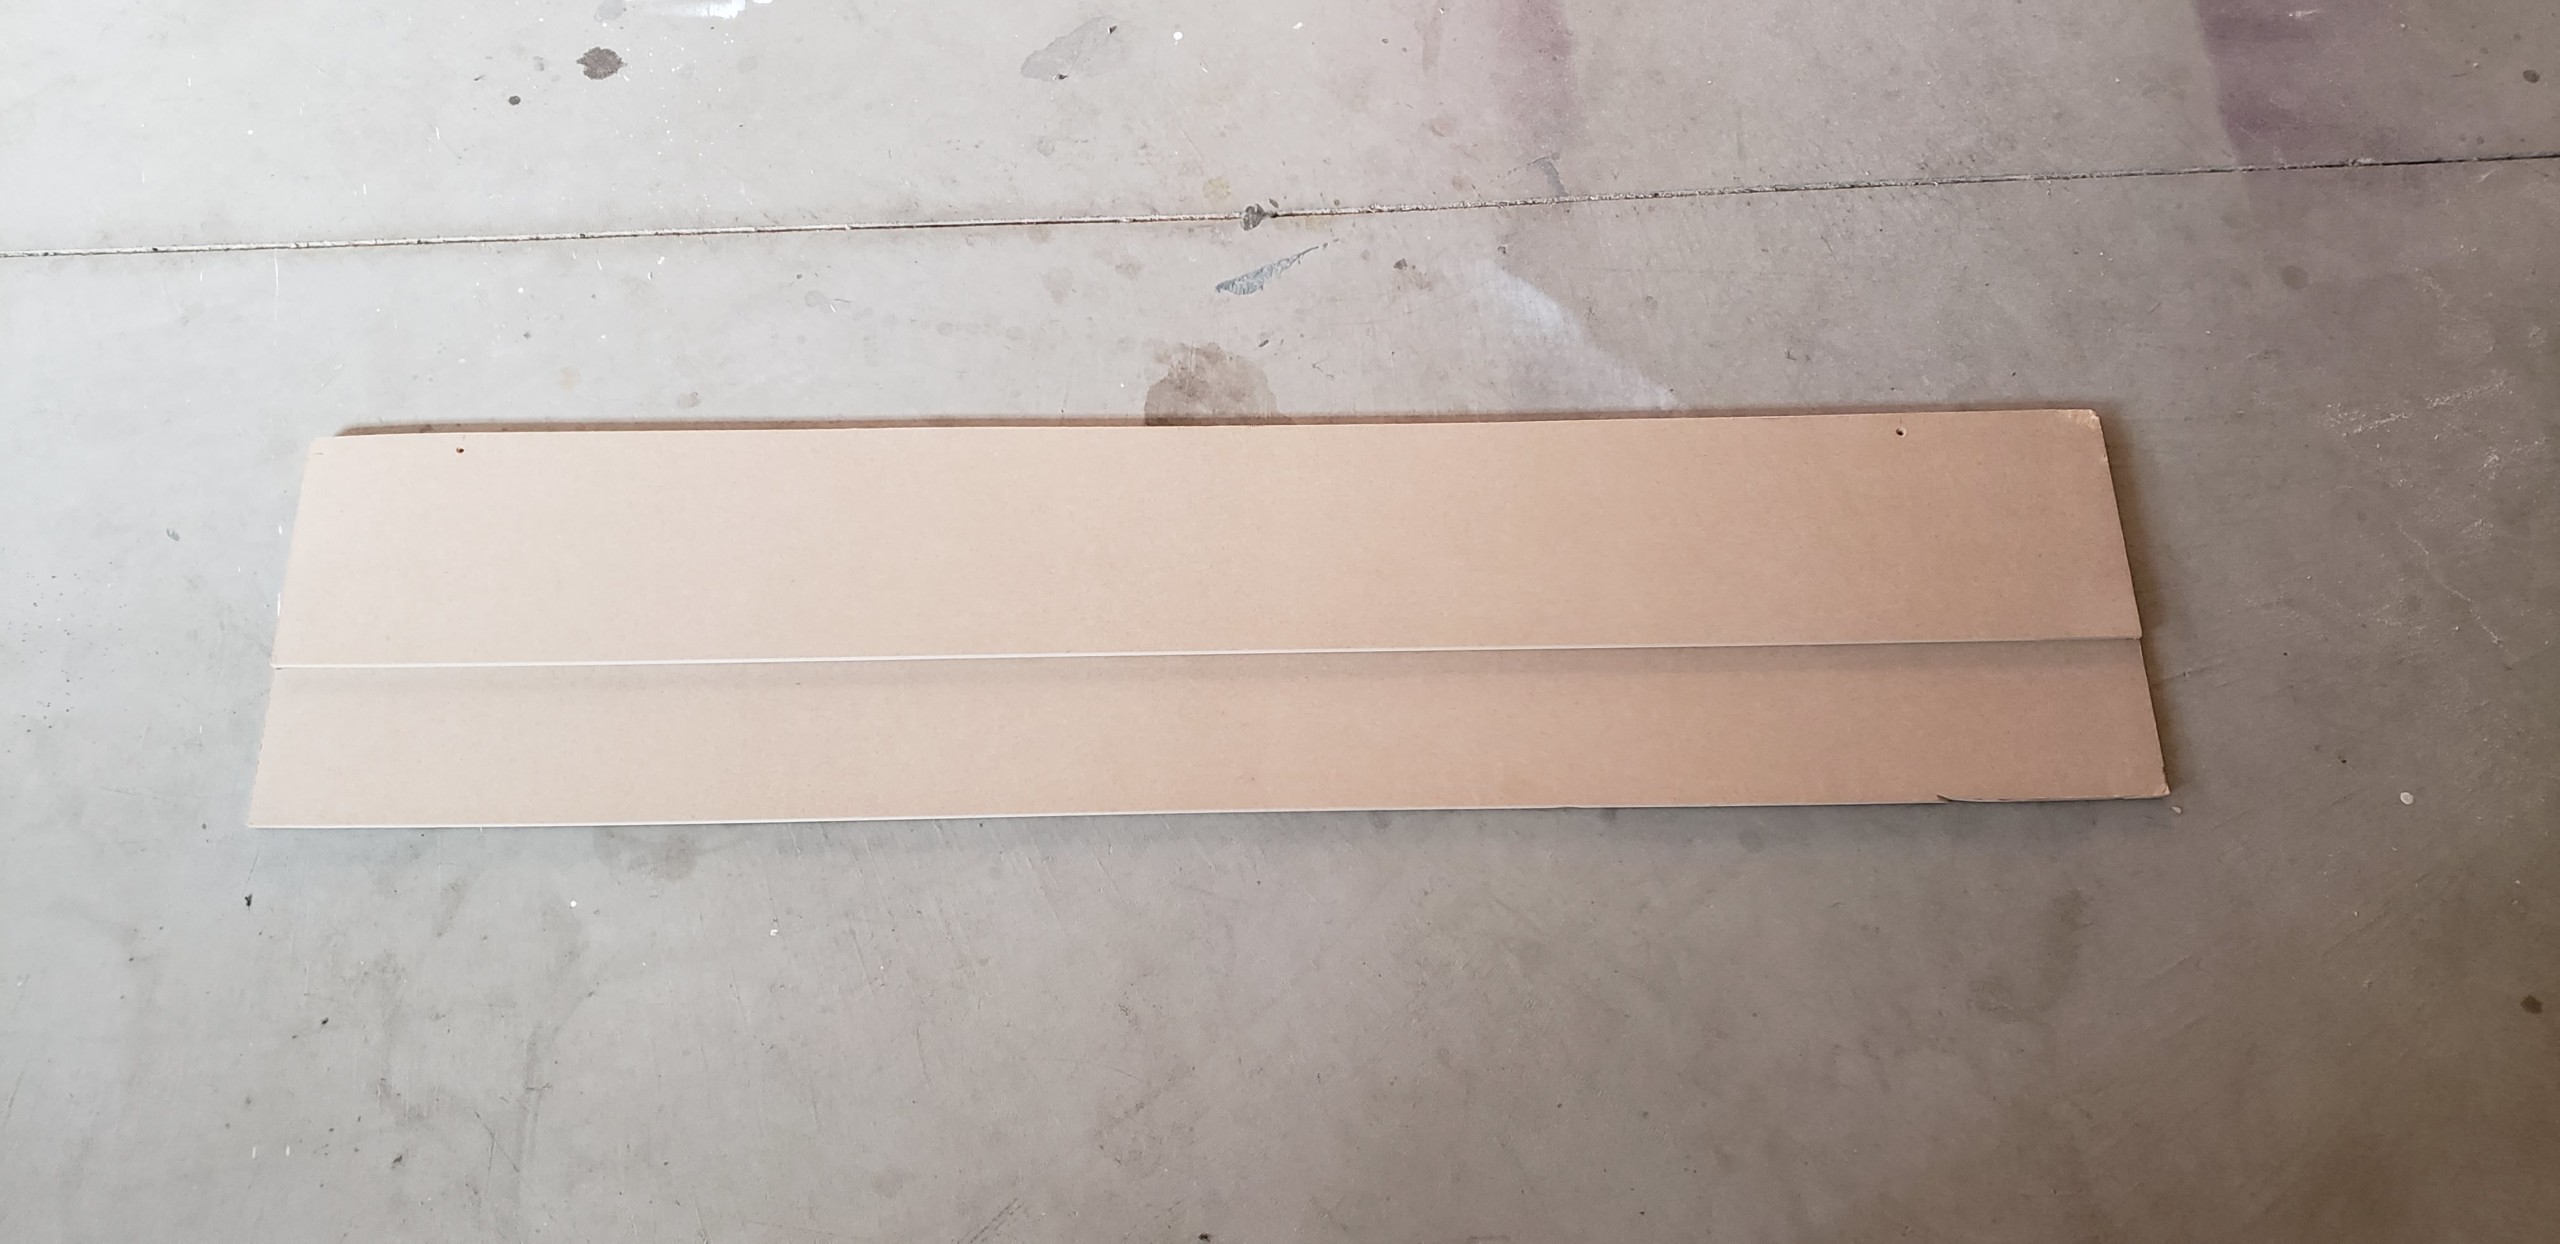
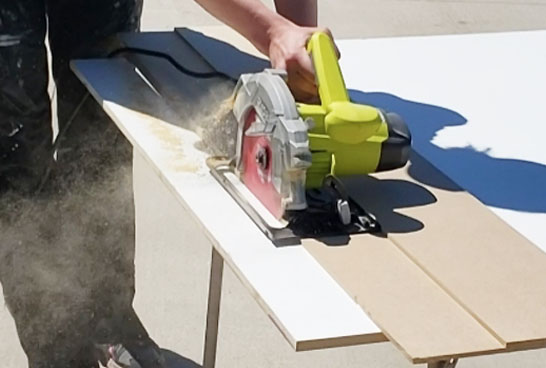
Step 1: Cut the bevel into the top and side panels of the side table.
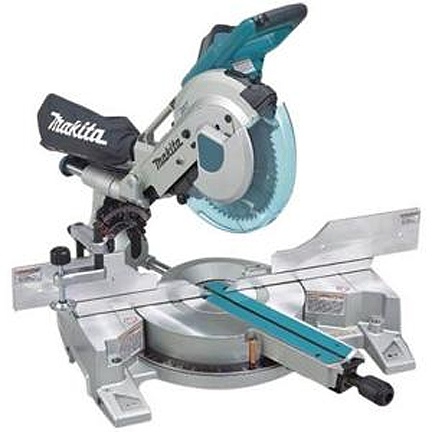
- Using either your table saw or your circular saw, adjust the blade to cut at a 45° bevel. To get this measurement exact I use a Wixey Digital Angle Finder which is helpful but if you don’t have this tool then feel free to use a speed square or protractor.
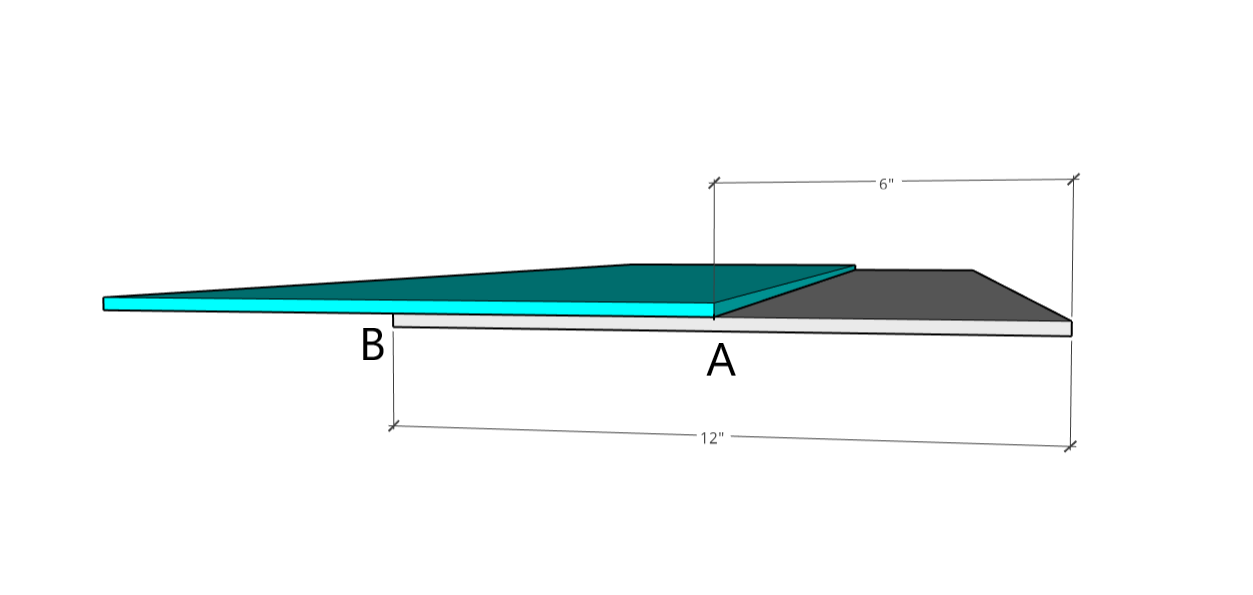
- Each side panel should have one bevel cut along the top edge
- The top panel should have a bevel cut along each side as pictured below

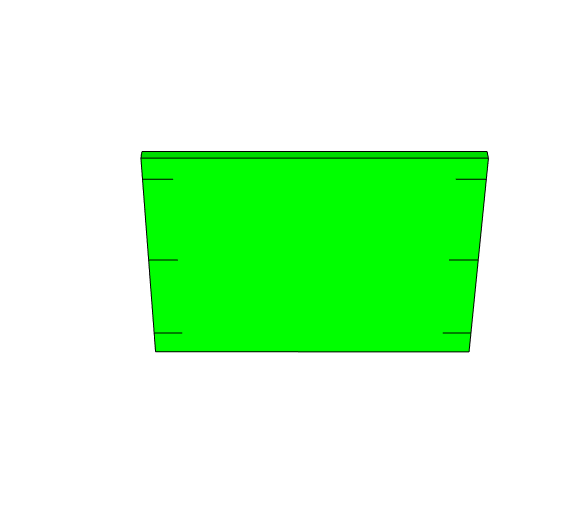
Step 2: Add pocket holes to the shelf panel
- Using your Kreg Jig, set to 3/4″ depth, drill three pocket holes into each side on the bottom of the shelf panel. This is how your shelf will attach to the sides of the side table.
Step 3: Edge banding
I won’t go over all of the steps for applying iron-on edge banding in this tutorial because the Pretty Handy Girl has already done this for me! If you are new to edge banding check out Brittany’s Edge Banding Tutorial.
- You will need to edge band the front edge of each panel (side panels, top panel, and shelf panel). This will finish the visible sides.
- You can also edge band all edges of the drawer face if you wish. This piece will be inset into the side table, so the edges won’t be visible when the drawer is closed but you’ll see them when open.
- Another option would be to use a solid piece of 1×6 for the drawer face to avoid needing to band the edges all together. (I used a scrap piece of 1×6 so it didn’t need edge banding.)
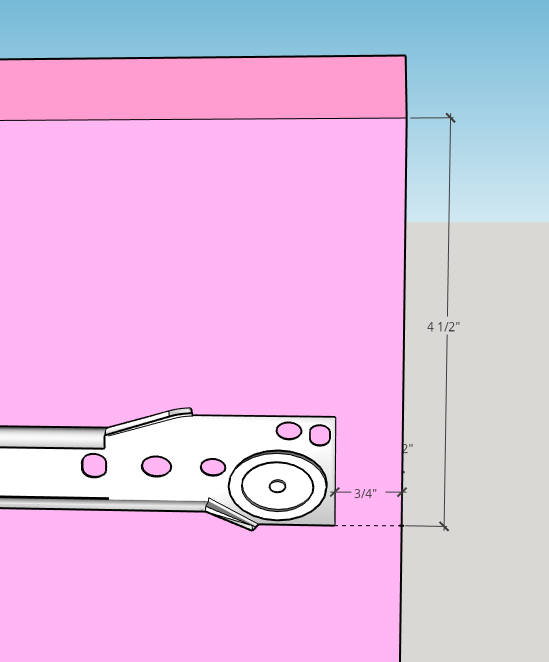
Step 4: Install drawer slides to table carcass
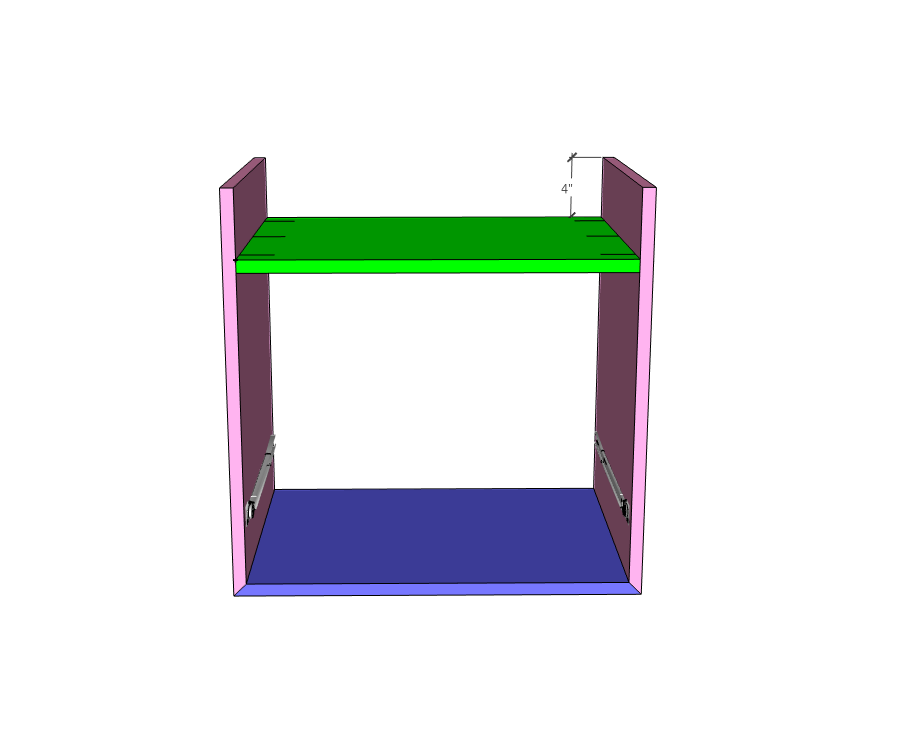
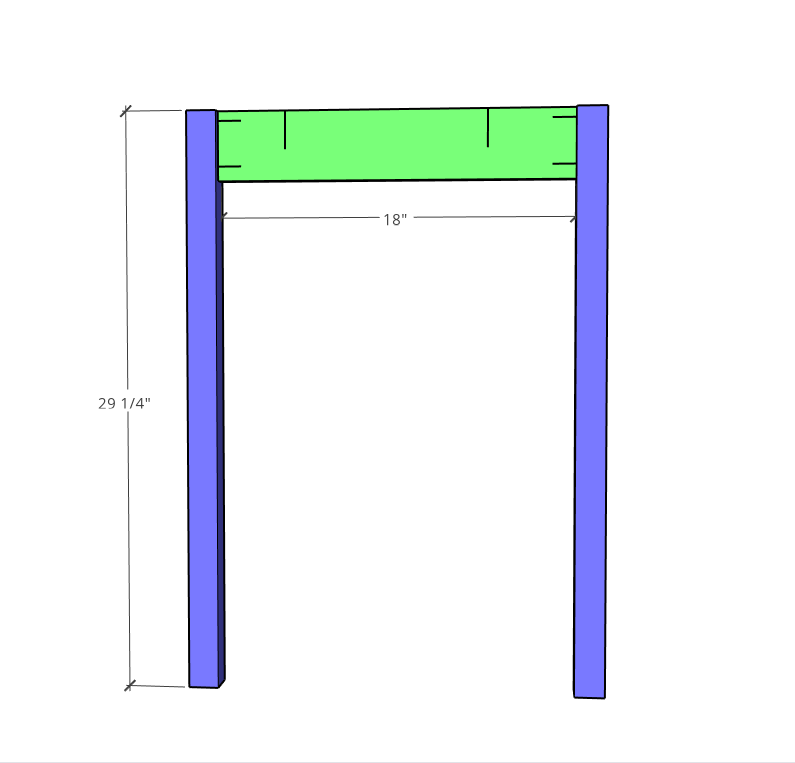
- Install the drawer slides (meant to attach to the cabinet) on the inside of each side panel measuring down 4 ½” from the top of the bevel and 3/4″ in from the front edge as shown. This is the step where the self-centering drill bit is really helpful to have!
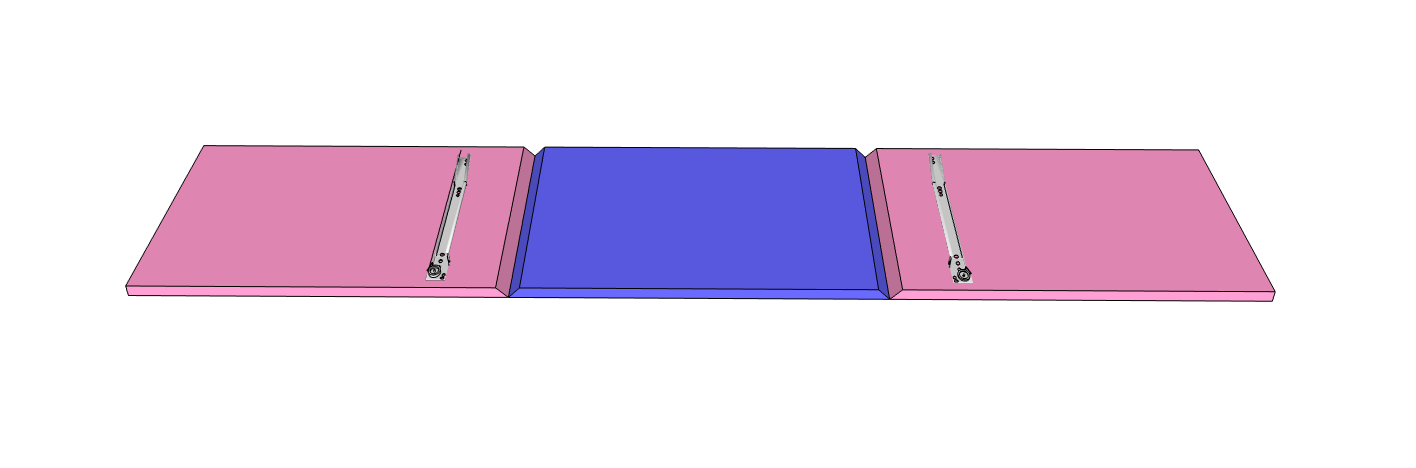
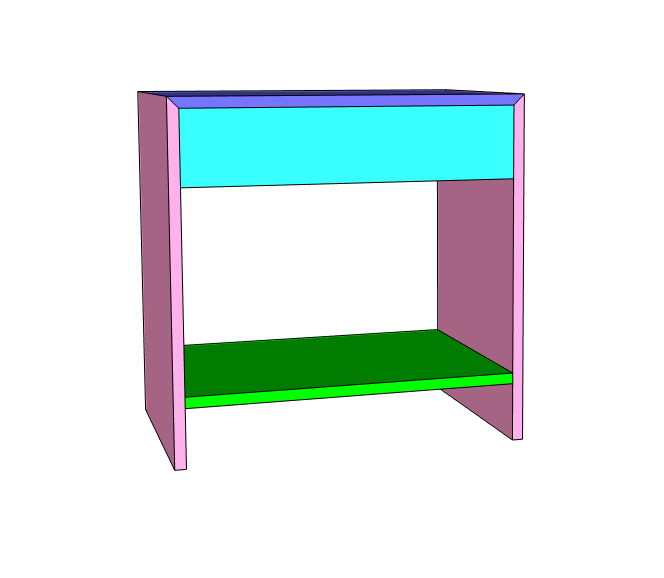
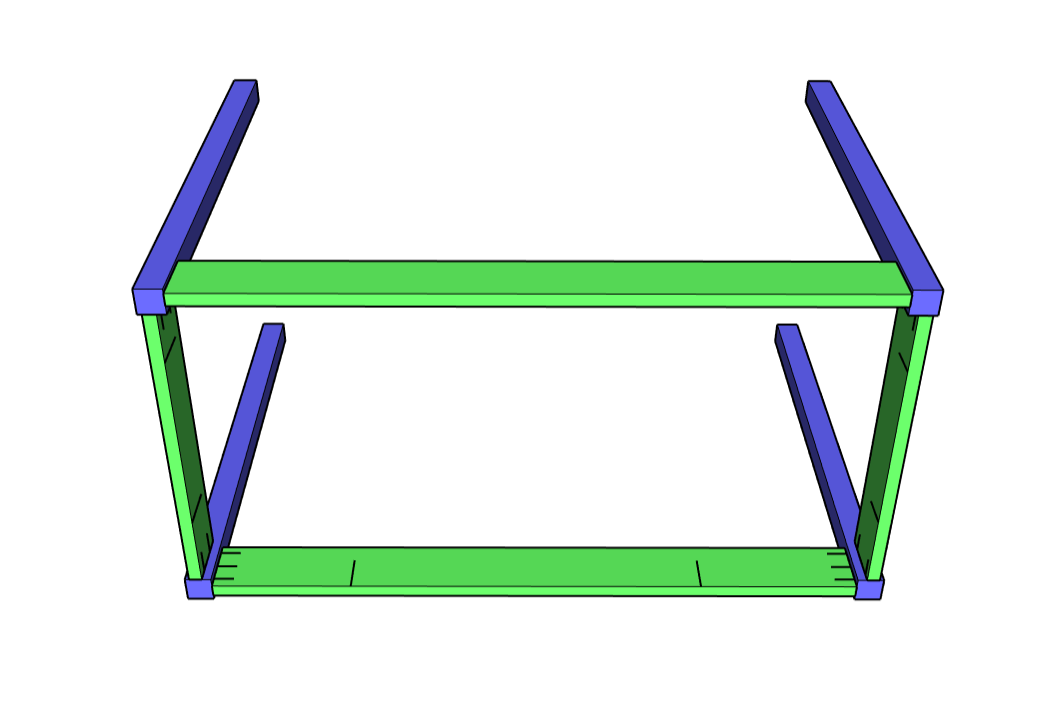
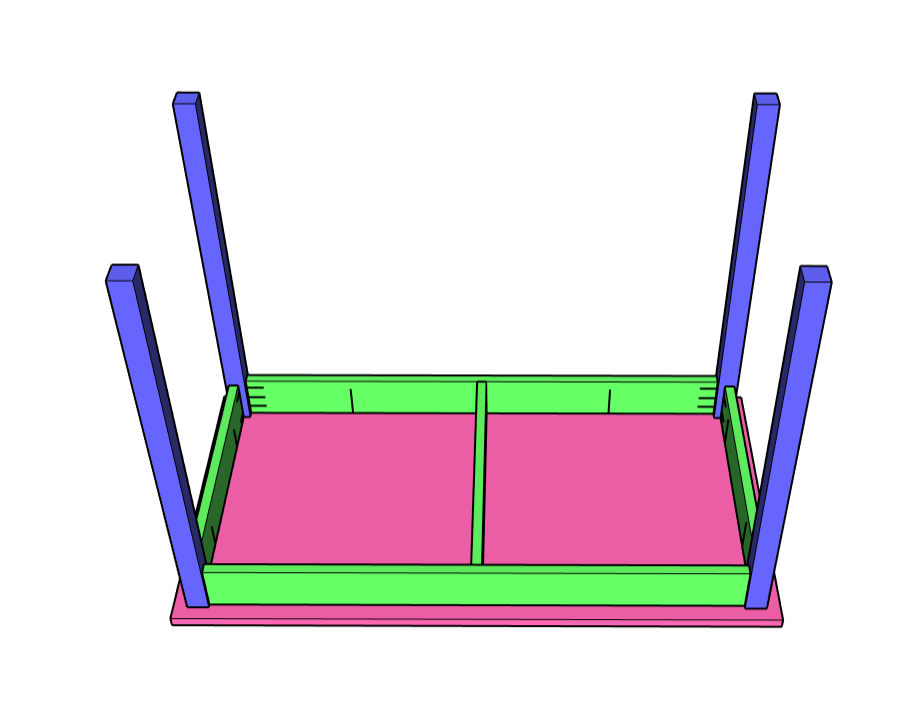
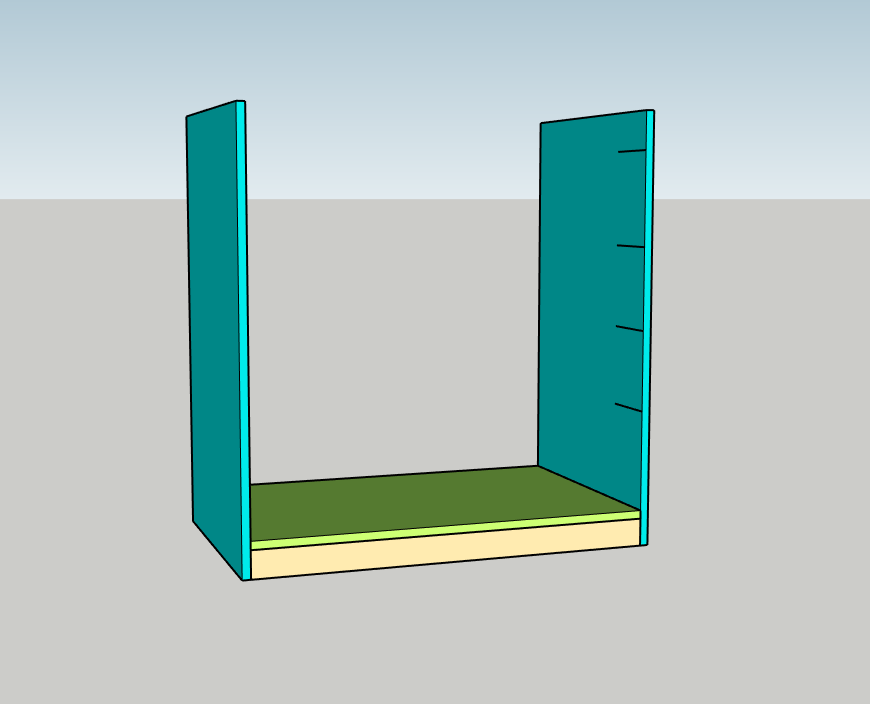
Step 5: Assemble the sides and top panels. The table will be upside down during assembly
- Add two pieces of painter’s tape to each of the two outside edges of the top panel, perpendicular to both beveled edges.
- Set the top panel down on your work surface upside down, sticky side of the tape facing up, and place the two side panels with the beveled edges touching the top panel’s beveled edge, also being sure to align the front and back of the panels. Press down firmly so the tape sticks to all three panels.
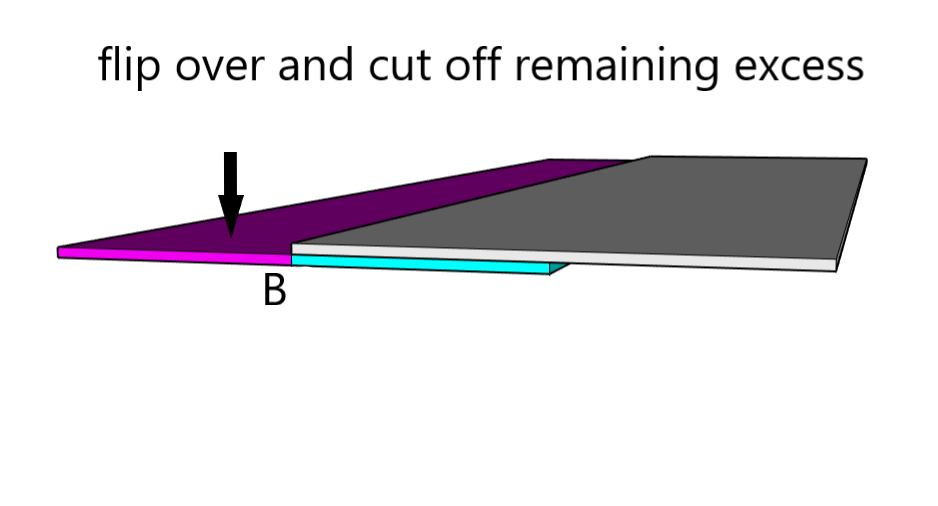
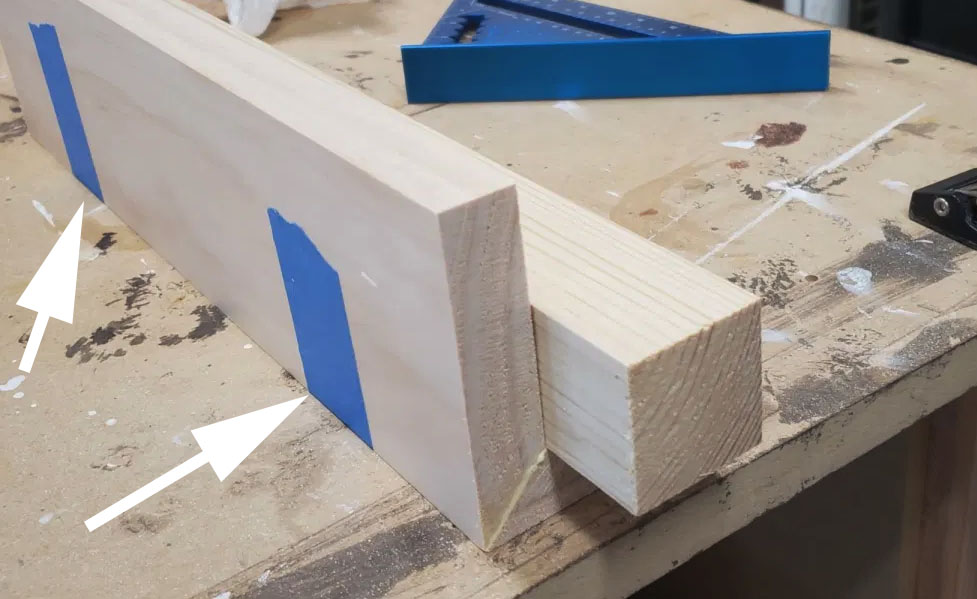
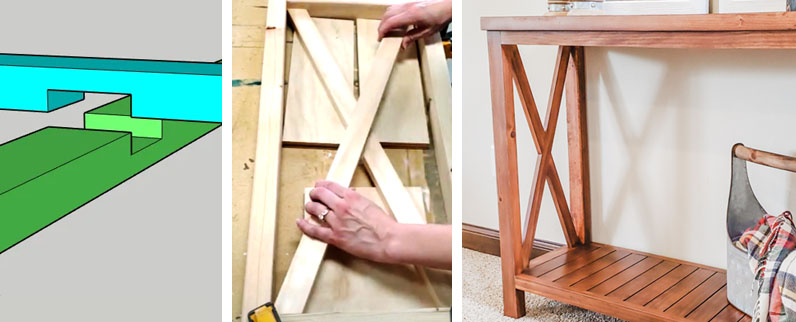
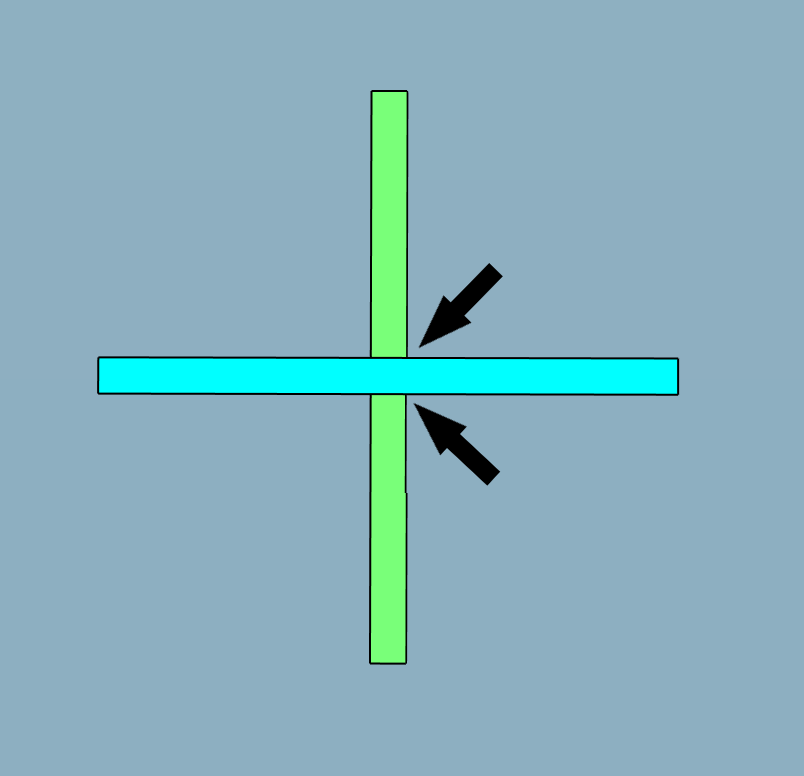
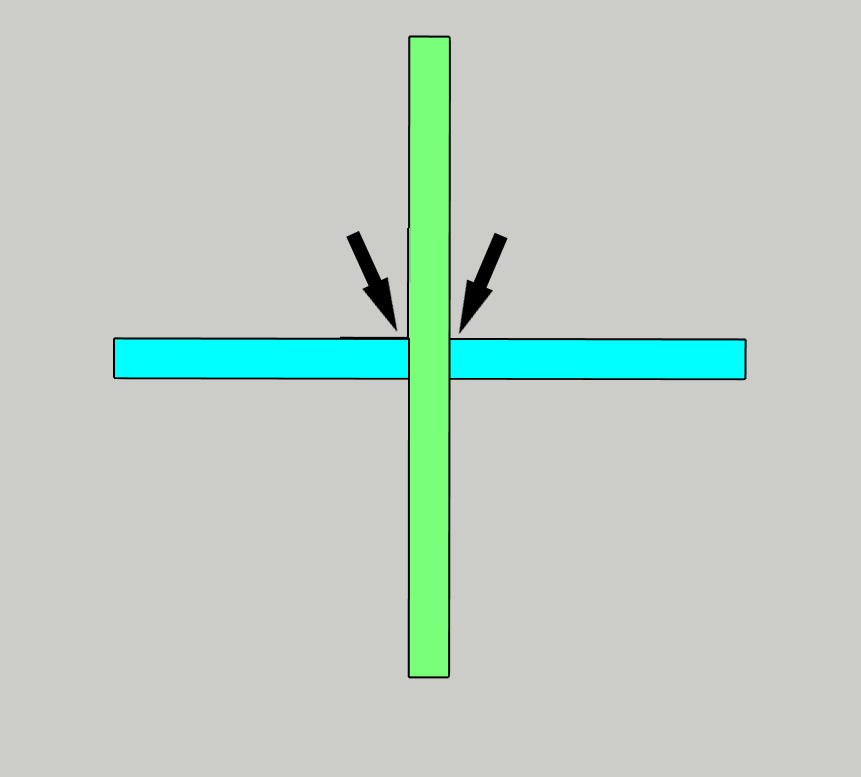
- Add an even bead of glue to both beveled surfaces and then lift one side panel as if closing a book. The two beveled edges will meet, and the tape will hold it in place (see photos below). Repeat this step for the other side panel.

The photo below is from another project, but shows how to use painter’s tape for holding the bevel joint in place.

- You can add a few 1 ¼” brad nails to the joint to help hold it in place. Use wood putty to fill in the brad holes and sand smooth.
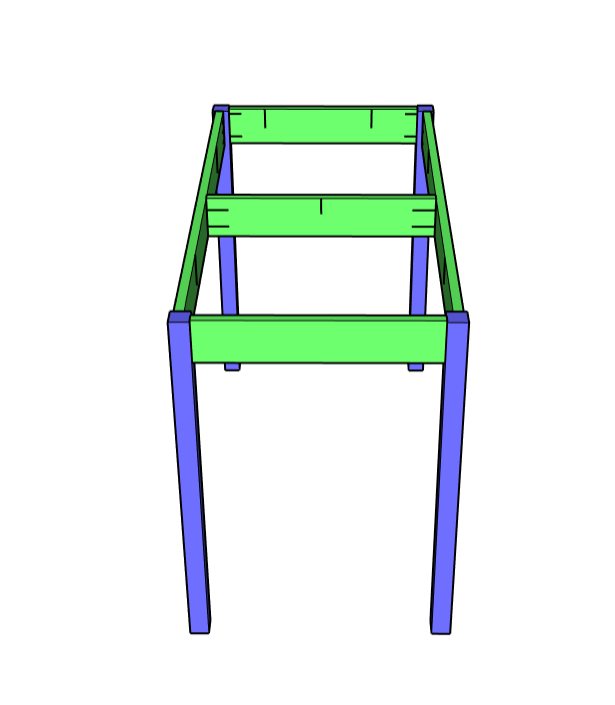
Step 6: Install shelf panel
- Install the shelf 4″ from the bottom of each side panel using wood glue and 1 ¼” pocket holes.
- This step is easier to accomplish with wood clamps or by carefully laying the table on one side.
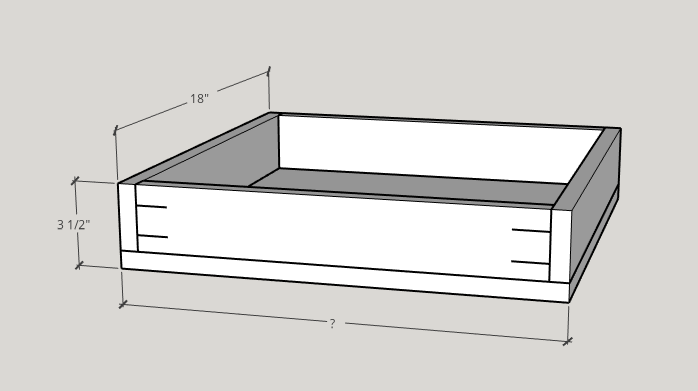
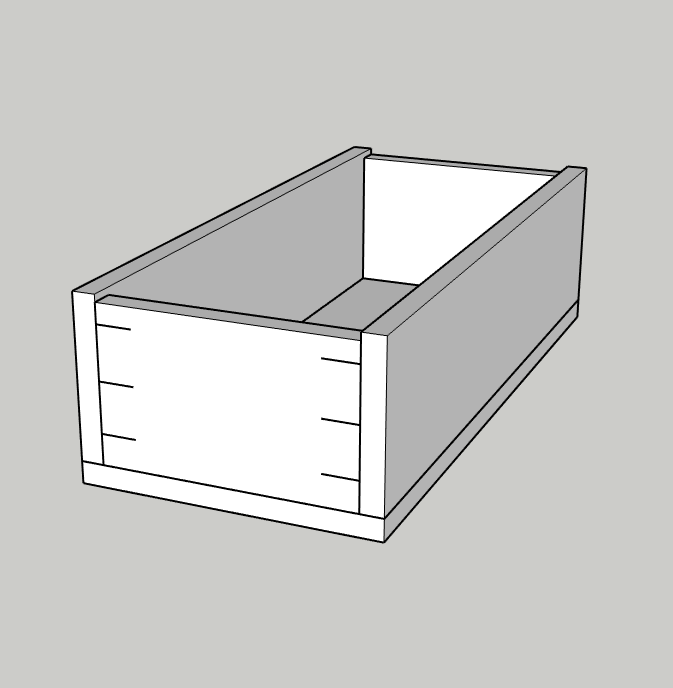
Step 7: Build the drawer
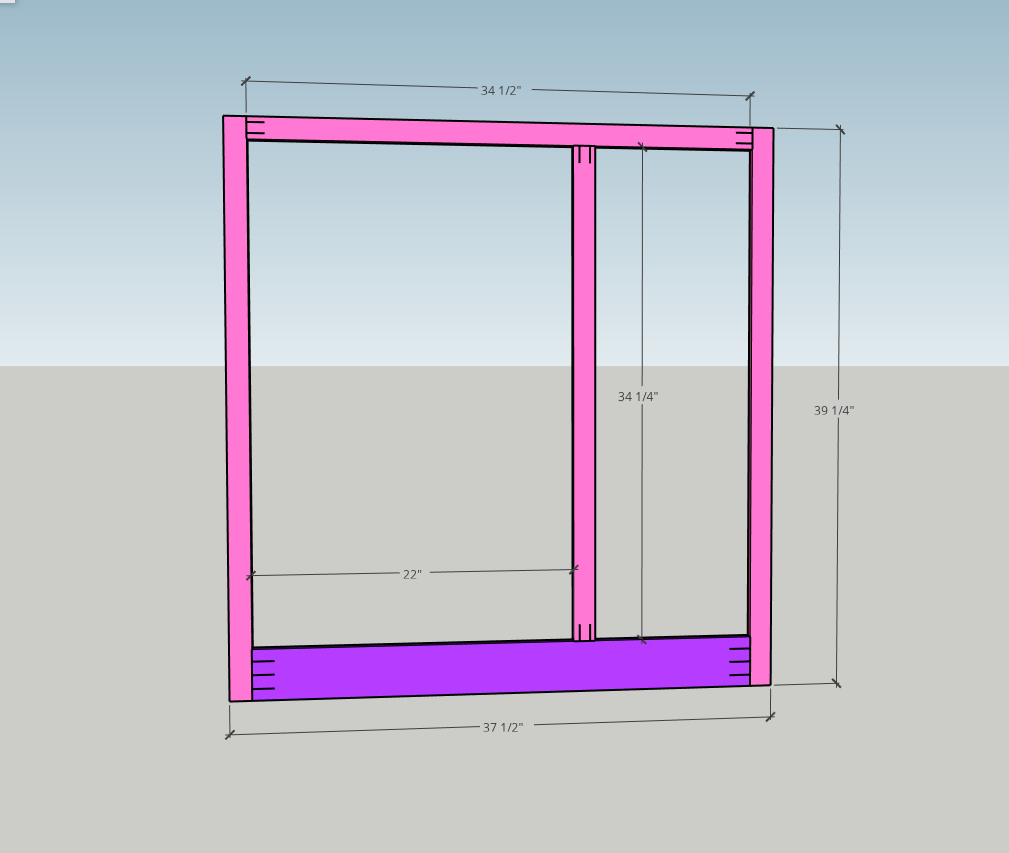
- There are several different ways to build drawer boxes. The dimensions for this drawer are 3 ½” tall and 18″ deep. The width of your drawer depends on the specific drawer slides that you’ve chosen to use. I have provided a diagram for a simple method of building drawer boxes. (Or you can follow this tutorial for building drawers.)
Step 8: Paint or Stain and Finish
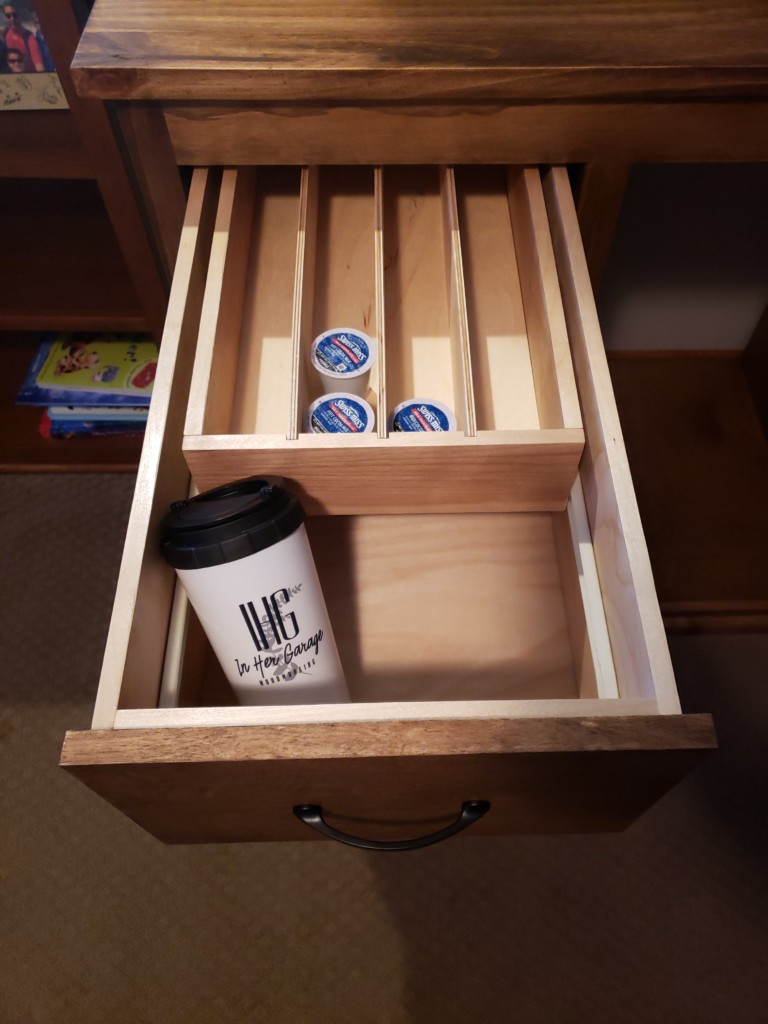
- Once the side table carcass is assembled and the drawer face has been edge-banded (if that is what you chose to do) then you can paint or stain your DIY side table. I chose to paint the carcass and apply a gloss top coat to give it a pretty shine. I left the drawer face a natural wood color because this is what looked best in my daughter’s room.
Step 9: Install the drawer face
- Once the carcass and drawer face are finished to your liking then you can slide the drawer box into place.
- Attach the drawer face using super glue and simply eye-balling the top and side gaps. Hold the drawer face firmly against the drawer box until they adhere together. Then gently pull the drawer out and drive two 1 ¼” wood screws from inside the drawer into the back of the drawer face.
- Feel free to add a pretty drawer pull or knob if you want. My daughter liked it without, so we decided to leave it as is.
Check out the entire furniture collection that I created for my youngest daughter’s bedroom.

DIY Platform Bed and DIY Quote Sign
Stay tuned for the DIY Hanging Bookshelf that I will be teaching you how to make next month!
![]()

Hi! I’m Kristen, from In Her Garage, and I am a self-taught woodworker and DIY fanatic from Minnesota where I live with my husband and our two daughters. Between being a wife, mom and, registered nurse, I try to make as much time for DIY as possible. My love for building came after our family built our current home in 2015. After we moved in, we needed furniture and instead of spending massive amounts of money to order the pieces we wanted I decided that I would build them myself. I started with a buffet table plan from the fabulous Ana-white and quickly set out to remodel my entire home office.
Since then I have started a side business building furniture for the people in my community. I love hearing my clients talk about the pieces they wish they had whether it be a rustic buffet table, a one drawer side table, or a toy box and then making it a reality for them. While starting my small business it made perfect sense that I would document my building journey so I simultaneously launched the In Her Garage blog and I love sharing my plans, tips and tricks.
Making something beautiful with your own two hands through a little preparation and determination is an amazing feeling and I hope to bring inspiration and know-how to those looking to tackle a big or small project.
I am so glad that you found me here and please feel free to connect with me on Pinterest, Instagram, Facebook, and Youtube to see what I am working on right now.


 DIY Track Saw Jig for your Circular Saw