Decorate your mantel for Christmas with these DIY stocking holders made of scrap wood!

Use up those scrap 2 x 4 pieces to create these gorgeous stocking holders!
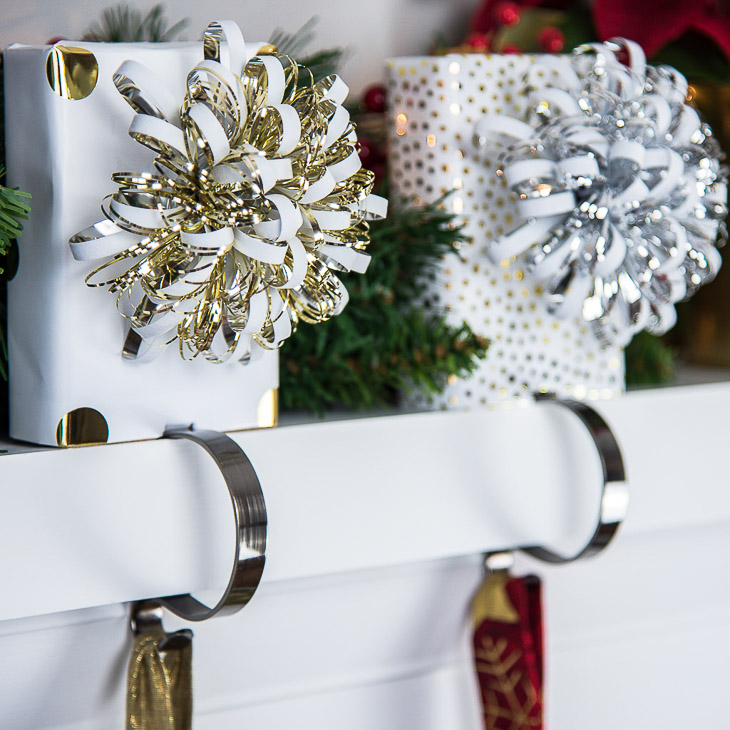
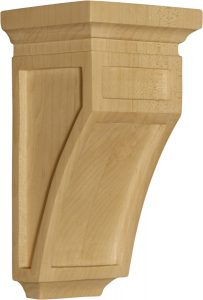
Hi there, Pretty Handy Girl readers! I’m Vineta from The Handyman’s Daughter, back with another tutorial for you! I have a mountain of wood scraps in my workshop, and the hardest pieces to use up are those pesky 2 x 4 end cuts. Lucky for you, I figured out an adorable way to use them! Feast your eyes on those gorgeous gift-wrapped stocking holders for your mantel!

Love how festive these DIY stocking holders look on the mantel!

Materials:

(I’ve included affiliate links for your convenience. I earn a small percentage from a purchase using these links. There is no additional cost to you. You can read more about affiliate links here.)


Instructions:

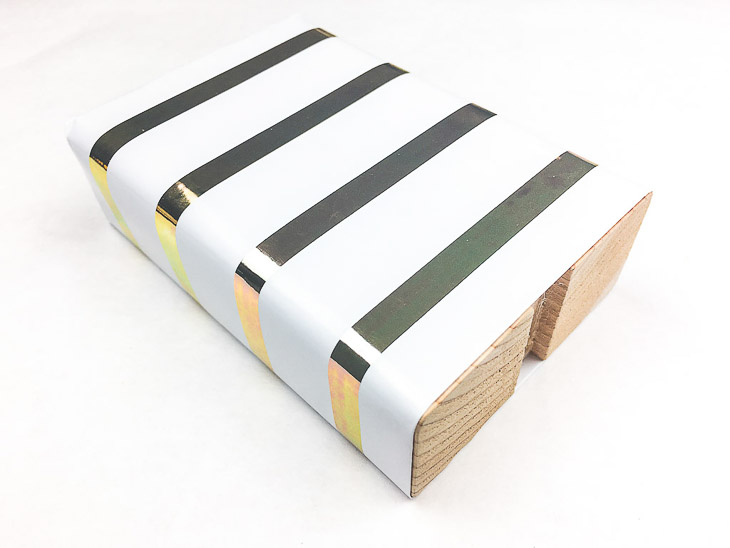
Gather up your scrap 2 x 4 pieces, especially those really ugly ones! Mine had paint splatters, stain samples and random pocket holes. Cut all to the same size.

Cut all your scrap wood pieces the same size to make these stocking holders.

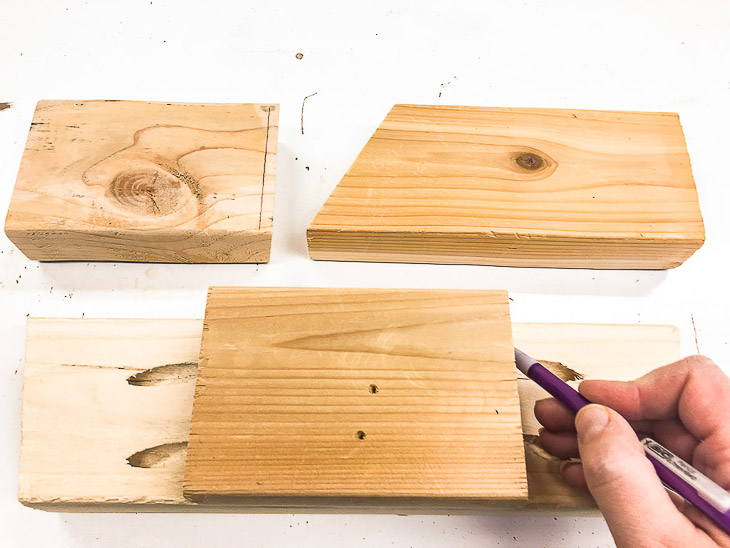
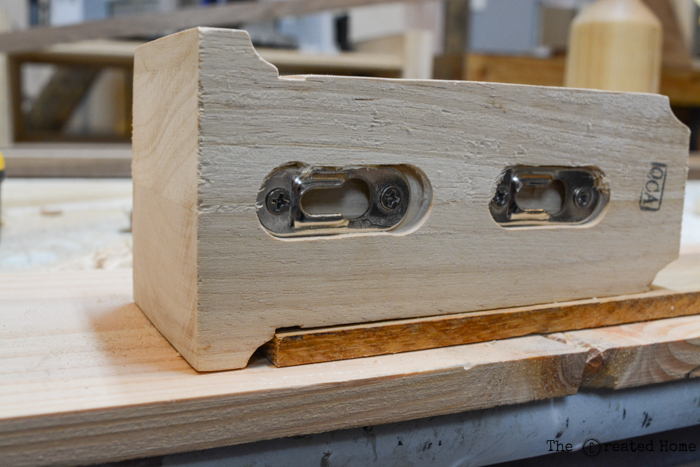
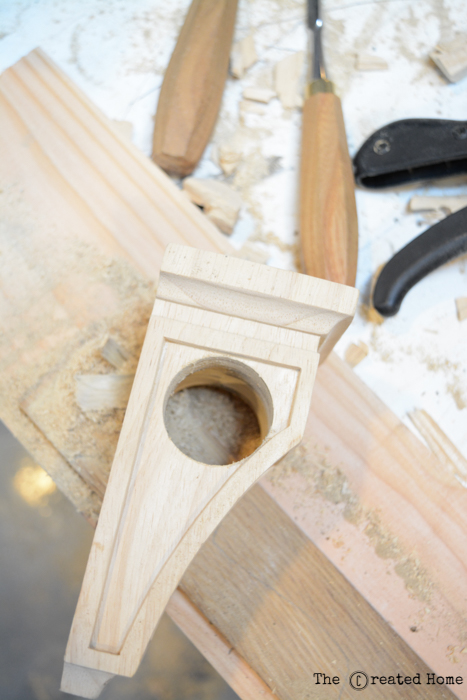
Center the mantel hooks and mark the width on the bottom of the scrap wood.

Mark the placement for your mantel hooks.

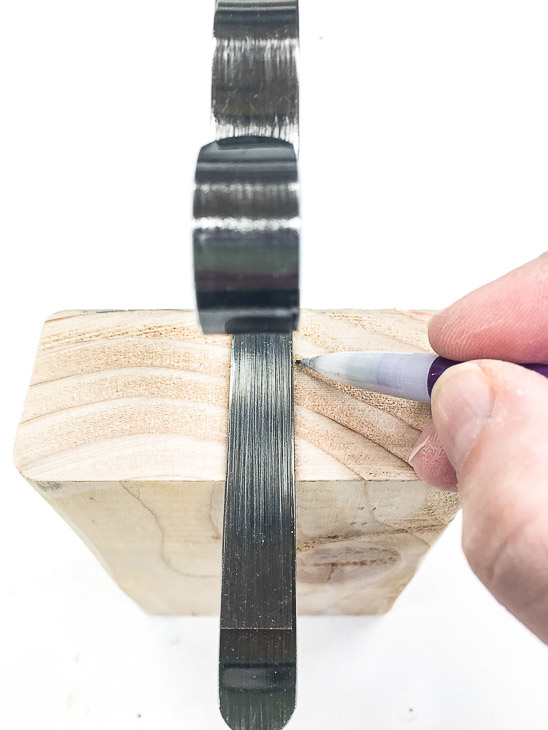
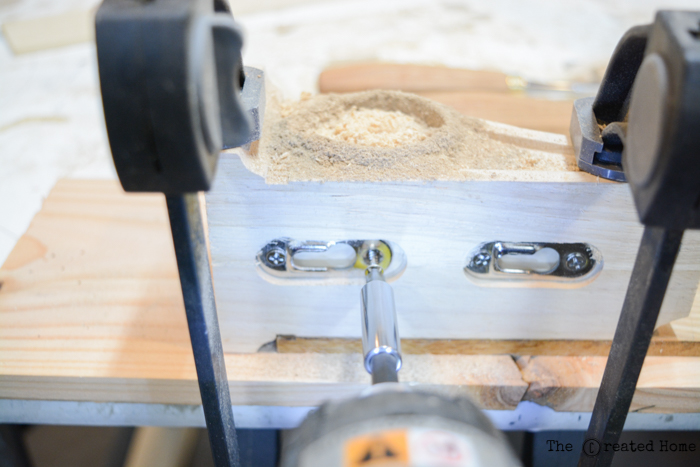
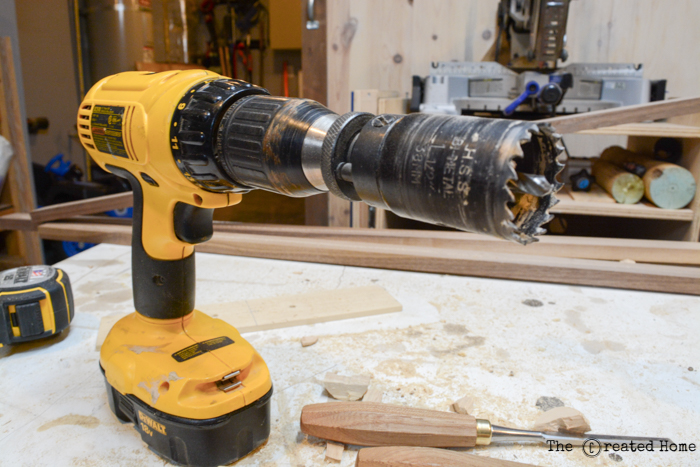
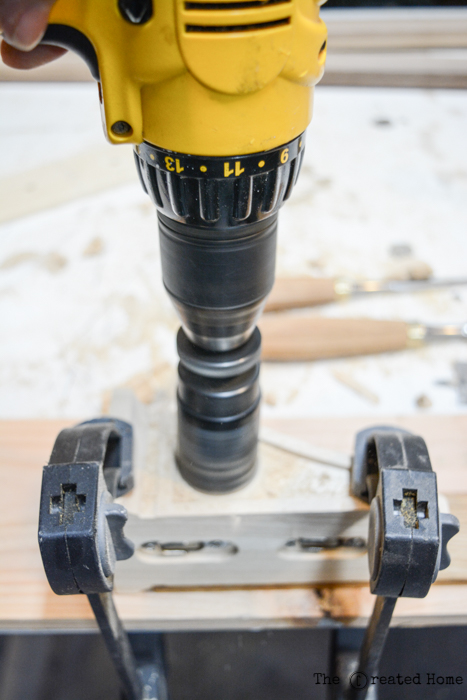
Cut a channel deep enough for the mantel hook to sit in. (I used a router for this, but you could chip it out with a chisel, use a Dremel, or use a table saw.

Cut out a channel in the bottom of the scrap wood for the mantel hooks.

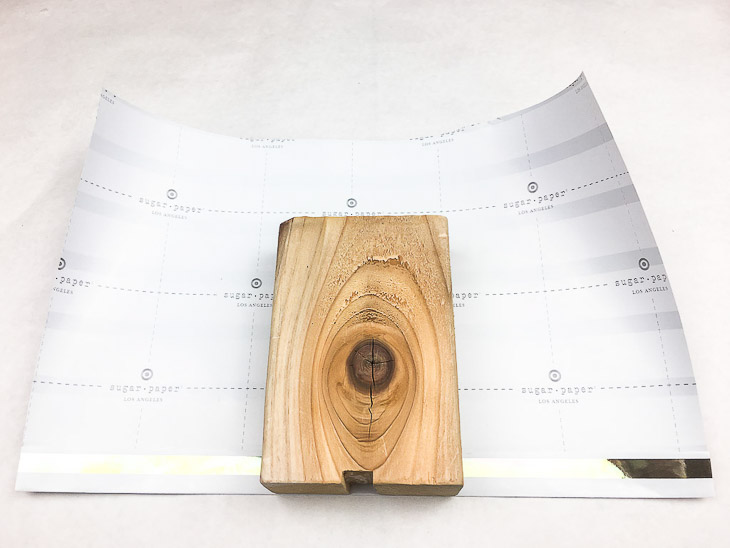
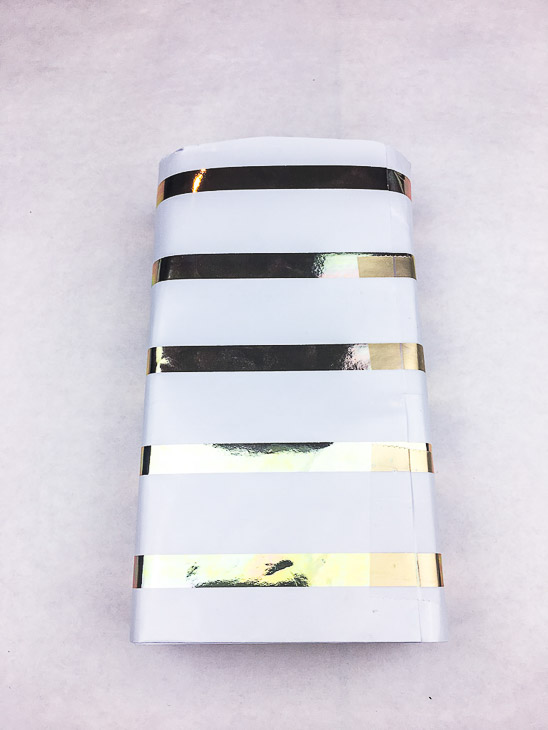
Cut a piece of wrapping paper big enough to cover the entire wood block. Fold the bottom edge then line up the cut channel end with the edge of the fold.

Fold up the bottom edge of the wrapping paper and place the block on top.

Wrap the wrapping paper around the sides of the block and tape it in the back.

Wrap the wrapping paper around the block and tape in the back.

Fold the top of the wrapping paper like a present, with the tape on the back side.

Finish wrapping your stocking holder block.

Add a festive bow to the front. Cut a notch in the wrapping paper at the front and back of the cut groove and fold it inward.

Decorate your stocking holders with a festive bow!

Apply hot glue to the groove and attach the mantel hook. (I cut my grooves a little too deep, so I filled in the extra space with more hot glue until the metal was flush with the surface of the wood.)

Glue the mantel hook to the bottom of the stocking holder.

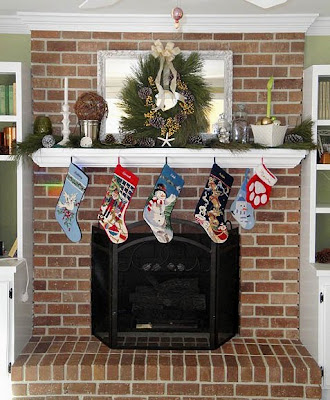
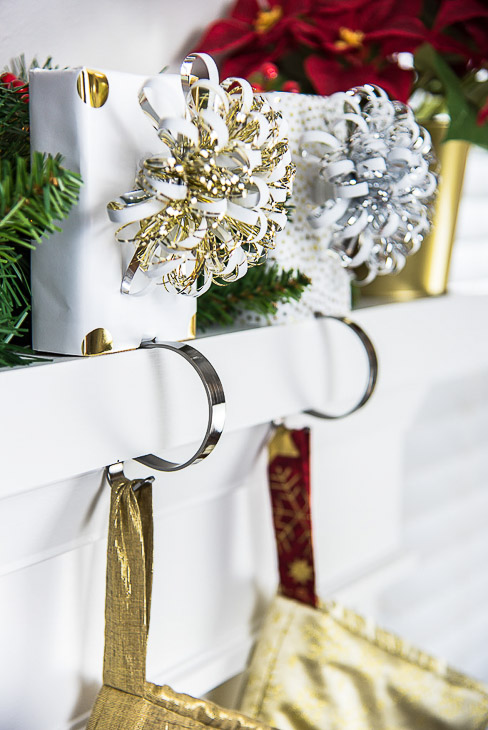
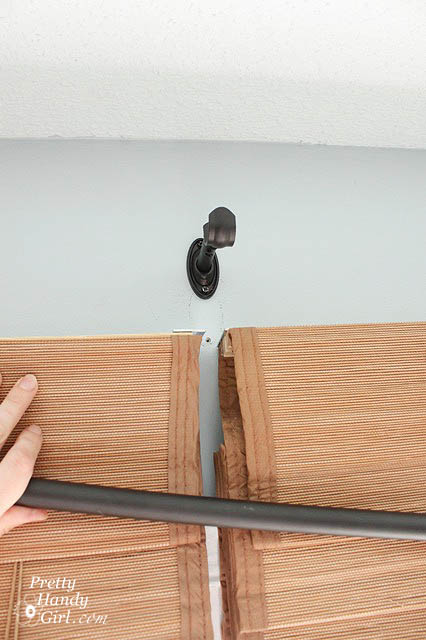
These hooks stretch over the mantel and clamp around the edge securely with its grippy surface. Now you don’t have to worry about little ones or pets pulling heavy stockings down on their heads! Santa can load up them with goodies and they won’t budge!

Decorate your mantel for Christmas with these DIY stocking holders made of scrap wood!

I love how all these stocking holders look lined up on the mantel. It was totally worth suffering through our fireplace remodel last year for this!

Love how festive these DIY stocking holders look on the mantel!

These stockings are all ready for Santa!

These stocking holders keep stockings secure and safe for children and pets.

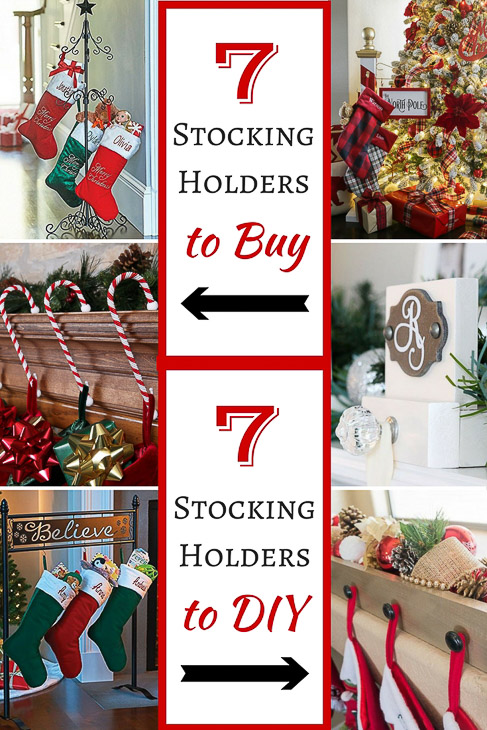
Want more ideas for hanging your stocking? I’ve rounded up 14 more stocking holders to buy or DIY, even if you don’t have a fireplace!

14 Stocking Holders to Buy or DIY

Have a wonderful holiday, and I’ll be back with another tutorial in the New Year!

~ view more of Vineta’s projects ~

Make an Elegant Holiday Wreath for Less than $20

Have you ever been in a home decor store and fell head over heels in love with a wreath only to gag at the $50 or more price tag? Put your wallet away, because today I want to show you how you can turn an inexpensive wreath into an Elegant Holiday Wreath for Less than $20! Who knows, you might already have one of these cheap wreaths and some of the supplies in storage — making your cost almost FREE!

Elegant Wreath for less than $20!

Materials:

(I’ve included affiliate links for your convenience. I earn a small percentage from a purchase using these links. There is no additional cost to you. You can read more about affiliate links here.)

Materials

Instructions:

Remove anything you don’t want to keep from your store bought wreath.  Fluff out the wreath by bending the branches to make it look larger and more full.

Grab your tree picks and decide where you want to place them on the wreath. Use strong wire cutters to cut off some of the length from the stems.

Curve the main branch of the tree pick so it mimics the curve of the wreath. Push the end of the stem under some of the wreath branches then back up so there is tension to hold the pick in place.  Wrap some wreath branches around the entire pick to hold it firmly and disguise the stem. (If you are using heavier tree picks, you can secure them using floral wire.)

Repeat the process for the other tree picks. Leave a blank space at the top for the ribbon.

Time to add some color! Make a u-shape with some floral wire and push it through the top of an ornament. Place the ornament on the wreath. Wrap the floral wire around the wreath, twist the wire to secure from the backside of the wreath.

Evenly space the remaining ornaments, then attach with florist wire.

To complete the wreath, take a length of ribbon and loop it around the top of the wreath. You can tie a bow if that is your preference, but I prefer the simple look this year.

And there you have it! An elegant holiday wreath for less than $20 made in just a few minutes.

Here’s the video tutorial showing you how incredibly easy this Elegant Holiday Wreath was to make:

Display your new beautiful wreath on your front door for the entire holiday season!

The great thing about this wreath is you can customize it to any design style or color scheme. Plus, you can change it up each year!

Pin this image and remember: Never spend more than $20 on an Elegant Wreath again!

elegant holiday wreath for less than 20 - pinterest image

Other posts I know you’ll like:

5 Steps for Beautiful Holiday Wreaths

5 Steps for Beautiful Holiday Wreaths


Rosemary Wreath, Juniper Garland Tutorial

DIY Rosemary Wreath & Juniper Garland | Pretty Handy Girl


12 Great Upcycled Ideas for Holiday Decor

12 Upcycled Holiday Decor Ideas

DIY Corbel Curtain Rod Holders

Hello Pretty Handy Girl readers! You know what costs too much? Curtain rods. Personally, I have a curtain addiction that is matched only by my addiction to accent pillows, but let’s face it, people notice the curtains, not the curtain rod and holders. Amiright?!

It doesn’t have to be. Rachel at Maison de Pax came up with a genius idea for Restoration Hardware inspired curtain rod and holders. Taking off from her ideas I’m going to show you a curtain rod holder idea that goes brilliantly with a wooden rod.

mini corbels osborne wood products

These mini corbels by Osborne Wood Products are a stunning statement piece and look upscale. Let’s get busy making your room look amazing with these DIY Corbel Curtain Rod Holders!

Materials:

(I’ve included affiliate links for your convenience. I earn a small percentage from a purchase using these links. There is no additional cost to you. You can read more about affiliate links here.)

Optional:

  • Paint
  • Stain
  • Paint Brush

(This tutorial assumes you are using a 1 ½” diameter curtain rod with an actual measurement of 1 3/8″).

Instructions:

Step 1:

Protect the bottom side of the corbel as you drill through by layering scrap wood underneath as shown, otherwise the wood will blow out on the other side.

mini corbels

You will need to remove the bottom screw from the top bracket, as shown in the next photo so that it won’t be in the way of the hole saw.

diy corbel curtain rod hangers

Insert the 1 ½” hole saw into your drill. (You can also use a spade bit if you prefer.)

hole saw

Clamp the corbel down and drill through the corbel in the wide spot between the trim and near the top. You may need to drill half way through one side, then flip the corbel and drill from the opposite side.

Don’t worry if the two sides don’t meet up exactly perfect, but do try to be as close as you can.

DIY Corbel Curtain Rod Holders

Step 2:

Stain and/or paint the corbels as desired. You could add whitewashing or distressing or any other technique you like.

DIY Corbel Curtain Rod Holders

Step 3:

Attach the corbels to the wall.

Pro-Tip: An easy way to line up the holes is to place a piece of painters tape over the back and mark where the screws need to go. Transfer the tape to the wall and you have an easy drilling template.

DIY Corbel Curtain Rod Holders

Be sure to space the corbels evenly from your window trim and the ceiling. Drive screws into studs whenever possible. (If you don’t have a stud to sink the screws into, be sure to use good wall anchors.)

DIY Corbel Curtain Rod Holders

Step 4:

Hang the corbels and rod. Be sure the screws are screwed in far enough that the corbel sits firmly against the wall. This will prevent them from moving around and allowing the rod to slip whenever you open or close the curtains.

DIY Corbel Curtain Rod Holders

How lovely is this?! You just added a designer touch to your window treatments.

DIY Corbel Curtain Rod Holders

The corbels look amazing with our new window trim and they add a more sophisticated look to the room.

diy corbel curtain rod hangers

Thanks for reading!


~See More Projects by Sarah~


Disclosure: Osborne Wood Products provided the mini corbels (in our Haven swag bags) that was the inspiration for this project.

If you liked this idea, be sure to check out Brittany’s guide to hanging curtain rods:

and how to make inexpensive romantic curtains!

Easy and Inexpensive Romantic Curtains | Pretty Handy Girl


16 Stunning Green Doors - Social Media imag16e

16 Stunning Green Doors - Social Media imag16eStunning Green Doors:

I admit it, I’m crushing on green doors lately. If you know me well, you know that I painstakingly stripped my front doors a few years ago and repainted them bright green. Now I’ve been thinking more and more about front door colors for Saving Etta. I hope you’ll help me decide by taking a look at all these fabulous green doors!

Did you know that a colorful and vibrant door can make a huge statement in your home? Whether it is exterior or interior, a green door is a great choice. (Hey, if you’re superstitious, it may even bring some cash your way.) Here is a collection of stunning green hued doors to inspire you to paint your door.

Stunning Green Doors - Houseful of Handmade

This lovely, bright green door by Houseful of Handmade adds a dramatic focal point to a room.


This green door near London, looks right at home with all the greenery around it.


Stunning Green Doors - Emily A Clark

Jungle green is a gorgeous contrast to the brick on Emily A Clark’s home.


Blue Peacock by Sherwin Williams - Creamy Tan trim and dark siding on this early 1900's home

This arts and crafts style house is the perfect canvas to showcase deep green doors with matching benches.


Stunning Green Doors - The DIY Dreamer screen door

You can add green to your screen or storm door for some major curb appeal like Christine, the DIY Dreamer did on her house.


Stunning Green Doors - Craftivity Designs mint

The extremely light mint green on this Entryway Door by Craftivity Designs is pure perfection in this space.


Chartreuse by Sherwin Williams - Small cottage green-yellow-lime colonial door with square wreath

This bright chartreuse door looks beautiful with neutral ivory siding.


Stunning Green Doors - A Turtles Life for Me bold green

When you want to renovate a room and make a statement, take a lesson from Natalie at A Turtle’s Life for Me: Paint a door (or two) bold spring green.


An aqua blue-green door adds loads of charm to this adorable bungalow in downtown Raleigh, NC.


The Brits really know how to showcase their colorful doors, like this green door spotted in Eaton.


Stunning Green Doors - Pretty Handy Girl green door

This bright green door was formerly royal purple, but after a little stripping it gets a lot more compliments.


Stunning Green Doors - Shabby Fufu

Lighten up your entryway and add curb appeal like Shabby Fufu did with her Seafoam Green doors.


Stunning Green Doors - Farmhouse Made - Olive

This gorgeous  Green Door by Farmhouse Made is perfect for this home.


Stunning green door - Oliver and Rust

An Olive green door by Oliver and Rust gives the entry a fresh, clean look.


Kelly green shows up beautifully against this old stone house. Add some colorful planters to really bump up the curb appeal.


And talk about WOW factor! I found the above green door online here.

I hope this collection gave you some inspiration on how to use green to add some character and pizzazz to your home. If you like this round up of stunning green door inspiration, pin this image to share it:

16 Stunning Green Doors - Pinterest image

Other related posts that you may like:

Bright and Bold Colorful Front Doors

33 Bright & Colorful Front Doors


Aging and Antiquing Finishes Roundup Social Media Image

Aging and Antiquing Finishes Roundup Social Media ImageAging and Antiquing Technique Tutorials:

Do you love the idyllic vintage or rustic look? If your answer is yes, then this round up is for you! I’ve curated some awesome projects with full details for aging and antiquing techniques that every DIYer should know. Check them out!

wood_crate_on_coffee_tableThis Rustic Wine Crate with Rope Handles looks great after a little staining and distressing.


Faux Painted Fireplace from white to brownstoneConsider Painting a Brick Fireplace to Beautiful Brownstone rather than tearing out the brick you hate.


How to Age, Distress & Antique | Pretty Handy GirlLearn many of the best techniques for Antiquing and Aging Furniture here.


Repaint Dated Decor Pear and GourdCheck out how you can update your home just by Repainting Dated Decor.


Green and purple hydrangeas in rustic wood trough. Build Your own Rustic Trough Centerpiece tutorial.

Learn my go to products and tips for achieving the Perfect Rustic Paint Technique.


Antique Glaze from Asphaltum Learn how to antique beautiful furniture using Asphaltum Glaze.


white-washed-window-boxCheck out this White-washed Window Box and see how to get this finish on your next project.


paint-wash-stand-plant_in_dry_sinkRefinish your furniture in no time using the help of a spray gun used here for Painting an Antique Washstand.


Aged Painted PailFind out how to get creative and make An Aged Painted Pail using something you can find in the school classroom.


finished distressed dresserThis Shabby Chic Dresser is gorgeous, check out how Holly (a professional refinisher) achieves this finish.


Secret_to_aging_new_wood_pin

Learn how to make new wood look old, weathered and rustic.


chalkboard zinc cabinetLearning how to Faux Zinc will open so many doors for you! Be creative!


Distressed Picket Fence Planter BasketLearn how to get a distressed finish with this Distressed Picket Fence Planter Basket tutorial.


Table painted, stenciled and distressedThis Chalk Painted, Stenciled and Distressed Dumpster Table gives you all the details on how to make an amazing table like this one!


Rustic Pie Safe Painted with Milk PaintThis Rustic Red Pie Safe painted with Miss Mustard Seed Milk Paint is a great way to learn about using milk paint.


Oil Rubbed Bronze Knobs HardwareDon’t buy new, learn how she refinished old hardware to get these Rubbed Bronzing Cabinet Knobs.


White-washed Patriotic Sign A slightly different finish can make any item a statement piece, like this White-Washed Patriotic Flag Sign.


Painted Distressed Wood PanelThe gorgeous technique on this Painted Distressed Wood Panel could be used for a huge variety of projects.


Rustic Wood HeadboardSee how they got this Rustic Wood King Headboard finish. Hint: it involves chains!


Painted Galvanized Storage TubChange up your metal bins with some paint, like this Galvanized Tub Storage.


Painted and Distressed - vintage oarsThese Vintage Painted Oars have an amazingly realistic finish and look so great! You’ll never guess what they used to be!


Faux Finished Weathered Wood GrainLearn how to Create Faux Finished Weathered Wood Grain. Yup, that’s not real wood grain and it looks amazing!


Faux Aged Galvanized BucketLearn how to Age Galvanized Metal Quickly, sometimes aging just gives extra charm.


Unique Wine Rack Distressed FinishCheck out how to accomplish this Unique Wine Rack Paint Finish, you’ll be glad you did.


Make vintage old sign from footboardWith a little chalk paint and sand paper, you can make a gorgeous old sign from a footboard.


Rustic Vintage Chalkboard Find out how to Build Giant Vintage Chalkboard and finish it off tonight.


Faux Copper and Patina This Faux Copper and Patina finish is stunning, learn how to make it happen on any surface!


Restoration Hardware Stain Recipe Get the Gray Restoration Hardware Stain Recipe. It’s so easy to get the same finish as that coveted store.


Paint a Giant Mandala Deck Tattoo DesignLearn how to Paint a Giant Mandala Deck Tattoo and turn something ordinary into something elegant.


Aging and Antiquing Furniture Legs

Here are some tips and tricks (you don’t want to miss) for Aging and Antiquing Furniture Legs.


Faux Aged Metal PulleyThis Faux Aged Metal Pulley is just awesome. Find out how it was done.


Chalk Painted Wooden StoolLearn the technique for this Chalk Painted Wooden Stool, it will be handy for sure!


Rustic Painted Reindeer Sleigh Make something amazing with this technique, like a Vintage Rustic Sleigh Ride Sign.

Thanks for stopping by. Do you have any techniques we didn’t cover here? Feel free to share your tips for aging and antiquing in the comments! Don’t forget to pin this image so you can find it again!

Aging and Antiquing Finishes Roundup Pinterest Image

Like the vintage look? You’ll love this Vintage Map Lampshade project:

Vintage Map Lampshade | Pretty Handy Girl