How to Install Cable Railings | Pretty Handy Girl

How to Install Cable Railings | Pretty Handy Girl

Today I have a special tutorial for you! Have you ever fallen in love with cable railings but worried you couldn’t install them yourself? I have great news. You can learn How to Install Low Visibility Cable Railings from this tutorial!

How to Install Cable Railings | Pretty Handy Girl

(This tutorial is sponsored by Feeney. I approached them about working with me on this screen porch makeover because they had great reviews about their products.)
How to Install Cable Railings | Pretty Handy Girl

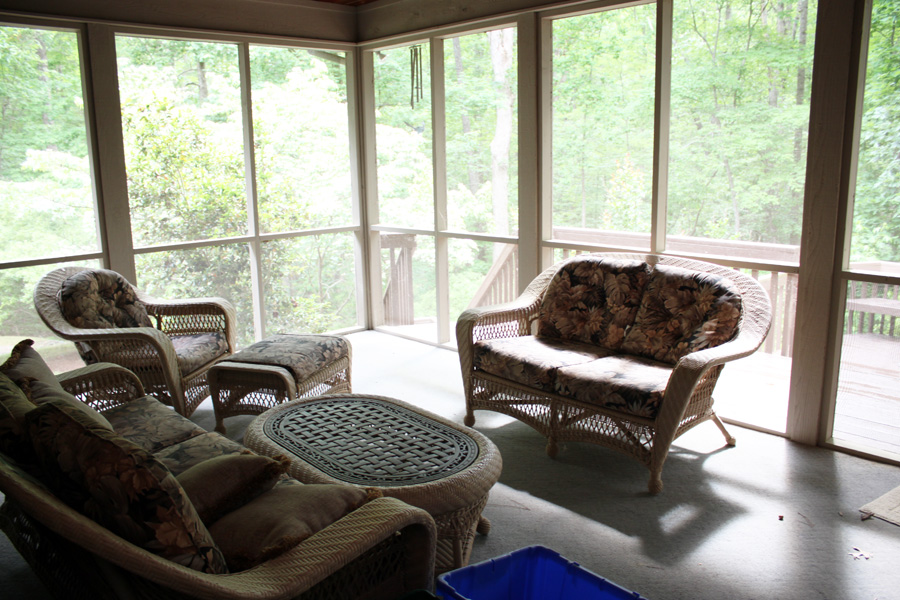
This is one makeover that has been in my head for almost two years. My much loved stepmom has a screen porch that needed a facelift. We started with a dark, dated and drab porch. All the porch surfaces were painted brown. The furniture had a monotone brown look. The only different color on the porch was from a very faded and dirty blue carpet that was glued to the porch floor. It was so dirty you could probably call it brown too!
How to Install Cable Railings | Pretty Handy Girl

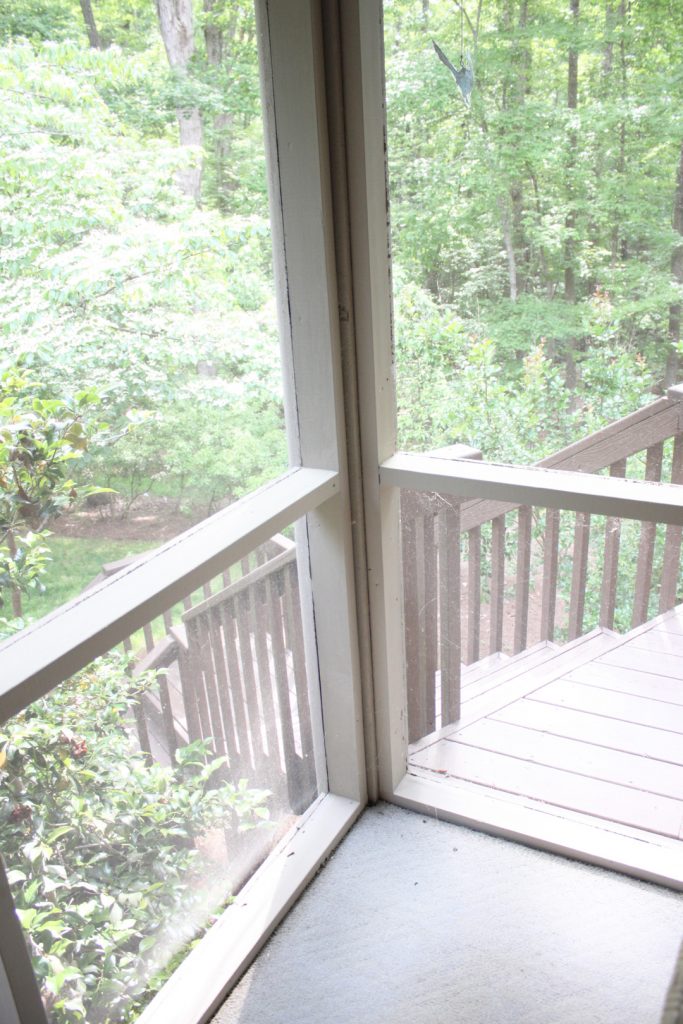
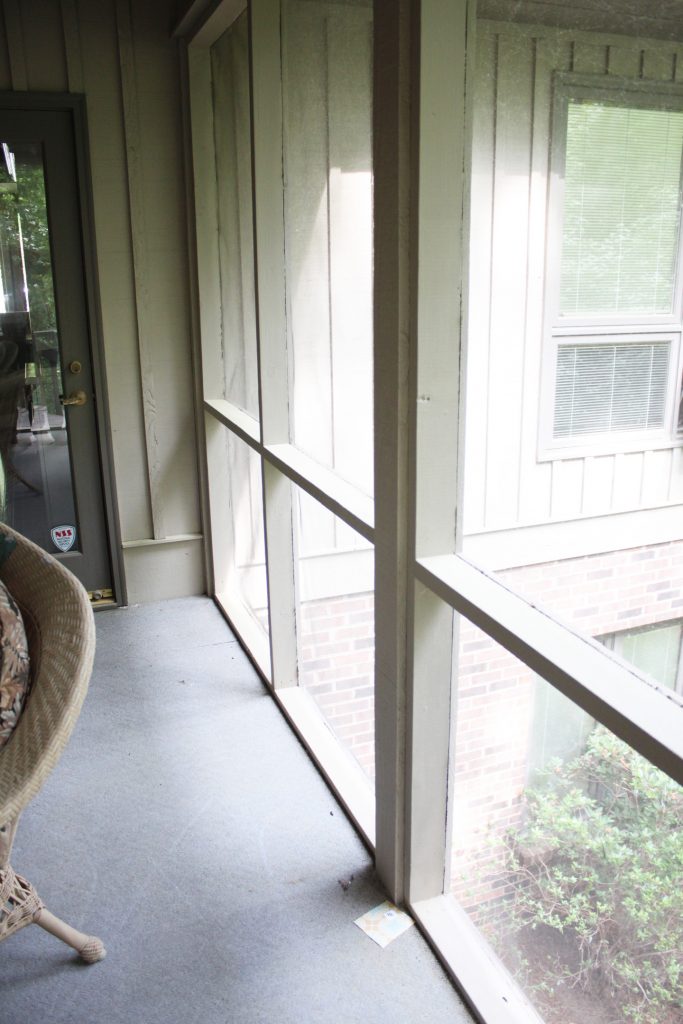
In addition to an appearance upgrade, this screen porch needed a safety solution. This is the issue that has bugged me since my stepmom moved into her home. Can you spot it?
How to Install Cable Railings | Pretty Handy Girl

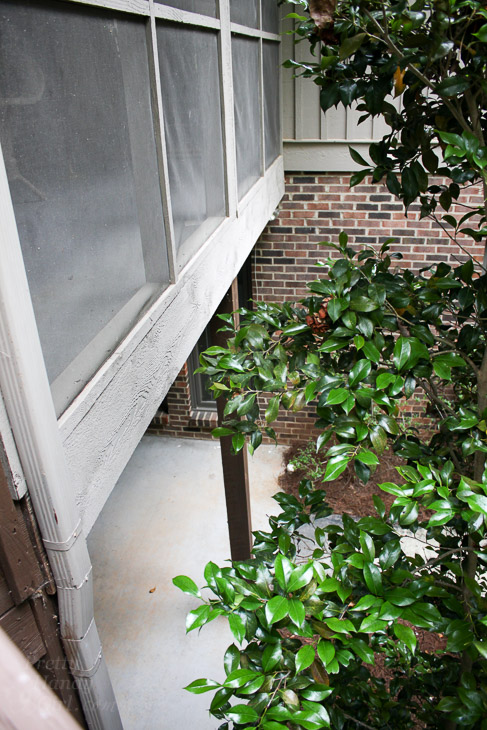
This side of the screen porch has always made me cringe. Can you see the problem from this angle?
How to Install Cable Railings | Pretty Handy Girl

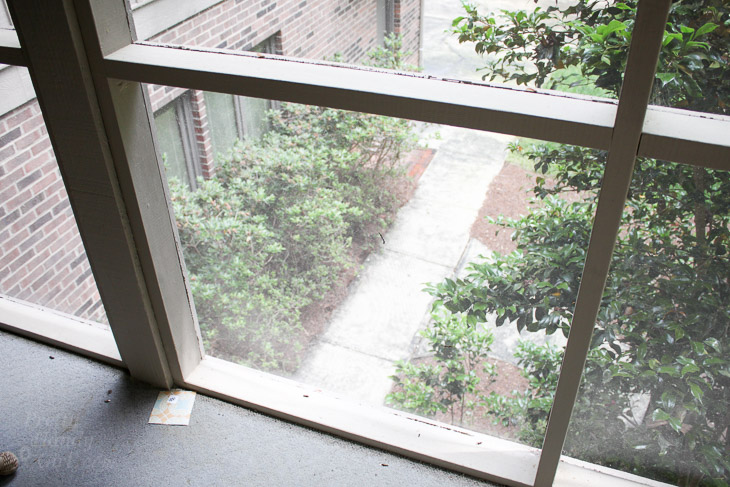
There is a 10′ drop down from the screen porch. The only thing between this drop and people is a thin screen. For the record, this is not how you build a screen porch, it is not to code. There is supposed to be a railing on the lower sections.
How to Install Cable Railings | Pretty Handy Girl

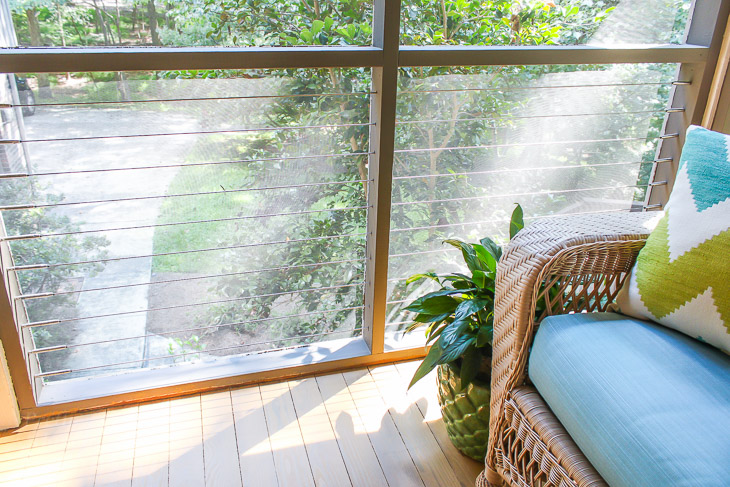
I finally convinced my stepmom to let me solve the problem. One requirement she had was it couldn’t block the view. Luckily I had the perfect solution. Feeney CableRail System!
How to Install Cable Railings | Pretty Handy Girl

They are sleek, modern and nearly disappear. Feeney’s CableRail system with their special easy-to-use Quick-Connect® cable fittings can be installed by any homeowner. Ready to learn How to Install Low Visibility Cable Railings? This tutorial is for installing the cable railings on an existing structure. Installing cable railings on stairs, new construction decks and other applications can be learned about from the Feeney’s website.

Let’s get to it.

Materials:
(contains affiliate links)

Instructions:

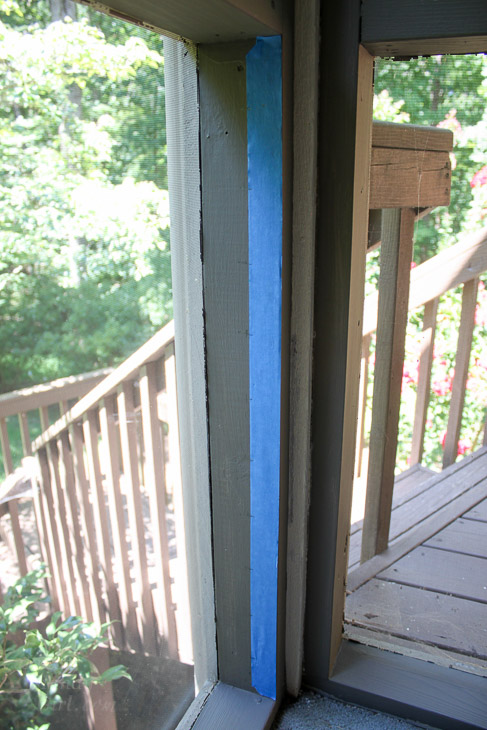
Cut a piece of painter’s tape to fit against the porch’s end supports where the Quick-Connect® fittings will be installed.
How to Install Cable Railings | Pretty Handy Girl

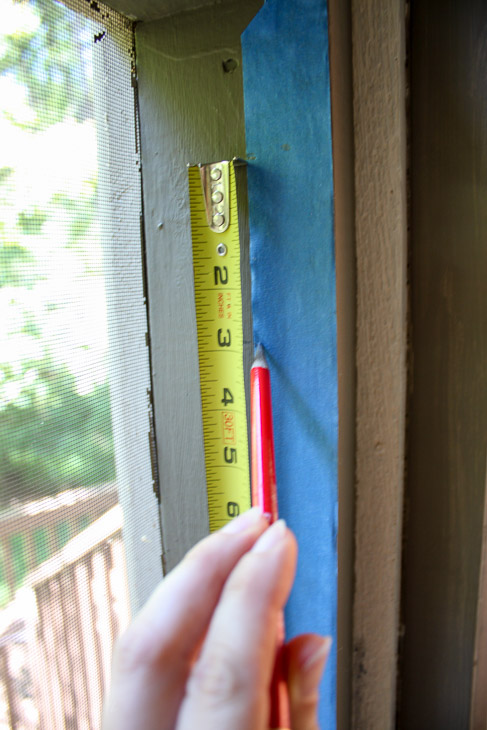
Find the vertical center. Mark 3″ increments along the painter’s tape.
How to Install Cable Railings | Pretty Handy Girl

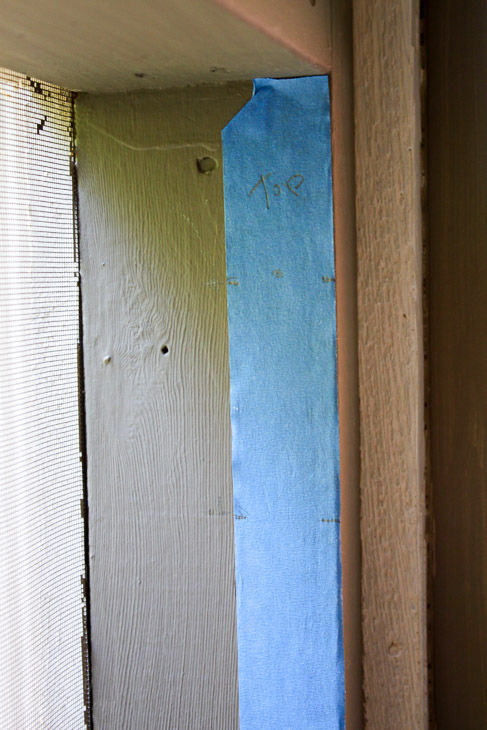
Label the top of the tape for reference.
How to Install Cable Railings | Pretty Handy Girl

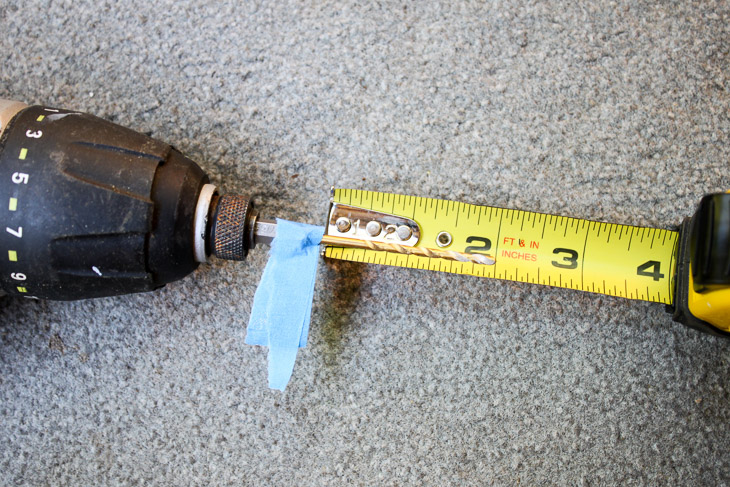
Mark 2″ on your 7/64″ drill bit with a piece of painter’s tape.
How to Install Cable Railings | Pretty Handy Girl

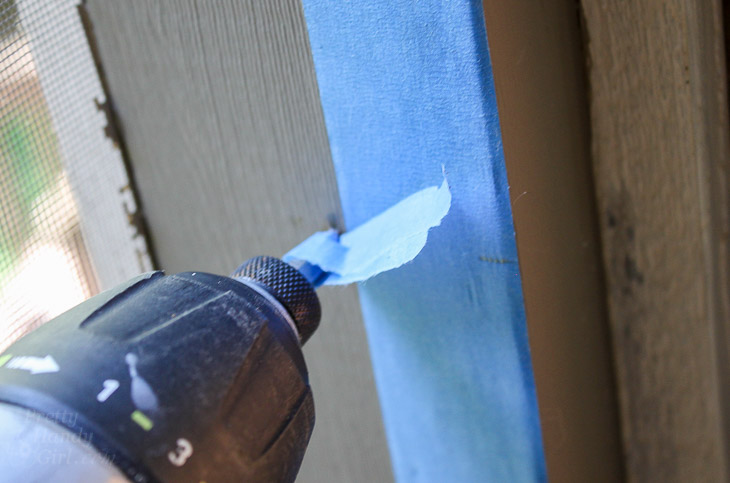
Drill holes at the marked locations into the porch supports. Stop when the painter’s tape flag meets the frame.
How to Install Cable Railings | Pretty Handy Girl

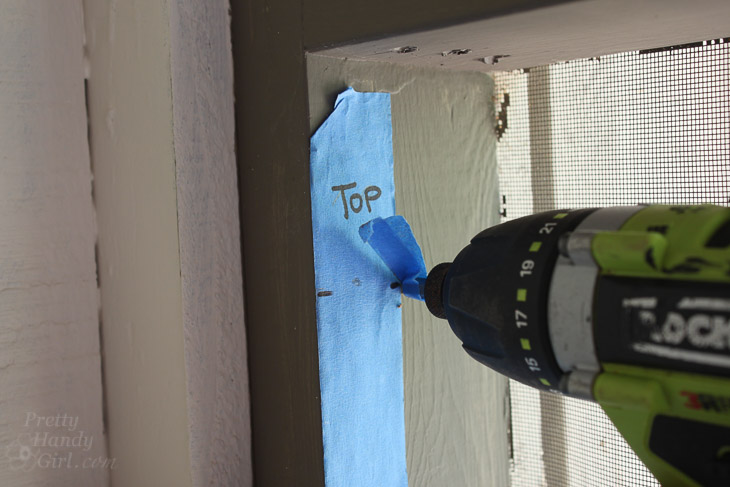
When you finish drilling all the holes on one side, remove the marked painter’s tape and place it on the other end support. If the height differs, center it vertically.
How to Install Cable Railings | Pretty Handy Girl

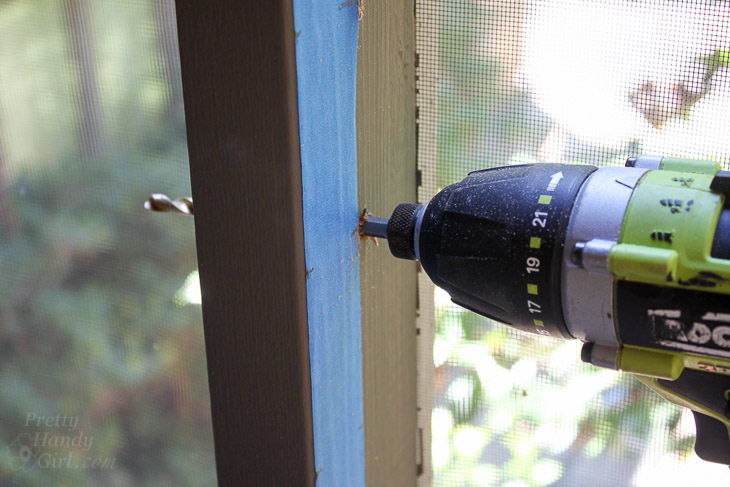
To drill through the center supports, switch to the 1/4″ drill bit and drill completely through the support.
How to Install Cable Railings | Pretty Handy Girl

How to Install the Lag Hanger Bolts:

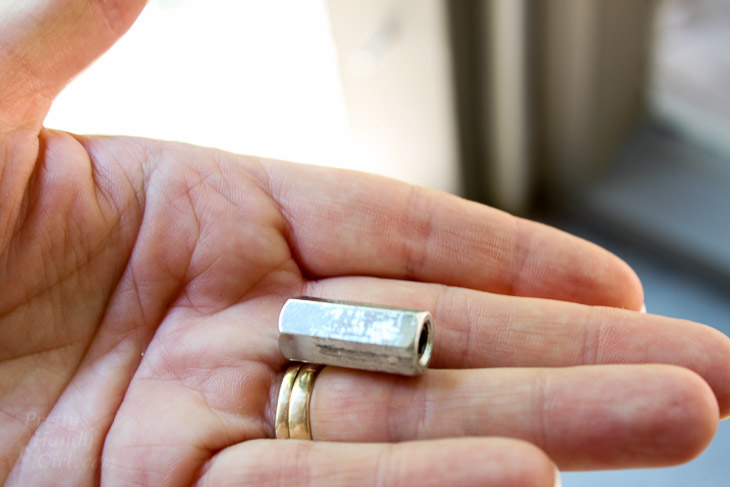
The lag bolt installation tool makes installing the lag bolt a breeze. One word of caution: go slow and steady with this tool or you will risk getting it stuck on the lag bolt.
How to Install Cable Railings | Pretty Handy Girl

Place the lag bolt installation tool into the drill. Tighten the chuck.
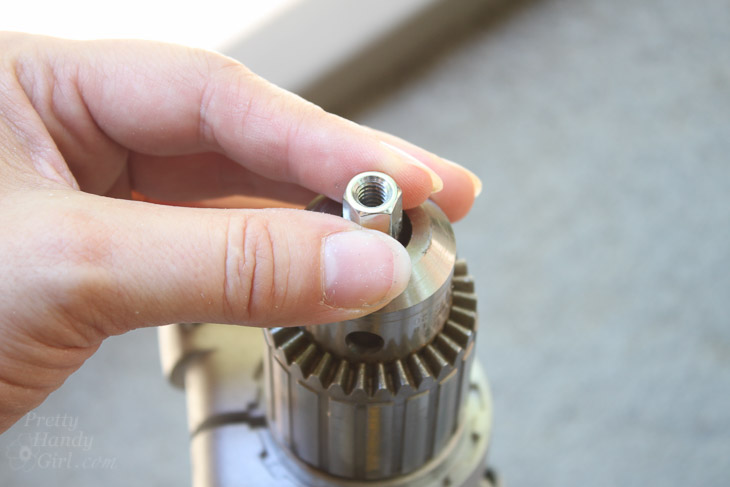
How to Install Cable Railings | Pretty Handy Girl

Select the lag bolt you need for your application. If you are securing into a wood post directly you can use the shorter screw. If you are securing into a post that has a wrap or sleeve you have to use the 2 1/2″ lag screws.
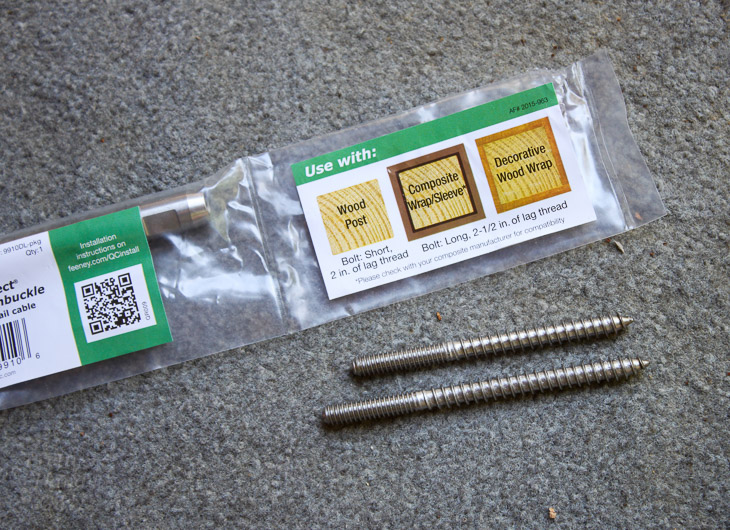
How to Install Cable Railings | Pretty Handy Girl

Thread the lag bolt into the installation tool in your drill.
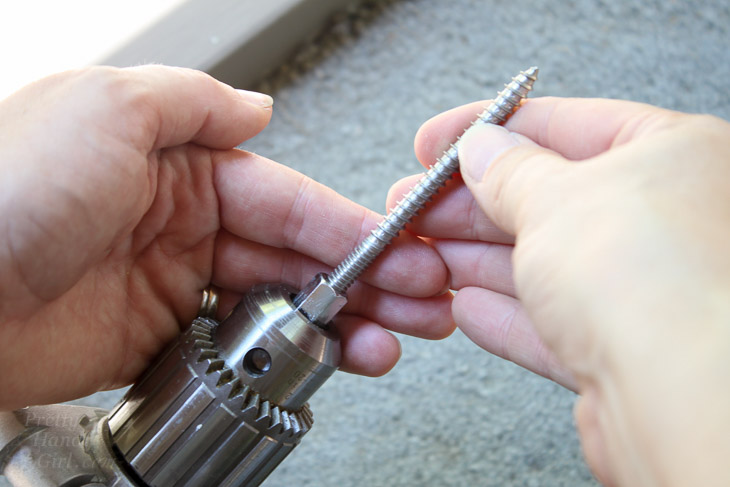
How to Install Cable Railings | Pretty Handy Girl

Slowly drive the lag bolt into the porch support. Stop when you reach the fine threads (exactly 1″ exposed.)
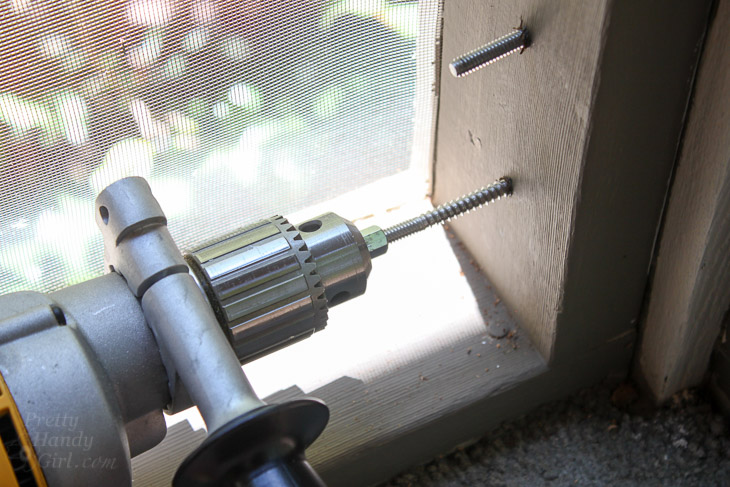
How to Install Cable Railings | Pretty Handy Girl

Repeat until you’ve installed all the lag bolts into both end supports.
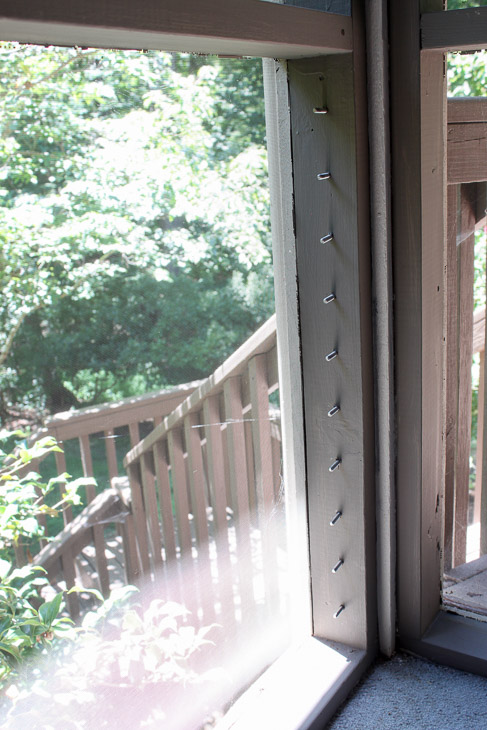
How to Install Cable Railings | Pretty Handy Girl

Squeeze a small amount of thread locking compound ONLY onto the lag bolts that will receive the Quick-Connect® Lag Fittings.
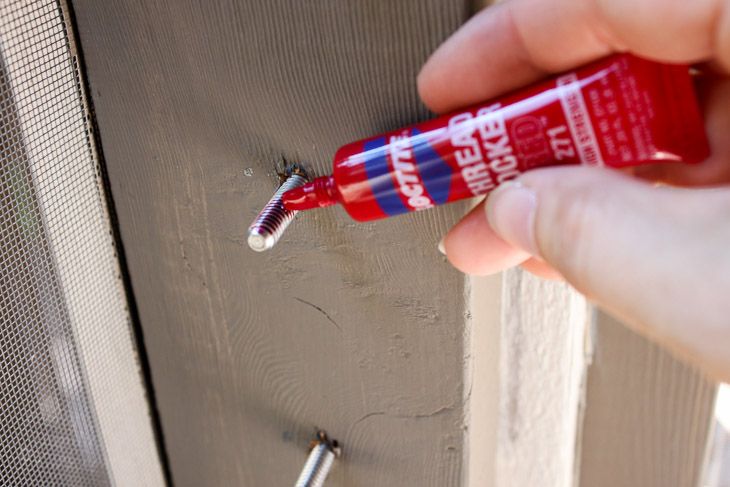
How to Install Cable Railings | Pretty Handy Girl

Turn the Feeney CableRail Quick-Connect® Lag Fitting onto the bolt until it stops against the wood.
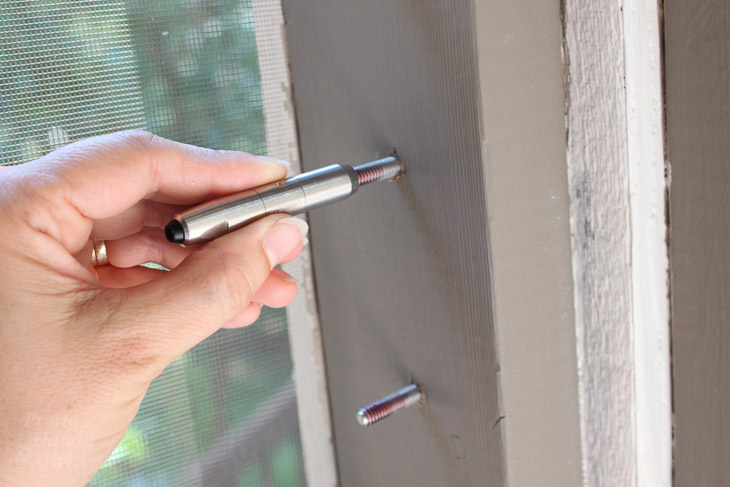
How to Install Cable Railings | Pretty Handy Girl

Repeat until all the lag fittings are installed on one side of the porch.
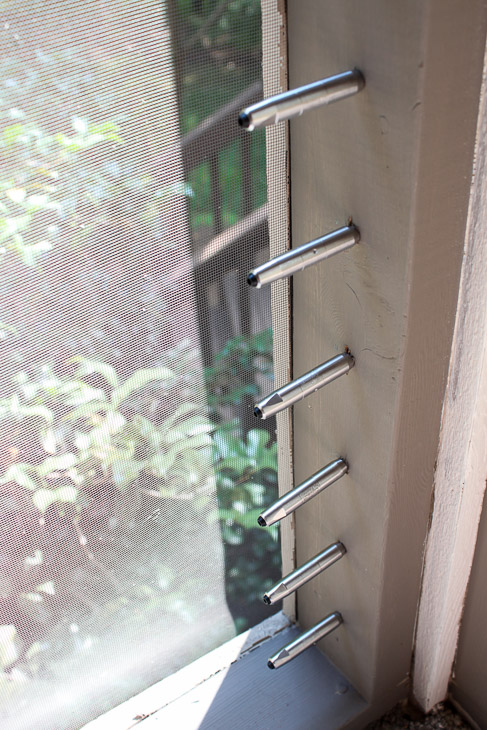
How to Install Cable Railings | Pretty Handy Girl

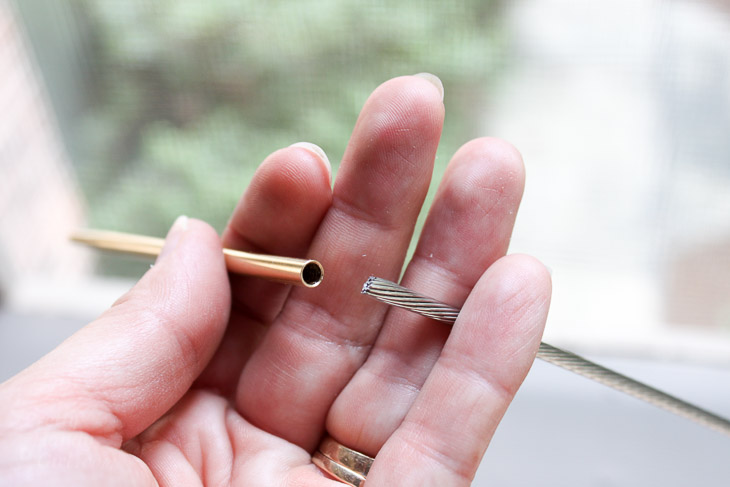
If you have a middle support, thread the cable through the support before connecting to the Quick-Connect® Lag Fittings. Locate the cable needle. Slip it onto the cable end.
How to Install Cable Railings | Pretty Handy Girl

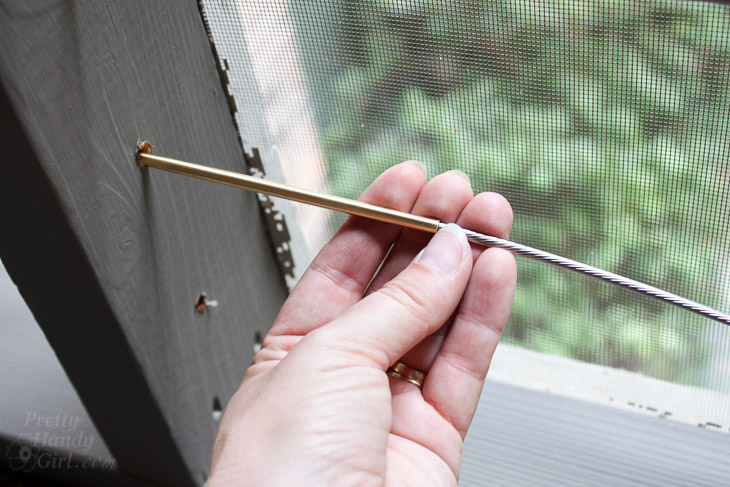
Thread the needle through the center support post toward the lag fittings.
How to Install Cable Railings | Pretty Handy Girl

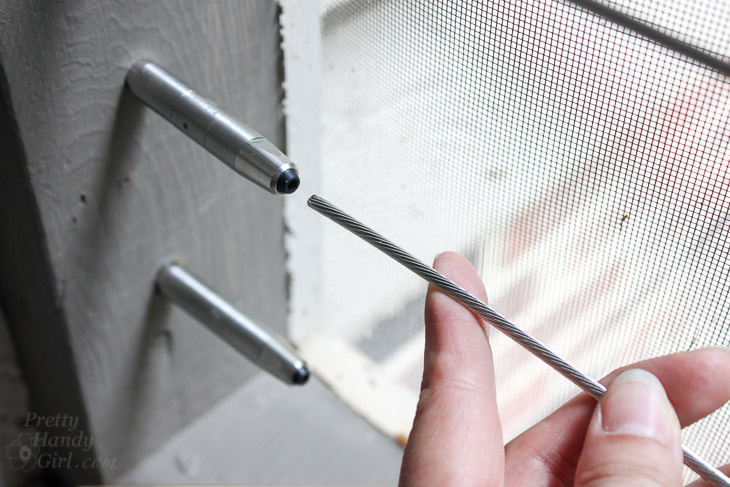
Once the needle and cable have passed through the support, remove the needle. Press the cable straight into the Quick-Connect® Lag Fitting. It should slide in smoothly. Don’t force it in.
How to Install Cable Railings | Pretty Handy Girl

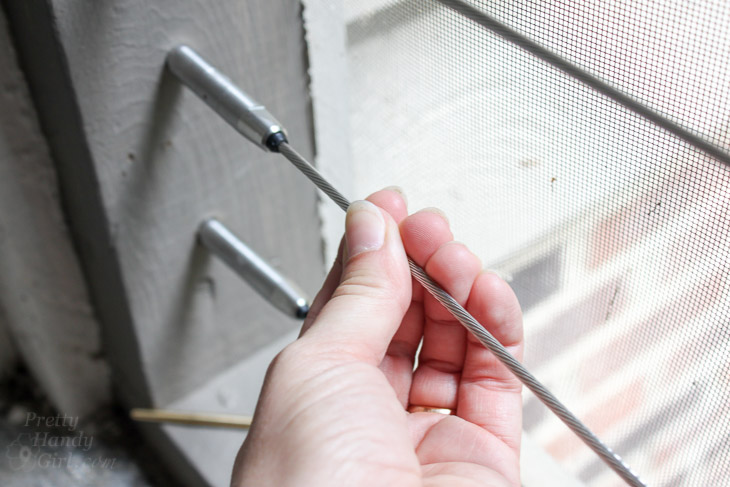
When the cable bottoms out, pull back to make sure it has locked into place.
How to Install Cable Railings | Pretty Handy Girl

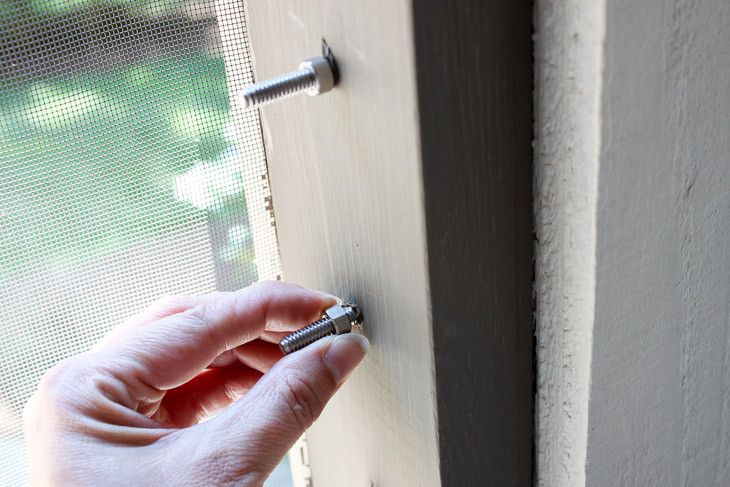
Head to the opposite side of your porch. Thread the lock nuts onto the lag bolts until it touches the wood.
How to Install Cable Railings | Pretty Handy Girl

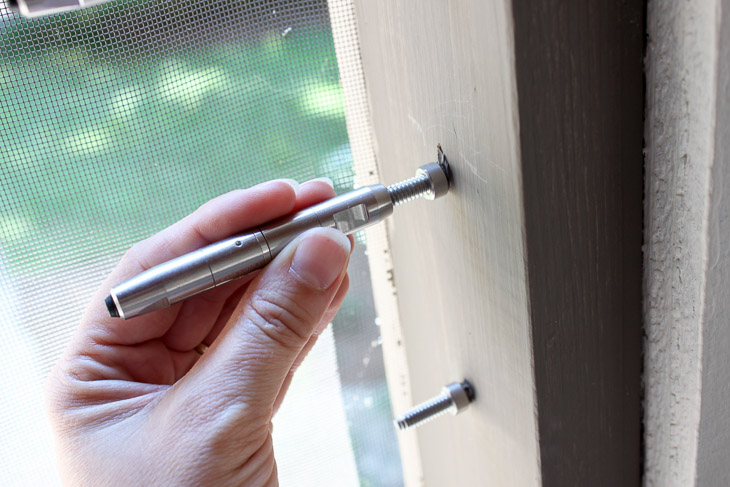
Thread the Quick-Connect® Lag Swivel Turnbuckle four full rotations onto the lag bolt.
How to Install Cable Railings | Pretty Handy Girl

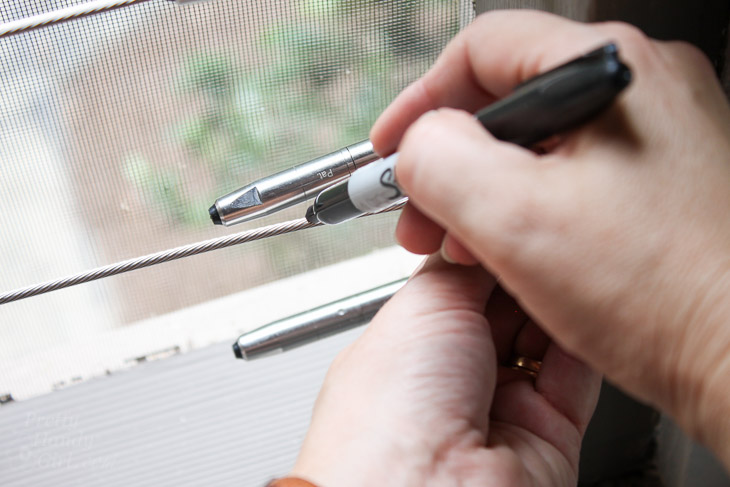
While pulling the cable tight use a Sharpie to mark the cable against the mark on the turnbuckle fitting.
How to Install Cable Railings | Pretty Handy Girl

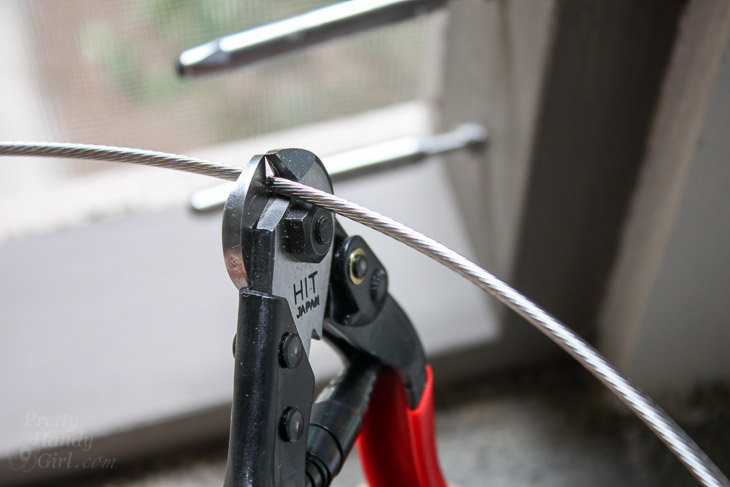
Use the cable cutters to cut the cable at the mark.
How to Install Cable Railings | Pretty Handy Girl

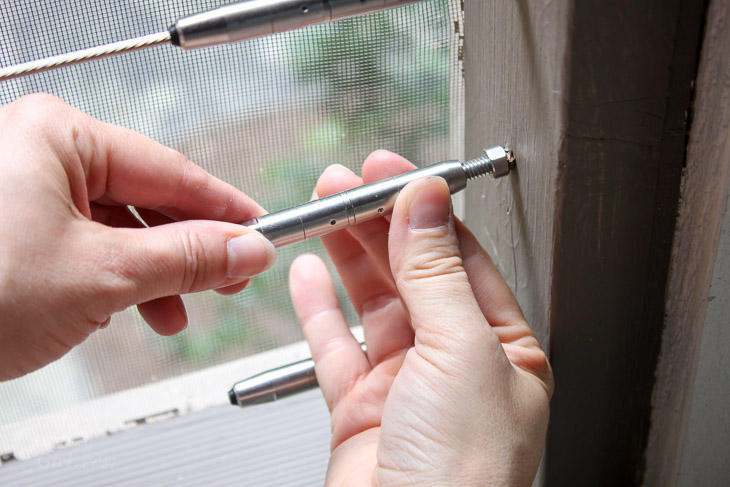
Loosen the turnbuckle two full rotations.
How to Install Cable Railings | Pretty Handy Girl

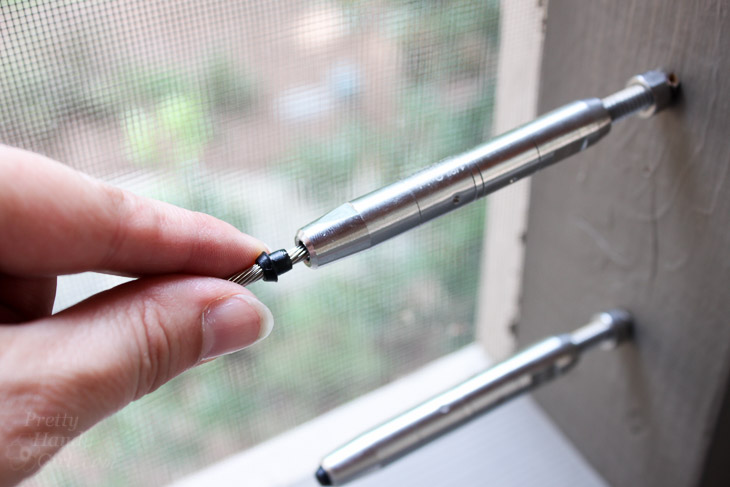
Insert the cable into the turnbuckle fitting.
How to Install Cable Railings | Pretty Handy Girl

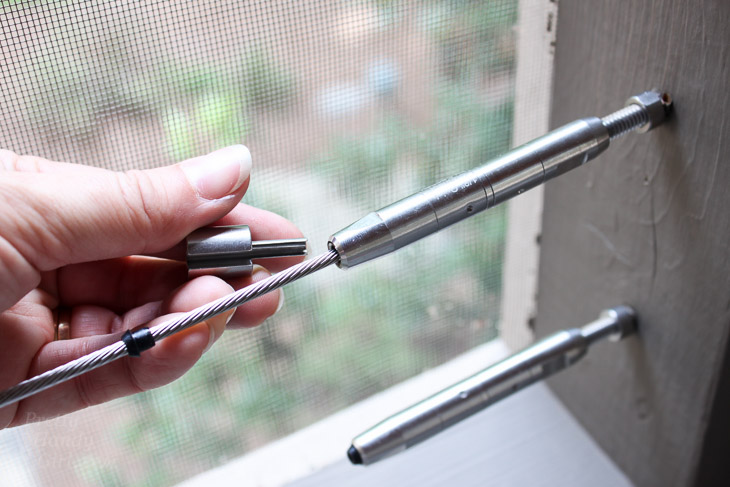
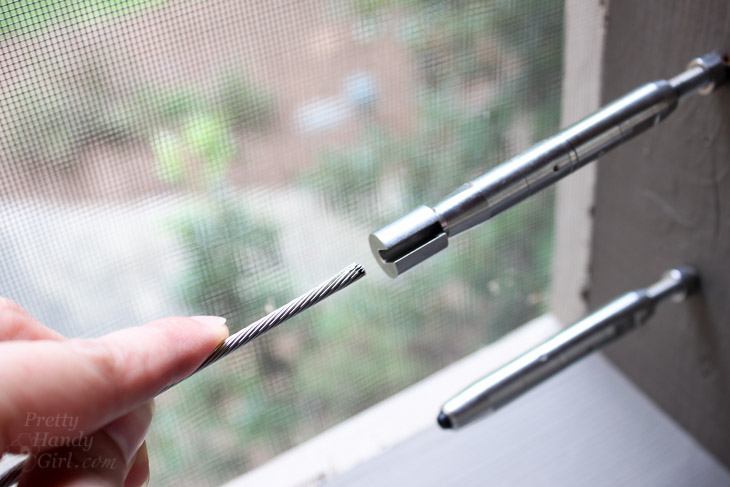
If you make a mistake and need to remove a cable, don’t stress. Use the cable release tool.
How to Install Cable Railings | Pretty Handy Girl

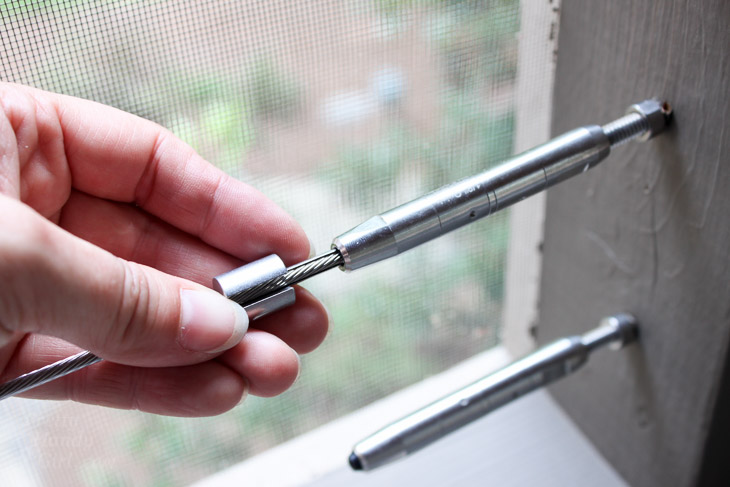
Press the release tool into the connector.
How to Install Cable Railings | Pretty Handy Girl

You might need to tap the connector lightly with a hammer to get the tool to release the cable (especially if you already tightened the cable.)
How to Install Cable Railings | Pretty Handy Girl

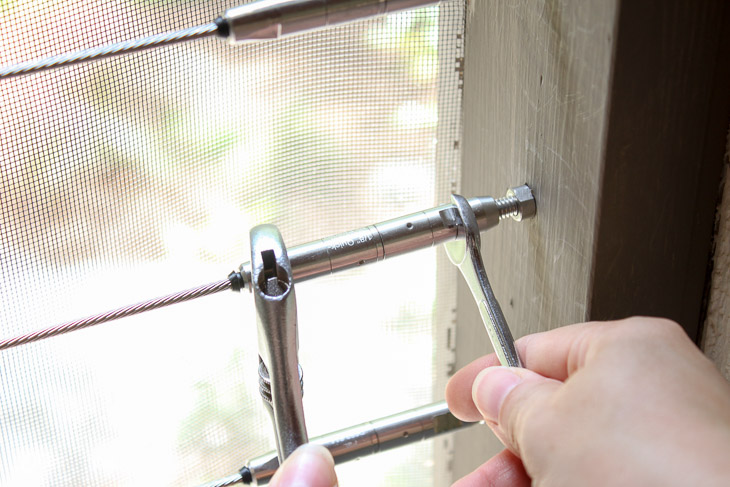
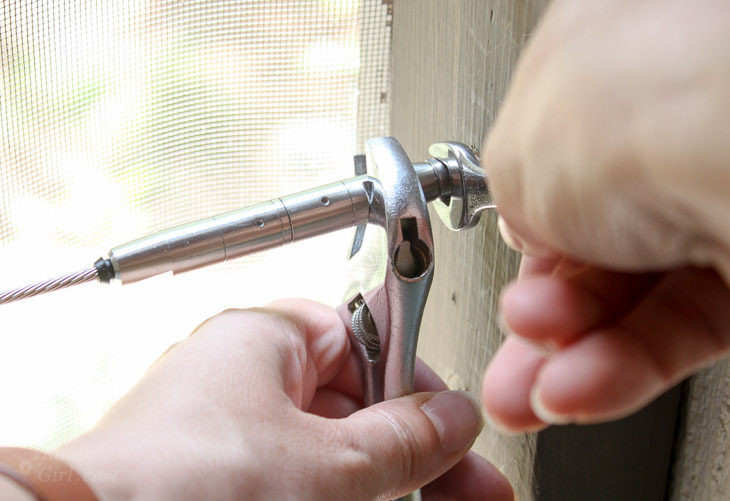
Hand tighten the Quick-Connect® Swivel Turnbuckles. Use two wrenches to grasp the connectors at the notched ends. Hold the end with the cable steady and tighten the side closest to your post.
How to Install Cable Railings | Pretty Handy Girl

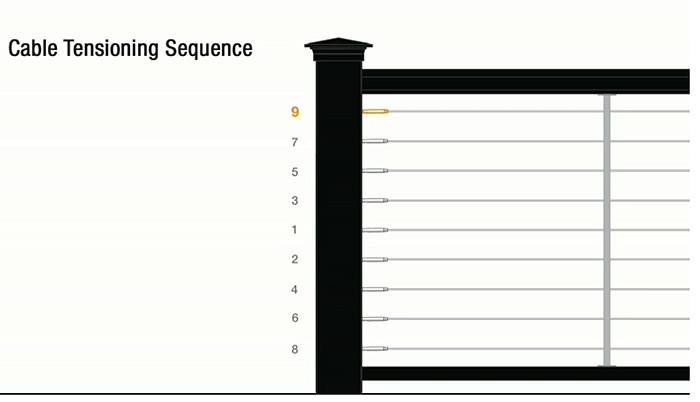
Follow the sequence for tightening as shown below:
How to Install Cable Railings | Pretty Handy Girl

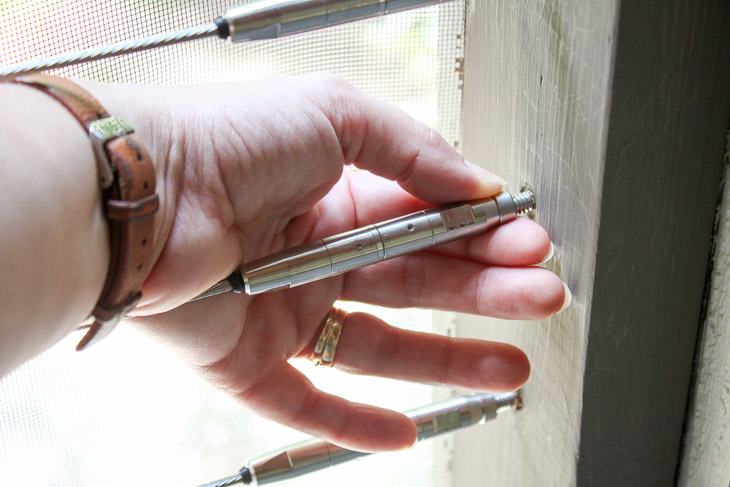
Once the cables are all fully tightened, turn the nut until it is secure against the connector.
How to Install Cable Railings | Pretty Handy Girl

Secure the nut against the fitting with your wrenches.
How to Install Cable Railings | Pretty Handy Girl

For more detailed installation instructions, watch this video for Installing Feeney CableRail System to a Wood Post with Sleeve or browse these Feeney video tutorials for more installation tips and help.

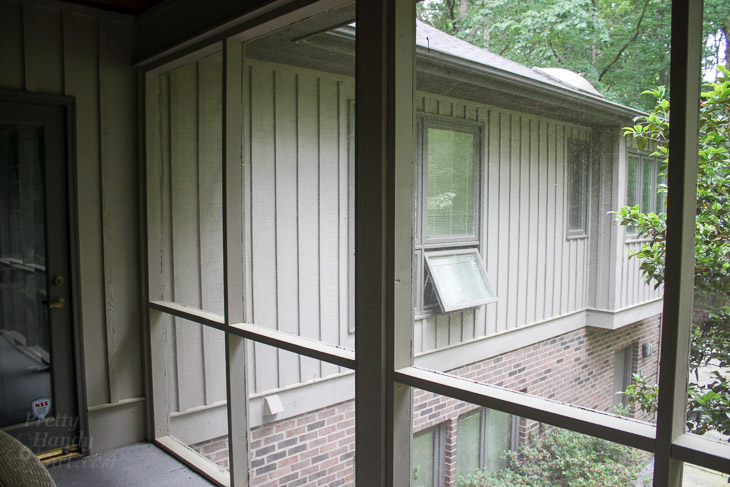
Ready to see the difference? Behold the scary, unsafe…

Before:
How to Install Cable Railings | Pretty Handy Girl

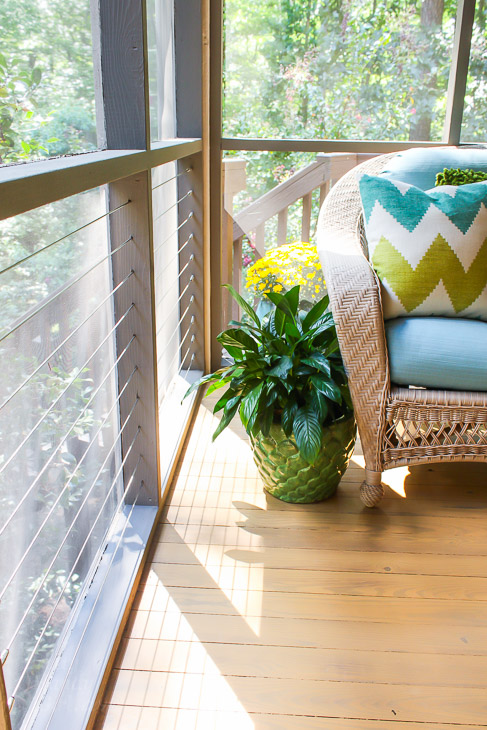
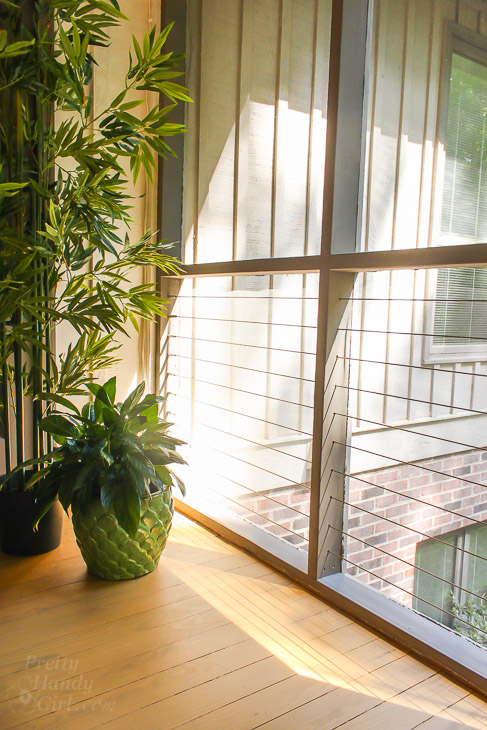
And the sleek, beautiful and safe…

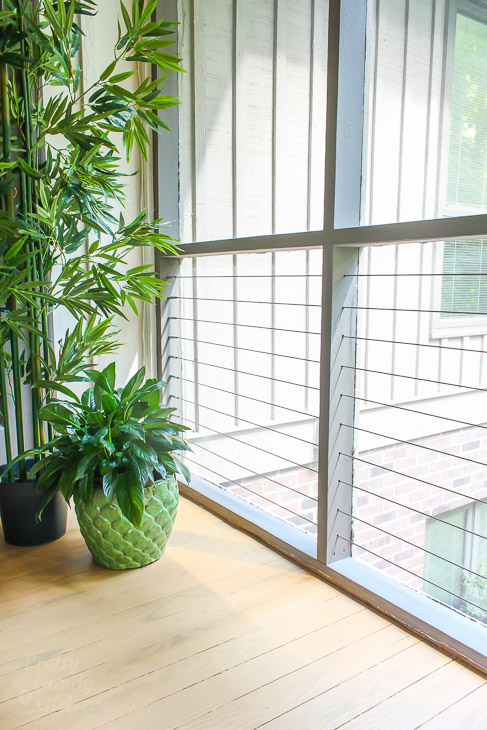
After:
How to Install Cable Railings | Pretty Handy Girl

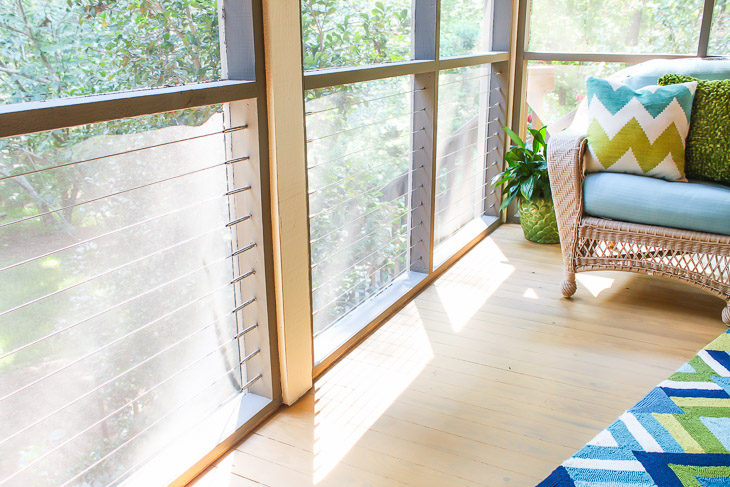
Another before:

How to Install Cable Railings | Pretty Handy Girl

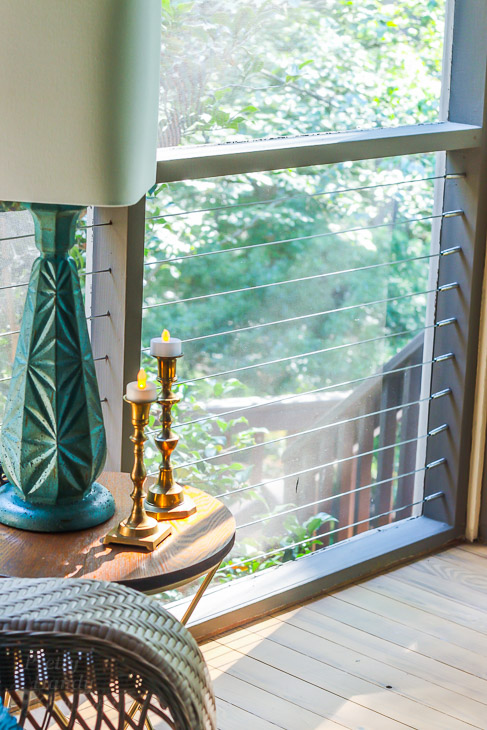
And after:How to Install Cable Railings | Pretty Handy Girl

How to Install Cable Railings | Pretty Handy Girl

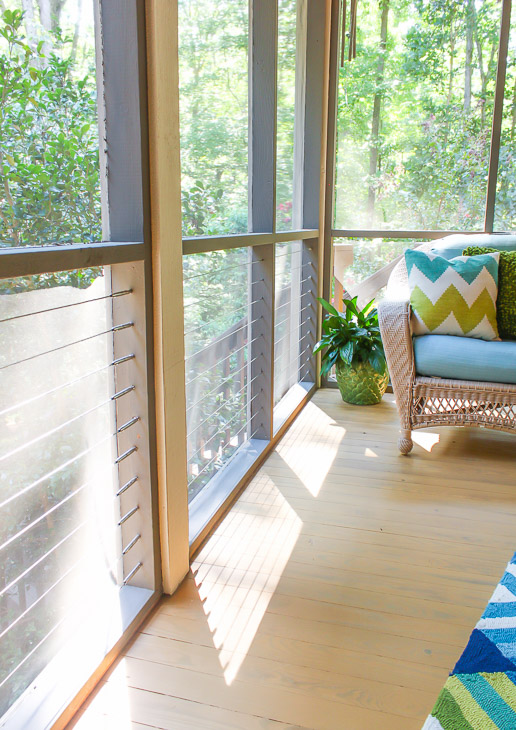
Don’t you love the look of Low Visibility Cable Railings? Now you can install them in your own home!
How to Install Cable Railings | Pretty Handy Girl

Want to see the full screen porch reveal, take a look here.

If you use any Feeney systems, be sure to share your photos with Feeney to be entered to win cash prizes! The next deadline is in November!


Enter Feeney Photo Contest

PHGFancySign

Disclosure: This is a sponsored post for Feeney Cable Rail. I was provided with materials and compensation for my time. I was not told what to write. All opinions are my own. As always I’m very particular about the brands I partner with. 


Pin for later!
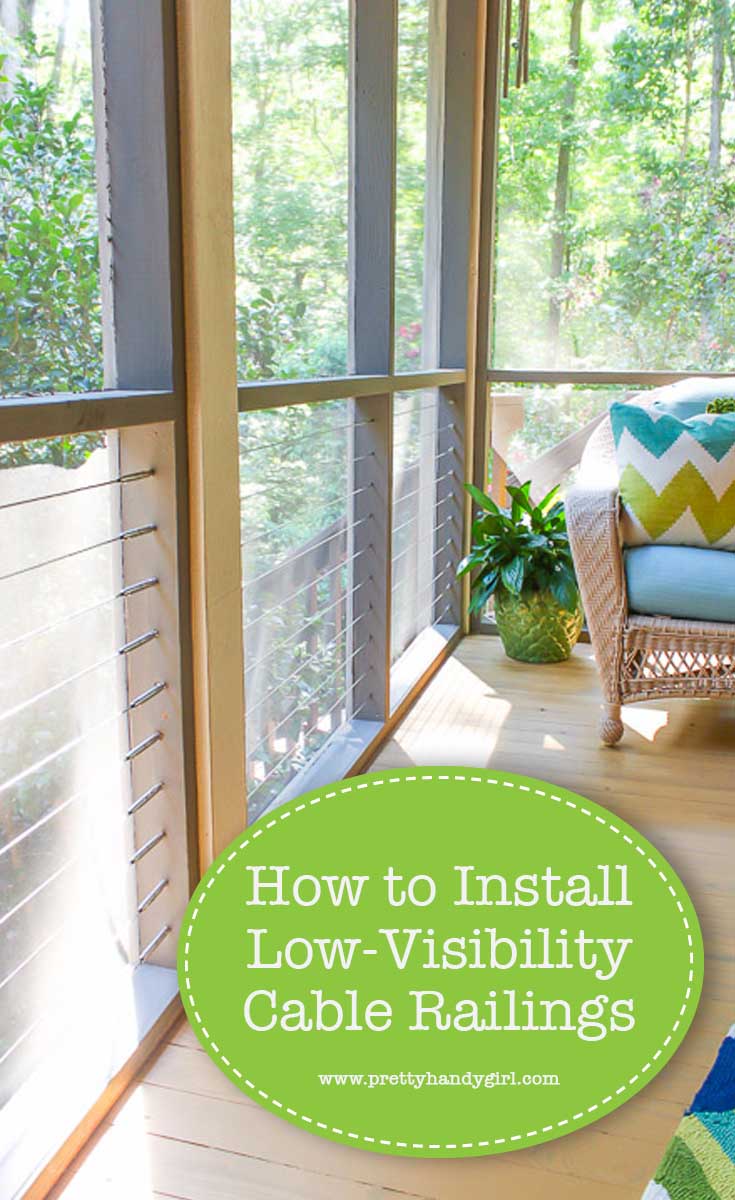
Learn How to Install Low Visibility Cable Railings from this tutorial from Pretty Handy Girl! | #prettyhandygirl #DIY #homeimprovement

How to Build: Industrial Dog Bowl Feeder Stand | Pretty Handy Girl

How to Build: Industrial Dog Bowl Feeder Stand | Pretty Handy Girl

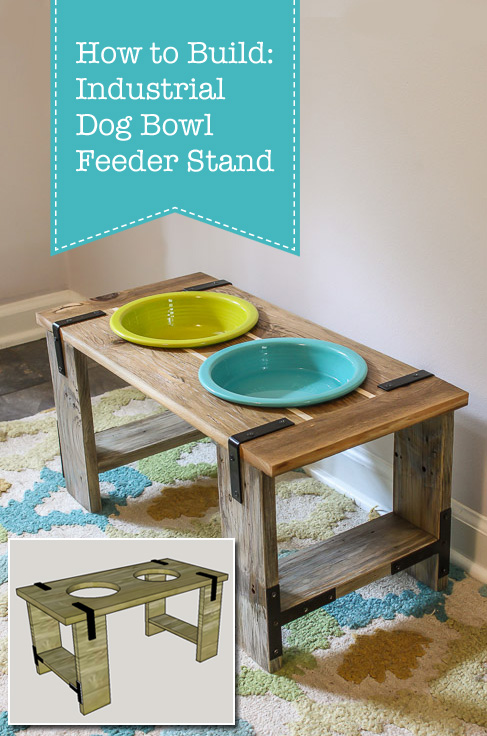
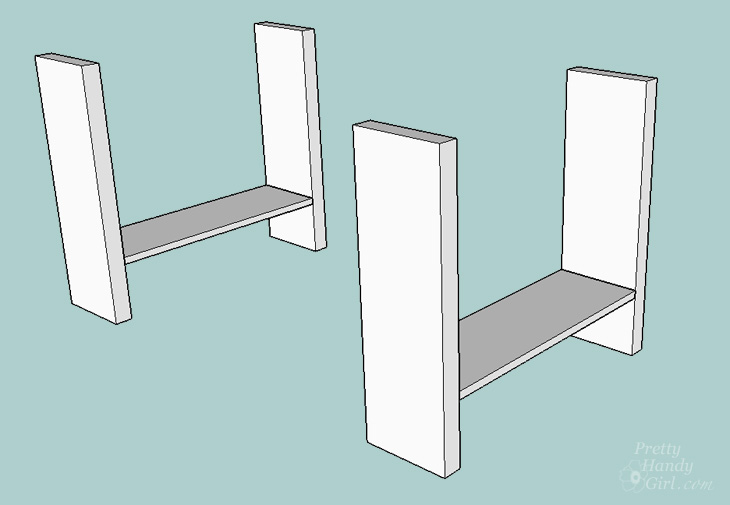
Hi all you pet lovers! I’m checking in with a cool project for the dog and cat parents out there. When I brought home Lena the Lucky Dog, it was quickly obvious that she was much larger than Handy Dog was. Not only did she not fit on his old dog bed, but his dog feeder was too small for Lena, too. She was having a hard time opening her mouth inside the smaller bowls to eat. I searched online for some beautiful industrial style raised dog bowl feeders. But, I was coming up short. The only one I found cost way more than I wanted to spend. And frankly, it wasn’t quite the style I was craving. What’s a handy girl to do? Make my own! And luckily for you, I’ve included the full DIY tutorial (sponsored by National Hardware) so you can build your own Industrial Dog Bowl Feeder Stand. You’re welcome ;-).

(This post contains some affiliate links. You can read more about affiliate links in my disclosure statement.)

Material List:

Cut List:

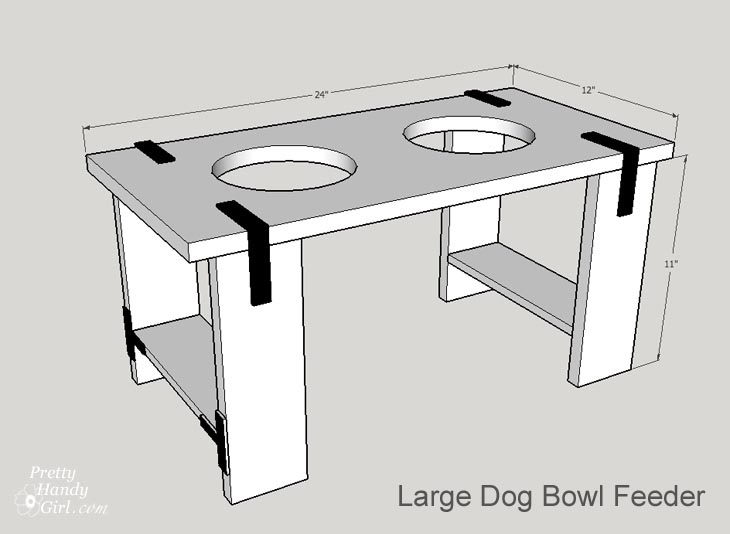
Large Dog Feeder Size

Rustic Industrial Dog Bowl Feeder Stand | Pretty Handy Girl

  • 1 – 1″ x 12″ x 25″ wood of choice for top (actual board size is 3/4″ x 11 ½” x 24″)
  • 4 – 1″ x 4″ x 11″ for legs (actual board sizes are 3/4″ x 3 ½” x 11″)
  • 2 – 1″ x 4″ x 10″ for the leg supports (actual board sizes are 3/4″ x 3 ½” x 10″)

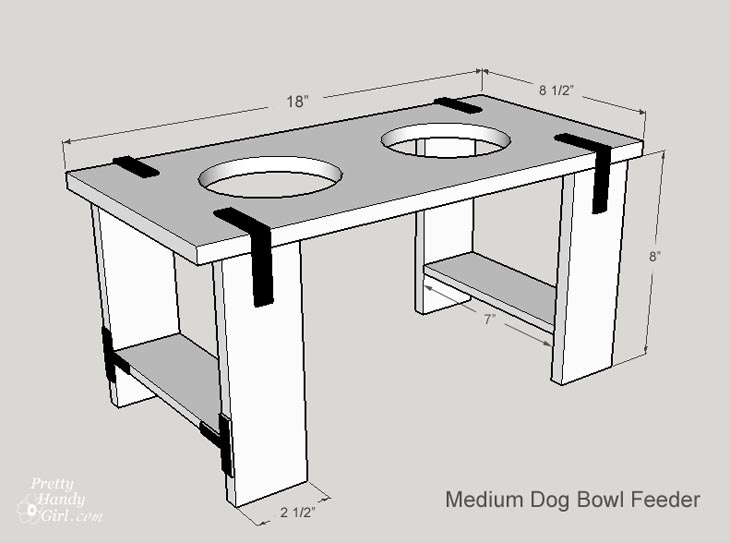
Medium Dog Feeder Size –

Rustic Industrial Dog Bowl Feeder Stand | Pretty Handy Girl

  • 1 – 1″ x 9″ x 18″ wood of choice for top (actual board size is 3/4″ x 8½” x 18″)
  • 4 – 1″ x 3″ x 11″ for legs (actual board sizes are 3/4″ x 2½” x 8″)
  • 2 – 1″ x 3″ x 7″ for the leg supports (actual board sizes are 3/4″ x2½” x 7″)

To build a Small Dog Feeder Size (use the same dimensions as the medium dog feeder, but shorten the legs to 5 inches tall. And set the leg supports 1 ½” from the floor.)

Instructions:

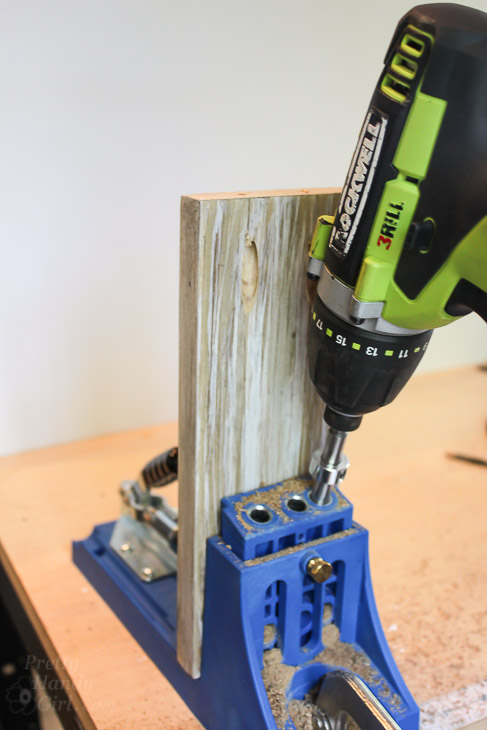
Drill two pocket holes on each end of the underside of the leg support pieces (1″ x 4″ x 10″ for the large feeder and 1″ x 3″ x 7″ for the medium feeder.) If you need assistance, you’ll find this tutorial for How to Use a Kreg Jig useful.

Rustic Industrial Dog Bowl Feeder Stand | Pretty Handy Girl

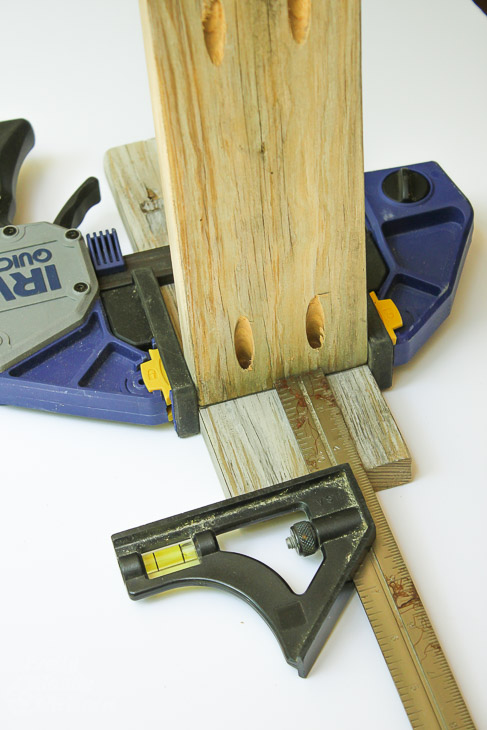
Measure 2½” from the base of each leg (use 1½” if you are building the small feeder) and make a pencil mark. Line up the leg support with the pencil marks and clamp to hold it in place.

Rustic Industrial Dog Bowl Feeder Stand | Pretty Handy Girl

Secure the leg support to the legs using 1 ¼” pocket hole screws.

How to Build: Industrial Dog Bowl Feeder Stand | Pretty Handy Girl

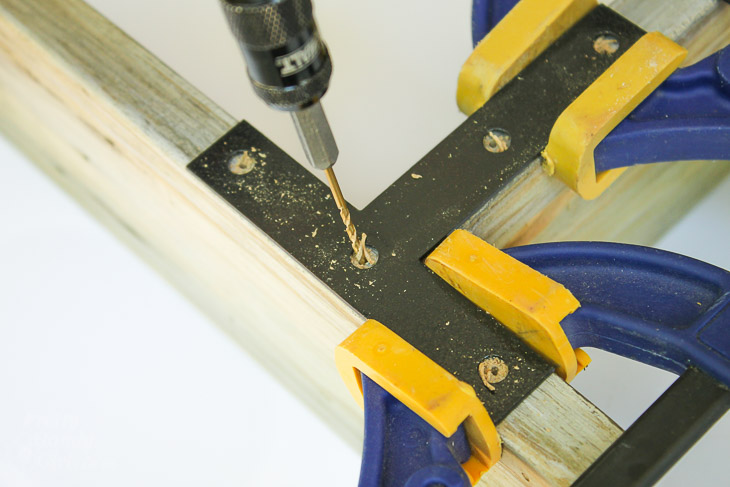
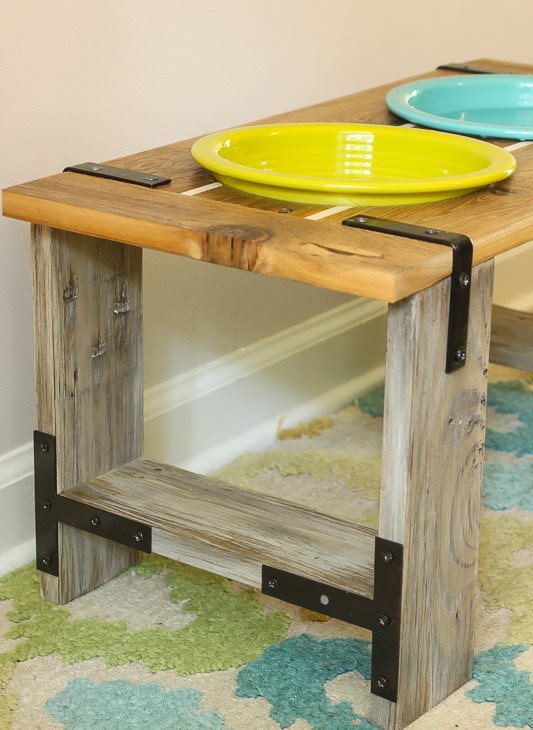
Line up the T mending plates where the legs and leg support pieces meet. Pre-drill holes with the 1/16″ drill bit. (It helps to use clamps to hold the plate in place.) Repeat for the other three mending plates.

Rustic Industrial Dog Bowl Feeder Stand | Pretty Handy Girl

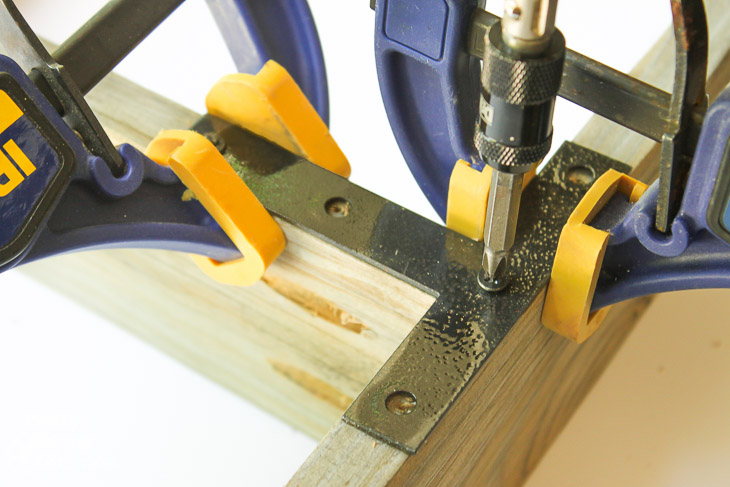
Secure the T plate to the legs and leg support using screws provided with the T mending plates.

Rustic Industrial Dog Bowl Feeder Stand | Pretty Handy Girl

Prepping the top for bowls:

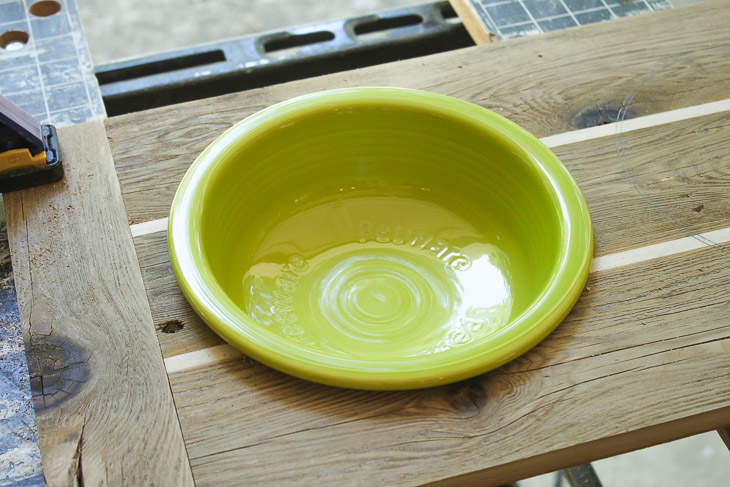
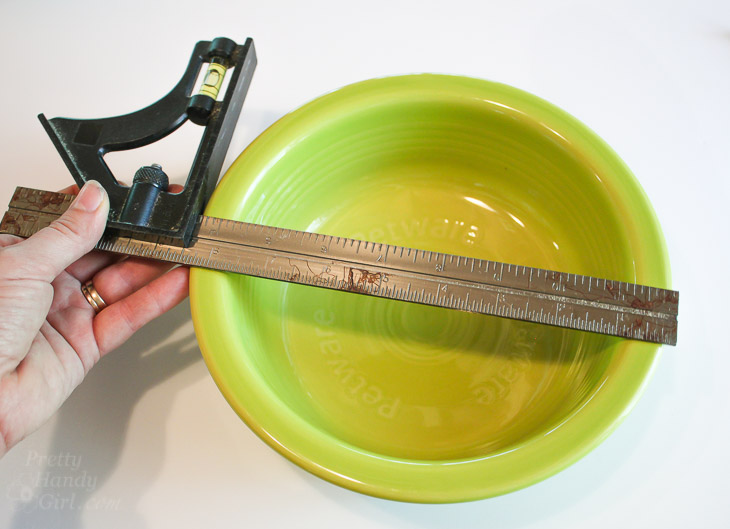
Measure the diameter of your pet bowls. Subtract the lip dimensions.

Rustic Industrial Dog Bowl Feeder Stand | Pretty Handy Girl

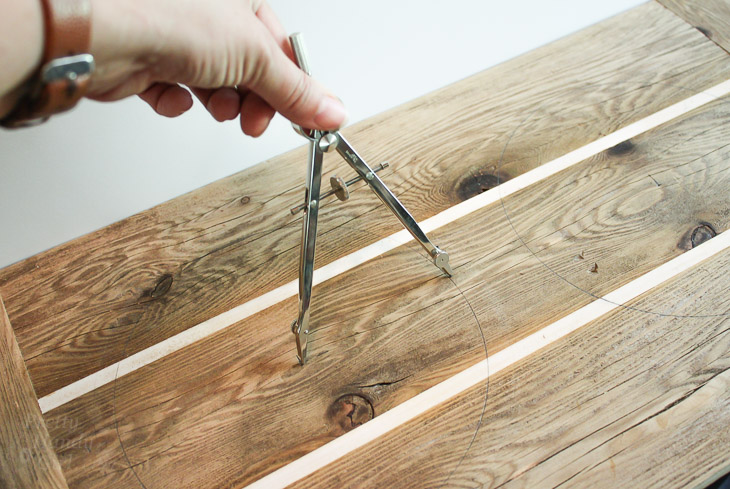
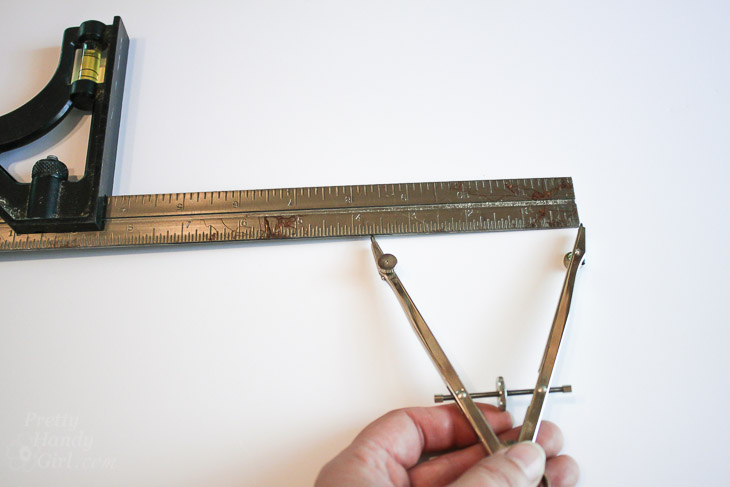
Divide your measurement in half and set your compass to this dimension.

Rustic Industrial Dog Bowl Feeder Stand | Pretty Handy Girl

Decide where you want the bowls to sit on the feeder top. Center from front to back and draw a circle with your compass.

Rustic Industrial Dog Bowl Feeder Stand | Pretty Handy Girl

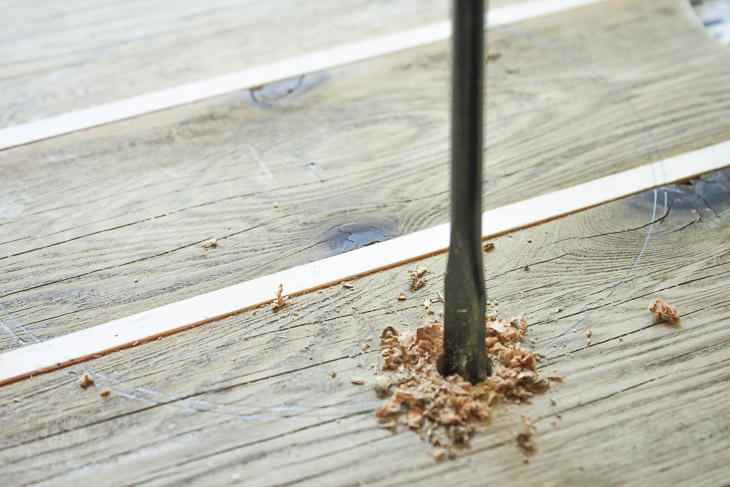
Drill a hole into the interior of the circle using the 1/2″ drill bit.

Rustic Industrial Dog Bowl Feeder Stand | Pretty Handy Girl
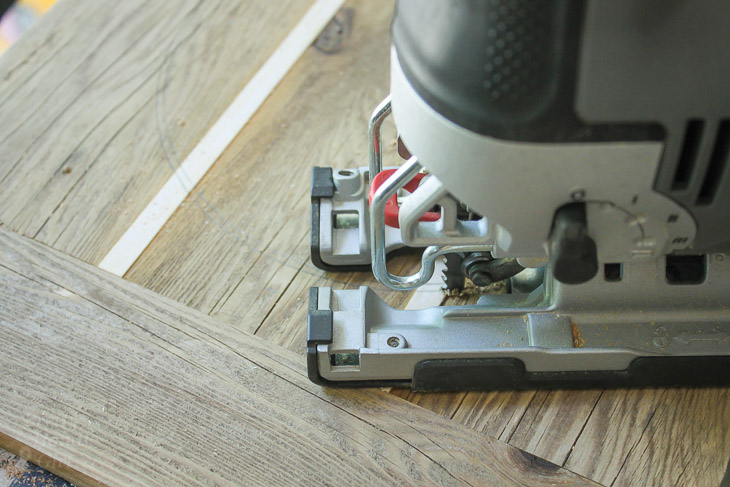
Set your jig saw blade into the circle and cut along the line of the circle.

Rustic Industrial Dog Bowl Feeder Stand | Pretty Handy Girl

Repeat for the second hole. Test the fit of the bowls and make any adjustments necessary.

Rustic Industrial Dog Bowl Feeder Stand | Pretty Handy Girl

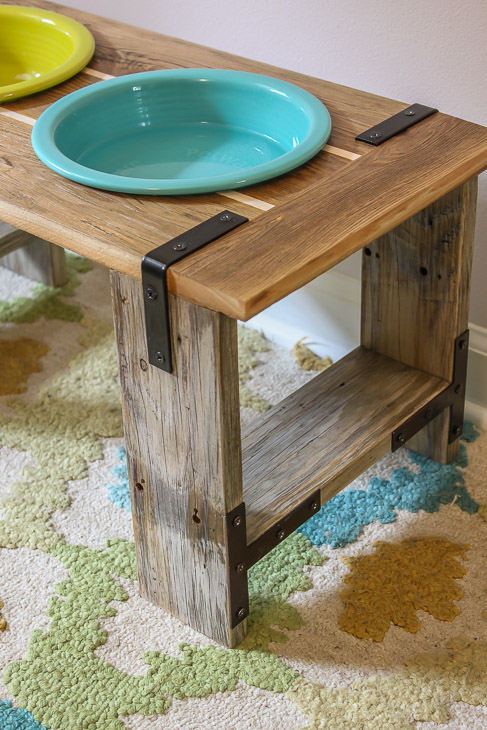
Center the top on the legs. Leave a 1 inch overhang on each side.

How to Build: Industrial Dog Bowl Feeder Stand | Pretty Handy Girl

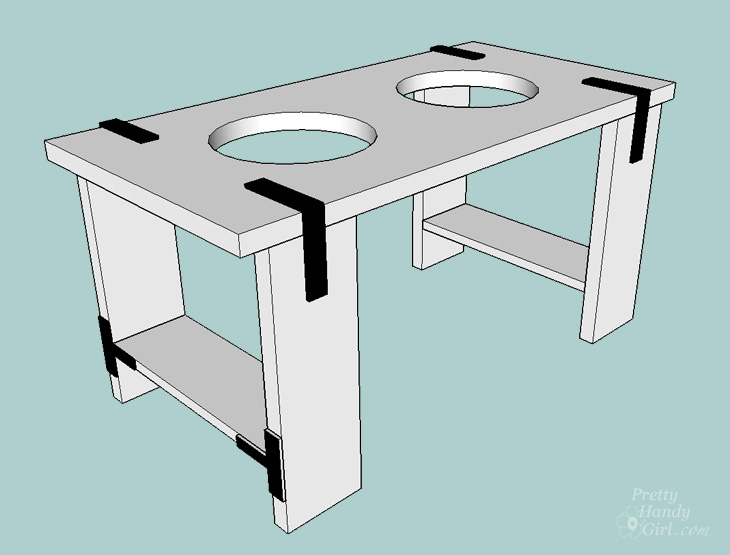
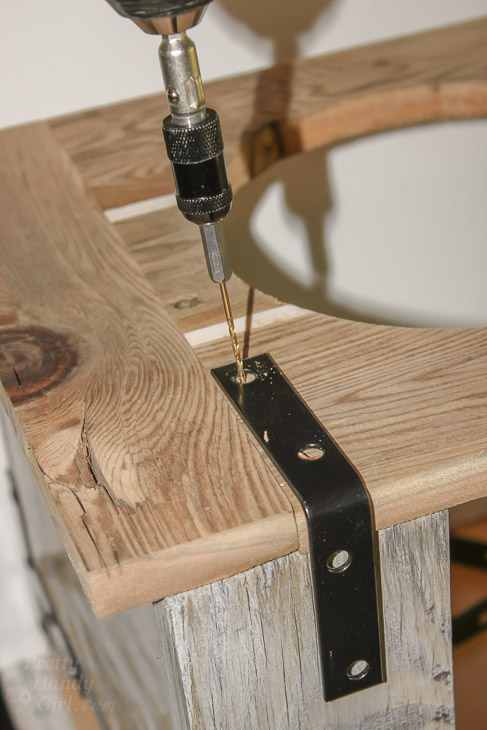
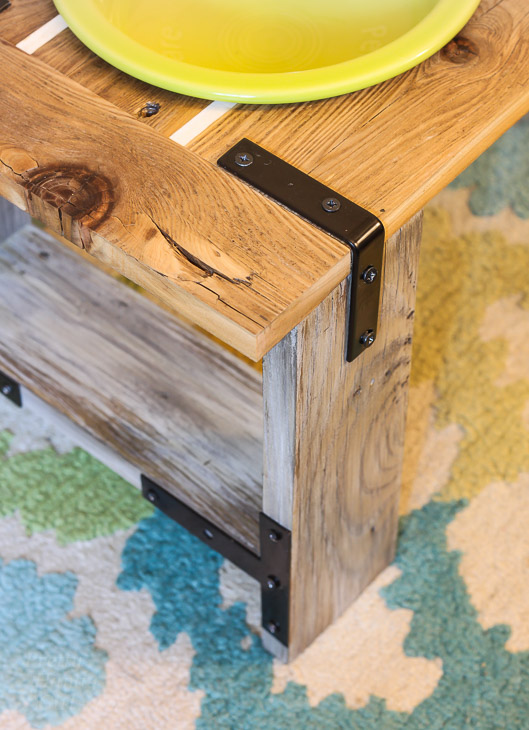
Rest the corner support brackets on the feeder top. Center the brackets on the legs. Pre-drill holes through the corner support bracket.

Rustic Industrial Dog Bowl Feeder Stand | Pretty Handy Girl

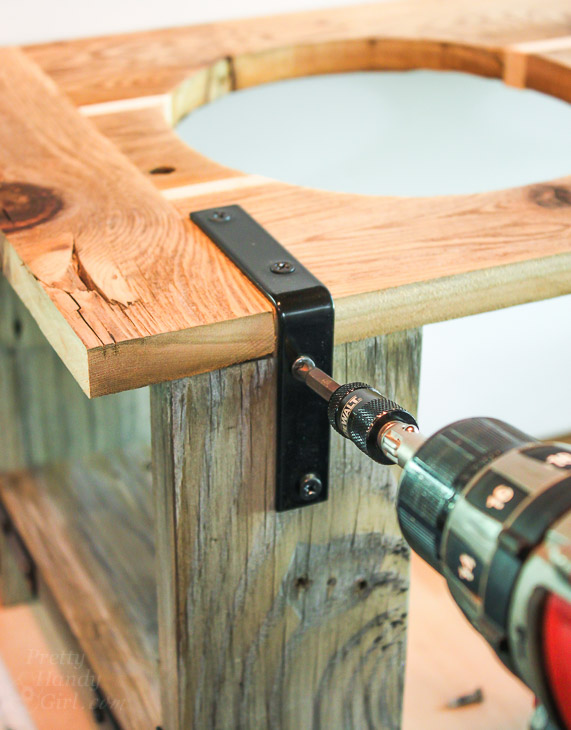
Attach the feeder top to the legs with the corner support brackets and provided screws.

Rustic Industrial Dog Bowl Feeder Stand | Pretty Handy Girl

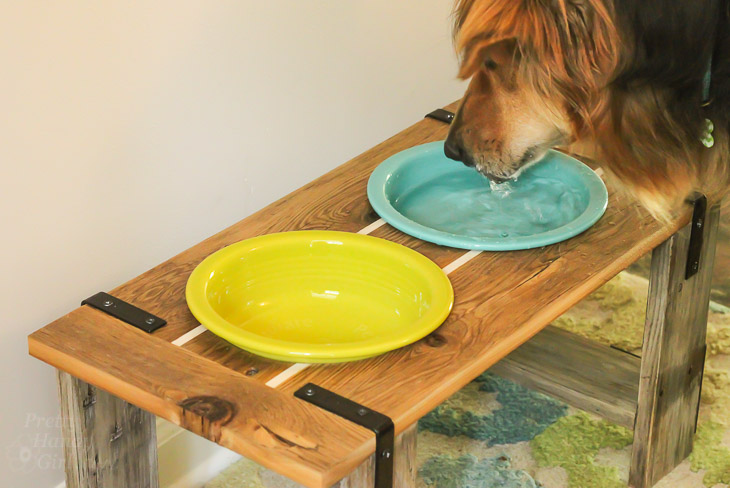
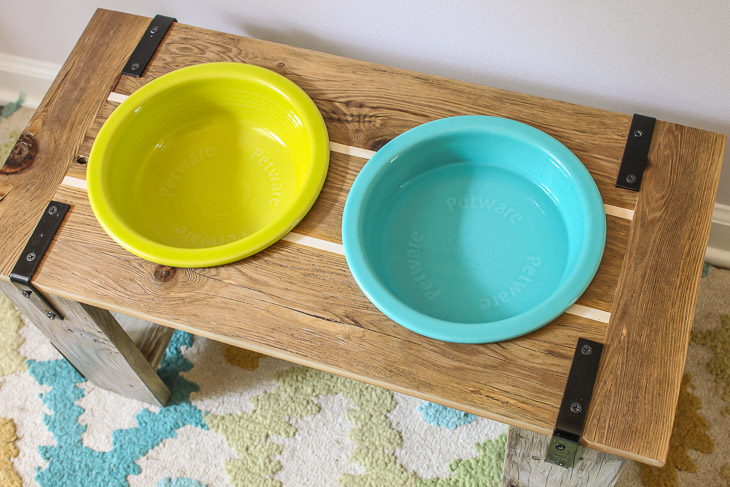
Place the dog bowls into the feeder stand and fill ’em up! Then check out your pup’s reaction as they discover their new stylish Industrial Dog Bowl Feeder Stand.

Rustic Industrial Dog Bowl Feeder Stand | Pretty Handy Girl

You are sure to be the hit of the neighborhood when the pets converse on the street.

Rustic Industrial Dog Bowl Feeder Stand | Pretty Handy Girl

I can hear it now, “Oh yeah, well my owner built me a cool industrial feeder while your’s just cleaned up your poop! Top that, Sparky!”

Rustic Industrial Dog Bowl Feeder Stand | Pretty Handy Girl

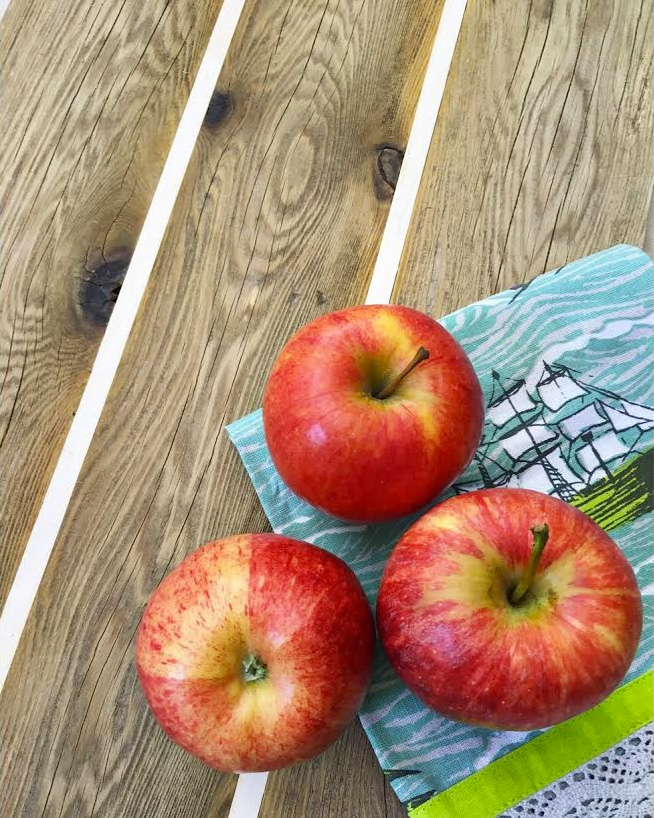
You may have noticed that my top was a little more than just a standard piece of lumber. I made that striped wood block following this method.

Rustic Industrial Dog Bowl Feeder Stand | Pretty Handy Girl
I don’t know about you, but my wheels are turning for how I can use these cool mending plates and support brackets for another industrial project.

Rustic Industrial Dog Bowl Feeder Stand | Pretty Handy Girl

Any ideas? I’m open to your suggestions. Bring it on!

PHGFancySign

Disclosure: This is a sponsored post for National Hardware. I was provided complimentary hardware and was compensated for my time and efforts to promote National Hardware. I was not told what to write. All opinions are my own. I am particular about the brands I represent and will always let you know when you are reading a sponsored post.

How to Make a Striped Wood Block | Pretty Handy Girl

Make a Striped Wood Block | Pretty Handy Girl

I’ve always wanted to experiment with different color woods and make a striped wood block. Normally this technique is used for creating beautiful cutting boards. But, you can use this technique for much much more! Ready to learn How to Make a Striped Wood Block?

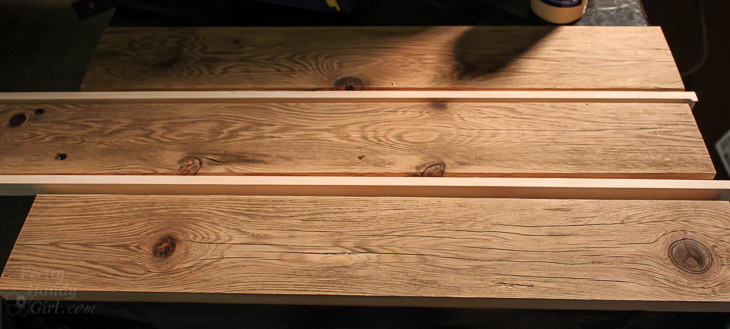
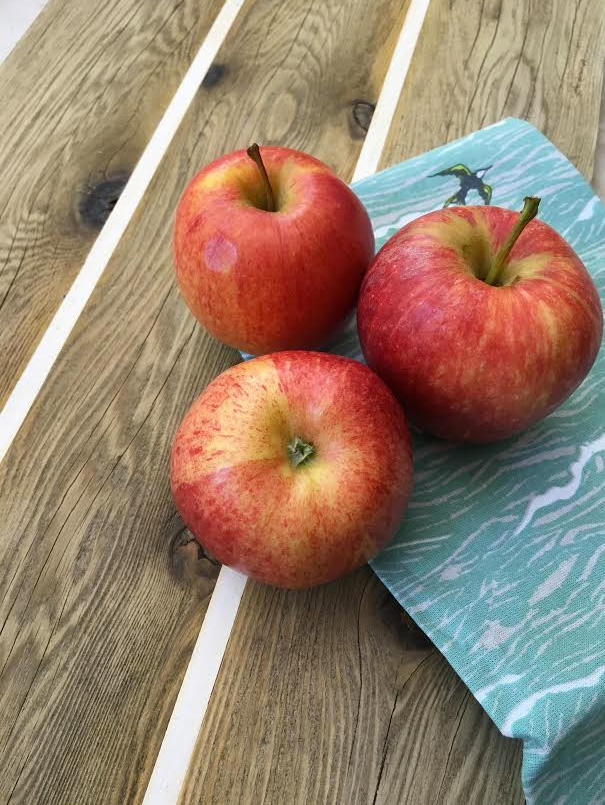
Begin by choosing your wood. All the wood should have the same thickness. I worked with some weathered cedar and new pine boards to get beautiful contrasting gray and white colors on my board.

Rustic Industrial Dog Bowl Feeder Stand | Pretty Handy Girl

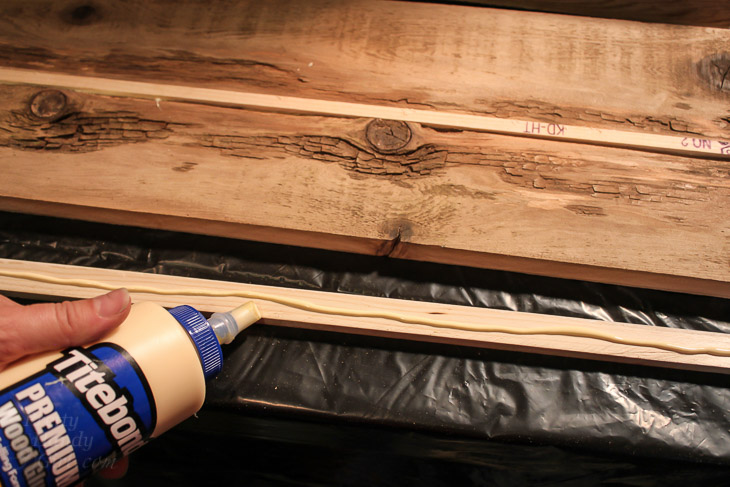
Squeeze a liberal amount of wood glue onto the wood edges being glued together.

glue-wood-strips

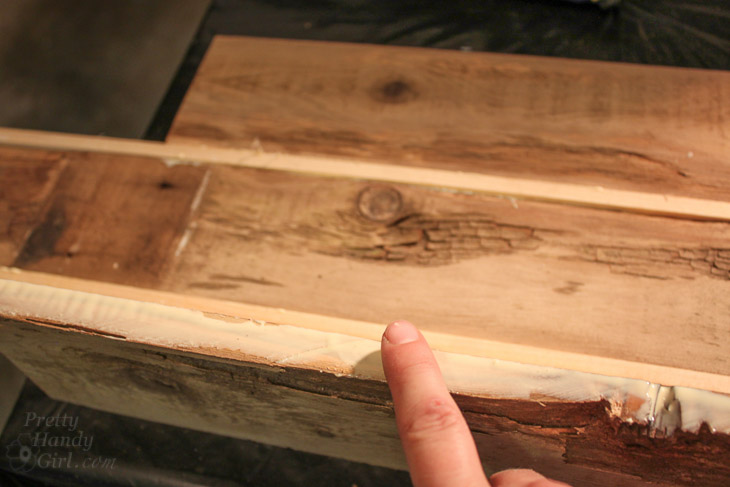
Spread glue along the entire edge of each board with the exception of the outside edges.

Rustic Industrial Dog Bowl Feeder Stand | Pretty Handy Girl
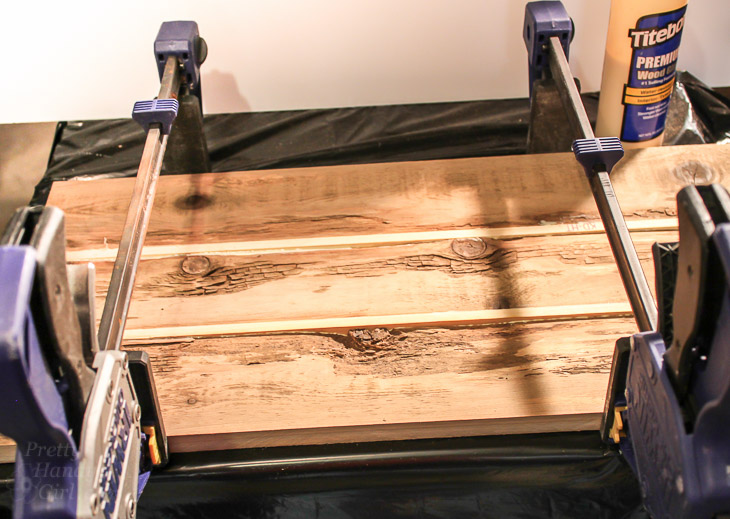
Clamp the boards together. Wipe off any excess glue that squeezes out.

Rustic Industrial Dog Bowl Feeder Stand | Pretty Handy Girl

Let the glue dry overnight and remove the clamps in the morning.

What’s left is a beautiful striped wood block. This could be a tray, a backdrop, a plank or board for building and much much more!

Make a Striped Wood Block | Pretty Handy Girl

I can’t wait to show you what I made with this striped block. Can you guess? You’ll have to check back on Monday to find out.

PHGFancySign


Pin for later! 
 

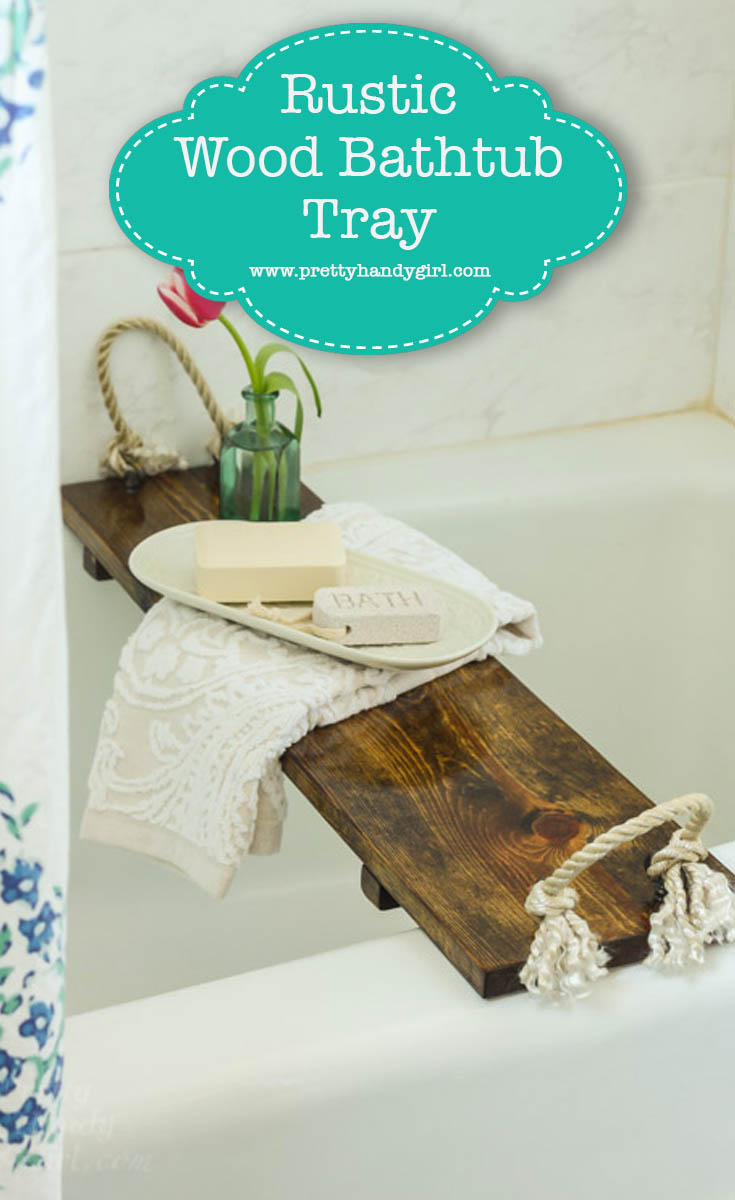
Rustic Wood Bathtub Tray | Pretty Handy Girl

build-your-own-rustic-wood-bathtub-tray-pin

There are days that I want to crawl into a hot tub of water and disappear for a few hours. If you have children or even a rough day I’m sure you can relate!

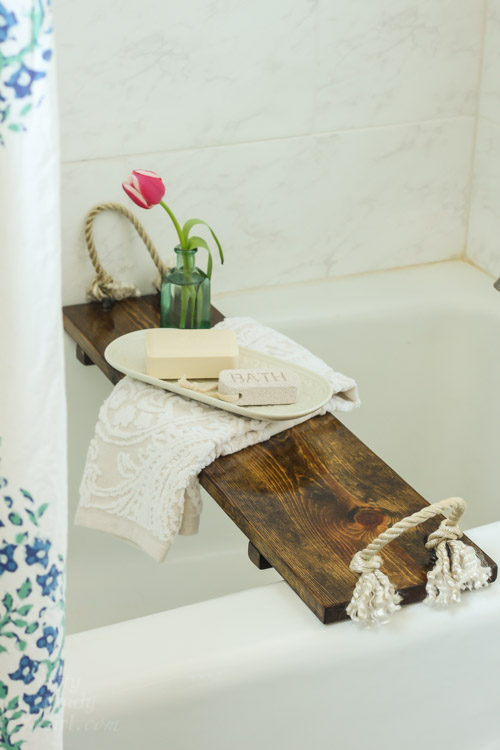
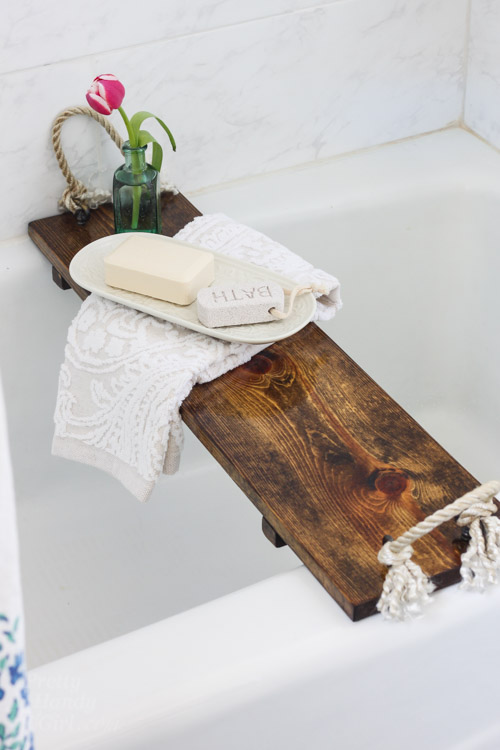
Today I have just the thing to ease your frazzled nerves. A Rustic Wood Bathtub Tray so you can lock the bathroom door and soak in a warm bathtub. You can prop a book and a glass of wine on your tray. Or maybe some tea and the iPad so you can binge watch some Netflix. Hey, whatever you need to recharge is okay with me.

Rustic Wood Bathtub Tray | Pretty Handy Girl

Fill that tub with a bath bomb and put this Rustic Bathtub Tray to good use!

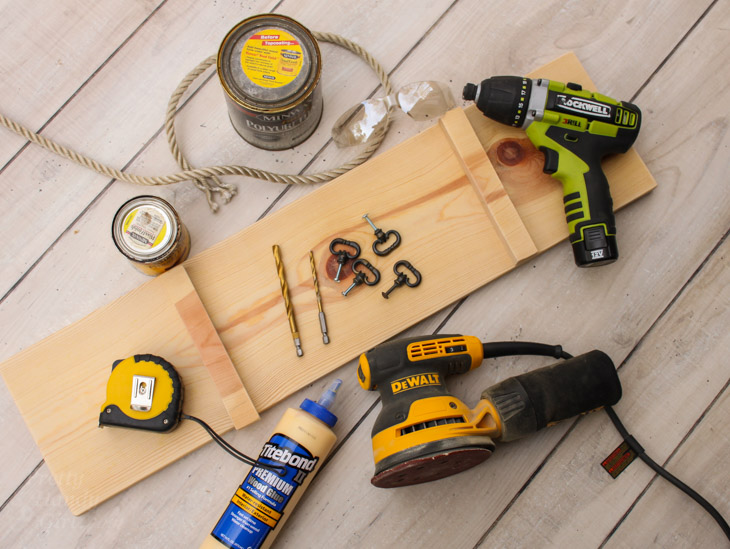
Materials:
(contains some affiliate links for your convenience)

Rustic Wood Bathtub Tray | Pretty Handy Girl

Instructions:

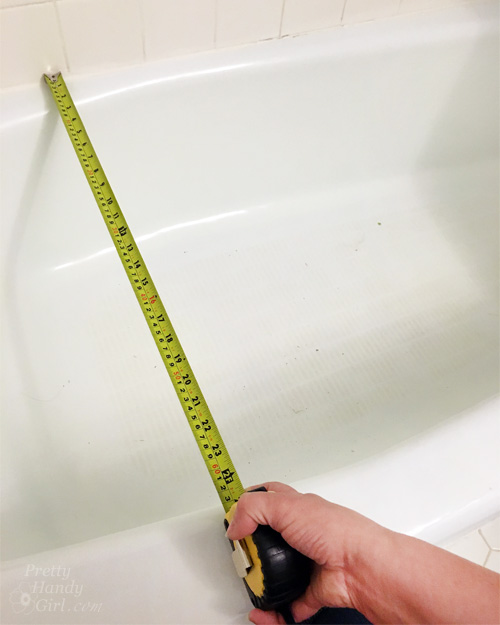
Measure the exterior width of your tub.

Rustic Wood Bathtub Tray | Pretty Handy Girl

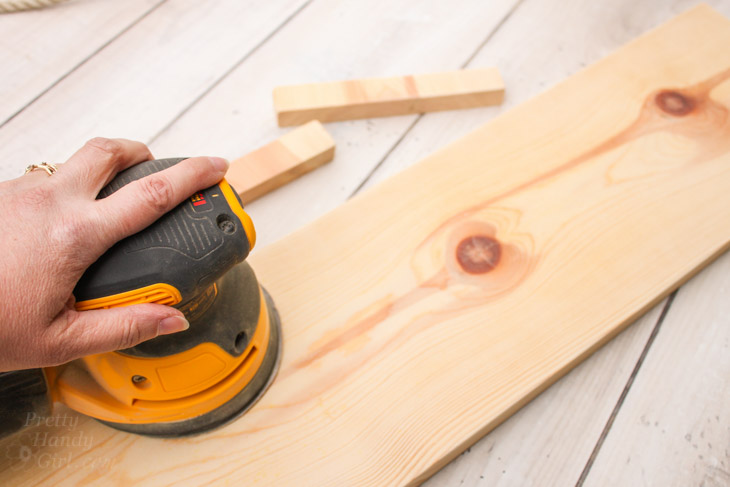
Cut two small pieces about 1″ wide from the board (these will be the stops to hold your tray in place.) Then cut your board to the width of your tub. Sand the wood smooth.

Rustic Wood Bathtub Tray | Pretty Handy Girl

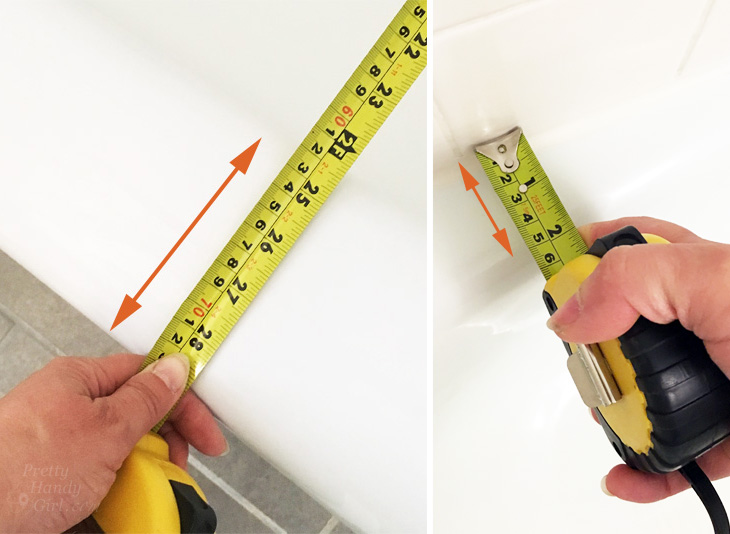
Measure the lip of your tub and mark the location of the inside edges of the tub onto your board.

Rustic Wood Bathtub Tray | Pretty Handy Girl

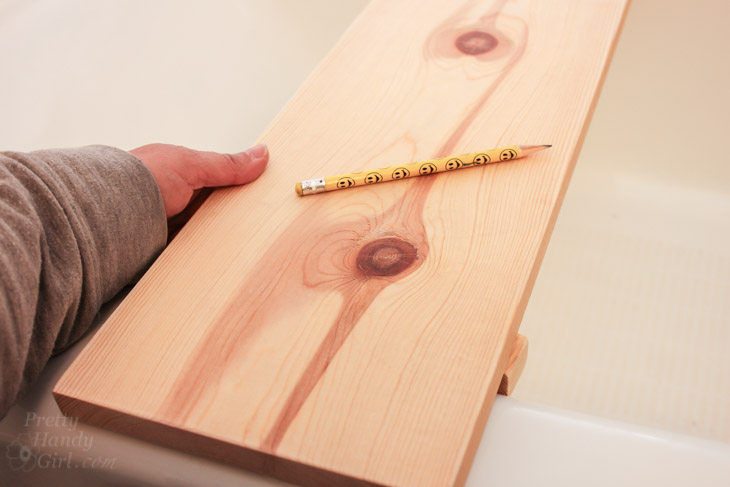
Hold the 1″ strips under your board and test to see that it fits inside the tub but against the walls to keep your try from sliding side to side.

Rustic Wood Bathtub Tray | Pretty Handy Girl

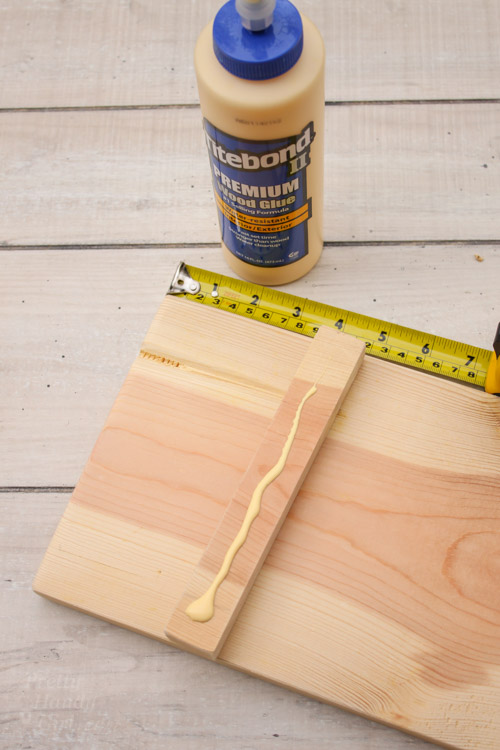
Add some wood glue to the underside of the 1″ strips.

Rustic Wood Bathtub Tray | Pretty Handy Girl

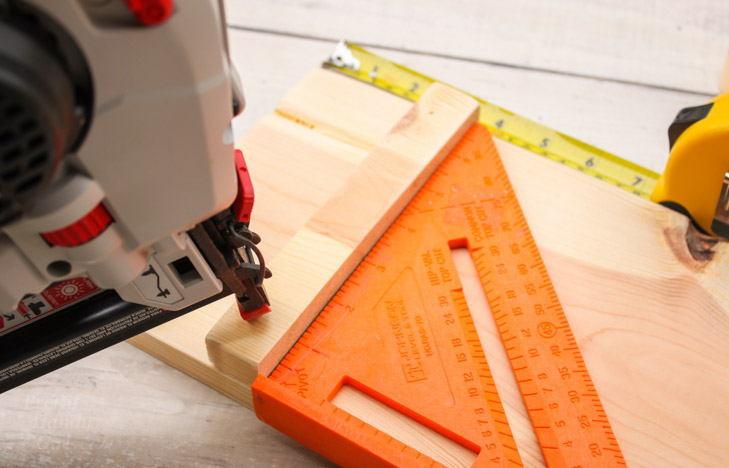
Secure the strips to the underside of the board using finish nails. Repeat for the opposite side.

Rustic Wood Bathtub Tray | Pretty Handy Girl

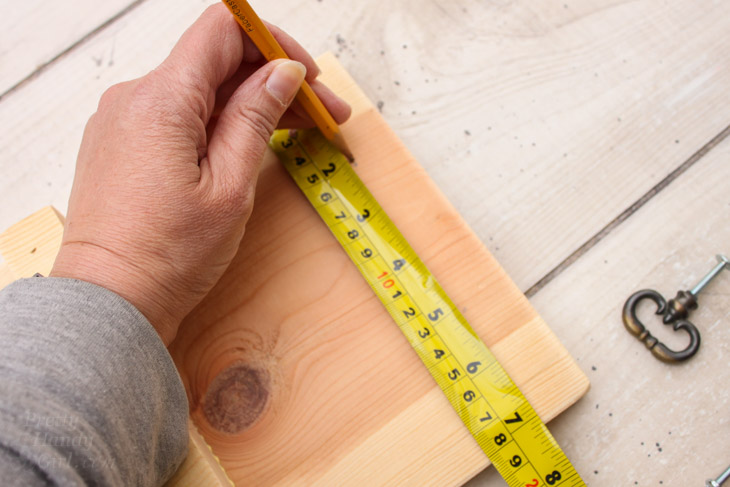
Mark the location for your handle, centering it front to back on the tray edges.

Rustic Wood Bathtub Tray | Pretty Handy Girl

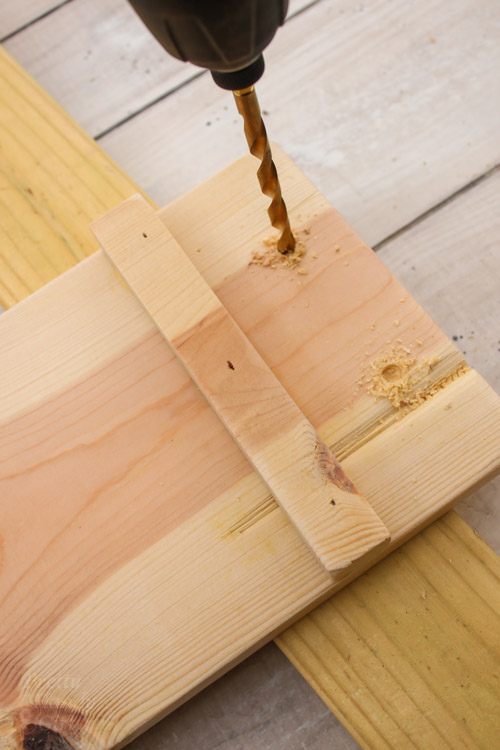
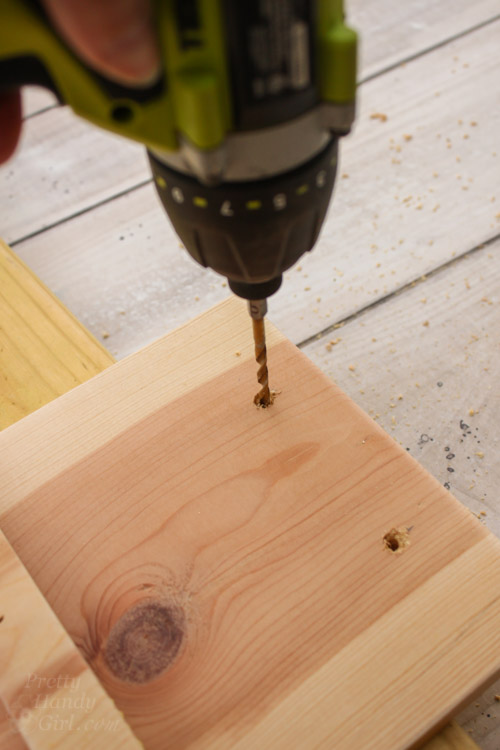
Using the larger drill bit, drill slightly into the bottom of the tray.

Rustic Wood Bathtub Tray | Pretty Handy Girl

Use the smaller drill bit to drill through the tray at the same location.

Rustic Wood Bathtub Tray | Pretty Handy Girl

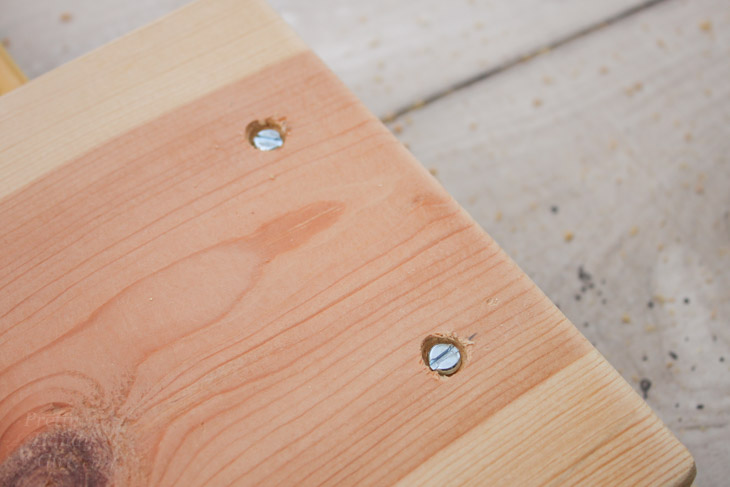
Set the handle screws into the bottom of the tray and make sure the screw sits inside the surface of the wood. (No need to have rusty screws leaving marks on your tub.)

Rustic Wood Bathtub Tray | Pretty Handy Girl

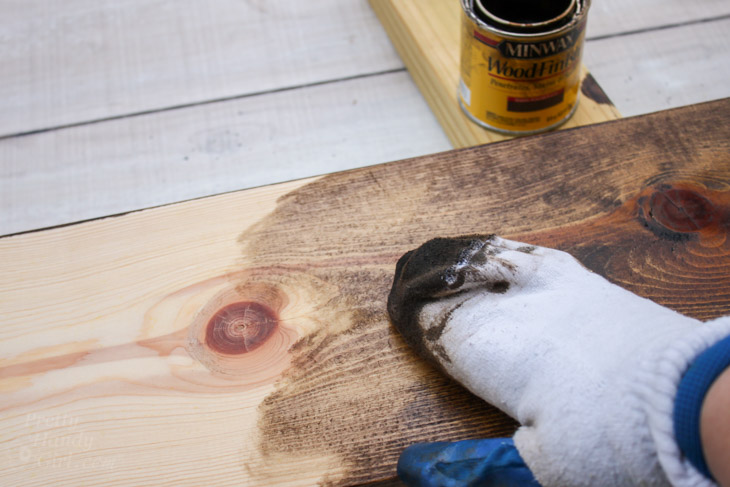
Stain your board by wiping the stain on, let it sit a minute and wipe off any excess. Repeat until desired color is achieved. Apply 2-3 coats of polyurethane to protect your tray from the water. Allow the tray to dry.

Rustic Wood Bathtub Tray | Pretty Handy Girl

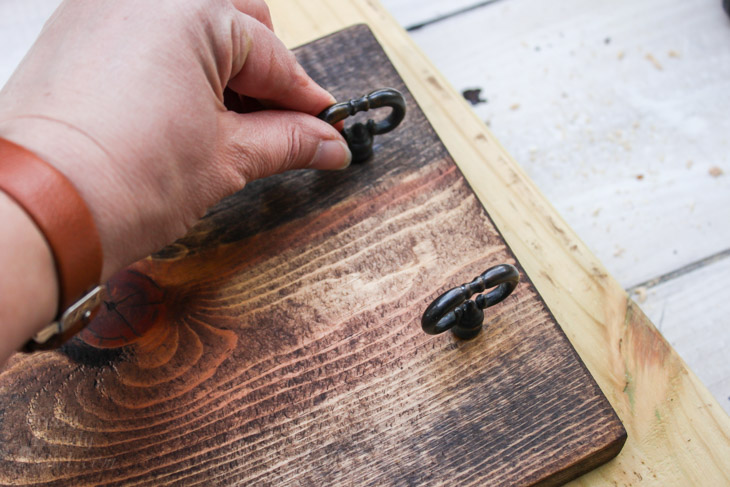
Install the knobs for the handle into the tray.

Rustic Wood Bathtub Tray | Pretty Handy Girl

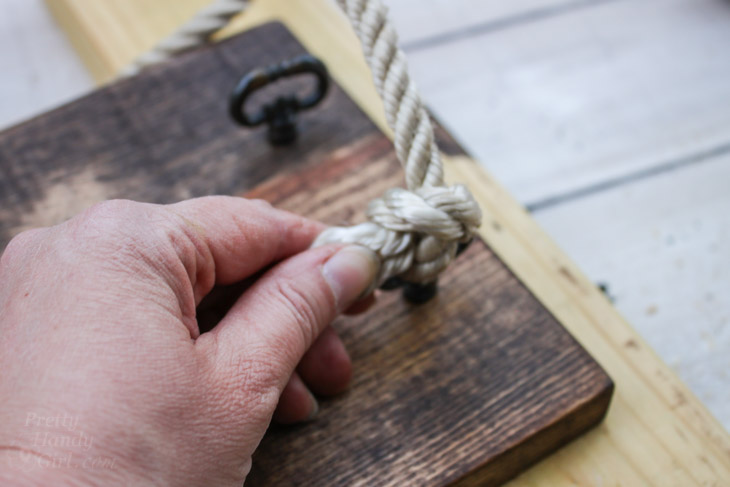
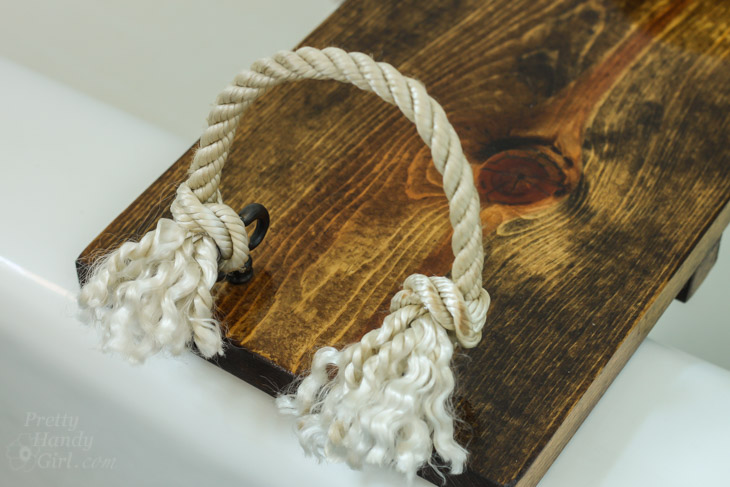
Tie the rope between the two knobs. To keep the rope knots secure, add a dab of glue inside the knot.

Rustic Wood Bathtub Tray | Pretty Handy Girl

Fray the ends of the rope if you desire.

Rustic Wood Bathtub Tray | Pretty Handy Girl

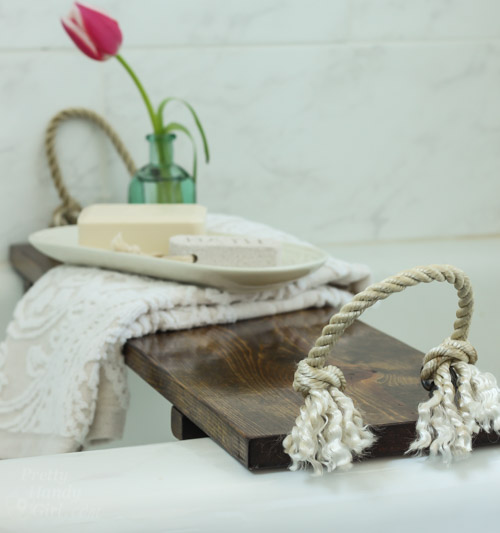
It’s time to slip away to your bathroom and lock the door!

Rustic Wood Bathtub Tray | Pretty Handy Girl

Enjoy some calm time to yourself to recharge.

Rustic Wood Bathtub Tray | Pretty Handy Girl

Did you like this simple tutorial? Want to create some more simple projects for your home like a rustic wood serving tray?

Rustic Pallet Serving Tray

Check out my entire Build It project gallery for more fun projects!

PHGFancySign


Pin for later!
 

How to Make an Air Conditioner Screen from Pallets

How to Make an Air Conditioner Screen from Pallets

Hi friends. It’s Jessica from Decor Adventures and I’m here to show you an easy project that will improve the look of your yard.  If you are like me and are lucky enough to have central air conditioning in our home, but unlucky enough to have a large air conditioning unit taking up some of our backyard patio space, this project is perfect for you. We decided to create an air conditioning screen that would conceal the unit and help make our back patio into a better looking space for relaxation.

Making a screen to hide your air conditioner unit is easy. We elected to do this with pallet wood which (although it’s not the best quality wood) is free and easy to work with. Here’s how to make an air conditioner screen from pallets.

Materials:

  • Pallets
  • Reciprocating saw
  • Eye protection
  • Work gloves
  • Pry bar
  • Braid nails
  • Nail gun
  • Level
  • Measuring tape
  • Miter saw
  • Hinges and screws
  • Drill and drill bits
  • Exterior paint/primer
  • Paint brush
  • Water
  • Plastic drop cloth

How to Make an Air Conditioner Screen from Pallets

Instructions:

First find pallets to use for this project. We looked on Craigslist and found some listed for free. If you don’t see any, you can ask at places like automotive repair stores, home improvement stores, manufacturing warehouses, etc. Make sure to ask if you can take some and how many.

For this project we used about 2 pallets. Pallets aren’t the best quality wood, prying them apart can break the wood. We opted to cut them apart with a reciprocating saw. Cut apart each pallet until you get flat pieces of wood like this. We didn’t use the inside “frames” of the pallets for this, just the flat parts.

How to Make an Air Conditioner Screen from Pallets

Measure your air conditioner to determine the height and width of your screen. Add a few inches to the height and width. This screen has 2 sides hinged together but you could easily make a third or even fourth side if needed.

How to Make an Air Conditioner Screen from Pallets

Next, use a miter saw to cut four pieces of wood to size for each side of the screen, two for the vertical sides and two for the horizontal rows for each side. This will form the frame for each side. The bottom board is a few inches off the ground to give the screen feet to stand on.

How to Make an Air Conditioner Screen from Pallets

Measure and cut more pallet boards to create the slats of your screen. Nail the pallet slats onto the frame, making sure the boards are level. Repeat the process to make a second side.

How to Make an Air Conditioner Screen from Pallets


Take the two sides and lay them on a flat surface next to each other, with the back sides facing up. Locate two hinges. (I used small hinges we already had on hand, but there are a variety of sizes available at the home improvement stores.)

Mark where the hinges will go with a pencil and pre-drill holes for the screws. With your drill or screwdriver, attach all four screws for each hinge. (I used three hinges for this screen.)

How to Make an Air Conditioner Screen from Pallets

To conceal the air conditioning unit more, I elected to paint the wood gray to help it blend in more. Mix 1 part exterior primer/paint to 2 parts water and brush it on the screen. Blending the paint with water gives it a more washed look and lets some of the wood show through.

How to Make an Air Conditioner Screen from Pallets

Let the paint dry and then prop it up around your air conditioner.  This makes a nice looking piece of furniture instead of a utility that takes up part of your yard or patio. You can even get creative and hang plants from it.

How to Make an Air Conditioner Screen from Pallets

When you set up the screen around your air conditioning unit, make sure to allow at least 8-10 inches from the unit for the best air flow and efficiency of your unit.

How to Make an Air Conditioner Screen from Pallets

Learn more about maintaining your air conditioner here.

See you at Decor Adventures soon and happy building!

Decor Adventures Blog

Read more of Jessica’s tutorials ~


Pin for later!