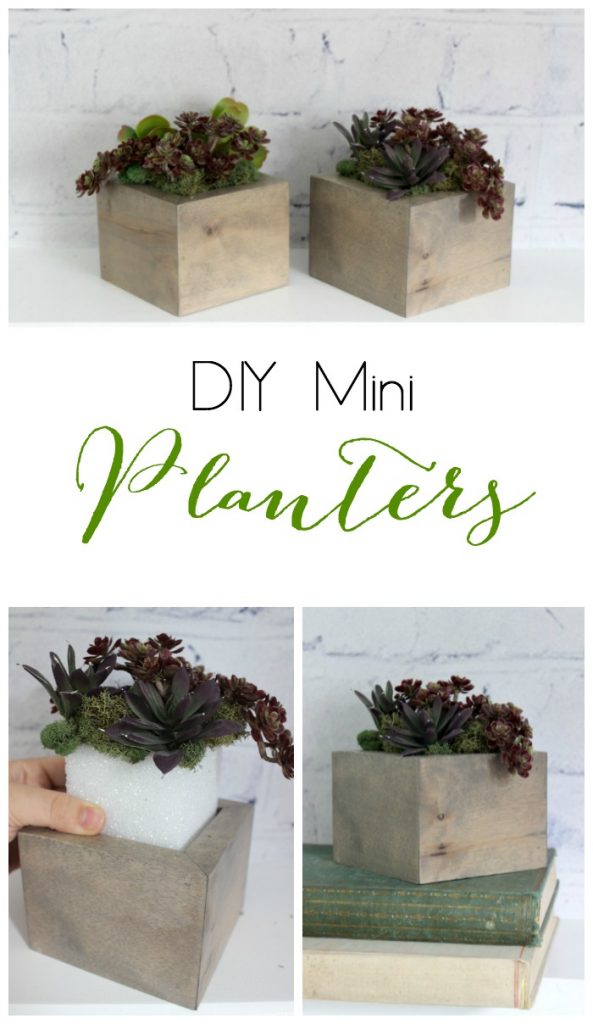
DIY Mini Planters I Pretty Handy Girl

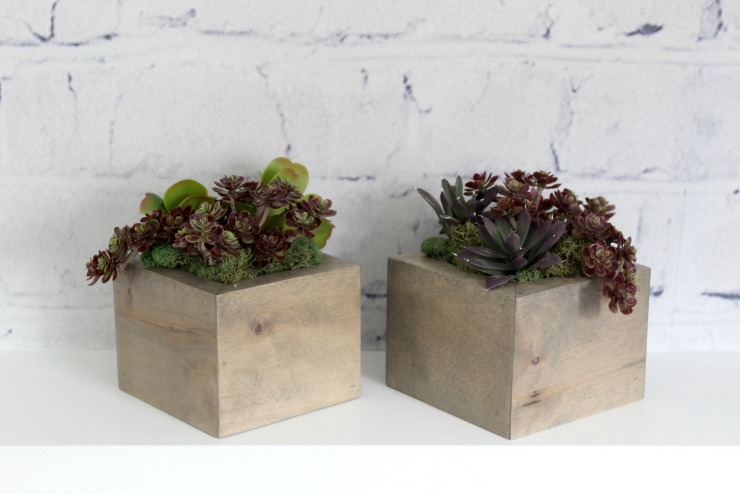
Hi everyone! This is Lindi, visiting again from Love Create Celebrate. I’m really excited to show you how to make your own mini planters. Tis the season for filling up our homes with garden plants (or faux plants if you lack a green thumb!) With only a few tools and a couple hours you can make your own simple DIY Mini Planters.

DIY Mini Planters I Pretty Handy Girl

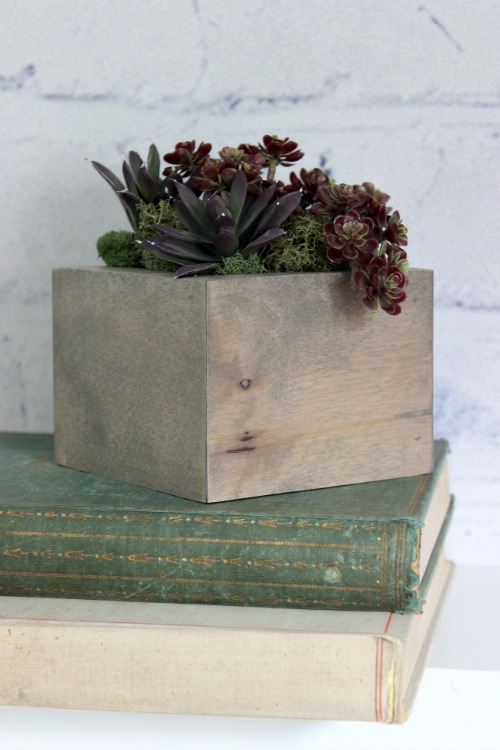
I LOVE these planters! They are the perfect mix of chic and rustic. I actually made them from maple, although any wood will work. The wood from this project came from an old pallet! Most pallets in Canada are made with cheap pine, but we lucked out. Lesson learned: always check your pallets! Now let’s get busy and make a few DIY Mini Planters.

Materials:

  • 1″ x 6″ x 4′ board
  • 4″ x 4″ ¼” plywood piece (per planter)
  • Wood glue
  • Wood stain of your choice
  • Styrofoam square (optional)
  • Faux florals (optional)

Tools: 

  • Speed square
  • Measuring tape
  • Miter saw
  • Table saw or router table
  • Nail gun
  • Sander
  • Clamps

Instructions: 

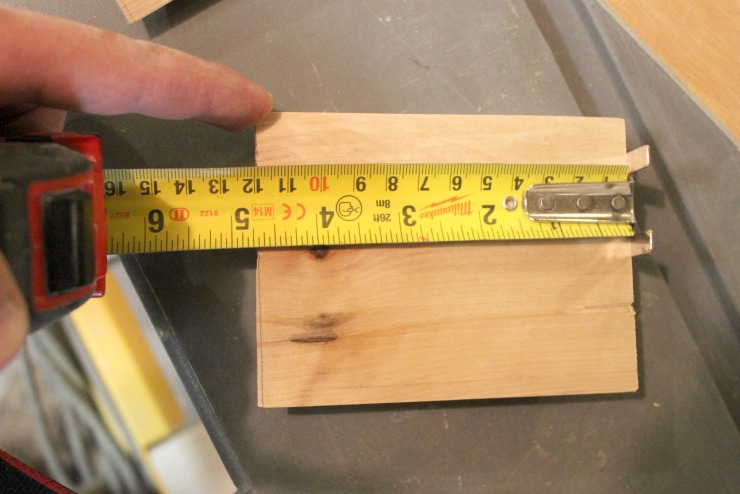
Use your miter saw to cut your 1″ x 6″ board into four 54 3/4″ long pieces. Then use the table saw to cut all four of those pieces to 3.5″ wide (these will be your sides.) Cut your plywood into a 4″ by 4″ square.

DIY Mini Planters I Pretty Handy Girl

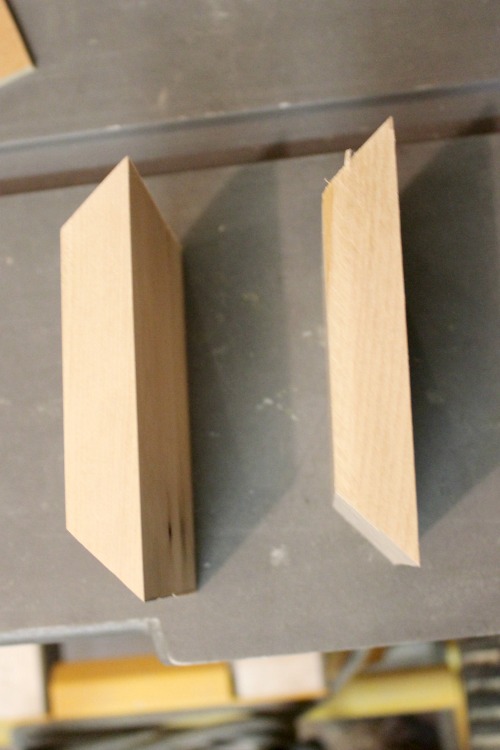
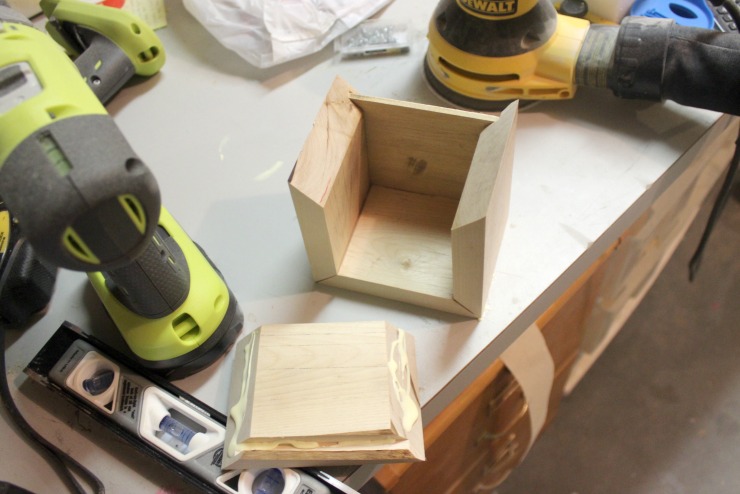
Use your speed square to mark a 45º angle on both edges of your 4 side boards. Cut along those marks with your miter saw. You will have four boards measuring 4 3/4″ x 3.5″ on the outside edge, with 45º cuts on both sides.

DIY Mini Planters I Pretty Handy Girl

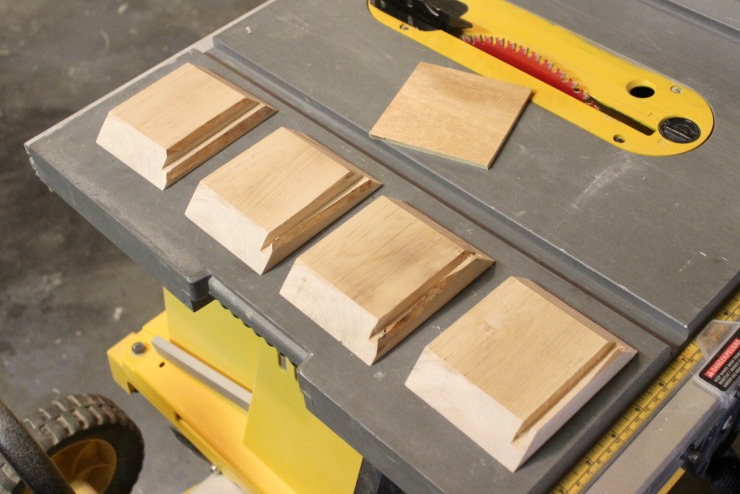
Next use your table saw or router table to make a 1/4″ groove about 1/4″ inch above the bottom of your 4 3/4″ x 3.5″ boards.

DIY Mini Planters I Pretty Handy Girl

When all of your pieces are cut and grooved, it’s time to assemble them.

DIY Mini Planters I Pretty Handy Girl

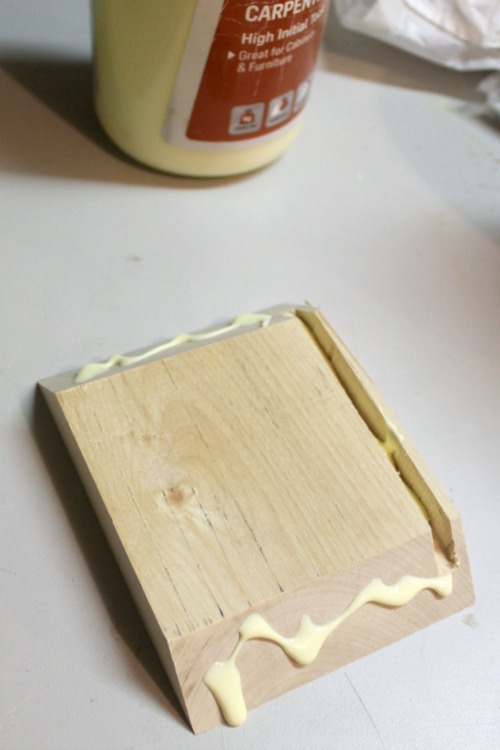
Put wood glue on the edges of the first piece, fit the two edges of either side of it and use your nail gun to attach these three sides.

DIY Mini Planters I Pretty Handy Girl

When three sides are attached, slide your plywood into the groove you created. Add more wood glue and nail the last piece in place.

DIY Mini Planters I Pretty Handy Girl DIY Mini Planters I Pretty Handy Girl

Once the glue is dry, give the planter a quick sand and stain it whatever color you would choose.  Add a styrofoam block with some faux florals! If you want to add real plants, line the planter with plastic and add soil and plants.

DIY Mini Planters I Pretty Handy Girl

I LOVE these planters!

DIY Mini Planters I Pretty Handy Girl

I made them in no time at all and they look amazing in my living room!

DIY Mini Planters I Pretty Handy Girl

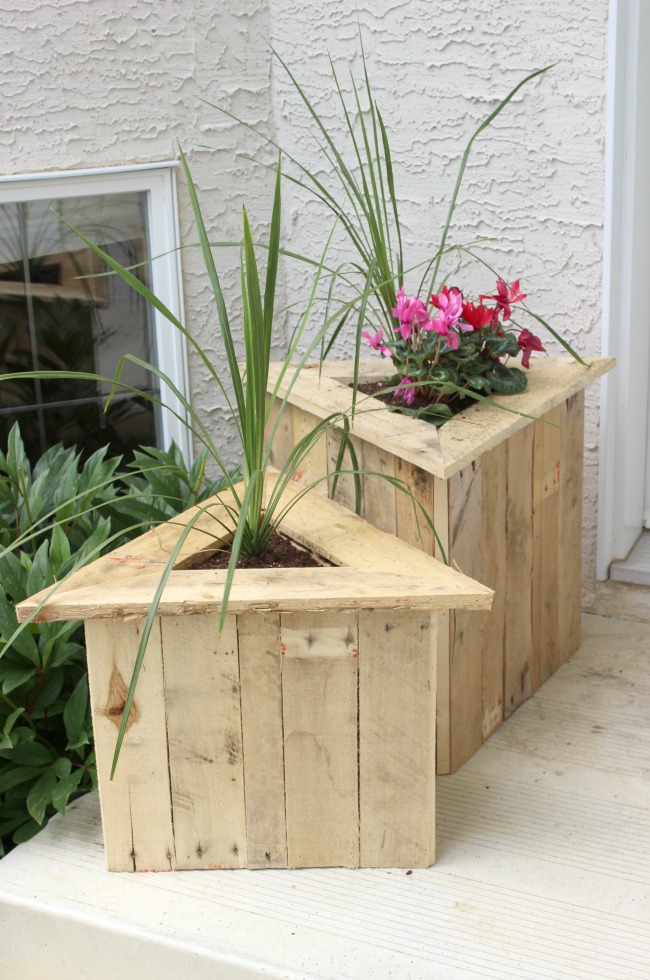
If you like planters, you’re in luck! I’m sharing these Triangle Planters from Pallets over at Love Create Celebrate!

planters build plans

For more DIY decor inspiration visit Love Create Celebrate.

Lindi Signature


Pin for later!

With only a few tools and a couple hours you can make your own simple DIY Mini Planters | Pretty Handy Girl #prettyhandygirl #DIY #planter

Rustic Home Sign I Pretty Handy Girl

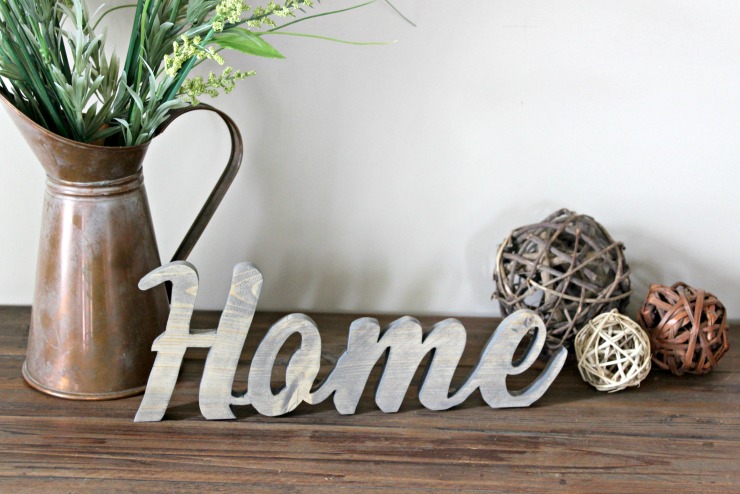
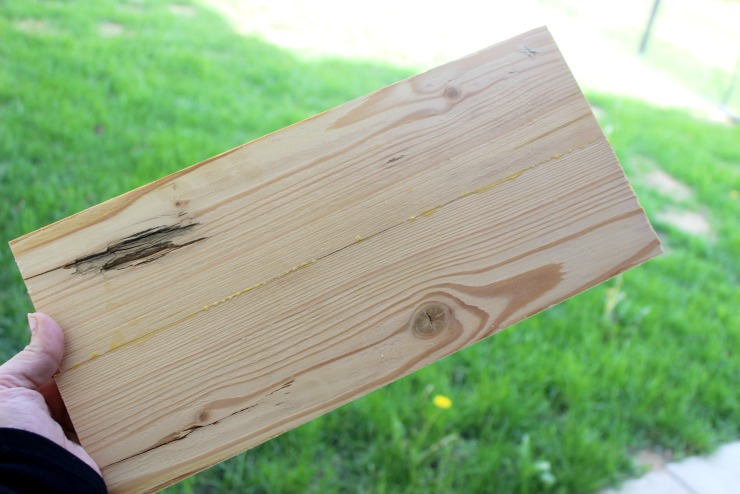
Hi everyone! This is Lindi, visiting again from Love Create Celebrate! I’m really excited to show you how you can make your own Rustic Home Sign. You’ve probably seen something similar in a home decor store, but didn’t want to pay big bucks for one. You’re in luck, I’m going to show you how to make your own Rustic Home Sign using a scrap of wood you might have sitting around. If your scrap wood isn’t wide enough, you can glue two pieces together.

Rustic Home Sign I Pretty Handy Girl

Materials: 

  • 1×6″ wood board (as big as you want your sign to be)
  • Pencil or stencil
  • Drill
  • Scroll Saw
  • Sandpaper
  • Wood Stain

Instructions: 

Cut your wood board down to the approximate size that you want your sign to be. Mine was about 12″ long. Make sure the edge that the sign will sit on is flat. If not, sand down that edge. Sand the front and back of the board (especially if you glued two boards together.)

Rustic Home Sign I Pretty Handy Girl

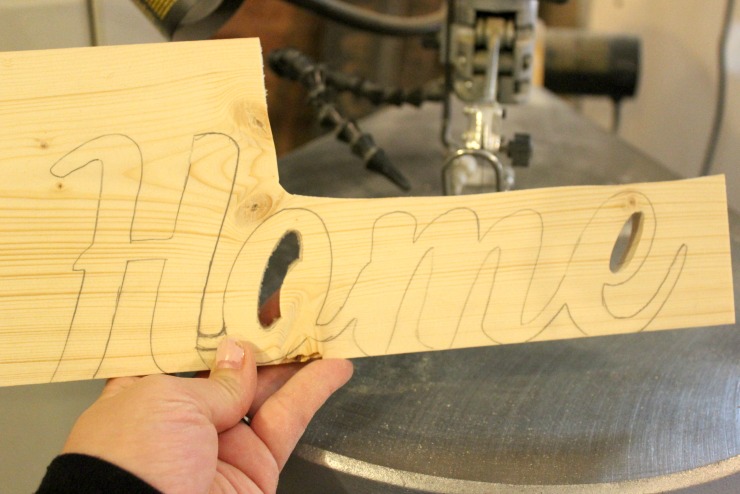
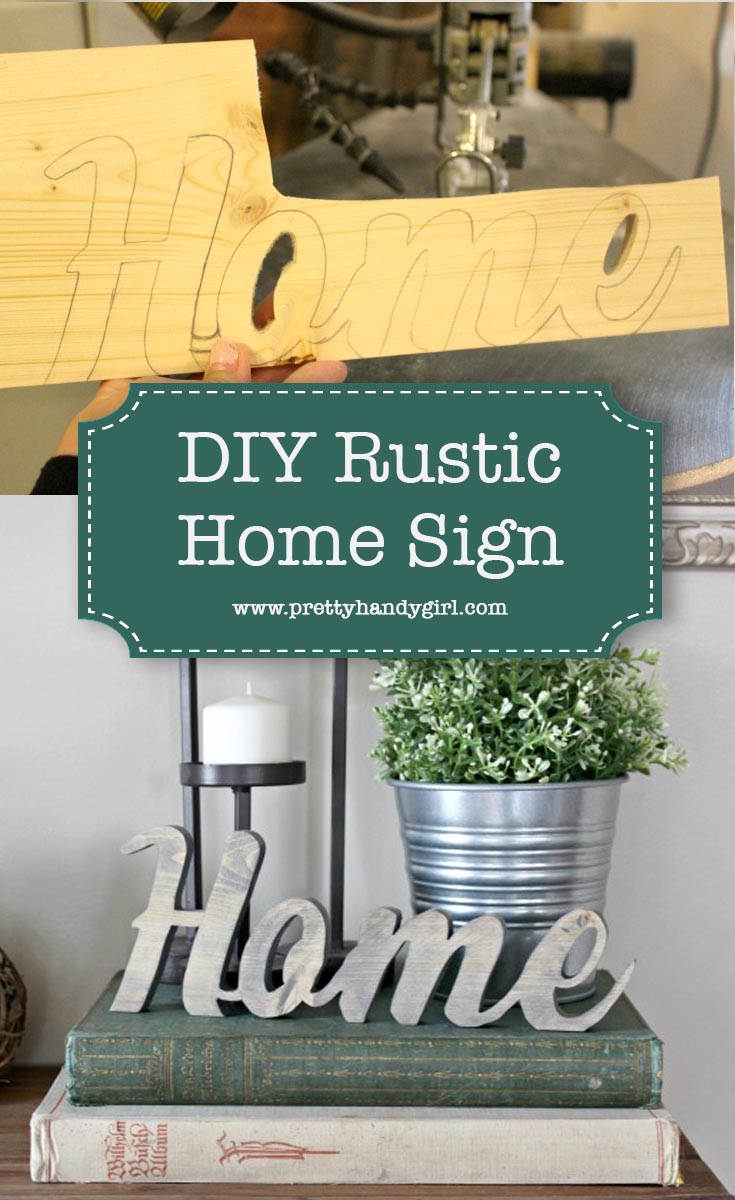
Trace the word “Home” on your board. Draw it by hand or transfer from a print out. Make sure that all of your letters are connected and that the bottom of the letters run off the bottom of the board (this way it will sit flat).

Rustic Home Sign I Pretty Handy Girl

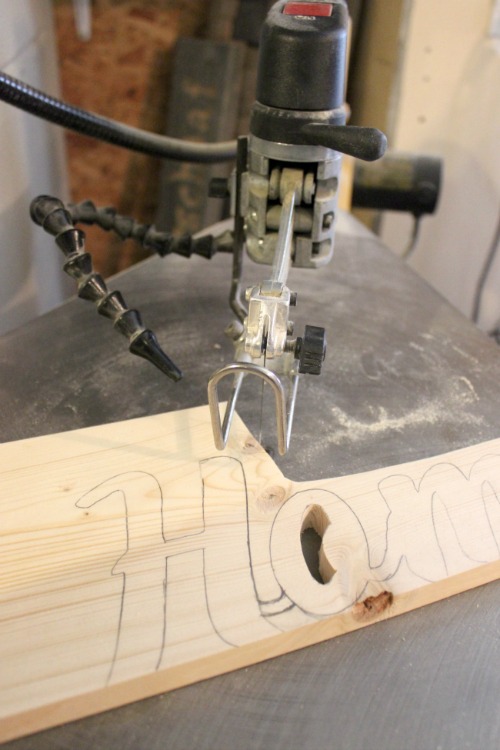
Using your drill, drill holes into the centers of the “o” and “e” that are enclosed. Use a scroll saw to cut around the word and within the letters. Use a very thin blade to allow you to navigate the edges and curves.

Rustic Home Sign I Pretty Handy Girl

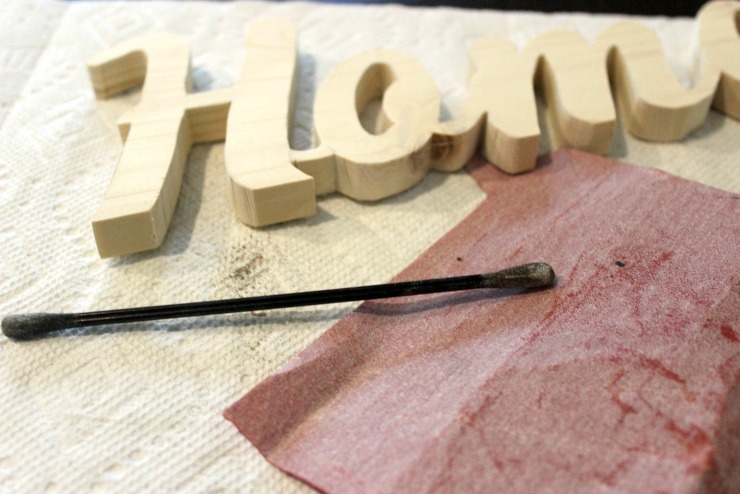
When you are done cutting, double check that your piece sits flat. Use your sandpaper to sand all edges. (Folded up sandpaper and a nail file will help you get into the curves.)

Rustic Home Sign I Pretty Handy Girl

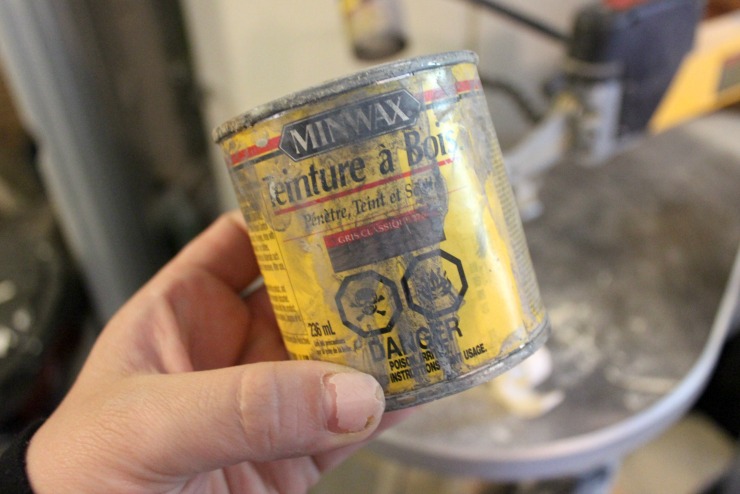
Stain your pieces using your favorite wood stain. (I used my well-loved can of grey.)

Rustic Home Sign I Pretty Handy Girl

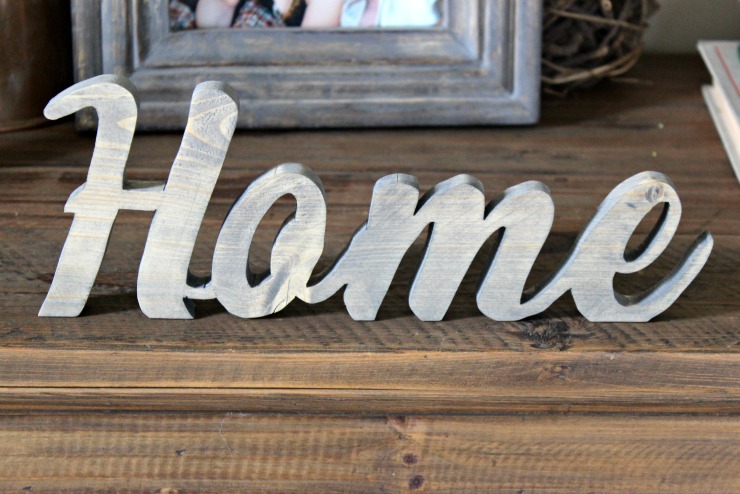
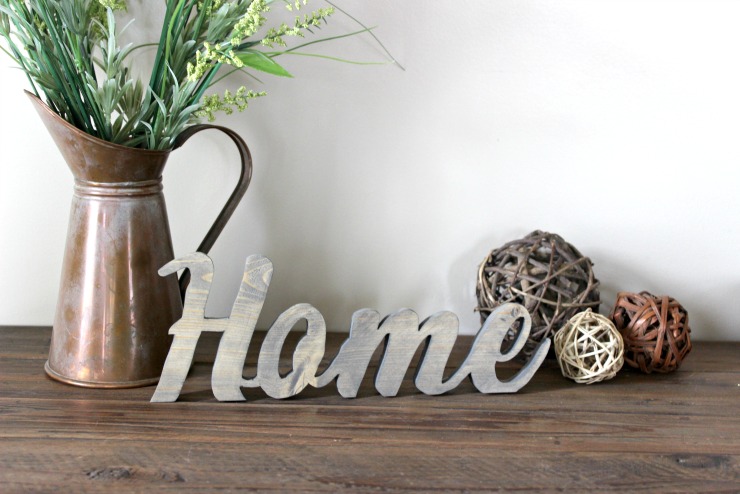
Let it dry, and display it proudly in your home!

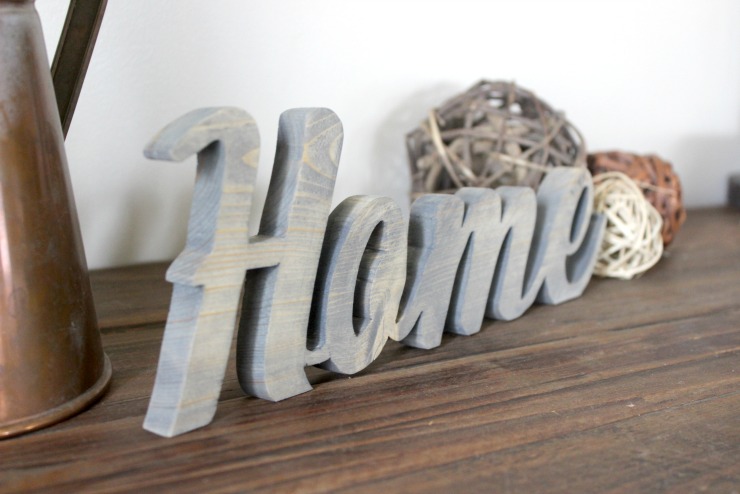
Rustic Home Sign I Pretty Handy Girl

I love how this piece turned out.

Rustic Home Sign I Pretty Handy Girl

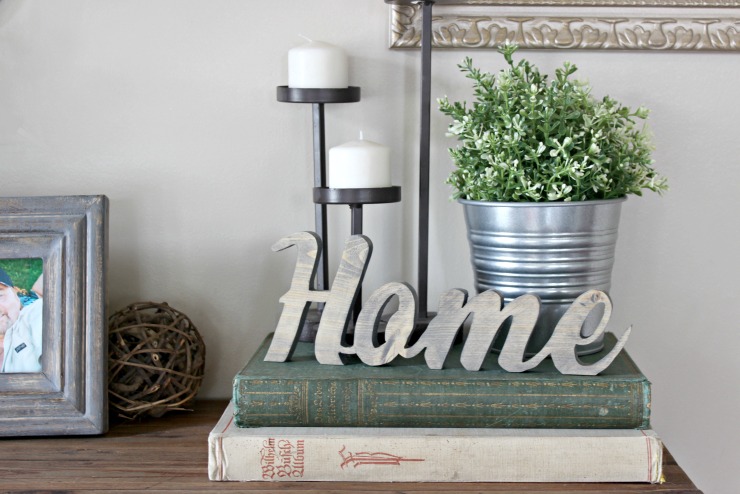
I can see myself using this piece on my mantle or any of the many shelves in my home!

Rustic Home Sign I Pretty Handy Girl

I may have to make a few more or make some with different words.

Rustic Home Sign I Pretty Handy Girl

For more DIY decor inspiration visit Love Create Celebrate.

Lindi Signature

~ view more projects by Lindi ~


Pin for later!

How to make your own Rustic Home Sign using a scrap of wood you might have sitting around. | DIY wooden home sign | Pretty Handy Girl | #prettyhandygirl #rusticsign #woodsign #DIYtutorial

DIY Tool Tote Gift Idea | Pretty Handy Girl

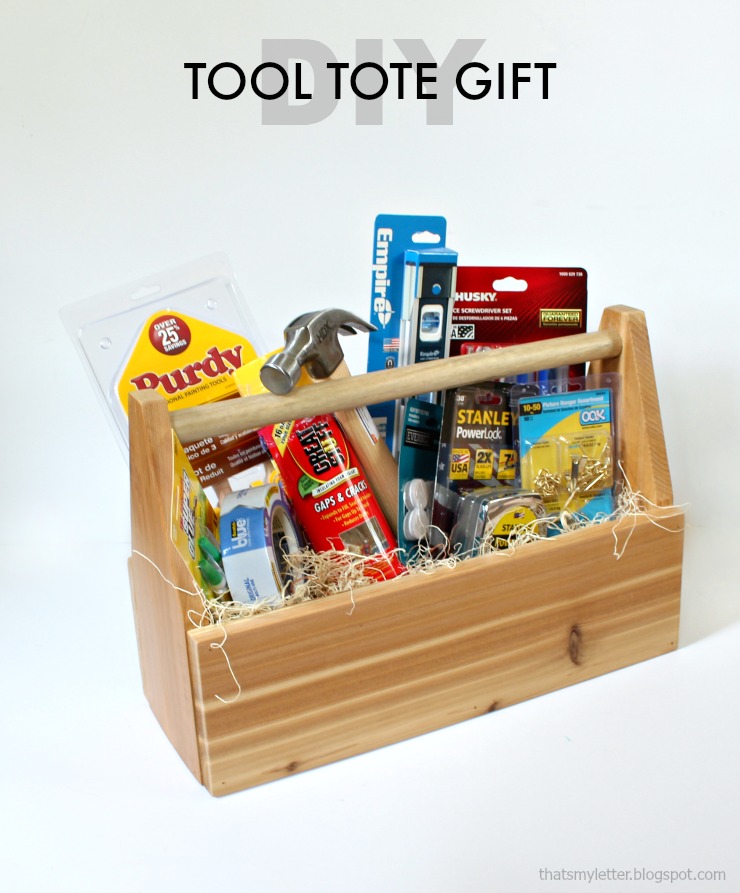
tool tote gift

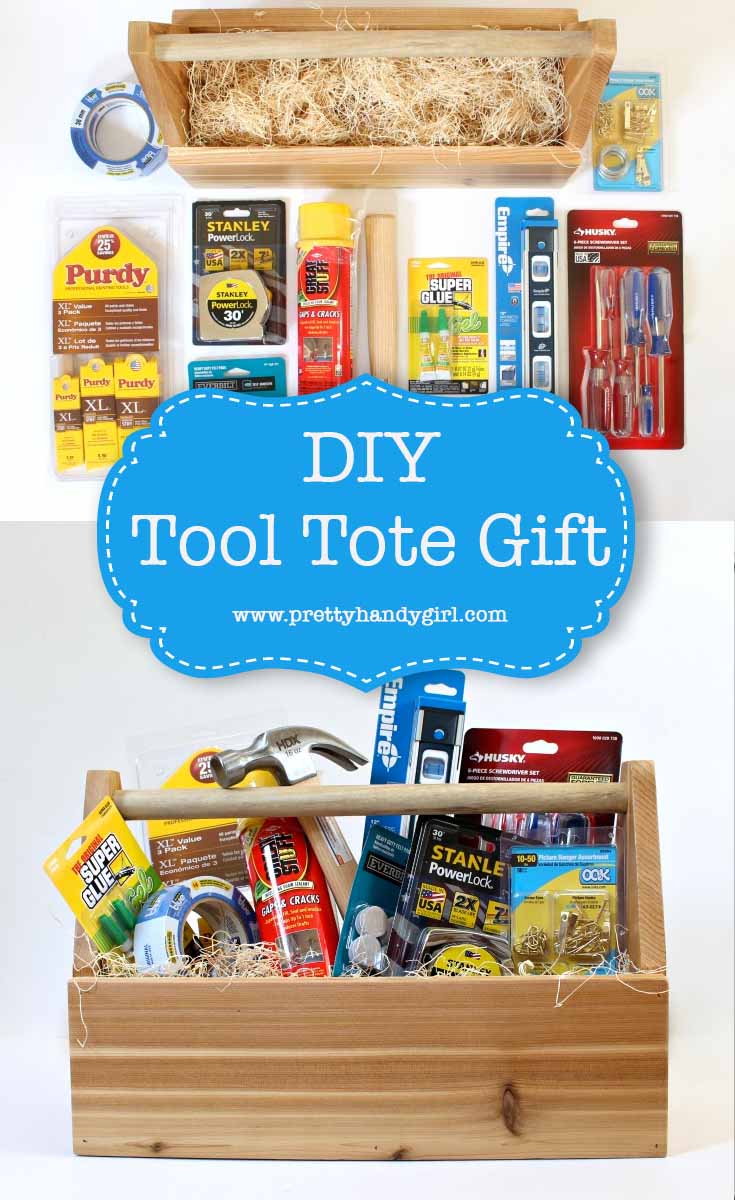
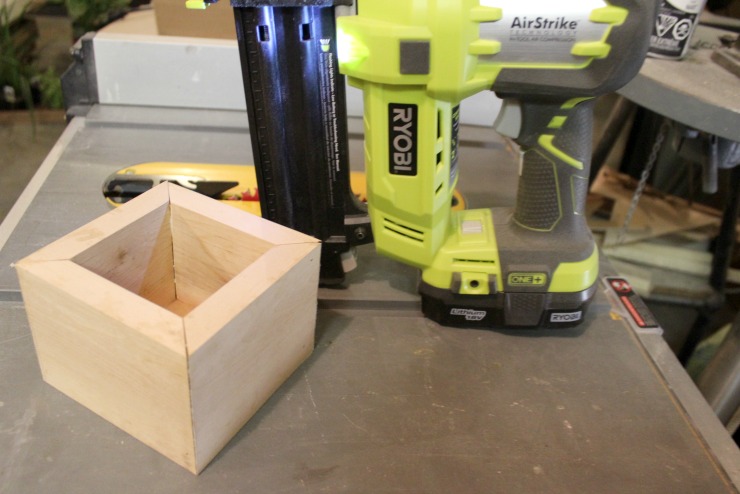
Jaime here today from That’s My Letter dropping in to say hello to all you Pretty Handy Girl readers.  I’m sharing this DIY tool tote gift idea. It’s perfect for Father’s Day, a Honey-Do Shower, New Homeowners, or basically any occasion — because who doesn’t love tools?!!

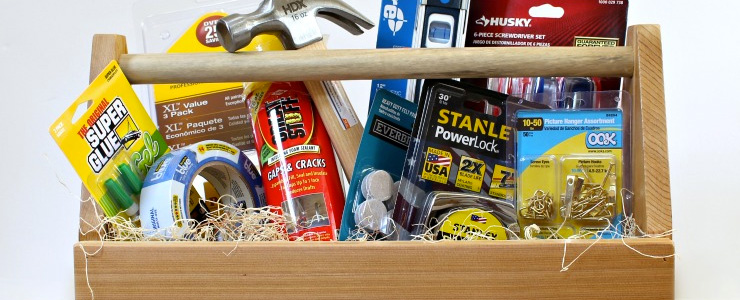
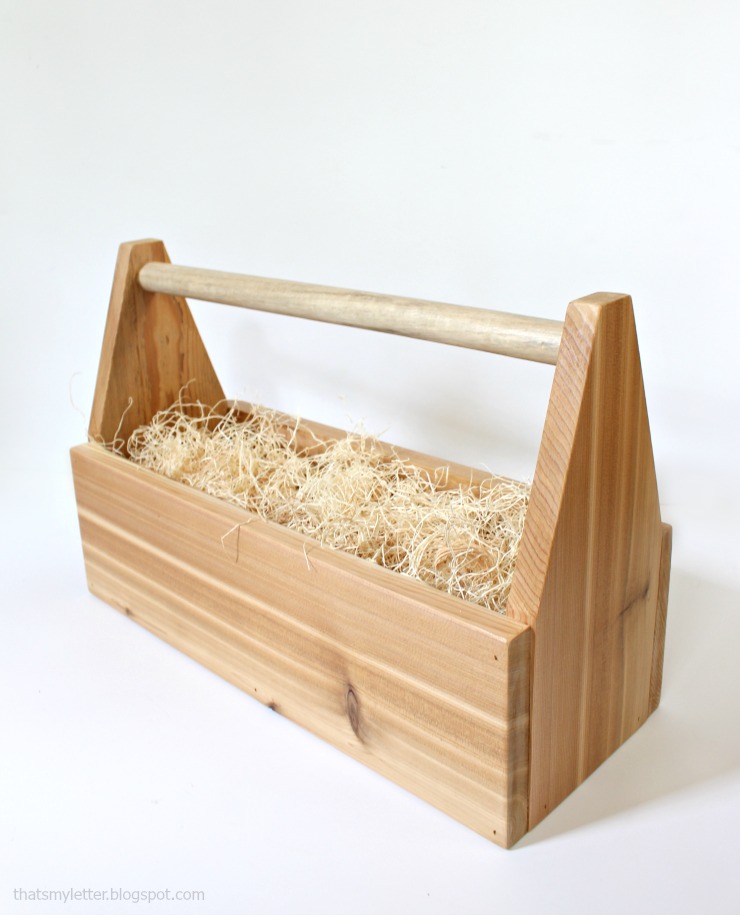
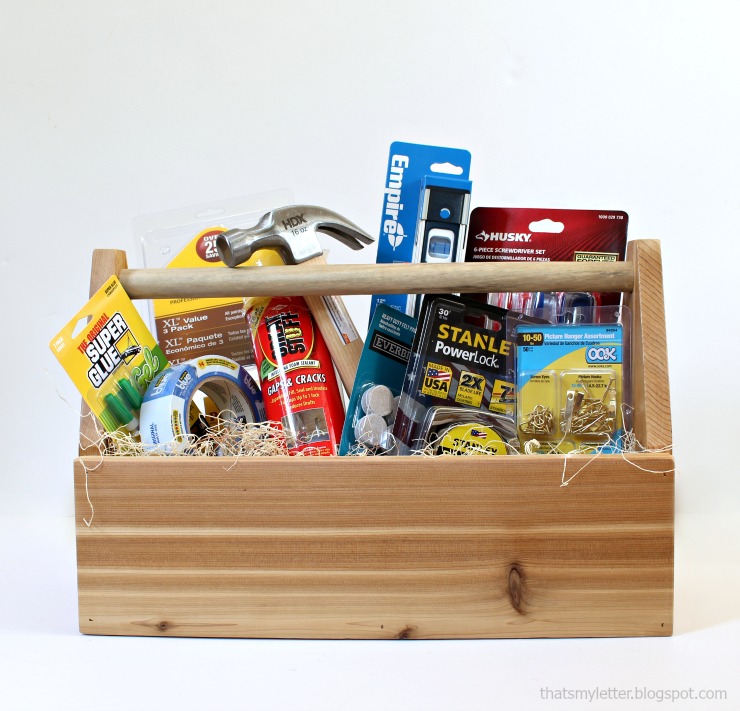
You can use any scrap wood, I used a piece of 1×6 cedar and a 1″ dowel to built this tool tote.  Then simply fill with all the essential basics one might need or want:

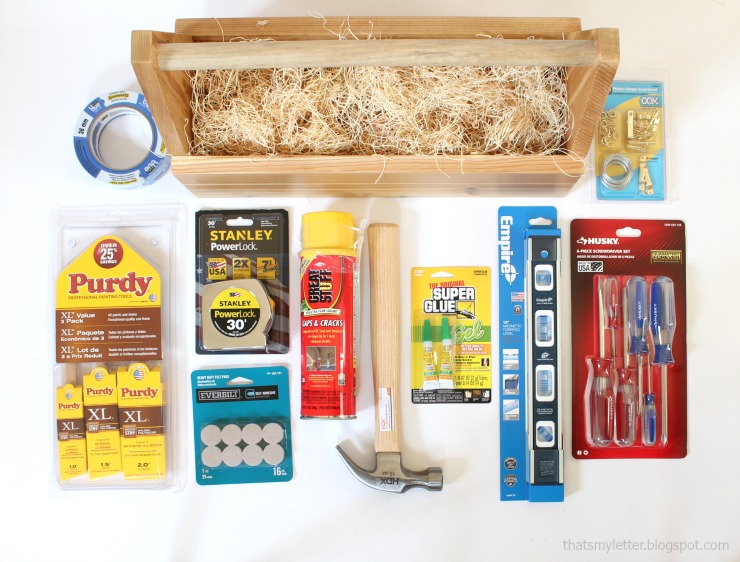
tool tote gift 2

You could go crazy at the hardware store pulling together all your favorite tools and supplies.  I stuck to the basics with a hammer, screwdrivers, measuring tape, level, paint brushes, painter’s tape, super glue, spray insulation, chair felts and picture hanging hooks.

Of course you don’t have to fill the tote with tools, it’s perfect for any gift basket contents:

tool tote gift 3


Below are the step-by-step instructions to build this tool tote.

tool tote gift 1

Always follow all safety precautions when operating power tools.

Materials:

  • 1 – 1″x6″x8′ cedar board
  • 1 – 1″ dowel
  • saw
  • measuring tape
  • pencil
  • drill and 1″ forstner bit
  • nailer and 1 ¼” finish nails
  • wood glue
  • sander
  • clear polyurethane

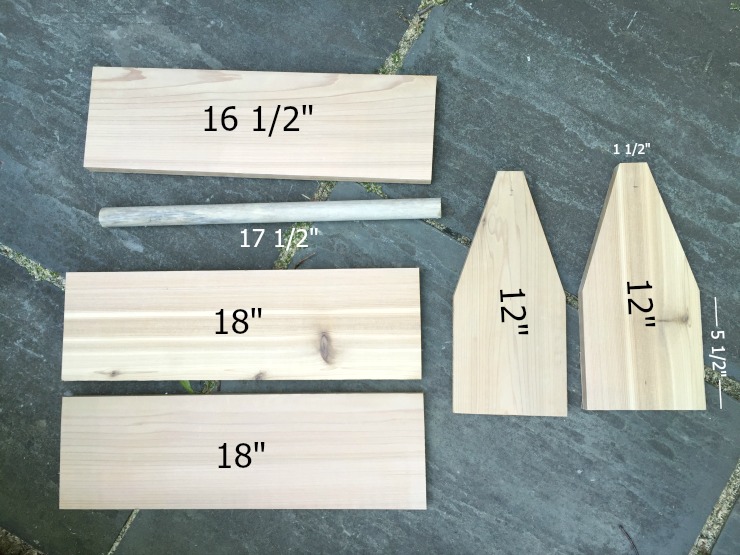
Cut List:

tool tote gift cuts

  • 2 – 1×6 @ 18″ (sides)
  • 2 – 1×6 @ 12″ (ends, dog ear the corners as pictured)
  • 1 – 1×6 @ 16 ½” (base)
  • 1 – 1″ dowel @ 17 ½” (handle)

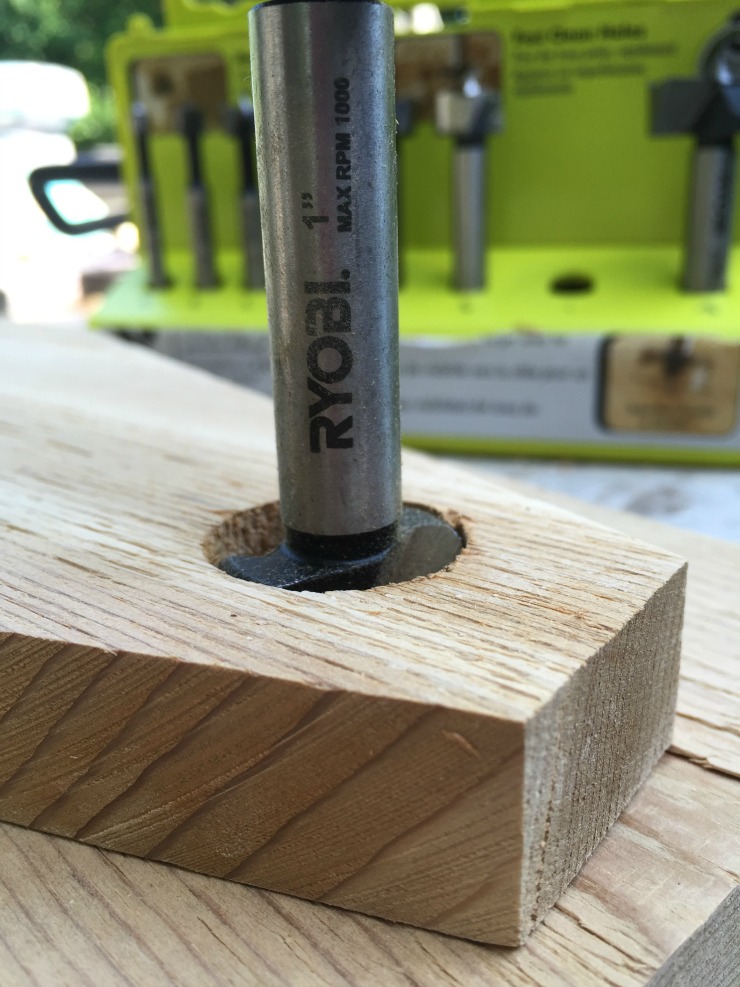
Step 1: Using a 1″ forstner bit, drill a hole for the handle about 1/2″ deep into center top of each dog-earred end piece.

tool tote gift step 1

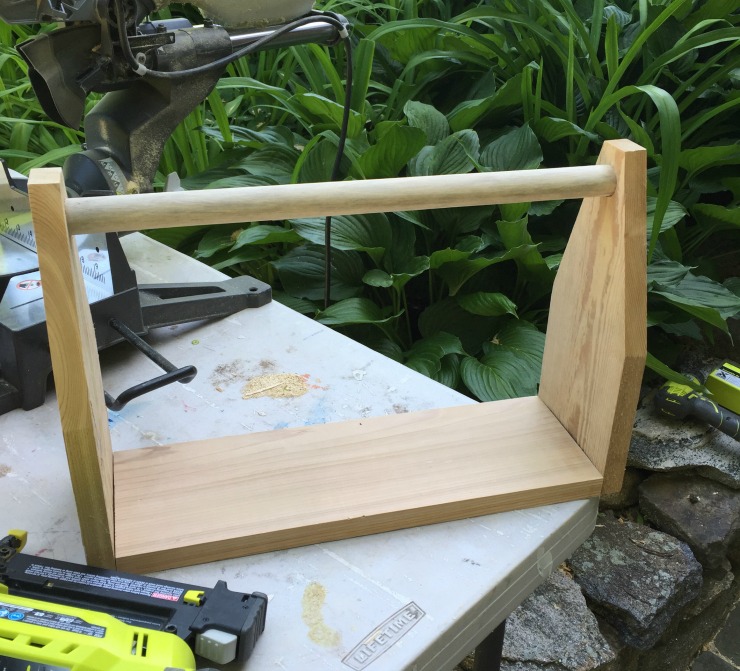
Step 2: Assemble the handle into the ends. Attach the ends to the base using wood glue and 1 ¼” finish nails.

tool tote gift step 2

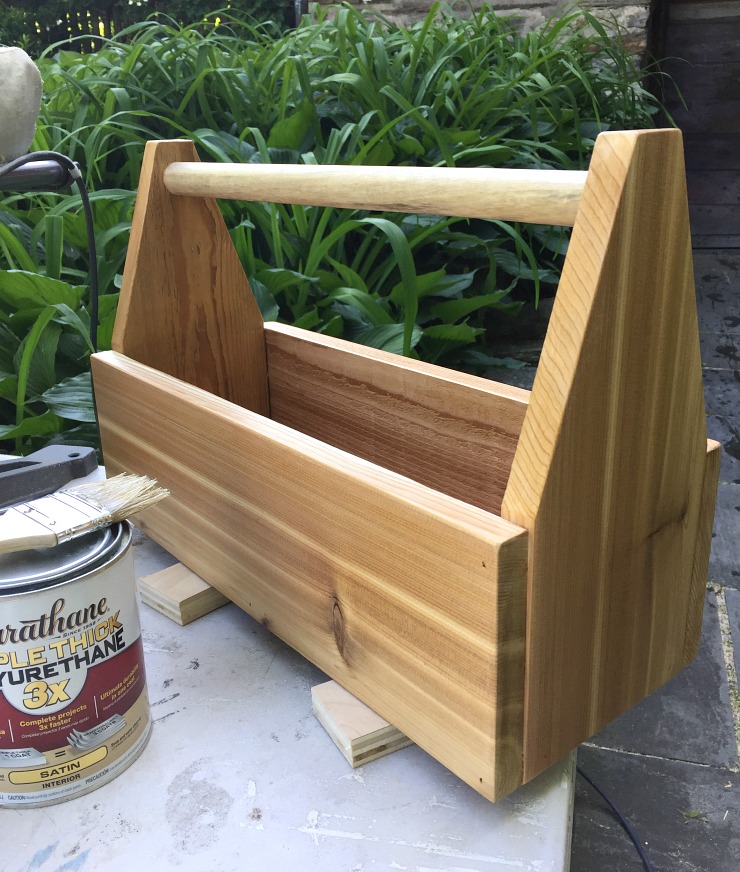
Step 3: Attach the sides using wood glue and 1 ¼” finish nails.  Sand smooth.

Applying clear satin polyurethane will make the cedar wood grain pop. It not only looks beautiful, but will protect the wood from wear and tear.

tool tote gift step 3

Are you ready for Father’s Day?  Do you have a certain someone who could use a tool tote gift?

tool tote gift 4

I hope you enjoyed this DIY project idea.

Jaime signature~ read more of Jaime’s tutorials ~


Pin for later!
Check out this DIY tool tote gift idea. It's perfect for Father's Day, a Honey-Do Shower, New Homeowners, or basically any occasion — because who doesn't love tools?!! | DIY gift ideas | Father's Day gift idea | Pretty Handy Girl | #prettyhandygirl #DIYgift #handmadegift #fathersdaygift

Half Round Copper & Wood Side Table | Pretty Handy Girl

Half Round Copper & Wood Side Table | Pretty Handy Girl

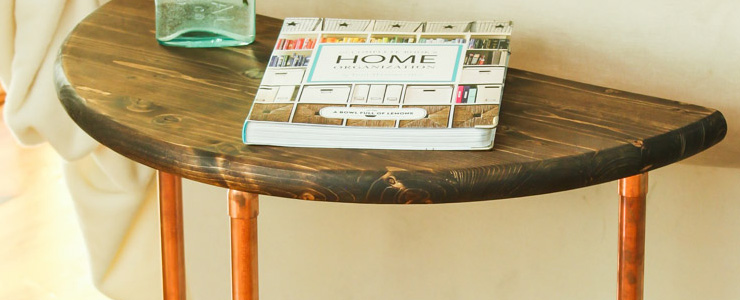
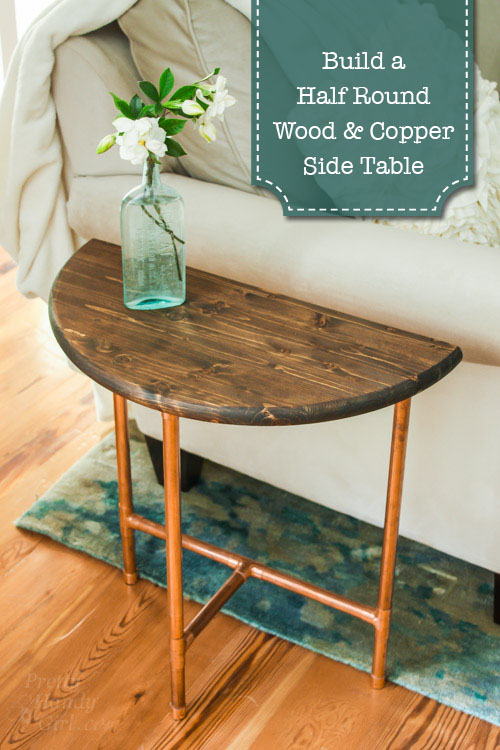
I wanted to build a small side table for our living room that wouldn’t take up a lot of floor space and have a light, airy, and industrial feel. I realized that was a tall order, but I like to challenge my creativity. On top of that order (like whip cream on a mocha frappé) I wanted some shiny copper bling (because who doesn’t love bling?) I had a general idea for the structure of the table, but wasn’t sure what to use for the top. While on one of my weekly excursions to Lowe’s, I spotted wood rounds. I grabbed one, headed to the plumbing department to buy some pretty copper pipe, and headed home to make a Half Round Copper & Wood Side Table.

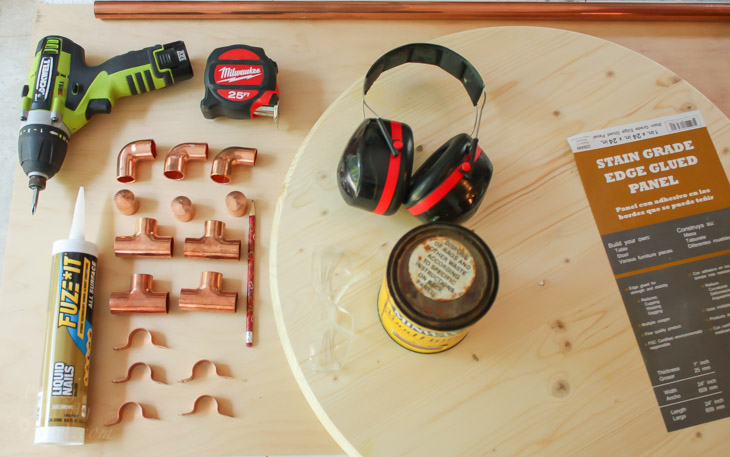
Before you think you won’t be able to make this table because you can’t solder, I have a surprise for you. It isn’t soldered! I used an all surface adhesive to secure all the joints! Not just any adhesive will work. Luckily I was recently acquainted with Liquid Nails Fuze*It when Liquid Nails challenged me to use it in a sponsored post. Challenge accepted!

Materials:

(I’ve included affiliate links for your convenience. I earn a small percentage from a purchase using these links. There is no additional cost to you. You can read more about affiliate links here.)

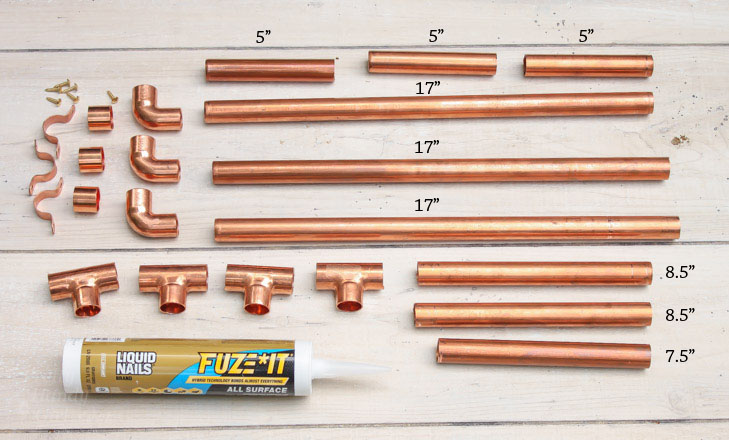
Half Round Copper & Wood Side Table | Pretty Handy Girl

Pipe Cut List:

Half Round Copper & Wood Side Table | Pretty Handy Girl

  • 3 – 5″
  • 3 – 17″
  • 2 – 8 ½”
  • 1 – 7 ½”

Instructions:

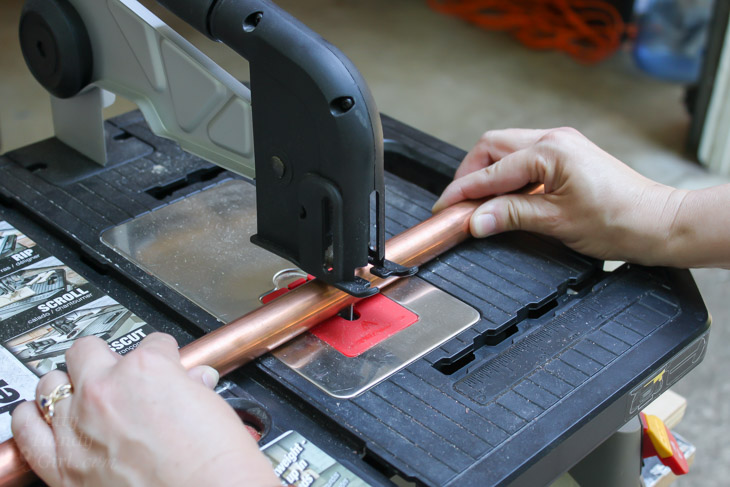
Begin by cutting your copper pipe to size. You can use a pipe cutter or any saw with a metal blade.

Half Round Copper & Wood Side Table | Pretty Handy Girl

(When my pipe cutter broke, I tried the Rockwell BladeRunner. It cut through the pipe nicely but the last cut always resulted in a slight kickback action. Not a big deal as the hood kept it from flying.)

Half Round Copper & Wood Side Table | Pretty Handy Girl

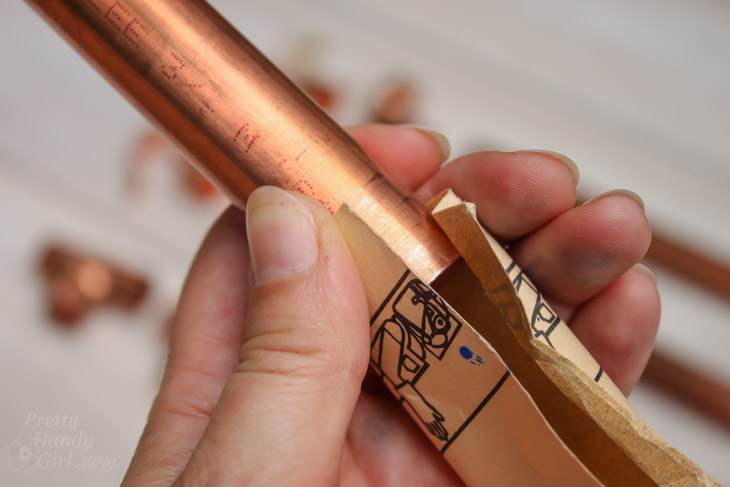
Use a piece of sandpaper to clean up the cut edges of the pipes.

Half Round Copper & Wood Side Table | Pretty Handy Girl

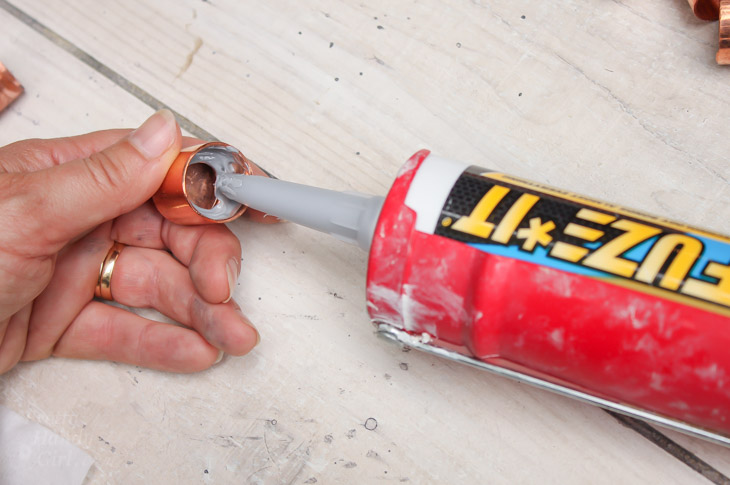
Open the tube of Liquid Nails Fuze*It All Surface Construction Adhesive. Remove the nozzle and puncture the top of the tube. Load the tube into a caulk gun. Squeeze some adhesive into the three copper caps.

Half Round Copper & Wood Side Table | Pretty Handy Girl

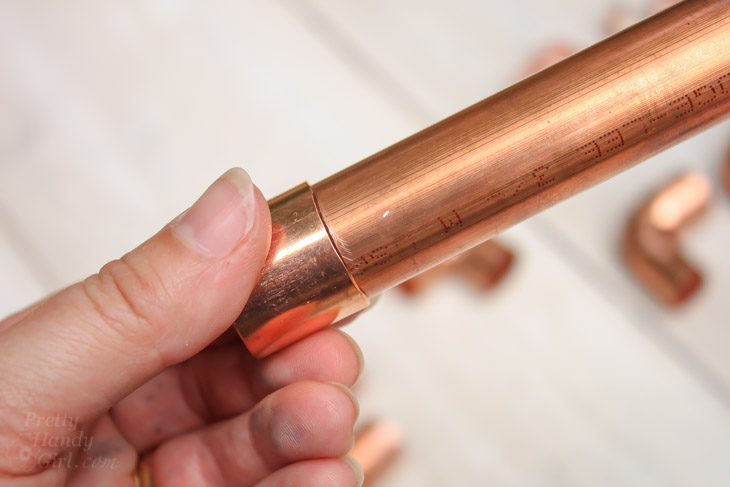
Insert the three 5″ pipes into each cap. These will be the feet of the side table.

Half Round Copper & Wood Side Table | Pretty Handy Girl

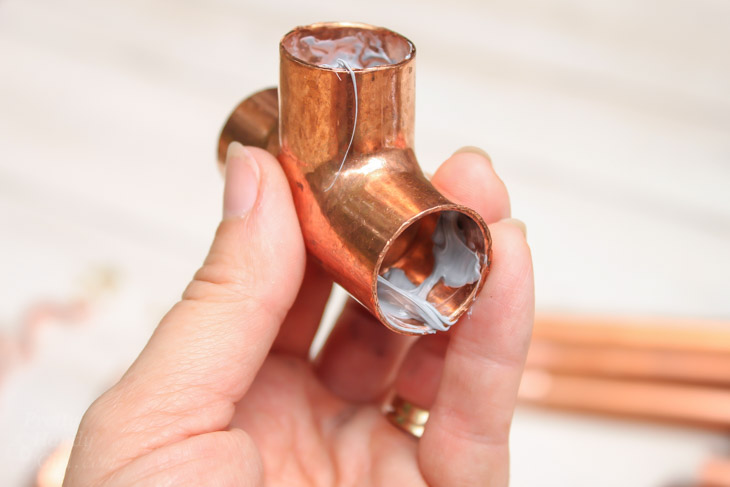
Squeeze the Fuze*It adhesive into the three openings in the “T” connectors. (You can wipe off any excess adhesive with a damp paper towel or baby wipe.)

Half Round Copper & Wood Side Table | Pretty Handy Girl

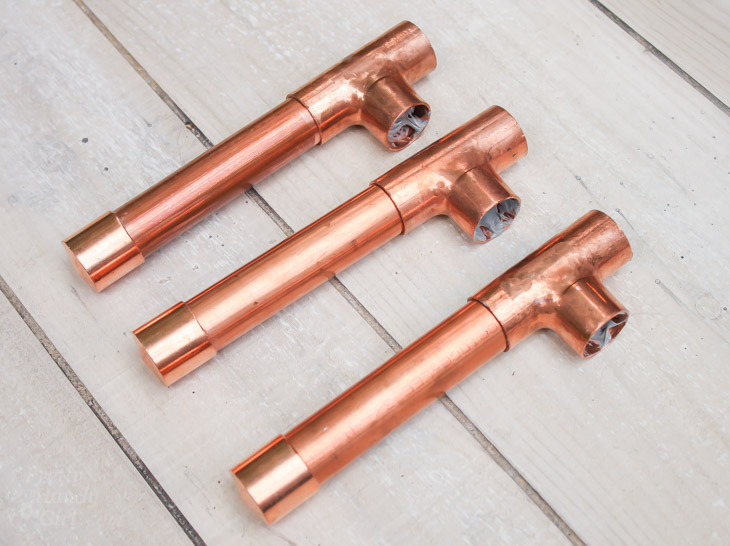
Slide the feet into one side of the “T” connectors as shown below.

Half Round Copper & Wood Side Table | Pretty Handy Girl

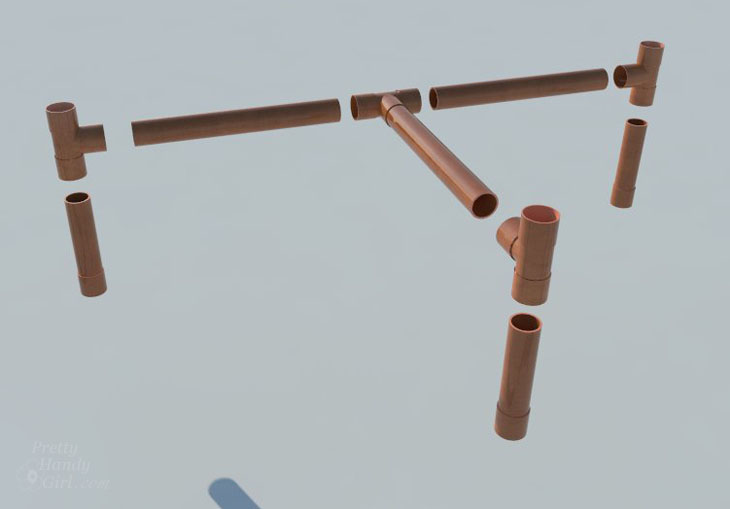
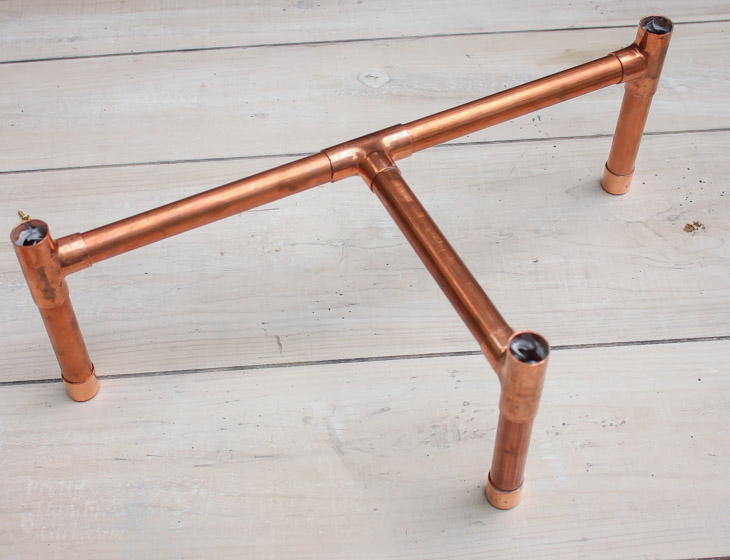
Insert two 8 ½” pipes and the one 7 ½” pipe into the last “T” connector and attach the glued legs as shown below to create the base.

Half Round Copper & Wood Side Table | Pretty Handy Girl

Half Round Copper & Wood Side Table | Pretty Handy Girl

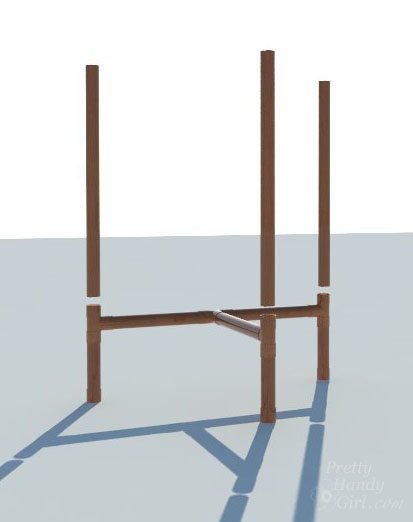
Slide the 17″ pipes into the base as shown:

Half Round Copper & Wood Side Table | Pretty Handy Girl

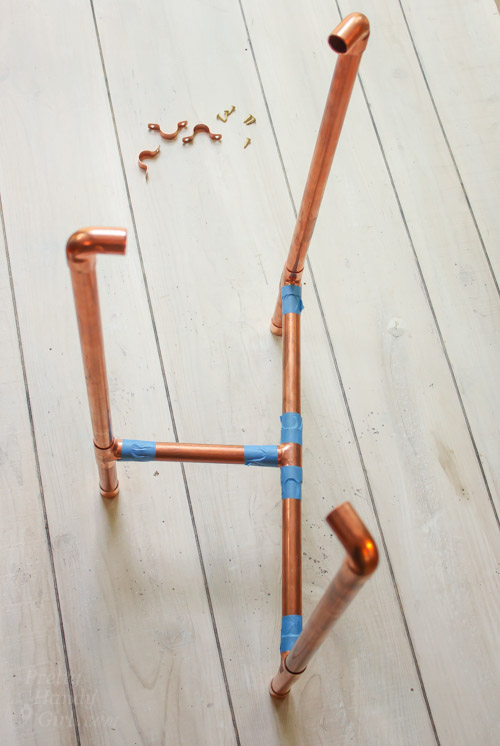
Add more Fuze*It adhesive to the 90° elbow joints and attach to the tops of the legs. Aim the elbows in toward the center.

Half Round Copper & Wood Side Table | Pretty Handy Girl

Check all the legs to make sure they are straight and plumb.

Half Round Copper & Wood Side Table | Pretty Handy Girl

Add painter’s tape to the joints to hold until the adhesive cures (in a few hours).

Half Round Copper & Wood Side Table | Pretty Handy Girl

Meanwhile, measure and mark the half location (with the wood grain) on the wood round . Cut, the round with the BladeRunner, jig saw, band saw or table saw.

Half Round Copper & Wood Side Table | Pretty Handy Girl

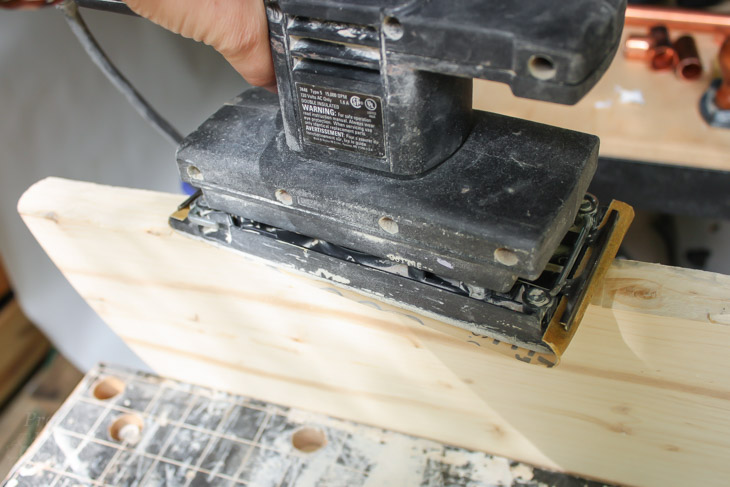
Sand the cut edges smooth.

Half Round Copper & Wood Side Table | Pretty Handy Girl

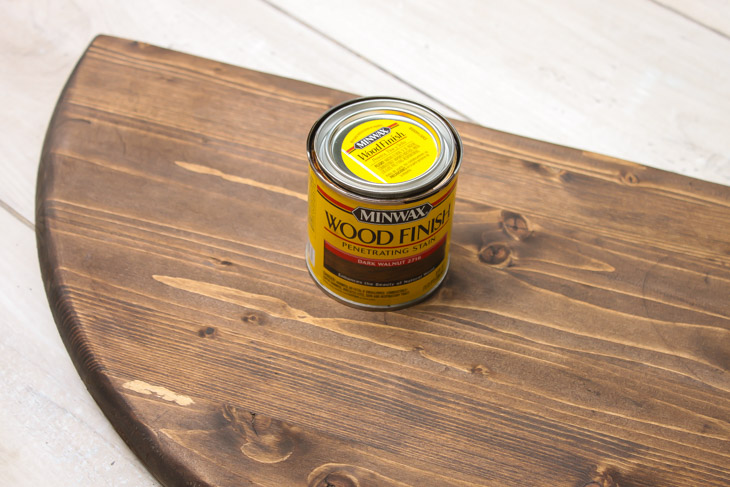
Wipe any sanding dust off the table top. Stain with Dark Walnut stain. Wipe off excess. After the stain has dried, re-apply a second or third coat to achieve the darkness you desire.

Half Round Copper & Wood Side Table | Pretty Handy Girl

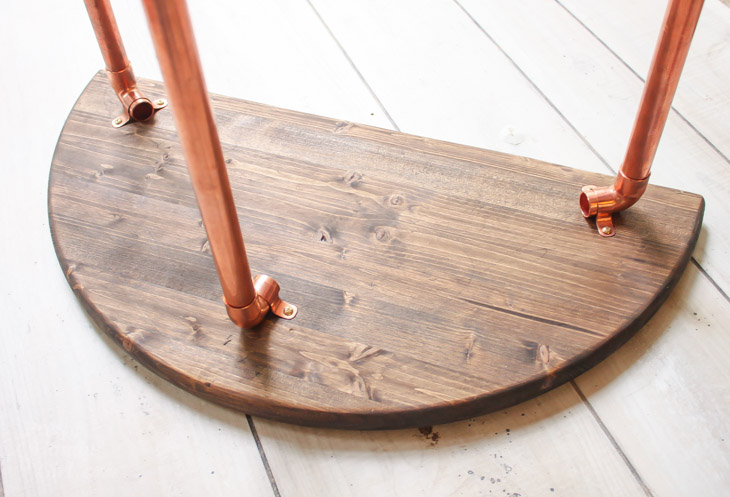
Once the Liquid Nails Fuze*It adhesive has cured, turn the legs upside down and center the legs on the table. (To allow the straight side to fit snug against a wall, center the legs 1 ½” from the edge. The round edge will protrude a few inches beyond the center leg.

Half Round Copper & Wood Side Table | Pretty Handy Girl

Attach the 90° elbows to the half round with pipe straps and 3/4″ screws.

Half Round Copper & Wood Side Table | Pretty Handy Girl

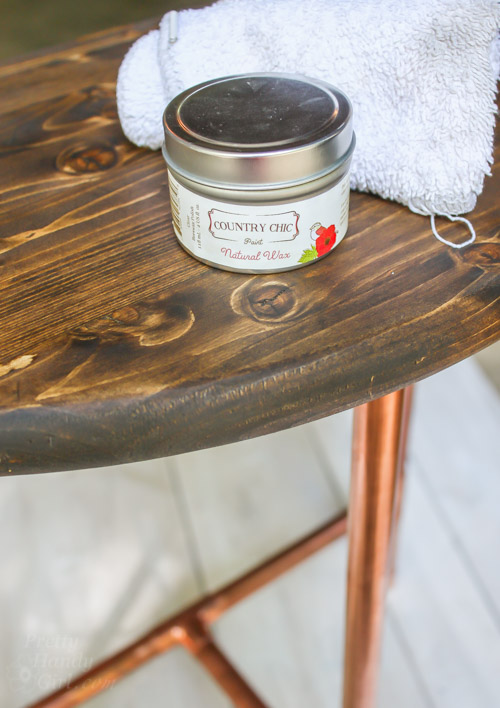
Wax or polycrylic the table top to protect it.

Half Round Copper & Wood Side Table | Pretty Handy Girl

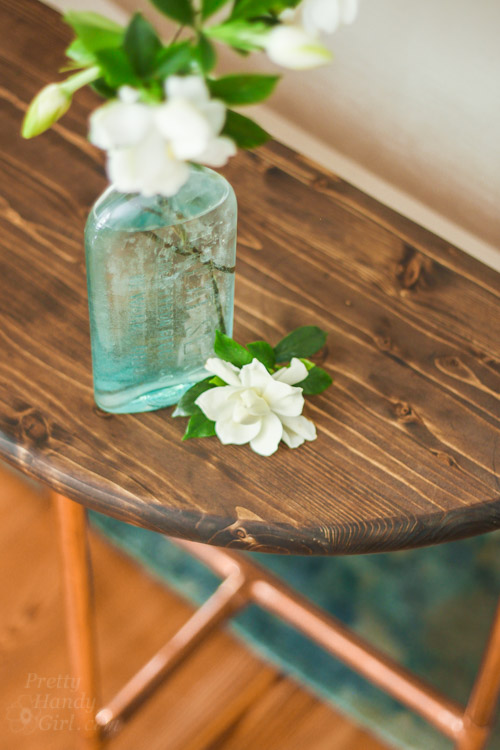
Enjoy your new Half Round Copper & Wood Side Table.

Half Round Copper & Wood Side Table | Pretty Handy Girl

Obviously, I still have another wood half round to make a second table. But, I’m going to try to come up with another creative use for it. Any ideas?

Half Round Copper & Wood Side Table | Pretty Handy Girl

No one has to know that you didn’t solder the joints. It’s our little secret.

Half Round Copper & Wood Side Table | Pretty Handy Girl

I was surprised how simple this project was. The hardest part was making sure the legs are plumb.

Half Round Copper & Wood Side Table | Pretty Handy Girl

I hope you’ll make one for yourself. Be sure to pick up some Liquid Nails Fuze*It All Surface Construction Adhesive. It bonds almost everything to almost everything else.

PHGFancySign

Disclosure: This is a sponsored post for Liquid Nails Fuze*It. I was compensated for my time. I was not told what to write. As always I’m very particular about the products I write about. 


DIY Drawer Organizer | Pretty Handy Girl | Storage and Organization

DIY Drawer Organizer | Pretty Handy Girl | Storage and Organization

I like to think of myself as an organized person, but that isn’t 100% true. I spend 15 minutes searching for my son’s baseball hat on the way out the door to his game; I shuffle papers from one pile to another; and I have that dreaded “drop spot” in my kitchen where everything seems to land when I walk in the door. The one thing I am good at is putting things back where they belong.  If an item has a spot to live in my home, it is easy for me to put it there.

Drawers can be tricky when it comes to organization because when you toss things that belong in, they can still become cluttered.  DIY Drawer Dividers help get your drawers more orderly and I can show you how to build them to suit your exact needs!

Materials:

  • 1/4″ poplar hobby boards (width and length will be determined by the size of your drawer)
  • Wood glue
  • Shelf paper
  • Old newspaper or other scrap paper
  • Painter’s tape

Tools:

  • Hand saw or miter saw

Instructions:

The first step is the most important.  Clean out your drawer. By emptying it completely and then adding back what you intend to keep, you are designing your storage around things you actually need.

I built my dividers for my bathroom drawers that hold our toothbrushes, toothpaste and floss so there wasn’t much to throw away, but there was plenty of cleaning to do.

DIY Drawer Organizer | Pretty Handy Girl | Storage and Organization

Once your drawer is cleaned out, line it with some pages from an old magazine or craft paper. This will protect the drawer from the wood glue later on.

DIY Drawer Organizer | Pretty Handy Girl | Storage and Organization

Next, add back the items you want to keep in your drawer.  This will help you with measuring and planning where the dividers will go. Use a marker to map out the compartments by drawing lines on the magazine pages.

DIY Drawer Organizer | Pretty Handy Girl | Storage and Organization

Take your measurements and cut your wood.  Then place them in the drawer for a dry fit.

You may need to do this in sections to get the right measurements.

DIY Drawer Organizer | Pretty Handy Girl | Storage and Organization

If you have a section that will run the entire width of the drawer, you can cut that piece to fit snug so it stays in place and then glue other pieces to it.

Glue the pieces together in your desired configuration and use the painters tape to hold them while the glue dries.

DIY Drawer Organizer | Pretty Handy Girl | Storage and Organization

(I don’t recommend gluing the dividers to your drawer sides. You never know when you may want to change the configuration.  By only gluing the sections to each other, you can remove them easily to clean without any damage to your drawers.)

After the glue has dried, remove the dividers from the drawer and remove the tape. Add shelf paper to the bottom of the drawer and put your dividers in place.

DIY Drawer Organizer | Pretty Handy Girl | Storage and Organization

All that’s left to do is add in all your perfectly organized items.

DIY Drawer Organizer | Pretty Handy Girl | Storage and Organization

This project was so easy, I made a DIY Drawer Divider.  My kids aren’t the only ones who need organized toothbrushes.  Now my husband and I have ours neat and tidy too.

DIY Drawer Organizer | Pretty Handy Girl | Storage and Organization

By creating custom drawer dividers you save time, effort and money. I have tried so many different ways to organize these drawers with no success.  These DIY drawer dividers have finally made this storage space work for me. I hope you have the same success.

Jillian's Signature

~ Read more of Jillian’s tutorials ~


Pin for later!
wooden drawer dividers