Build a Wood Storage Shed | Pretty Handy Girl

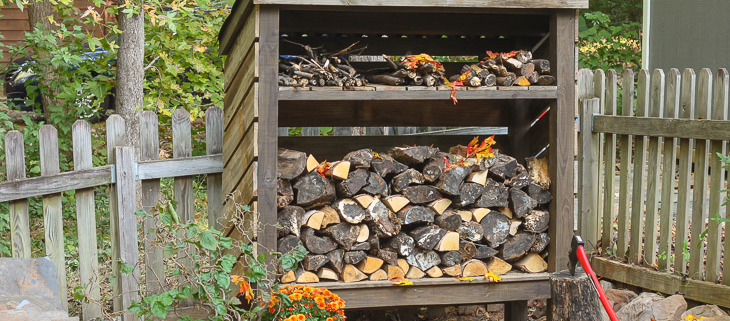
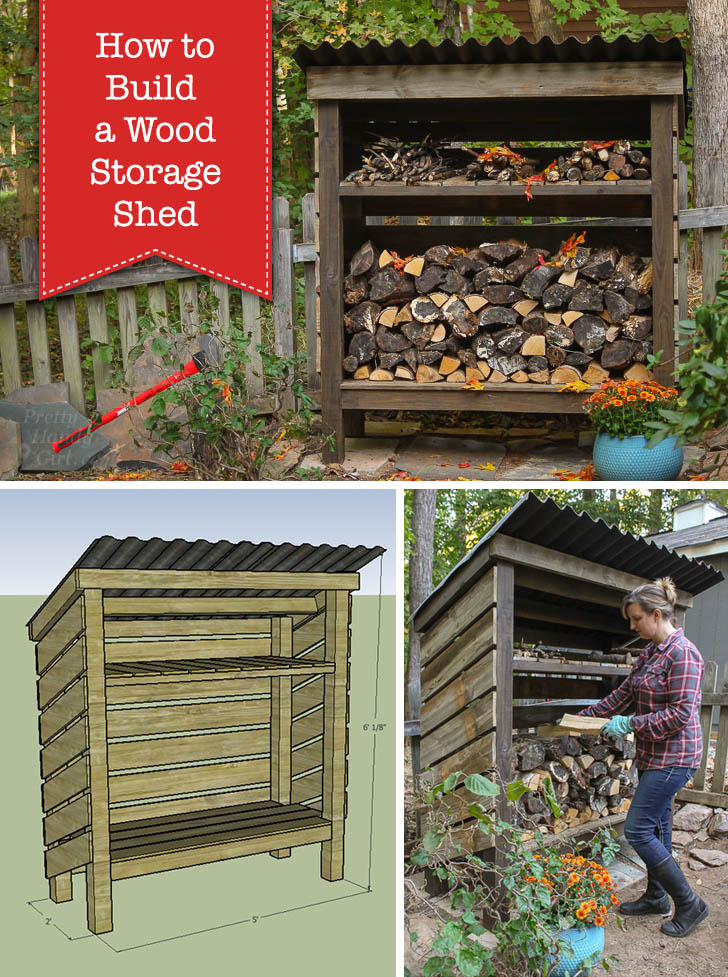
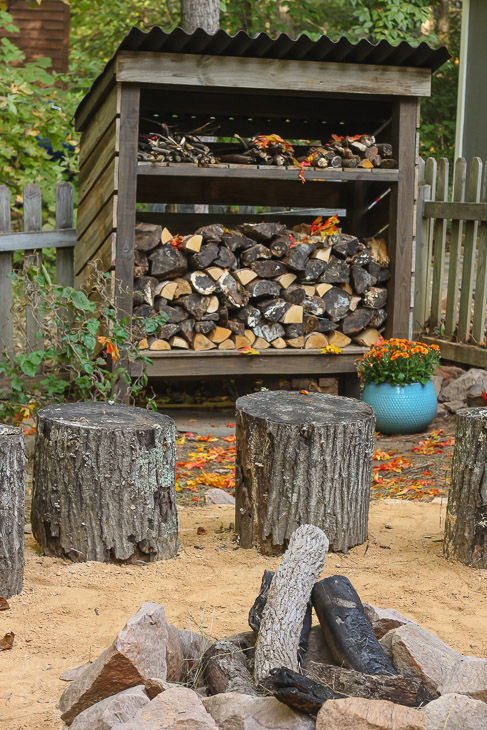
Welcome! I’m really excited to share with you the plans for How to Build a Wood Storage Shed today.  This project is sure to dress up your fire pit area or create a nice spot to store and preserve firewood for your home. Learn how to build your own wood shed.

Build a Wood Storage Shed | Pretty Handy Girl

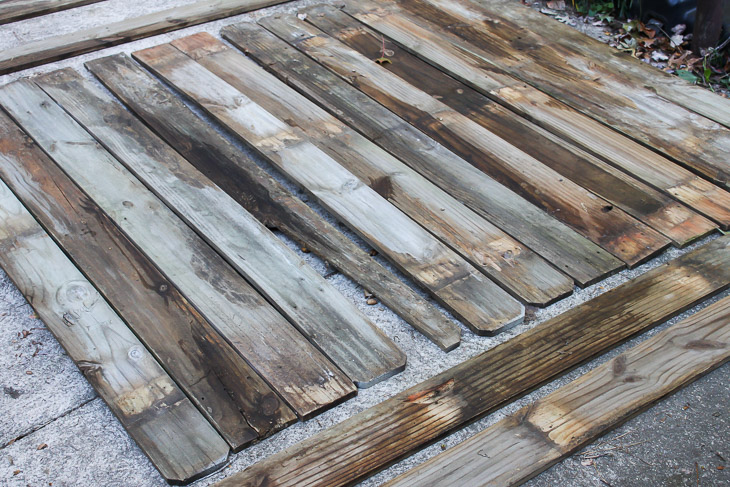
My neighbor emailed me the other day to ask if I wanted any salvage wood from their privacy fence. I gladly picked through her wood and scored some nice rustic fence pickets that I used for building this wood storage shed.

Build a Wood Storage Shed | Pretty Handy Girl

If you don’t have a nice neighbor getting rid of their old fencing check on Craig’s List or at your nearest Habit ReStore. If you can’t score used pickets you can buy them or substitute plywood for the shelves.

Ready to get building? Let’s get to it!

Wood Storage Shed Materials:

  • Drill
  • Hammer
  • Circular saw (or hand saw)
  • Miter saw (or hand saw)
  • 3″ exterior decking wood screws
  • 4- 4″ x 4″ x 6′ pressure treated posts
  • 6 – 2″ x 4″ x 10′ pressure treated studs
  • 21 – 5/8″ x 6″ x 6′ pressure treated fence pickets
  • Nailgun (or hammer)
  • 2″ Finish nails
  • 1 – Corrugated Roofing Sheet
  • Roof nails
  • Waterproof washers for nails
  • Clamp
  • Tape measure
  • Pencil
  • Level
  • Sander
  • Sandpaper

Optional:

  • Kreg Jig to drill pocket holes
  • Deck stain
  • Paint brush

Cut List:

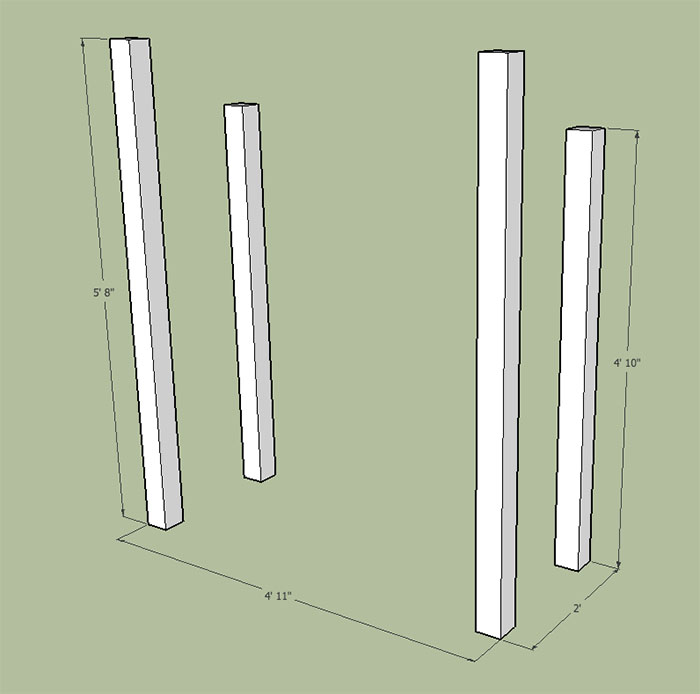
  • 2 – 4″ x 4″ cut to 58″
  • 2 – 4″ x 4″ cut to 68″
  • 4 – 2″ x 4″ cut to 53″
  • 5 – 2″ x 4″ cut to 21″
  • 2 – 2″ x 4″ cut to 63″
  • 1 – 2″ x 4″ cut to 60″
  • 2 – 5/8″ x 6″ cut to 59″
  • 2 – 5/8″ x 6″ cut to 53″
  • 9 – 5/8″ x 6″ cut to 24″
  • 7 – 5/8″ x 6′ cut to 60″
  • 2 – Angled 2″ x 4″ cut at 22.5˚ angle to width to be determined*
  • 14 – Angled 5/8″ x 6″cut at 22.5˚ angle to width to be determined*

*I highly recommend cutting your angled pieces as you go. Measure and mark based on your structure as 4″x4″ posts can angle and twist slightly.

How to Build a Wood Storage Shed Preparation:

Pre-cut your lumber.

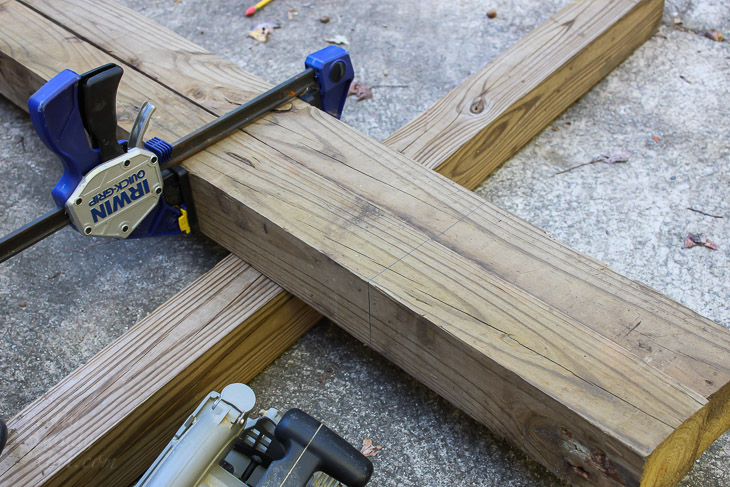
To cut your 4″ x 4″ posts, measure and mark all sides of the 4″ x 4″. Clamp two together and cut one side.

Build a Wood Storage Shed | Pretty Handy Girl

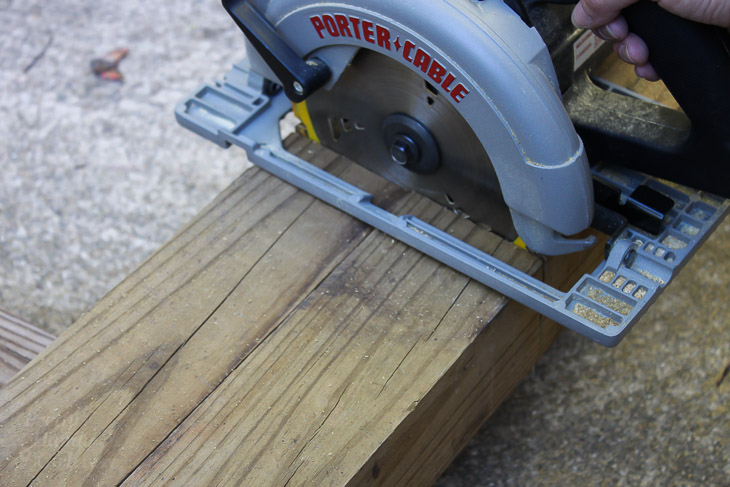
Flip the 4″ x 4″ over to complete your cut. This will give you two posts the exact same height.

Build a Wood Storage Shed | Pretty Handy Girl

Sand any splinters or rough edges.

Build a Wood Storage Shed Instructions:

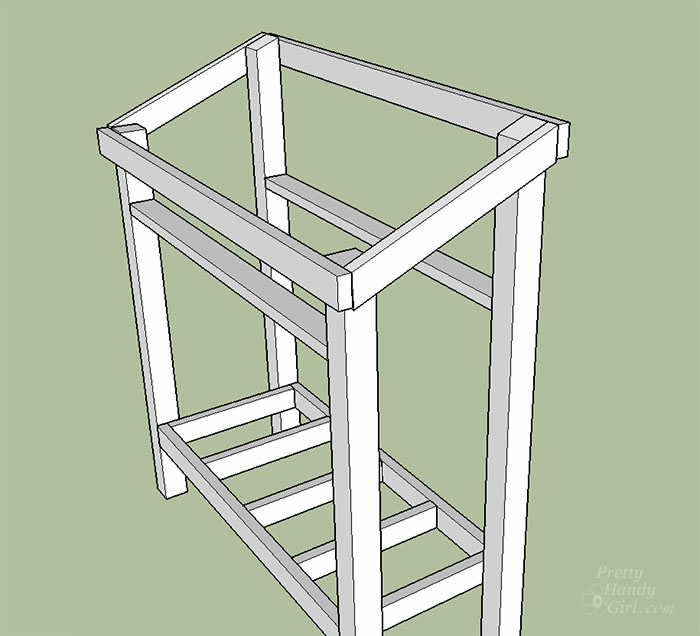
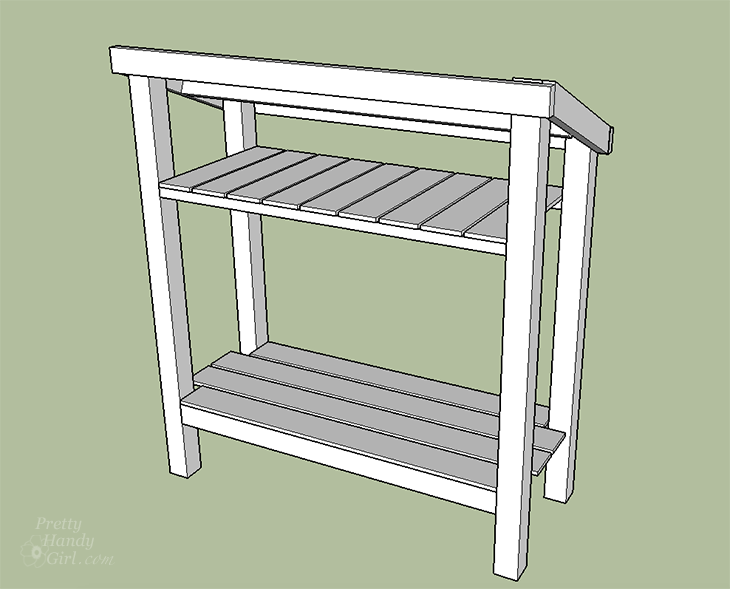
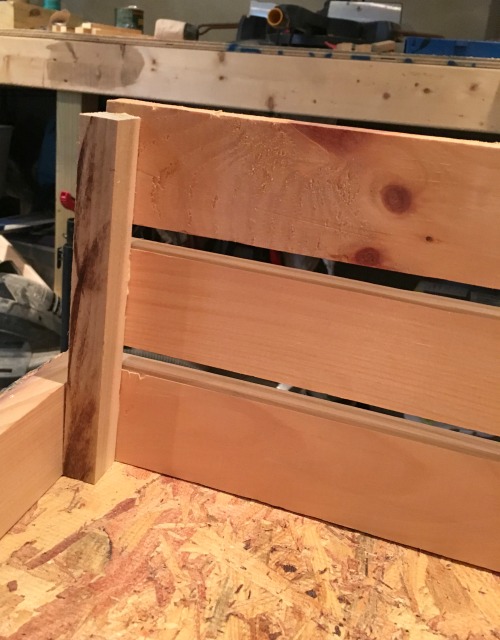
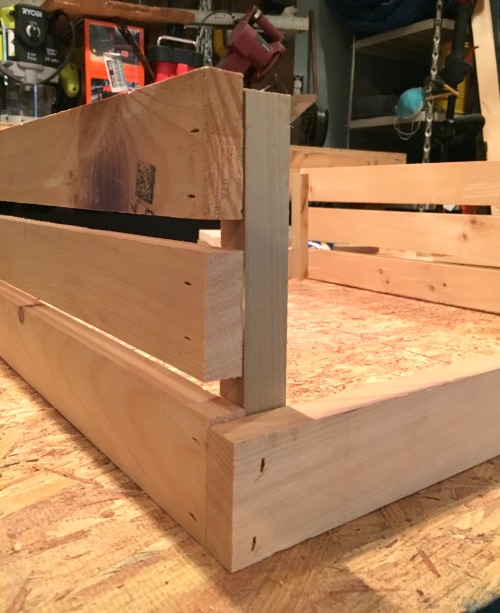
Line up your 4″ x 4″ posts as shown. You will probably need to lay them on their sides while building the frame. Having a buddy around would be helpful, but you can also use clamps to help hold your boards as you assemble.

Build a Wood Storage Shed | Pretty Handy Girl

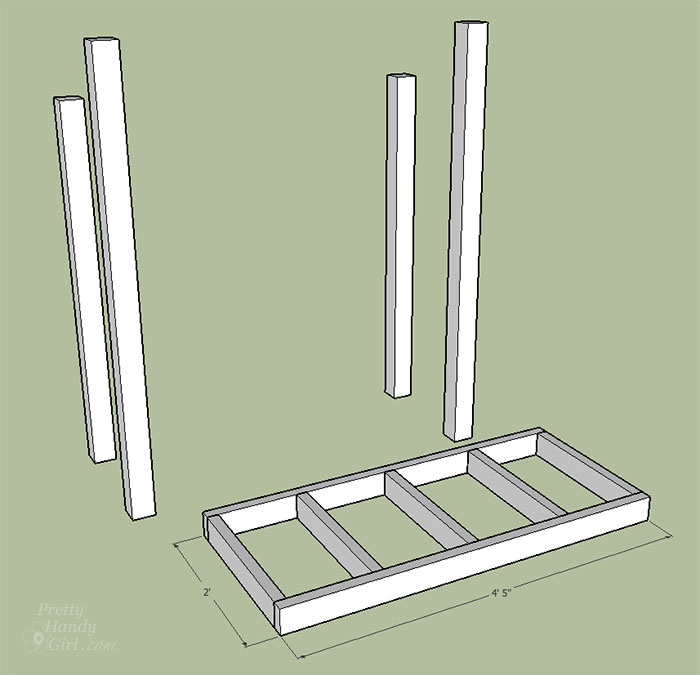
Build the bottom shelf structure using two 53″ studs and five 21″ studs. Use wood screws to secure the 21″ stud through the face of the 53″ studs.

Build a Wood Storage Shed | Pretty Handy Girl

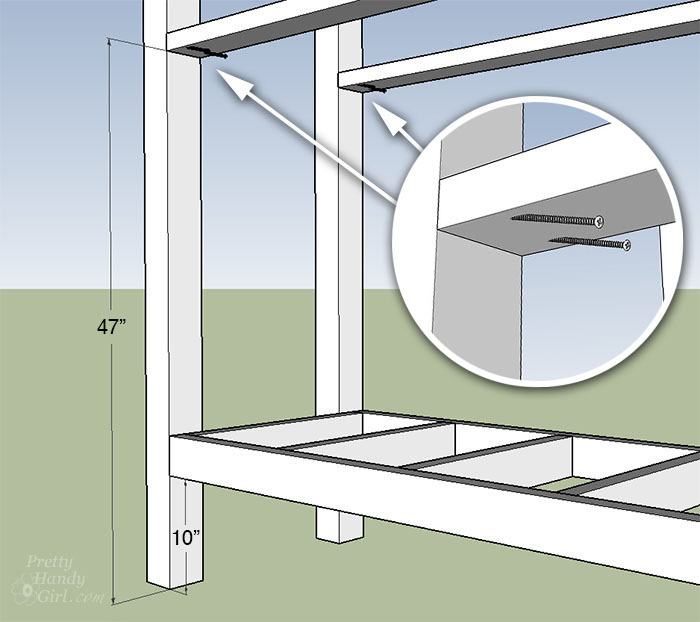
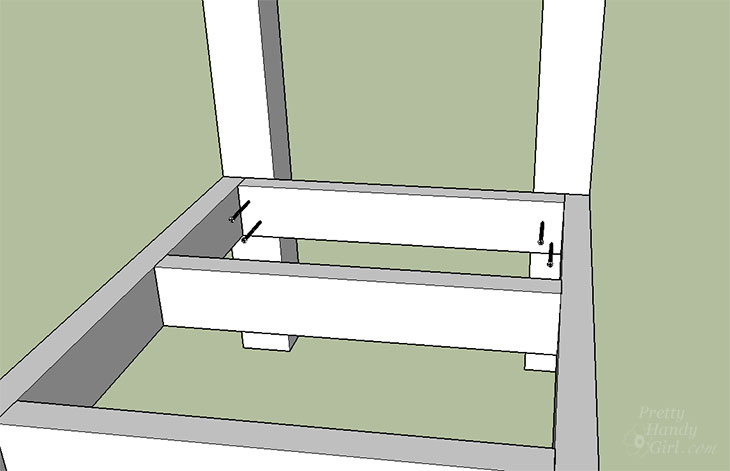
Drill pocket holes into both ends of two 53″ 2×4 studs. (Alternatively, you could just drive the screws in at an angle since they will be on the underside of your supports.) Secure these two 2×4’s to the 4×4 posts at 47″ from the ground.

Build a Wood Storage Shed | Pretty Handy Girl

Secure the bottom shelf structure to the 4×4 posts, 10″ from the ground using wood screws.

Build a Wood Storage Shed | Pretty Handy Girl

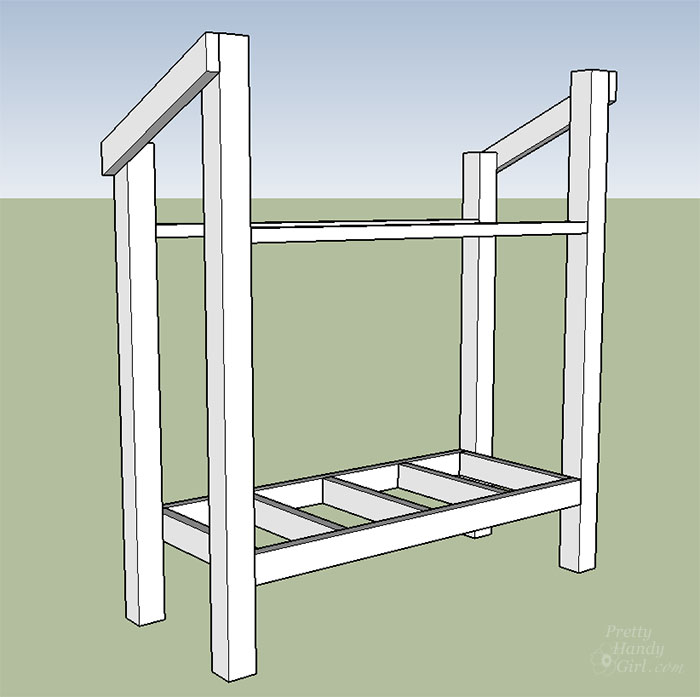
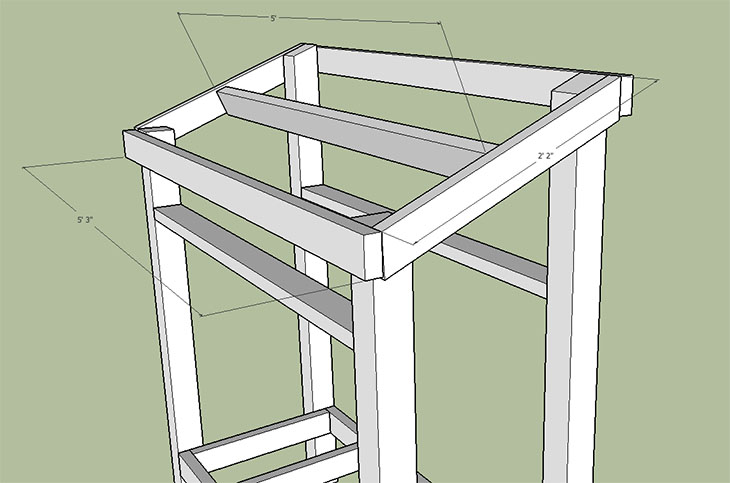
Cut one end of two 2″ x 4″ studs at a 22.5˚ angle. Mark the cut length against the 4×4 posts and cut the other end at the same angle. Secure both angled 2×4’s to the outside of the top of your structure.

Build a Wood Storage Shed | Pretty Handy Girl

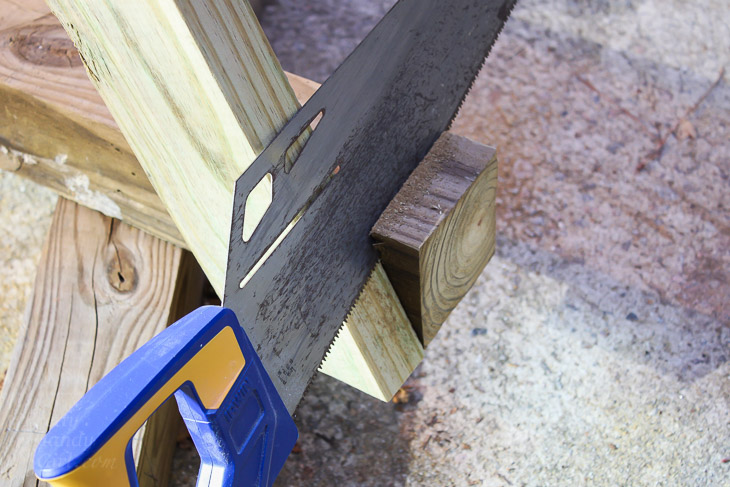
Use a handsaw to trim the top off the front 4×4 posts flush surface with the angled 2×4’s.

Build a Wood Storage Shed | Pretty Handy Girl

This will leave you with a flush surface for the roofing material to rest on later. Attach the two 63″ 2×4’s to the front and back of your structure.

Build a Wood Storage Shed | Pretty Handy Girl

Secure the 60″ 2×4 to the center of the roof structure as shown below:

Build a Wood Storage Shed | Pretty Handy Girl

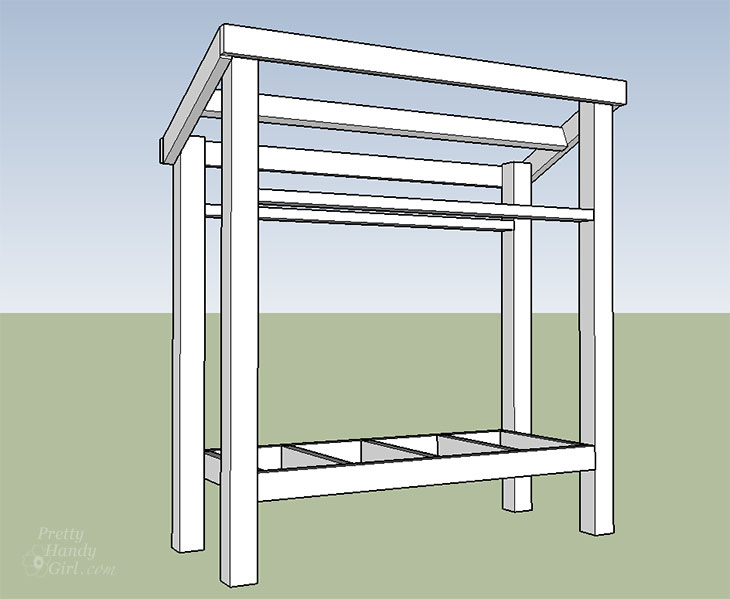
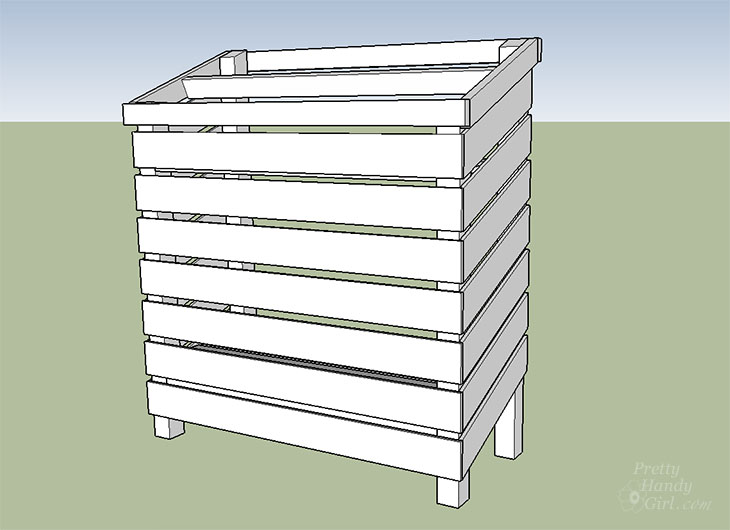
Your wood storage structure is now ready for the shelves and side cladding.

Build a Wood Storage Shed | Pretty Handy Girl

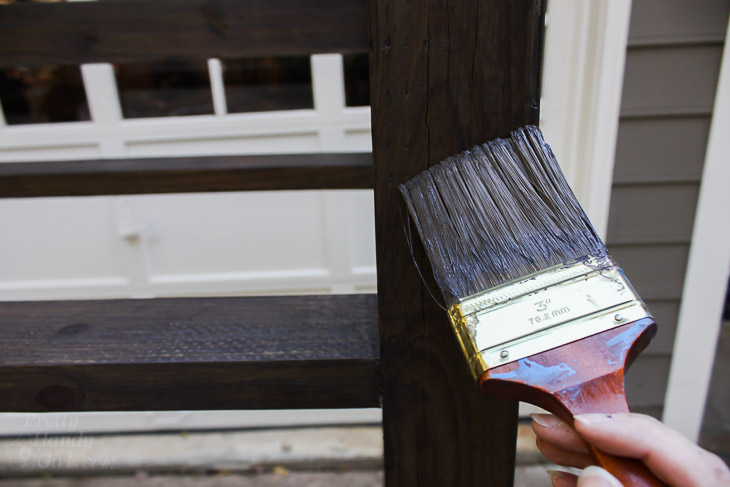
If you want to stain your wood storage shed, you might want to do that now. I left the shelves and side cladding raw wood to show off the beautiful rustic silver color. But, if you have new wood you can stain it as well. (I used two coats of Sherwin Williams SuperDeck Charwood color.)

Build a Wood Storage Shed | Pretty Handy Girl

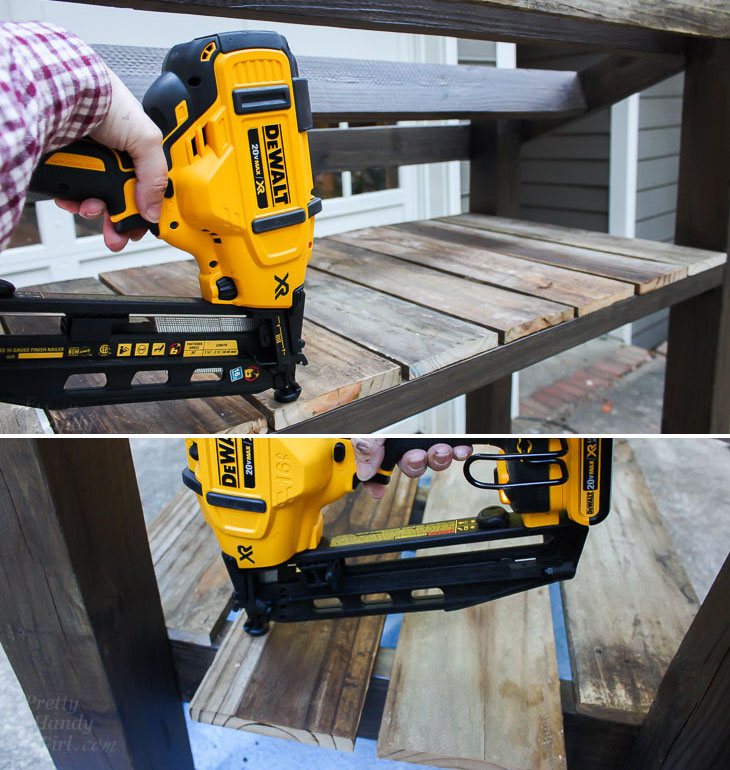
Allow the stain to dry. Evenly space nine 5/8″ x 24″ boards on the top shelf supports. Secure with finish nails.

Build a Wood Storage Shed | Pretty Handy Girl

Center two 5/8″ x 59″ boards to the bottom shelf. Line up the two 5/8″ x 53″ boards against the front and back of the bottom shelf. Secure with finish nails.

Build a Wood Storage Shed | Pretty Handy Girl

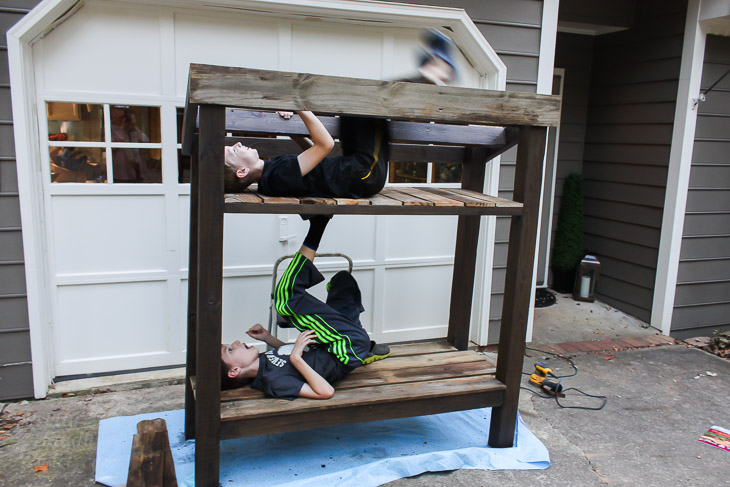
Enlist two rough and tumble boys to test the strength of your structure. (Good grief, how am I going to survive the next 10 years with these crazy boys?)

Build a Wood Storage Shed | Pretty Handy Girl

Secure seven 5/8″ x 60″ boards to the back of the shed. Use a 1″ scrap piece of wood to space them evenly. Secure with finish nails.

Build a Wood Storage Shed | Pretty Handy Girl

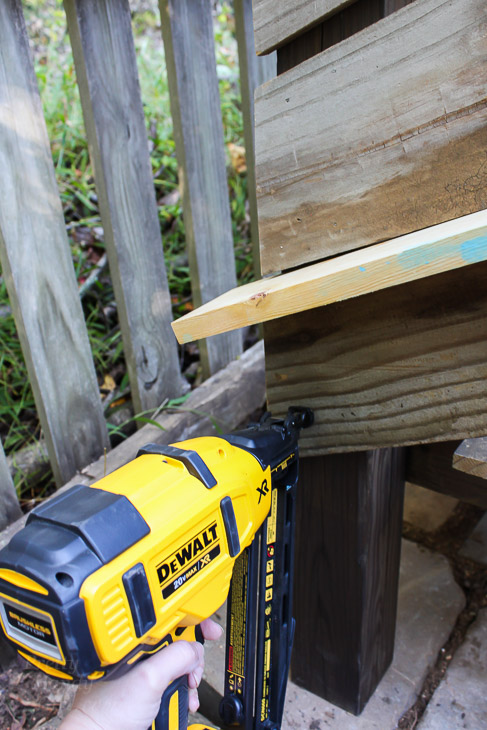
Cut one end of fourteen 5/8″ x 5″ boards at a 22.5˚ angle. Then line up and mark the other end against your structure. For a clean look, allow 5/8″ to overlap the back of the structure to hide the ends of the back cladding. (I suggest measuring and cutting your angled 5/8″ boards as you go. I have a 1/2″ variance in width along my sides.)

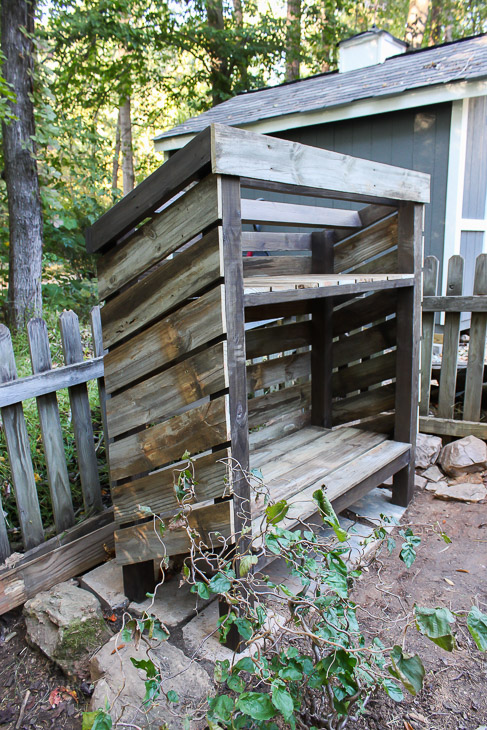
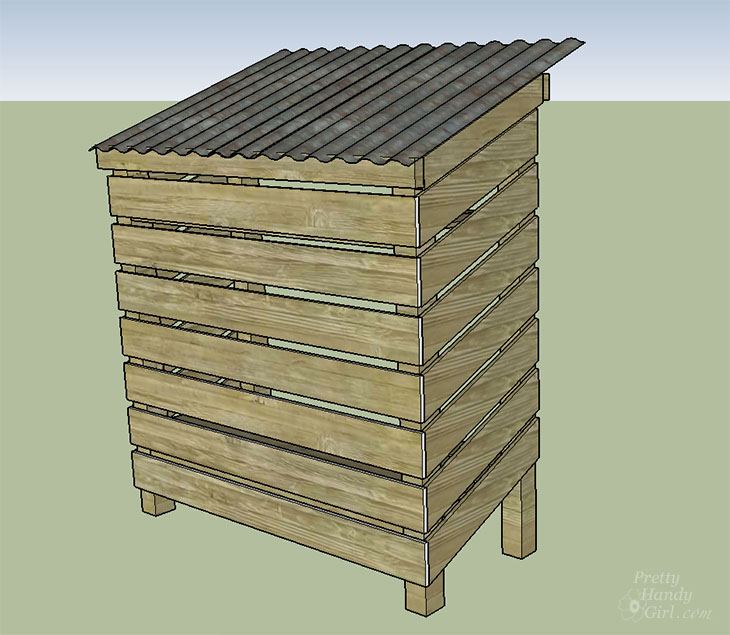
Your wood storage shed should look like this:

Build a Wood Storage Shed | Pretty Handy Girl

or this:

Build a Wood Storage Shed | Pretty Handy Girl

Installing the Roofing Sheet:

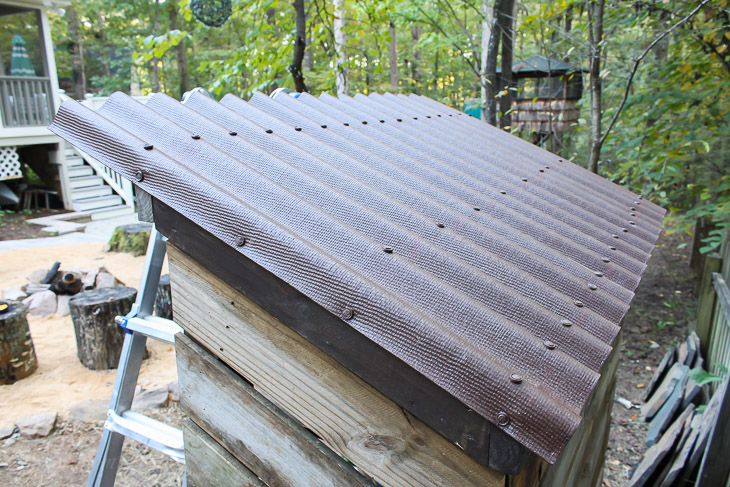
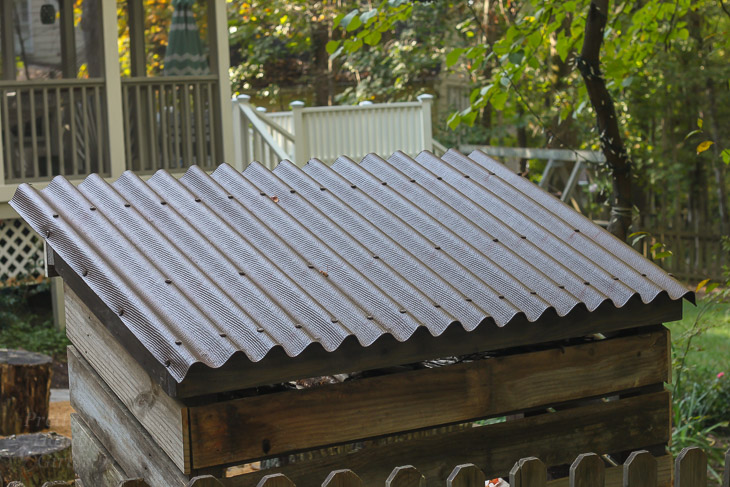
One of the easiest ways to roof a shed or small structure is to use corrugated roofing sheets. At 4′ x 6’7″, it’s easier to cover a larger area in just a few minutes. You can use metal or asphalt based corrugated sheets.

Build a Wood Storage Shed | Pretty Handy Girl

Here’s how to install the roofing sheets :
(I used asphalt sheets from Lowe’s for my shed. For more specific and detailed installation guidelines, check with the manufacturer of your roofing sheet.)

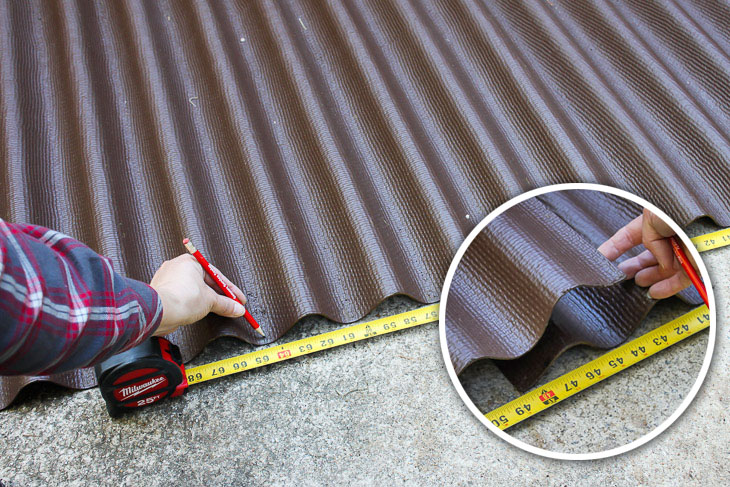
Measure the roof area on your shed. Add 2″ – 3″ to the width to allow for folding over the sides to secure to the shed sides. It works out that you’ll only need one sheet to roof this wood storage shed.

Measure your wood shed’s roof depth and add a few inches for overhang (if using asphalt roofing do not extend the sheet more than 2″ over a support or you could have some sagging over time.)

Build a Wood Storage Shed | Pretty Handy Girl

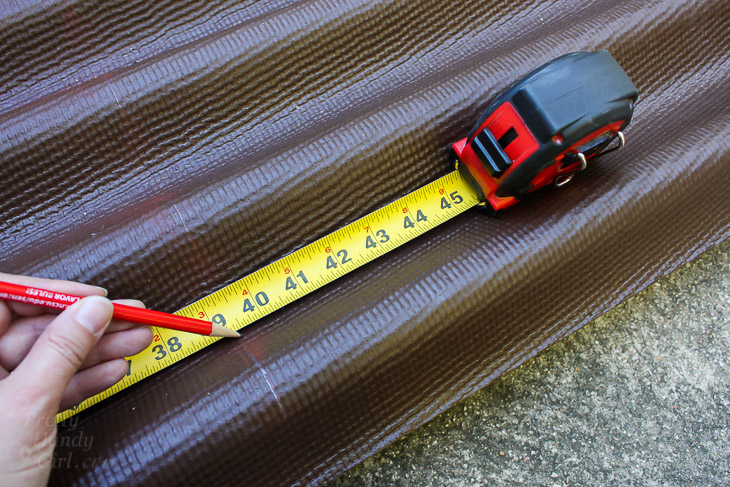
You can cut asphalt sheets with any saw or utility knife. Cut your sheet for the depth (front to back) measurement first. Next, overlap one sheet over the other (only overlap one peak.) Mark the width of the shed roof plus 2″. For these plans 65″ is the width that worked on the shed, but be sure to double check your shed roof.

Build a Wood Storage Shed | Pretty Handy Girl

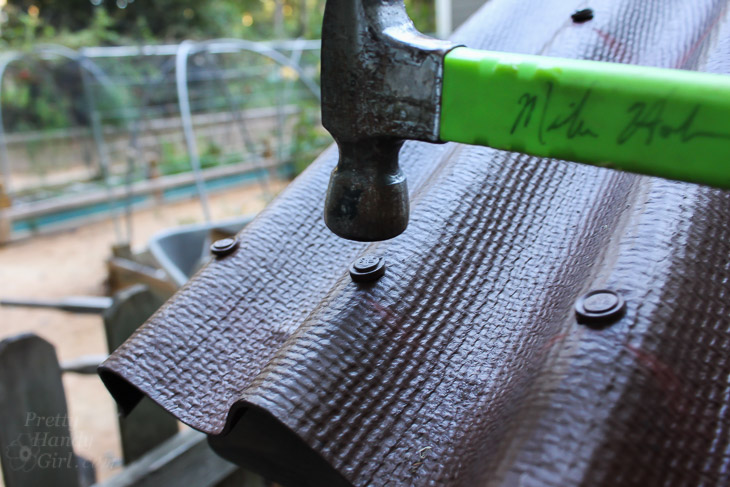
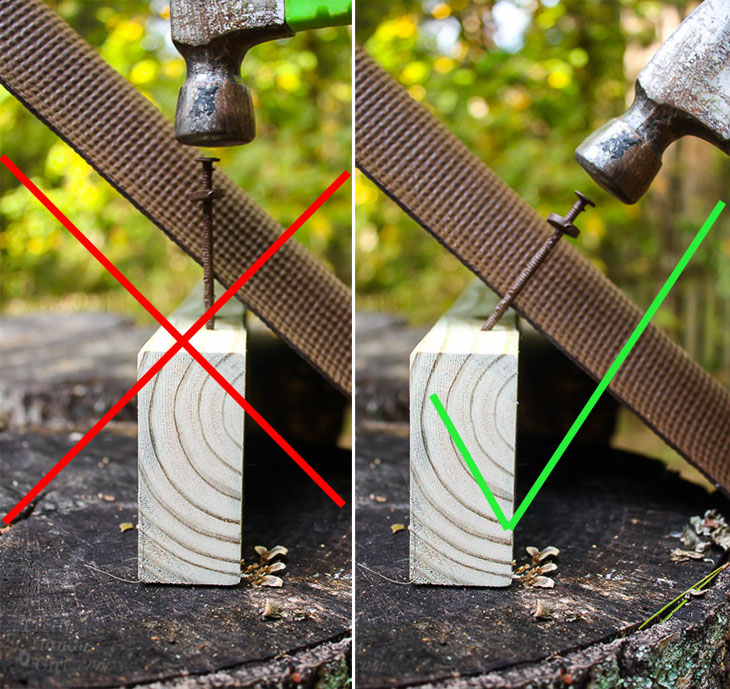
Slip a washer on each roofing nail.  Hammer the nails into the sheets (keep the nail heads parallel with the sheet as shown below.)

Build a Wood Storage Shed | Pretty Handy Girl

Hammer until the rubber washer covers the hole made by the nail.

Build a Wood Storage Shed | Pretty Handy Girl

Nail the sides down to the wood shed roof framing.

Build a Wood Storage Shed | Pretty Handy Girl

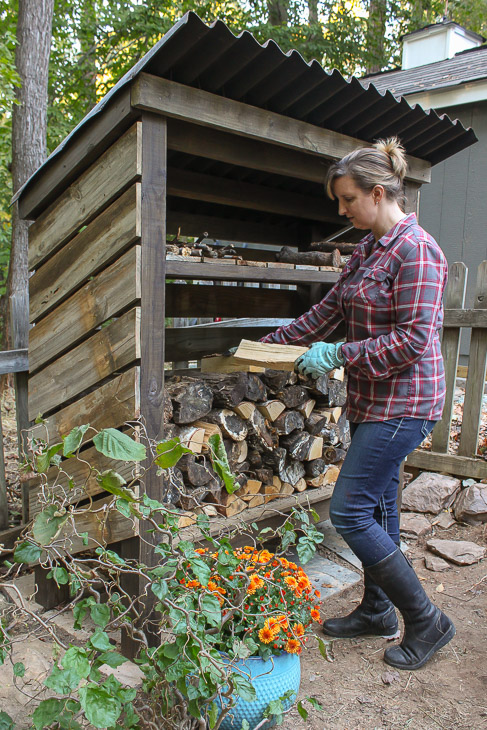
And call it a day! You’re done.

Build a Wood Storage Shed | Pretty Handy Girl

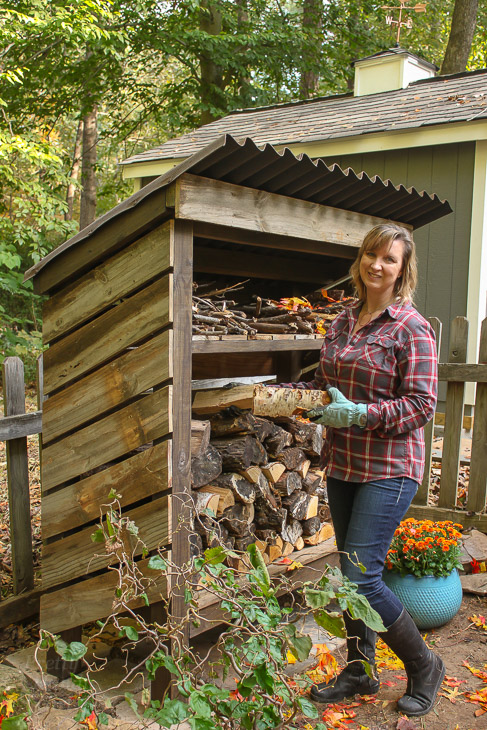
Go ahead and fill your wood storage shed with kindling and firewood.

Build a Wood Storage Shed | Pretty Handy Girl

Want to watch how I built this shed? Watch this video:
(Inserted You Tube video here when published.)


Build a Wood Storage Shed | Pretty Handy Girl

PHGFancySign

PPG Paint Trends and Demo Event Giveaway | Pretty Handy Girl

PPG Paint Trends and Demo Event Giveaway | Pretty Handy Girl

Last month I had the honor to represent PPG, makers of OLYMPIC® Paints & Stains , GLIDDEN® Paint, the LIQUID NAILS® brand and the PPG PAINTS™ brand, at the Paint Tips & Sips media event in New York City. It was an invite-only event for media representatives. This gave me the opportunity to talk one-on-one with several magazine reps. I wish you could have been there, but if you read to the end of this post we have a special giveaway for you!

Additional PPG representatives set up tables with information about color trends, including Violet Verbena the color of the year.
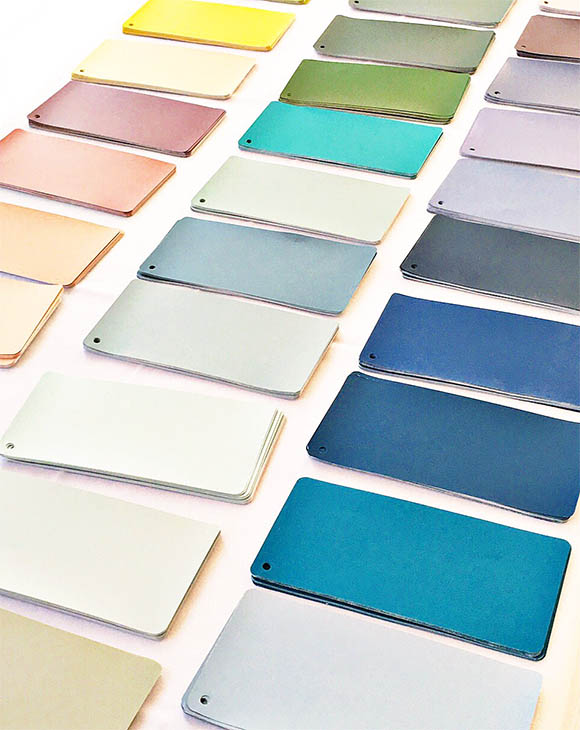
PPG Paint Trends and Demo Event Giveaway | Pretty Handy Girl

Plus, I was introduced to more PPG products for home renovations and improvements. I discovered some innovative HOMAX® products that will definitely come in handy when I find a flip house:

  • Homax Tough As Tile® Tub & Sink Refinishing Kit Epoxy Finish has a spray tip for easier application, improved whiteness, faster drying time and superior flow and level for a beautiful finished result. 
  • The Homax Brand Pro Grade Wall Texture with Dual Control™ technology has adjustable pattern and pressure features. Plus, ultra-fast dry results with an advanced lower odor.

The Homax products are available at The Home Depot, Lowe’s, Walmart, Menards, PPG Paints stores and independent retailers.
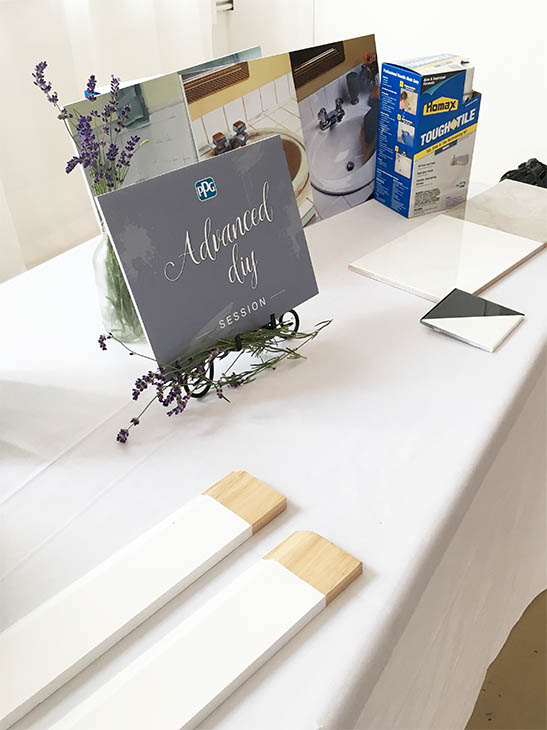
PPG Paint Trends and Demo Event Giveaway | Pretty Handy Girl

Can I just say how cute this paint chip dress is? If I were back in high school I’d love to make my own prom dress. So fun!
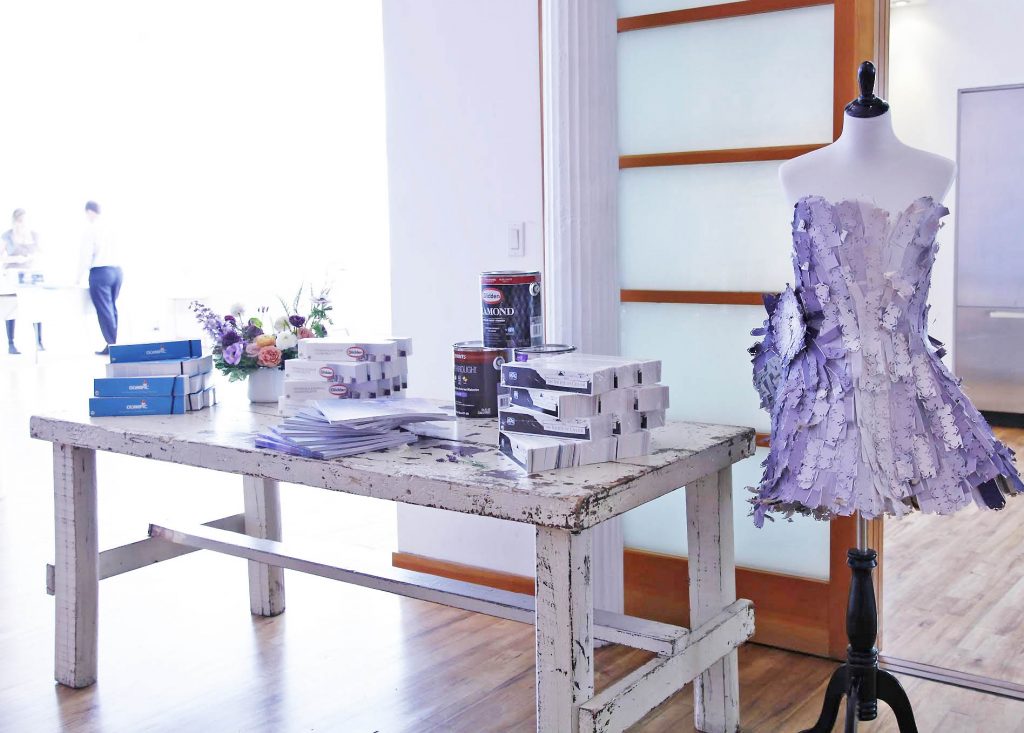
PPG Paint Trends and Demo Event Giveaway | Pretty Handy Girl

I gave a little demonstration on painting and building a half round wood and copper table using Liquid Nails FUZE*IT®. FUZE*IT® All Surface Construction Adhesive has two times the strength of fasteners alone and bonds nearly all materials in any weather conditions. It’s available at a variety of home improvement retailers
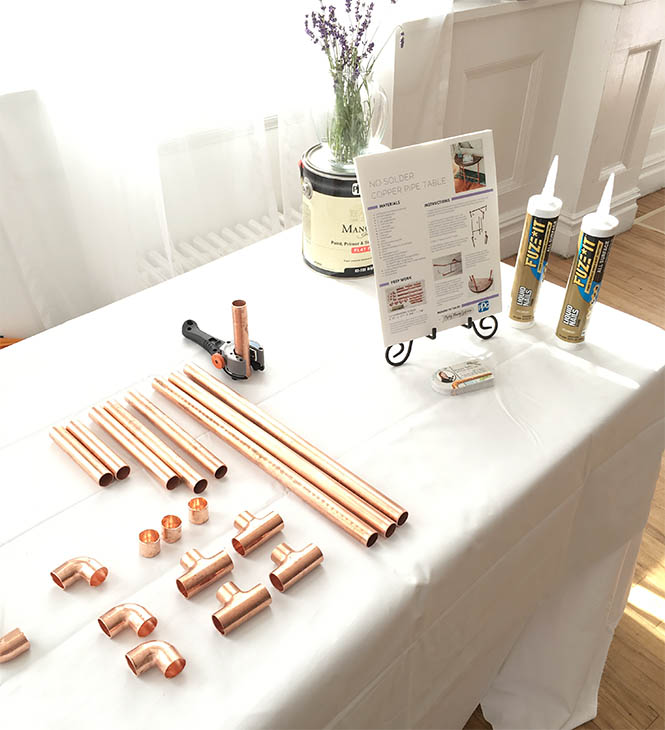
PPG Paint Trends and Demo Event Giveaway | Pretty Handy Girl

You may recall my tutorial to build the half round wood & copper side table. It was the same table with a twist!
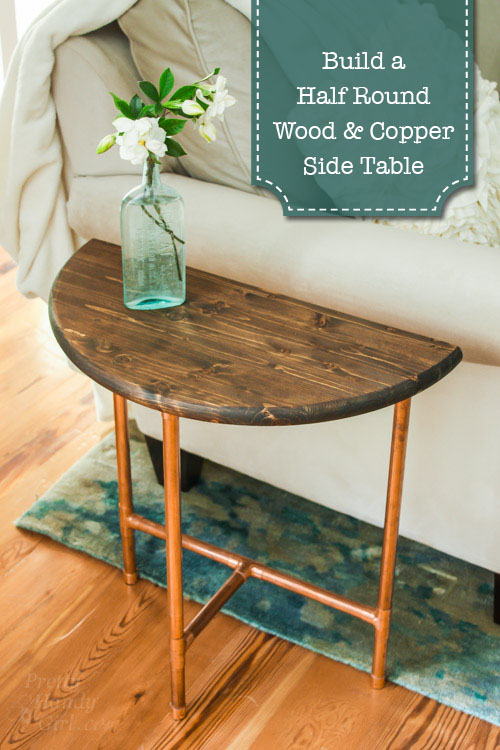
Half Round Copper & Wood Side Table | Pretty Handy Girl

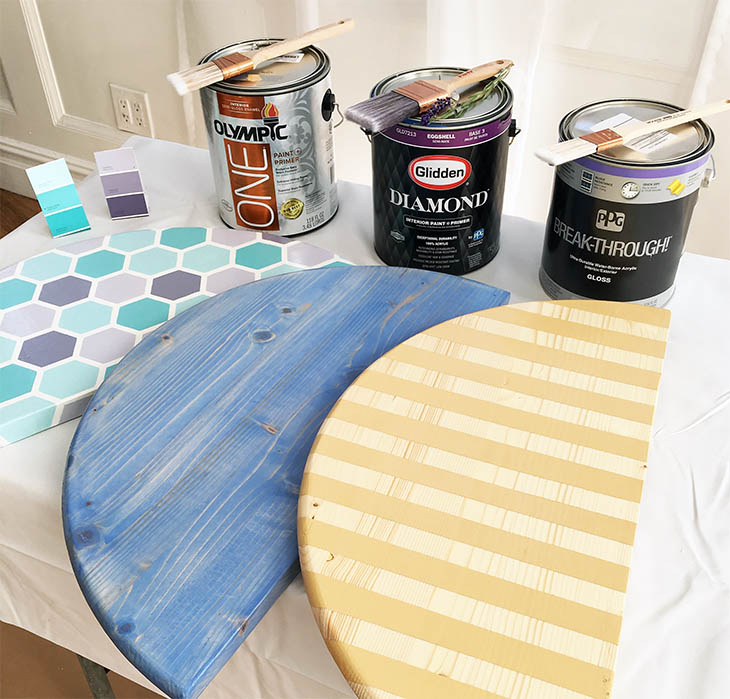
The twist was being able to experiment with different styles for the table top. (More on how I created the tops later.)
PPG Paint Trends and Demo Event Giveaway | Pretty Handy Girl

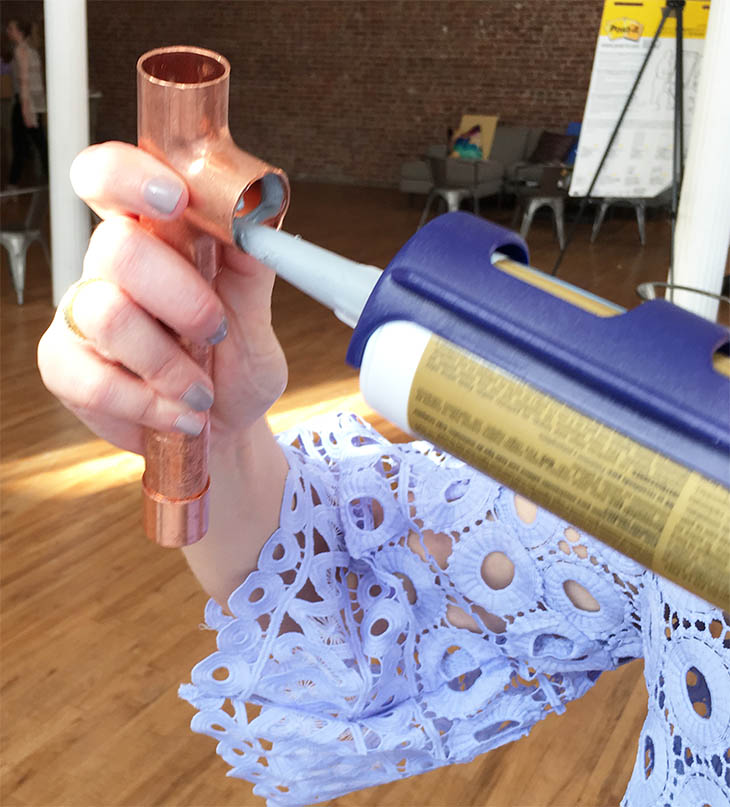
If you’ve ever been present at one of my demonstrations, you probably got your hands dirty. This event was no different. I enjoyed making the ladies use the caulk gun to help assemble the copper pipe legs. Nothing beats hands on learning. 😉
PPG Paint Trends and Demo Event Giveaway | Pretty Handy Girl

I decided it would be fun to make four different table tops to show how this little copper pipe table can fit with any decorating style. From the urban cowboy to the trendy tween—I found a look for each one. To customize each table, I experimented with paint techniques using PPG paint color trends:PPG paint color trends: Olympic ONE® in Honey Bunny OL654.3,  Glidden DIAMOND in Portuguese Blue, and PPG Paints BREAK-THROUGH!® paint in Violet Verbena PPG1169-5.

PPG Paint Trends and Demo Event Giveaway | Pretty Handy Girl

Ready to see the finished tables? You will be amazed by the different styles!

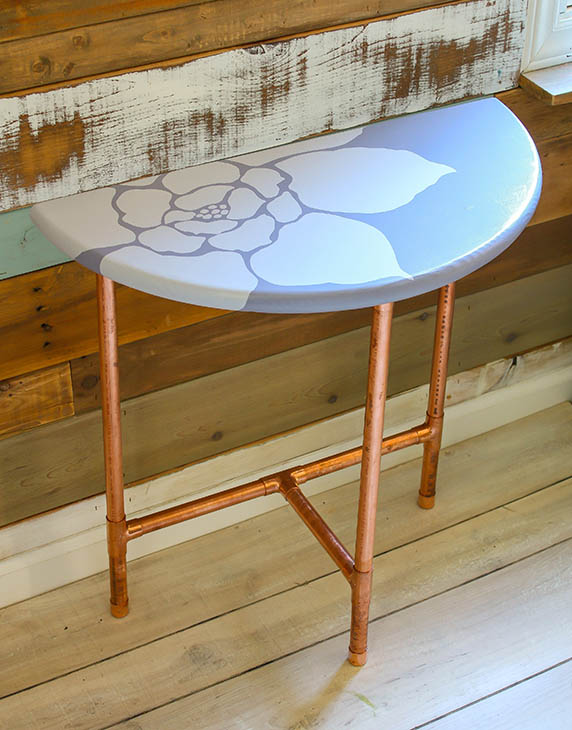
This sophisticated floral table features PPG Paints Break-Through! paint in Violet Verbena PPG1169-5:
Half Round Copper Table Giveaway | Pretty Handy Girl

To re-create the look, you’ll need:

Paint the table top with the Seal Grip Primer. Let dry. Paint two coats of PPG Paint in Violet Verbena. Let dry. This won’t take long because PPG Breakthrough Paint dries to the touch much faster than other latex paints. The Breakthrough paint also has flexibility to resist cracking and peeling.

Draw a floral design with chalk. Paint in the design with the lightened version of Violet Verbena. Let dry and touch up any areas that might need more paint. No need to seal this table top. The Breakthrough paint will resist water and anything life can dish out.

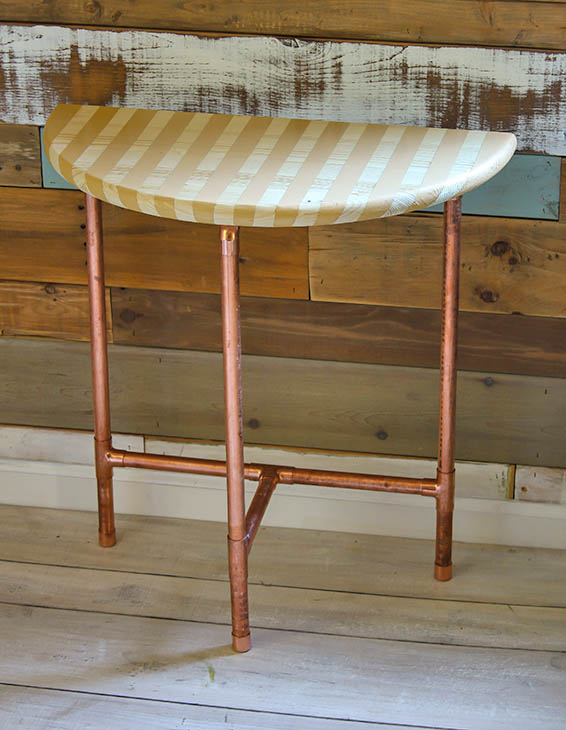
This striped beauty features Olympic ONE in Honey Bunny OL654.3:
Half Round Copper Table Giveaway | Pretty Handy Girl

I love the warm neutral color of Honey Bunny and how it blends nicely with raw wood. To recreate this table you’ll need:

Measure and mark 1 ½” increments along the straight edge of the table top. Tape off every other section using the painter’s tape. To seal the edges of the painter’s tape, press firmly along the edges with your finger. Then dip your paint brush in Olympic One paint and lightly paint along the edge of the tape (use very little paint for this step.) Let the paint dry a few minutes. Fill in the remainder of the stripes with paint.

After the stripes dry, coat the entire table top with Deft Interior Polyurethane Water Based Acrylic. This will seal the raw wood stripes. If you painted the entire top with Olympic One, no Deft Polyurethane is needed.

This is a quick project because you don’t need to use a primer when you paint with Olympic One paint. Also, the primer would show on the edges of the stripes.

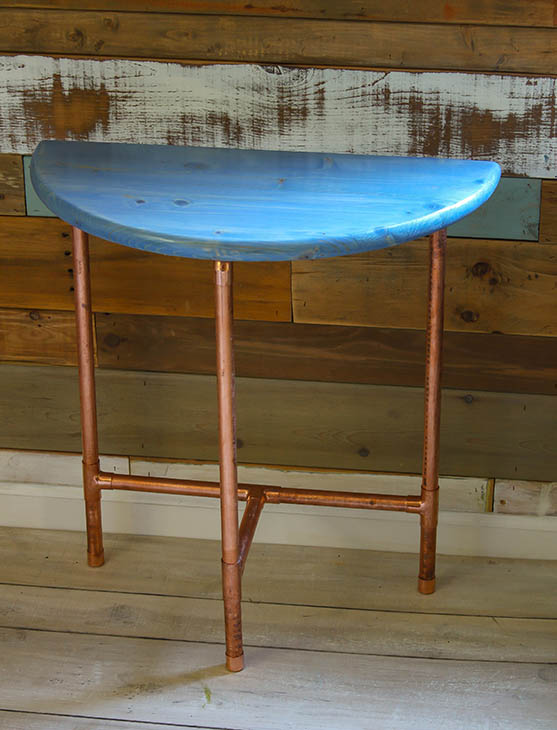
This minimalist blue stained table was created using Glidden Diamond in Portuguese Blue:
Half Round Copper Table Giveaway | Pretty Handy Girl

The blue color-washed table was achieved using a 1:1 watered down version of Glidden Diamond in Portuguese Blue. To re-create this look, you’ll need:

  • Glidden Diamond Paint in Portuguese Blue
  • 2″ Paint Brush
  • Dry Rag
  • Deft Interior Polyurethane Water Based Acrylic

Brush the Glidden Diamond Paint onto the table top (brush strokes should go with the grain.) Immediately wipe the excess off with a dry rag. After the paint dries, seal the table top with Deft Interior Polyurethane Water Based Acrylic. Because the paint was watered down, it’s advisable to use a polyurethane to completely protect the table top. With a full coat of Glidden Diamond, no primer or sealer is needed. The paint sticks perfectly to raw wood.

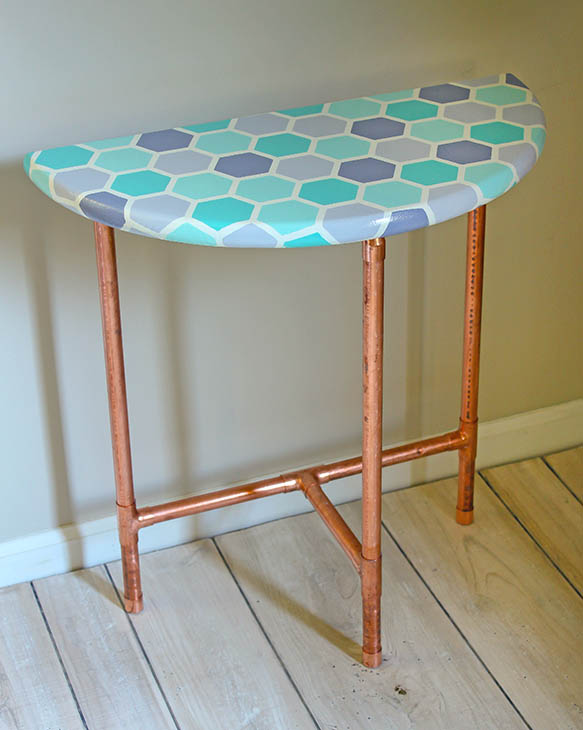
This fun geometric table was created using PPG Paints brand’s Violet Verbena PPG1169-5 and Glidden paint’s Tropical Surf 30BG 72/069:
Half Round Copper Table Giveaway | Pretty Handy Girl

I created the geometric table top by using a hexagon stencil I made on my Cricut vinyl cutter. If you don’t have a vinyl cutter at your disposal, you can purchase a hexagon stencil here.

To re-create this tabletop, you’ll need:

Apply one coat of PPG Seal Grip Acrylic Primer/Sealer.  After the primer dries, paint 1 coat of white paint onto the table top. Let dry. Position the stencil onto the table top. Use a stencil brush (or sponge) to pounce one color randomly into several hexagons. When finished with one color, you should be able to start right away using the next color even if it is next to a painted hexagon. That’s the beauty of the PPG Breakthrough paint. It dries to the touch much faster than other latex paints. Plus, it has a flexible finish that will resist cracking or peeling. Continue filling in hexagons until you’ve filled them all in. Carefully remove the stencil and touch up any mistakes with a small brush. No need to add a protective polyurethane. The PPG Breakthrough paint will resist water, scratches and abusive children.

Here’s a little more information about the paints I used:

PPG PAINTS™ are available at over 600 PPG Paints stores and thousands of independent retailers

  • The PPG Paints brand introduced the next generation of the <50 grams per liter volatile organic compound (VOC) version of BREAK-THROUGH!® interior and exterior water-borne acrylic paint earlier this year. Break-Through! paint offers a unique and versatile technology that provides excellent adhesion, hardness and block resistance to a variety of residential and commercial surfaces. 

OLYMPIC® Paints & Stains – Available at Lowe’s Home Improvement stores

  • Olympic ONE® Interior and Exterior Paints are engineered for ultimate performance and durability. The high-quality paint and primer in ONE offers easy application, a variety of gorgeous color options and a durable finish that’s easy to keep beautiful.

GLIDDEN® Paint – Available at THE HOME DEPOT®, WALMART® and independent retailers

  • In July 2016, GLIDDEN DIAMOND™ paint launched exclusively at The Home Depot. A 100 percent acrylic paint + primer, it provides a smooth, beautiful finish with diamond-tough durability that withstands daily wear and tear.

GIVEAWAY TIME!

Do you have a favorite table? Let me know in the comment below because PPG and I decided it would be fun to giveaway these tables to a few of my readers! You have until Monday, December 12th to enter to win one of these fun tables! (See terms and conditions below.)

Good luck!

PHGFancySign

Disclosure: This is a sponsored post for PPG. I was provided with complimentary travel and airfare to attend the event. I was also compensated for my time.  All opinions are my own.

Terms & Conditions: Winners will be selected randomly. Entries must be received by Sunday, December 11th, 2016 at 11:59pm EST. Contest open to Continental US residents only. Must be an adult aged 18 and older. Winner will be notified by Wednesday, December14th via email. Winner must reply to email within 2 days of receiving the notice. Please be sure you have [email protected] as an acceptable email address.
Prizes will be fulfilled by PPG. Pretty Handy Girl cannot be held responsible for prizes that are lost or damaged en route.

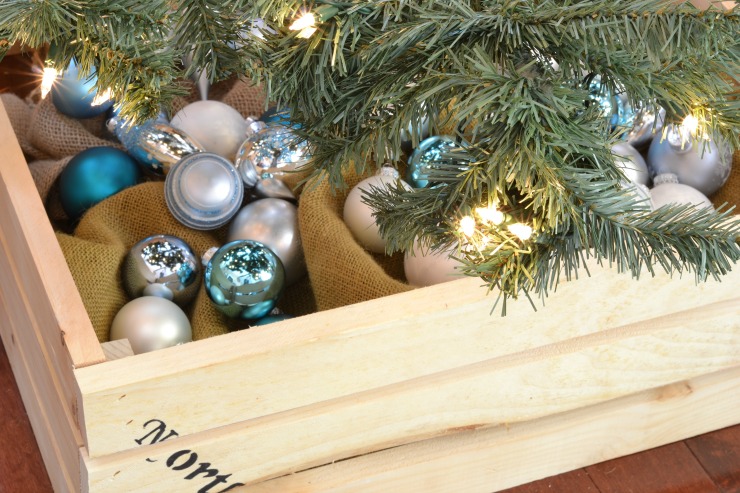
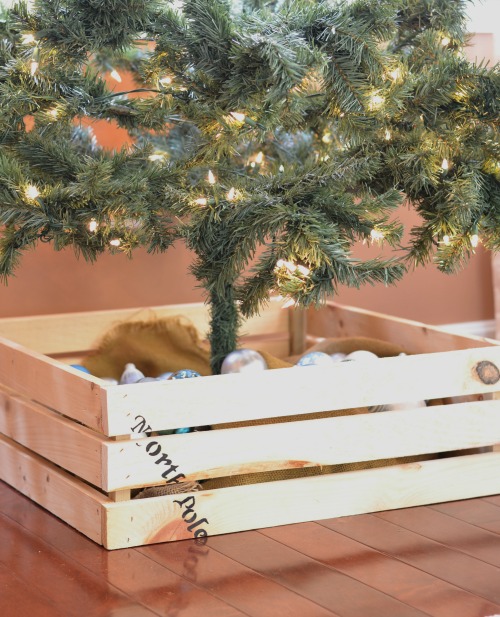
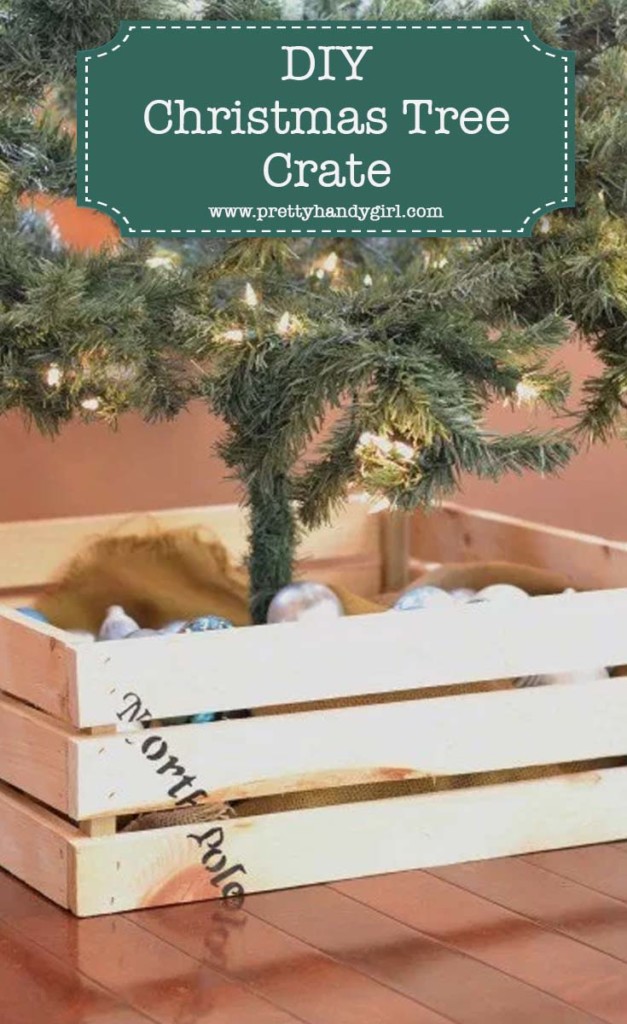
This quick and easy DIY Christmas tree crate is just what you need to update your decor this year.

This quick and easy DIY Christmas tree crate is just what you need to update your decor this year.

Hi Pretty Handy readers! It’s Jillian from I Am a Homemaker, and I am here to share a fun and inexpensive idea to hide your Christmas tree stand.

I have always had a tree skirt for my tree, but this year I thought I would mix it up a bit.  I have so much scrap wood in my shop. Finding uses for it is almost a relief. It took one hour and cleared up one tiny little section of my pile, but now I have a great DIY Christmas Tree Crate for the bottom of my tree. Interested to learn how to make your own? Let me show you!

(I’ve included affiliate links for your convenience. I earn a small percentage from a purchase using these links. There is no additional cost to you. You can read more about affiliate links here.)

Materials:

Cut List:

  • 12 – 1″ x 2″ @ 24″
  • 4 – 1″ x 1″ @ 7.5″ cut from left over 1×4

Instructions:

Step 1: Before we get into cutting, measure your tree stand. My tree stand is 20″ across but I wanted to make the crate to accommodate any stand I may buy in the future, so I made each side of my box 24″ long.

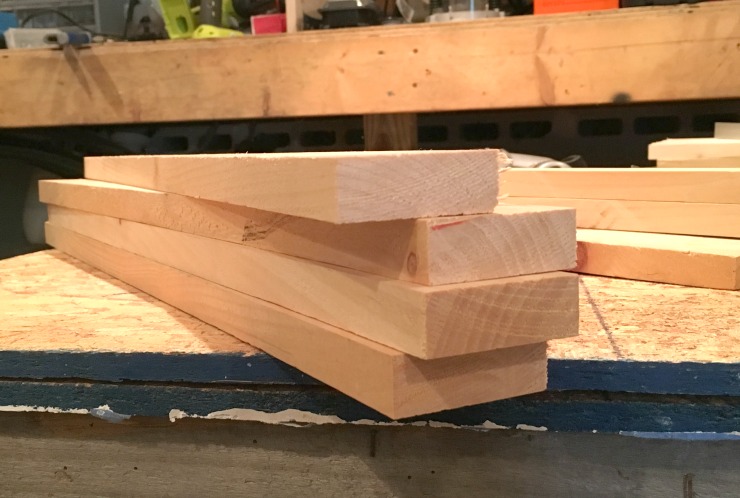
Cutting a 1×4 down to size makes this project inexpensive, but if you aren’t comfortable using a table saw you could also buy 1×2 boards instead.

This quick and easy DIY Christmas tree crate is just what you need to update your decor this year.

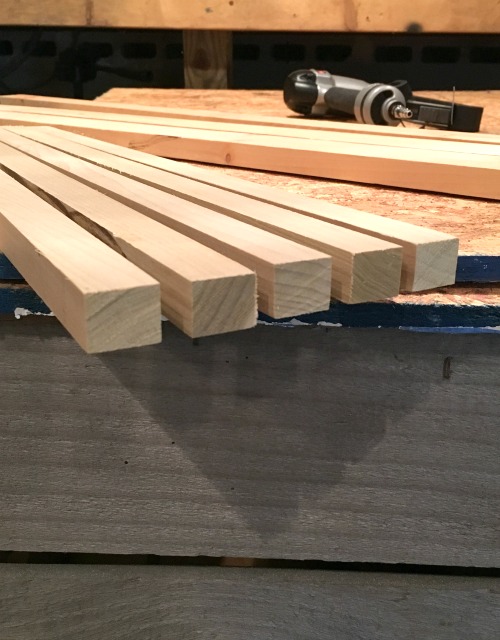
The 1x4x8 can be cut in half lengthwise and then cut into 24″ sections. You will have enough scrap left over to slice into 1″x1″ pieces for the corners. We’ll pretend I only took a picture of 4, right? ‘Cause you only need 4 ;-).

This quick and easy DIY Christmas tree crate is just what you need to update your decor this year.

Step 2: Lay two 1×1 boards onto your work surface. Dry fit the 1x2s on the top to figure out your spacing. You can just eyeball a space that looks good to you. (I’m sure Santa doesn’t require the elves to have perfect measurements on shipping crates.)

Glue and staple the 1x2s onto the 1x1s.

It is fine if you want the top 1×2 to come a bit above the 1×1.

This quick and easy DIY Christmas tree crate is just what you need to update your decor this year.

Step 3: Continue stapling the 1×2 boards onto the 1×1 to create a box. Line the sides up flush on the ends.

This quick and easy DIY Christmas tree crate is just what you need to update your decor this year.

There is no need to create a bottom because the tree will sit directly on the floor in the middle of the crate.
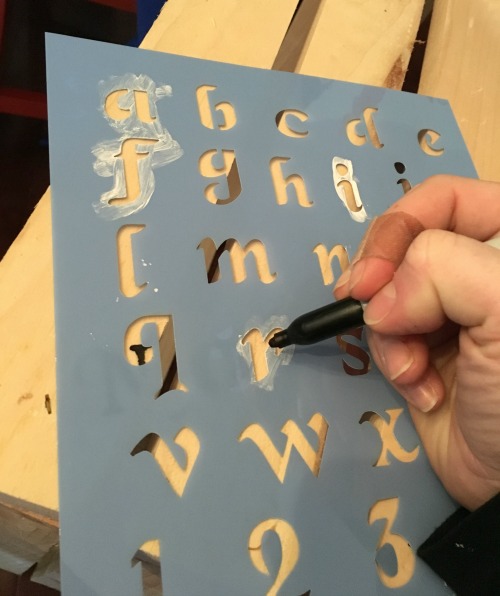
Step 4: Once you have completed the four sides of your crate, you can customize it with stencils. You could write something like “North Pole” or “To: your family’s name From: The North Pole.”
This quick and easy DIY Christmas tree crate is just what you need to update your decor this year.

Step 5:

Add your tree and some burlap, shredded paper or left over packing peanuts.  You could also add small, wrapped gifts or ornaments for fun.

This quick and easy DIY Christmas tree crate is just what you need to update your decor this year.

I have been meaning to build this for years. I am so glad I can finally cross it off my list!

This quick and easy DIY Christmas tree crate is just what you need to update your decor this year.

I’m off to wrap some gifts and get this season started.

This quick and easy DIY Christmas tree crate is just what you need to update your decor this year.

What is your favorite way to camouflage your tree stand?

Jillian's Signature

-Read more of Jillian’s posts-


Pin for later!

Industrial Charging Station and Lock Box | Pretty Handy Girl

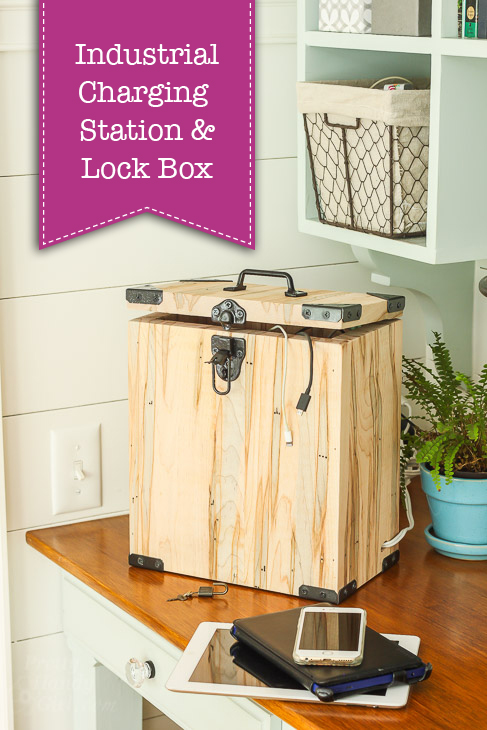
Industrial Charging Station & Lock Box | Pretty Handy Girl

We’ve definitely entered the digital age. My boys love nothing more than to plop down with an “i” device in their hands and waste time playing some electronic game or watching TV. We’ve always had strict rules about screen time. My boys have 20 minutes a day and can earn an additional 2o minutes by doing an assortment of helpful things. In the past year, my boys have begun “sneaking” extra screen time. One morning my husband came downstairs to find Handy Boy #1 asleep on the couch with the TV on and the remote still in his hand pointed at the TV — BUSTED! Another time, we found the boys huddled in the closet playing on the iPad. Although we put passcodes on all the devices, these boys seem to figure out the codes (and we’ve changed the codes so many times I can’t remember the new code.)
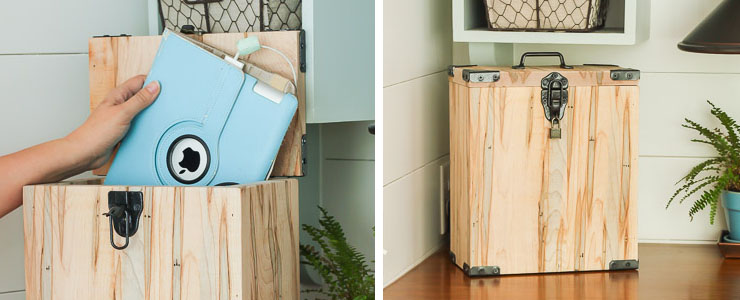
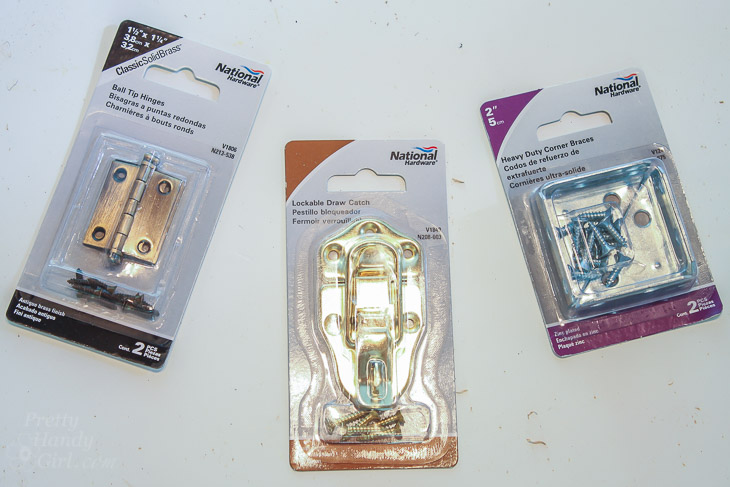
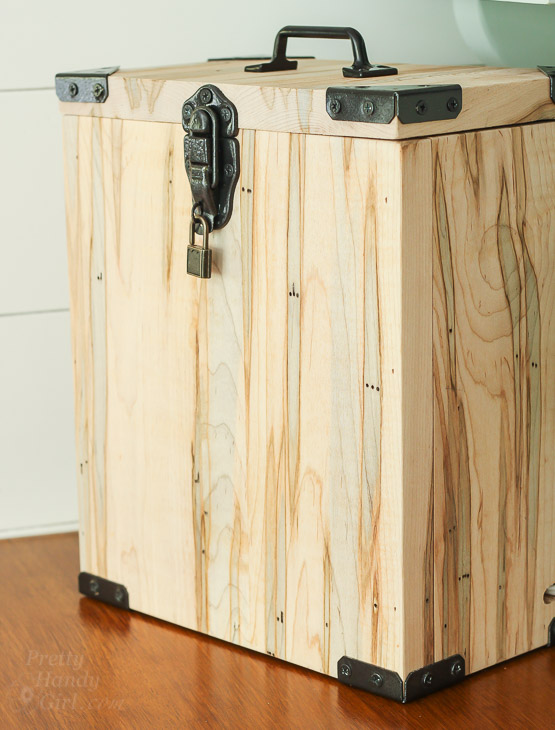
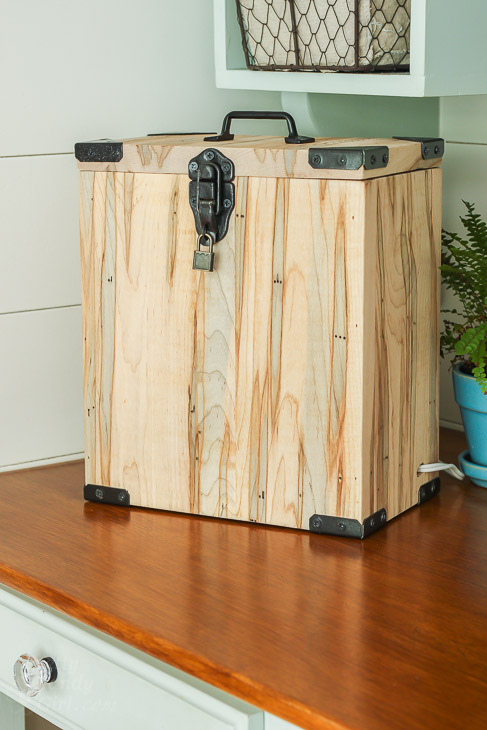
I decided to put an end to their shenanigans (and save my failing memory) by building an Industrial Charging Station & Lock Box. Want to make a charging station and lock box for your family? It’s an easy DIY project (sponsored by National Hardware) that will prevent your children from sneaking screen time.

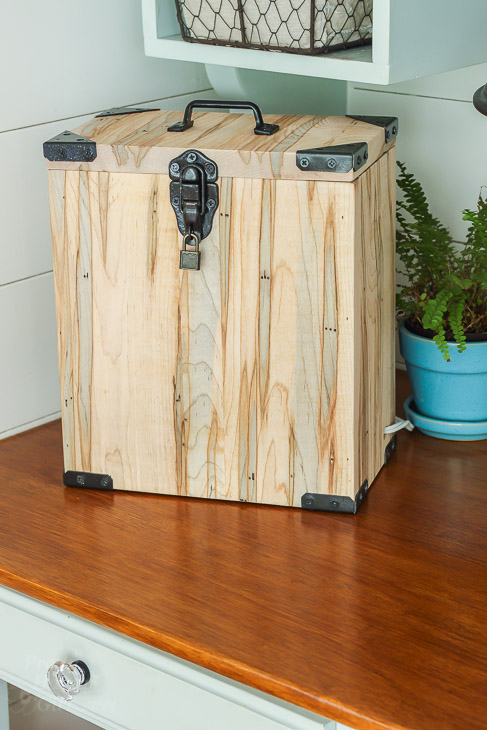
Before we jump into this tutorial, can we take a minute to admire that beautiful wood I used? I visited my local Woodcraft store and found myself drooling over all the wood varieties they stock. I was especially drawn to this ambrosia maple. The beautiful blue streaks tugged at my heart and wouldn’t let me walk away without buying the board. Luckily, I was able to make the entire industrial charging station from one 8′ board.

Industrial Charging Station & Lock Box | Pretty Handy Girl

Ready to build this puppy? Let’s gather the materials and tools!

(I’ve included affiliate links for your convenience. I earn a small percentage from a purchase using these links. There is no additional cost to you. You can read more about affiliate links here.)

Materials:

Industrial Charging Station & Lock Box | Pretty Handy Girl

Cut list:
(These measurements are actual size. Feel free to use your own measurements based on available lumber.)

  • 2 – 1″ x 11″ x 12″ (front & back)
  • 2 – 1″ x 5″ x 12″ (sides)
  • 1 – 1″ x 5″ x 9″ (base)
  • 1 – 1″ x 11″ x 7″ (top)
  • 1 – 1″ x 2″ x 5″ (interior shelf)

Preparation:

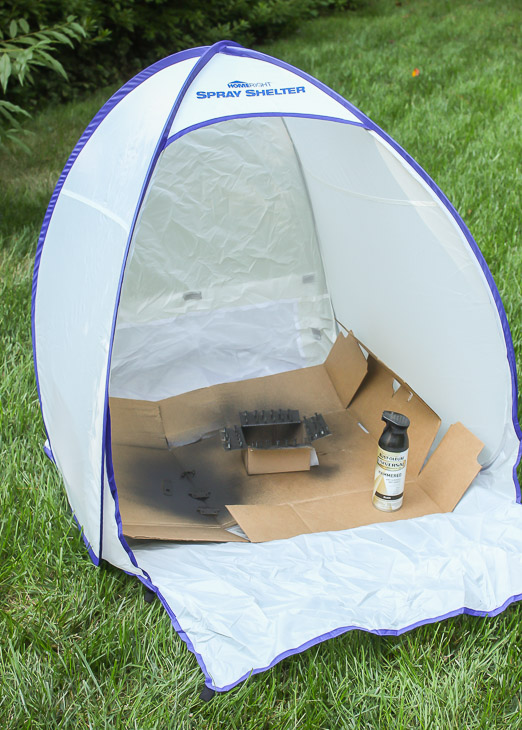
Spray paint all hardware to match using hammered metal spray paint. Let the hardware dry while you build the charging station.

Industrial Charging Station & Lock Box | Pretty Handy Girl

Instructions:

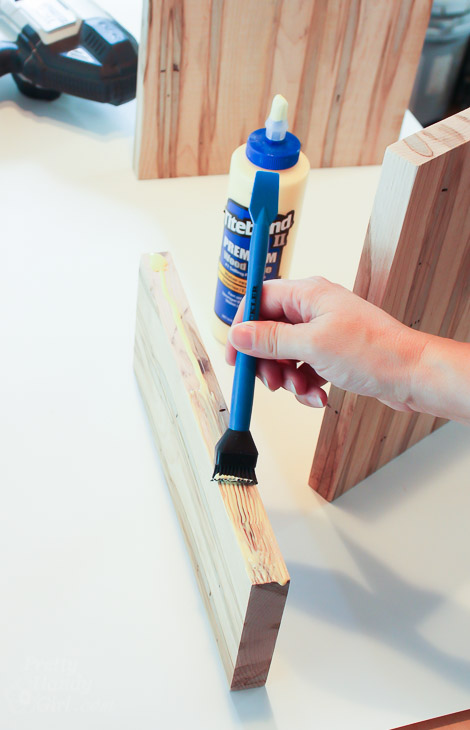
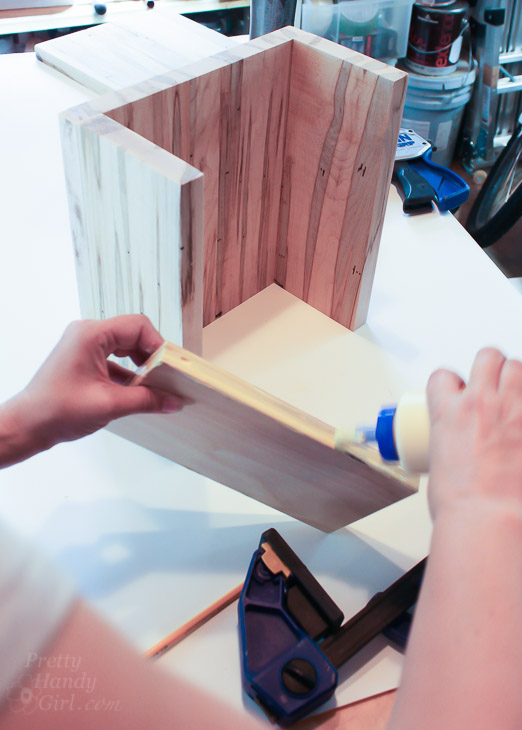
Add glue to one long side on each of the side pieces.

Industrial Charging Station & Lock Box | Pretty Handy Girl

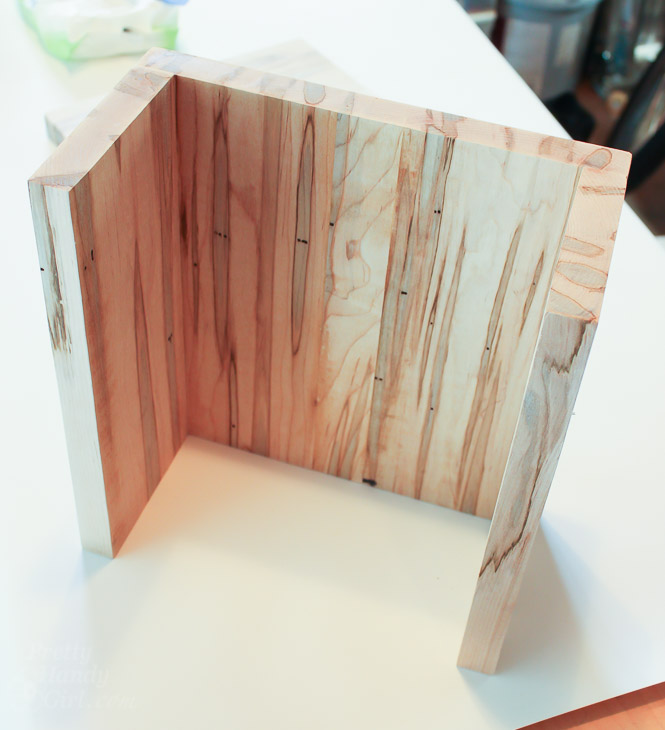
Line up the two sides with the back. Glue onto the back piece.

Industrial Charging Station & Lock Box | Pretty Handy Girl

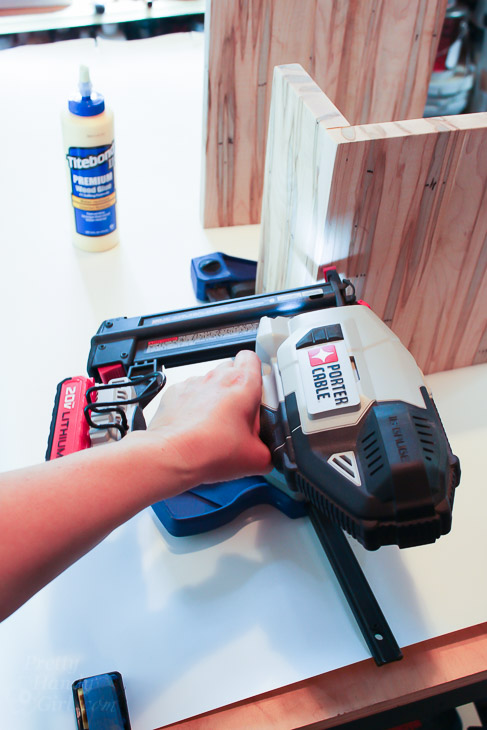
Clamp and secure with finish nails.

Industrial Charging Station & Lock Box | Pretty Handy Girl

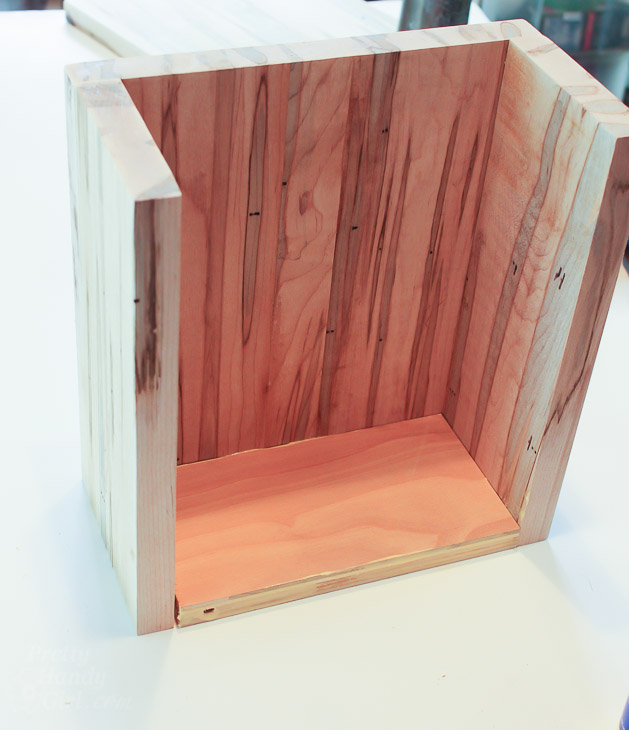
Add glue to the perimeter of the base.

Industrial Charging Station & Lock Box | Pretty Handy Girl

Set the base inside the box form.

Industrial Charging Station & Lock Box | Pretty Handy Girl

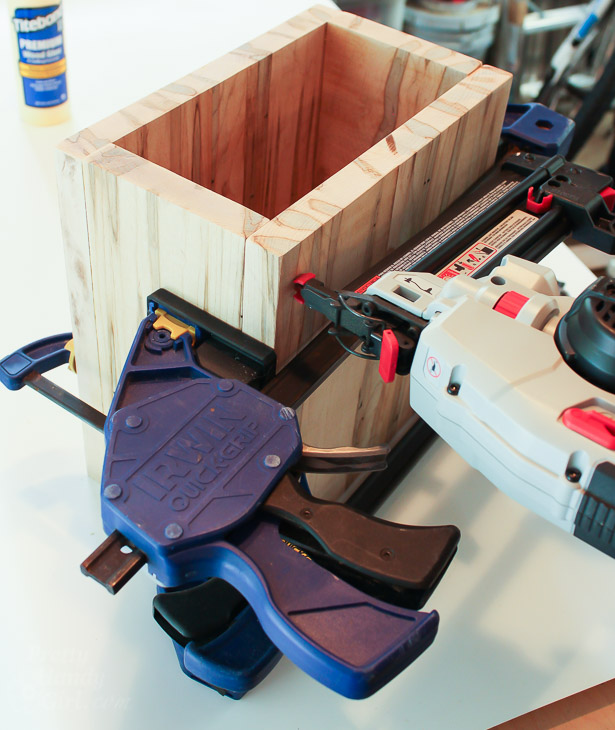
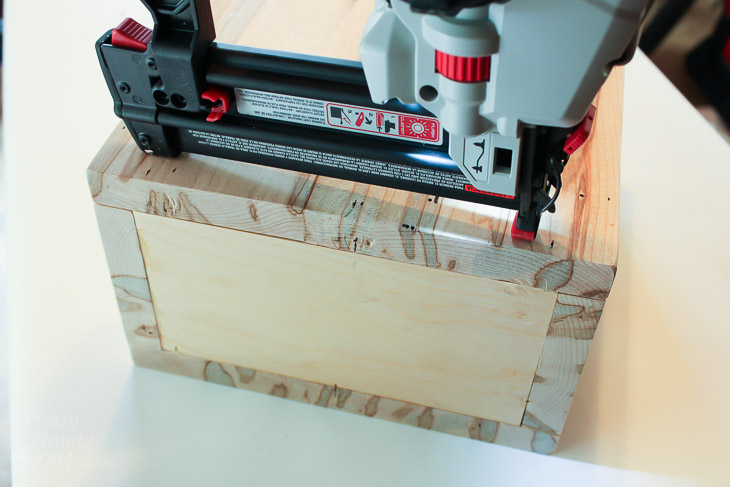
Add the front. Clamp and nail the front to the two sides.

Industrial Charging Station & Lock Box | Pretty Handy Girl

Secure all four sides to the base with finish nails.

Industrial Charging Station & Lock Box | Pretty Handy Girl

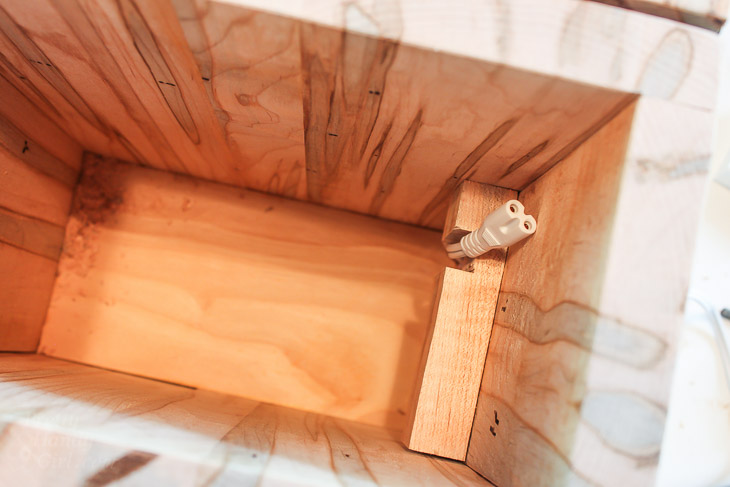
Cut a notch into the 1″ x 2″ piece of wood to accommodate the USB power plug.

Industrial Charging Station & Lock Box | Pretty Handy Girl

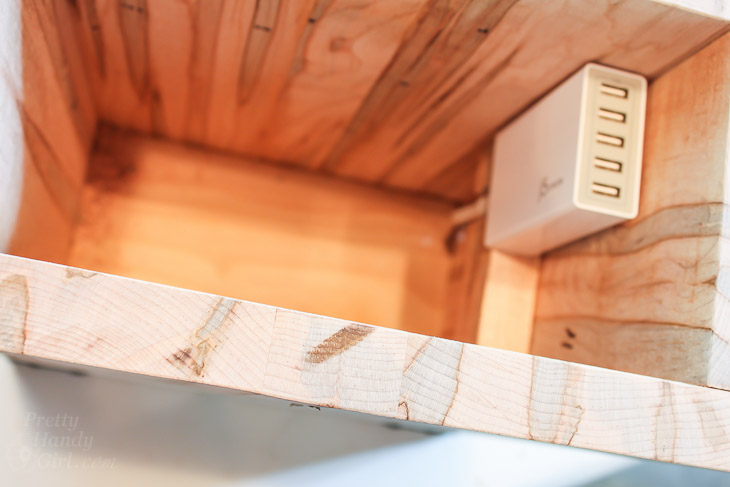
Glue the 1″x2″ piece 5″ down from the top of one side. (You can also drive two nails into the 1″x2″ for extra hold.)

Industrial Charging Station & Lock Box | Pretty Handy Girl

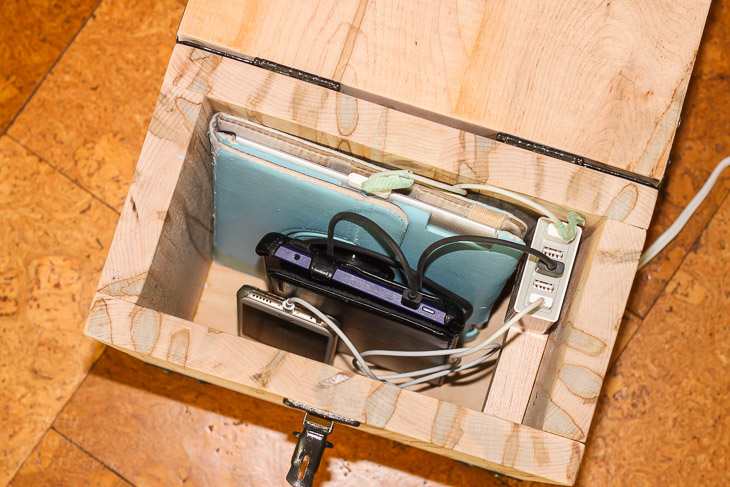
This will allow enough space for the USB charger and the device cords. Check measurements if you aren’t using the same port as I did. Use adhesive velcro to hold the USB charger against the side of the box.

Industrial Charging Station & Lock Box | Pretty Handy Girl

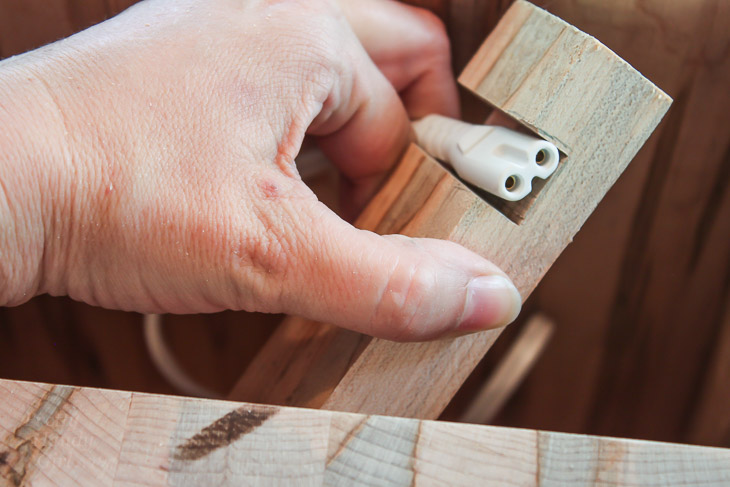
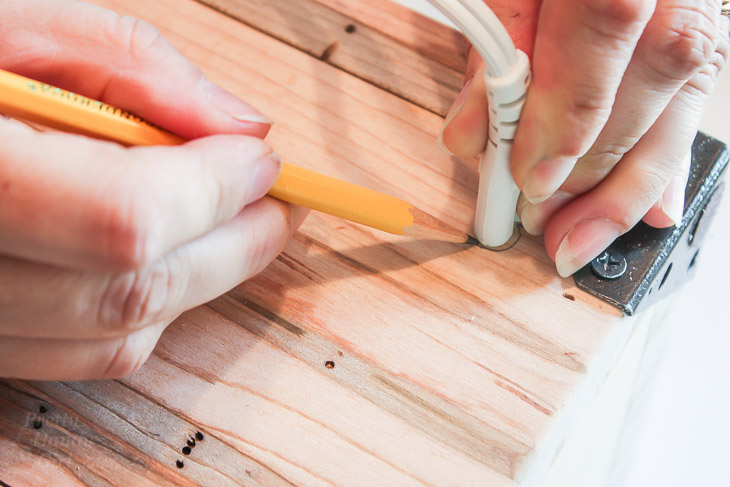
Decide where the power cord will enter the charging station/lock box. (Be sure to leave enough room for the corner brackets.) Trace the plug.

Industrial Charging Station & Lock Box | Pretty Handy Girl

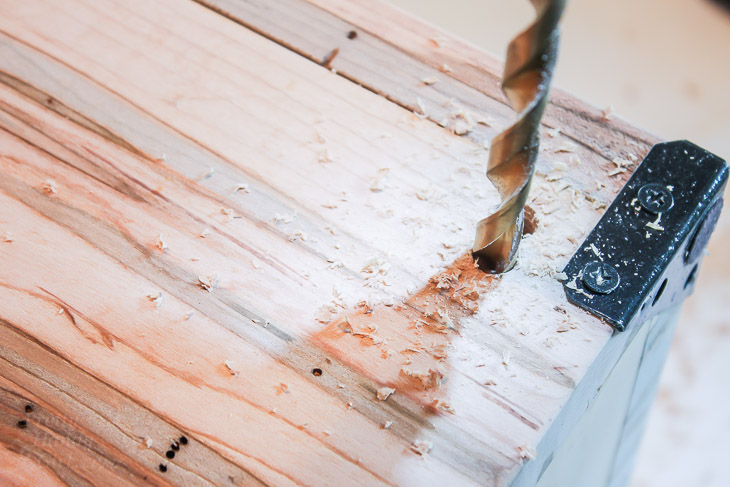
Use the 1/4″ drill bit to drill two holes side-by-side to accommodate the plug.

Industrial Charging Station & Lock Box | Pretty Handy Girl

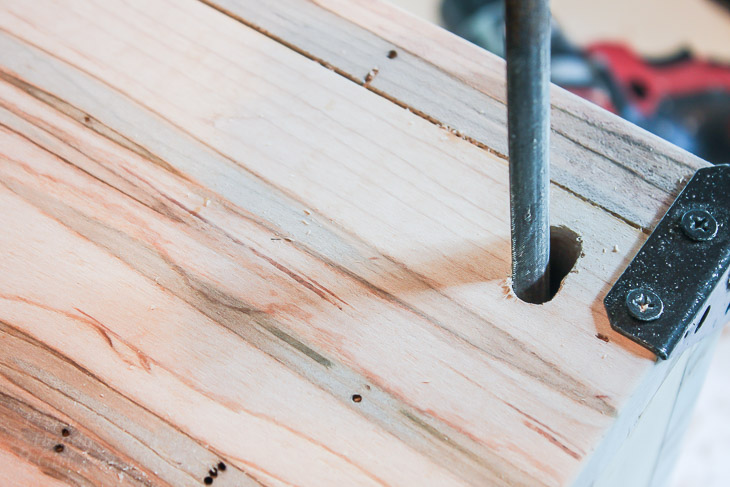
File the edges of the hole smooth.

Industrial Charging Station & Lock Box | Pretty Handy Girl

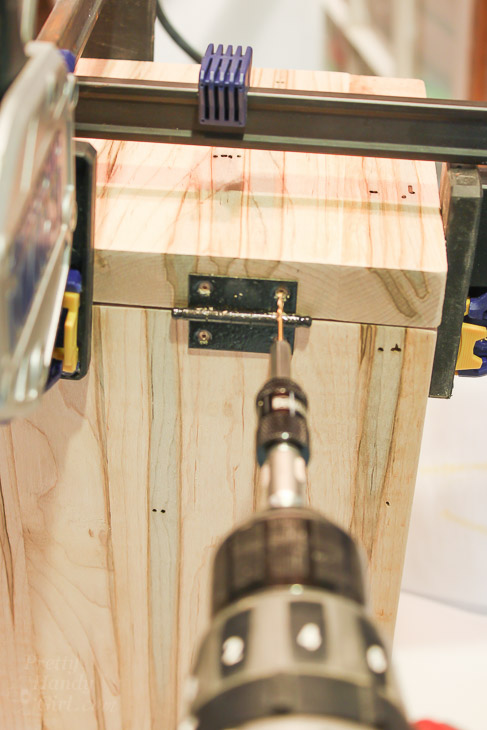
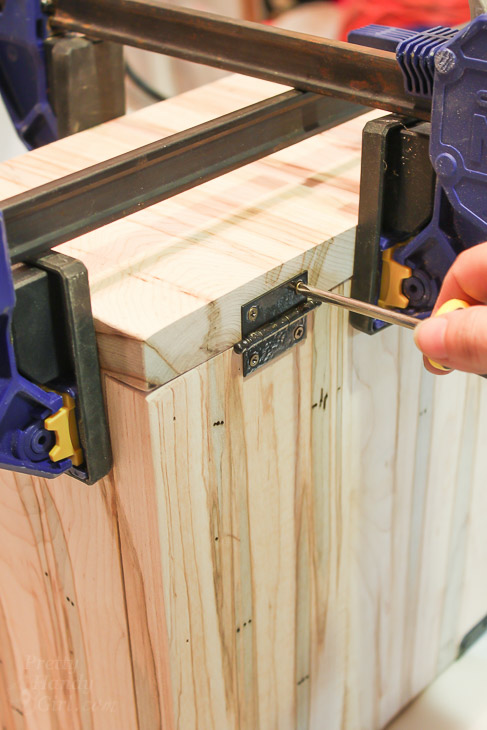
Line up the lid on top of the box. Clamp it in place. Pre-drill holes for the hinges.

Industrial Charging Station & Lock Box | Pretty Handy Girl

Use a screwdriver to secure the hinges to the back of the lock box and the lid.

Industrial Charging Station & Lock Box | Pretty Handy Girl

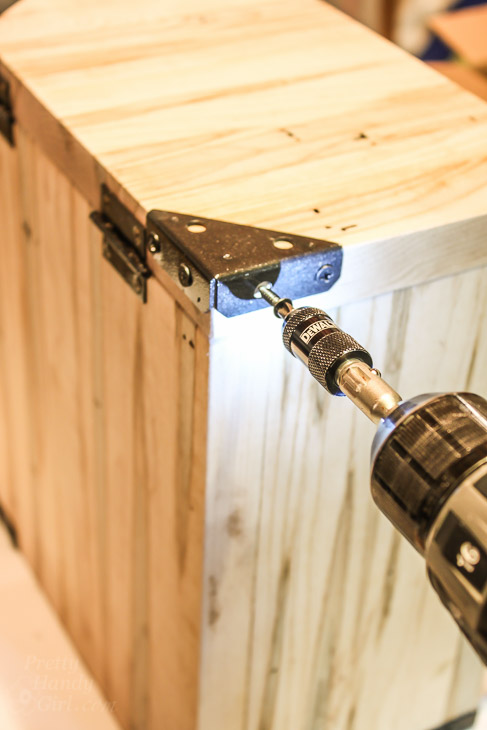
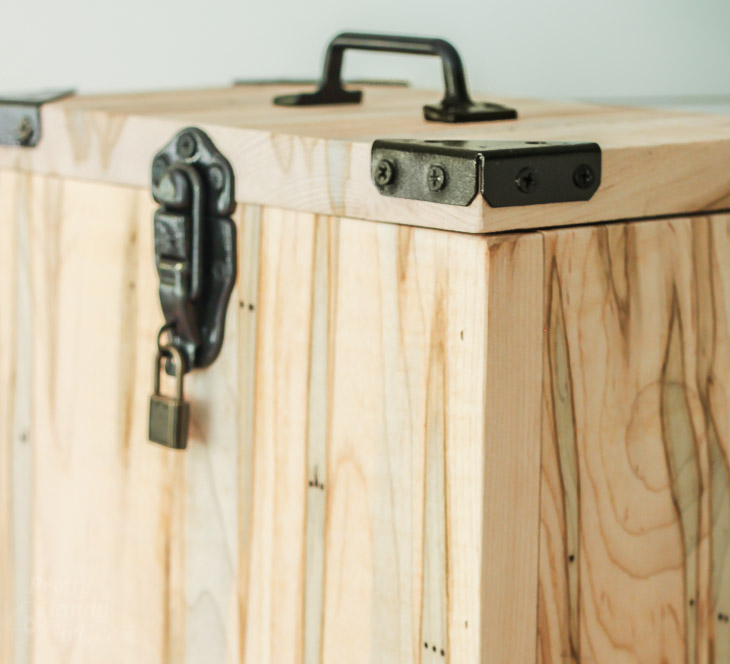
Add corner brackets to the four corners of the lid and the four corners of the base.

Industrial Charging Station & Lock Box | Pretty Handy Girl

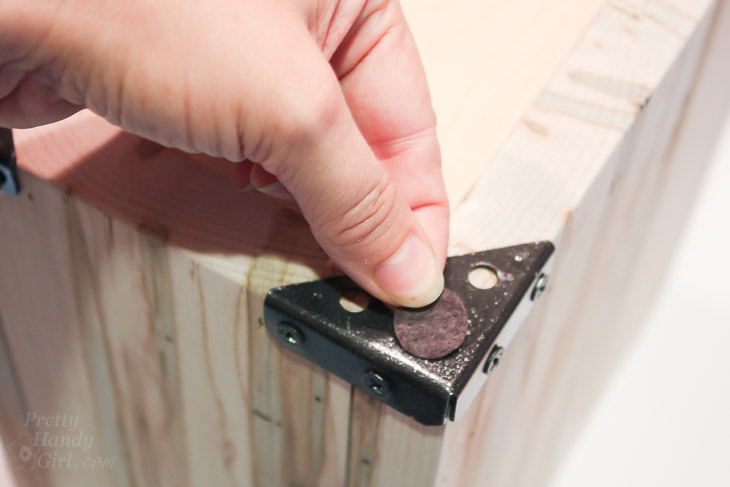
Turn the lock box over and add felt pads to the corner brace.

Industrial Charging Station & Lock Box | Pretty Handy Girl

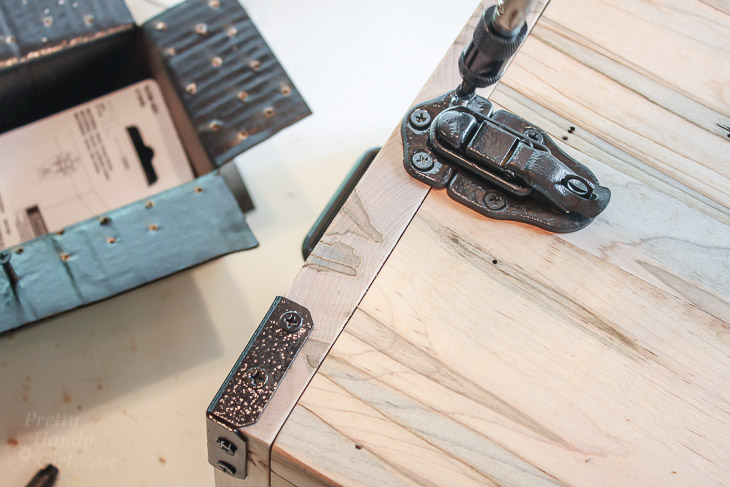
Find the center of the front and the lid. Attach the locking clasp to the front of the lock box (and lid).

Industrial Charging Station & Lock Box | Pretty Handy Girl

Add a handle to the lid if desired. (This makes it convenient for moving the box as it is heavy with all the devices inside.)

Industrial Charging Station & Lock Box | Pretty Handy Girl

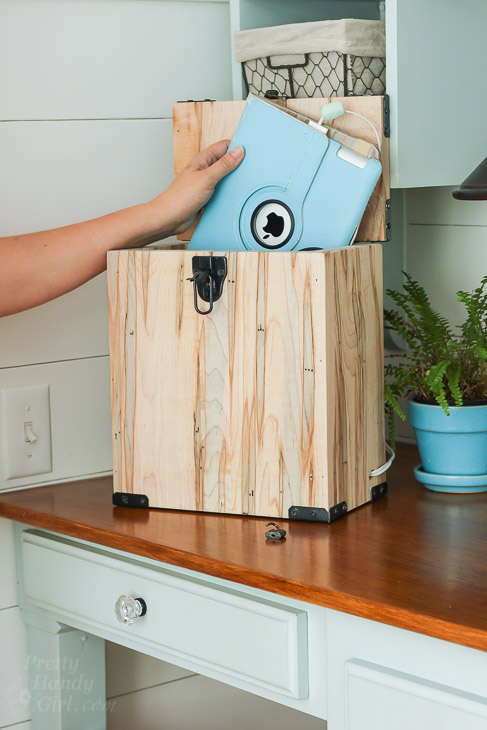
Fill the charging station with USB devices. Our lock box holds an iPad, a kindle, multiple iPods and iPhones. I left enough room to store the TV remotes as well. No more late night Netflix bingeing for my boys.

Industrial Charging Station & Lock Box | Pretty Handy Girl

Now I need to train the boys to put their devices into the charging station and lock box when they are done. Currently I gather them up at night and set them in the box.

Industrial Charging Station & Lock Box | Pretty Handy Girl

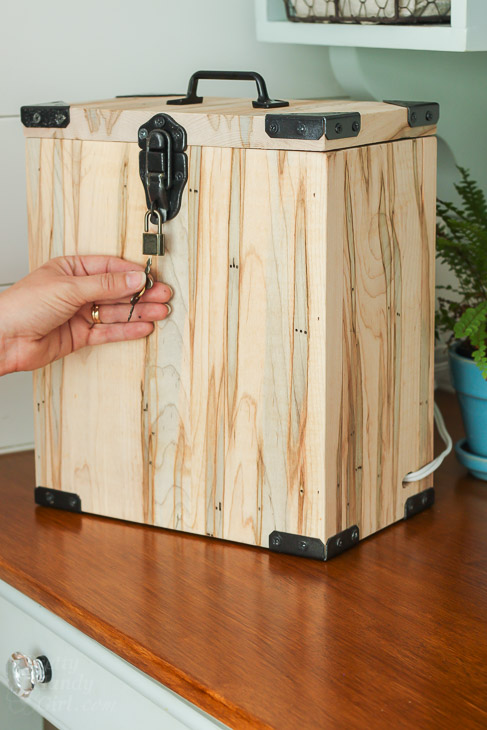
Then I put on the padlock . . .

Industrial Charging Station & Lock Box | Pretty Handy Girl

. . . and hide the key until morning. 😉

Industrial Charging Station & Lock Box | Pretty Handy Girl

I really love the industrial style of this charging station and lock box. It adds that look of rugged tough security.

Industrial Charging Station & Lock Box | Pretty Handy Girl

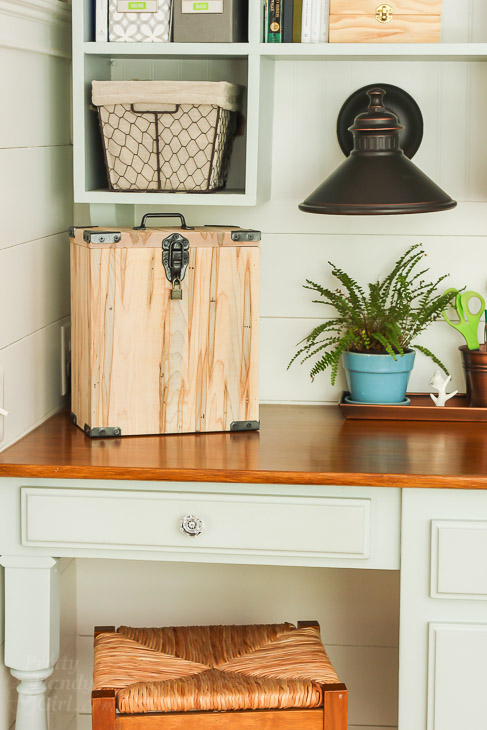
The charging station and lock box sits on my desk and plugs in. It can also rest on the floor near an outlet in the living room.

Industrial Charging Station & Lock Box | Pretty Handy Girl

Finally, I can rest at ease knowing nobody is sneaking downstairs to play Clash Royale or watch The Flash after I fall asleep. We certainly don’t need grumpy sleep-deprived boys in this house! How about your family? Do you have issues with kids who sneak screen time?

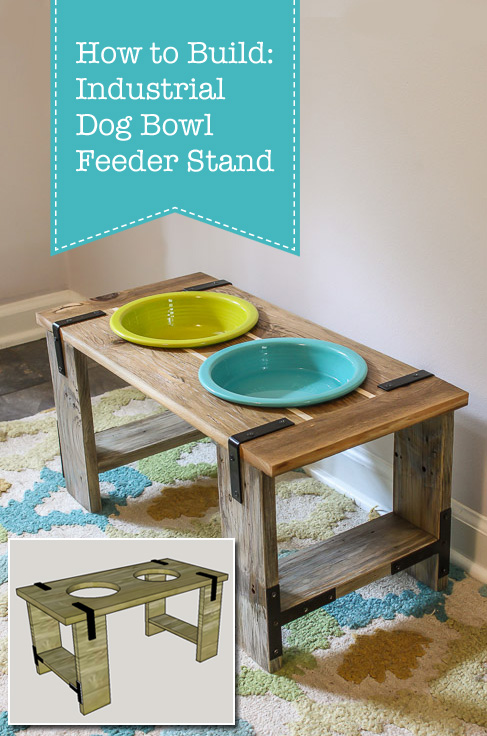
Did you like this project? If so, you’ll love building an Industrial Dog Bowl Feeder with an industrial design style.

How to Build: Industrial Dog Bowl Feeder Stand | Pretty Handy Girl

Have a great week.

PHGFancySign

Disclosure: This is a sponsored post for National Hardware. I was provided complimentary hardware and was compensated for my time and efforts to promote National Hardware. I was not told what to write. All opinions are my own. I am particular about the brands I represent and will always let you know when you are reading a sponsored post.

How to build an industrial hat rack to keep all your hats organized. | prettyhandygirl.com

How to build an industrial hat rack to keep all your hats organized. | prettyhandygirl.com

Hi Pretty Handy readers, it’s Jillian from I Am a Homemaker. I’m here to show you how I finally wrangled all the baseball hats my son has collected, with an industrial hat rack.

I absolutely love to add some unexpected touches to my projects and the plumbing aisle is a fantastic place to get those unique ideas.

My latest idea was hatched while trying to figure out what to do with my son’s ever growing baseball hat collection.  Iron pipes are used for everything from shelf brackets to table legs, and now we can add hooks to that list of usefulness.

How to build an industrial hat rack to keep all your hats organized. | prettyhandygirl.com

My son’s room already has some industrial decor, so using the pipes for this hat rack works perfectly.

Here’s how to DIY your own industrial hat rack.

Materials:

  • 1  1″ x 6″ board at 5′ long (The length can be altered to suit your needs but will also alter the number and placement of the flanges so adjust accordingly.)
  • 2 D-rings for hanging
  • 5   1/2″ iron floor flanges
  • 5   1/2″ iron 90 degree street elbows
  • 5   1/2″ iron plugs
  • 20  1/2″ screws (choose a finish that matches your flanges or spray paint them to match)

Instructions:

Step 1:

Cut the 1″ x 6″ board to the desired length. Sand the edges and finish to your style.

How to build an industrial hat rack to keep all your hats organized. | prettyhandygirl.com

Step 2: 

Place the top flange 1″ below the top of the board. Attach to the board with screws. Attach the remaining flanges to the board 8½” apart.

How to build an industrial hat rack to keep all your hats organized. | prettyhandygirl.com

Step 3:

Add the street elbows to the flanges. (I chose to make this rack to hang vertically to make the best use of a narrow wall space.)

How to build an industrial hat rack to keep all your hats organized. | prettyhandygirl.com

Step 4:

Add the plug into the top of the elbow and screw it in tightly.

How to build an industrial hat rack to keep all your hats organized. | prettyhandygirl.com

Step 5:

Attach the D-rings to the back for hanging.

How to build an industrial hat rack to keep all your hats organized. | prettyhandygirl.com

Another display option is to skip the D-ring and just lean it against the wall. I like it this way, but I don’t think free standing is the safest option for a child’s room. A furniture tether could be used to prevent tipping while still allowing it to stand on the floor.

All that’s left to do is gather up all your hats and have fun hanging them on their new, industrial hooks.

How to build an industrial hat rack to keep all your hats organized. | prettyhandygirl.com

With different D-ring placement and a little turn of the 90 degree elbow, you can easily hang this rack horizontally. You can also hang almost anything on this rack. How about towels? Flowers? Jewelry or purses? Use your imagination and get organized.

How to build an industrial hat rack to keep all your hats organized. | prettyhandygirl.com

I hope you enjoy this idea. Hopefully it pushes you to use your imagination and explore the hardware store.

Jillian's Signature

-Read more of Jillian’s Tutorials-


Pin for later!


How to build an industrial hat rack to keep all your hats organized. | Industrial DIY project | DIY hat rack | Pretty Handy Girl #prettyhandygirl #DIY #industrialdecor #homeorganization

How to build an industrial hat rack to keep all your hats organized. | Industrial DIY project | DIY hat rack | Pretty Handy Girl #prettyhandygirl #DIY #industrialdecor #homeorganization