I’ve been super busy this weekend finishing up some projects. I’m very excited and can’t wait to show you some of them.

However, because several of them are tutorials (which take a little longer to write up), I decided to share with you a guest bathroom makeover from our old house.

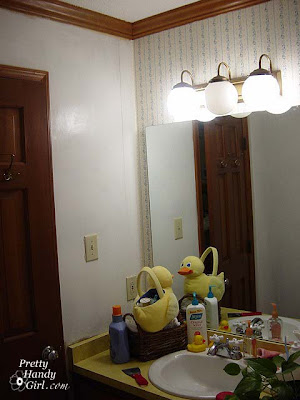
This poor bathroom had an identity crisis.

With its 1970’s light fixture, 
 
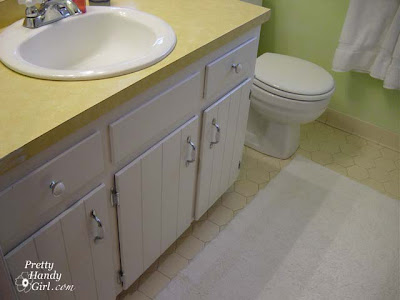
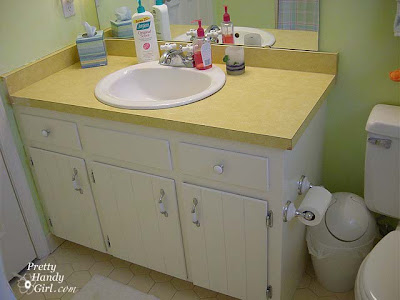
Harvest gold laminate counter top and dark wood vanity,
 
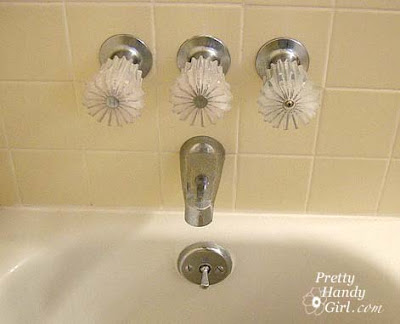
Sunburst shaped handles that hurt your hands to use them,


and Laura Ashley style wallpaper.

The first thing we did was strip the wallpaper in this room. If you have never stripped wallpaper, there are two types of wall paper stripping projects. The easy ones and the hard ones! Luckily we had an easy one.

Awww, doesn’t Pretty Handsome Guy look happy?!  

The walls had been primed before the wallpaper was attached (as opposed to gluing the wallpaper on top of the drywall (or sheetrock as some people call it.)
Forget the steamer, forget the chemicals, we used these tools:

  • Cheap, cheap, cheap pink fabric softener mixed 1:1 with water
  • Spray Bottle to pour your fabric softener mixture in
  • Paper Tiger or wall scoring tool
  • Wallpaper scraper – We really liked the Piranha shaver since it has a razor sharp blade
  • Or Wallpaper Trim Tool

You start by scoring the wall with the Paper Tiger or similar tool. The more holes the better, so put on some dancing music and get busy.

Then you spray the walls with your fabric softener mixture. Really saturate them! Wait 15 minutes, then spray them again. Now, use your scraper to start peeling. I truly hope your sheets come off in nice big sheets like ours did. If not, you may have to have your walls re-skimmed with spackle or joint compound.

Or, I hate to mention this, but you could paint over the wallpaper. We have two rooms in our current home that this was done in (we know for a fact that the wallpaper was glued to the drywall without priming first.) If you take this route, I want to let you in on two secrets:

  1. Use an eggshell or satin finish paint (it will not show the edges or imperfections as easily.)
  2. Take the time to make sure all the wallpaper seams are glued down and then spread some joint compound or spackle over the seams and sand it smooth. This will get rid of the tell-tale seam lines when you paint over wallpaper.

After you have removed all the wallpaper you need to wash your walls really well to remove the glue. We saturated the walls again with the fabric softener and then cleaned it off. Finally, we used TSP cleaner (available at any home improvement or hardware store) to get the walls perfectly cleaned.

Then I painted the walls a bright Nickelodeon slime green. I kid you not, but I didn’t take a picture of it in that state. My friends thought I had flown the cuckoo’s nest. But, I went back with a creamy lemon glaze and ragged it on top. The result was a beautiful lime sherbert color (perfect for a little boy or girl’s bathroom.)

Next, the light fixture had to go, and it went quickly!

 I replaced it with a four light chrome fixture.
Then, I had to paint over that ugly vanity cabinet:
 
Now that is looking better! I added new chrome/porcelain pulls.

But, that harvest gold vanity would not stop shouting “groovy dude” whenever I saw it. So, it had to go too. Unfortunately, we were on a limited budget, so I had to get creative.

 
I fixed the chipped corner and seams with wood putty.
Then I sanded and primed the countertop with Zinser Oil based primer
(A necessity to get the  surface prepped with a super adhesion coat of primer)
so I could do this:
 
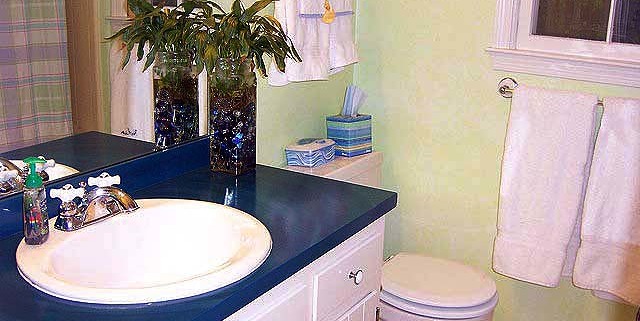
 Beautiful blue water reflections
I painted the vanity top and then added five coats of polyurethane to seal it. I recently had the opportunity to visit our old house and couldn’t wait to see how the vanity top held up over the years. It really held up better than I expected. There was some slight chipping where the back of the sink met the back splash. I should say that our neighborhood has very hard water and this is where the splashed water would hide and sit. So, for the cost of paint, we had a new vanity top that has held up to use for over three years so far.
 
So, are you ready to see the final reveal? Here it is:
Before: 
After: 
In case you are wondering what ever happened to those sunburst tub faucet handles:
Yes, that is me, installing new valve stems at 8.5 months of pregnant bloated-ness. 
That was also THE day I went into labor!
Anyone else have some crazy last minute pregnancy stories?


If you were here the other day to see my dormer window transformation, you may have seen my exterior lights. I’ll be talking about Installing New Exterior Lighting today!

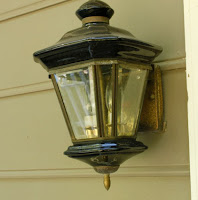
Then again, maybe you didn’t because they are miniscule! Not only are they tiny, but the light sockets were cracked, the brass trim was dated and rusty, and they just weren’t making me smile. And that is what it is all about, isn’t it!

I’ve been looking for affordable exterior lights that fit the style of our home for about a year now. I didn’t want anything too trendy or contemporary because our house has an old world feel, it is a dutch colonial.

I happened to be at Lowe’s buying our new stove (yep, the one that caught fire in this post) and I spied these beauties on clearance for $24! I snatched them up in an instant and high tailed it out of the store before I could find any more things I “needed”.

Materials:

Flat head screwdriver*
Phillips head screwdriver*
power drill with screwdriver bits (if you wish to speed up unscrewing and screwing)
Wire Strippers*
Wire cutter*
New light fixture with instructions

* When working with electricity, It is safest to work with tools that have rubber or plastic handles that won’t conduct electricity, should you forget to turn off the power.

Required Safety Instruction:

Turn off the power to the light fixtures you are working on. Turn your lights on and visually inspect they are lit before turning off the circuit. Then shut off the circuit at your circuit breaker and check to see that the light has gone out.


Remove your new light from the packaging. Check for the instruction manual and all the parts. I like to put screws and small parts in a bowl so I don’t lose them.

Okay, now comes the easy part. Disassemble your old light. Take the top off and keep removing parts until you are down to the bare bones.

Unscrew the mounting plate from the wall by turning the small ball cap nuts (okay, no snickering, that is what they are really called!)

Watch out for critters that might be living behind your fixture! This cute little tree frog jumped out at us. Poor little guy. We actually found him in our house later that day and had to shoo him back outside.


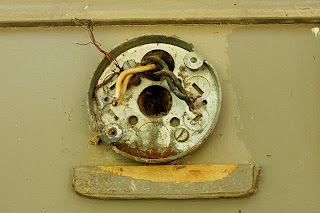
Pay attention to which wires are connected to the white and black wires on your fixtures.


Now you can remove the wire nuts and free your old fixture. (Don’t forget to clean out your junction box (the round, square, or octagon shaped box that is mounted to the wall and contains your house wires.)

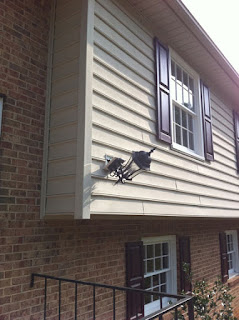
Also, take a moment to make sure your junction box is attached firmly to the house. And/or that you have something solid to attach your mounting bracket to. Case in point: this poor light fixture is hanging on by a wire because the mounting bracket was screwed into the foam insulation!

Locate the mounting plate for your new fixture. Thread the machine screws that will attach to your new light from the back of the mounting plate so they are sticking out towards you. Make sure the screws line up with the holes in your light fixture canopy (the metal cover on your light fixture that will rest flush against the wall.)

THEN you can attach it to your junction box. Honestly, this took me the most amount of time because I wanted to move my fixture up a little to compensate for its larger size. It took me too long trying to determine which holes to use for mounting. I did end up putting one screw into the junction box, and then used a wood screw to attach the other side to the siding on our house (which I then caulked to keep it from rotting the siding.)  You will probably be lucky and won’t need to do this step.

Double check to make sure that the plate is snug and attached firmly to the junction box and/or a solid surface.

These next few steps will be much easier if you have an assistant to hold the light fixture while you make the wire connections.

Unless your fixture comes with short wires, trim the excess and strip about 3/4 inch of the insulation from the end of the wires using your wire cutters and wire strippers. Making sure that your wires will fit inside your junction box, go ahead and connect the bare wire (ground wire) from your house to the green ground screw. If your new fixture has a bare or green wire, wrap that around the green ground screw as well.

Separate your white and black wires from your house, ideally you want them to be on opposite sides of the junction box so there is no risk of them touching. Go ahead and use a wire nut to connect your white wires. Then do the same for the black wires. Gently push the wires into the junction box (keeping them apart from each other).

Line up the holes in the canopy on your light fixture with the machine screws sticking out of the mounting plate. Use the ball cap screws that came with your fixture to cap the ends of the machine screws.

Hopefully everything looks good at this point (straight, no exposed wires, etc.) I would recommend turning on the power to check your wire connections and make sure your fixture works before the next step, and before installing the second light (if you have one.)

Caulk around the edges of your light fixture to keep water from entering the junction box. Use clear or paintable exterior grade caulk.

Don’t forget to turn off the power again before removing and installing your second light fixture.

You can see both the old and new light fixtures in the photo below. The one on the left is the new one, and the right is the puny old one.


Once you get the second fixture up and check to see that it works, stand back and admire your handywork!

Here are the after pictures of our new exterior light fixtures:

We’re still getting used to the size of the new lamps, but I definitely think they fit the scale of our house better than the old ones.


What do you think? I’m curious if anyone else likes copper (instead of Oil Rubbed Bronze.) Don’t get me wrong. I like ORB, I just didn’t think it fit our home’s style.

PHGafterwindow
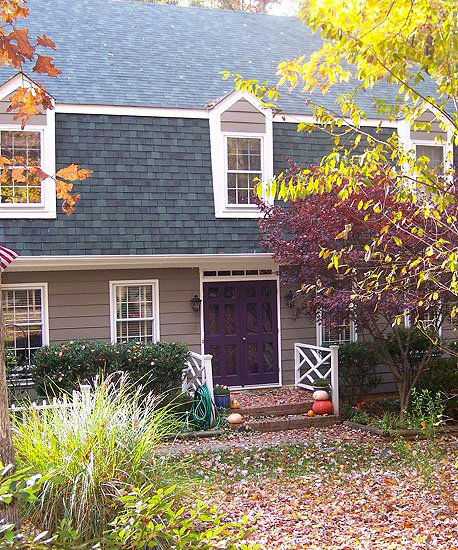
Our home has beautiful dormer windows.

dormeroutside

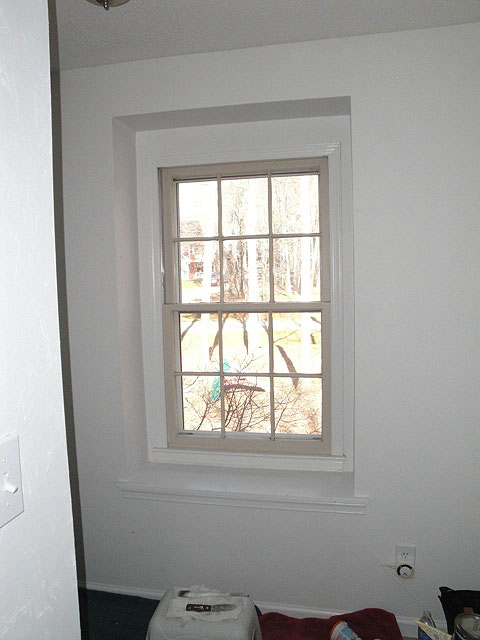
I love the little recessed ledges inside each dormer. But, the window in our hallway always looked so sad.

BeforeWindow

Then one day it hit me! This poor window has been neglected and has no character, jewelry or bling! For whatever reason (maybe because I was sleep deprived?) it took me a year to realize that the window itself had not been painted white like the other windows in our home.

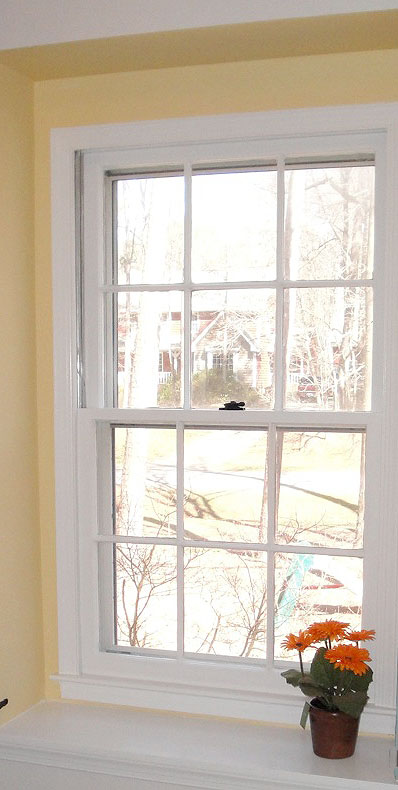
The first thing I did was grab a paint brush and paint the muntin bars (or grille), the bars that separate and hold the panes of glass. Don’t say I never taught you anything on this blog! Want to learn more about the anatomy of a window? Look on Pella’s website.

It looked better, but there was too much white, so I painted the recessed area a sunny yellow.

whitegrille

Wow, that looks better! But, the window still looked a little stark. That lonely plant just wasn’t pulling its own decorative weight.

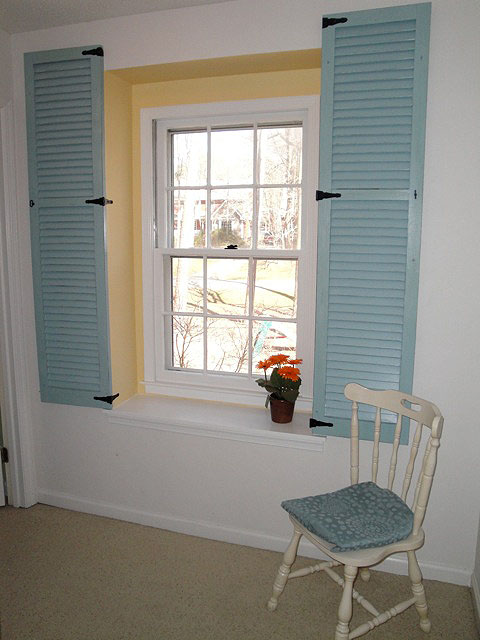
So, I ran up to the attic where all the original shutters from our home are stored. I pulled two out of the attic and painted them with a pretty aqua blue oops paint.

Next, I took a sand paper and roughed up the edges and distressed them until you could see the dark green peeking through.

I bought four gate hinges at Lowe’s and mounted them on the bottom and middle rails. I knew that there were studs on the edges of the window well, so I drove my screws into those corner studs.

ShuttersUP

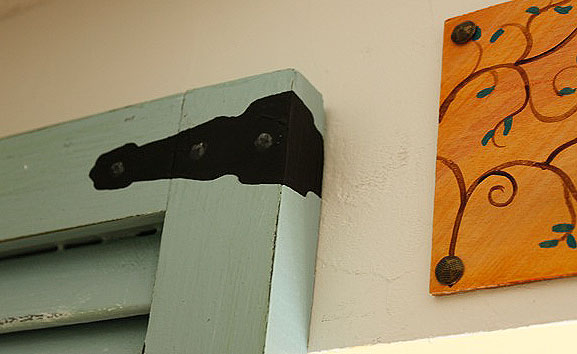
The tops of the shutters protruded over the window well, so I couldn’t use a gate hinge there. I painted a faux hinge on the shutters instead.

FauxHinge

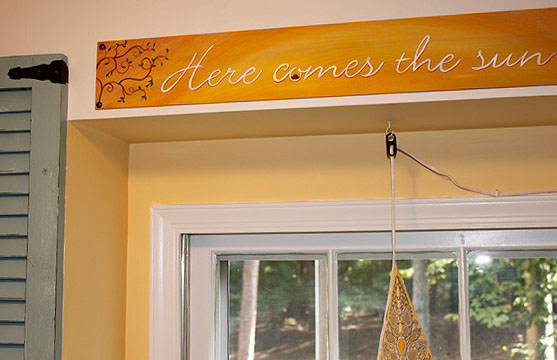
I also painted a little sign over the dormer to fill up the visual blank space between the tops of the shutters. The board was just piece of scrap cabinet toe kick. And, yes, those are simple upholstery tacks holding it to the wall.

HereComestheSun

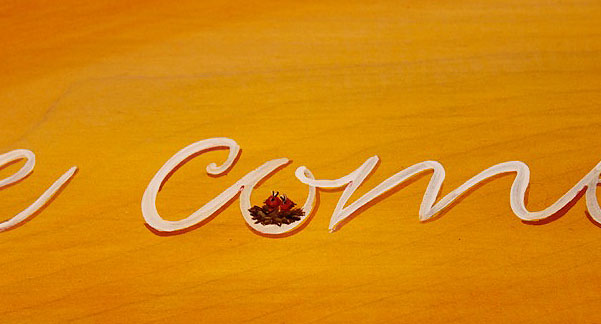
To create this little sign, I found a font I liked, then typed out the phrase on the computer. I was able to tile two sheets together to span the width of the board. I rubbed pencil on the backside of my paper. Then traced the letters on the front of the paper. By pushing hard with the pencil, my type was transferred on the wood. This allowed me to paint over the pencil marked letters: “Here Comes the Sun…” one of my favorite Beatles songs.

birdsinnest
 Sweet little birds waking up in their nest.

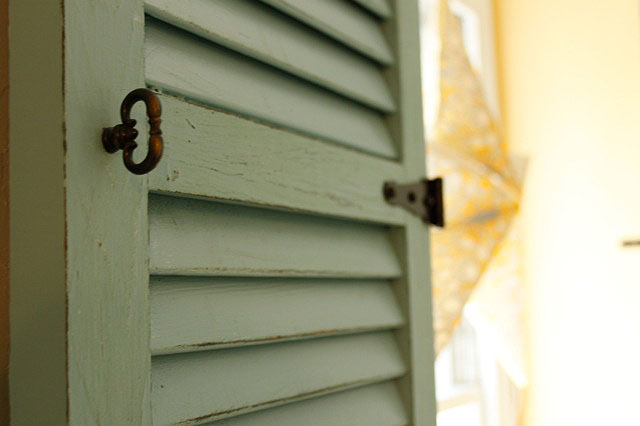
I dressed up the shutters by adding little keyhole drawer pulls.

keypull

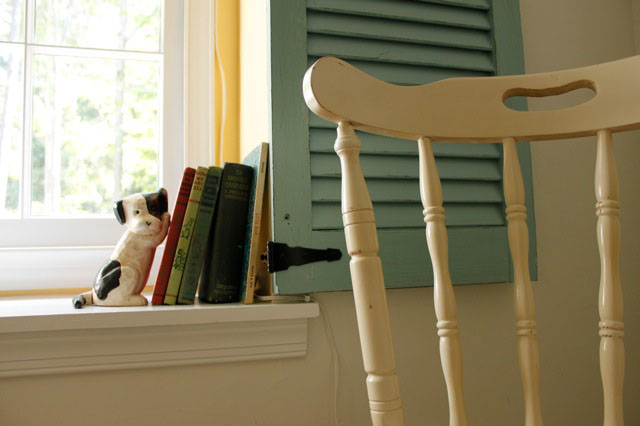
I accessorized and put a little $5 Goodwill chair in the corner.

chairview
doggystop
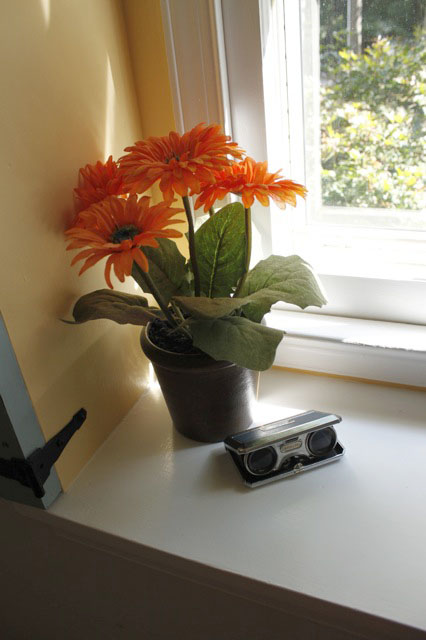
flowersincorner

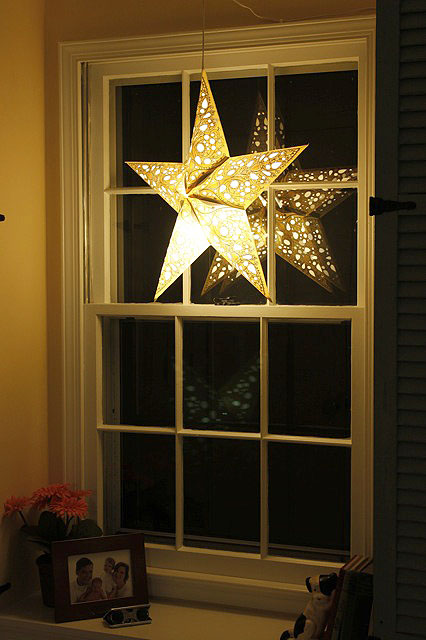
Around Christmas time I hung the star light for decoration, but it puts off the perfect amount of light for those darn night wakers. (Anyone else have those in your home?) So, it now hangs year round.

nightlight
I think this window is very happy now!
PHGafterwindow

What do you think? Does it need anything else? Maybe paint the chair or distress it? Or maybe that chair just needs a colorful cushion.

PHGFancySign


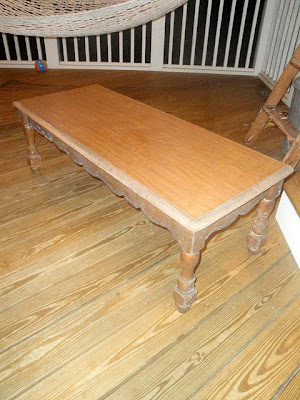
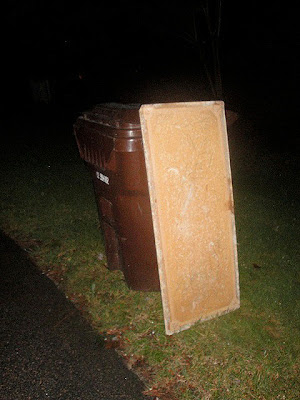
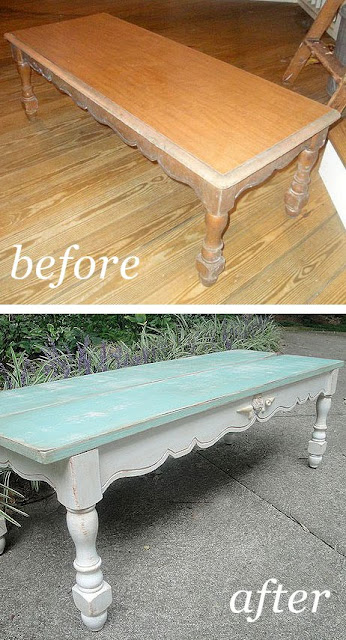
Okay readers, so the truth is out, I just can’t seem to pass up discarded furniture. They look so sad and pitiful awaiting the trash trucks. They plead with me to rescue them from life in the dump. That is how I found this coffee table.

It was resting against a dumpster. The legs and skirt of the coffee table were in good shape structurally, but the top was cheap masonite (compressed and glued fibers of wood.) This type of wood will swell and absorb water like a sponge. I’m one of those unfortunate homeowners who’s house is sided with hardboard (essentially the same as masonite.) Now you can see why that isn’t a good thing:

Moisture causes mold to grow, and the retained moisture also causes the wood to swell, become misshaped and will eventually rot away. The first thing I did was unscrew the top and throw it away! Yuck.

Sorry Mr. Tabletop, there was no rescuing you.

I also removed the hardware from the table skirt and saved it with the screws.

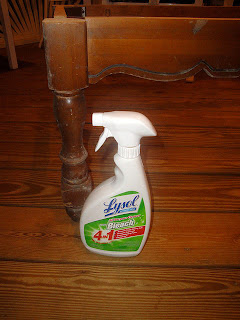
I cleaned the base of the coffee table with bleach cleaner to get rid of all the mold.

After it dried, I roughed up all the surfaces on the legs and base.

Then I primed it to seal the wood and prepare it for painting.

I painted the legs and skirt with two coats of Benjamin Moore Impervo white paint (leftover from our living room trim.)
I always paint the undersides or the hidden side first, then I use a technique for elevating my object and keeping it from sticking to the drop cloth.

Simply tap a nail into each leg after you have painted the foot. Then turn the table over and continue to paint. Some other bloggers have found the Rockler painting pyramids, but I have yet to find any in my local stores to try them out. Hey Rockler, if you are reading this, send me some painting pyramids so I can give them a spin and see if they work better than my nail technique!

After the paint dried, I removed the nails from the bottom of the legs and hammered floor protectors in their place.

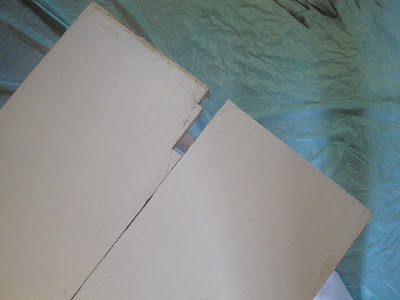
Now, to replace the masonite top with something with more age and character. I searched through my wood stash and found these two discarded boards that I think used to be in someone’s closet or pantry.

The boards fit well on the skirt of my coffee table, but it had a funny cut out on the edge of one of the boards. It was probably a profile cut.

It didn’t look very old or interesting to me, so I drew a line diagonally along the board and cut it off with my jigsaw. That looked much better! More like a salvaged board. Then I flipped the cut board to the inside edge.

I distressed my new table top with a heavy chain, pry bar, and hammer (read more here.)

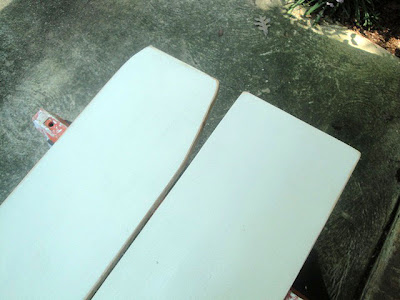
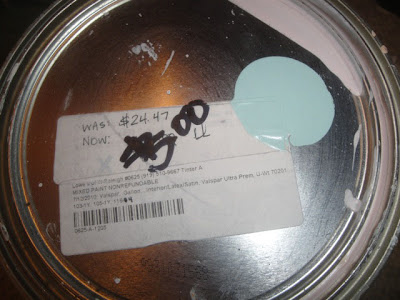
At this point, I went to my “oops” paint stash and chose this gallon of $5 baby blue color.

I know it looks like a nursery color, but I wanted something vibrant to show through after glazing and antiquing. I painted the whole table top this light blue color. Luckily I was able to skip the priming step because the boards had previously been painted.

After the boards were dry, I sanded, glazed and then applied a stain to antique it (more on these techniques here).

Then I turned the boards upside down, and used the screws I set aside to attach my boards to the table skirt.

I decided not to re-use the handle hardware that was originally on the coffee table.  Instead I wanted to give this table a beachy look. So, I added some shells to the front of the coffee table using my new favorite glue, E-6000 glue. This glue holds super strong, I even set the table down on the shell edge (forgetting they were there,) and the shell broke, but all the shells remained glued to the table. Now that is a strong bond!

My last step was to put a protective coating of polyurethane over the whole coffee table. I used an old can of oil based polyurethane that had yellowed. This added the perfect age to my coffee table.

And here is my Trashy Coffee Table turned into a Beautiful Beachy Babe!

Uneven boards = instant character


Glazed legs and table skirt


Now isn’t she beautiful?
One more look at the before and after:
 

Not bad for a new coffee table for our porch that essentially cost me NOTHING, since I already had all the paint and supplies leftover from other projects. What do you think? Do you like her color? Or too baby blue for you?

Next Up: More tips on antiquing, distressing and adding age to objects. I hope you come back soon.

(I’ve included affiliate links for your convenience. I earn a small percentage from a purchase using these links. There is no additional cost to you. You can read more about affiliate links here.)

Why do we wait to remodel the rooms that we spend the most time in?

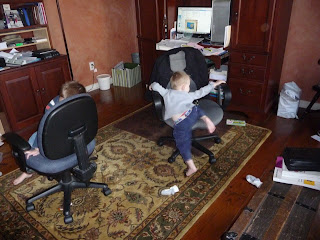
Our home office had very humble beginnings. No overhead lights meant we had to use a floor lamp and table top lights to see.

The walls were a deep burnt sienna color that didn’t bounce much of that light around.

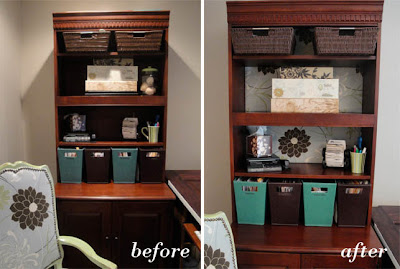
I had a big computer armoire that was dark inside. But, worst of all, Pretty Handsome Guy and I worked together in the room with our backs to one another for 3 years!

I dreaded sitting and working in that room. As a graphic and web designer, I had no inspirations, no creative energy. And being the light obsessed person I am, I was depressed by all the darkness in the room. I took frequent breaks just to escape from the office.

I dreamed of a home office with one wall of built-in bookcases and storage and a work surface that jutted out in the middle. I tried to sell the idea to my better half, but Pretty Handsome Guy just couldn’t picture it.

As luck would have it, three months later, Sandra at Sawdust and Paper Scraps just completed my dream office in her home!

Sawdust and Paper Scraps Built-in Dream Office Come to Life

She posted the pictures on Remodelaholic. Hey Sandra, thanks for taking too long to finish it. Just kidding. But, If she had posted her pictures three months ago, our office may have looked very different.

Sometimes fate is a good thing, and in this case I am thrilled with the end result of our home office and it is all thanks to an inspiration I had when I found two of these:


$15 for a pair of solid wood doors with beautiful cherry stain on one side. 
I snatched them up at a church yard sale! You can imagine the look on Pretty Handsome Guy’s face when I came home with these hanging out the back of my car. “Um, don’t we already have doors on all our doorways?”  I answered with one word, “Potential.”
We didn’t do a thing to the doors except to remove the hardware and use the hinges in other rooms of our home. The stain color was a perfect match to our existing furniture.

If you look back at some of our earlier posts you have been privy to some of the changes we made in the office.


Well, we finally put the finishing touches on the room, and I’m ready to show you the results.


New window treatments, and freshly scraped and painted ceilings.


 FIVE! Yes, count them, five ceiling light fixtures.
4 can lights + 1 drum shade pendant = 5 glorious ceiling lights
where there were ZERO, ZIP, NONE before!


A corner bistro table where we can sit and have coffee.
I can meet with graphic design clients. 
But, mostly so the kids can color, work on homework or
someday start a blog called MyMomIsPrettyCrazyGirl.com
Enough about those crazy kids. This is where I blog!
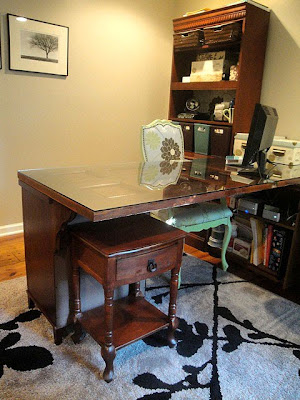
So, do you see my inspiration door?
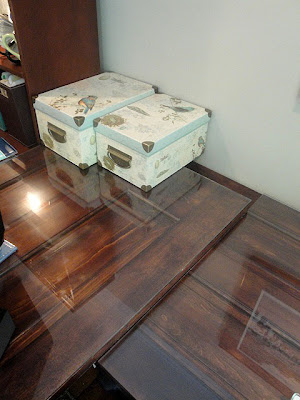
Here is a hint: There is a layer of custom cut glass on top,
and a keyboard tray mounted underneath.
 
Plus a hole to run the cords through.
 
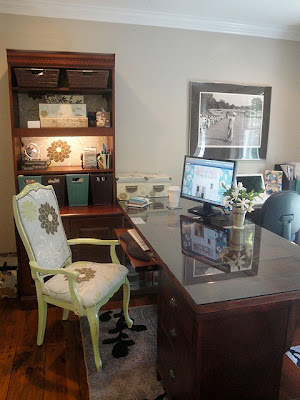
 How about now? Do you see it now? The doors are our desktops.
This is where I blog, design, and work! 
So open and airy.

We simply stacked the two doors on top of one another.
 
 And bought two pedestal file cabinets from Office Depot.
(I had to cut the legs shorter on this one to accommodate for the
difference in height with the two doors stacked.)
And voila! Two desks in an “L” shape.
No more back-to-back working.
Plus, lots of natural light bouncing around.
In the corner under the two doors, is an $8 yard sale bookcase that holds my computer, back up drive, CDs, books, and more supplies. It is hidden underneath, which is a good thing, because it desperately needs a little TLC.
 
The doors may have been my inspiration then,
but having a view out this window brings me loads of inspiration now!

This room is so special to us. We can sit and work, talk, catch up, and the boys have a great spot in the corner to color or practice reading on Starfall.com

The color paint we used is: Benjamin Moore Aura paint in Hot Spring Stones. It is the perfect warm gray beige color (in my opinion). The rug is from Home Goods. Curtains from Overstock.com. And fabric on chair, bistro table, and bookshelf back is called Fermini Sky. The drum shade pendant was from Amazon.com.