Installing New Exterior Lighting
If you were here the other day to see my dormer window transformation, you may have seen my exterior lights. I’ll be talking about Installing New Exterior Lighting today!
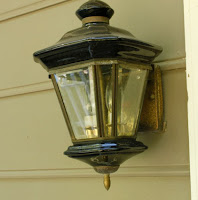
Then again, maybe you didn’t because they are miniscule! Not only are they tiny, but the light sockets were cracked, the brass trim was dated and rusty, and they just weren’t making me smile. And that is what it is all about, isn’t it!
I’ve been looking for affordable exterior lights that fit the style of our home for about a year now. I didn’t want anything too trendy or contemporary because our house has an old world feel, it is a dutch colonial.
I happened to be at Lowe’s buying our new stove (yep, the one that caught fire in this post) and I spied these beauties on clearance for $24! I snatched them up in an instant and high tailed it out of the store before I could find any more things I “needed”.
Materials:
Flat head screwdriver*
Phillips head screwdriver*
power drill with screwdriver bits (if you wish to speed up unscrewing and screwing)
Wire Strippers*
Wire cutter*
New light fixture with instructions
* When working with electricity, It is safest to work with tools that have rubber or plastic handles that won’t conduct electricity, should you forget to turn off the power.
Required Safety Instruction:
Turn off the power to the light fixtures you are working on. Turn your lights on and visually inspect they are lit before turning off the circuit. Then shut off the circuit at your circuit breaker and check to see that the light has gone out.
Remove your new light from the packaging. Check for the instruction manual and all the parts. I like to put screws and small parts in a bowl so I don’t lose them.
Okay, now comes the easy part. Disassemble your old light. Take the top off and keep removing parts until you are down to the bare bones.
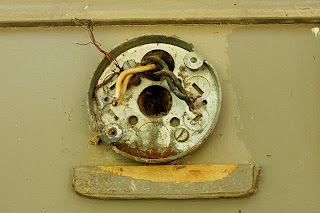
Unscrew the mounting plate from the wall by turning the small ball cap nuts (okay, no snickering, that is what they are really called!)
Watch out for critters that might be living behind your fixture! This cute little tree frog jumped out at us. Poor little guy. We actually found him in our house later that day and had to shoo him back outside.
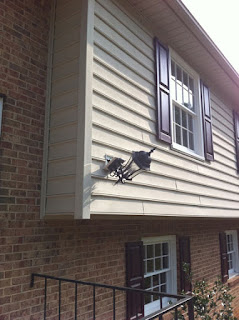
Also, take a moment to make sure your junction box is attached firmly to the house. And/or that you have something solid to attach your mounting bracket to. Case in point: this poor light fixture is hanging on by a wire because the mounting bracket was screwed into the foam insulation!
Locate the mounting plate for your new fixture. Thread the machine screws that will attach to your new light from the back of the mounting plate so they are sticking out towards you. Make sure the screws line up with the holes in your light fixture canopy (the metal cover on your light fixture that will rest flush against the wall.)
THEN you can attach it to your junction box. Honestly, this took me the most amount of time because I wanted to move my fixture up a little to compensate for its larger size. It took me too long trying to determine which holes to use for mounting. I did end up putting one screw into the junction box, and then used a wood screw to attach the other side to the siding on our house (which I then caulked to keep it from rotting the siding.) You will probably be lucky and won’t need to do this step.
Double check to make sure that the plate is snug and attached firmly to the junction box and/or a solid surface.
These next few steps will be much easier if you have an assistant to hold the light fixture while you make the wire connections.
Unless your fixture comes with short wires, trim the excess and strip about 3/4 inch of the insulation from the end of the wires using your wire cutters and wire strippers. Making sure that your wires will fit inside your junction box, go ahead and connect the bare wire (ground wire) from your house to the green ground screw. If your new fixture has a bare or green wire, wrap that around the green ground screw as well.
Separate your white and black wires from your house, ideally you want them to be on opposite sides of the junction box so there is no risk of them touching. Go ahead and use a wire nut to connect your white wires. Then do the same for the black wires. Gently push the wires into the junction box (keeping them apart from each other).
Line up the holes in the canopy on your light fixture with the machine screws sticking out of the mounting plate. Use the ball cap screws that came with your fixture to cap the ends of the machine screws.
Hopefully everything looks good at this point (straight, no exposed wires, etc.) I would recommend turning on the power to check your wire connections and make sure your fixture works before the next step, and before installing the second light (if you have one.)
Caulk around the edges of your light fixture to keep water from entering the junction box. Use clear or paintable exterior grade caulk.
Don’t forget to turn off the power again before removing and installing your second light fixture.
You can see both the old and new light fixtures in the photo below. The one on the left is the new one, and the right is the puny old one.
Once you get the second fixture up and check to see that it works, stand back and admire your handywork!
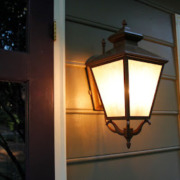
Here are the after pictures of our new exterior light fixtures:
We’re still getting used to the size of the new lamps, but I definitely think they fit the scale of our house better than the old ones.
What do you think? I’m curious if anyone else likes copper (instead of Oil Rubbed Bronze.) Don’t get me wrong. I like ORB, I just didn’t think it fit our home’s style.







Not done to code. Those need a mounting block. Caulk is not proper. Sorry.
The house was built in 1978, so it wasn’t required then. Since then we have installed a junction box to bring it up to code. Thanks.
Quick question. I am swapping out old for new light fixtures this weekend.. old ones have clear silicone sealant/caulk around them. Do you have any hints or tips about removing the o,d stuff? Thanks.
Yes, just use a utility knife to score around the sealant, then you can remove the fixture. Use a putty knife to scrape off the rest of the caulk. If the fixture is outside, be sure to replace with a line of caulk when you are done for good measure.