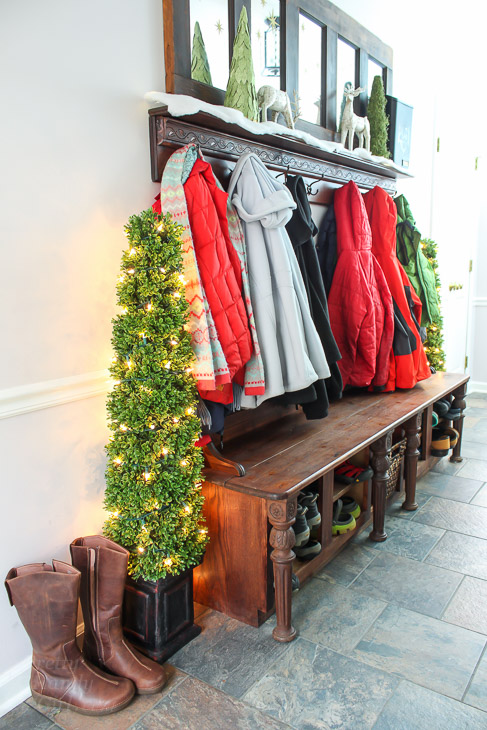
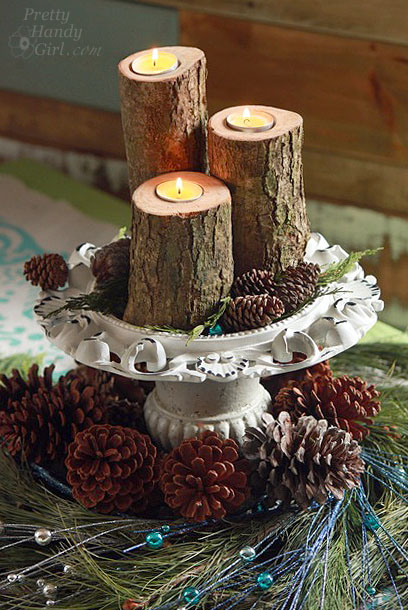
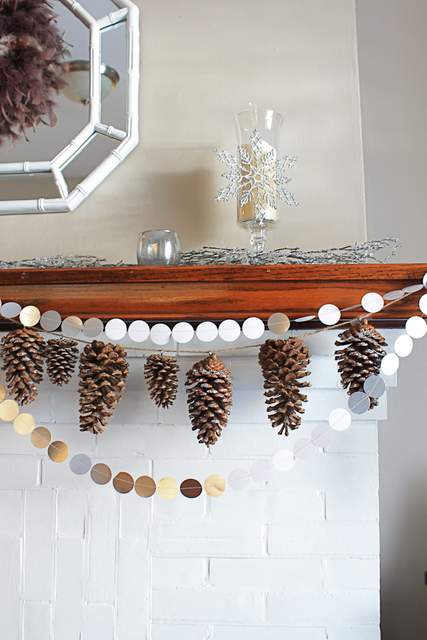
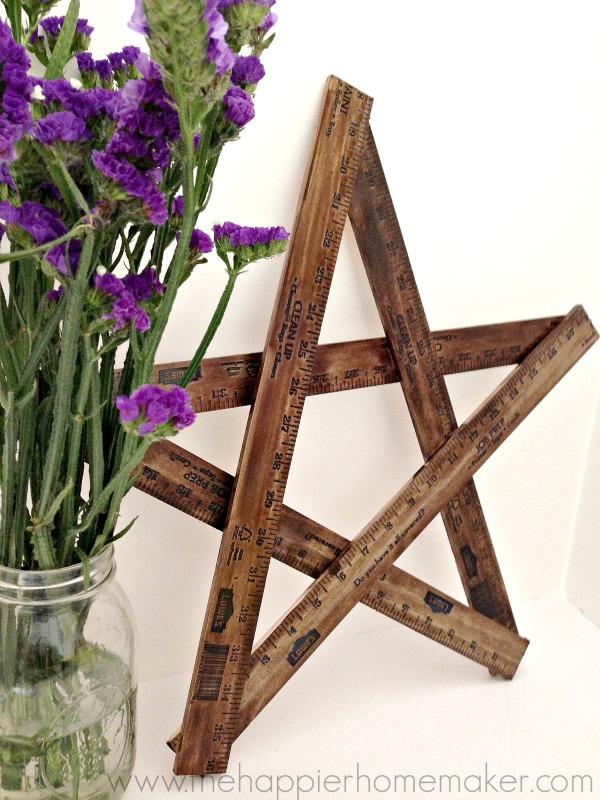
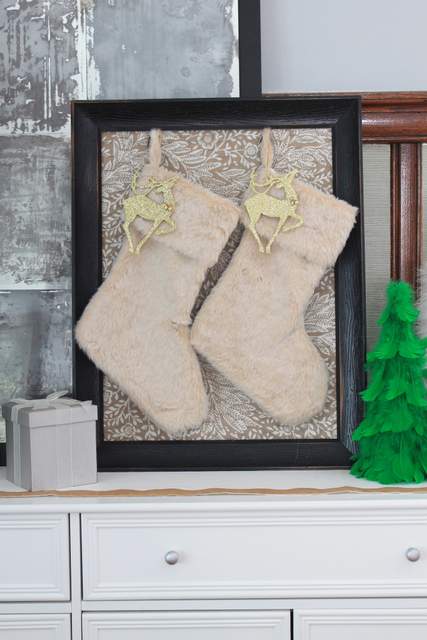
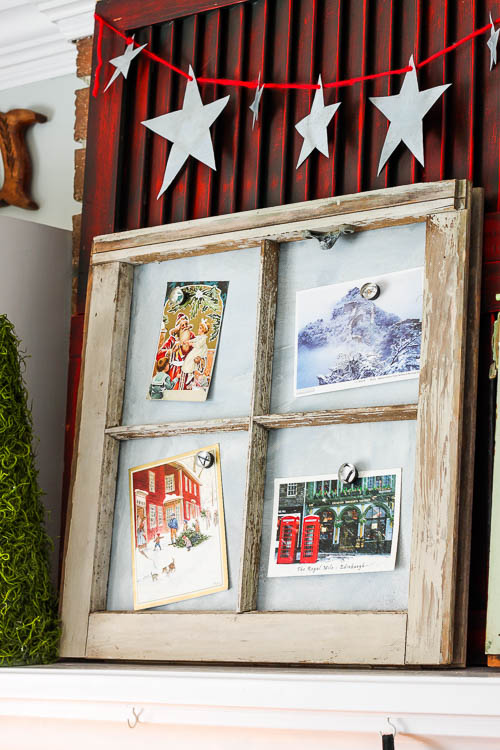
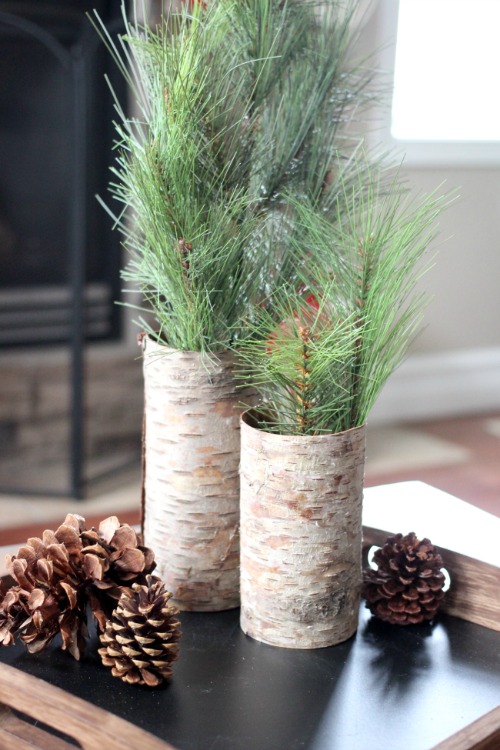
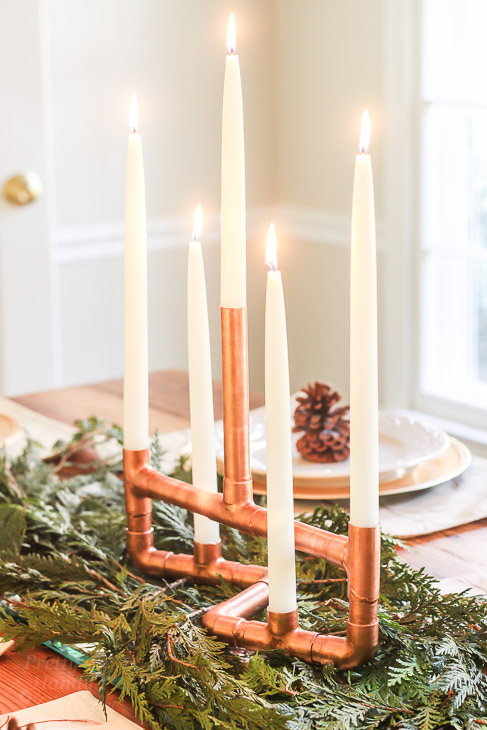
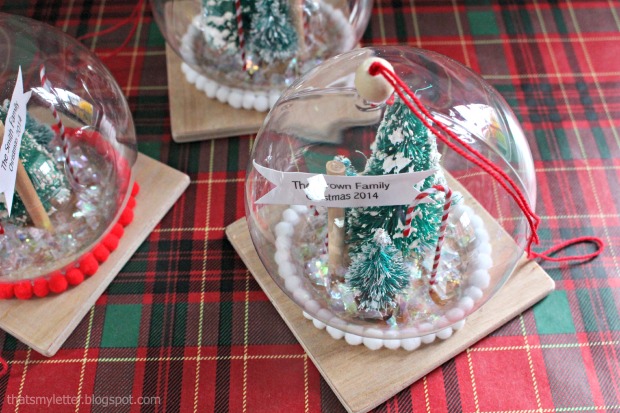
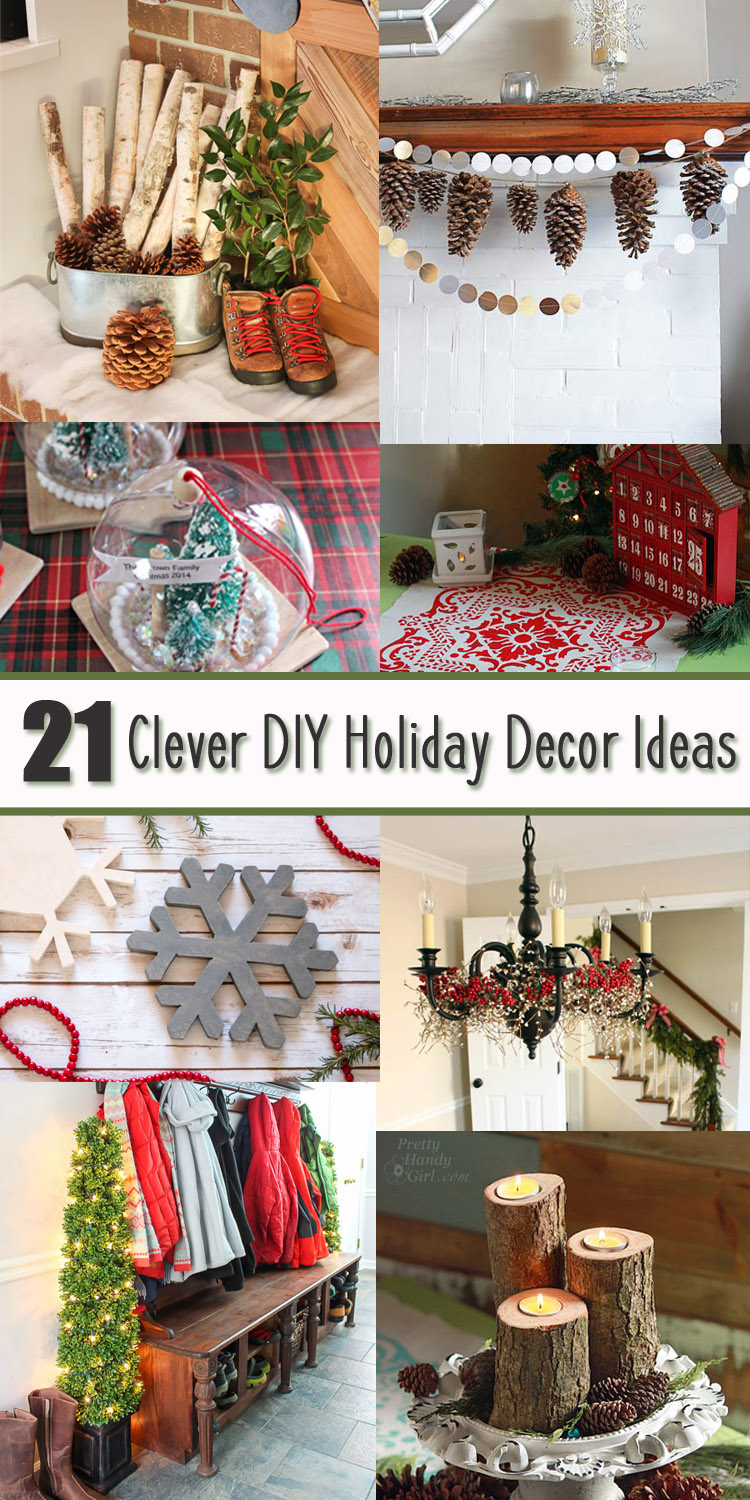
The holidays here, but there is still plenty of time to make some DIY holiday decor that will bring the warmth and festivity of the season into your home. Here are 21 Clever DIY Holiday Decor Ideas to inspire you!
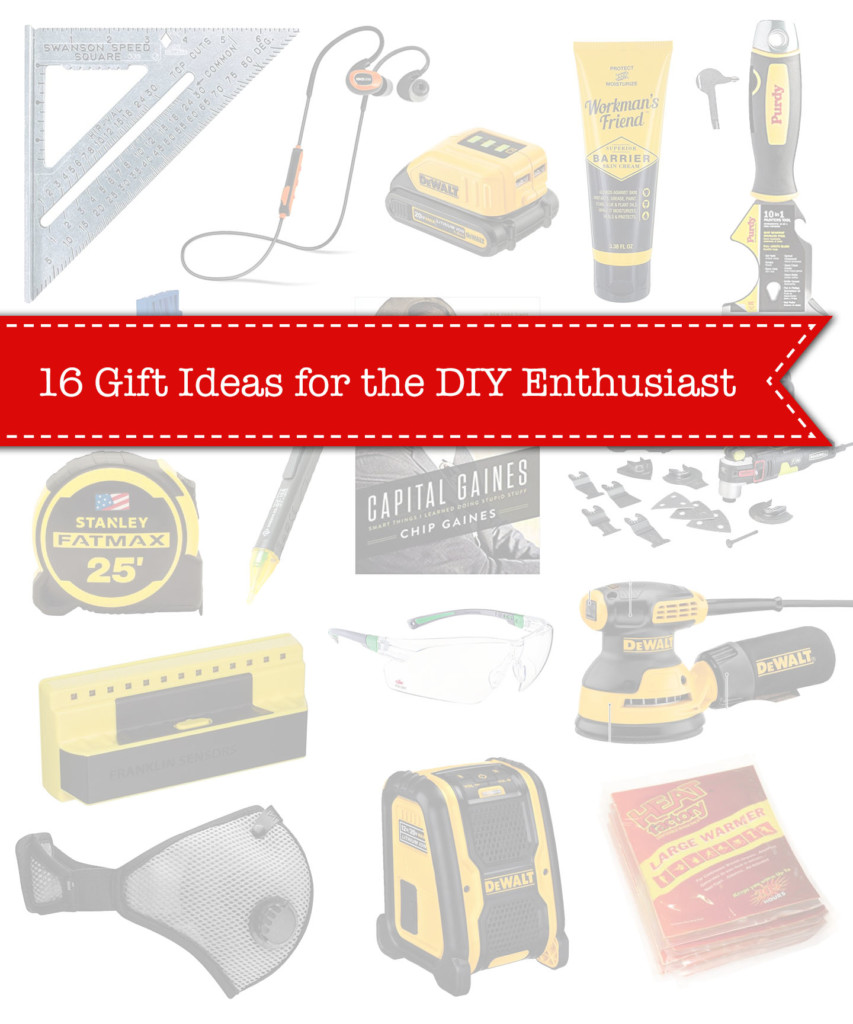
Cyber Monday is the perfect day to look for online deals and steals. Even if you missed Cyber Monday, I have some stocking stuffer ideas for your little (or big) DIYer? These are gift items I know any DIYer would love to have in their stocking. In the list are items I’ve found useful while working on a variety of projects this year (including building a whole house.) Here’s my list of 16 gift ideas for the DIYer in your life (in no particular order):
Swanson Framing Square – This year I’ve used this framing square for many framing and cutting needs especially when using my circular saw. In addition, I’ve used it to scribe a line for ripping lumber with my circular saw. Any good carpenter would be lost without a good framing square.
Iso-tune Bluetooth Noise Reducing Headphones – When you are trying to protect your hearing (but dread using ear plugs), this set of noise reducing ear buds will keep you happy and safe as you jam to your favorite tunes while working.
DeWalt Battery USB charger adapter – While preparing for Hurricane Florence, I pulled this USB charger adapter from my tool box and brought it inside. Although I didn’t have to use it, this little adapter has been invaluable for freeing up the outlets while my crew and I were running on conditional power. (It does require a DeWalt battery to attach to for charging.)
Workman’s Friend Barrier Cream and Moisturizer – I’m very particular about hand lotions. They have to provide a lot of moisture without leaving a greasy feeling. The Workman’s Friend moisturizing cream in my opinion is the perfect consistency, but it also acts as a barrier cream keeping your hands cleaner after a day of getting dirty.
10-in-1 Painter’s Tool – I didn’t think there was any way to improve on the standard 5-in-1 painter’s tool, but Purdy proved they could do it. Tucked into the handle of this tool is a small flat head and philips head screwdriver. In addition to the screwdrivers, you can also use this tool to set nails, scrape, open cans, spread compound, open/clean cracks, clean rollers, pull nails, and hammer.
Kreg Jig – The Kreg Jig has been my favorite tool for building furniture and frames. It’s an invaluable tool for anyone getting started in woodworking. You can read my tutorial for How to Use a Kreg Jig here. Forget the more expensive models of the Kreg Jig, the K4 is all you need.
Capital Gaines by Chip Gaines – This book may seem random in a list of tools, but I highly recommend everyone read this book. Chip has written a book that is full of inspiring quotes and mindsets to push you forward in any endeavor you choose!
Rockwell Oscillating Tool – This is one of those desert island tools that will get you out of a jamb and allow you to make precision cuts to molding, cut nails and score in tight spots. I never take this tool out of my truck.
Stanley FatMax Fit in Hand Tape Measure – I get it, you already have a working tape measure. But, if you try this tape measure you’ll understand my new found love for the “fit in your hand” tape measure. As a woman, I struggle with larger tape measures, but this one fits nicely in my hand, and it’s perfectly balanced if I want to drop extend it while standing on a ladder. Finally, it beats all other tape measures in a stand out competition. (Let’s be honest, it’s lots of fun to beat out the boys in a stand out competition. LOL.)
Greenlee Non-Contact Voltage Tester – Never take on any electrical job without this tool. It can test for power through wire insulation and is easy to see and hear when voltage is present.
Pro-Sensor Precision Stud Finder – This is by far the simplest and easiest stud finder I’ve used. It visually shows where the start and end of studs are in your walls.
No Cry Safety Glasses – I have a small head, but these safety glasses fit perfectly on my face without slipping down my nose. But, they also fit a larger head circumference comfortably. The No Cry Safety glasses are my new favorites.
DeWalt Random Orbital Sander – This orbital sander is another favorite tool with a dust collection bag or port to hook up to a vacuum cleaner. The hook and loop pad makes changing sandpaper a breeze.
RZ Re-usable Dust Mask – When it comes to safety equipment, you’ll be more likely to wear it if it’s comfortable. That’s why I like the RZ dust masks. The soft fabric doesn’t leave mask marks and the velcro closure provides a more comfortable fit. The inner filter can be changed as needed, and the exterior can be used over and over again. It’s better for you and the environment!
DeWalt Jobsite Bluetooth Speaker – This little bluetooth speaker has great sound, it’s small and can withstand being dropped and kicked around.
Hand & Body Warmers – Working in my unheated garage or on the job site this time of year leads to frozen fingers. I like keeping a stash of these hand warmers nearby to keep my fingers and body warmer (allowing me to work longer hours.)
I hope you liked this list of 16 Gift Ideas for the DIY Enthusiast. Anyone who works with tools or on a job site will love them too.
https://prettyhandygirl.com/wp-content/uploads/2018/12/DIYers-Holiday-wishlist.jpg17281440Brittany Baileyhttps://prettyhandygirl.com/wp-content/uploads/2021/07/PHG-logo-tagline-2020-1030x211-R.jpgBrittany Bailey2018-11-25 07:00:002021-08-23 19:48:39Top 16 Gift Ideas for the DIY Enthusiast
Do you live near Raleigh, North Carolina? If so, I’d love to invite you to the live open house tour of the Saving Etta project.
Yes, I know, I need to get you all caught up on the progression of the house. It’s been a whirlwind month of non-stop activity at the house.
If you just can’t wait for me, come on out in person! Here are the details:
Saturday, November 17th
11am – 5pm
1007 S. Person Street, Raleigh, NC 27601.
Please note, street parking only. Please be mindful of neighboring driveways.
Hope to see you there!
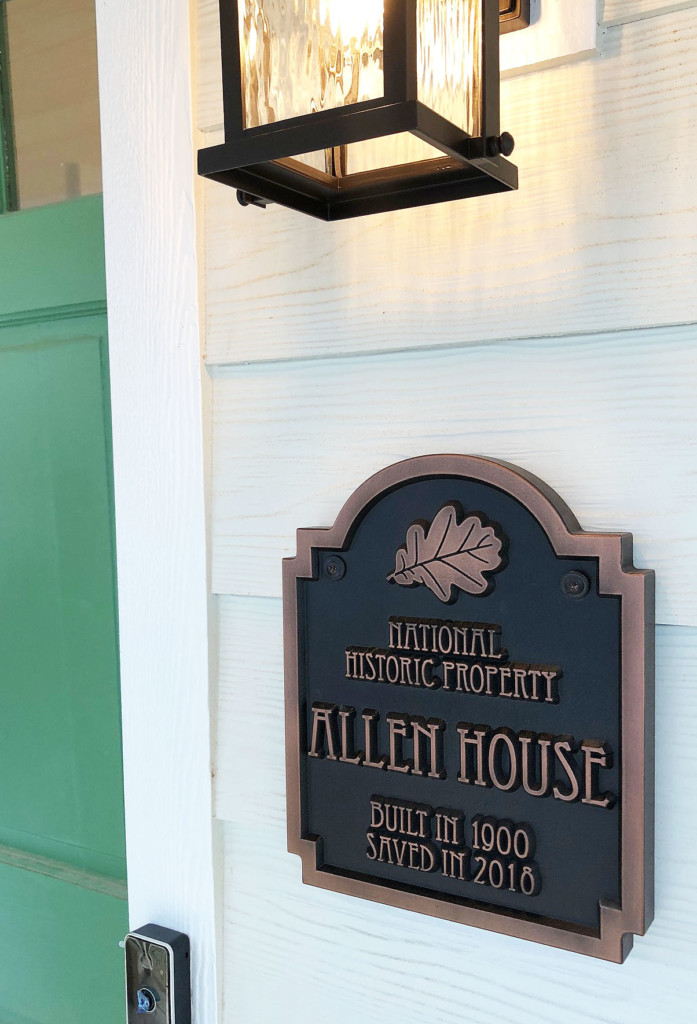
By the way, I have a secret I’ve been keeping from you. The house I saved isn’t really named Etta. (Shocker!) She actually has a name though. The Allen House is the official name and it is on the National Historic Property registry. We just put up this plaque this week, and now I can say she’s been officially saved.
https://prettyhandygirl.com/wp-content/uploads/2018/11/before-after-house.jpg7001120Brittany Baileyhttps://prettyhandygirl.com/wp-content/uploads/2021/07/PHG-logo-tagline-2020-1030x211-R.jpgBrittany Bailey2018-11-14 07:00:002020-03-03 10:31:35You’re Invited to the Saving Etta Open House
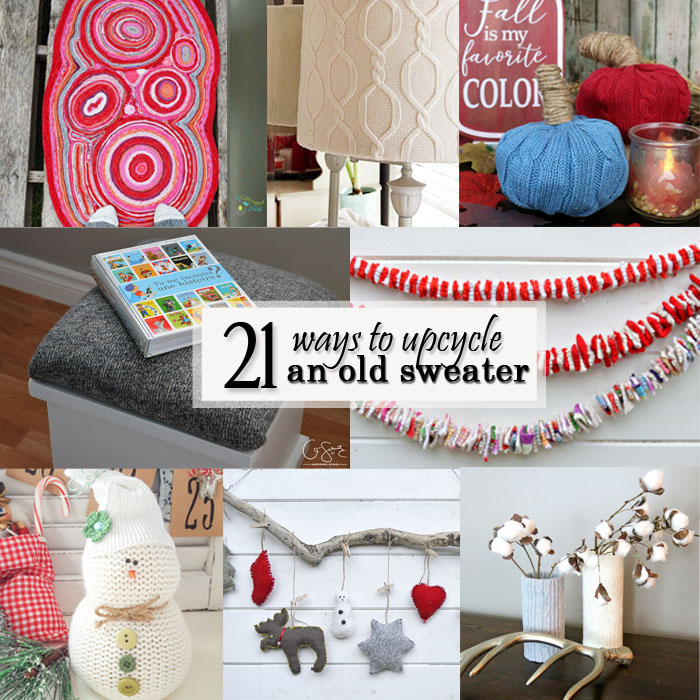
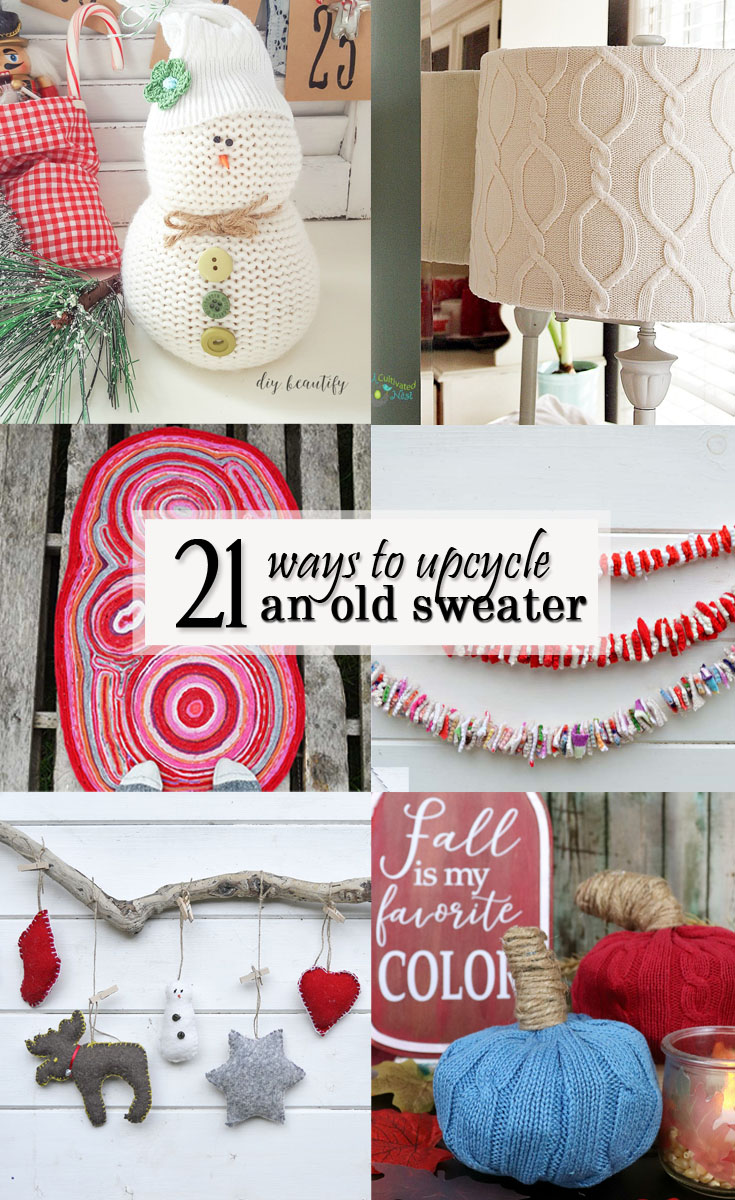
Decorating for winter doesn’t always have to mean decorating for the holidays. Have you ever thought about reusing an old sweater to make winter decorations? Sweaters represent warmth and coziness. Implementing them into your decor can bring those same attributes to your home. Here are some fantastic ideas on how to reuse or upcycle an old sweater to make something new!
I hope you enjoyed all of these ideas on how to reuse or upcycle an old sweater. They are such creative and fun ideas! Please be sure to save this post on Pinterest so you can find it easily again and share via social media if you would like. Here’s a great photo for Pinterest:
Hi, I’m Sheri from Hazel + Gold Designs. Here are a few fun stats about me: I like love chocolate and peanut butter (together of course.) If you like stats, I have been crocheting for about 16 years, crafting for 20, and woodworking for about 4 years. I found a passion in making and being creative and began documenting my projects online at Hazel + Gold Designs.
When not working on projects, I enjoy spending time with my husband, four children, perfect dog, and ornery cat. You can find me on Facebook, Pinterest, Instagram and Twitter.
https://prettyhandygirl.com/wp-content/uploads/2018/10/21-ways-to-reuse-or-upcycle-an-old-sweater-featured-image.jpg700700Sherihttps://prettyhandygirl.com/wp-content/uploads/2021/07/PHG-logo-tagline-2020-1030x211-R.jpgSheri2018-10-31 07:00:352018-10-30 22:03:1821 Ways to Reuse or Upcycle an Old Sweater
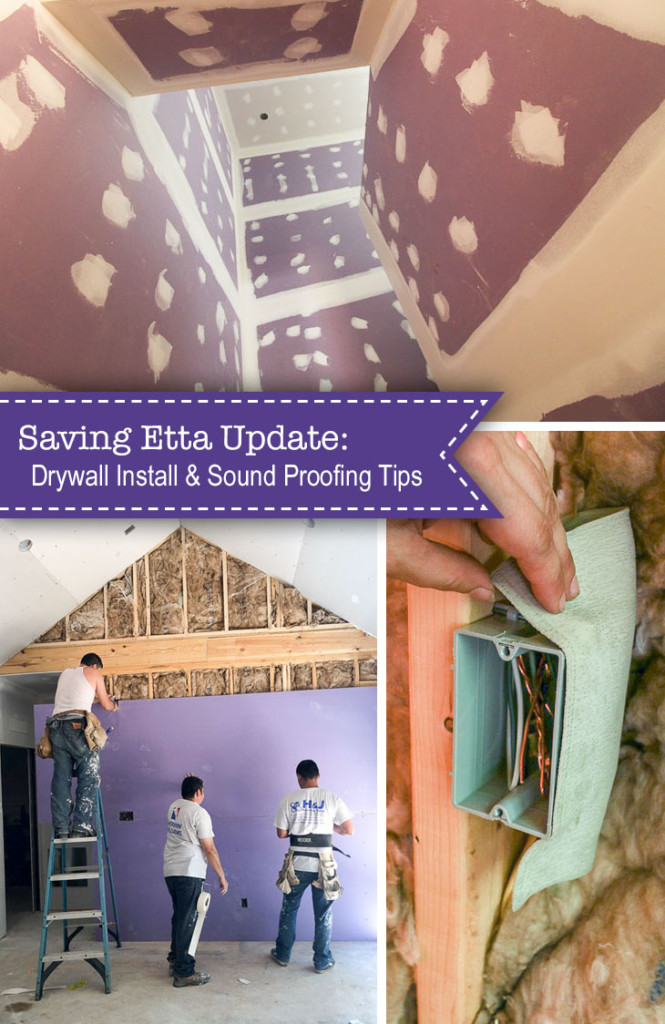
Saving Etta: Drywall Update + Reducing Sound in the Master Bedroom
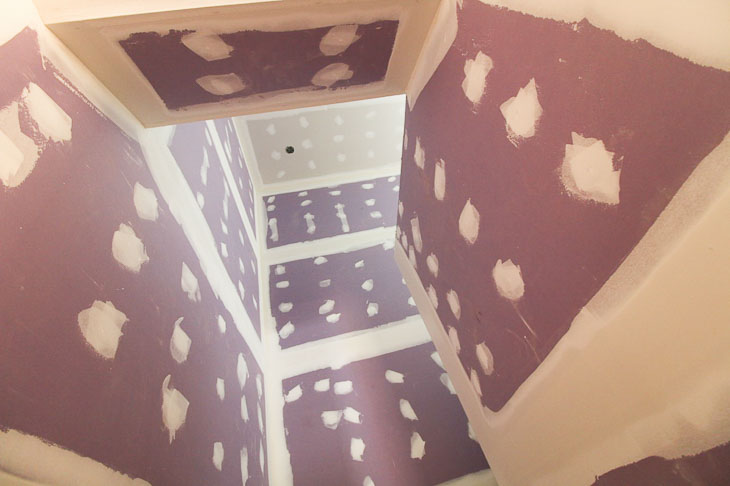
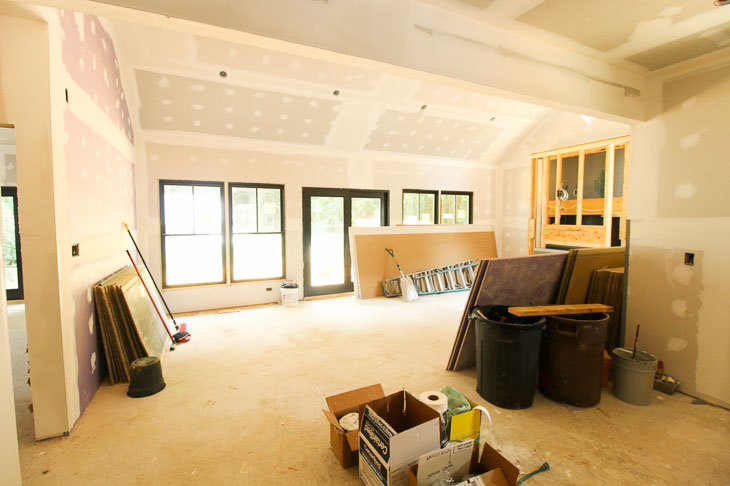
One of the biggest progress milestones (besides the framing stage) in building a house happens at the drywall installation. This is the point where the structure starts to really feel like a house. This is also the point where the flow in the house becomes apparent. It also sucks not being able to walk through walls anymore. (Ghosts have it made, I tell ya!)
But seeing the drywall go up felt like a monumental step. I’m excited to show you this progress update and explain all the different types of drywall we installed. You may remember that Ask For Purple (a National Gypsum line of products) is a Saving Etta sponsor. And you might remember learning How Drywall is Made and What is Purple Drywall. Now I get to share with you the perfect spots for all those different types of drywall.
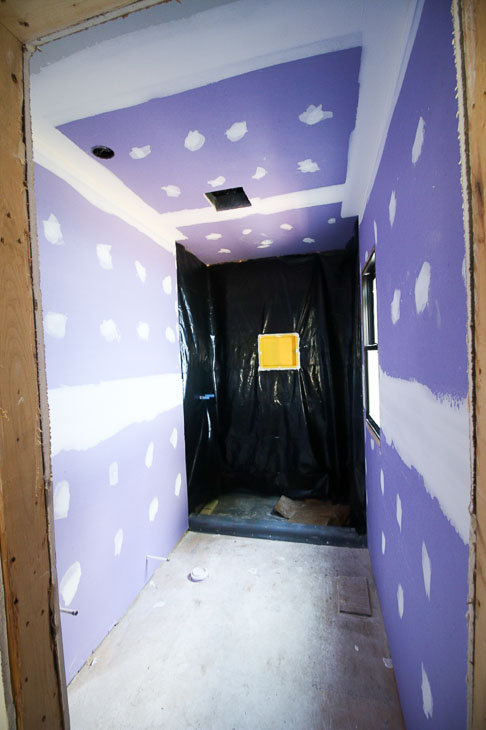
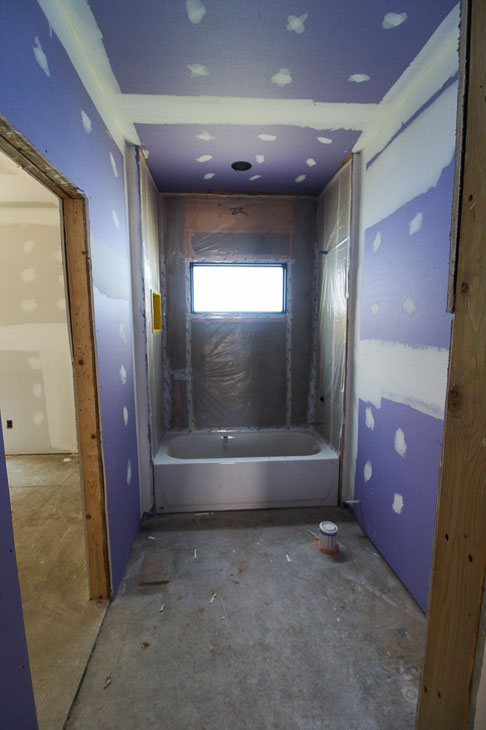
Purple XP® – We installed Purple XP® in the kitchen, all three bathrooms, and the laundry room. Any room that had water pipes were going to get this mold and mildew resistant drywall. I can’t begin to tell you how important it is to get rid of regular drywall in rooms that have a lot of moisture and/or water.
Master Bathroom
Shared Downstairs Bathroom
Upstairs Bathroom
Laundry Room
Kitchen
(After this picture was taken, I asked my drywall contractors to tear out the two lower sections of regular drywall and use Purple XP drywall on the entire lower portion of the kitchen. After I explained to them why, they were happy to make the swap.)
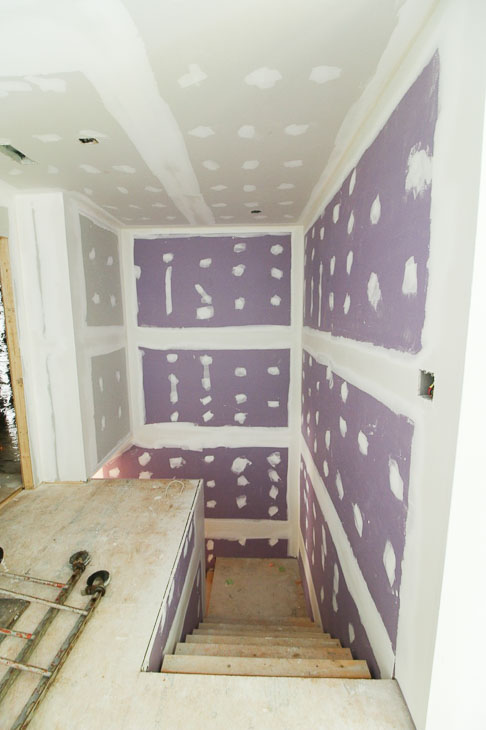
Hi-Abuse XP® – This drywall was installed in the mudroom and the stairways because it is more resistant to scuffs and scratches. We all know entryways and stairways get the most abuse in a home. Hopefully the new homeowners will appreciate a stronger drywall in these areas.
Mudroom
Stairway
Hi-Impact® XP® – The stairway is one spot I wish I had installed this strong impact resistant drywall. Little did I know that one of my carpenters was going to lose his grip on a big sheet of masonite as he carried it up the stairs. Unfortunately it left a big gash in the stairway wall. Oh well, we’ll patch it before painting. Normally the Hi-Impact wall board is made for garages, locker rooms, rec rooms, or anywhere holes are more likely to happen. For my next build, I’ll consider installing Hi-Impact in the stairways and behind doors (where door knobs frequently puncture the wall.)
SoundBreak® XP® – This is the innovative drywall product I’m most excited to share with you. SoundBreak is designed to absorb and dissipate sound between rooms and spaces. During construction, you can take measures to reduce sound transmission between rooms.
Below you can see the two layers in the SoundBreak XP sheets. They are separated by a polymer material specifically designed to absorb and reduce sound.
I knew this would be an important product to use between the living room (with its tall ceilings) and the master bedroom. Anyone who has a house with tall ceilings knows that sound can bounce and magnify in these type of rooms. I wanted to make sure the new owners could rest easy when one person stayed up late watching Netflix and the other wanted to go to bed. Maybe SoundBreak needs to be marketed as a marriage saving product. LOL!
How to Install Purple XP SoundBreak for Maximum Sound Reduction:
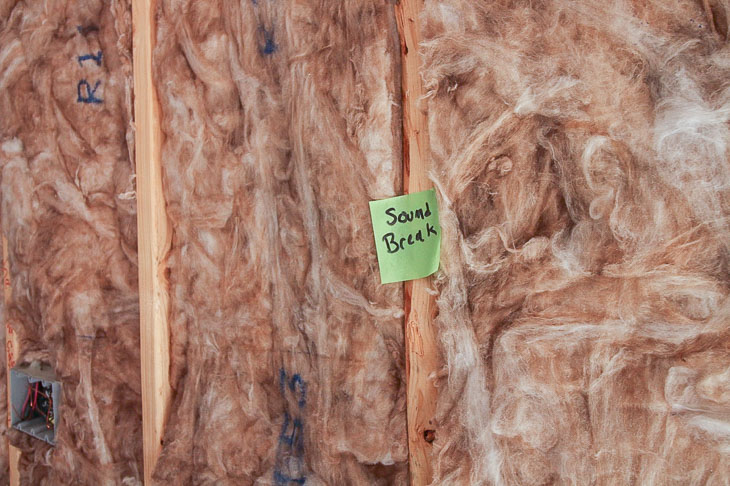
Before installing the SoundBreak drywall, the wall has to be prepped for maximum noise reduction. To start, install insulation in the wall separating these two spaces. Don’t forget to add insulation up against the header joists and any spots that are open to the adjacent room. (You might want to leave a little note for your drywall installers to make sure they install the SoundBreak drywall on the correct walls.)
Now it’s time to add acoustic putty pads(affiliate link) to all the light switch and outlet boxes on this shared wall. I created a video to show you how to install the putty pads and finish prepping the walls before hanging the SoundBreak XP drywall.
Following these tips will help control the sound transference between two adjoining rooms. Hopefully the homeowners will appreciate the extra measures I’ve taken to give them a better night’s sleep.
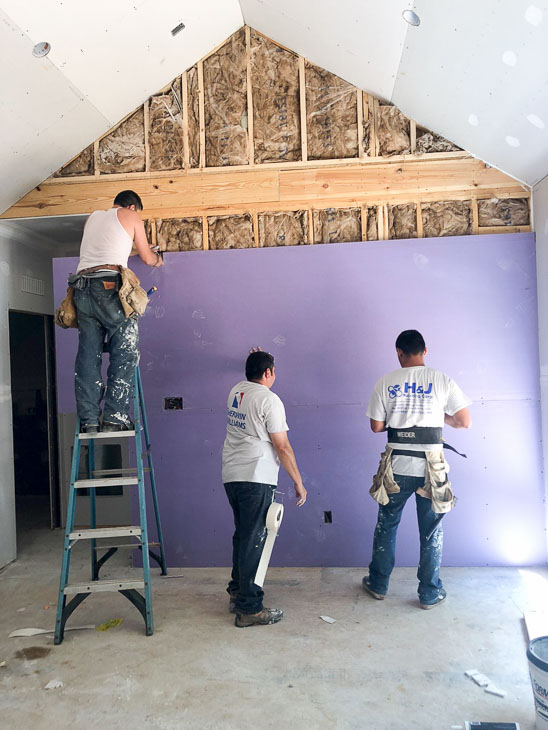
Installing the SoundBreak XP Sheets
Master Bedroom
I can’t wait to install the doors to hear how much of a difference the SoundBreak makes in this bedroom!
SoundBreak XP Retrofit® – For anyone who is upset that their home builder didn’t use SoundBreak XP, I have good news for you! There is a solution to your woes. You can add SoundBreak XP Retrofit to your existing walls and reduce the sound transference.
Gold Bond® Gypsum Board – I’m not going to lie, there is an added cost to using the specialty purple drywall. Therefore, non-water, non-traffic heavy, and non-noise sensitive rooms received Gold Bond Gypsum drywall to be easier on my budget.
Living Room as seen from the Kitchen
Front Foyer
North Bedroom
I hope you enjoyed this Saving Etta update. Things are really moving along at the house. I’ll try to get you another update soon, but honestly we’re in major crunch time right now. I’m going to attempt to list the house before Thanksgiving. If you live in the local area (or don’t mind making the trip) I’m planning an open house style home tour that will be open to the public on Saturday, November 17th. I’ll be sure to share more details as soon as I have them.
In the meantime, have some patience with me until I can post the remaining updates for the Saving Etta project.
Disclosure: This is a sponsored post for National Gypsum and Ask for Purple. I was provided with some complimentary products to use in the Saving Etta house. I was not told what to say, all opinions are my own. As always I only work with brands that I would use myself.

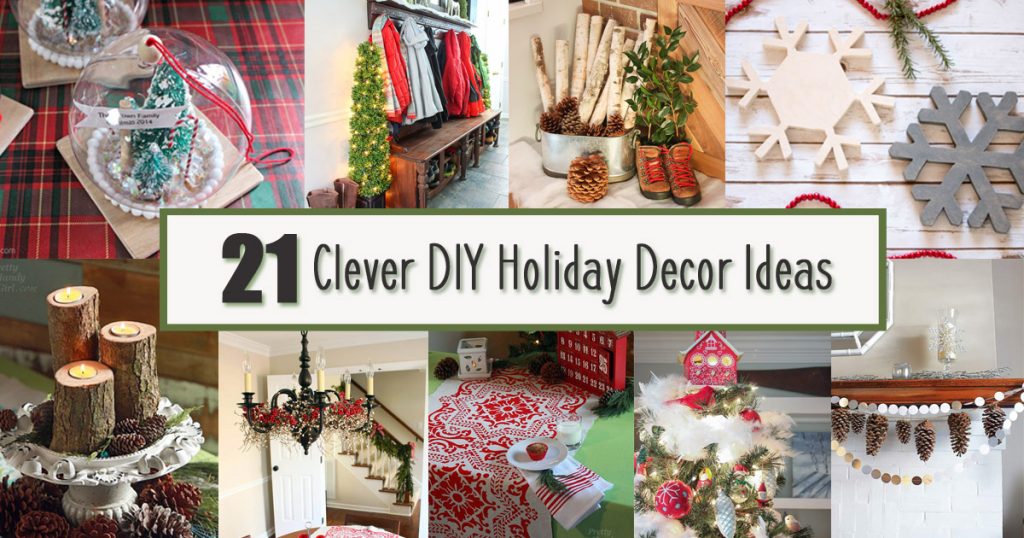 21 Clever DIY Holiday Decor Ideas


 Top 16 Gift Ideas for the DIY Enthusiast


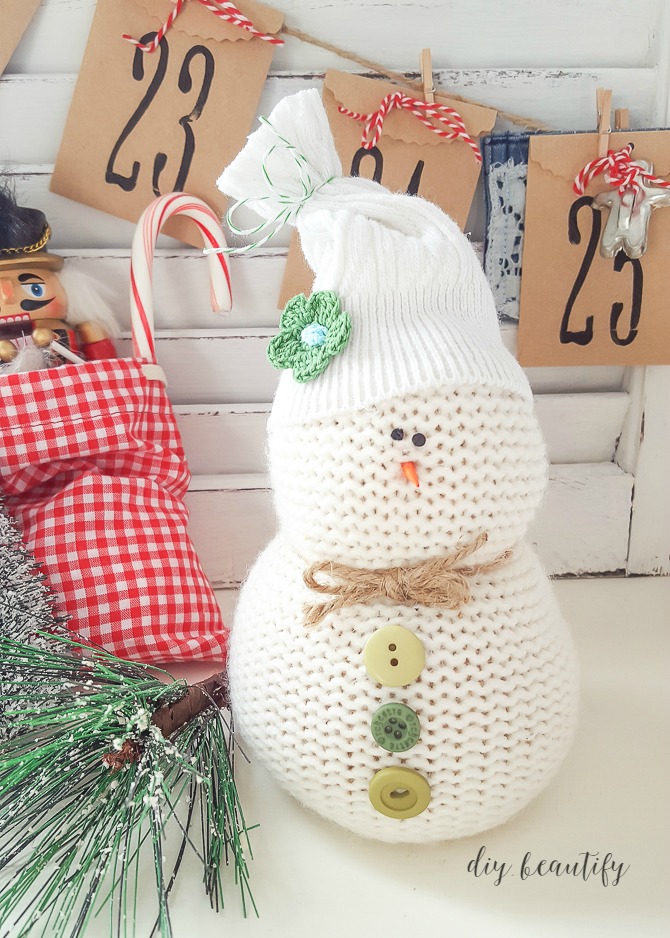 Create this adorable Snowman
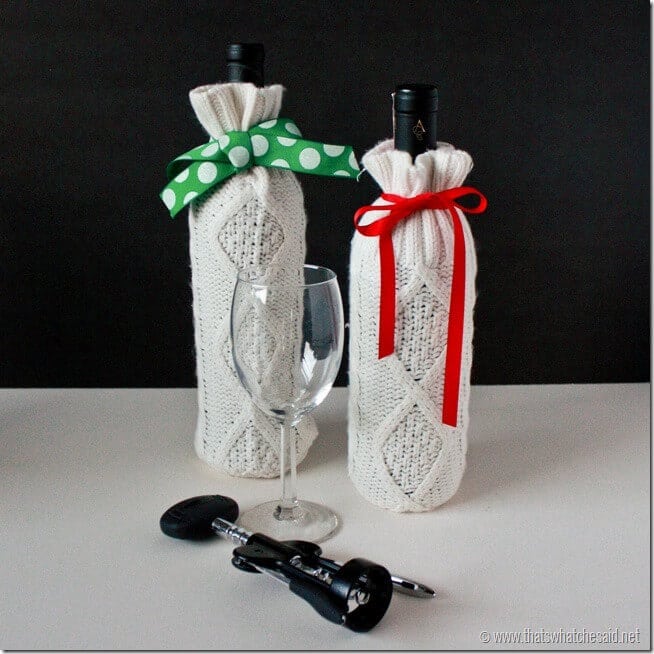
 Create a Fall Wreath from a sweater
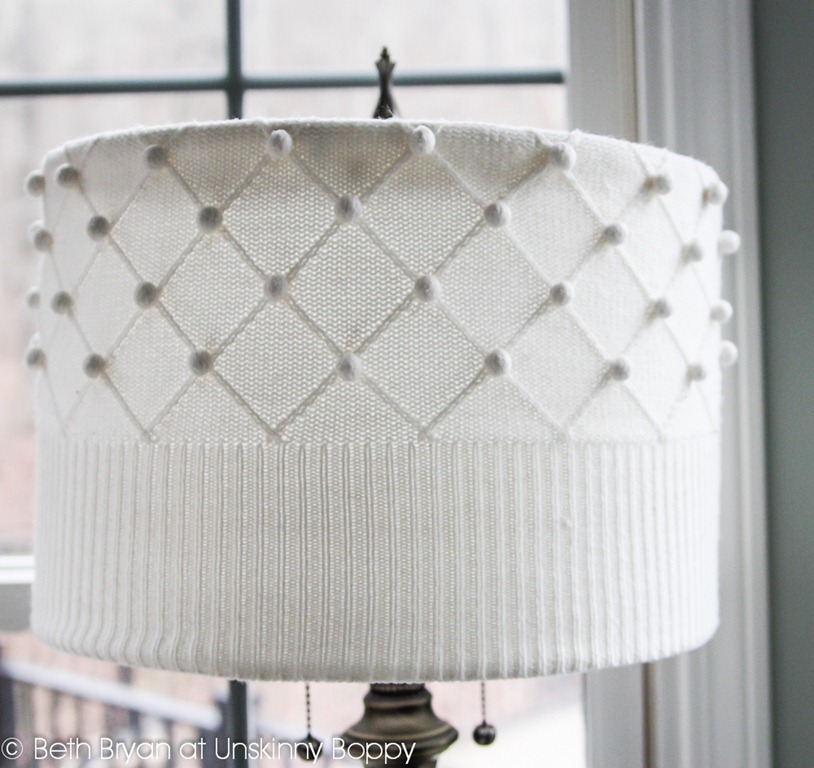 Make a gorgeous chic lampshade
 Create this 10-minute Tooth Fairy Pouch
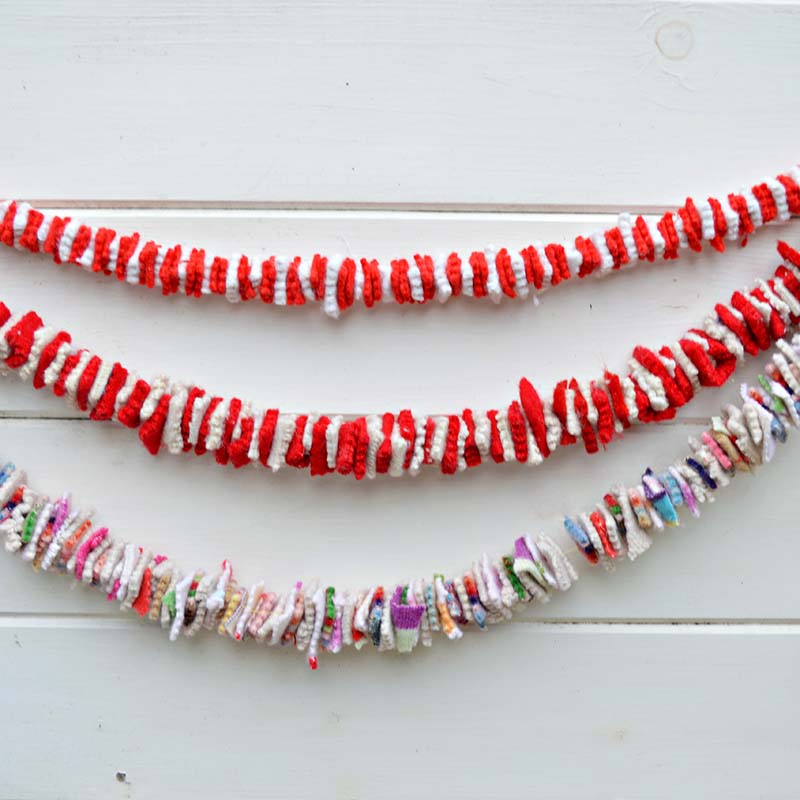 Make these gorgeous wool garlands
 How cute is this sweater vase
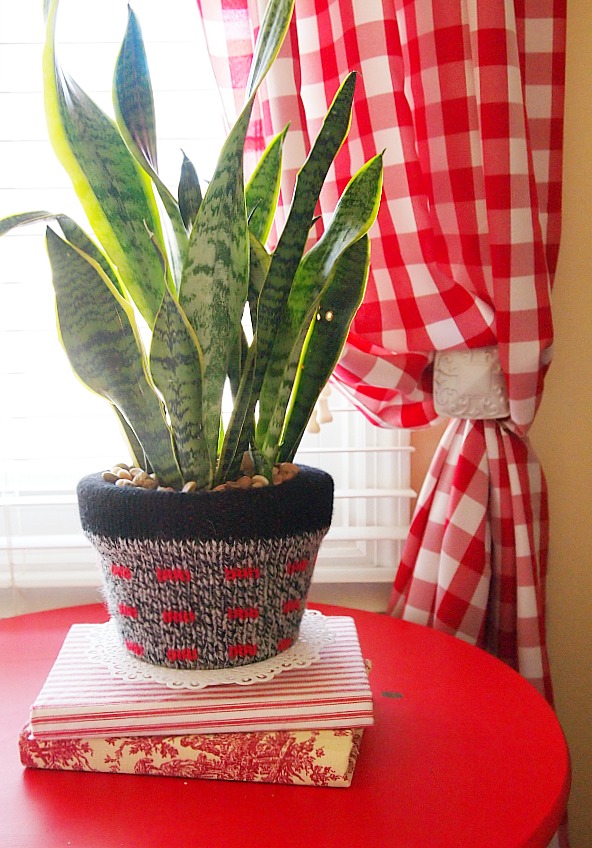 Use a patterned sweater
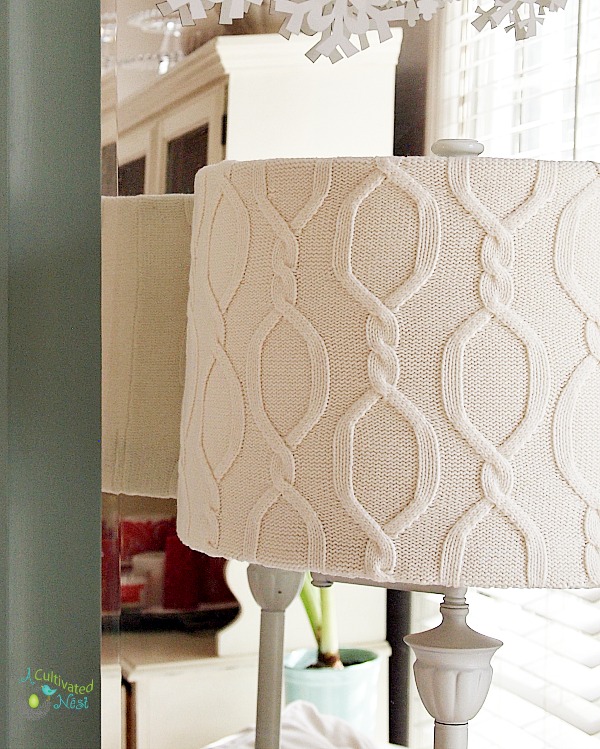 Create some coziness in your room by covering this lampshade
 These no-sew sweater pumpkins
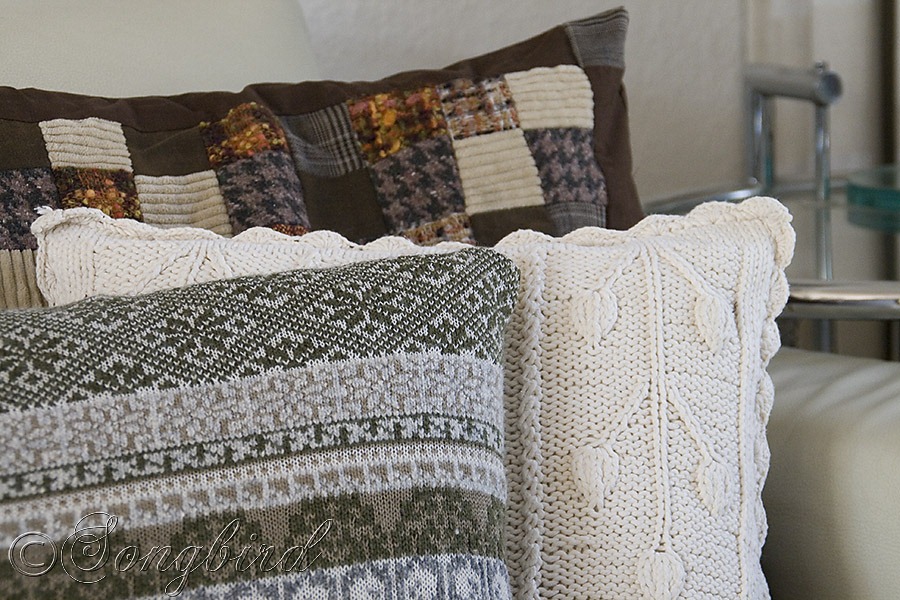 Create some DIY pillows using old sweaters
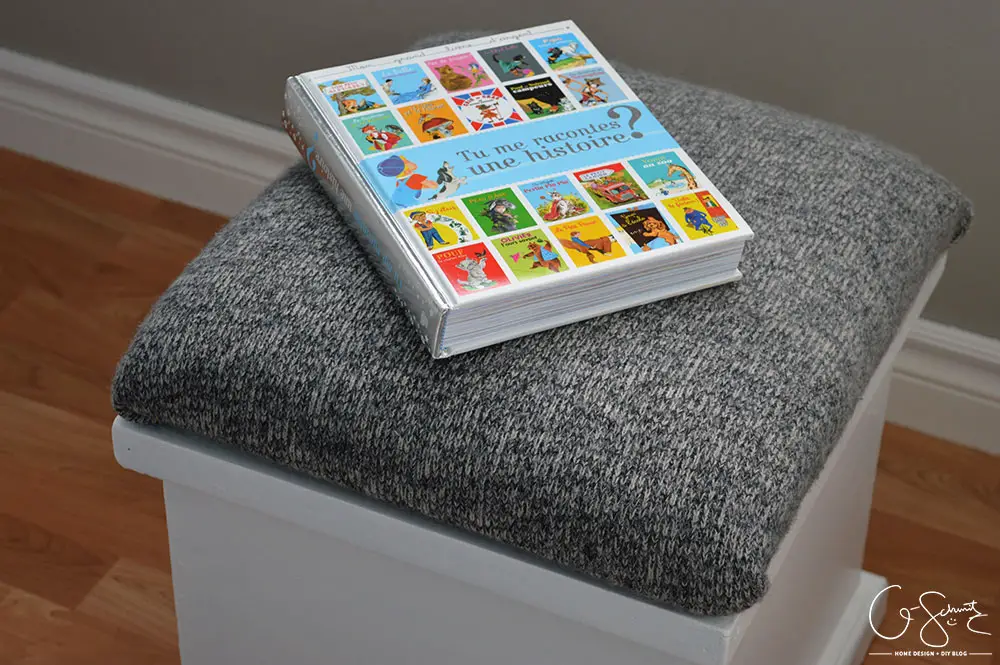 Makeover a storage ottoman
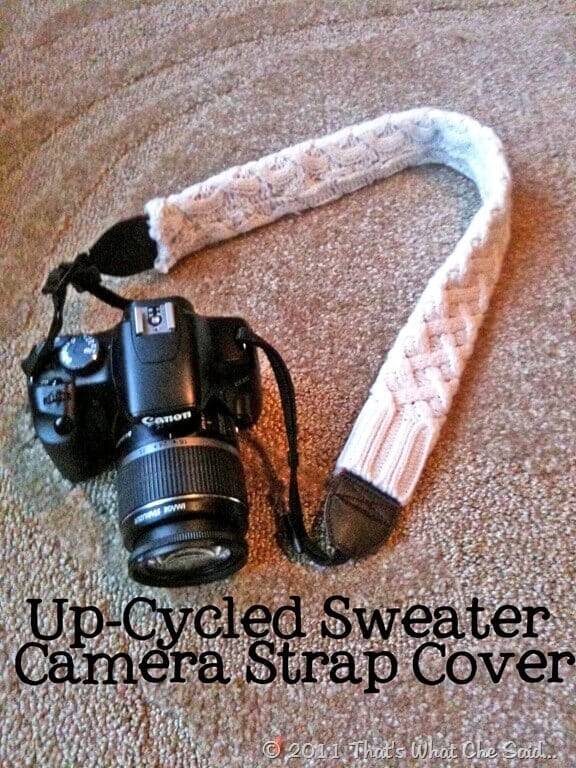 Cushion your camera strap
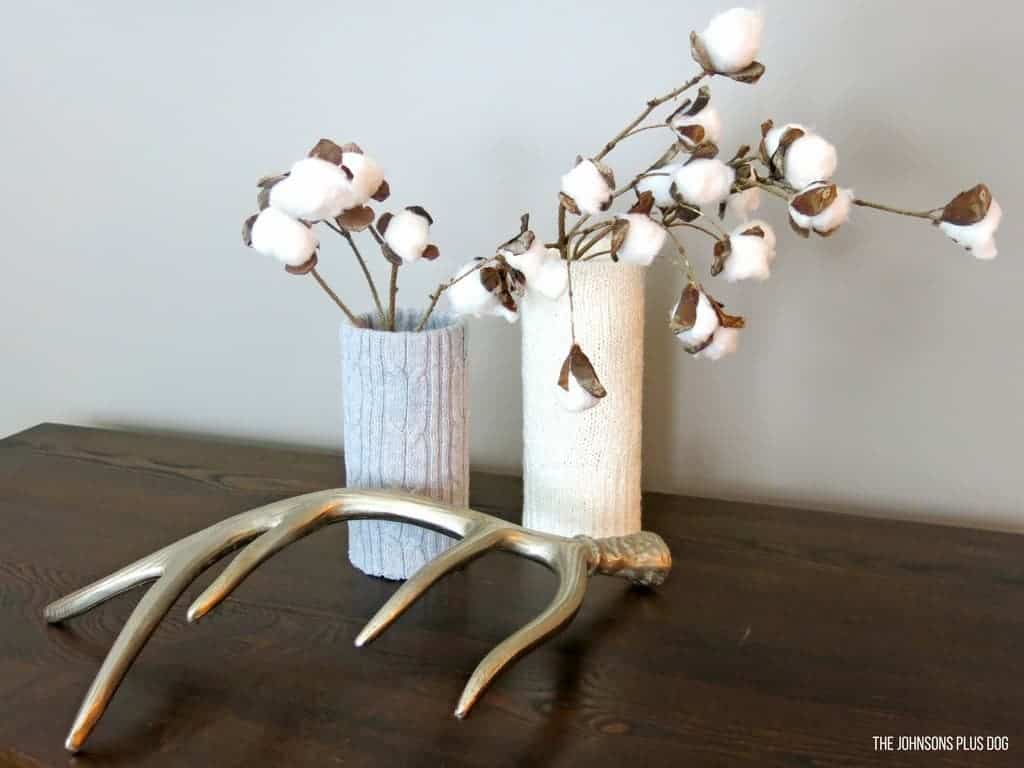 Here’s a tall version of sweater wrapped vases.
 Use old sweaters to make these adorable christmas ornaments.
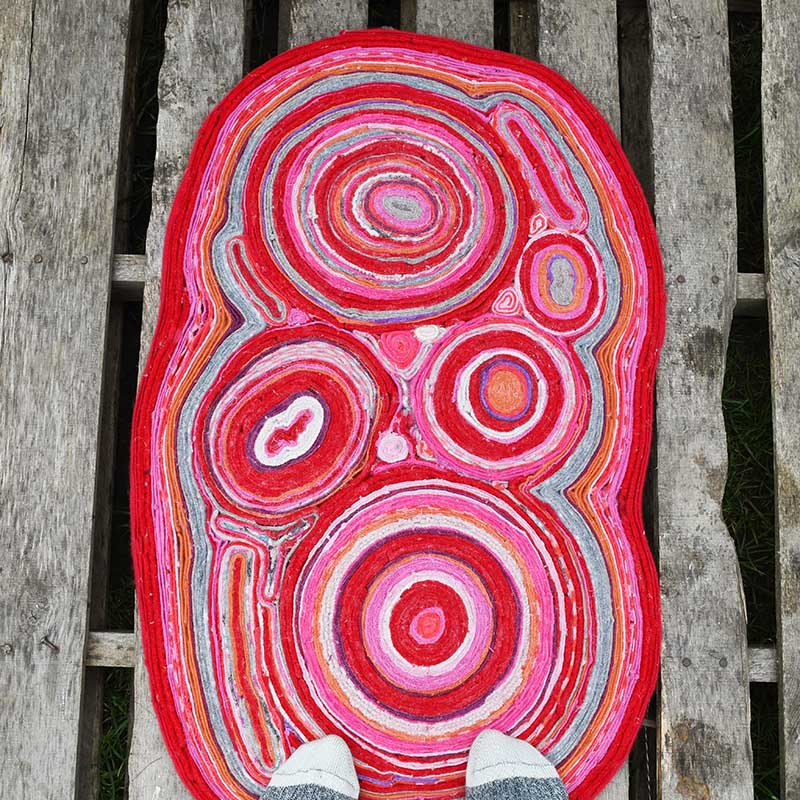 Create a psychedelic rug using
 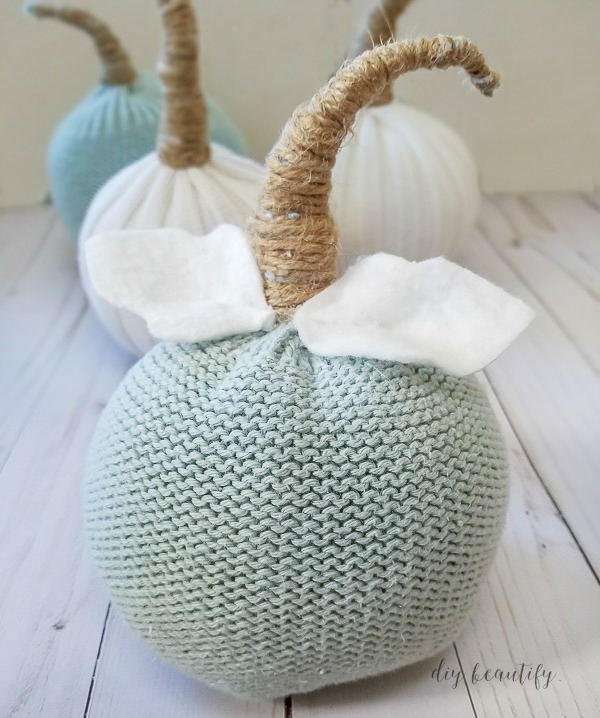 Turn sweater sleeves into these adorable pumpkins
 Re-size and Dress Up a sweater
 Make leg warmers really quickly


 Shared Downstairs Bathroom
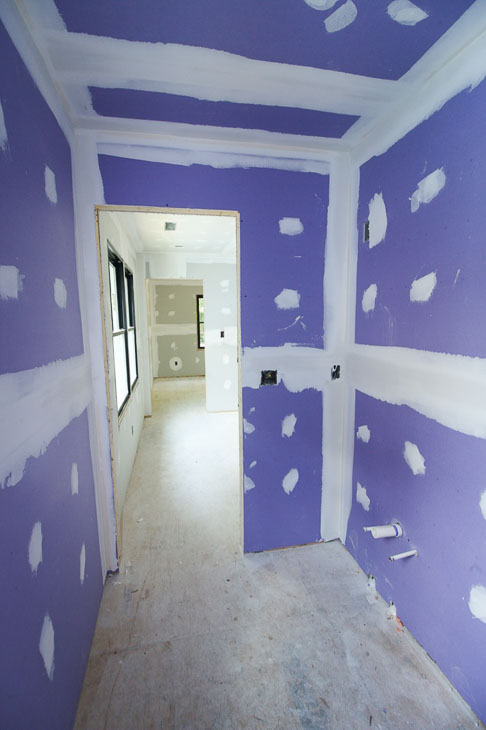 Upstairs Bathroom
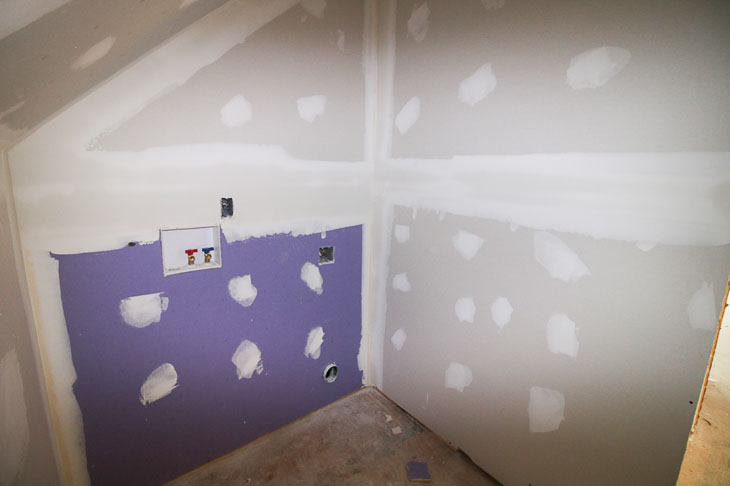 Laundry Room
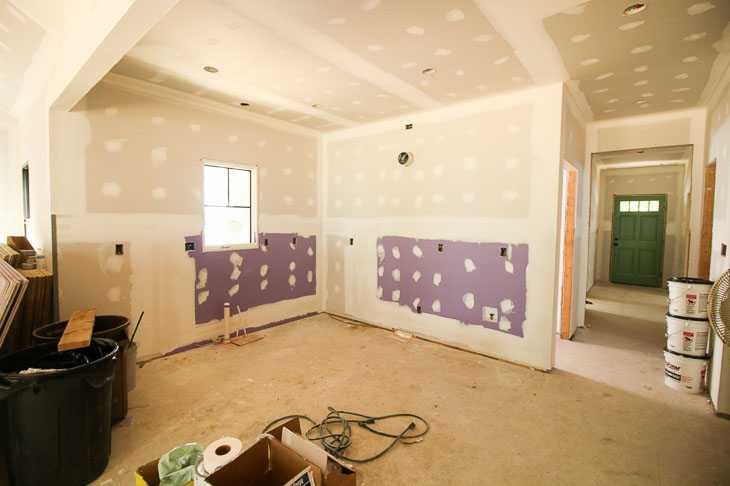 Kitchen
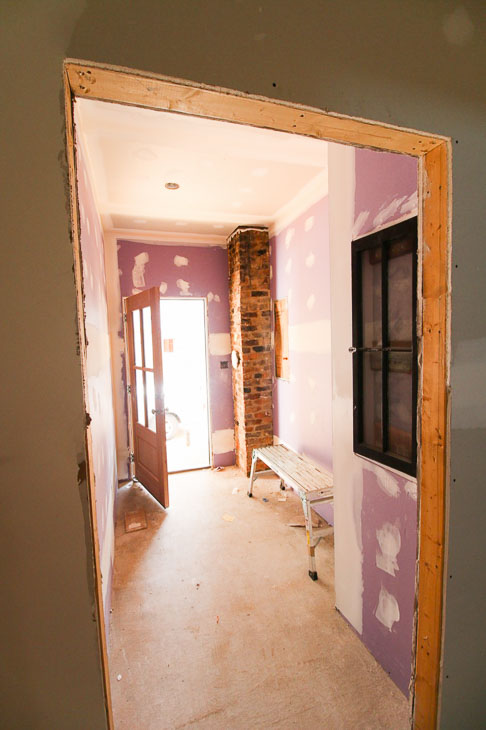 Mudroom
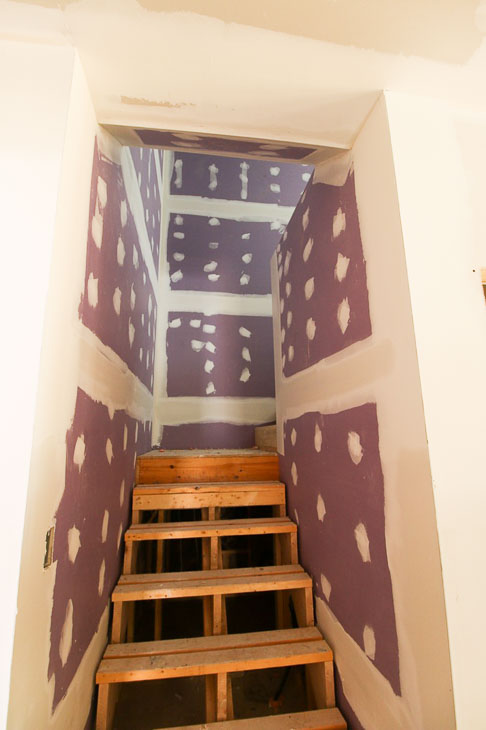
 Stairway
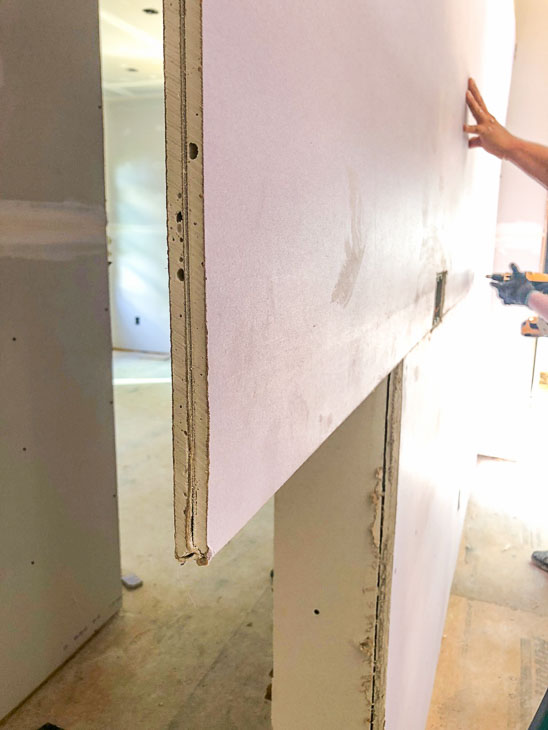
 Installing the SoundBreak XP Sheets
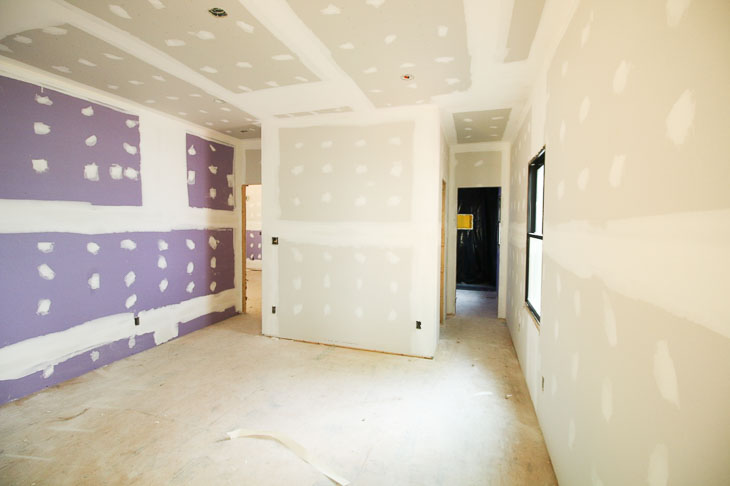
 Living Room as seen from the Kitchen
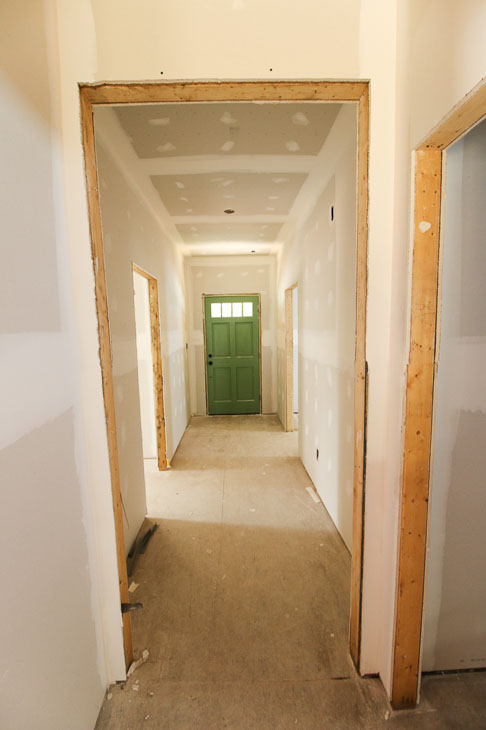 Front Foyer
 North Bedroom