iphone charging by bedside usb charging outlet

Learn how you can make simple electrical upgrades to your home. Today I’ll show you how to install an outlet that charges your USB devices and powers your appliances at the same time.

How to Install USB Charging Outlets

How to Install a USB Charging Outlet

I’m so excited to share this tutorial with you. Anyone who has a tablet, mobile phone, or other USB connected device will love this tutorial! How many times have you combed through your house for the plug to the cord for your device? I think I lost count how many times those little square plugs have eluded me. But, today they can stay hidden forever! I don’t need them now that I discovered How Easy it is to Install a USB Charging Outlet! As one of the Saving Etta sponsors, Leviton sent me several USB charging outlets to install in the house. (Spoiler Alert: I’ll be sharing some photos of the finished Saving Etta project. If you want to wait for the progress posts, go ahead and avert your eyes.) My electrician and I installed the outlets in strategic places where the homeowners would likely want to charge their USB devices.

Each bedroom received at least two outlets on either side of where a bed might be positioned.

usb charging outlet next to bedside table in master bedroom

The kitchen has a few on the counters…

white usb charging outlet on white subway wall open shelving

…and one in the island (in a matching gray color.)

gray usb charging outlet in gray island cabinets

The upstairs bedroom has a few more, especially under the little built-in desk between the closets. This is the perfect spot to sit and work while enjoying the view out the window.

vintage typewriter on desk by window between closets

Are you ready to learn how to install your own Leviton USB Charging Outlet in your home? It’s easy and takes about ten minutes to complete. Grab these few tools and let’s get busy.

Materials:

(I’ve included affiliate links for your convenience. I earn a small percentage from a purchase using these links. There is no additional cost to you. You can read more about affiliate links here.)

materials for installing outlets

Required Safety Instruction:

Turn off the power to the outlet you are working on. Check the outlet with a voltage tester. If you don’t have one, I highly recommend putting a night light or light in the outlet and turn it on. Then shut off the circuit at your circuit breaker and check to see that the light has gone out.

How to Repair Your Dishwasher - Control Panel Replacement

Ok, now that you have all of your materials and the power is off, you’re ready to go. To see how to install this USB charging outlet watch this step-by-step video tutorial below. It also shows you how to install the outlet it if you are starting with a new construction junction box.

If you need to remove your old outlet, you can follow the directions in this post on replacing an ugly old outlet.

Now that you are finished, aren’t you feeling proud of yourself? Taking on a simple electrical project like swapping out an outlet is super simple. I hope you’re motivated to make more electrical upgrades in your home!

For example, why not learn how to install a smart dimmer switch you can control with your phone or with a voice-activated device like Alexa or Google Home!

How to Install Smart Dimmer Switches

Gotta run now, I’m still finishing up some last punch list items at the Saving Etta house. While I work, it’s been nice having the ability to plug in my phone to charge while listening to my Pandora stations!

iphone charging by bedside usb charging outlet

Visit the Leviton website for more information, installation instructions, and where to buy devices from Leviton’s residential product family.

Disclosure: This is a sponsored post for Leviton. I was compensated for my time and efforts to promote the Leviton Residential products. However, all ideas and opinions are my own. I will always let you know when you are reading a sponsored post. You should also note that I’m very particular about the brands I work with.

Saving Etta: Kitchen Cabinet Decision and Install

Saving Etta: Kitchen Cabinet Decision and Install

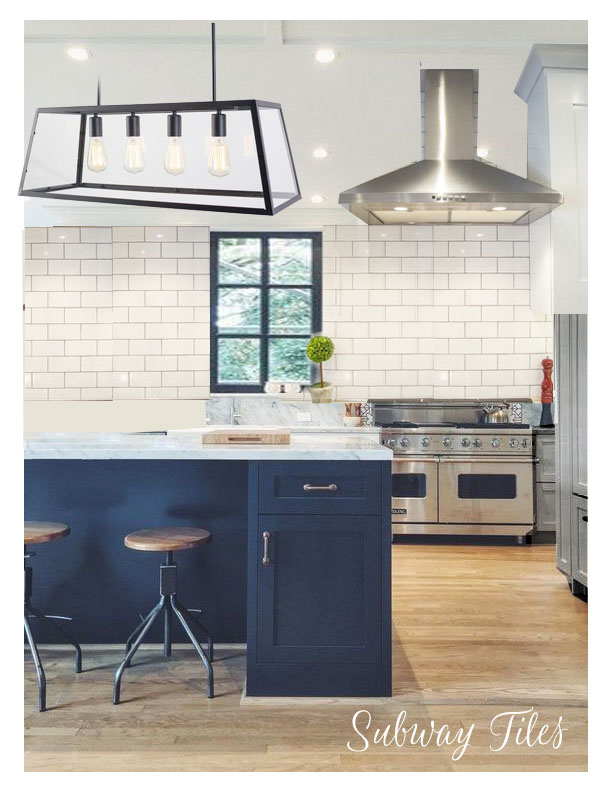
Oh my goodness, I just realized I never shared the Saving Etta kitchen mood board with you! Well, I guess it’s a bit late for this, but here you go:

Saving Etta: Kitchen Cabinet Decision and Install

Inspiration Sources:

Kitchen Design Image from Regan Baker Design’s Lake District Revival

Stainless Steel Hood by Broan

4″ x 12″ Subway Tiles by Jeffrey Court for Home Depot

Morley 4 Light Island Light Fixture

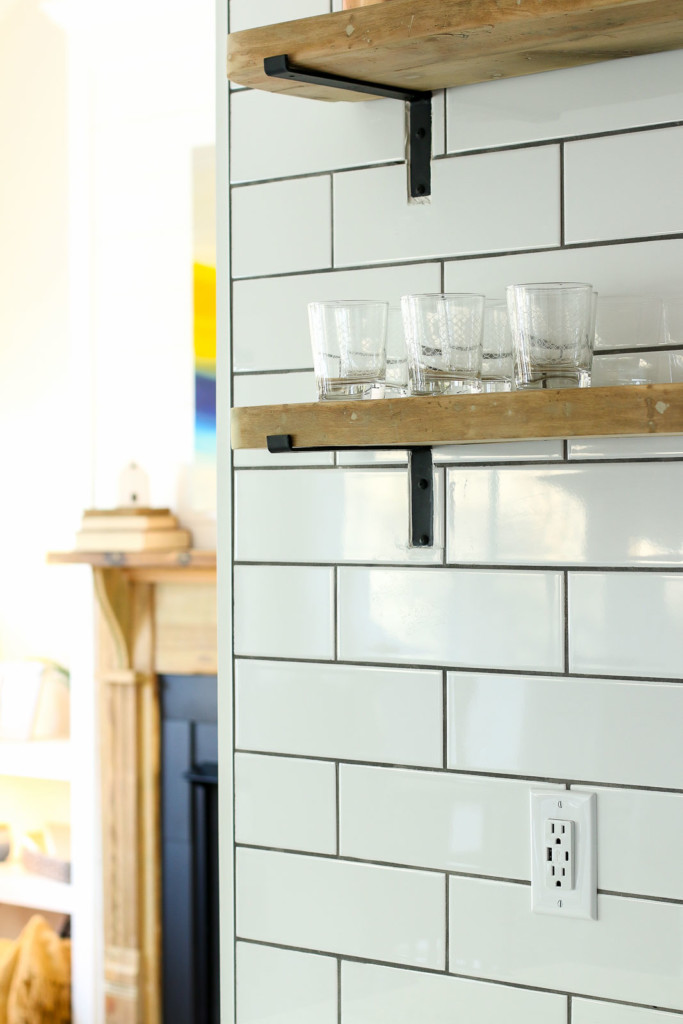
Not shown, were open shelving I planned to install on the full tile wall to the left of the window. What I was really digging is the painted island in navy. About a week after I created this mood board, I was stopped in my tracks by this photo from my friends Katelyn & Uriah, at The Inspiring Investment.

Saving Etta: Kitchen Cabinet Decision and Install

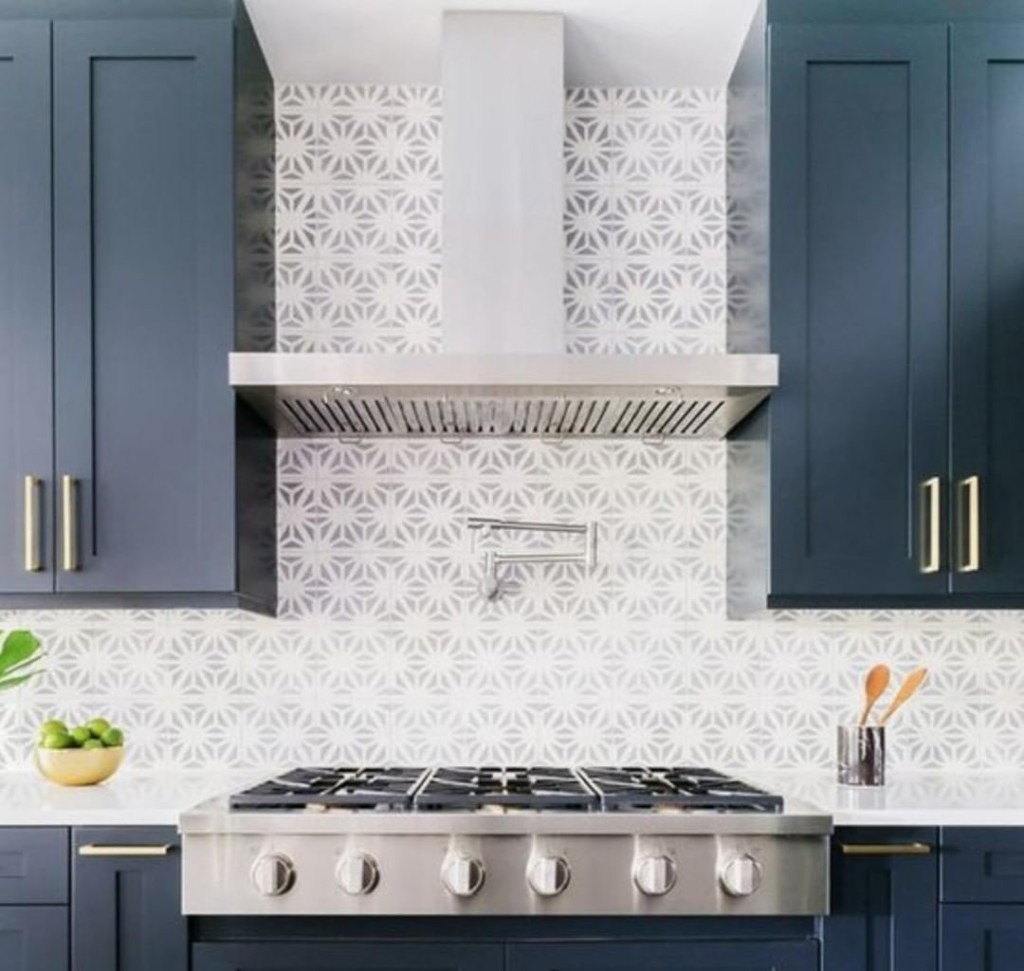
I immediately messaged Katelyn to ask if the cabinets they used on their LaRancharita flip was navy or was I just dreaming? She replied “YES!” (If you aren’t following The Inspiring Investment on Instagram, you need to. Katelyn and Uriah are local flippers who I love to watch!) By now I was smitten and determined to use a similar color in Etta’s kitchen. As you may know, I’m certainly no stranger to using color in a kitchen. You may recall that my own kitchen cabinets are a pretty minty blue.

Saving Etta: Kitchen Cabinet Decision and Install

The Decision Process:

I began hunting for stock navy cabinets to purchase but was coming up blank. If you’re wondering why I didn’t purchase custom cabinets, here’s why:

  • For my own kitchen, I didn’t mind paying the extra fee for a custom color. For a flip, I have a tighter budget.
  • Going with a custom color might not appeal to as many potential buyers. (Remember my front door color dilemma?)
  • Ordering custom painted cabinets can add weeks to the timeline.
  • Hunting down a manufacturer that doesn’t charge an arm and a leg for custom colors is time consuming.

Ultimately, time and budget played a huge role in ditching the idea of using navy cabinets (insert sad emoji face.) This was my mood when I found myself at Cabinets To Go (not sponsored). By this time I was ready to order cabinets and be done with it. But, first I needed to make sure the cabinet quality was up to my standards.

I pulled out all the drawers and inspected them. Dovetail construction on all drawers: check. Then I tested the drawers and doors. They all had soft close slides and hinges: check. But, the final inspection these cabinets had to pass could be a deal breaker. Having been through a major unplanned kitchen renovation. because cabinets were ruined by water, has changed the way I choose cabinets forever. I looked at the inside of the Cabinets To Go cabinets and was pleased to see plywood boxes: check.

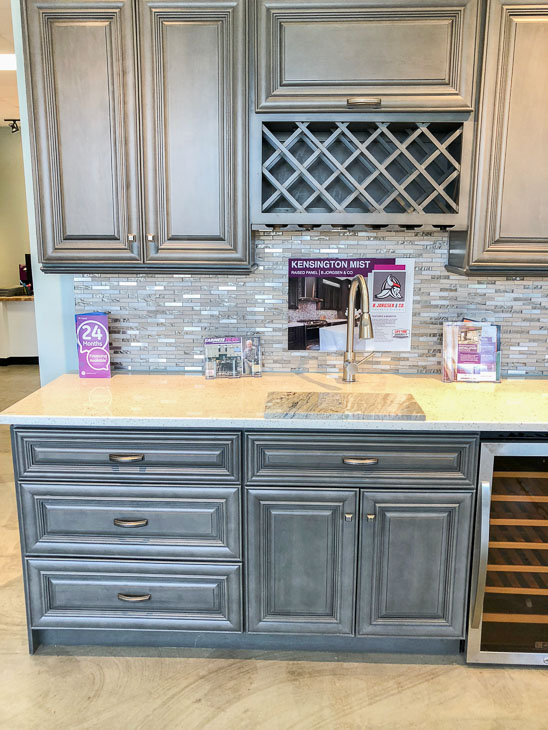
Next it was time to choose the cabinet style. I was resigned to the fact that I couldn’t get navy cabinets (although I did ask.) As a distant second choice, I decided to look for a neutral gray cabinet as a safe choice. These were the first cabinets I looked at, but ultimately I didn’t like all the molding profiles and dark wax look. I needed something a little more updated for a younger buyer.

Saving Etta: Kitchen Cabinet Decision and Install

On the opposite end of the style scale were these glossy modern cabinets. They are sleek and sexy, but I was craving a modern farmhouse style for Etta (I don’t think she’d want to flaunt her sex appeal at her age.)

Saving Etta: Kitchen Cabinet Decision and Install

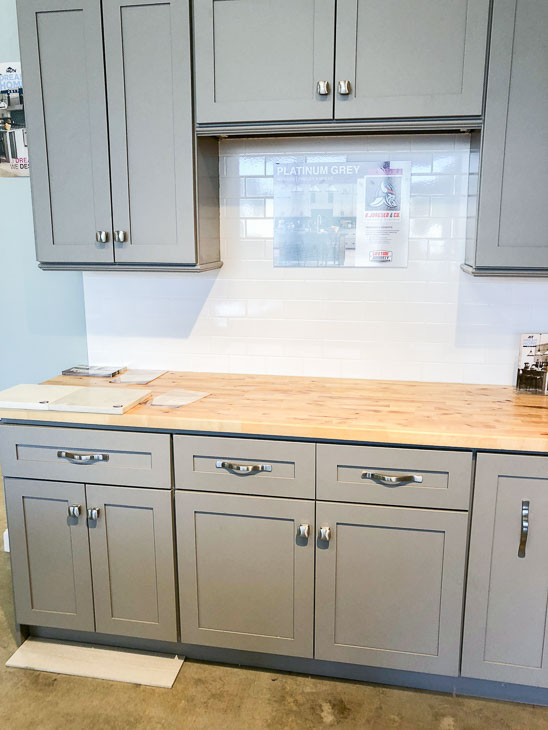
Finally, I settled on a simple shaker style cabinet. The “platinum grey” color was exactly what I was looking for to appeal to a variety of home buyers.

Saving Etta: Kitchen Cabinet Decision and Install

After meeting my high standards, I braced for the total price. Luckily I was eligible for a contractor discount and paid about $3,000 for all the cabinets. I put down my deposit and was told I could pick up the flat-packed and un-assembled cabinets in about two weeks. I could have paid an additional $1500 for assembly and installation, but I figured this was a good place to save some money.

Assembling Cabinets:

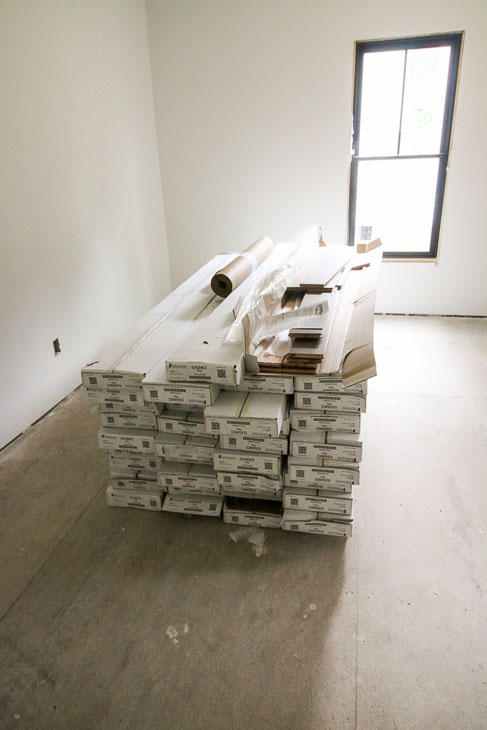
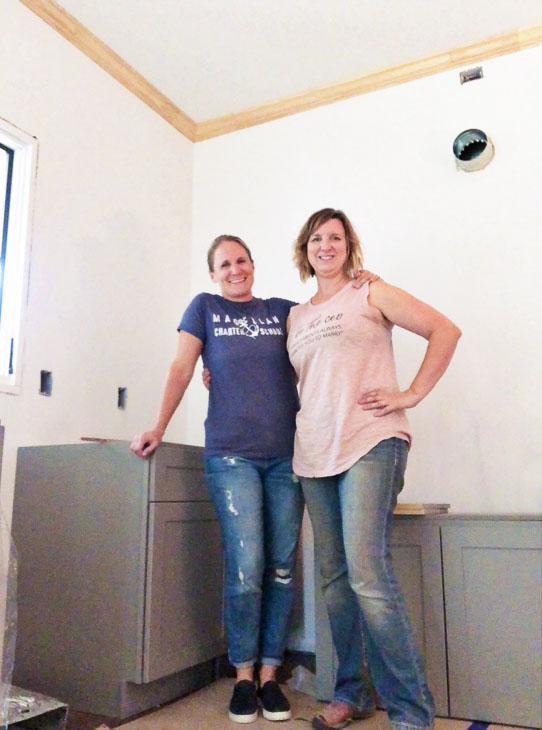
After the wood floors were installed, I was anxious to pick up the cabinets. My good friend Holly, a fellow renovator and local realtor, offered to help me with assembly. Little did I know how incredibly grateful I would be for her offer. As we unpacked the cabinets from the boxes, she looked at the instruction sheet briefly and said, “Perfect! These are just like the ones we assembled for our rental house.” With her experience in assembling cabinets, I let her take charge. Before long we had assembled the majority of the cabinets.

Saving Etta: Kitchen Cabinet Decision and Install

Honest Opinion of Cabinets to Go Cabinets:

One of the last cabinets to assemble was the corner lazy Susan cabinet. If you purchase this cabinet from Cabinets to Go, throw away the instruction sheet because it is useless! Watch this video to see how to assemble it.

I want to take a minute to let you know my honest opinion of the Cabinets To Go quality. For the price, I was pleased with them. But, for my own home, I would definitely want something with stronger construction. The flat packed cabinets have a finicky turning lock nut (think IKEA furniture construction) that hold the panels together. It took some finagling to get some of them to line up correctly. But, ultimately they seem to assemble tight together. Only time will tell if they hold up to regular use.

Hanging Wall Cabinets:

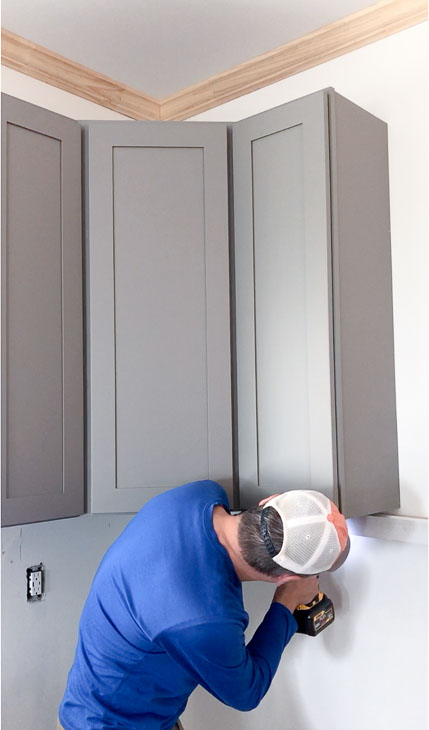
About a week after cabinet assembly, I was finally able to get a helper to assist me while hanging cabinets. My husband, aka Pretty Handsome Guy, offered to take the day off work to help me get the cabinets installed. You may remember his skill set from this popular tutorial on fixing common gift wrap problems. I still get a good laugh from his first guest post on the blog. Although he’s not handy, he does a great job holding things and handing things to me. I am truly grateful for his help.

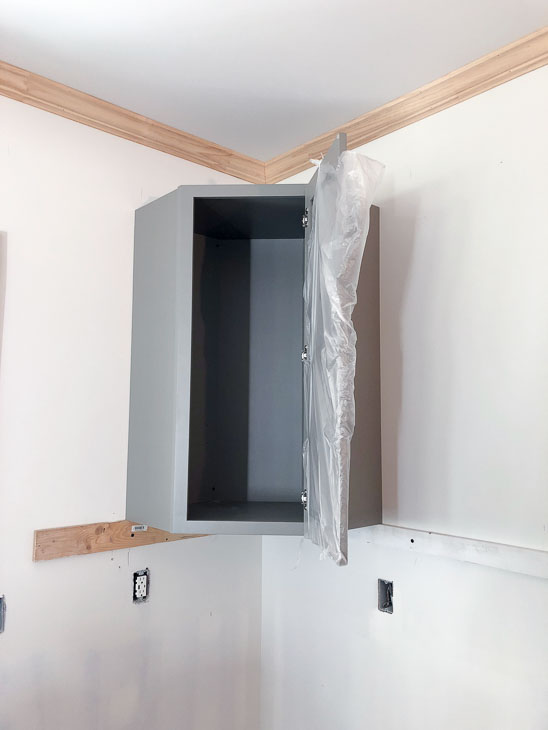
We started by securing level ledger boards to the wall to rest the wall cabinets onto. Then we started with the corner wall cabinet.  You’d never want to work your way into the corner because walls are harder to move than cabinets. Know what I mean?

Saving Etta: Kitchen Cabinet Decision and Install

Next, we installed the two cabinets flanking the corner cabinet. Each cabinet was secured with multiple screws into the studs and then secured to the cabinet next to it.

Saving Etta: Kitchen Cabinet Decision and Install

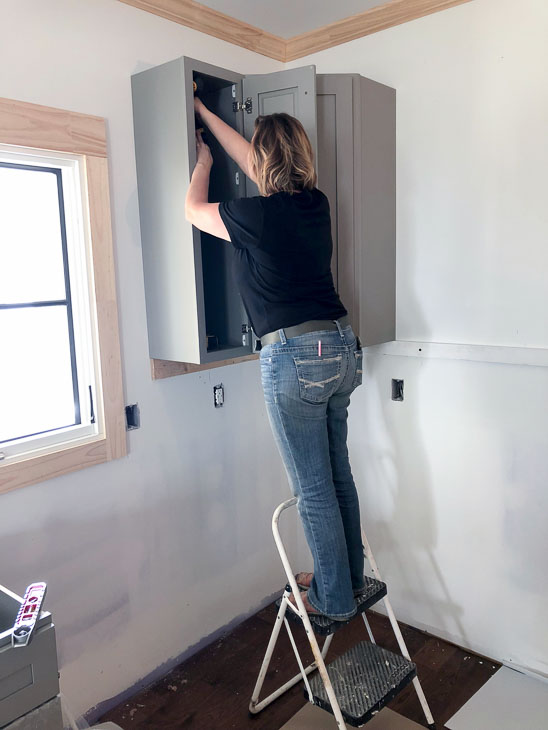
Luckily, we only had three upper cabinets to hang. This certainly made our first cabinet installation job a snap. After the wall cabinets were secured, we removed the ledger board. The holes in the wall would be easy to patch, but I knew I’d be tiling over them.

Saving Etta: Kitchen Cabinet Decision and Install

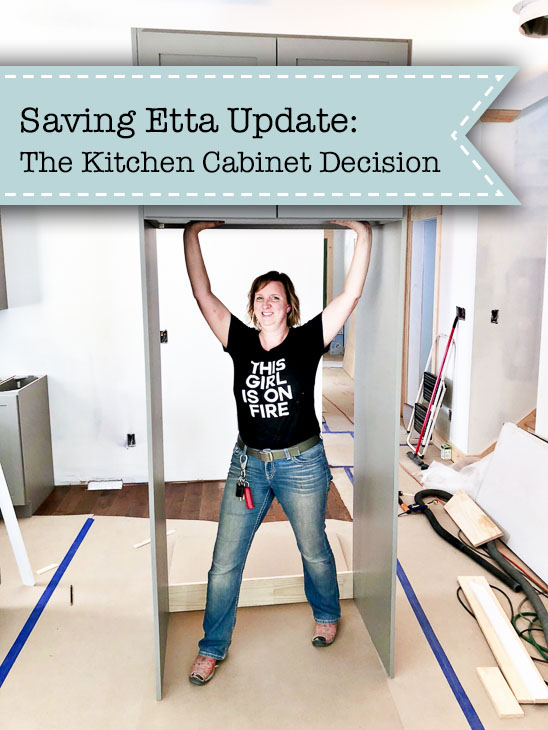
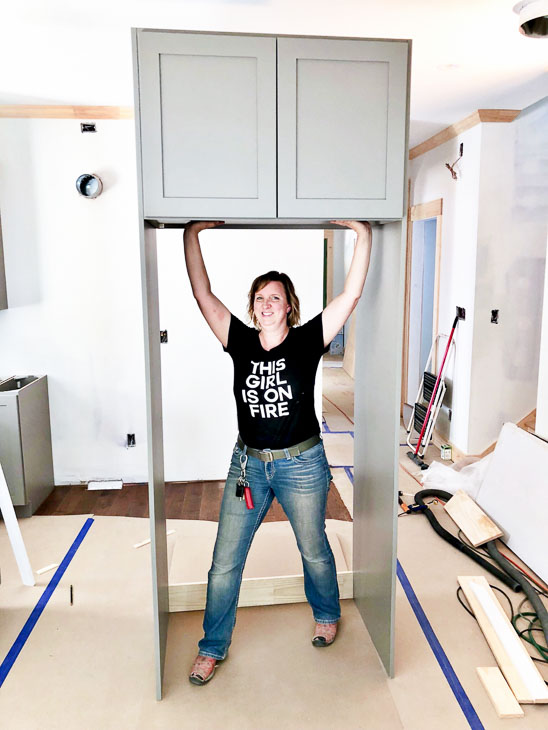
Next we assembled the fridge cabinet and secured the side walls to the cabinet on the floor before lifting it upright and securing it to the wall. If you decide to try this method of attaching the cabinet walls, make sure your ceiling is tall enough to accommodate the cabinet at a diagonal when you lift the cabinet upright. We had no issues because Etta’s ceilings are nine feet tall.

Saving Etta: Kitchen Cabinet Decision and Install

Hanging the wall and fridge cabinets took most of our time that first day. The next day I worked solo installing the base cabinets and assembling the island. There was a fair amount of leveling and shimming to get them all level. Unfortunately one cabinet had to be trimmed on the base where the floor had a hump in it. I mistakenly thought the new construction portion of the house would be perfectly flat and level—I was wrong.

Saving Etta: Kitchen Cabinet Decision and Install

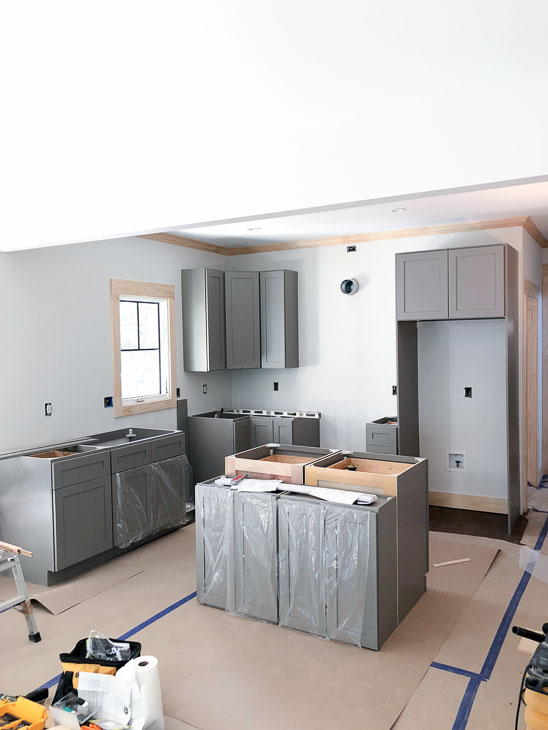
The last step in the cabinet install was to build a base for the two wall cabinets designated for the back side of the island. Unfortunately I didn’t take a picture of that step. You’ll forgive me right?

Saving Etta: Kitchen Cabinet Decision and Install

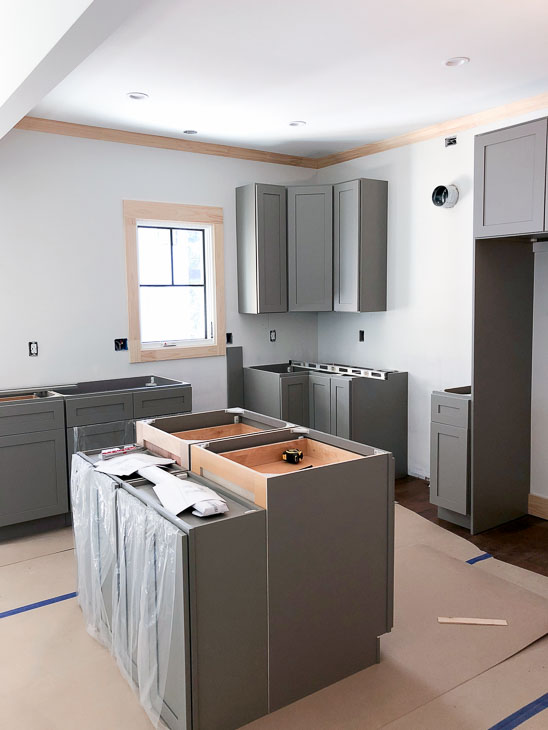
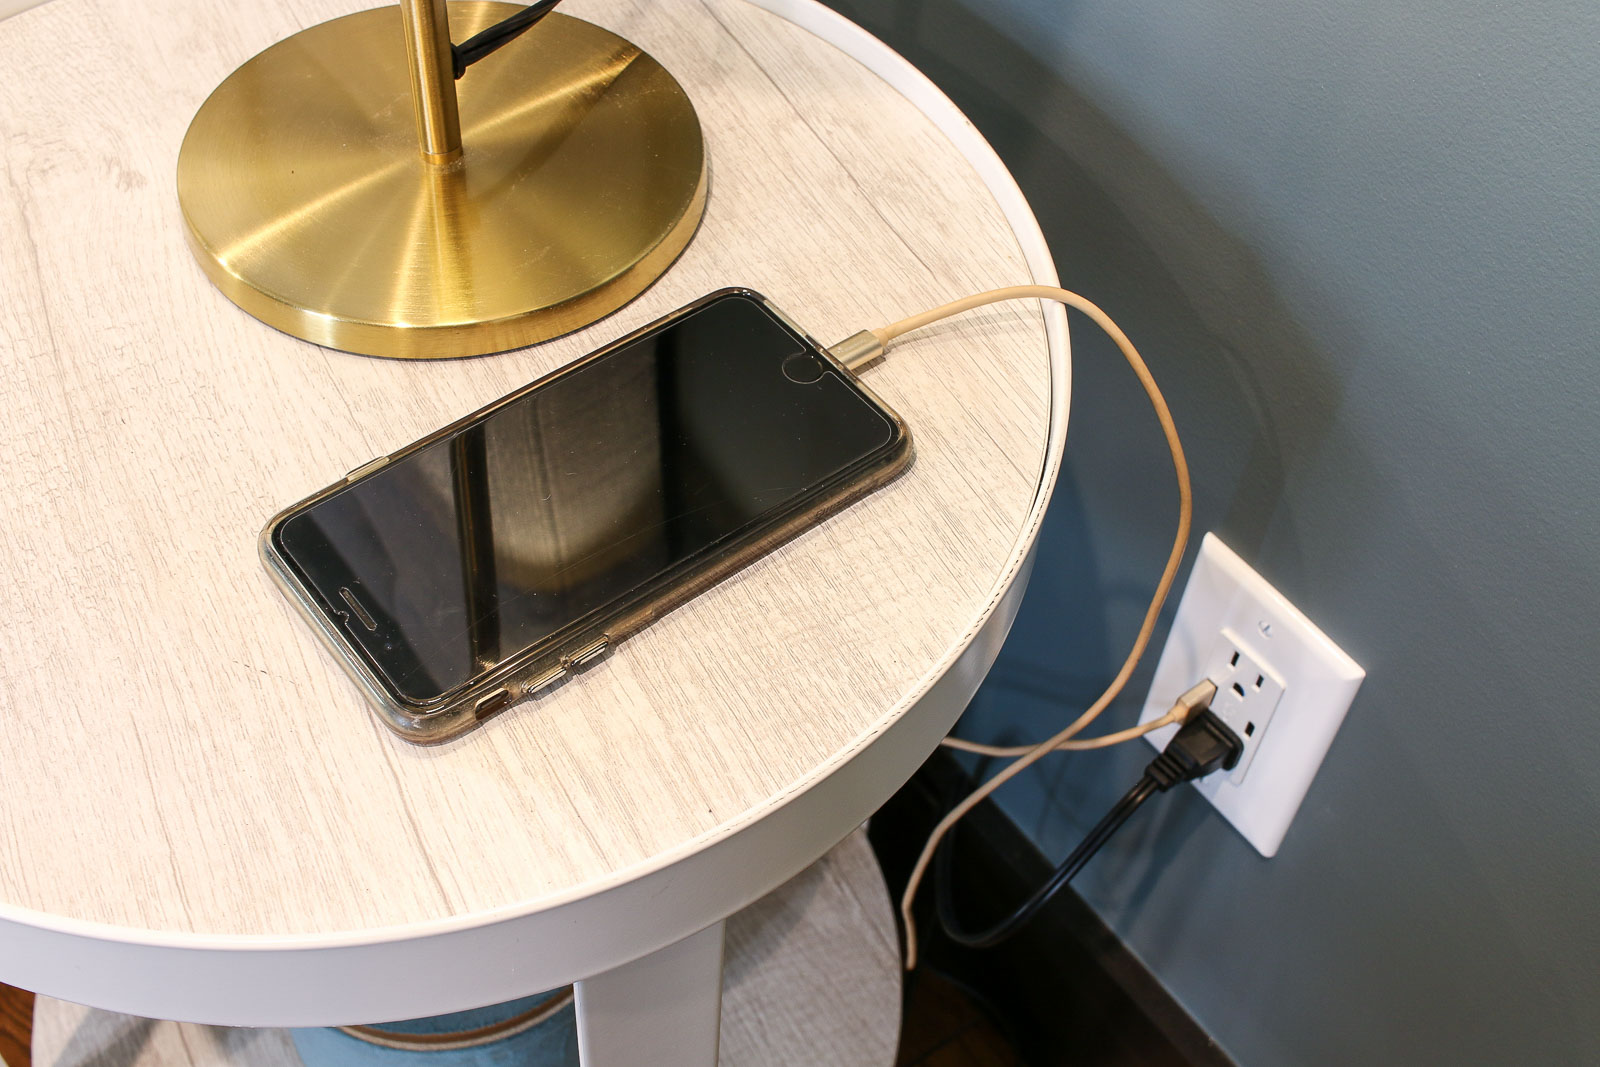
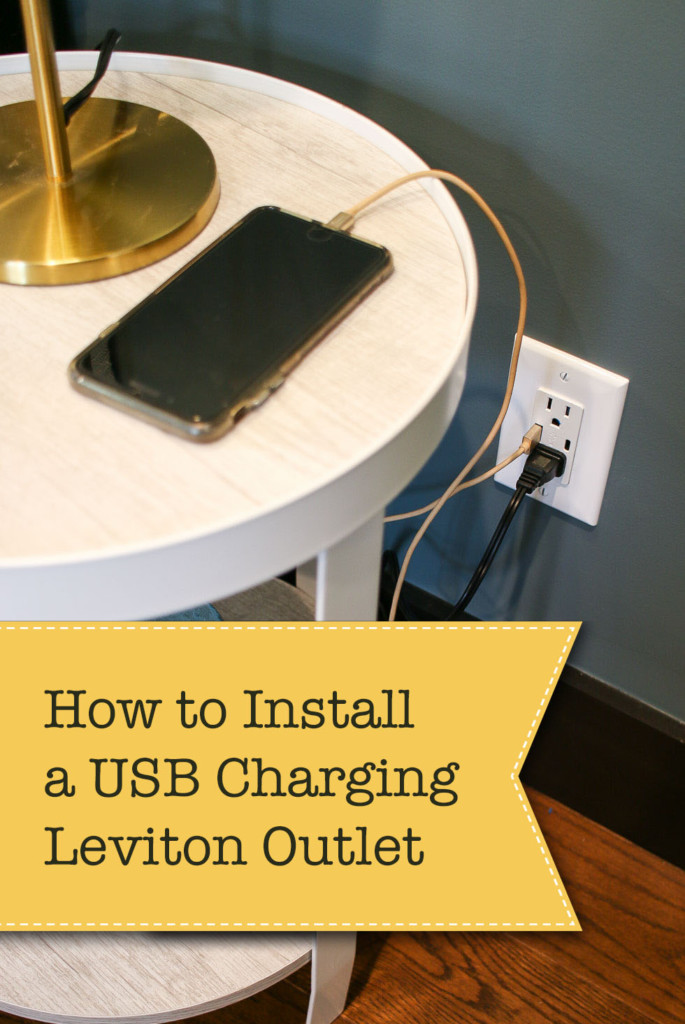
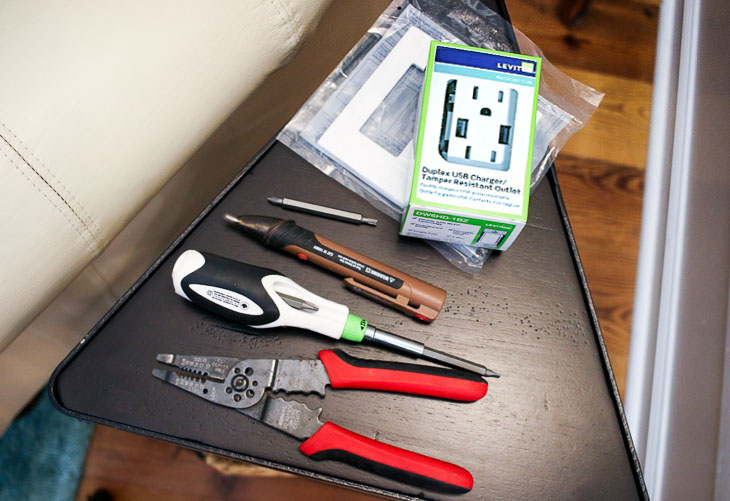
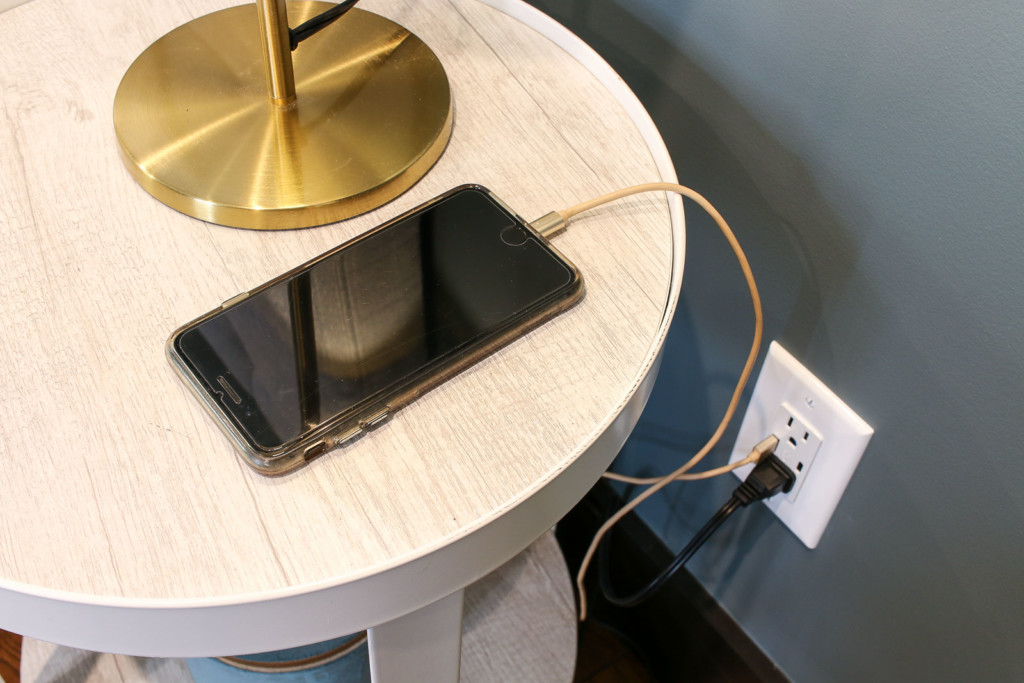
The island cabinets were eventually secured to one another and secured in place with shoe moulding around the base. Tomorrow I’ll show you a little something special I added to the island. If you have USB devices (and who doesn’t these days), you’re going to love it!

What do you think of the gray color? Is it a safer choice, or should I have looked longer for navy cabinets? Stay tuned for more Saving Etta updates!

Saving Etta: Kitchen Cabinet Decision and Install

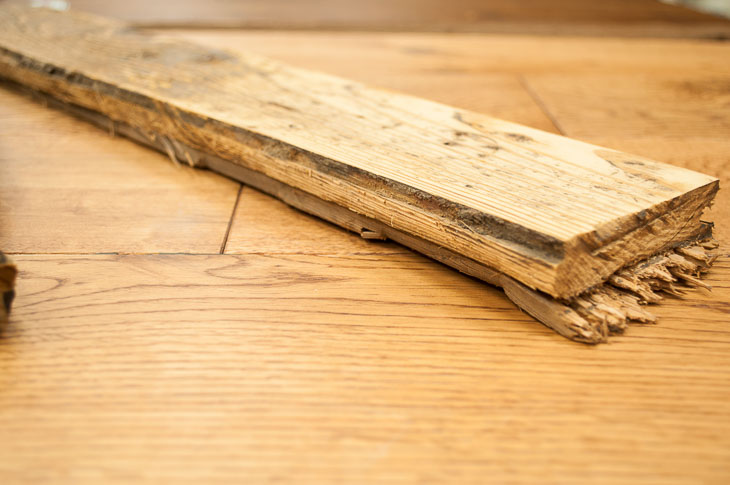
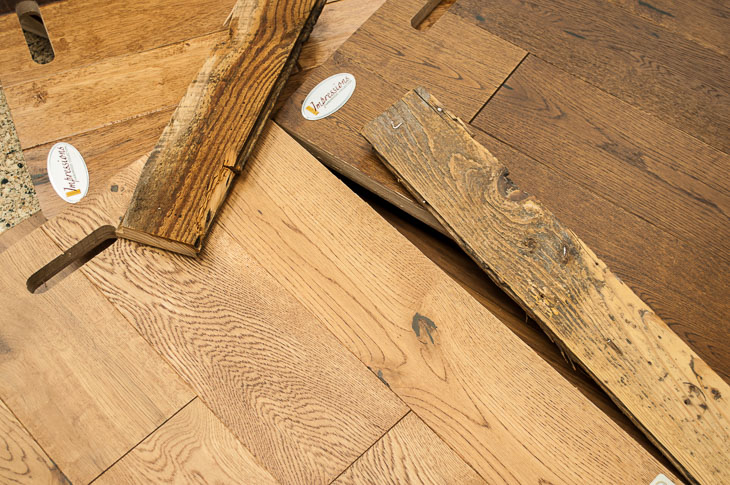
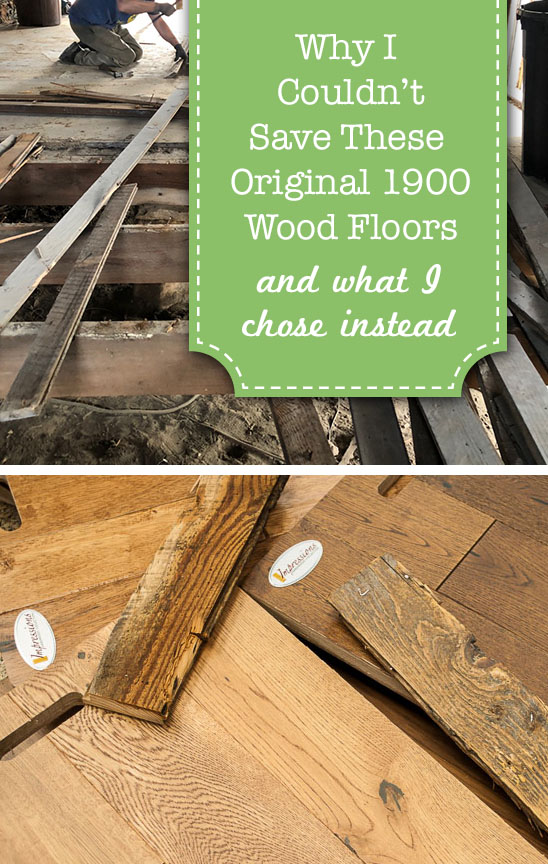
Saving Etta: Why I Couldn’t Save the Original 1900 Wood Floors

The day I realized I couldn’t save Etta’s original wood floors was one of the roughest days during the demolition phase. By then we discovered that most of the flooring in the north bedroom was too water damaged to reuse. The floors in the south bedroom were in better shape, but they were covered with a glue down linoleum flooring.

Sadly there wasn’t a sure fire way to tell if they would be salvageable after removal of the linoleum. I decided to proceed with demolition and try to salvage as much of the wood floor as I could. But during demolition almost every board we pulled up cracked and splintered as we freed them from the floor joists. Because there was no subfloor, the wood had been exposed to the crawlspace for more than 100 years. Time had taken a toll on them, and they were officially shot. After assessing the situation with the flooring, it became clear that the original wood floors weren’t salvageable. I may have cried a fair amount as I watched them being piled up for trash.

This next picture is hard to look at. If you can’t stand seeing antique hardwood floors being destroyed, look away my friend …look away.

Before they were hauled away, I grabbed as many boards as I could fit in my truck (hoping to be able to use them on another project.) For now, those planks are stored away in my garage.

What I Chose Instead:

Fast forward several weeks and I contacted Impressions Hardwood Collection, a local flooring distributor, about being a Saving Etta sponsor. I explained to them my predicament and they graciously invited me to their local office to see the samples of their flooring. With so many beautiful options to choose from, I knew it would be hard to make a decision. But, I brought two pieces of salvaged flooring from Etta to try to find something that would be fitting of a house built in 1900.

As I began looking through all the beautiful samples, two stood out from the rows of new shiny wood flooring. I pulled them and saw that they were both from the Elegance series. The grain on the wood was beautiful and the finish was almost an imperceptible flat finish.

Chris explained to me that the Elegance series is wire brushed to enhance the grain and it has a low luster finish.

I was instantly in love with the Elegance flooring because it looked old, not shiny or new.

Both the wheat and flint colors looked similar to Etta’s original flooring. Ultimately, I chose the Flint color (the darker of the two) because it has that dark aged wood look. I could not be happier with this decision. Suddenly, what had been a dark cloud over the flooring loss, became a silver lining after discovering this beautiful solid wood flooring. As a bonus, I was thrilled to be partnering with a local family-owned flooring distributor who offers quality flooring to their customers.

Wood Flooring  Installation:

As you know from the last Saving Etta update, the tile floors were being installed while the Elegance Series wood floors acclimated to the house. Why is this important? Impressions Hardwood has a great blog post explaining why you don’t install wood floors right after delivery.

After the delivery of the flooring, I couldn’t wait to rip open the boxes and gaze on them.

After ten days (and after the tile floors were in), it was finally time to install these beauties! I hired a local flooring contractor to install the wood floors and they did a phenomenal job.

Of course, I had to resist the urge to clean off those sawdust foot prints until the job was complete.

Pretty impressive when the living room view transitioned from this:

to this in a few days:

I leave you to drool over these beautiful photos of the Impressions Hardwood Collection Elegance Series solid wood flooring in Flint stain color.

They look so good against the vintage hex tiles! Both look like they could be original to the house, right?!

But, hey, look here! They go great with modern tiles too!

And this photo legit makes my heart skip a beat! The new floors with the original pine door from 1900. I can’t handle how gorgeous they look together (even though people will talk, saying that door is a cougar and way too old for that young handsome floor. LOL.)

Are you in love with these solid wood floors? Can you forgive me for having to ditch the original floors? Have you seen all the other flooring options Impressions Hardwood Collection has to choose from?

Disclosure: This is a sponsored post for Impressions Hardwood Collection in exchange for their sponsorship of the Saving Etta project. I was not told what to write. All opinions and ideas are my own. As always, I am very particular about the brands I choose to work with. You will always be notified if you are reading a sponsored post.Â