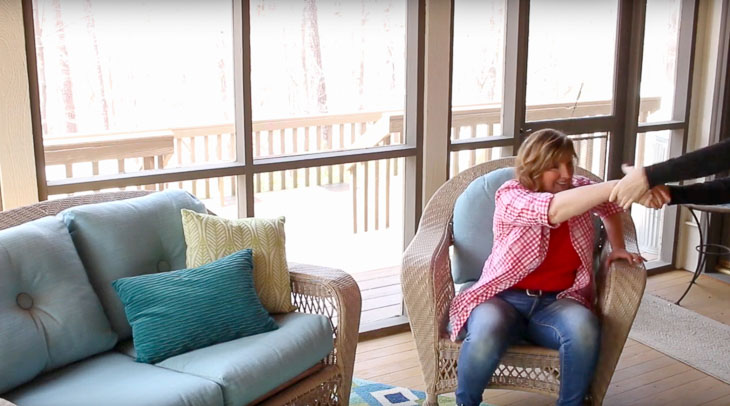
A few years ago I gave my stepmom’s screen porch a much needed makeover. At the time we noticed the seat cushions were starting to sag, but decided they still functioned. This year, my stepmom told me they had to be fixed. Boy was she right! Today I’m going to show you the easiest (and most permanent) way to fix sagging furniture seat cushions for good!
If you’ve ever dealt with sagging porch furniture I have a simple solution for you! Let’s get fixing!
Materials:
(I’ve included affiliate links for your convenience. I earn a small percentage from a purchase using these links. There is no additional cost to you. You can read more about affiliate links here.)
Feel free to watch the video or read the full tutorial below. It’s your choice.
If your furniture has removable seat frames, take them off the seats. Measure the seat frames and figure out how much plywood you’ll need to cover the seat frames.
Lay the seat frames onto the sheet and mark around the seats. (Alternatively, you can make a paper template of your seats and transfer them to the plywood.)
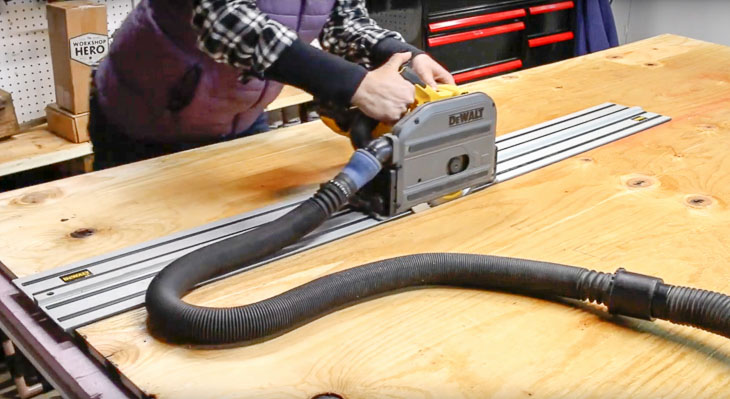
Cut the plywood to the size of your seats using a circular saw (or my preferred tool: the track saw.)
Here’s a tip for cutting sheet lumber:
Put a piece of rigid foam insulation under your plywood sheet. Set the depth of your blade just slightly deeper than your lumber. Cut the plywood on top of the insulation. The insulation supports the plywood while the saw blade cuts into the insulation and not your work surface.
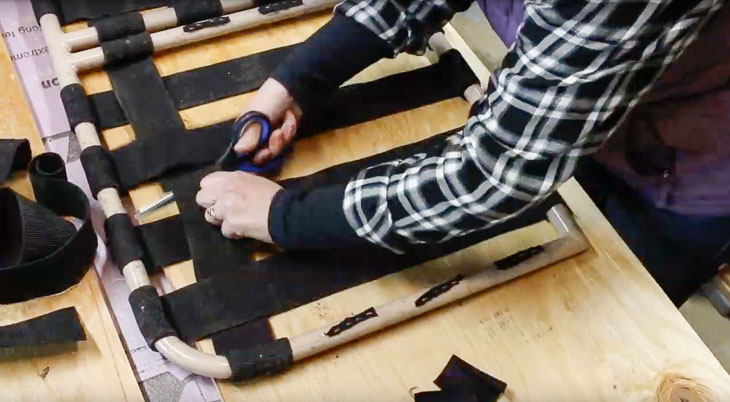
If your seat frame has webbing, go ahead and cut it off the frame. Throw away the webbing.
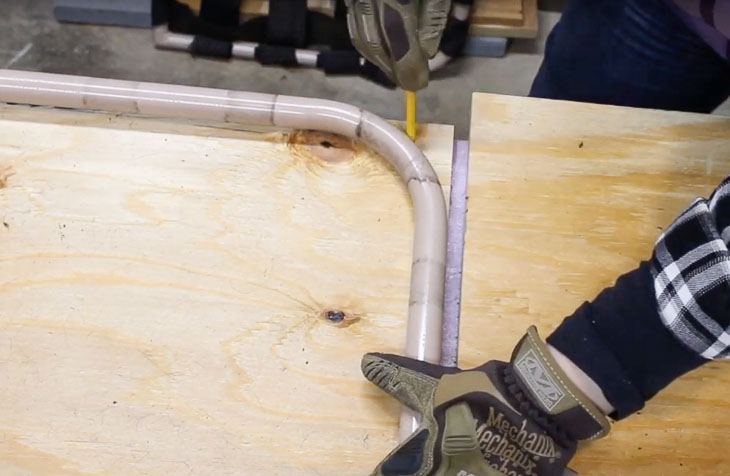
Trace around any corners or specific shapes of your seat frame.
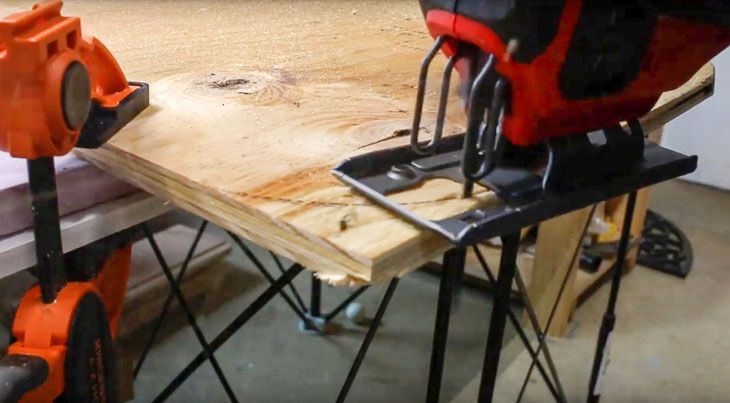
Use a jigsaw to cut off these shapes.
Sand all rough edges and give the entire plywood seat a good sanding to remove splinters.
If your plywood seat will be exposed to the elements, it’s a good idea to seal it with primer and/or paint.
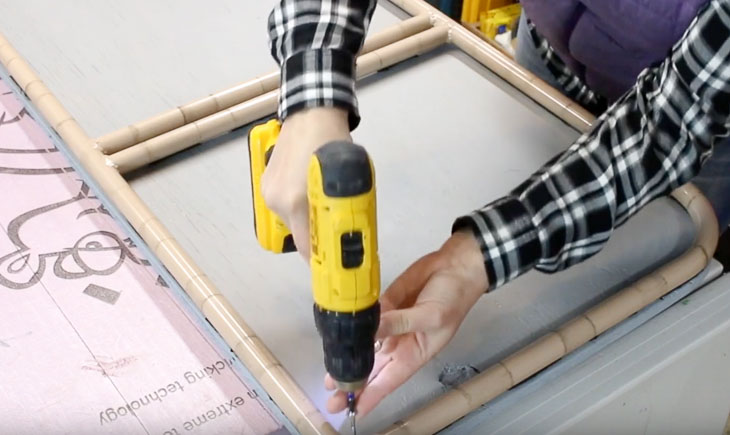
To secure the plywood to the seat frame, drive a screw through the plywood at each corner of the frame. Stop when the screw head is resting on top of the frame. Add more screws at any cross supports. The screws are mainly to keep the plywood centered on the frame, so they don’t have to be super strong structurally.
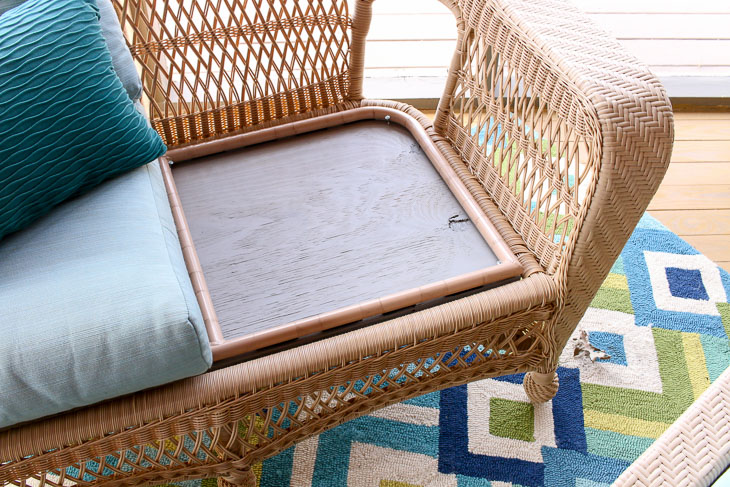
Set your plywood seat frame back into the furniture. We chose to have the old frame on top otherwise you would see the edge of the plywood.
If your furniture didn’t have a removable frame, you can put the plywood directly onto the seat (under your cushions.)
“Ahhh, much better. ”
I hope this tutorial helped you fix your sagging furniture cushions! Let me know if you tried this fix and how it worked for you.
Did you like this video? If so, be sure to subscribe to my YouTube Channel to get notified every time I have a new video published.
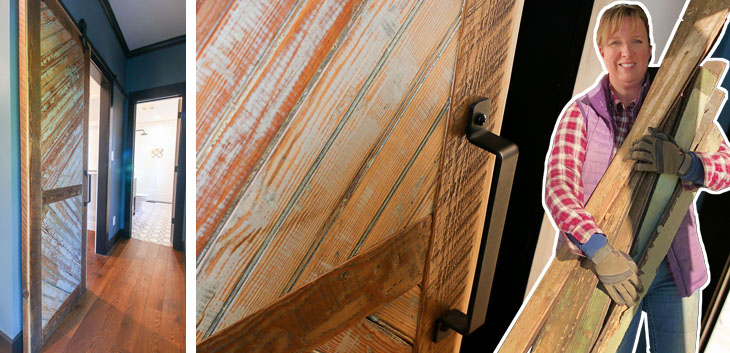
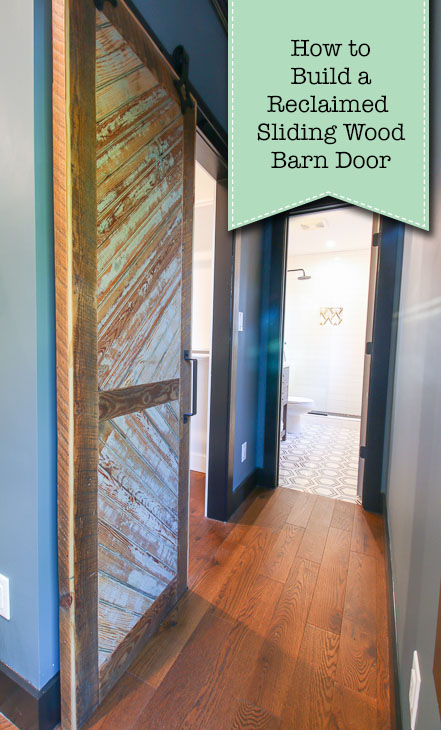
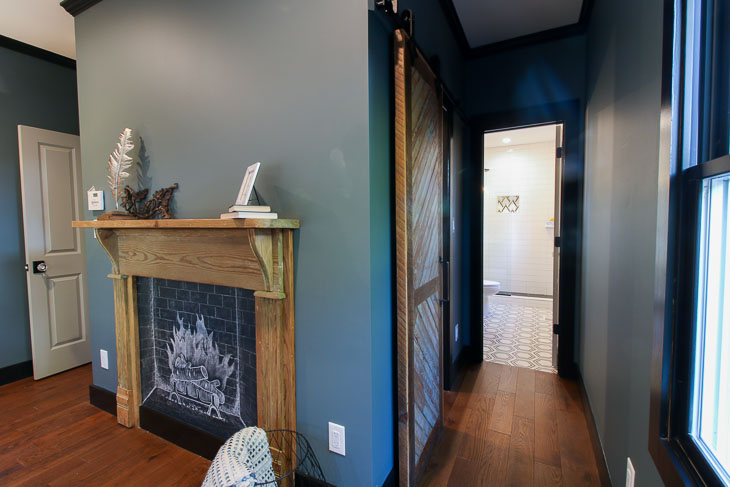
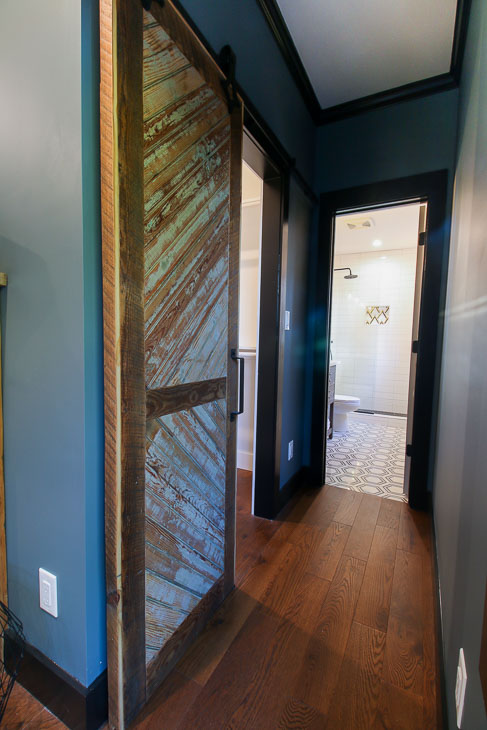
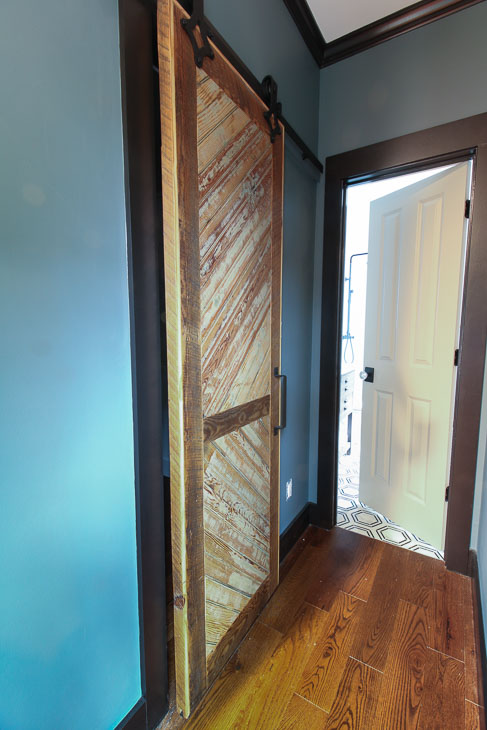
Earlier this week when I showed you the master bedroom in the Saving Etta house, you probably noticed the sliding barn door. I am in love with that door and especially excited that I was able to salvage the old beadboard and repurpose it as cladding on the barn door. Now it’s time to show you How to Build a Reclaimed Wood Sliding Barn Door. Let’s get building!
Notes about Materials:
To build your custom barn door you’re going to need to purchase a 4×8 sheet of plywood. The plywood will offer strength and rigidity and will add some thickness to the barn door. You don’t need to buy the finish grade plywood, instead purchase the cheapest plywood you can find because it will be covered up. One side will get a sheet of masonite bead board, and the other will be clad with the reclaimed lumber. And the sides will get trimmed out to hide the layers. So, as long as your plywood isn’t warped, it won’t matter how it looks. For my door I used 3/4″ plywood, but it was heavy. You may want to use 1/2″ plywood instead, but be sure to check the thickness requirements for your barn door track and hardware. This will ultimately dictate your width and weight!
Stripping Paint and Lead Paint Warning:
When you are using reclaimed wood, always test any paint with an instant lead check swab. Or treat it like it is lead paint. Because of the age of the bead board, I’m pretty sure my wood had lead paint. Before stripping lead paint, you definitely need to wear a dust mask or respirator and gloves. Eye protection is a good idea. And since my HEPA vacuum is loud, I wear hearing protection too.
Put down a plastic sheet under your work area and onto the floor. Make sure the sheet extends enough in each direction to catch any wayward paint chips.
The one thing you never want to do with lead paint is create airborne particles. This means you never want to dry sand it or use power tools to remove the paint. In the video, I’ll show you how I prefer to remove lead paint. In the past, I have used a chemical stripper like CitriStrip (although, the CitriStrip has a lot fewer chemicals than other strippers, it still makes a gooey mess). Instead, I found this ProScraper tool on Amazon and thanks to the recommendation of my friend at The Craftsman’s Blog, this is my new go to tool for paint stripping.
To use the ProScraper, clamp your wood to the table top. Use the ProScraper tool attached to a HEPA vacuum hose. While the vacuum is on, use firm pressure and pull the ProScraper towards you. It will take several passes to remove all the paint. Especially if your wood is old like mine and has over 100 years of paint layers on it.
After you finish scraping, be sure to vacuum up any paint chips and dust around your work area. Use a disposable damp rag to clean off the wood and remove any remaining dust.
When you are finished, place the damp rag and any other disposables into the center of the plastic sheet. Carefully gather the plastic sheet in towards its center. Deposit the plastic sheet and trash in a sealed plastic trash bag. Clean your work area to remove any remaining paint dust.
Tools & Materials:
(I’ve included affiliate links for your convenience. I earn a small percentage from a purchase using these links. There is no additional cost to you. You can read more about affiliate links here.)
4×8 sheet of plywood
4×8 sheet of masonite bead board
Reclaimed bead board, siding, or other lumber
ProScraper (paint scraper that attaches to vacuum cleaner)
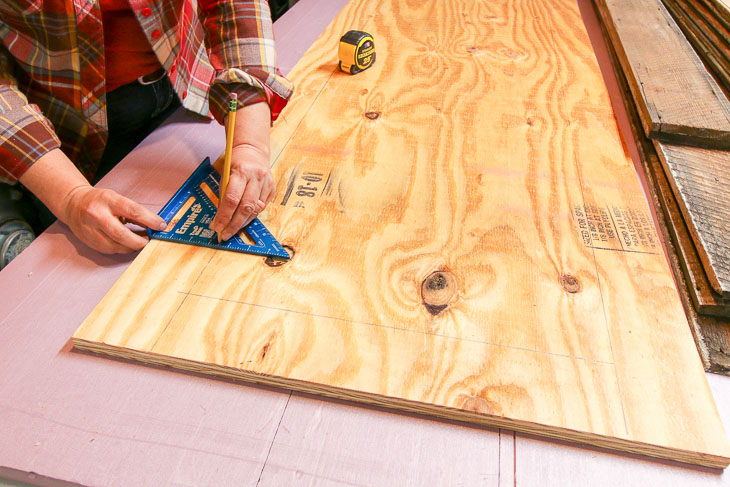
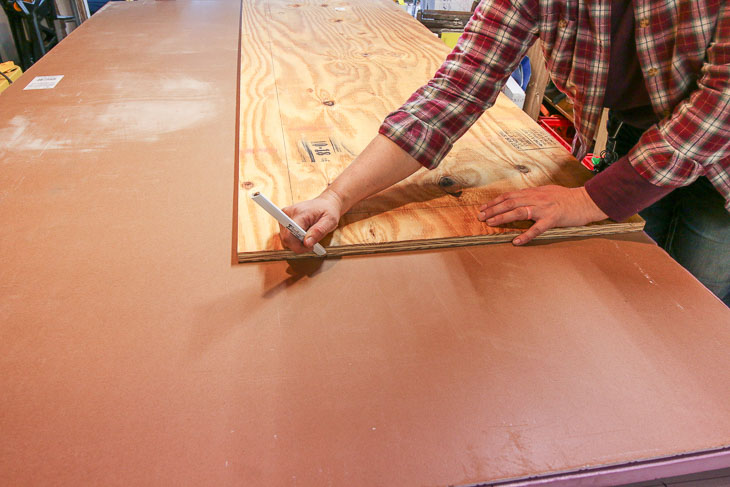
Time to cut your materials. Measure and mark the size of your door on the plywood and masonite beadboard sheet. (Be sure to add two inches to your door opening so the barn door will cover the opening.)
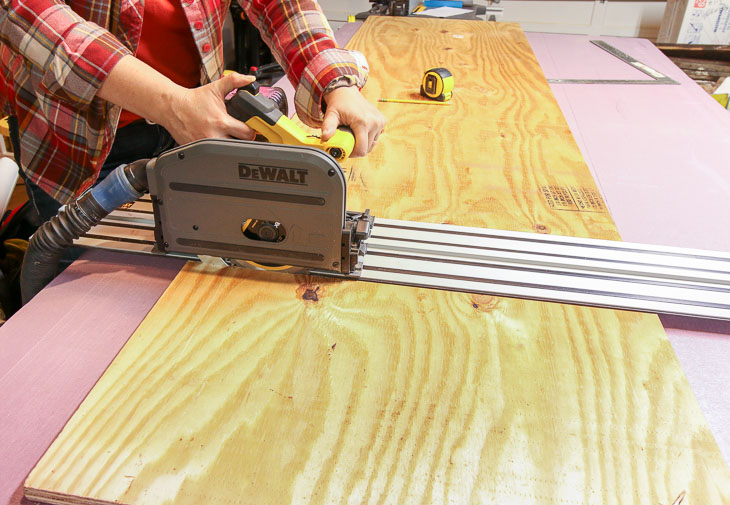
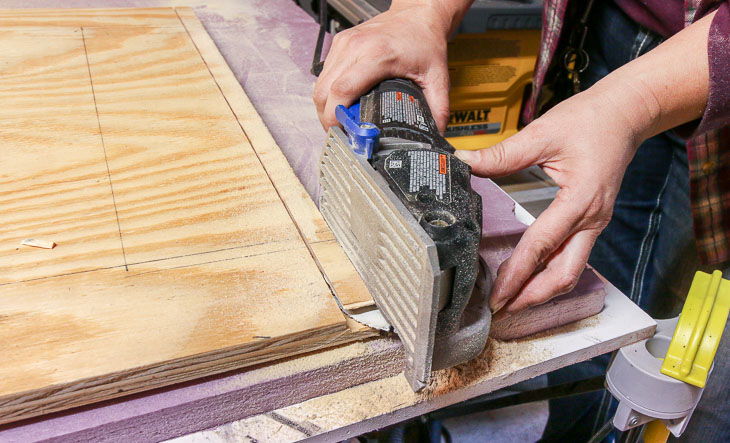
Cut your wood with a circular saw, or if you have one, use a track saw! I’ve found this battery-powered track saw by DeWalt to be invaluable for cutting down large sheets. Because it runs on batteries I can even bring it with me to the store and cut the materials in the parking lot if necessary!
The hanging hardware for my barn door has a small bar that mounts on the floor. I needed to cut a groove into the bottom of my door to accept the bar and keep it from swinging back and forth when opening or closing.
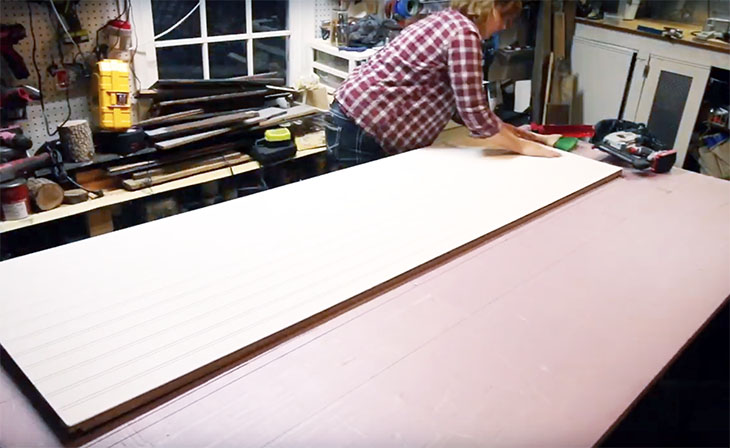
Add a fair amount of construction adhesive to one side of your plywood door. Then lay the masonite beadboard sheet onto the plywood and press firmly into the glue. Drive a few brad nails into the masonite to keep it in place as the glue cures.
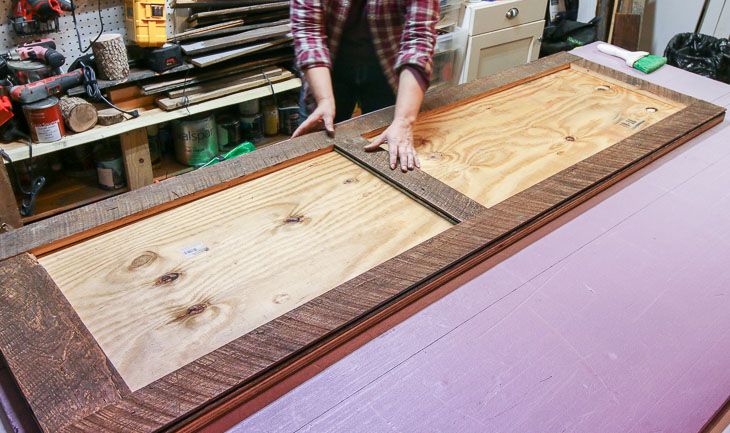
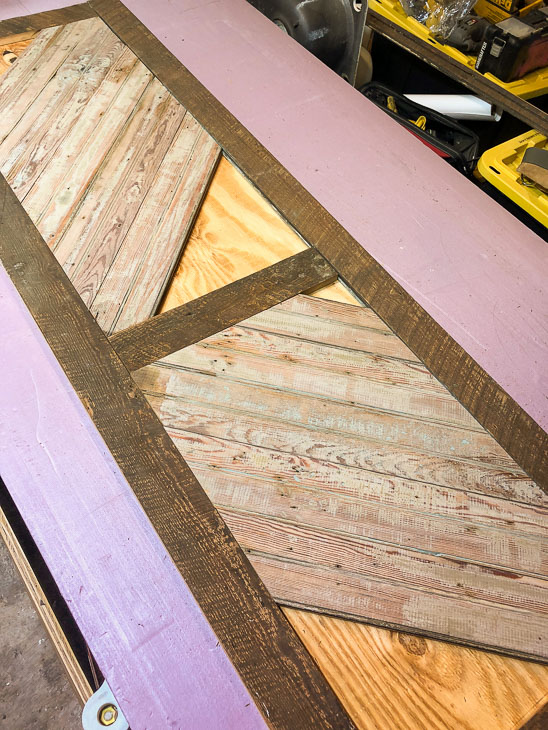
Flip your door over and start laying out the border design. Did you know these are the back sides of the beadboard? So pretty!
Apply construction adhesive under the border pieces and set them in place. Then add some brad nails to hold it until the glue cures.
I decided to sand the border pieces to remove any rough edges and splinters, but made sure not to sand too much or I’d lose the dark weathered look.
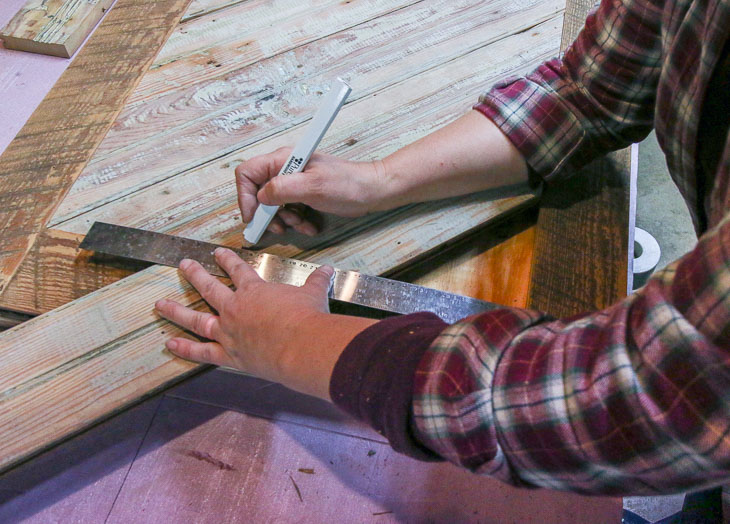
To cut the interior beadboard pieces, cut one end of the boards at a 45˚ angle. Then set them into the border frame. Using a ruler and pencil, mark where to cut the other side.
Test the fit of your bead board. Continue marking and cutting all the bead board pieces. Make sure they all fit before moving on.
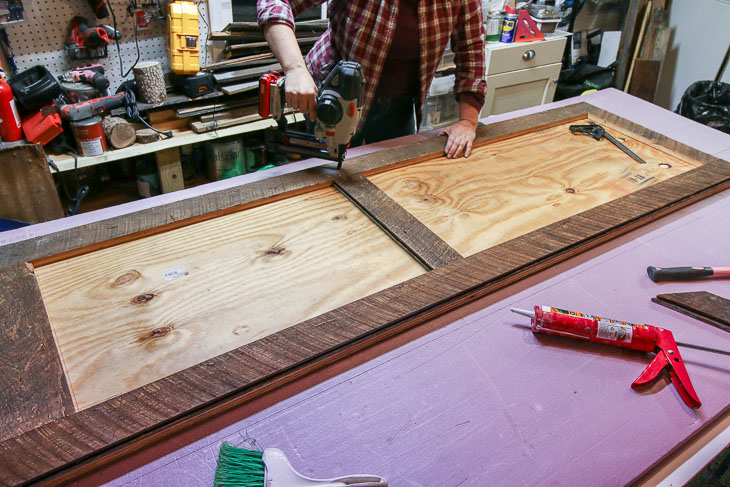
Secure all the interior pieces with construction adhesive and brad nails. You might find your last piece isn’t as wide as your boards, cut this piece on a band saw or jig saw if necessary and fit in place.
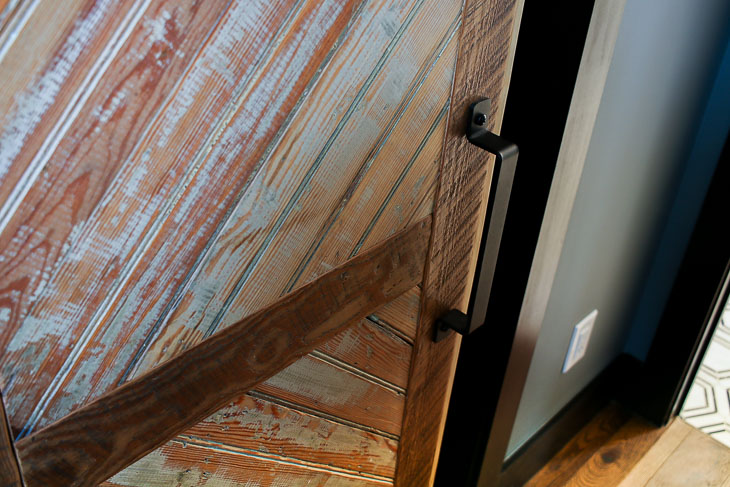
To hide the plywood, rip pieces of bead board or use flat trim to finish the edges of your door.
Use a polycrylic or water-based top coat to seal the door (and prevent exposure to any lead paint left on the door). I prefer the General Finishes High Performance Flat top coat. What I like about it is it has no sheen. The top coat protects the wood while letting the beauty of the grain show, and there’s no shine to detract from the wood.
https://prettyhandygirl.com/wp-content/uploads/2019/04/how-to-build-reclaimed-wood-barn-door-feature.jpg353730Brittany Baileyhttps://prettyhandygirl.com/wp-content/uploads/2021/07/PHG-logo-tagline-2020-1030x211-R.jpgBrittany Bailey2019-04-05 10:00:002020-09-08 16:49:55How to Build a Reclaimed Wood Sliding Barn Door
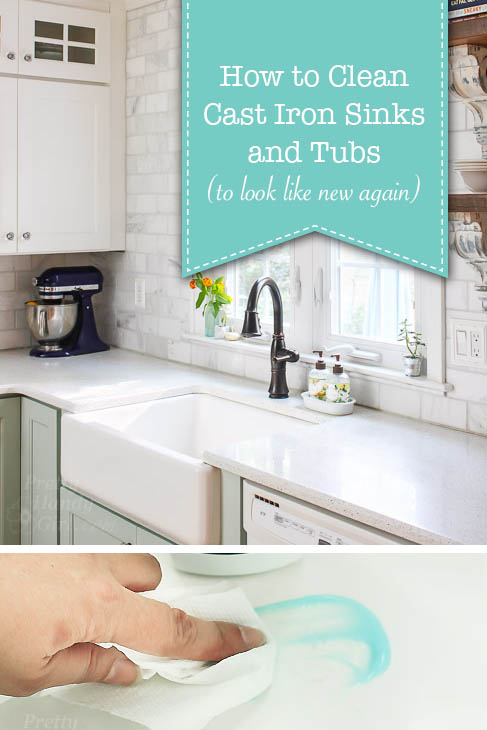
To keep our cast iron fixtures looking new, I have a never-fail formula to clean and remove all those scuffs and scratches! Here’s how I clean our cast iron sinks and bathtubs.
How to Clean Cast Iron Sinks and Bathtubs
While I was helping my client get her house ready to sell she said they were committed to replacing the cast iron bathtub in their boys’ bathroom because it was scratched and stained. I told her to hold off because I knew How to Clean Cast Iron Sinks and Bathtubs to look new again.
I use this same technique on our own cast iron sink every few weeks when the scuffs and scratches get noticeable. And if we get any scratches in our bathtub I clean it the exact same way.
Let’s get started and turn back time on your dirty, dingy, scratched cast iron sink or tub. It will look new when we are done. Promise!
Materials:
(I’ve included affiliate links for your convenience. I earn a small percentage from a purchase using these links. There is no additional cost to you. You can read more about affiliate links here.)
How to Clean a Cast Iron Sink or Tub Instructions:
For your convenience, I made a video to show you exactly how I clean our sink. Feel free to watch the video or keep reading.
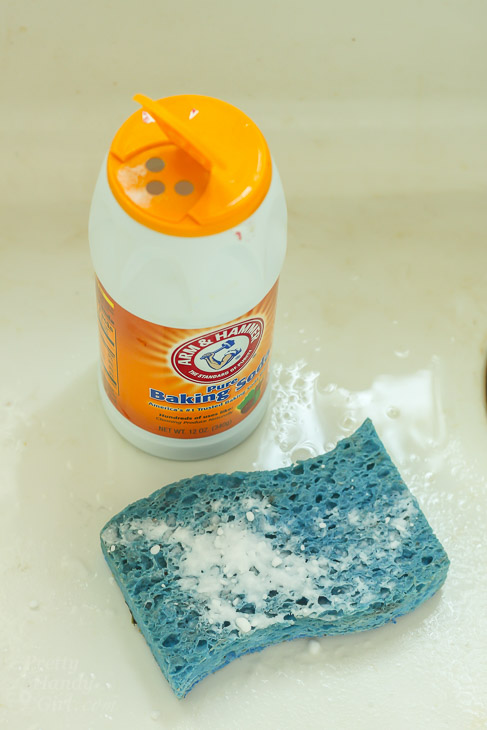
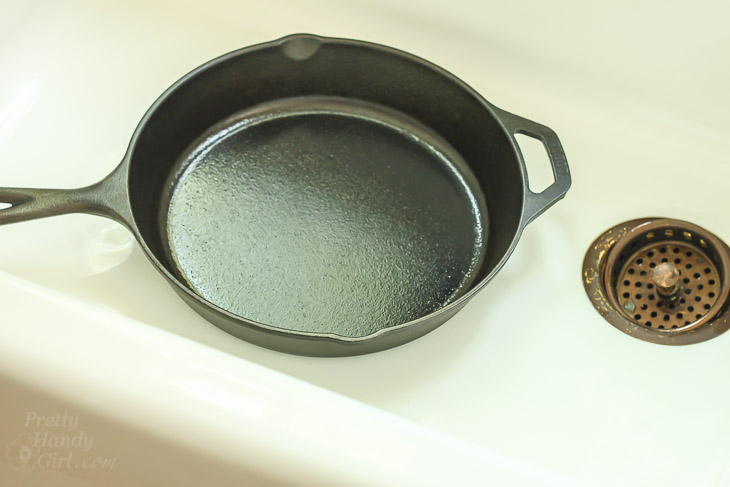
Rinse any food debris out of the sink. Next, sprinkle baking soda liberally in the sink and on a scrubber sponge. (If your sink is really dirty you can add a drop of dish detergent onto the sponge.)
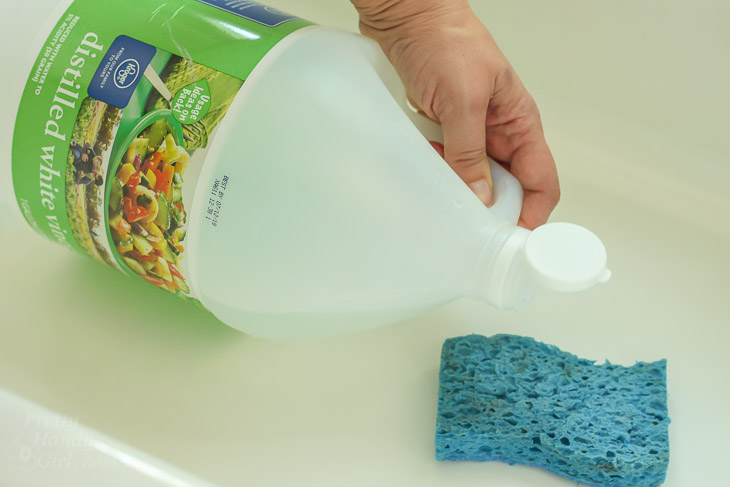
Scrub the sink using a little muscle. Pour vinegar onto your sponge and in the sink. Use the sponge to wipe and clean the baking soda out of the sink. Rinse the sink with water.
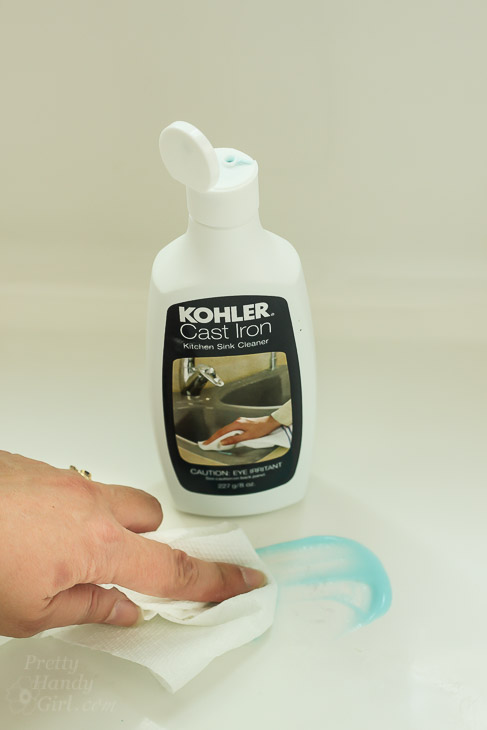
Your cast iron sink (or tub) should be clean now, but you might still have some scratches and marks on the surface. That’s okay, because it’s time to break out the Kohler Cast Iron Sink Cleaner. This is a miracle in a bottle!
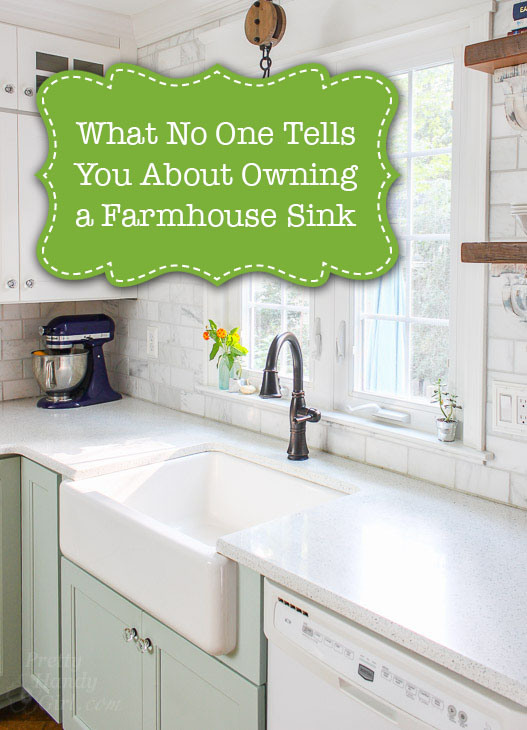
This is the cleaner recommended by our kitchen designer. Honestly, if I didn’t know about this cleaner, I would have been disappointed with our farmhouse sink a long time ago because it does get a fair amount of scratches from cast iron pots and pans. (Want to know if I’d buy a farmhouse sink again? I’ll answer that and tell you what no one tells you about owning a farmhouse sink in this post.)
Pour a small amount directly onto marks and discolorations. Use a clean dry paper towel to buff the cleanser into the scratches.
Rinse the sink with water and look…the marks disappeared! If you look closely you can see that the scratches are still in the sink, but they visually disappear.
Remember those marks before:
And after:
Hope this cleaning method helps prevent you from ripping out a perfectly good cast iron sink or tub! Keeping them looking great is as simple as knowing How to Clean Cast Iron Sinks and Bathtubs to look new again. Be sure to share this post with a friend. 😉
https://prettyhandygirl.com/wp-content/uploads/2019/03/remove-scratches-cast-iron-sink-preview.jpg18242736Brittany Baileyhttps://prettyhandygirl.com/wp-content/uploads/2021/07/PHG-logo-tagline-2020-1030x211-R.jpgBrittany Bailey2019-03-26 07:00:002020-06-19 22:20:27How to Remove Scratches from a Cast Iron Sink or Tub
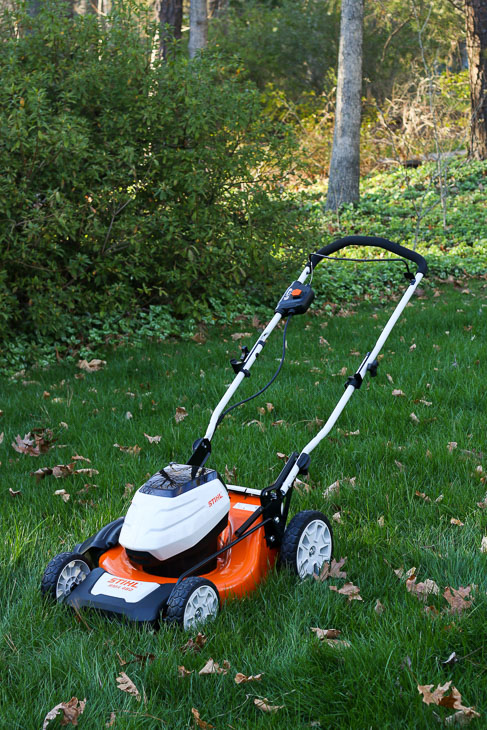
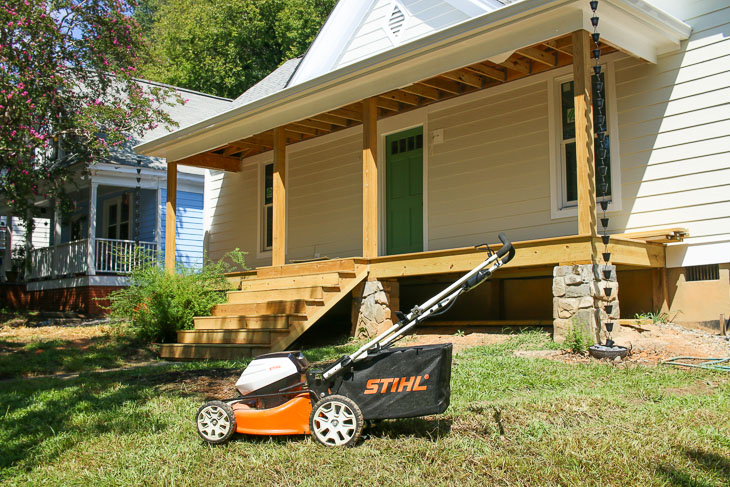
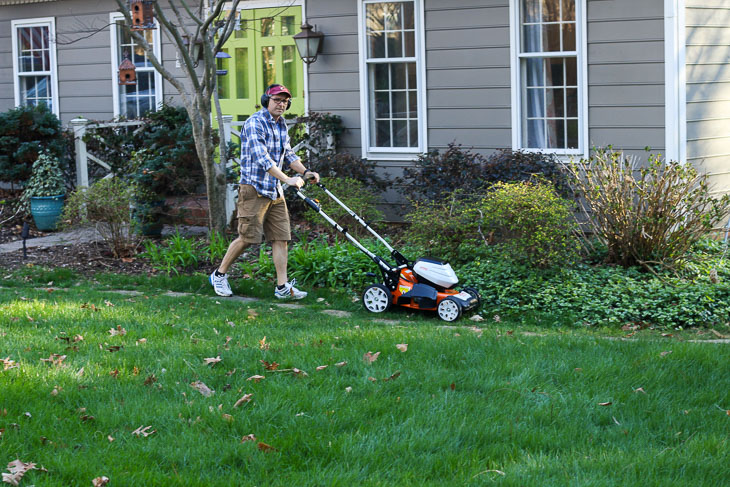
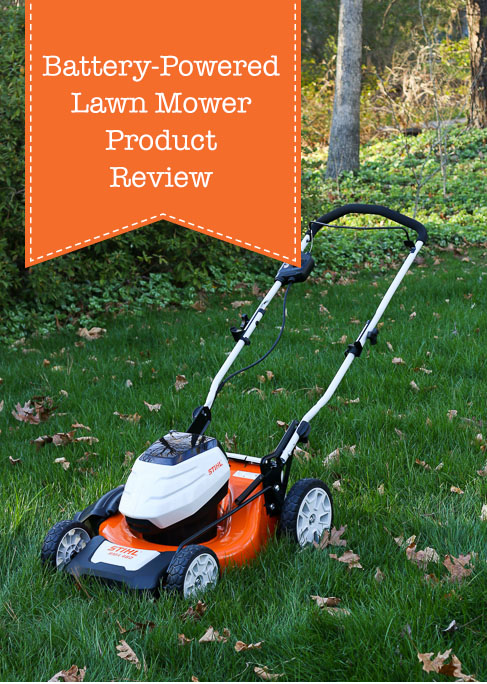
Can This Battery-Powered Lawn Mower Really Replace a Gas-Powered Mower?
I have underestimated the abilities of battery-powered mowers for years. But, recently I received the STIHL RMA 460 Battery Powered Mower to test out. Did it live up to the claims? Would I sell my gas-powered mower? You be the judge.
Before we begin, I want to tell you that STIHL sent me this RMA 460 battery-powered mower to try out and use. You may recall that STIHL was a Saving Etta project sponsor. However, this post is written solely on my own decision to share my experience with the mower.
If you want to watch the video, you’ll get all the information and some of the reasons I like the STIHL RMA 460 mower.
For more details and photos, read on.
Here’s My Honest Opinion of the STIHL RMA 460 Battery-Powered Mower:
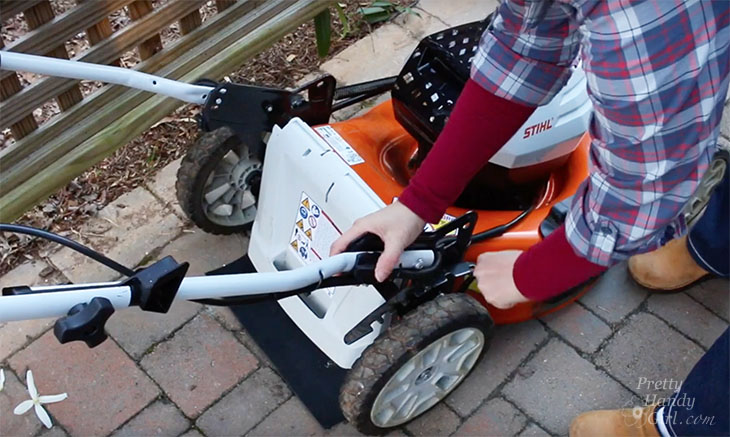
Folding the mower handle down is super easy. You just need to loosen the two knobs on either side.
It’s the first mower I’ve been able to lift into my truck unassisted. Although the mower isn’t weightless, at 60 pounds I can easily lift it and set it in my truck by myself. Before using the RMA 460, I needed my husband’s help to get our gas powered mower into the truck. When I got to the job site, I usually finagled one of my subcontractors to help me unload it.
Another advantage of this battery-powered mower is not having to haul a gas can around. And anyone who uses gas-powered lawn equipment knows you inevitably end up smelling like gasoline after finishing the work.
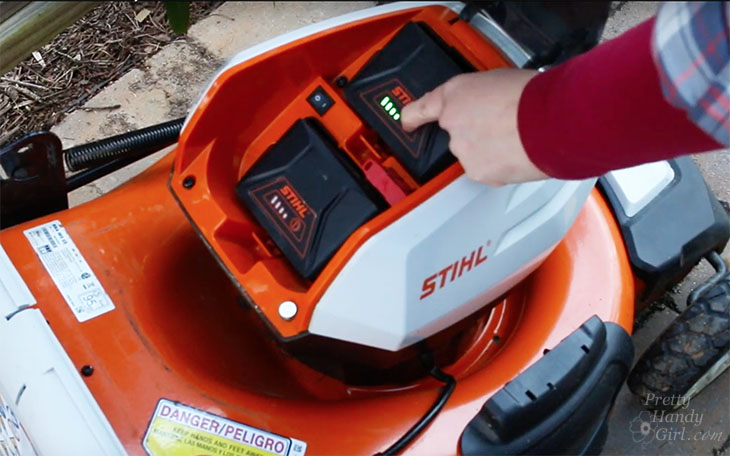
Battery and Start Up Features of the RMA 460:
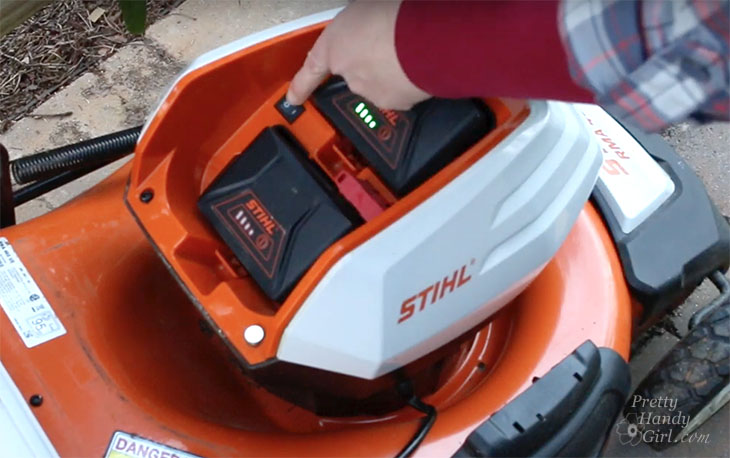
The STIHL RMA runs on the AK-series batteries. One port for the battery being used and the other port holds a spare should the first one run out. Although the mower runs on the entire AK line of batteries, I highly recommend using the AK30 for the longest run times. To see how much battery life is left, press the button on the top of the battery. The display will show how much charge is left.
The mower has a removable locking key to prevent accidental starts. (As a side note, I do wish the key had a string or somewhere to store it with the mower to prevent it from getting lost.)
The switch inside the mower activates the ECO MODE which should help the battery last longer in shorter grass. When the mower senses taller or thicker grass, it will return to full power mode for faster cutting.
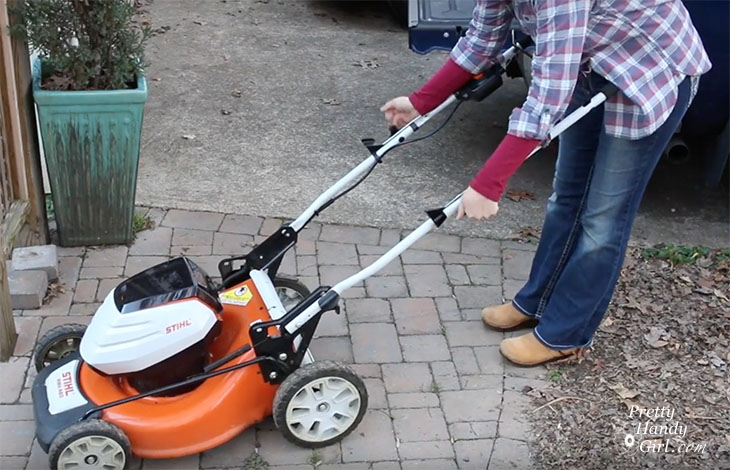
Raising the mower height is easily accomplished by grasping one handle to lower or raise all four wheels at once.
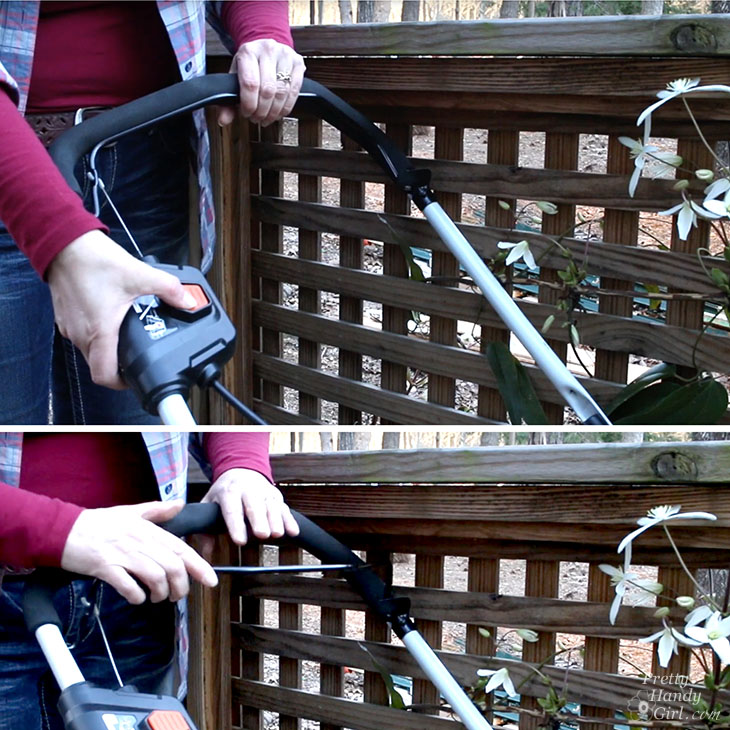
To start the mower, press the orange button and pull back the handle bar. You can see how easy it is to start. No more yanking on a rope to start a mower! This mower is much quieter in comparison to a gas-powered mower. To stop, simply release the handle bar.
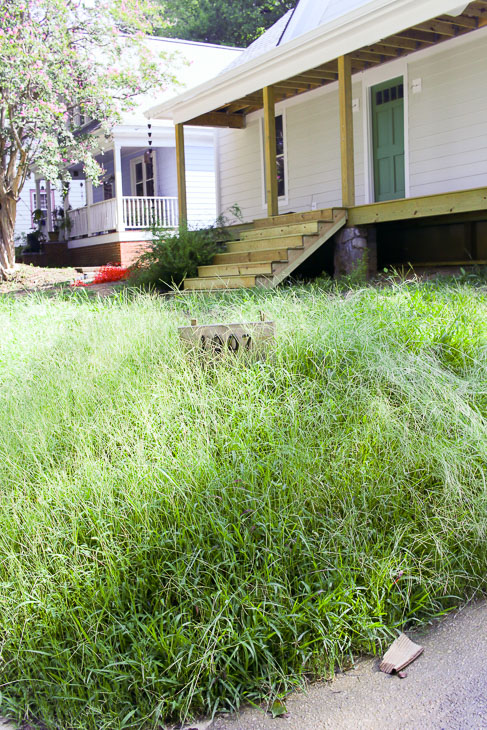
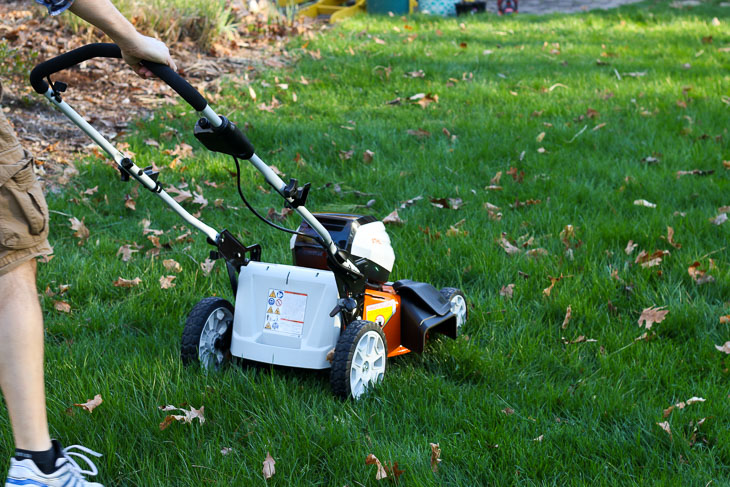
Can the STIHL RMA 460 Handle Super Tall Grass?
I had been using the STIHL RMA 460 mower for a month or so to cut the lawn at my flip property. But, then we went on a family vacation for over three weeks and I came home to this mess.
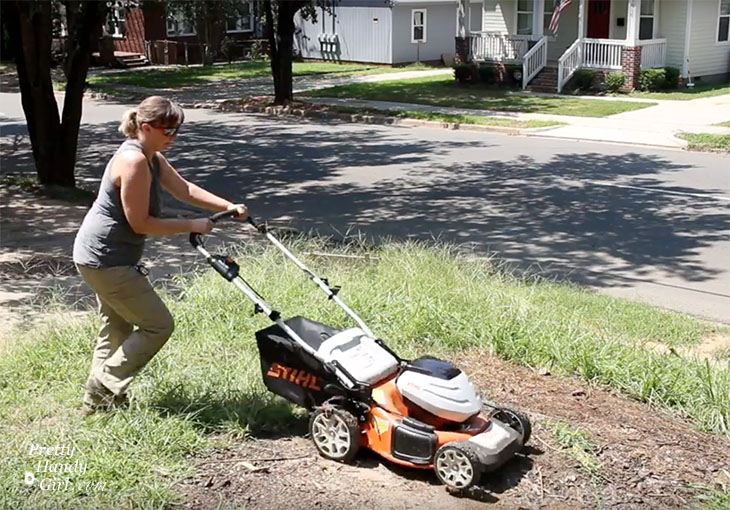
Although I had to make several passes for each section, the mower powered through the super tall grass. Before you lawn aficionados get on my case, I easily could have used the bag to collect clippings, but the property was still under construction and I wasn’t trying to protect the weedy grass that was there. If it were our lawn (which is already beautiful and well established), I would have bagged the clippings to prevent them from damaging the lawn. If you look close, you might notice that even with the height of the grass, there were no mounds of grass clippings left behind. The mulching feature on this mower did an outstanding job! To say I was impressed is an understatement.
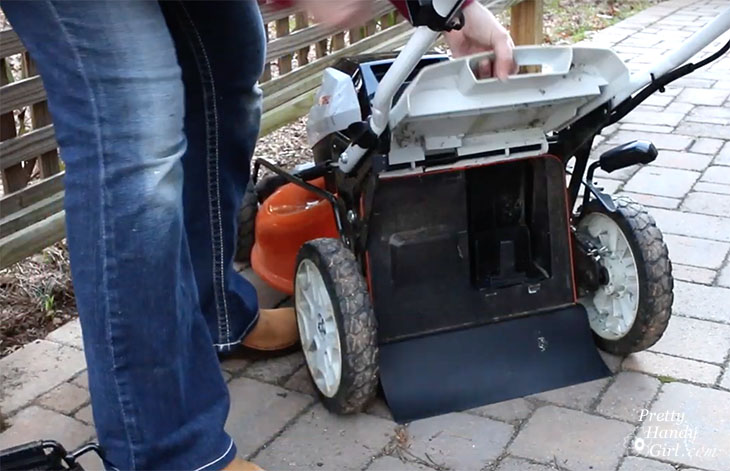
How to Insert the Grass Collection Bag on the Mower:
Simply lift the back flap on the mower and remove the plug.
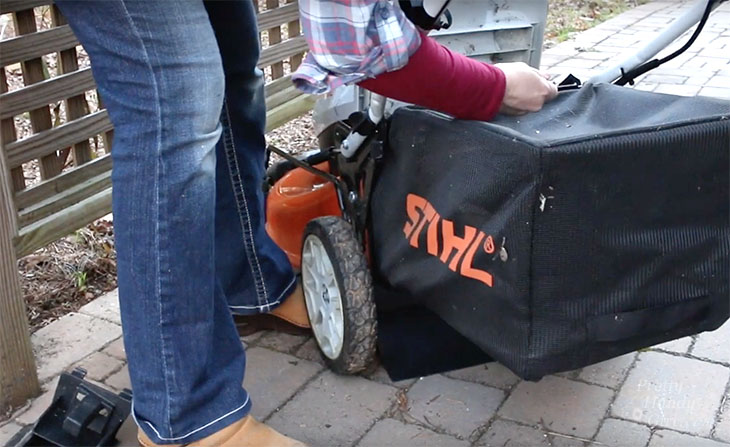
Then hang the bag from the mower and you can collect your grass clippings.
Will You Sell Your Gas-Powered Mower Now?
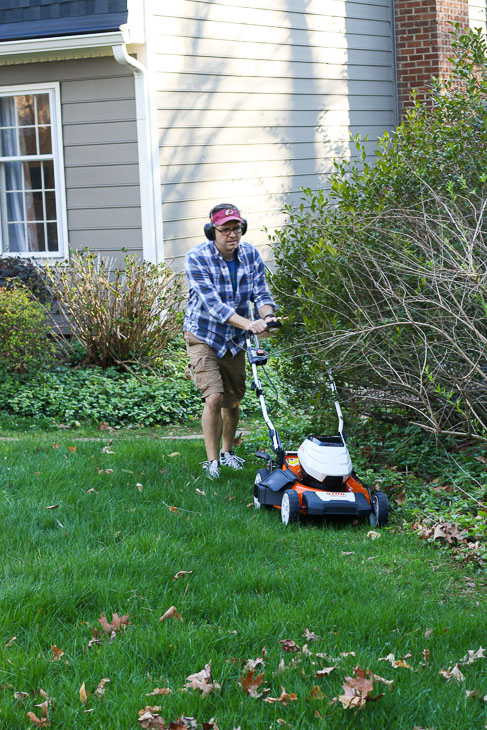
I have to tell you my husband has been cutting lawns since he was a teenager. He’s rarely impressed by new lawn mowers, but I caught him trying out the RMA 460.
When I asked him what he thought, he told me he really liked it. But, old habits die hard with this guy. He still prefers his gas-powered mower. (Must be a manly thing.)
Our teenage son has recently started cutting lawns and the STIHL RMA 460 is the only mower he wants to use.
Before trying this STIHL mower, I never thought I’d be happy using a battery-powered mower to cut our grass, but I’m a convert. Plus, it feels good knowing this mower is more environmentally friendly. For now our gas mower stays in the shed for my husband, but my son and I will only use the STIHL mower.
How Much Lawn Can the RMA 460 Cut?
Per the STIHL website, the RMA 460 Mower using the AK30 battery should be able to cut just under 3,000 sq. feet of lawn (depending on height and moisture content.) We have about ¼ acre of grass to cut and the mower cuts it using one and a half batteries (assuming this is for weekly trimming on non-wet grass.)
What do you think? Could you sell your gas-powered mower and replace it with the STIHL RMA 460 battery-powered mower?
Pin this image to share with a friend:
Disclosure: STIHL sent me this RMA 460 battery-powered mower to try out and use. I was previously sponsored by STIHL on another project, but this post is my own decision to share with you my experience with the STIHL RMA 460 mower.
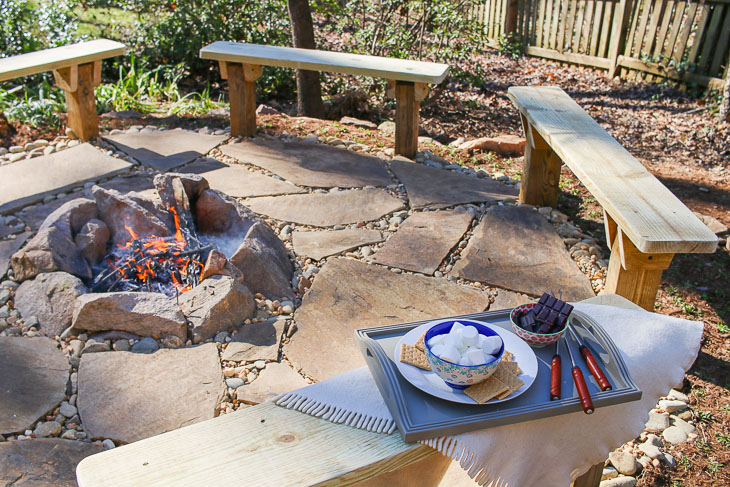
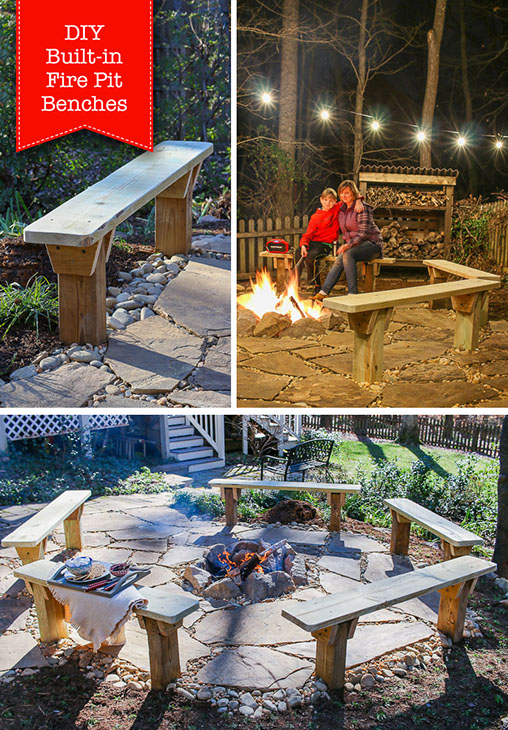
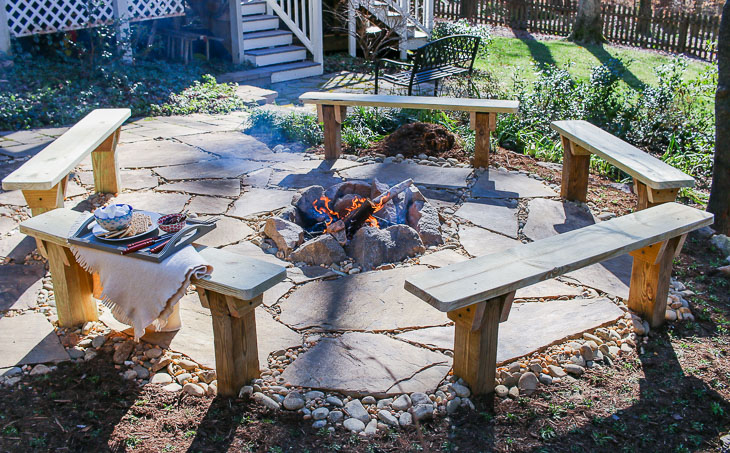
These simple DIY built-in fire pit benches are a simple and attractive design. The lumber costs are low and the skills required are minimal — a winning combination in my book! Just think, you could have these permanent benches built around your fire pit by the end of the weekend.
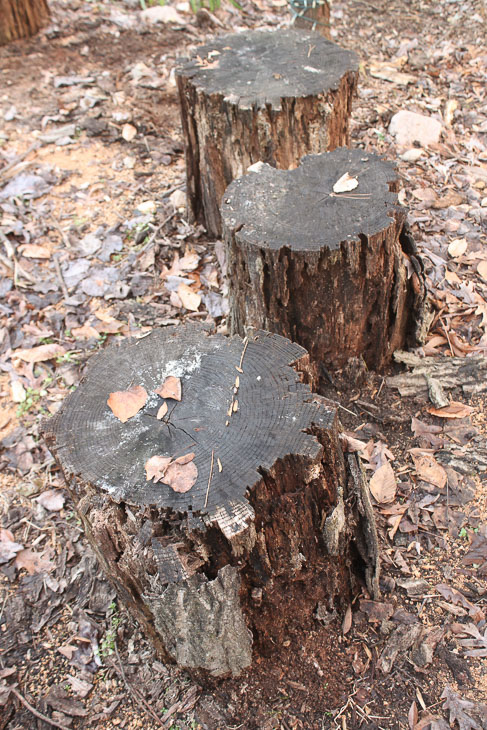
Years ago, I created a very simple (and inexpensive) fire pit using some stumps from a tree we had to have taken down. I simply asked the tree guys to cut the tree into 18″ stumps.
Having fire pit get togethers with friends and family is one of our favorite activities. During these gatherings, our meal planning is usually nothing fancy. Most of the time it consists of hot dogs, salad, s’mores, and good conversation over a warm fire. Unfortunately, after a few years, our stump seats rotted out. For the past year or more we haven’t had any friends over for a fire pit outing because I was afraid the stumps might disintegrate the minute someone sat down. That would be awkward, right?
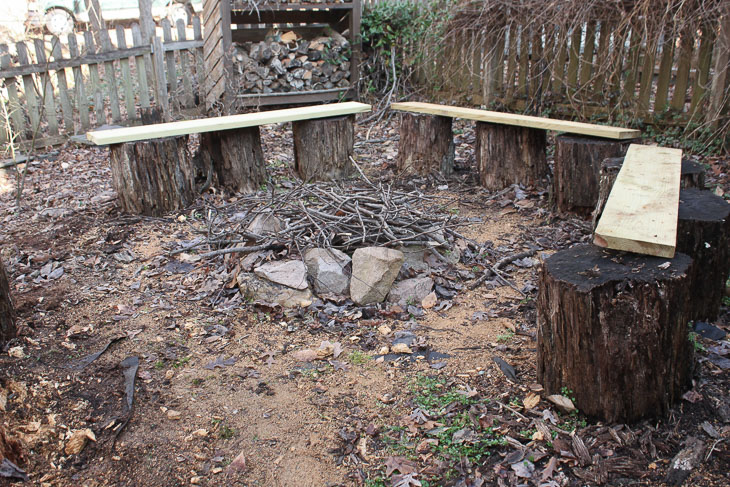
I toyed with the idea of buying more permanent seating, but all the options were expensive (especially when trying to provide seating for 12-15 people.) As luck would have it, after finishing all the construction on the Saving Etta project, I had some leftover lumber (a few pressure treated 2x10s, 2x6s, and 4×6 posts. On the day before the open house, I threw the lumber into my truck and hauled it home thinking I might be able to build benches for around our fire pit. (Note to self, 2x10s placed on top of rotting stumps is no more attractive than rotting stumps.)
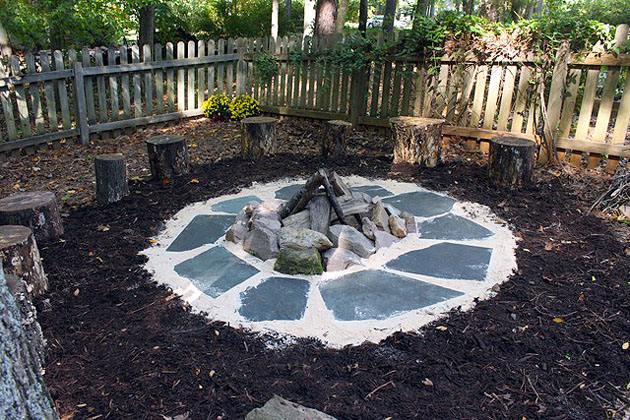
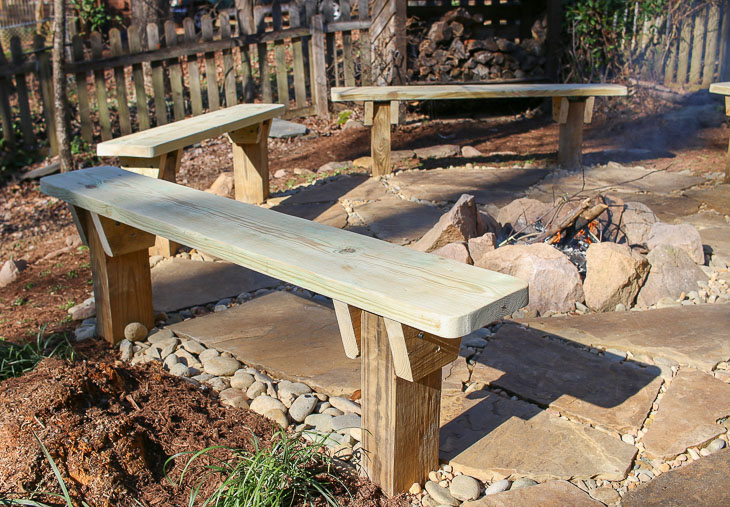
After a few days (and several cold days where you couldn’t drag me outside), I finished building five built-in fire pit benches and couldn’t be more thrilled with the results. Why don’t you join me and see how this rotten fire pit got it’s groove back with new seating and a new low maintenance stone surround.
Trust me, it is the same fire pit area you see above. Amazing transformation, right?!
DIY Built-In Fire Pit Benches Materials:
(I’ve included affiliate links for your convenience. I earn a small percentage from a purchase using these links. There is no additional cost to you. You can read more about affiliate links here.)
1 – 2″ x 10″ pressure treated lumber (purchase length for your bench seat)
1 – 2″ x 6″x 4′ pressure treated lumber
Scrap 2″ x 4″ lumber (or other lumber to brace posts while concrete cures)
Quikrete
Drainage rock
The All Battery Challenge:
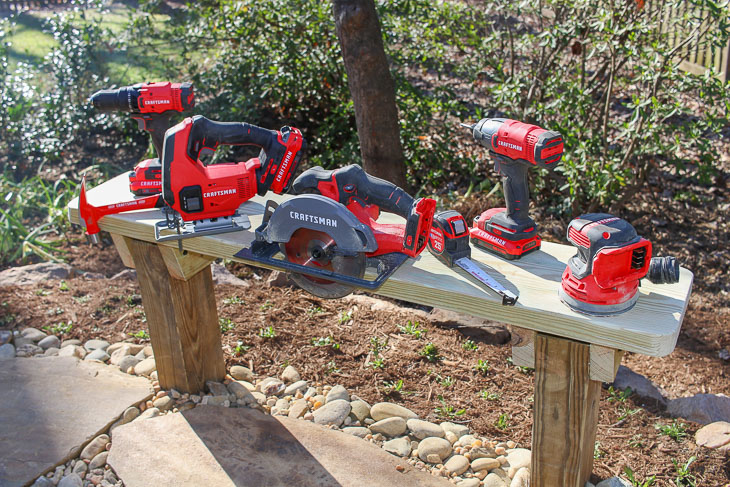
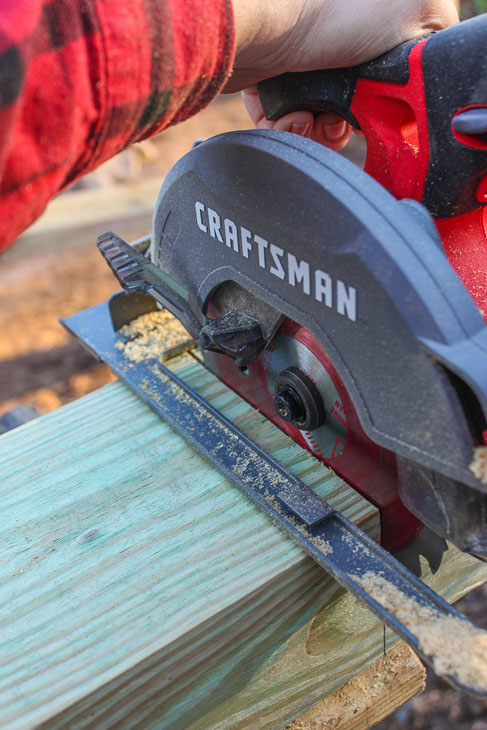
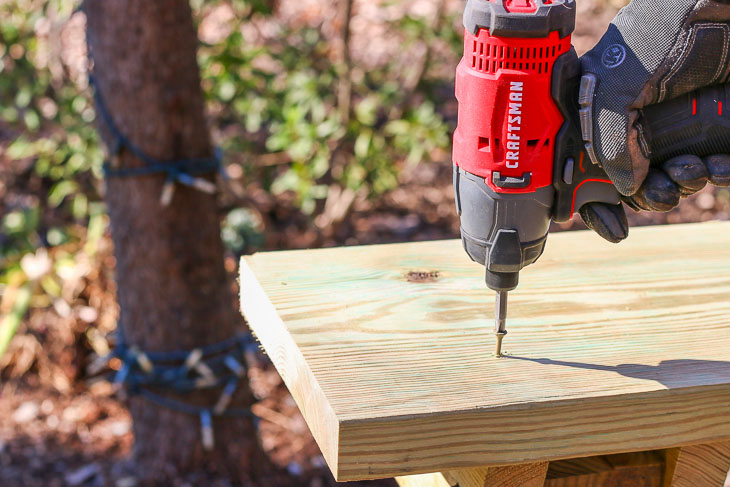
The folks at Craftsman sent me all the battery-powered tools used in this project. This is a sponsored post for Craftsman, so I decided to really challenge myself by only using the Craftsman V20 battery-powered tools and forgo dragging an extension cord out to the job site. (I also vowed not to cheat and use any of my corded power tools in my workshop.) Want to see if these tools lived up to the challenge?
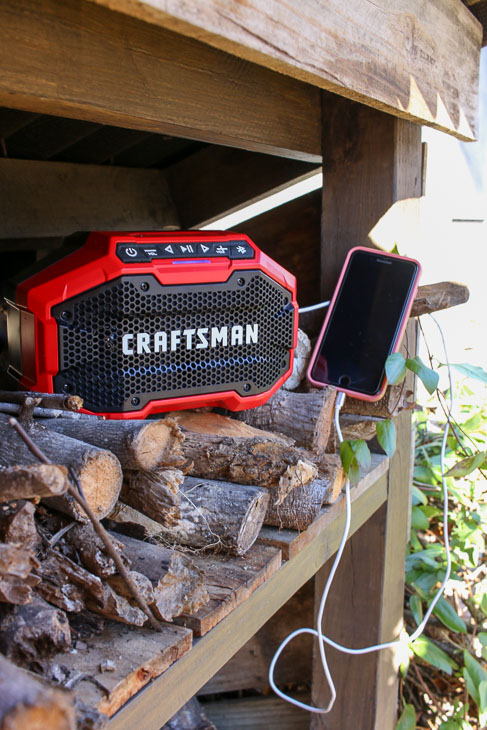
I can’t forget this Craftsman Cordless V20 blue tooth speaker that doubles as a USB charger when my phone battery get low while jamming out. Hard work is always easier with some rockin’ tunes.
DIY Built-In Fire Pit Benches Video Tutorial:
Some people learn best by watching others, I get that. Which is why I made this tutorial video for you! Feel free to watch the video below to learn how to make the built-in fire pit benches. I will include the step-by-step tutorial below with a little more detailed instruction. Let’s get building!
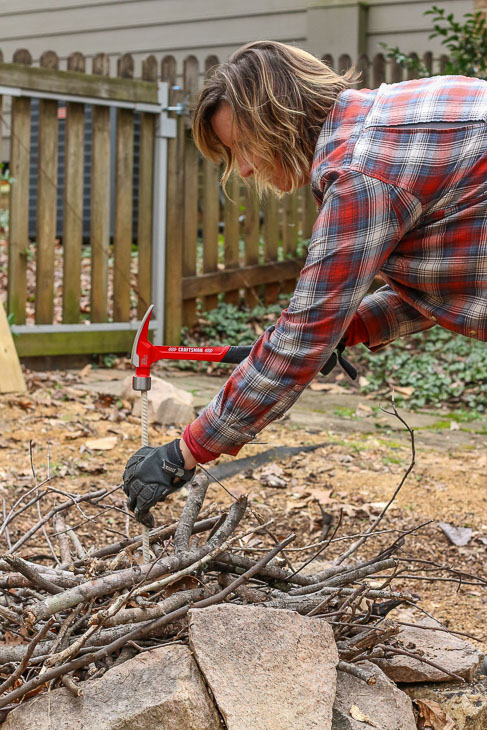
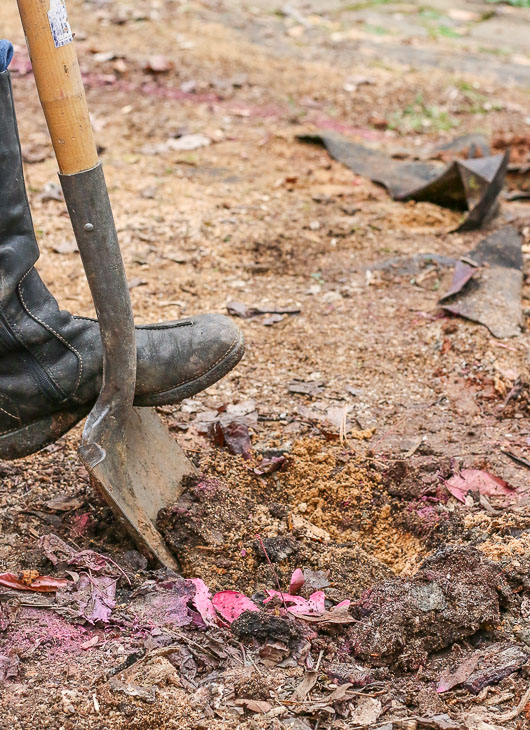
Site Preparation:
Before building your fire pit benches, clear your build area. It took me a bit of physics ingenuity to clear out the old rotting stump seats from our fire pit area. (Definitely watch the video to see my magnificent solution for lifting the stumps into the wheelbarrow. They may have been rotting, but they were still very heavy.)
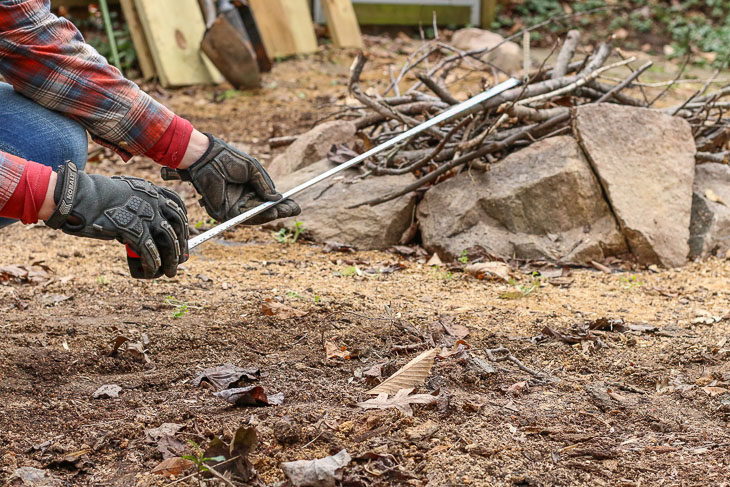
After the area is cleared, drive a stake into the center of your fire pit area.
Measure out 5’ from your fire pit center (or the distance you want your benches to sit.)
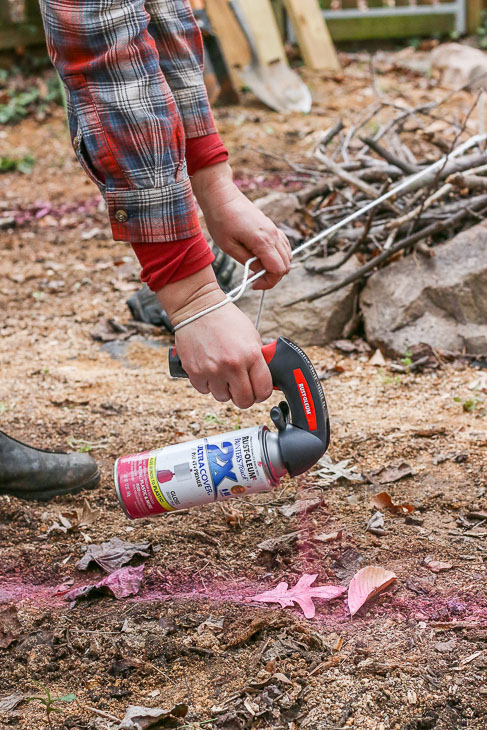
Attach the string to the stake. Make a loop big enough to fit your hand through at the 5 foot mark. Insert your hand into the loop and use a can of spray paint to trace a circle around the fire ring.
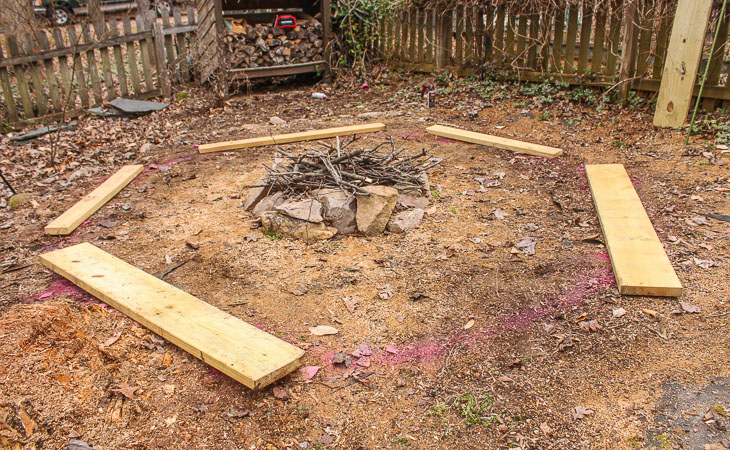
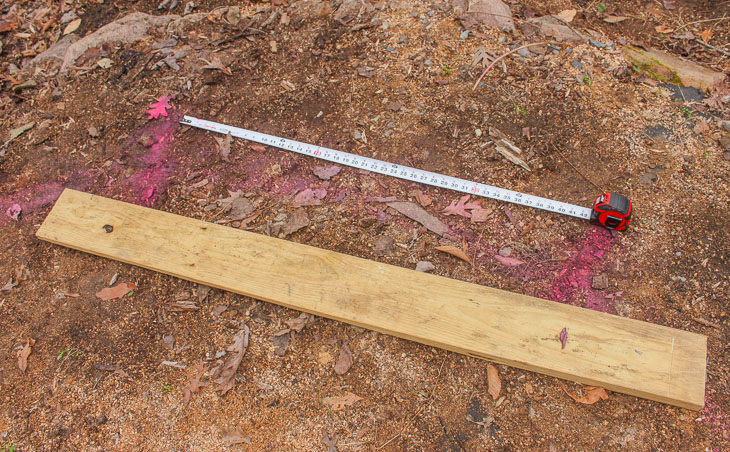
Cut your 2×10 pressure treated lumber to the size you want your bench tops. (Personally, I chose alternating 4’ and 5’ benches for our fire pit. The 5′ benches can accommodate three adults each or more little ones. These five benches will accommodate 13 adults comfortably and probably more people if we squeeze kids on some of the benches.)
Lay out where your benches will sit and mark the locations for the support posts. I suggest centering the support posts 18” narrower than the bench seats. (Nine inches in from each side.)
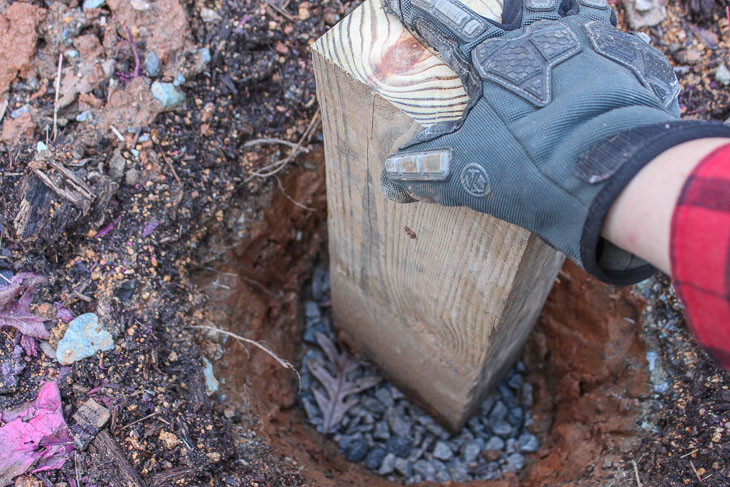
Set a 1-2″ layer of drainage rock into the base of your hole. Drainage rock provides a sturdy base for your post, but it also allows water to seep away from the post.
Use your post to tamp the gravel down and create a firm base.
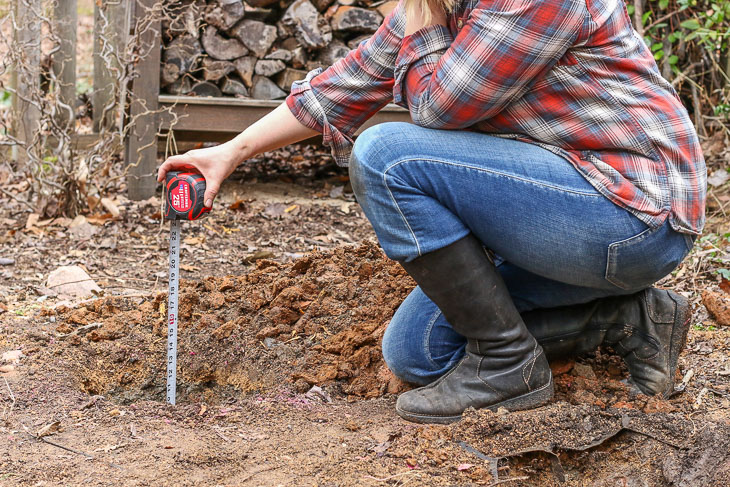
Measure the depth of your hole. Add 16 ½” to your hole depth and cut your posts to this length. (Hole Depth + 16.5″ = support post length.) This should give you an 18″ bench height, which is standard chair height.
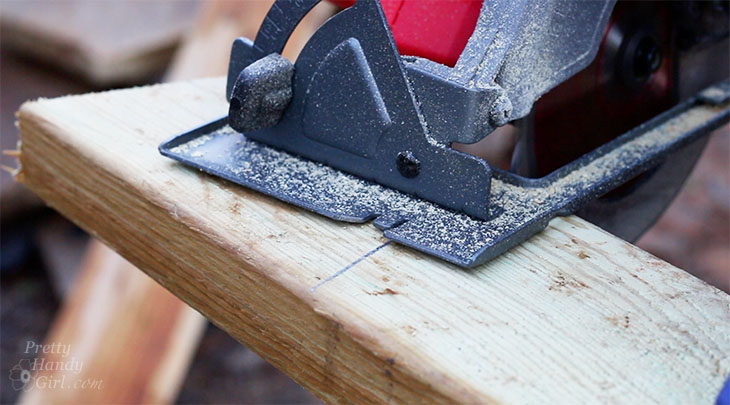
I had my doubts that this battery-powered saw could cut through all the pressure treated 4×6’s. But, with a fully charged battery and a steady feed, they cut through each post! (Tip: If your saw isn’t cutting through the lumber, swap out your battery for one with a full charge.)
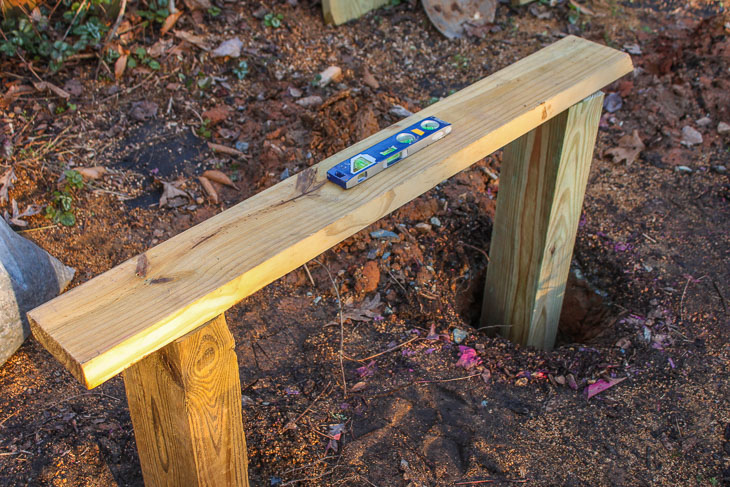
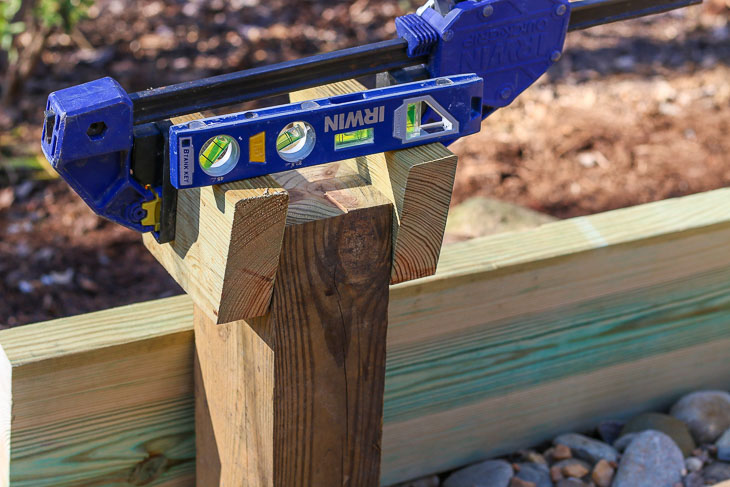
Place your first post in the hole. Then set your bench seat on top of the post. Level the bench seat and measure the distance between the bottom of the bench seat and the bottom of your hole to determine the length of your other support post.
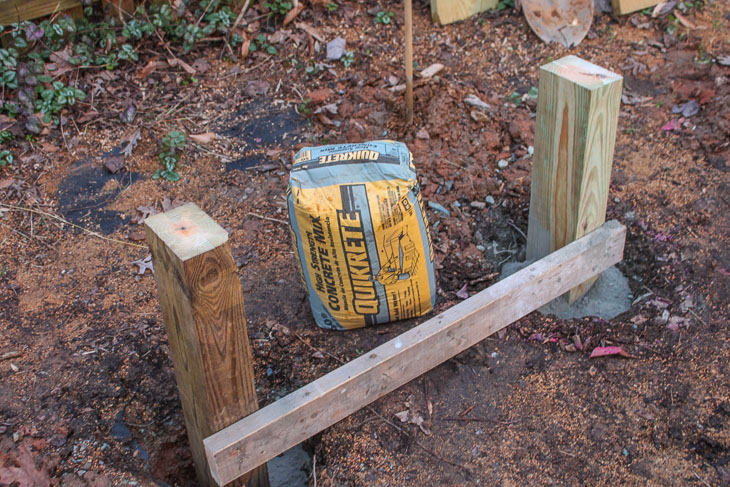
Set the second support post into the hole and check to make sure it is level with the first support post. Add or remove drainage gravel until the bench seat is leveled. Line up the two support posts so they are even and plumb in both directions. Secure a scrap 2×4 between the posts to hold them in place while adding the concrete mix.
Follow the directions on your concrete mix. Fill the holes with the mix and add the water. Allow the posts to set overnight.
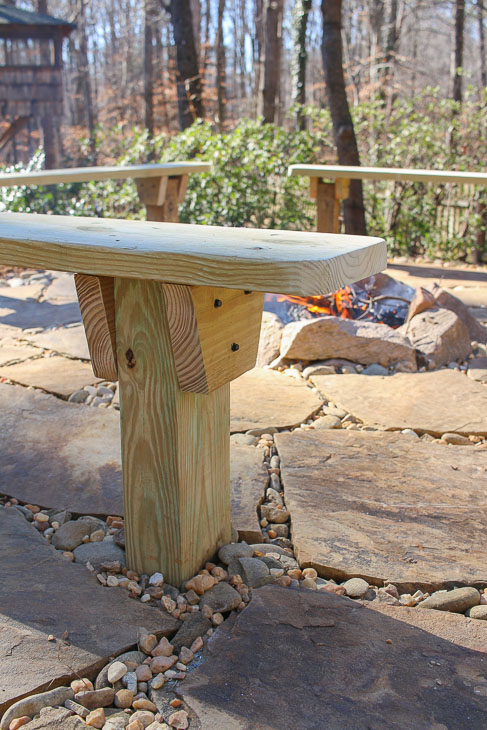
To cut the bench support pieces, trace a trapezoid shape onto a 2×6. The narrowest part of your trapezoid should be the width of your posts and the widest part of your trapezoid should be 1” narrower than your bench depth.
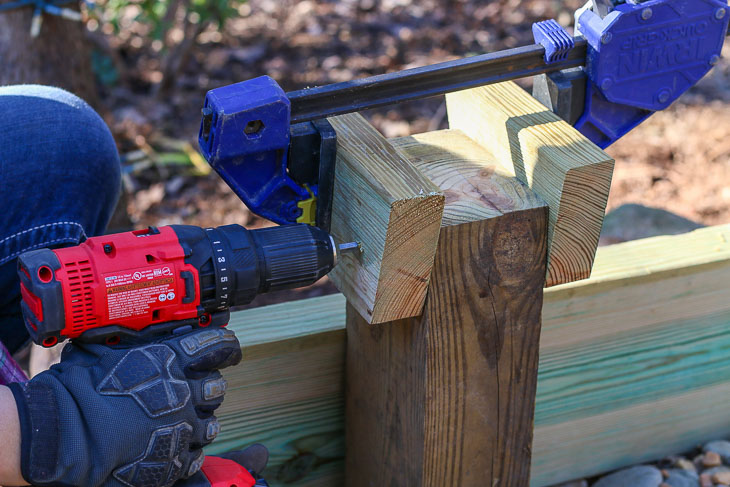
Each support post gets two trapezoid support pieces sandwiched onto either side. Use a clamp to hold the supports while you level them side to side and front to back.
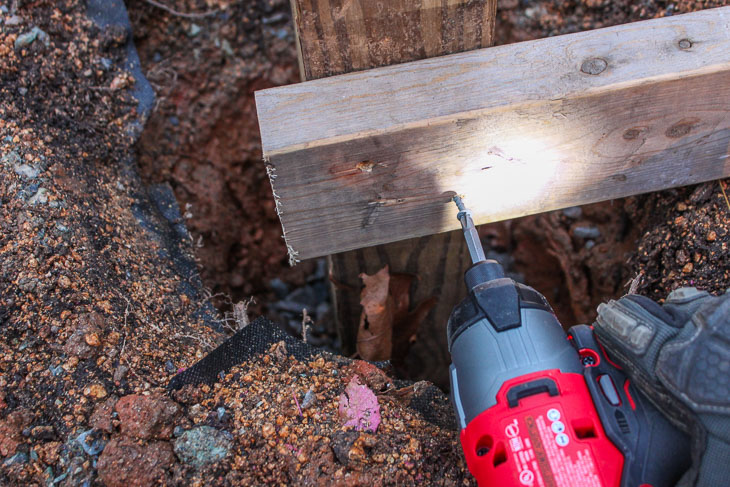
Then drill three pilot holes into each support piece.
Drive ⅜” lag screws or structural wood screws into the pilot holes.
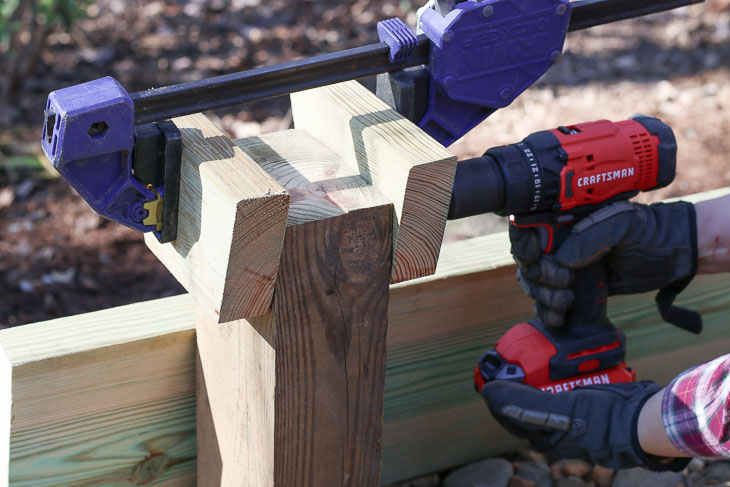
Clamp the other support trapezoid pieces to the second post. Check to make sure the top of the supports are level with the first supports. Make any adjustment, then drill pilot holes and drive structural wood screws through the trapezoids (like you did on the first post.)
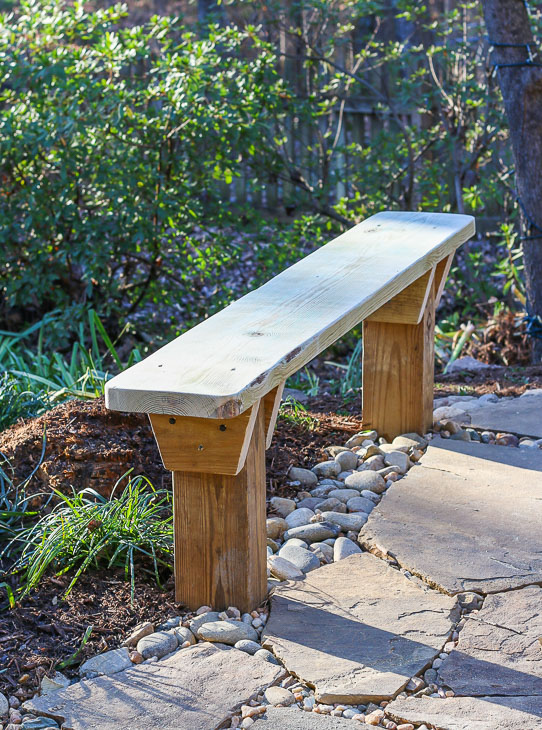
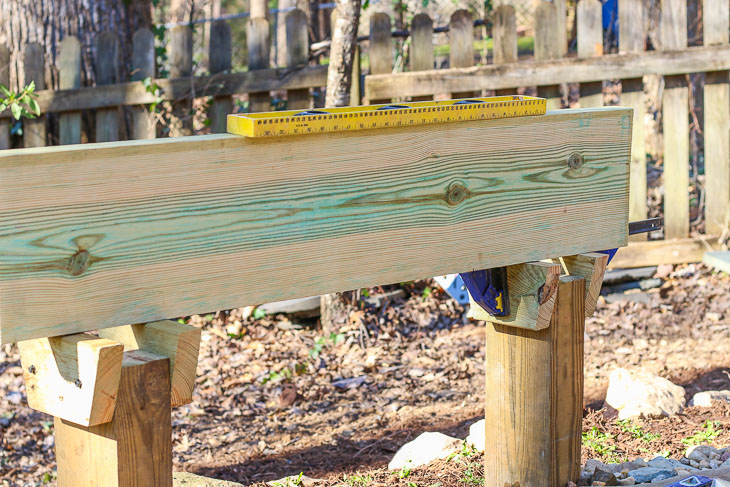
Center your bench top side to side and front to back on top of the support posts.
Drive 2 ½” wood screws through the bench top and into the support pieces. Two screws on each side of the seat should be sufficient.
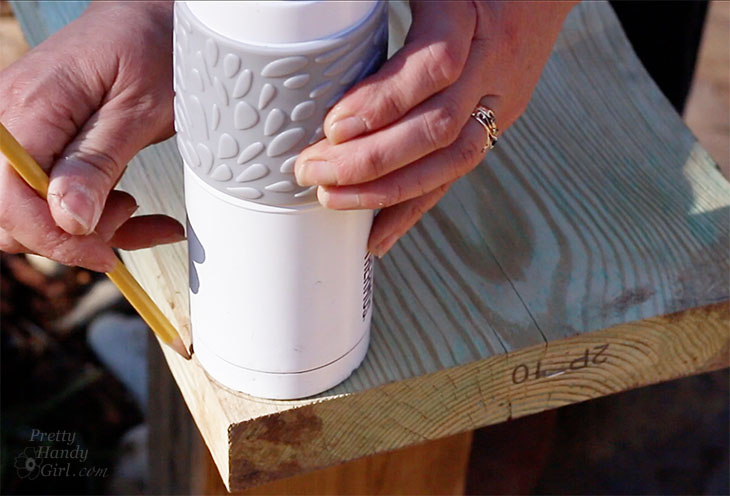
Using a circular object (like a glass or water bottle) trace a curve onto each corner of your bench seat. Use a jigsaw to cut along the lines and round off the sharp corners.
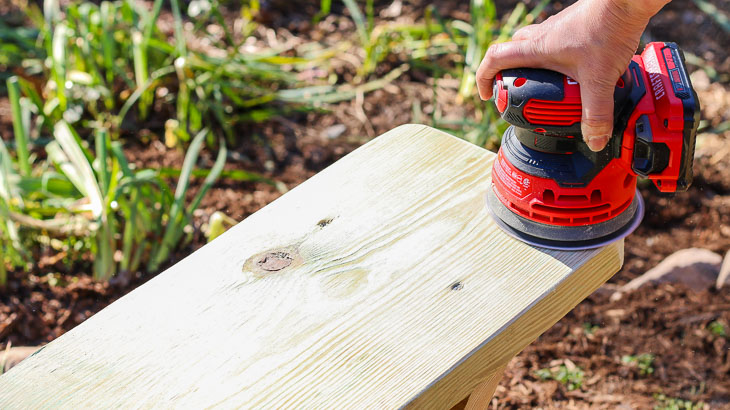
Sand all surfaces and edges smooth on your bench. Wipe off with a damp rag and finish your benches with paint, stain, or a sealant.
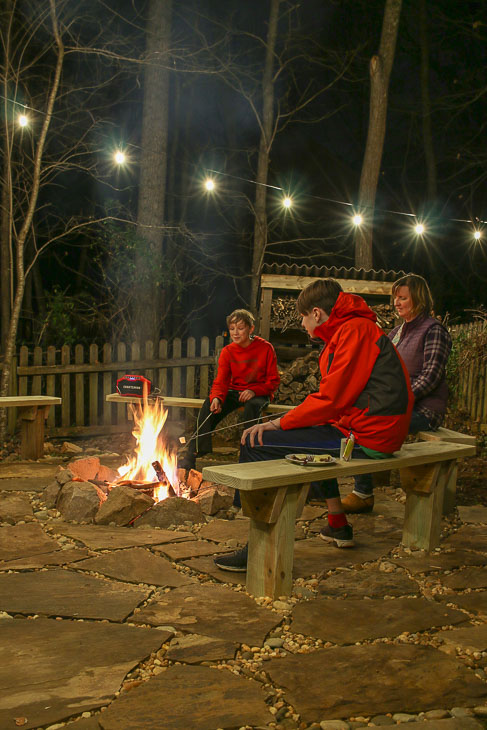
These benches are sure to last much longer than my rotting stumps. It’s time to call the family out and enjoy some s’mores by the fire!
Want a peek into my real life struggles? This was my goal: Take a nice family photo of my boys happily enjoying roasting marshmallows.
Result 1: One boy who can not sit still.
Result 2: If you put sticks in boys’ hands you can expect a wild rumpus.
Result 3: Bribe boys with one more marshmallow if they sit still for 2 seconds. Success!
We are loving the new built-in fire pit benches. I can’t wait to invite the first group of friends over.
I bought a new bag of marshmallows and chocolate just for the occasion!
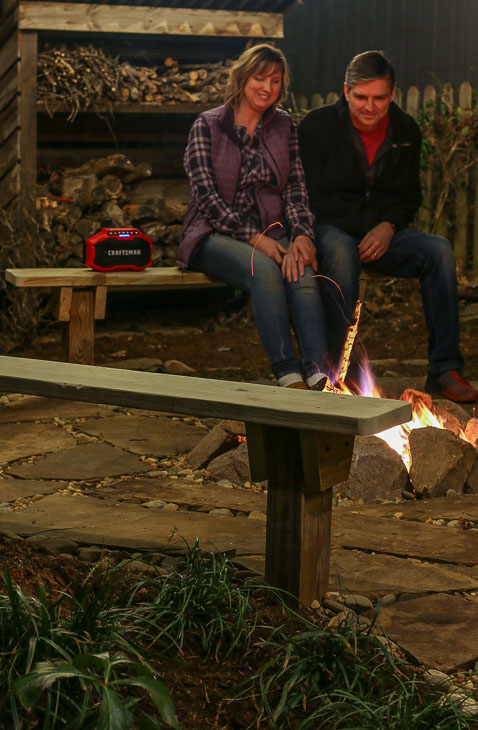
Of course, the fire pit area is also nice for just two people. Pretty Handsome Guy and I had a little wine and marshmallows after the boys went to bed. You can’t get a more frugal date night.
I hope you liked this tutorial. I’d love to hear from you in the comments below, especially if you have questions or build these benches for yourself!
Disclosure: This is a sponsored post for Craftsman. I was not told what to write. All words and ideas are my own. I am very particular about the brands I work with, and only partner with companies that provide quality materials and/or services.


 Can This Battery-Powered Lawn Mower Really Replace a Gas-Powered Mower?