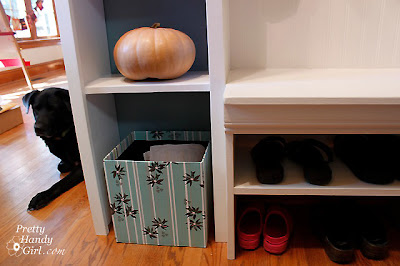
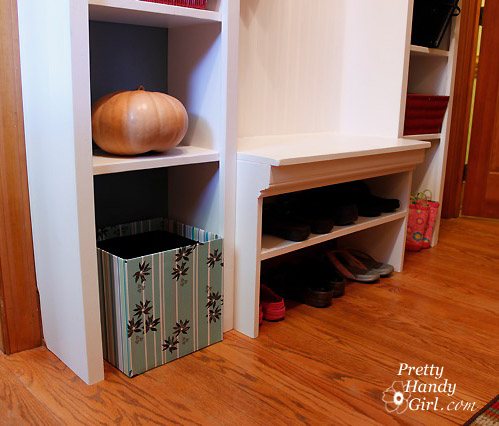
I’m just curious if I’m the only person who loses sight of her desk every week? I spend Monday mornings clearing the clutter and figuring out my plan of attack for the week. I could really save that 30 minutes each week by corralling my clutter in one place! On a recent excursion to Walmart, I found the perfect storage solution!


I also found lots of other goodies at Walmart. My friend Su and I had a blast shopping together. Su is the stay-at-home mom of five. She has a wonderful vivacious personality and is loads of fun to be around. If you haven’t met Su yet, head over to her blog The Intentional Home.

Being crafty gals, we set out to find some inspiration for a new craft project using the Plaid products that were sent to us.

(The Plaid paint selection is just like the candy aisle for me. Drooool!) In the past I have ordered aprons and canvas tote bags for teacher gifts, but now I know that I can pick them up at Walmart!

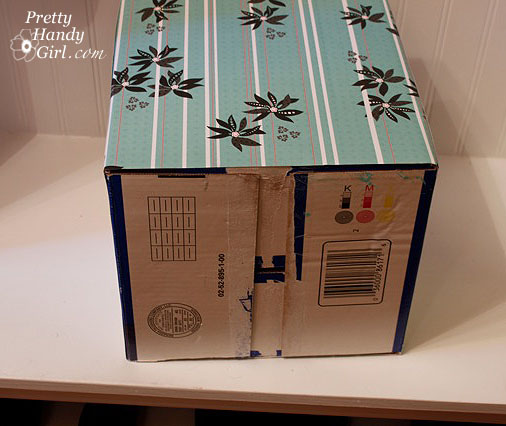
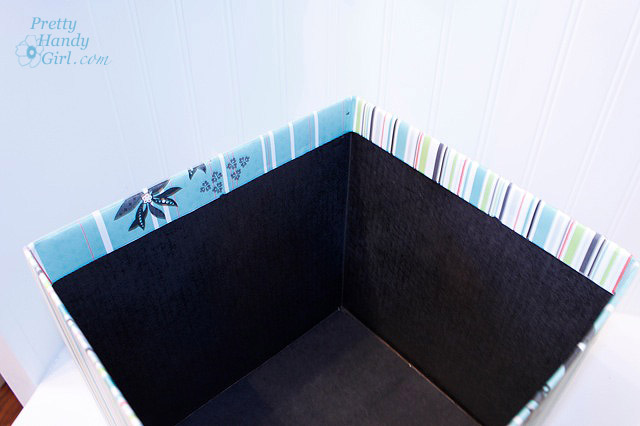
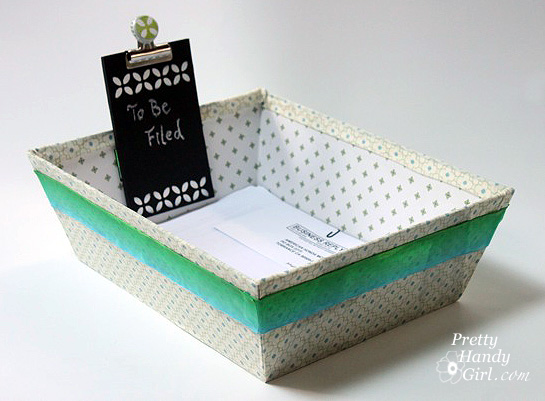
Sorry if I digressed a little, but that happens to me in those big super stores. Back to my storage solution. I found the perfect sized file bin at Walmart, but the design wasn’t cute enough for me. While browsing the aisles, I also picked up some cute pillow cases, and soon a plan was hatched to give my storage bin some personality. Here’s how I did it: Read more

Do you remember that cute little blue striped bin in Renee’s storage unit? The one that she uses for junk mail and recycling.

How much do you think she paid for that? Would you believe nothing?! I made it for her out of a cardboard box and art supplies I had on hand.

Materials:
Cardboard Box
Black Spray Paint (or other color)
Spray Mount (Spray Adhesive)
Elmer’s Glue
Scissors
4 sheets of scrapbook paper (wrapping paper, fabric or wallpaper)

Instructions:

1. I started with a square Huggies Pull Ups box. I knew you wouldn’t believe me, so here is the picture to prove it.


2. Spray paint the inside of your box (be sure to wear gloves because the spray will coat your hand since it swirls around inside the box.)

3. Spray adhesive on the back of 2 sheets of scrapbook paper.

4. Attach them to opposing sides of the box.

5. If your scrapbook paper wraps around the sides, that is good. Be sure to snip the top of the paper at the corners of the box so it can fold over inside the box.

6. Cut your other two sheets of scrapbook paper to the exact width of the uncovered box sides. Spray adhesive on those two sides and attached them to the box. Then fold over the top edges of the paper.

7. If the folded top edges don’t stay glued, put a little elmer’s glue underneath and then use a book, clothespins, or binder clips to hold it down while it dries.


And you are done! Cute, easy and cheap! That’s how I like my men projects.