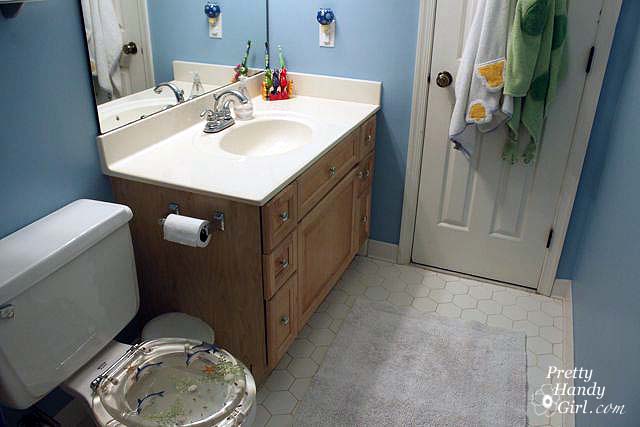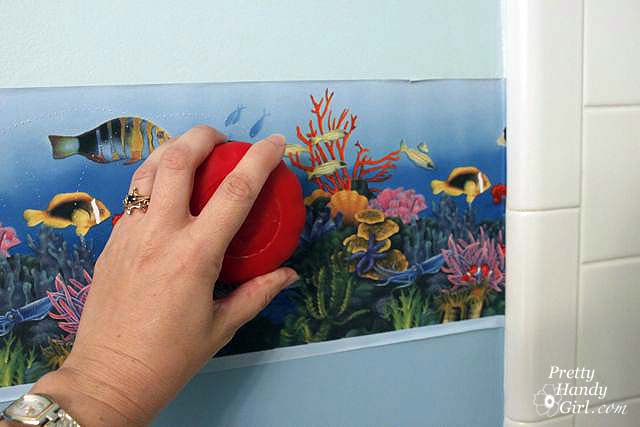
Last week I started to give my boys’ bathroom a facelift. The room was…well…a little fishy.

Removing Wallpaper Borders

Complete with fishy wallpaper border…
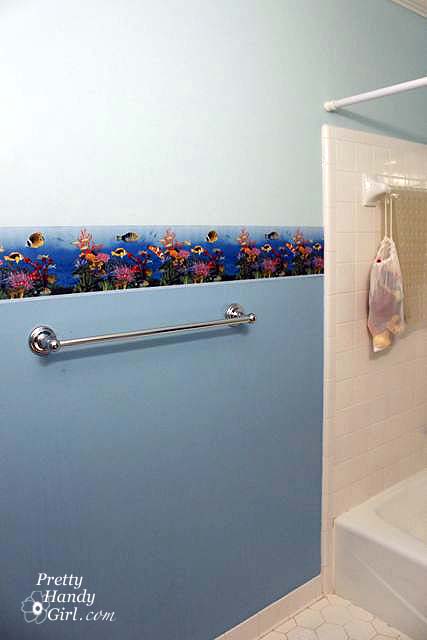
Removing Wallpaper Borders

And a fishy toilet seat!

Removing Wallpaper Borders

The room was cute and I didn’t mind it so much. But, the border had started to peel. And the toilet seat was rusting. DO NOT, I repeat, DO NOT buy any cheap toilet seats that have metal hinges. They may look cool, but the nature of moisture collecting around the toilet makes them rust in no time. This was our third seat to do this. Why I didn’t learn after the second? I’m optimistic by nature I guess.

Anyway, I had wanted to help this bathroom grow up a little. And I’d been anxious to try another moulding project after doing my son’s closet last year.

Before delving into the wonderful world of mouldings, I had to remove that wallpaper border. When wallpaper starts to peel, you think, “Oh cool! That means it will be easy to remove.” So you start picking and tearing at it. Well, resist the urge, it is just a funny joke wallpaper likes to play. You really need to be well stocked and prepared with the appropriate supplies for stripping wallpaper.

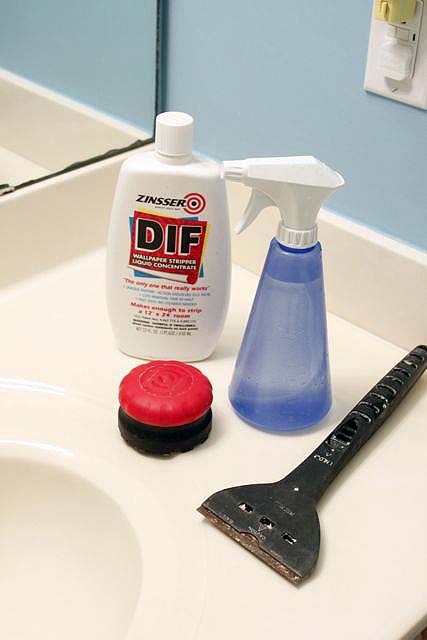
Removing Wallpaper Borders Materials:
Removing Wallpaper Borders

Wallpaper stripper (DIF or a cheaper alternative is to use 1:1 concentration of cheap pink fabric softener and water)

  • Scoring tool (aka Paper Tiger)
  • Scraper or spackle knife
  • Spray bottle
  • Lots and lots of rags
  • Sponge
  • Bucket of water

Removing Wallpaper Borders Instructions:

Start by using the scoring tool. Make lots and lots of holes until you just can’t lift your arm anymore.

Removing Wallpaper Borders

The more holes the easier it will be for the stripper to soak into the wallpaper glue.

Removing Wallpaper Borders

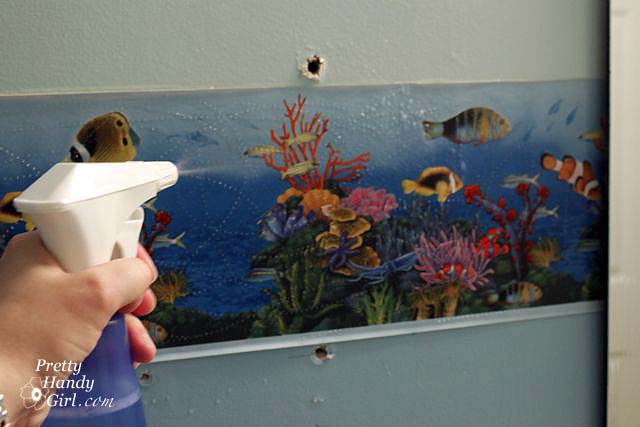
Spray on the wallpaper stripper and let it sit for 15 minutes.
Removing Wallpaper Borders

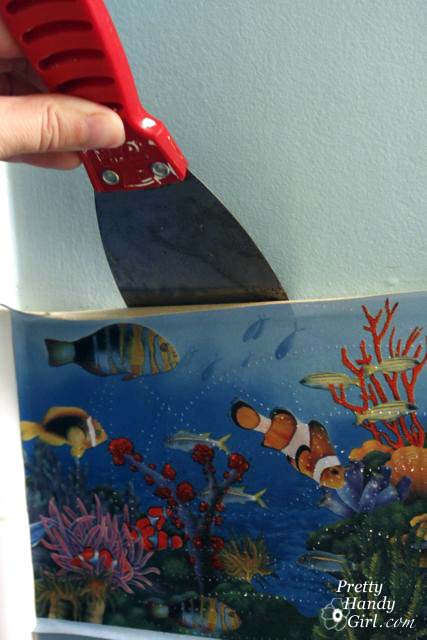
Repeat spraying the wallpaper (really soak it), and then gently try to slide your scraper behind the edge of the wallpaper.
Removing Wallpaper Borders

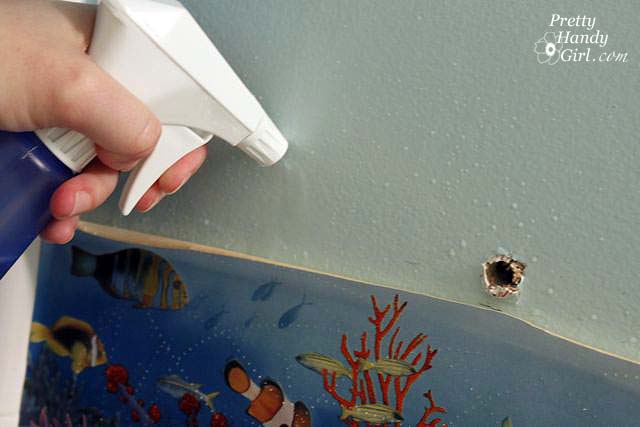
If you can remove the whole strip easily, go for it. In true stubborn form, my border was hanging onto the walls with a death grip. So, I sprayed more stripper behind the border and let it sit for about 5-10 minutes. (Please ignore the giant gaping hole in the drywall! I patched it later.)
Removing Wallpaper Borders

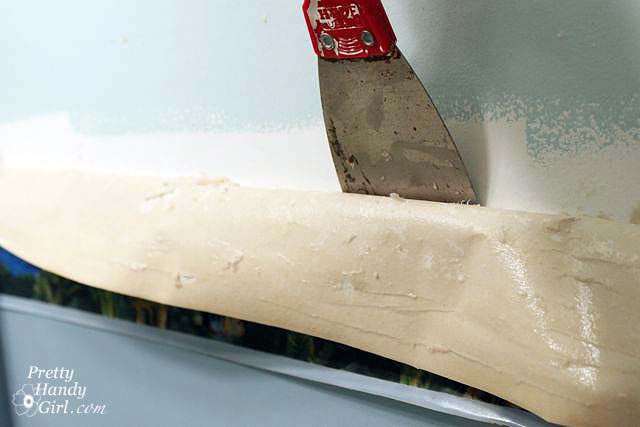
Hopefully by now, it has loosened it’s grip.
Removing Wallpaper Borders

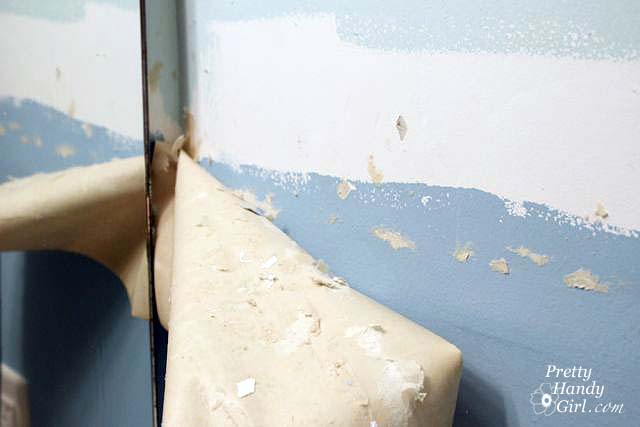
Gently pull the strip off while using the knife to help separate the border from the wall.
Removing Wallpaper Borders

Remove any pieces that are left behind.
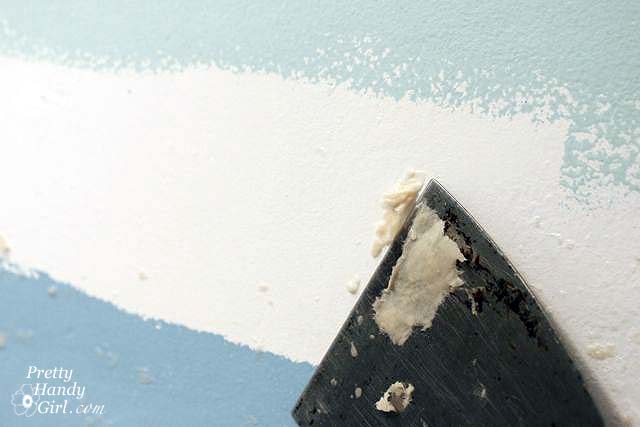
Removing Wallpaper Borders

Spray down the walls again with the stripper.
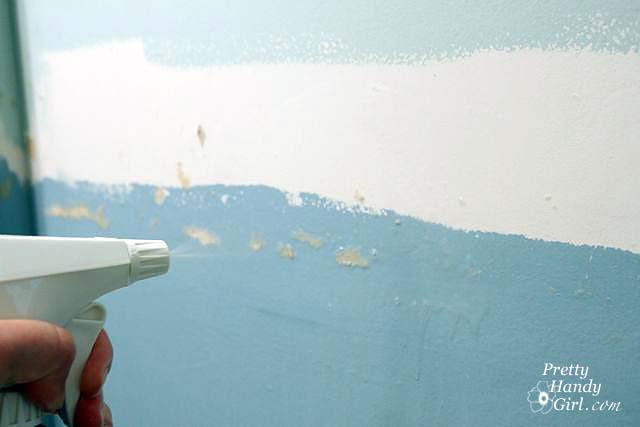
Removing Wallpaper Borders

Wipe it off with water and a sponge or rag.
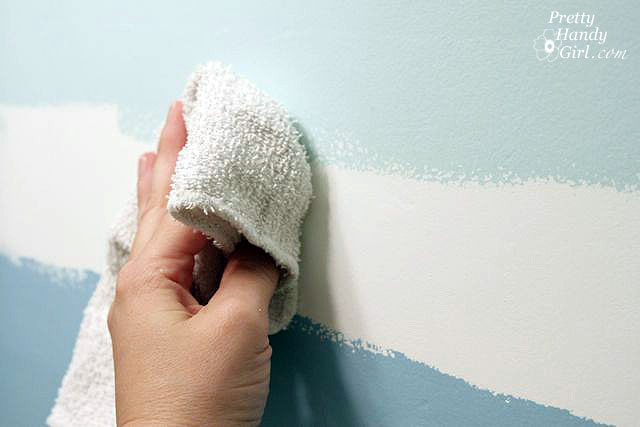
Removing Wallpaper Borders
This should get rid of all the wallpaper glue residue. But, it is still a good idea to use a primer on walls that previously had wallpaper on them. This will protect your paint job from doing something alien like bubbling up, flaking or who knows what!

Removing Wallpaper Borders If you follow me on Facebook, you were privy to my post over at Parentables. I gave them a special all accesses pass to my brain on a recent trip to the Habitat for Humanity ReStore on THIS day.
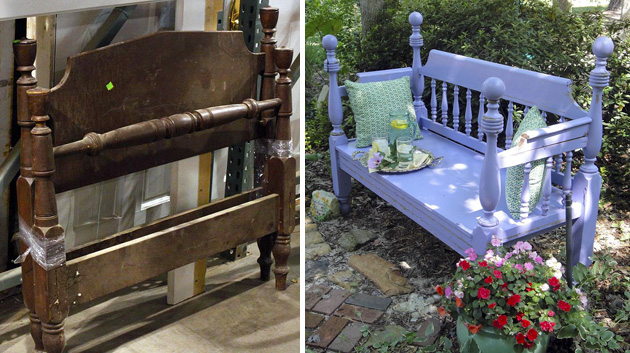
Removing Wallpaper Borders

You can view this and more transformations over there! Be sure to leave me a comment. It seems those Parentables readers are a bit more shy than y’all!

And, one last note. I finally delivered my promised Pretty Handy Girl in a box to Cheri (pronounced like Sherry), who writes Dragonfliez Creationz. She is such a sweet person and she didn’t even complain that it took me a month to deliver her box. Cheri and I like the same burritos from Tijuana Flats (thanks to Courtney for introducing me to this Raleigh gem.) But, unlike me, Cheri has a tough side too (luckily I didn’t get to see it.) She’s giving me assertiveness training because I’m too nice.

Removing Wallpaper Borders

That’s all for today. See you next week with some more bathroom updates.

Removing Wallpaper Borders


Me and My Little Sister Caitlin

I just got back from surprising my little sister, Caitlin in San Jose, CA. My sister’s husband, Ryan, and I conspired to give her a real treat for her birthday. She was really sad when she couldn’t make it to my 40th birthday party. And she has been lamenting the fact that it was taking too long to get her 3 yr. old daughter’s room big-ified (insert big girl furniture and pull out the baby furniture for when their new baby arrives.) One of the projects that was holding them up was painting an estate sale bed frame. Ryan had sanded it, primed it, and then ran into problems while painting it. It was killing me that I couldn’t be there to help them. With over 3,000 miles between us, it was difficult to help only over the phone.

But, with some frequent flier miles and a few secret phone conversations with Ryan, a plan was hatched. I was to fly out to California and give her a grand birthday surprise.

View over San Jose, CA from the Airplane

The ruse was perfectly planned and timed. Ryan told Caitlin that he was going to the hardware store to pick up some things to finish the bed painting project that had gone awry. Meanwhile, he was actually picking me up from the airport. Upon arriving home, he told her, “Honey, I got everything I need to finish painting our daughter’s bed.” And then I rounded the corner. The look on her face was PRICELESS! You can watch the short video of her reaction if you want.


Caitlin’s Surprise from Brittany aka Pretty Handy Girl on Vimeo.


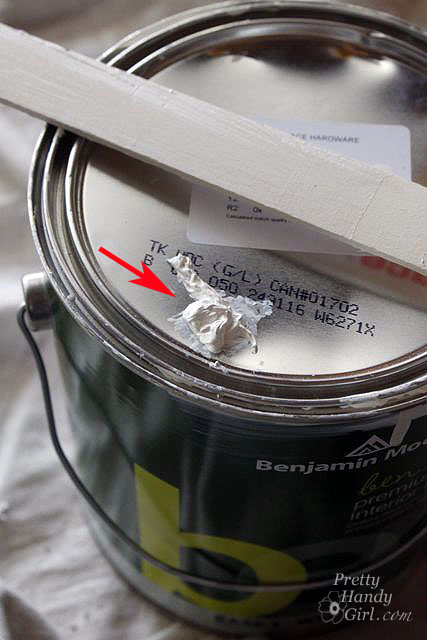
Ryan and I got busy working on repainting the bed the next day. Here is what had stalled the project:

The paint Ryan had used was Ben by Benjamin Moore. And it was bubbling and gumming up. It wasn’t until I started stirring up the paint can and pulled out a big wad of gummy paint at the bottom that we realized he had a bum can of paint.

The date on the can was almost a year old. Now, Benjamin Moore assured me that it still should have been okay if it had been stored properly. But, for whatever reason, it just gummed up on us.

We returned it to the Ace Hardware near their home. And they kindly upgraded our paint to Benjamin Moore Regal which boasts a paint and primer in one can.

The paint was better, no bubbles or bumps, however, we were still having issues with the paint drying very fast. I have to tell you that I’ve painted in heat before. But, we were having a very hard time painting that day. I’d brush on the paint, and could only brush through it one or two more times before it started to dry! CRAZY! I couldn’t understand what was going on. So, I contacted a few experts:

1. Diagnosis by Benjamin Moore Paint expert (I called their 1-800 number).  The Benjamin Moore Regal line is good paint, but it dries much faster than the Impervo (that I am used to using.) The other possibility for the fast drying time is the weather conditions. This makes sense because it was 96F in San Jose, but it was dry. Any paint would have dried faster that day as we slaved away in the garage. In NC, when the temperature reaches above 90F, it is icky, sticky, and muggy humid! You are lucky if your paint dries after 24 hours!

2. Diagnosis by Kate from Centsational Girl (a CA native blogger and furniture painting expert)- I figured she’d be a good resource for advice on painting in the CA dry heat. So I sent her a quick message asking for her help. She replied that I should look into buying some Floetrol to extend the paint and dry it slower. Thanks Kate for your quick reply!

We ended up moving our painting operation inside and that helped a lot. We didn’t buy the Floetrol, but I figured it might help y’all in the dry environments to know about it.

One other issue I had with the Regal Select was that there were a few spots on the furniture that we had sanded a little more thoroughly (through the separate coat of primer that was applied), and the stain or underlying paint kept coming back through the paint. I have to say, I am not exactly thrilled with the Regal “Paint + primer” in one. I suggest that you save yourself the headache and prime with a primer before you paint. Don’t try to cut corners.

Here are my lessons learned on this project:

  1. Check your new paint can carefully, if when mixing it creates a gummy blob at the end of your mixer, return it immediately!
  2. Use high quality paint to save you headaches and hassle. If we had driven the few extra miles to the Benjamin Moore store to buy Impervo paint (instead of the Ace Hardware where they only carried only a few Benjamin Moore lines), we would have had better painting results.
  3. If you have to use paint you already have and are working in a dry region, add Floetrol to it or move indoors.
  4. Don’t try to eliminate steps with a paint + primer in one product. Spend the time to sand your object, prime it, and then paint at least 2 layers of paint.

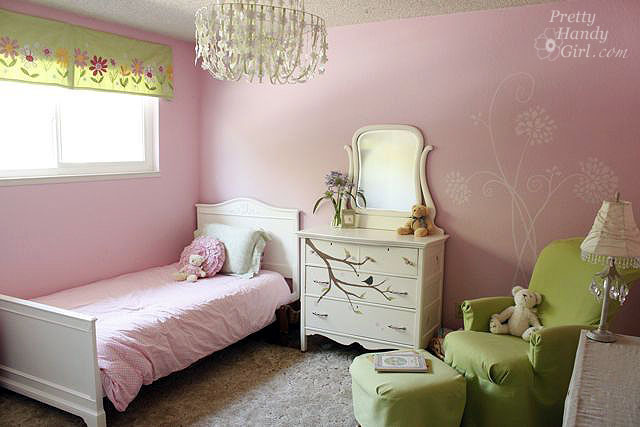
The five days I was in CA flew by, but we did accomplish a lot! My little niece has a big girl bedroom now and they have moved her baby furniture into the new baby’s room.

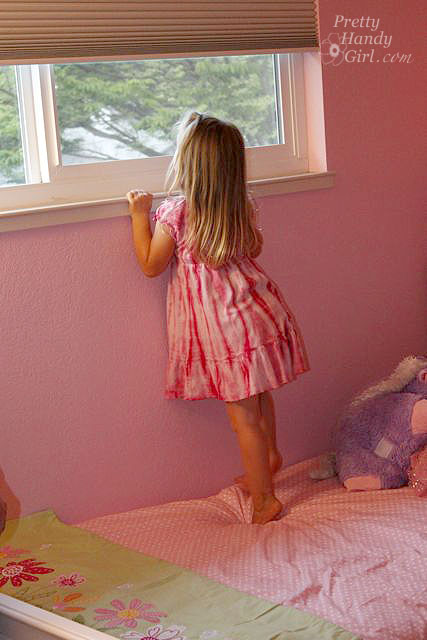
My little niece seems to like her big girl bedroom! She loves to stand on her bed and peek out the window now.

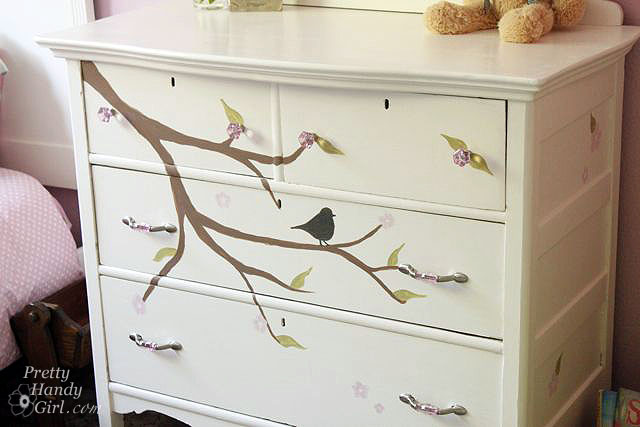
And check out the dresser that Caitlin refinished and hand-painted herself! Reminds me of a Miss Mustard Seed original!

I think she’s pretty talented, don’t you?

We added the “You are my Sunshine” vinyl graphic to the mirror.

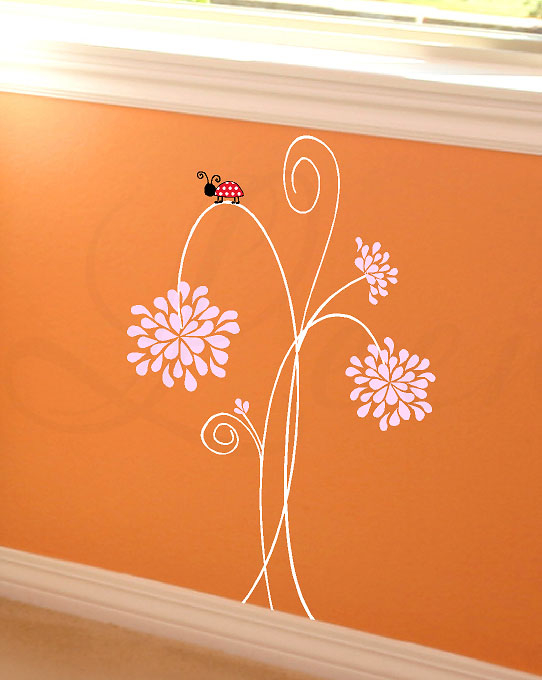
Caitlin also wanted a art on the wall. She picked out a graphic from Leen’s site.

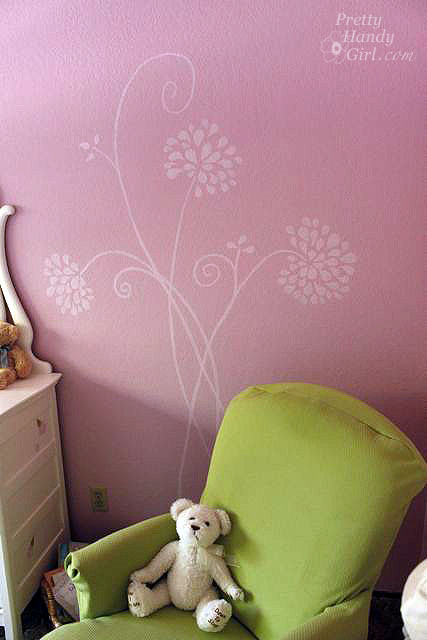
And I hand-painted a similar graphic onto the wall. After doing the dandelion mural in my bedroom, I knew this one would be a snap.

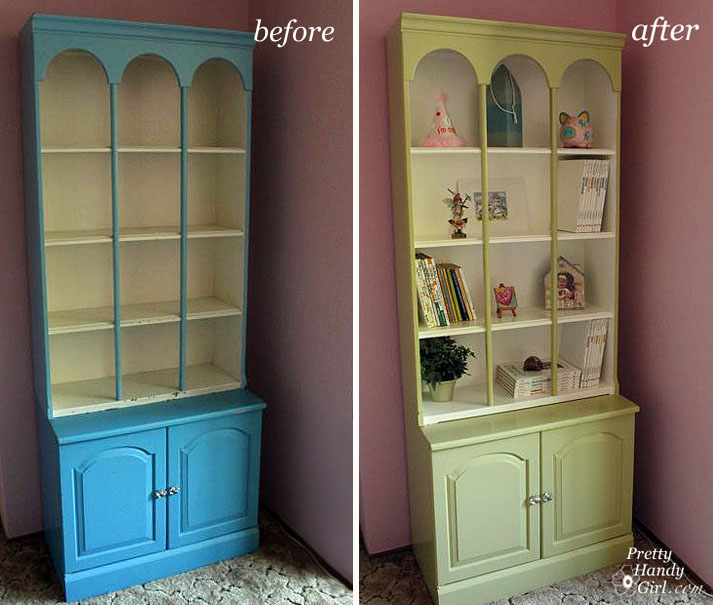
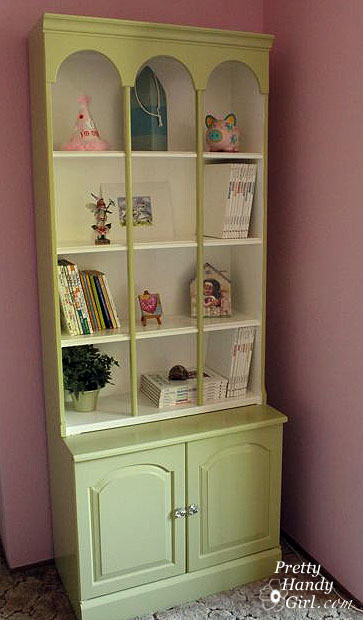
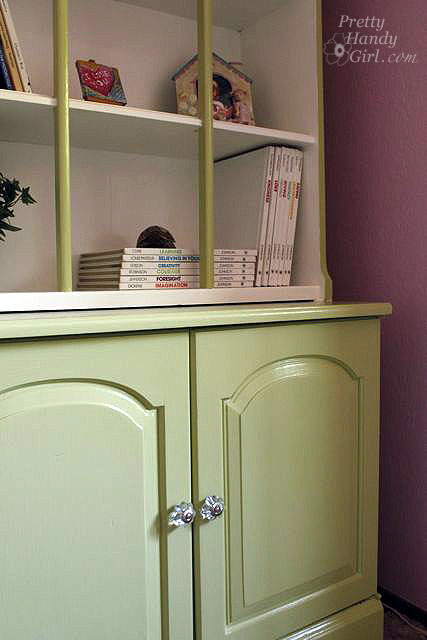
We also repainted this bookcase to match the new color scheme.

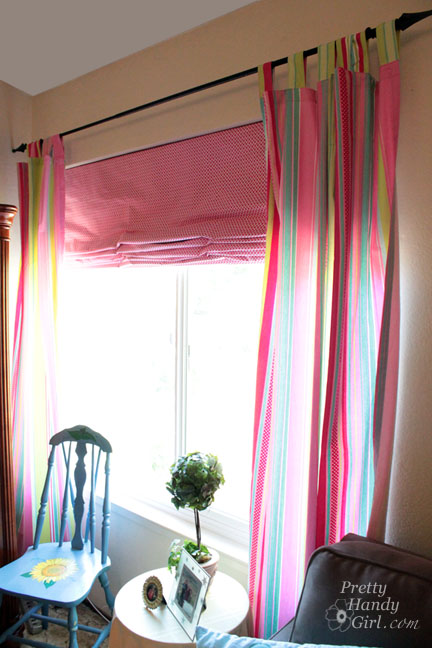
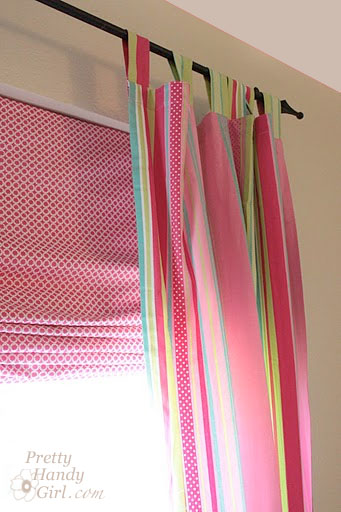
Finally, Caitlin found this tutorial written by Jen Duncan for sewing roman shades. She sewed the roman shade herself with just a few questions for me. (It was quite comical because neither one of us are strong at math.) But, we finished, and in the morning we had JUST enough time to hang it before leaving for the airport.
That little blue chair in the room was the first piece of furniture I ever painted. I painted it for Caitlin while I was in college. A long, long time ago.


Caitlin already had the curtain panels. She chose the roman shade fabric to coordinate with them. I love it!
I had so much fun surprising and helping my sister. Plus, it was fun working in and around a girly room. There is so much testosterone flying around my house (1 man + 2 boys + 1 male dog) that pink is not a color usually seen.

What do you think? Do you like my nieces’s big girl room? Have you ever surprised someone you love? I wanna hear!

I hope you will take a moment to view how I test drove my Dremel Trio. This is seriously a really fun power tool! Just be sure you are safe so as not to ruin the fun. Eye protection, face mask, and ear plugs. Check.

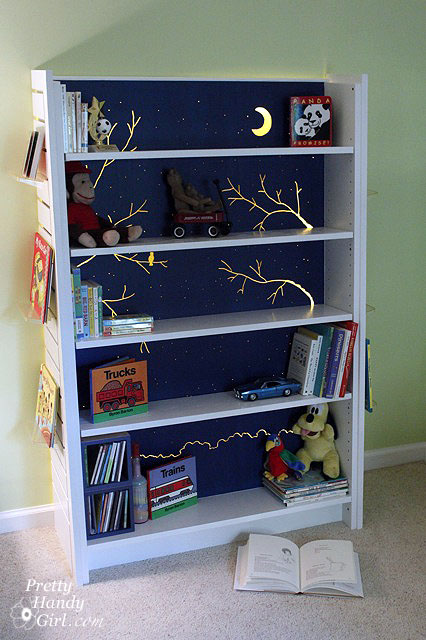
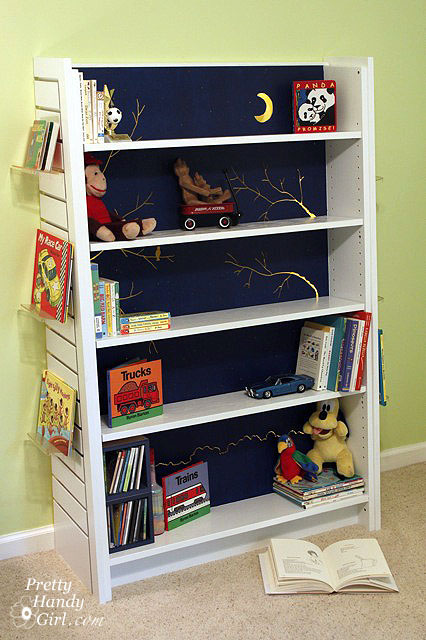
For those of you who like to skip to the end of the book and see the ending, here you go:


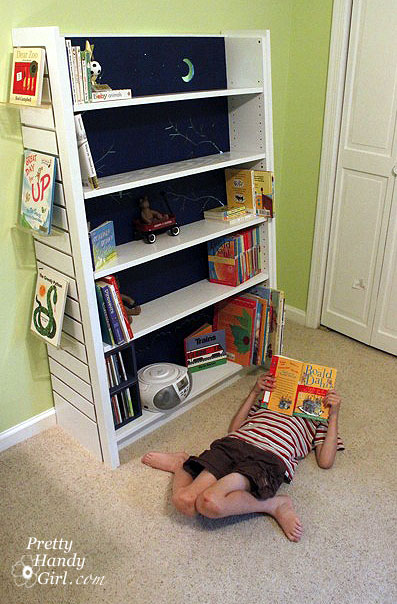
For the rest of you, here is how I created this cut out/back lit bookshelf that started life as a bookshelf from a closing Borders bookstore.


Tutorial for creating a cut out bookcase:
Almost any bookcase will work for this project, but the ones that have a thin wood (can be masonite) backing will work best. Set up a work area that you don’t mind getting dusty and dirty. Remove the shelves from your bookcase.

Cutting the endcap:

Materials:

  • circular saw
  • level
  • clamp
  • scrap wood
  • screws
  • drill

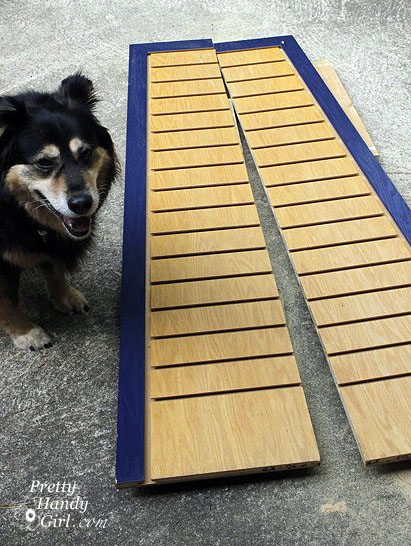
I cut the endcap in half lengthwise so I could use half for each end of my bookshelf, and to position it flush against the wall. To cut a straight line using a circular saw, I clamped one end of a level to the endcap. My level wasn’t long enough, so I drilled a scrap piece of wood on top of the level and into the end cap to support the other end.


I set the circular saw blade just below the depth of the endcap. By resting the endcap on two 2×4″ boards, I was able to creative a gap below the endcap for the sawblade to pass through.Then I ran the circular saw along the level for a straight cut. Straight as an arrow, and it met Pretty Handy Dog’s approval.

Cutting out the backing design and painting:

Materials:

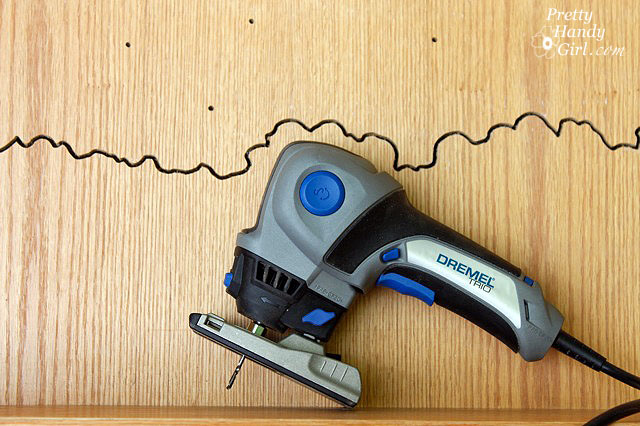
  • Dremel Trio
  • Palm sander
  • Sandpaper (100 grit & 220 grit)
  • Scrap 2×4 lumber
  • Chalk or pencil
  • Wood putty
  • Putty knife
  • Primer
  • Paint (white and navy blue)
  • 3M Clean Edge technology painter’s tape
  • Newspapers
  • 2″ paint brush
  • Small paint roller and tray

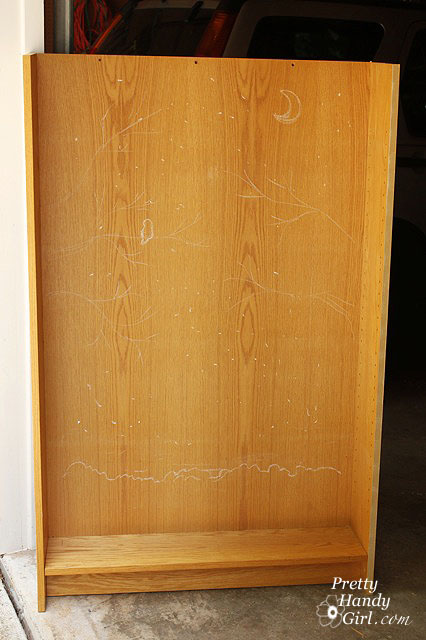
Sketch out the design on your bookshelf (using chalk or pencil) before beginning.

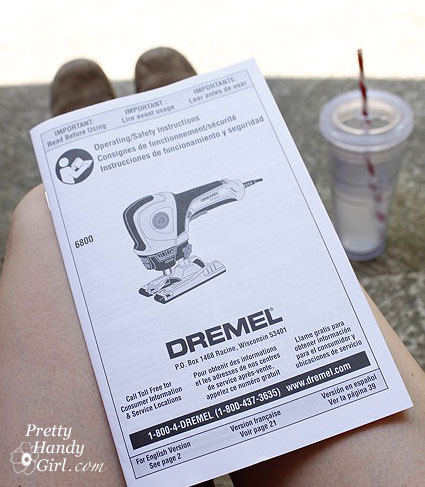
Before using any new power tool, take some time to read through the manual.

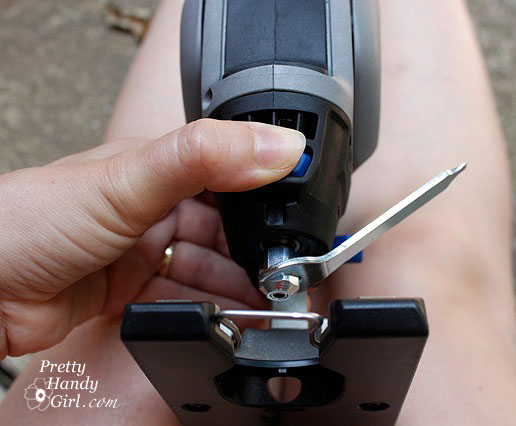
To insert a bit into the Dremel Trio, you push in the blue (shaft lock) button on the front and use the enclosed wrench to loosen the collet nut on the tool.

Insert the cutting bit into the Trio. (The trio also comes with a sanding drum bit and a routing bit!)

Tighten the collet nut with the wrench.

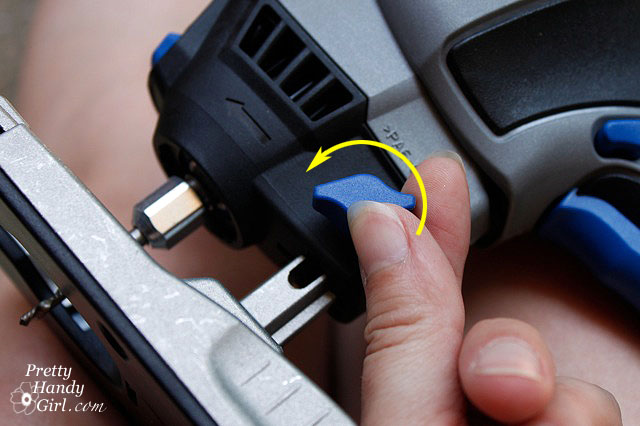
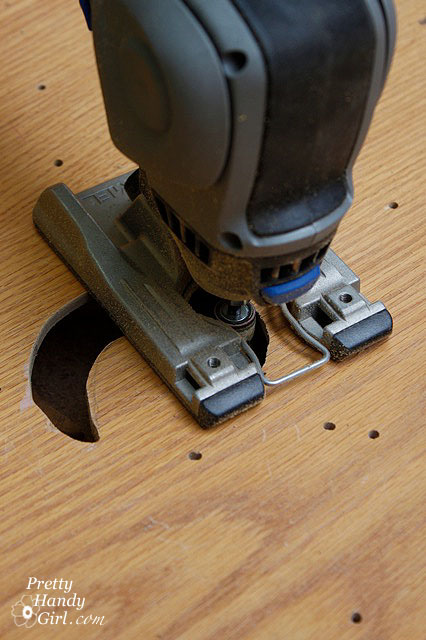
Turn the blue handle on the side of the TRIO to raise or lower the base plate.

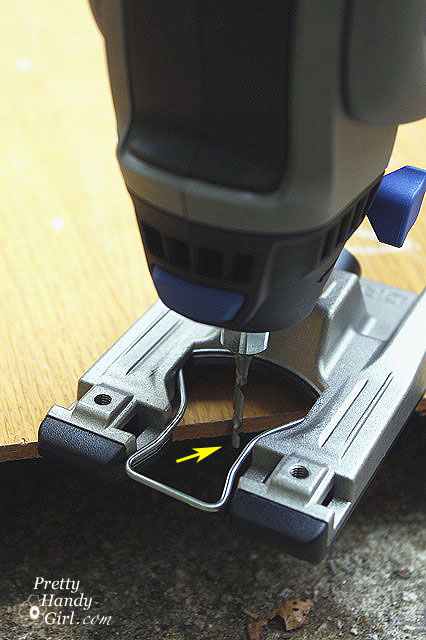
Adjust the base plate until the cutting bit extends slightly below the wood backing of your bookcase.

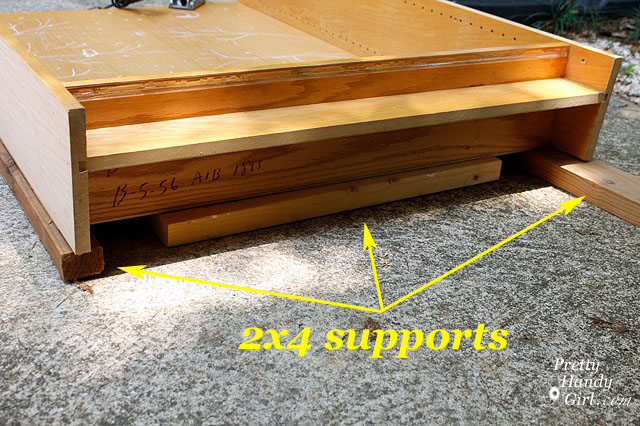
Lay the bookcase down on its back. Position 2×4 boards under the edges of the bookcase (or you will be cutting into concrete. I’m pretty sure the TRIO is not capable of that, but I could be wrong.)

Plug in your Trio and get ready to have some FUN! You may want to practice on a scrap piece of wood before working on your bookcase. The TRIO allows you to change directions quickly and easily. Creating fanciful cuts is a breeze!

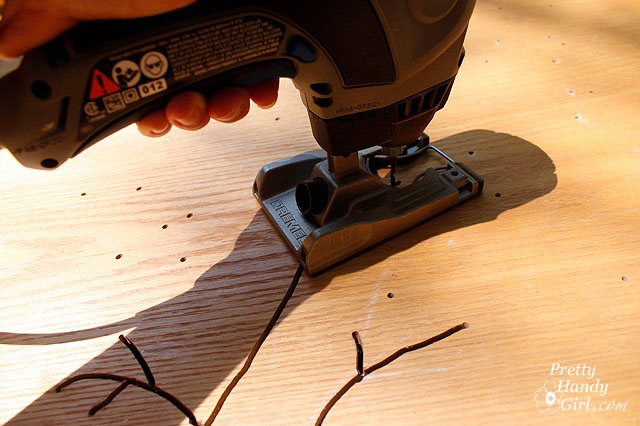
Squeeze the trigger and when the bit reaches full speed you can plunge it into the workpiece. For the pin holes hold the Trio steady, insert the bit and then lift it back out of the same hole.

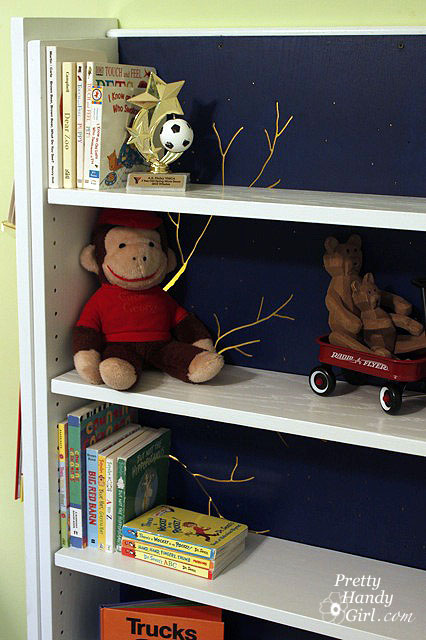
To cut trees and other designs, plunge the TRIO into the wood and then slowly move the tool through the wood to carve your design. Be wary of long “V” shape cuts as they will make the backing weaker.

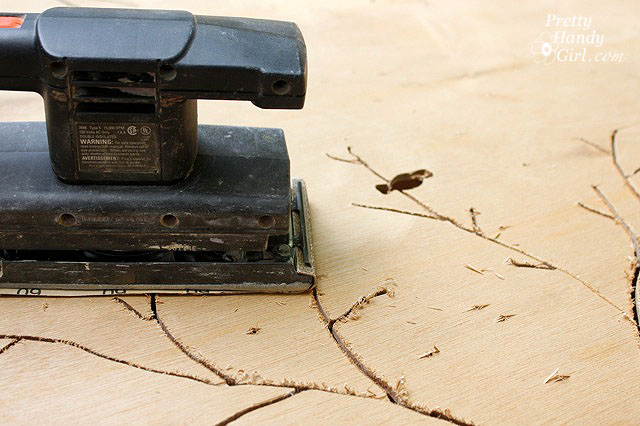
When your design has been completed, use the power sander to sand the back of the bookcase (where the majority of the splintering will have occurred.)

Insert the sanding drum bit into the TRIO and sand any large cut out areas.

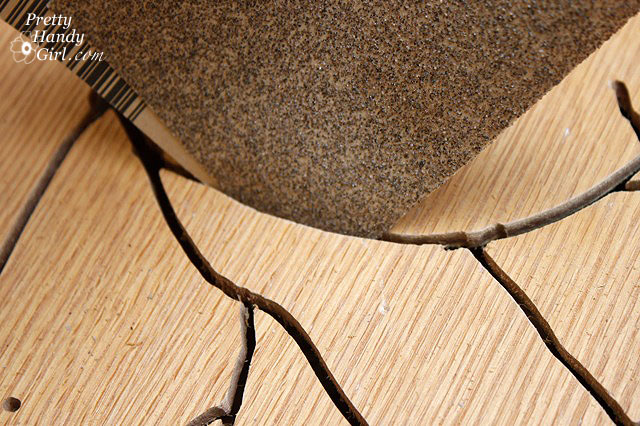
Fold a piece of sandpaper in half and feed it through the thin lines of the branches to sand any rough edges that can’t be reached with the sanding bit.

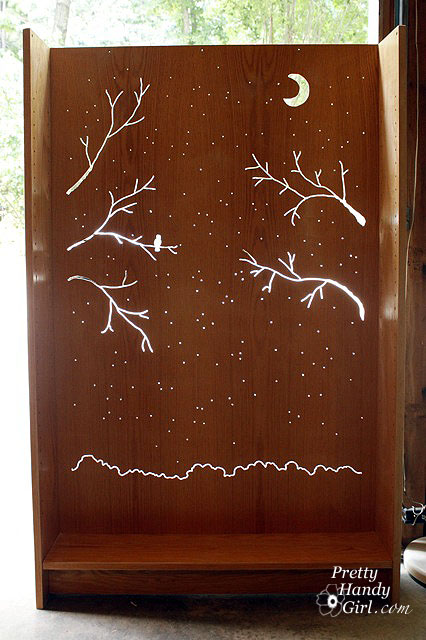
Set the bookcase upright and inspect the cuts for more splinters. You can preview what your design will look like when lit up. Lookin’ good, huh?!

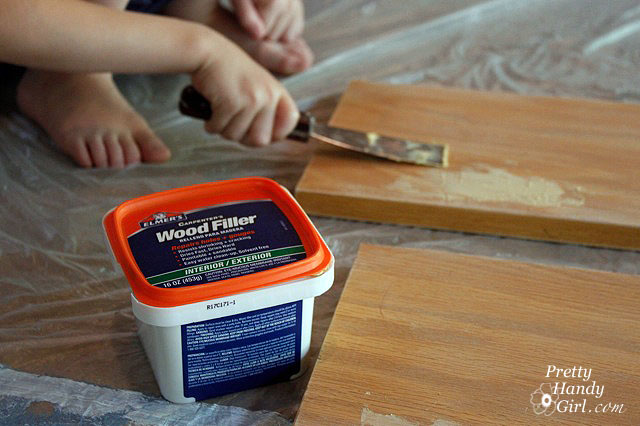
Before sanding the rest of the bookshelf, repair any dents or holes with wood putty. (This is a post I wrote about repairing all types of holes if you need help.)

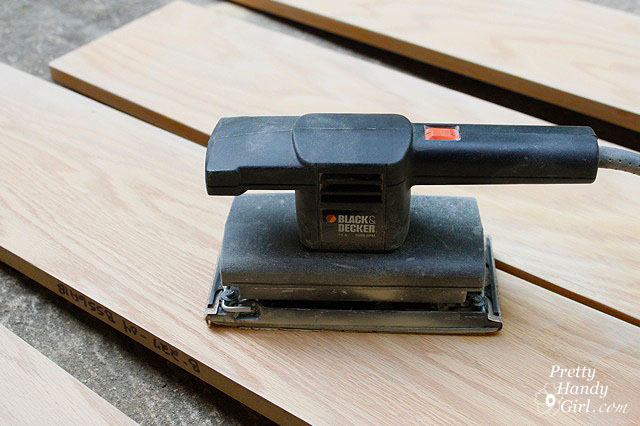
Use the palm sander and a fine grit (220 grit) sandpaper to rough up the rest of the bookshelf.

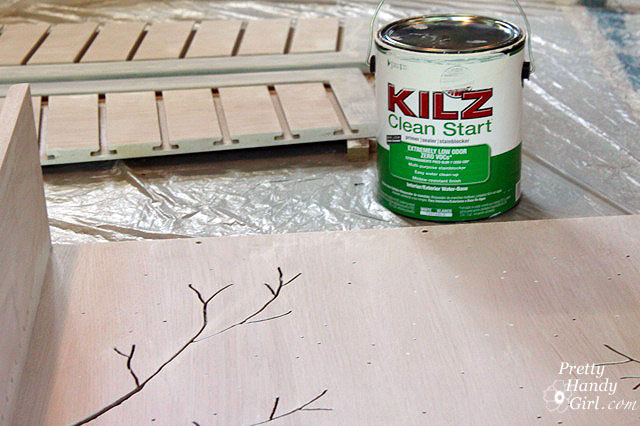
Apply a coat of primer to the bookcase, shelves and sides. (Still working on emptying that can of KILZ Clean Start primer! Love that stuff.
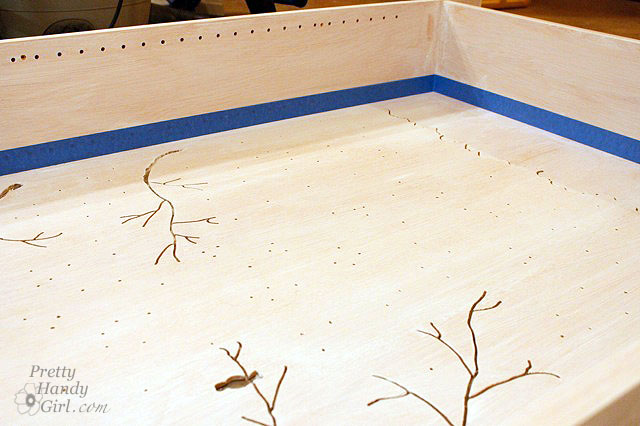
When the primer has dried, mask off the sides of the bookcase where they meet the back.

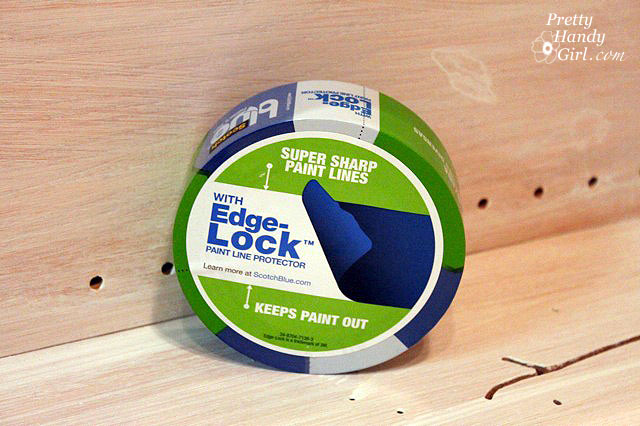
3M sent me this Scotch Blue Painter’s tape with Edge-Lock protector to try. I was skeptical, but when I pulled the tape off it did give me a clean edge. The only place I had a little bit of seepage was in the corners where I didn’t press the tape tightly into the corner. The key to using this tape is to firmly press the edges with your finger to engage the “Edge-Lock” seal. I haven’t tried it for painting walls, but you better believe I have a wall project coming up that I can try it on.

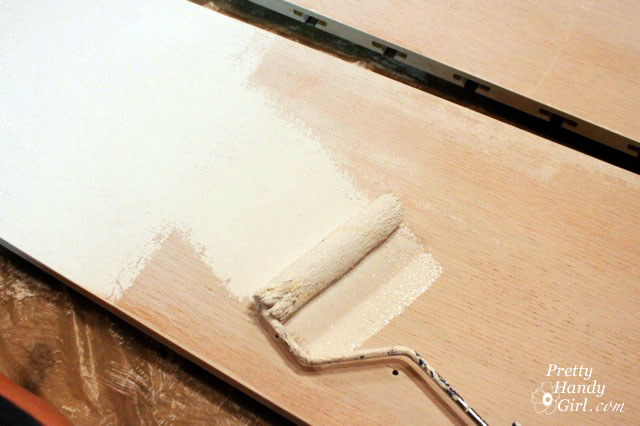
Paint the back of your bookcase. I chose a very dark navy blue. To save paint, I used a medium blue paint for my first coat to darken the back and hopefully save paint.

Then paint one coat of the navy blue.

Follow up with a second coat to eliminate any streaking.

When the navy paint has dried, tape along the edges of the navy blue backing, where it meets the sides. Slip pieces of newspaper underneath to catch any paint splashes. (Will you get a load of my lazy supervisor! You think he’s been working hard in the heat? Uh no, that would be me doing all the work and him snoozing away the day.)
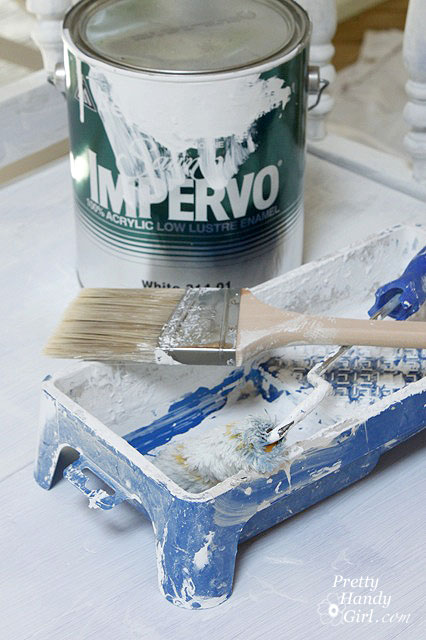
Paint the rest of the bookcase, the sides and the shelves white. I used two coats of Benjamin Moore Impervo Semi-gloss white.


Once the paint has dried completely, re-assemble the bookcase. And screw the end cap halves onto either side of the bookcase.

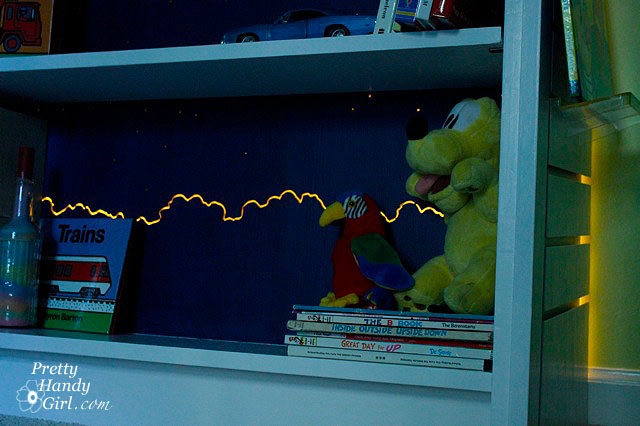
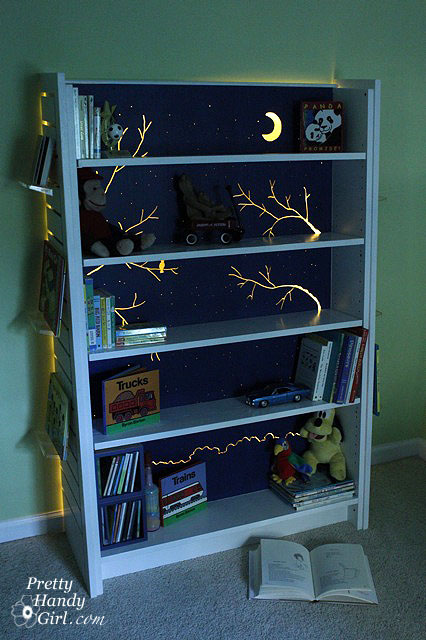
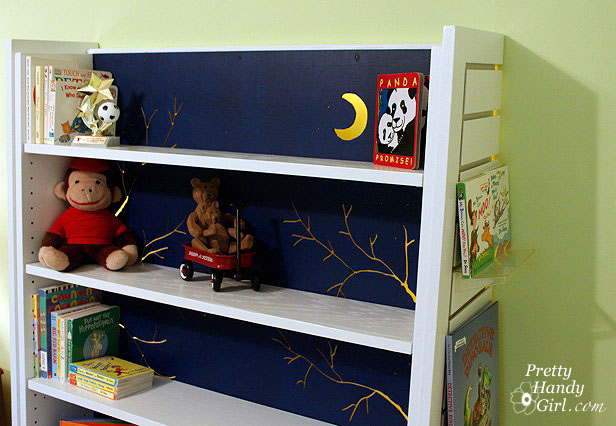
I installed a light rope behind the bookcase (tutorial to come at a later date) and set the lights on a timer. The rope light comes on at dusk and illuminates all the cut outs.

There is a very soft glow emitted from the back of the bookcase.

It provides the perfect amount of light for my son who HAS to have a light on at night.

My only complaint about the rope lights is that they give off a strong plastic odor. But, after a week the smell has dissipated.

I had the foresight to purchase a few of the clear display stands that slide into the end caps of the bookcase. It makes it easy to display books to pique my son’s reading interests.

Oh look! There he is now! Mission accomplished, reading interest piqued. Yes, I think he is double-jointed and a teacher pointed out that both my son’s sit like that. Must be in the genes.

A few more detailed pictures of the bookshelf. This has to be one of my favorite projects I’ve created recently. And it wasn’t very difficult to complete.


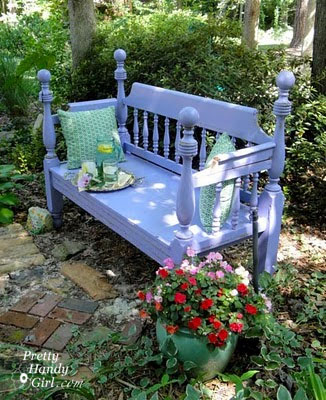
Recently I decided my garden bench that used to be a Craig’s List bed frame, needed to be refinished. I repaired, sanded and repainted the bench before setting it onto our porch where it would get less exposure to the rain.

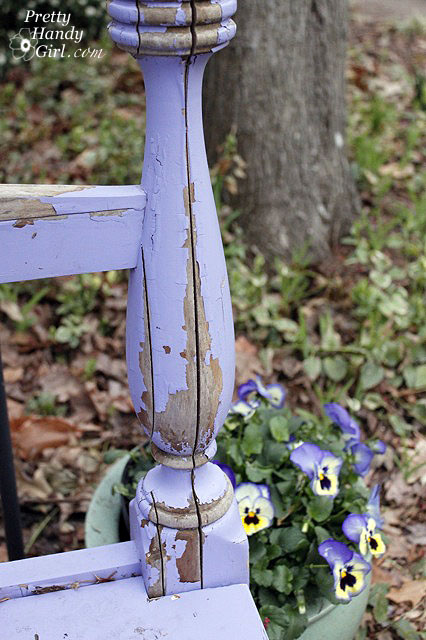
Well, it wasn’t weathering the elements too nicely. Or maybe I should say it was weathering them poorly. Regardless, I really liked the bench and decided to strip it and start over again. I believe the main problem was that the bed frame was not solid wood, it was glued pieces. Then, if you factor in that I used spray primer and spray paint, the rain and moisture got in easily and caused the wood to swell and some of the glued joints to come undone.

But, the bench was still structurally sound, so we moved it onto the screen porch and I got ready to refinish it.

Refinishing a Weathered Garden Bench

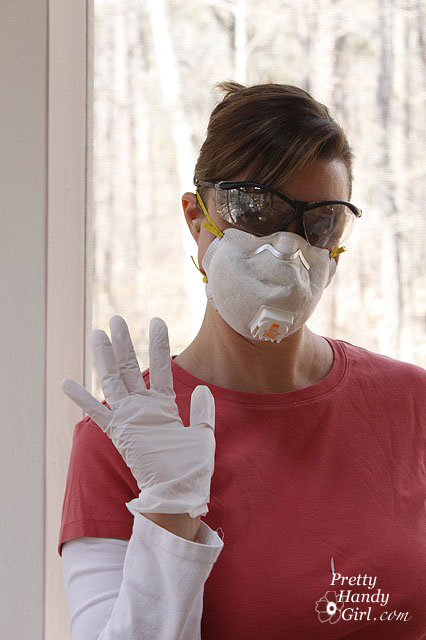
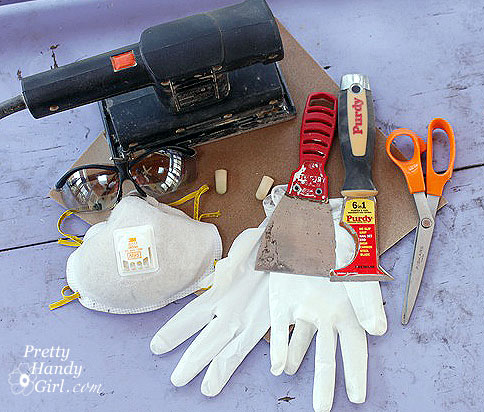
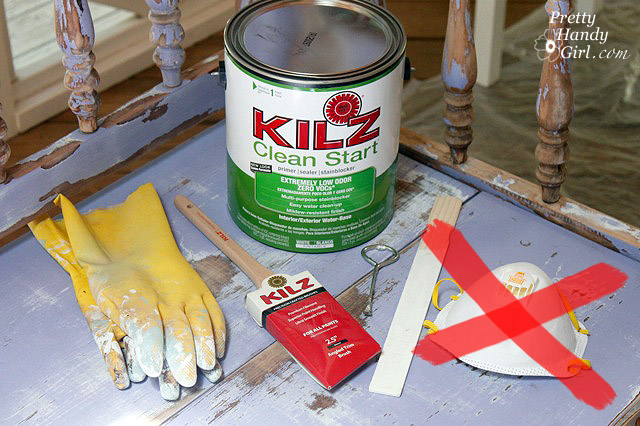
Safey First, (as Meri-K will tell you.) Because I was sanding and scraping the old paint I had to wear eye protection and a dust mask. I also wore ear plugs while sanding and gloves to keep my hands from getting rough.

Materials:

(I’ve included affiliate links for your convenience. I earn a small percentage from a purchase using these links. There is no additional cost to you. You can read more about affiliate links here.)

Instructions:

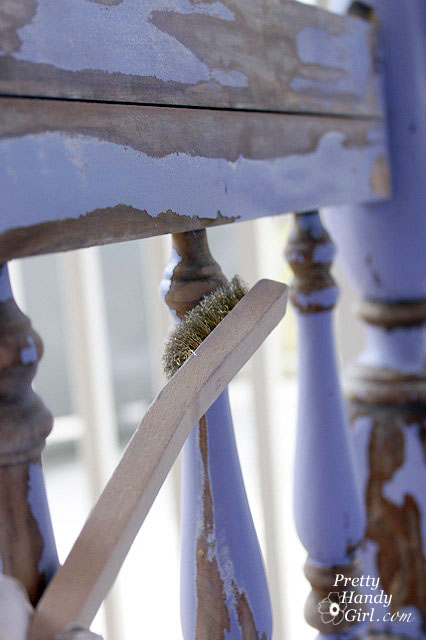
Begin by using the wire brush to remove any flaking paint and to get into the grooves of the spindles (and other hard to reach places.)

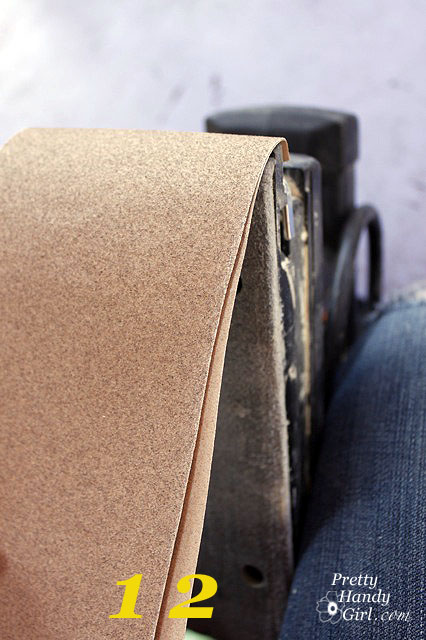
Tip from a Handy Girl: I am about to share with you a helpful time saving trick, so pay attention. If you have a power sander that holds the sandpaper with a clip. You can stack your sandpaper. I put the 220 grit on the bottom, then put the 1oo grit on top of that. After sanding my bench with the 100 grit, I simply tear off the top sheet and expose the finer 220 grit.

Sand down the bench with a rough 100 grit paper first, then follow up with a finer 220 grit sand paper.

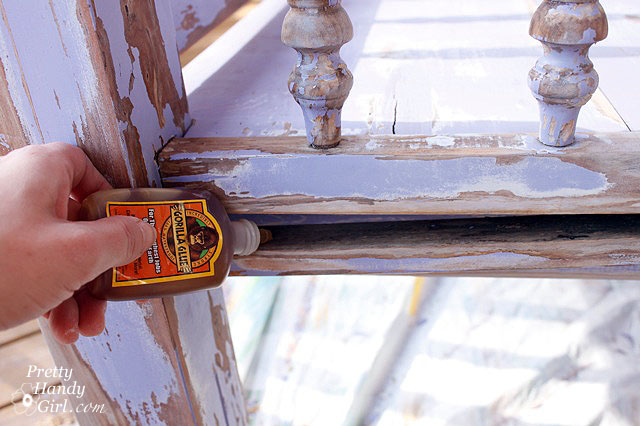
Secure any loose pieces of the bench. To use Gorilla Glue, you need to moisten the two pieces that you will secure.

Then put a small amount of Gorilla glue onto one of the pieces.

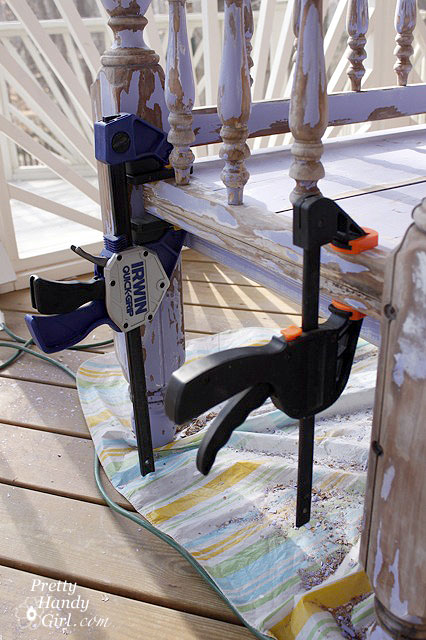
Clamp the joined pieces and allow to dry overnight. (By the way, don’t waist your money on cheap clamps. That little black & orange number below just bit the dust last weekend. My Irwin clamp is a CHAMP!) Check back after 30 minutes to wipe off any Gorilla glue that has spread out of the seam.

Because the posts on my bench were really falling apart, I decided to remove the ball finials.

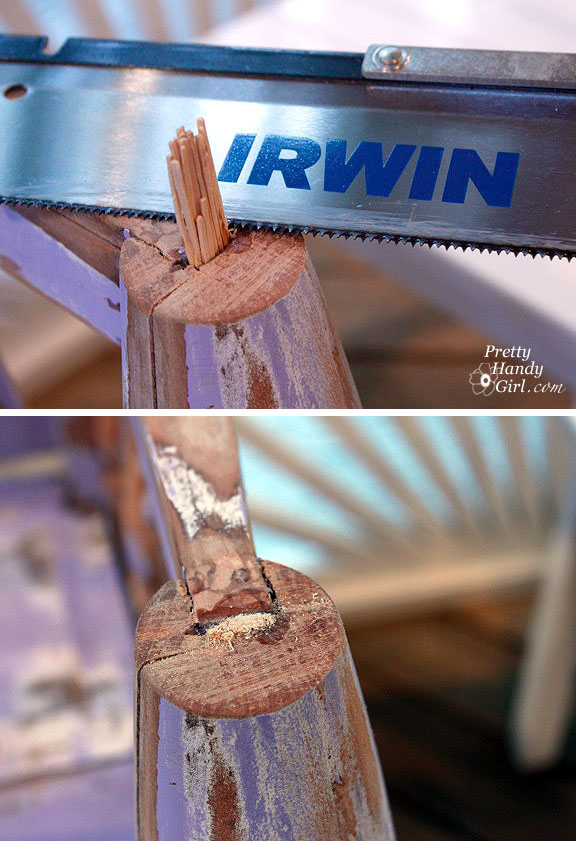
Use a saw to cut both finials off.

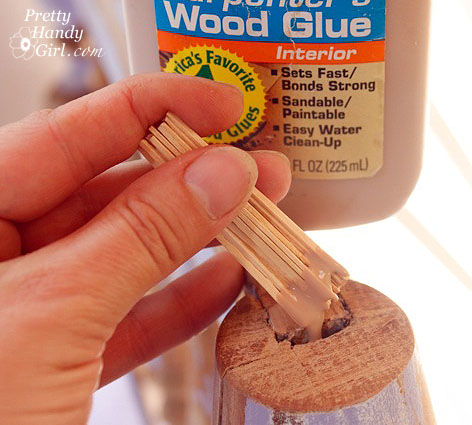
Patch the hole using toothpicks and wood glue.

After the glue has completely dried, saw off the toothpicks.

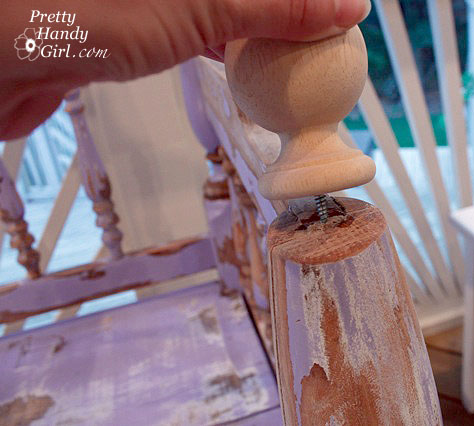
Add a curtain rod finial on top of the sawed off posts.

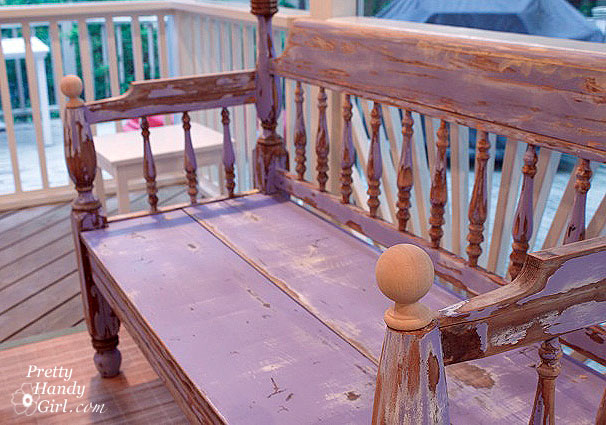
It looks like those finials were there all along!

Clean your bench off with a damp rag to remove any sawdust.

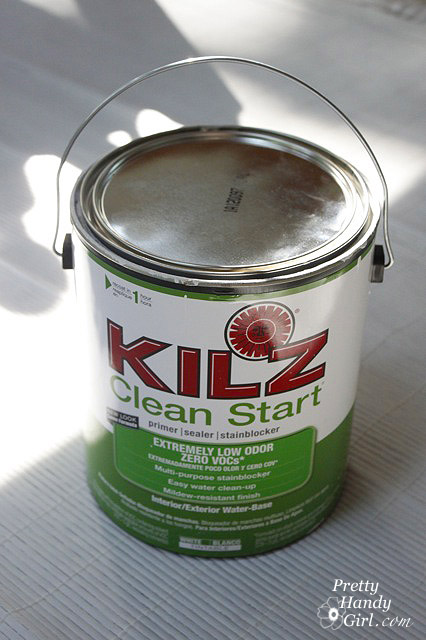
Cover the entire bench with one coat of KILZ Clean Start Primer. Want to know why I use KILZ Clean Start primer for all my projects now? Read how much I love it in this post where I used the same primer for painting a bamboo rug. I’m never buying any other primers (unless I’m priming a tricky surface, then I’ll use BIN 1-2-3 oil based primer. But, I won’t be happy about using that stinky stuff.)

After the primer has dried, use a piece of fine grit sand paper to gently remove any burrs or imperfections.

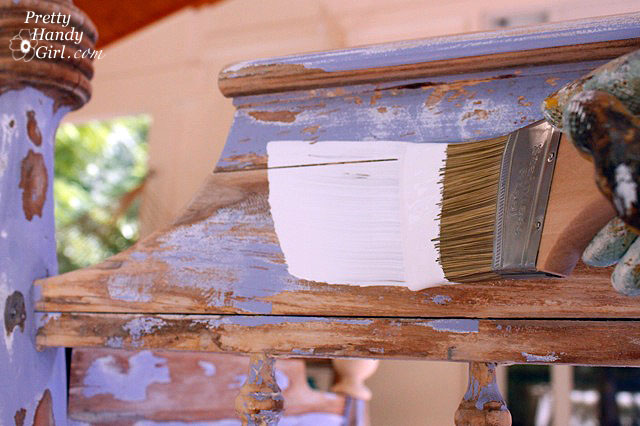
Then wipe off the bench with another damp wipe. I used Benjamin Moore Impervo Semi Gloss paint for the top coat on my bench. It leaves a really tough coating and will hold up to wear and tear.

Roll on the paint in one area. Then follow up with a brush to even out the paint. Remember to run your brush in the same direction as the grain of the wood.

Lightly sand after the first coat has dried and finish up with a second coat of Benjamin Moore Impervo paint. I didn’t add polyurethane, but if you are really concerned about a piece of furniture that will be exposed to the elements, go ahead and add two or more coats of polyurethane.

My bench should successfully last outside now for three reasons:

  1. I moved it inside the porch and out of the direct sun and rain.
  2. I primed the bench with a good quality brush-on primer (instead of a spray paint type.)
  3. I brushed on two coats of paint making sure I got into all the cracks and crevices of the bench.

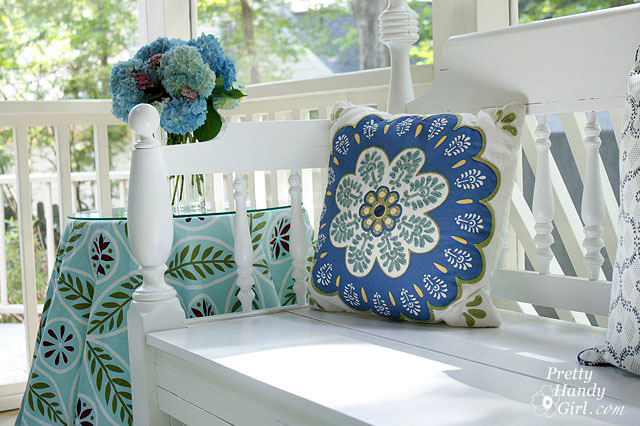
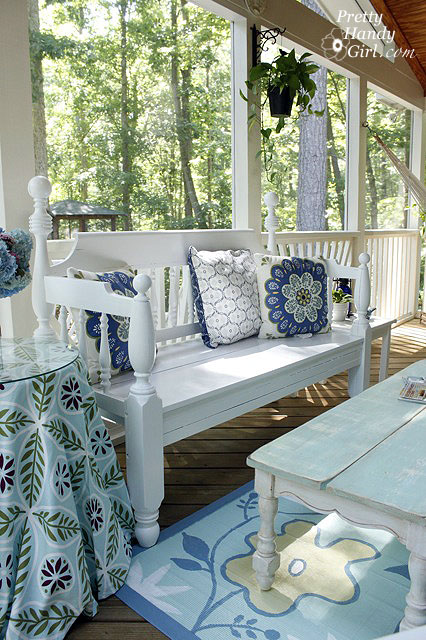
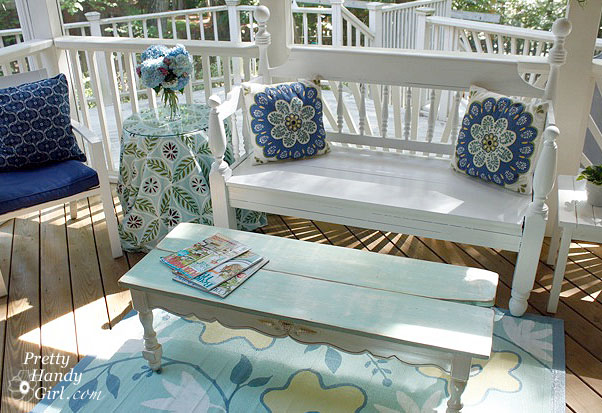
Here she is in her newfound home, our screen porch:


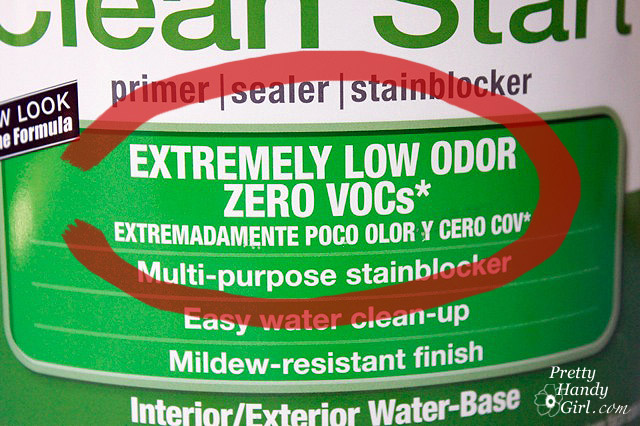
With zero VOCs and the quality that is standard in all the KILZ products, this primer is a must have for the DIY painter!


Disclaimer: The products mentioned in this post are products that I use and stand behind. The opinions expressed in this post are authentically mine. I was sent a gallon of KILZ Clean Start Primer and the Irwin Quick Grip clamp to try out, but I was not paid or swayed to write favorable things about the products. If I don’t like a product, I won’t write about it. And I certainly won’t pass it off on my valued readers.


Painted Bamboo Rug


Back story and my ramblings:

Sleeping outside on the screen porch was nice until I woke up with a sore neck. So, I won’t be doing that again for a while. But, I won’t complain because we are lucky to have a screened porch and I am really loving it after the recent makeover.

The makeover was spurred on by this Pier One bamboo rug that I scored for $25 while thrifting!

It’s nice isn’t it? Especially with the splashed paint on it. Yes, I was the sloppy culprit who dripped paint while repainting my garden bench. But, no big deal, I had bigger plans for that rug.

So I sat down at my computer and spent a few minutes hours on Pinterest to research some patterns for my rug – seriously addictive site! But, it is also proving to be a huge organizational tool for my blog. I can pin ideas I want to create. Or I pin other bloggers projects that I want to make sure I give credit to when I steal borrow their ideas.

Once I narrowed down the designs I liked, I used my photoshop skills to change color palettes and design to create a sketch for my painted rug.

Then I ran over to Ace Hardware to purchase some paint. I ran into my good buddy, Mr. Paint Dept Guru – and guess what he did! He told me he had just finished going through the mistinted cans and hadn’t even priced them so he let me have my pick of some cans for….FREE! That is why I love my Ace Hardware. They are a small neighborhood store and all the employees know my face. The cashier and I even have a running joke. She couldn’t remember my name once (how can she, there are only 300 customers in there a day), so I told her that I’d give her a hint. I told her that I share the same name with a famous pop singer. She laughed and said, well, I keep thinking Beyoncé but I know that isn’t your name. So, now she calls me Beyoncé everytime I walk in.

Tutorial:

If you just came here to find out how I painted the rug, I’m sorry about my story-telling. Anyway, here is the tutorial, you found it!

Materials:

  • Kilz Clean Start Primer
  • Stir stick
  • Drop cloth
  • ScotchBlue Painter’s Tape
  • Gloves
  • Paint brushes (thin and thick)
  • Paint roller
  • Butcher paper
  • Chalk
  • Scissors
  • Latex paint colors
  • Minwax Polyurethane
  • Mask Yeah! No need to wear a mask with the new KILZ clean start primer!

The good people over at KILZ recently sent me a gallon of their new eco-friendly primer* (yeah, I thought that was an oximoron too.) I’ve used KILZ 2 latex primer for years and have been very happy with the product, so I had serious doubts that some “green” primer could perform the same. Well, I stand corrected! Love this stuff!!! No face mask necessary, no need to worry about off gassing. The primer had no smell that I could determine.

And it sticks like glue to the surface that needs to be primed. It worked just as well as the regular “stinky” primer. I even scouted out my local Home Depot to see if they stock it (for when I run out) and they do! (My local Lowe’s hasn’t received a shipment yet.)

Just in case you didn’t see this: Zero VOCs!!! I like that!

Sorry, I get side tracked easily.

Start by laying down a drop cloth and putting on rubber gloves.

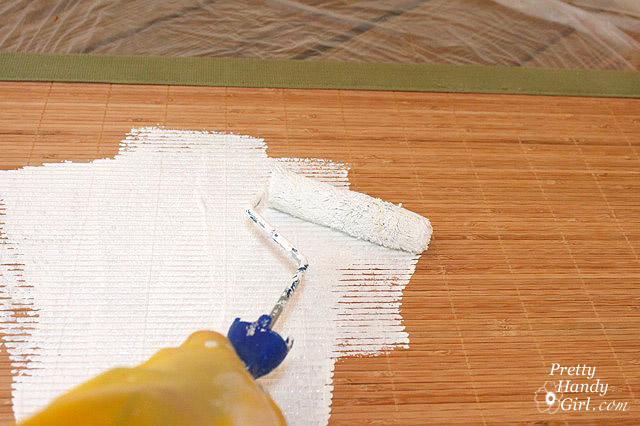
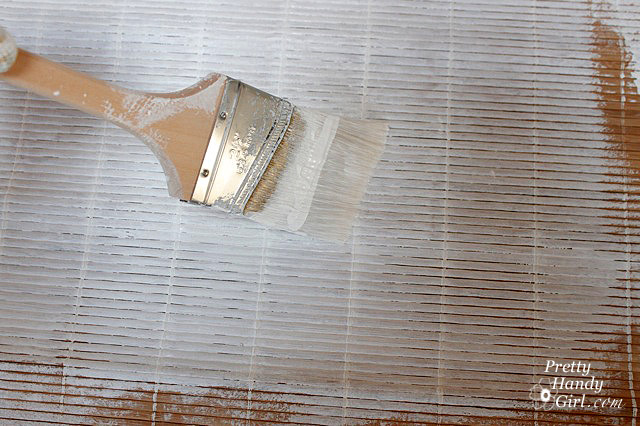
Stir your primer well. Roll on the primer onto the bamboo rug.

Then smooth the primer in the direction of the slats with a brush.

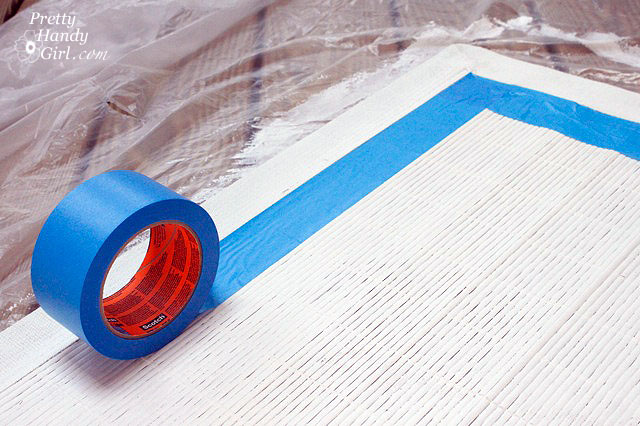
Tape off the inside edge of the canvas border using your painter’s tape.

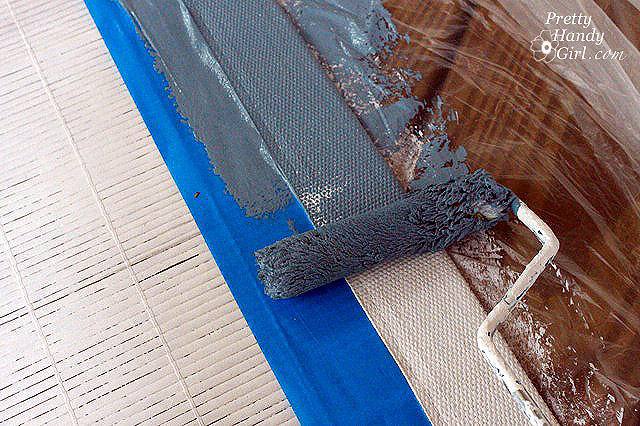
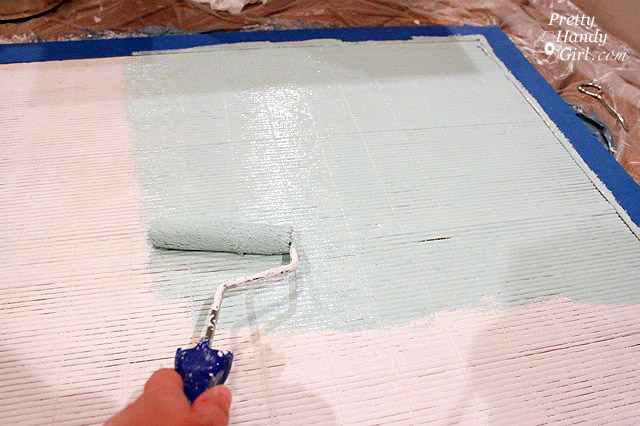
Roll on the border color. Yup, that pretty blue gray paint was a mistint and therefore FREE!

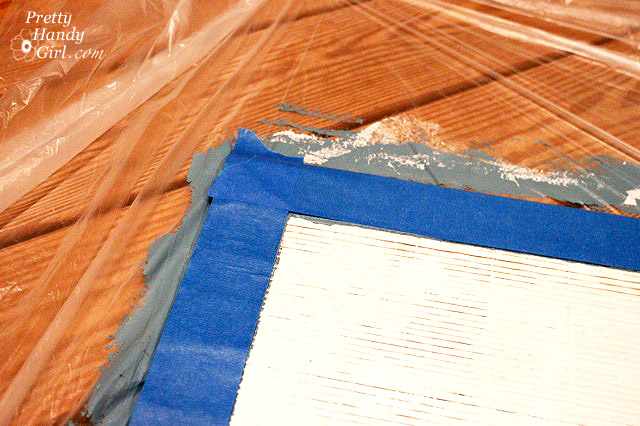
After the border color dries, remove the painter’s tape and then put tape on top of the border.

Roll on the base color for your rug. Then use a brush to drag the paint between the slats. You may need to apply a second coat of paint.

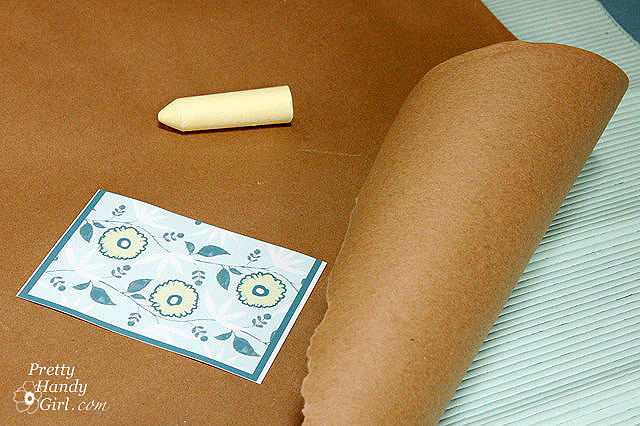
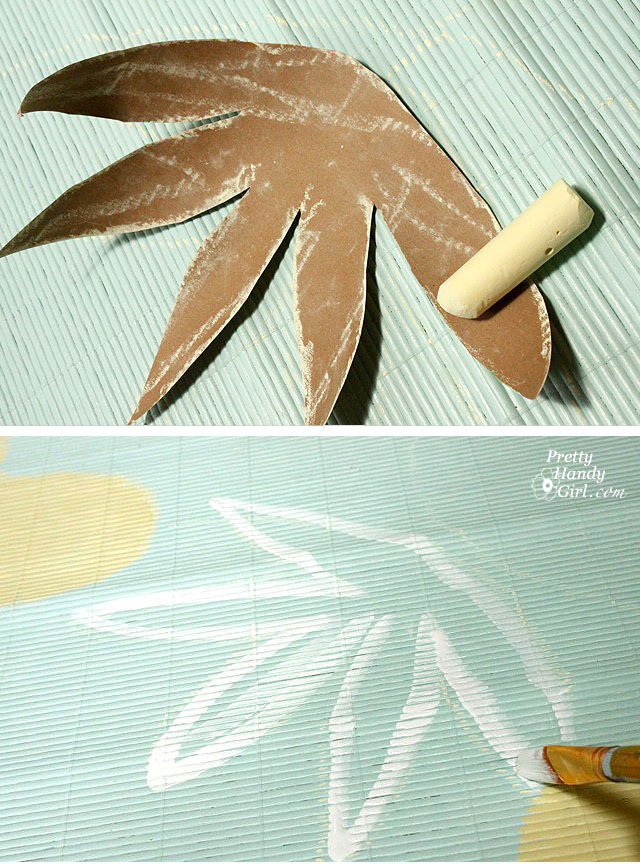
Using the chalk and butcher block paper, draw out your rug design.

And lay the design on top of the rug.

Cut out the largest shapes first. And trace inside the cut outs onto the rug.

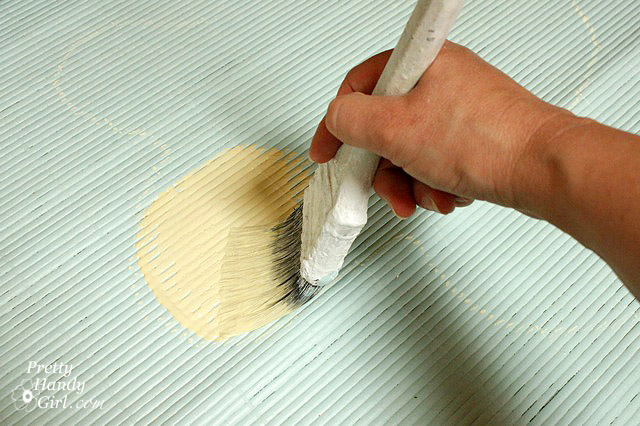
Paint inside the chalk lines with the flower color.

Next draw the vines and branches onto the rug using chalk. Chalk can easily be wiped off if you wish to work with the design a little bit.

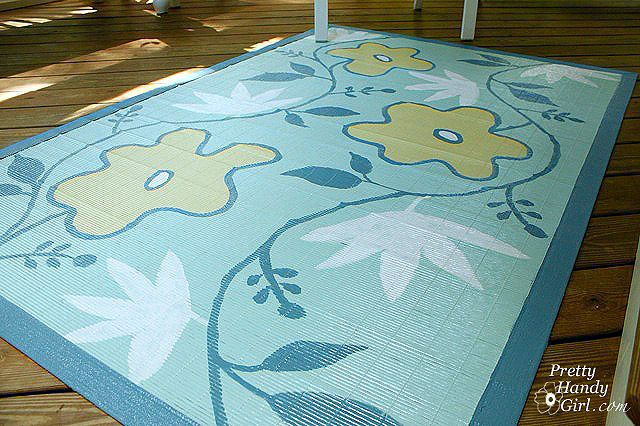
Continue tracing flowers, vines and leaves and fill them in with paint.

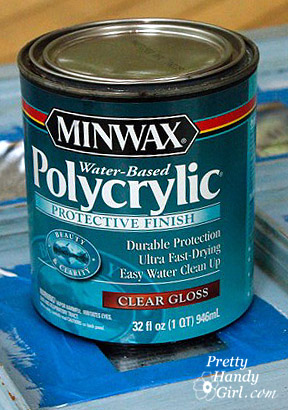
When your rug is completely painted and dry, wipe it off with a damp rag. Then roll on at least 2 coats of water based polyurethane. I prefer Minwax, but use what works for you.

One word of advice when painting on bamboo slats. Don’t try to be a perfectionist. Just relax and have fun. The inconsistencies will make your rug look more authentically hand-painted!

I love my new porch rug! Even better, I love the price!

It looks fabulous with my beachy coffee table I made last year.


I promise – a photo tour of our screen porch will be coming soon.


* Disclaimer: I was sent a gallon of Kilz Clean Start Primer for my honest review. I was not paid or compensated for the review other than with a gallon of primer. My thoughts and opinions are authentic and my own. In other words, I respect you and will not lead you astray with false product information.

Sharing this project with:

Visit thecsiproject.com