Welcome back, I hope you are ready to paint with me today! If you are just stopping by and haven’t prepped your room for painting, you may want to take a moment to read Painting Like a Pro Step 1 and Step 2.

Okay, are you ready? I’m going to show you how I painted my downstairs half bathroom, the professional way!
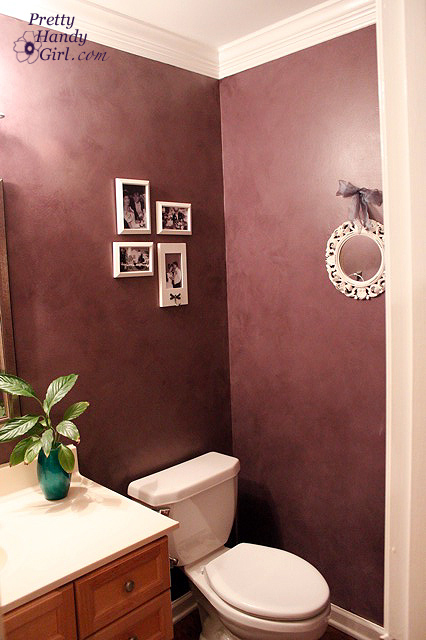
Before
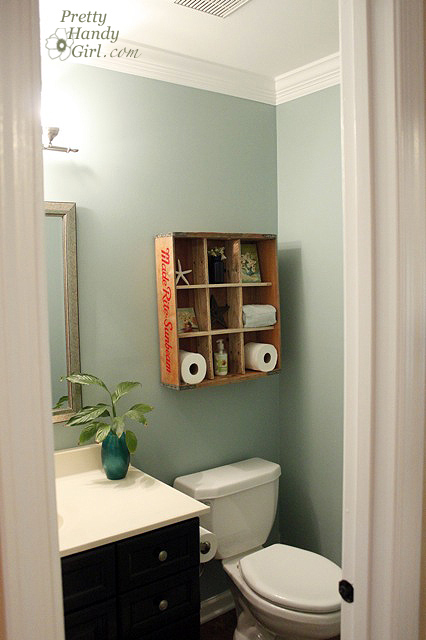
After

Materials:

  • paint tray
  • two plastic grocery bags (optional)
  • a paint roller with a regular nap for smooth walls. If you have a textured wall (orange peel, cottage cheese or as “My Boy’s Teacher” showed me: sand texture) you may need a thicker napped roller.
  • 2.5″ angled painter’s brush
  • edger (optional)
  • Painter’s tape (I prefer the Scotch Blue Delicate Surfaces tape)
  • a damp rag
  • sanding block with 200 grit or higher sand paper
  • damp sponge with a bucket of fresh water
  • x-acto blade (optional)
  • small flat artist’s brush

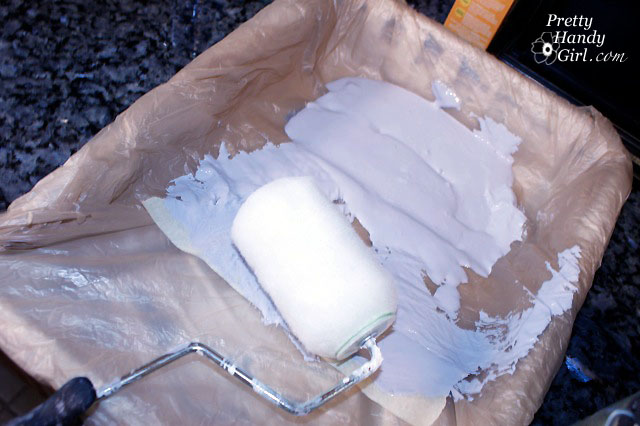
Go ahead and pour your paint into a paint tray (make a liner with grocery bags as I show HERE.)

Only fill the tray about half full (more than shown in the picture), you need some blank space at the top to squeeze the excess paint out of the roller by rolling it back and forth.
 

Painting Walls and Ceilings:

When I paint a room, I always paint the ceiling first, unless it REALLY doesn’t need painting. It is more efficient to paint the whole room while you have the tarps down and supplies out. Besides, you know you won’t go back and paint the ceiling another day. Am I right?!

You can paint the ceiling the same way I paint walls, just use an extension pole and a two-step ladder for painting the border. Don’t worry about taping off the walls or trim right now. I’ll tell you when to tape later. The only time I would use tape now, is if I need to mask off something like the vanity, a light fixture or a wall I’m not going to paint.

1. Begin by painting the border on your wall. Use either a paint brush or the edger. If you are using the Aura paint, let this border dry before you move onto the next step. If you are using another brand/type of paint, work quickly and move onto the next step.
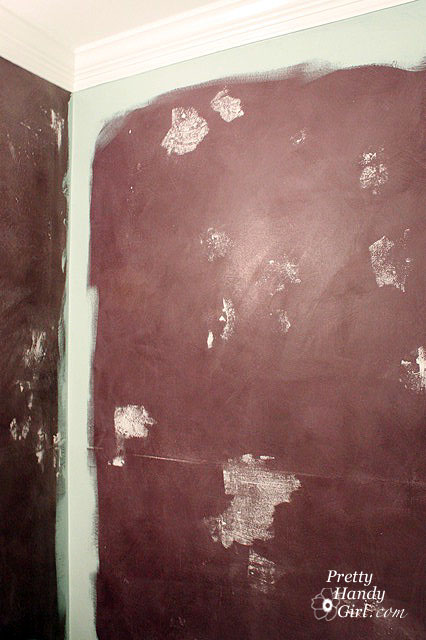
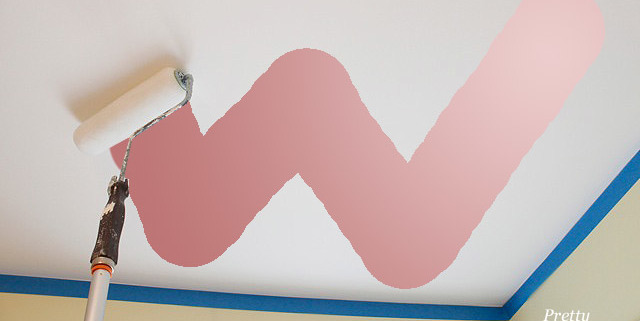
2. Use your roller to roll out a 3 – 4 foot “W” shape. Try to roll into the edge while it is still wet (unless you are using Benjamin Moore Aura paint.)
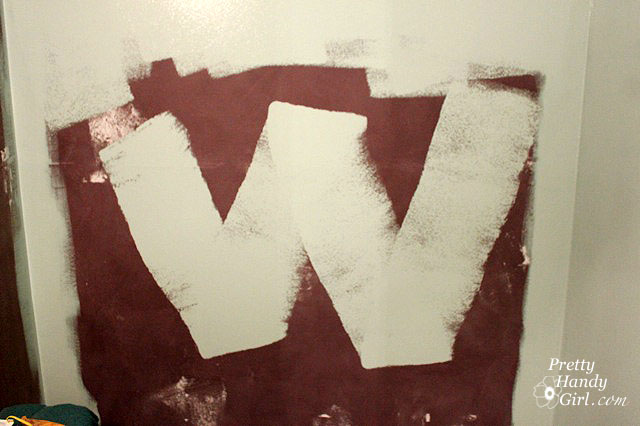
3. Roll the roller back and forth, up and down and in random directions until you have filled in a 4′ square section of wall.

4. Roll the roller very lightly over your square to make sure the coat of paint is even; feather the edges; and to rid the wall of any start and stop roller marks.

Start on the next section with another “W” shape and repeat steps 1-4 until you have covered your wall in paint. Then move on to the next wall. Keep in mind that you will need at least two coats of paint. You’ll get a more durable paint job, more even coverage, and it will look professional if you use two coats of paint. So, own up to the fact that you will need two coats!

A few words of caution while painting:

  • If your paint has started to dry and {{gasp}} you see a spot you missed or a bug in your paint, resist the urge to roll over it. Wait until it dries, then sand or paint the messed up area.
  • It is best not to overload your roller with paint. Too much paint can drip and run. If that happens, use your damp rag to wipe it up immediately. And remember, you are going to use two coats, right?!

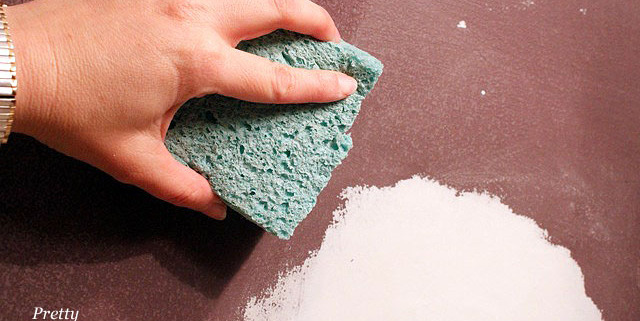
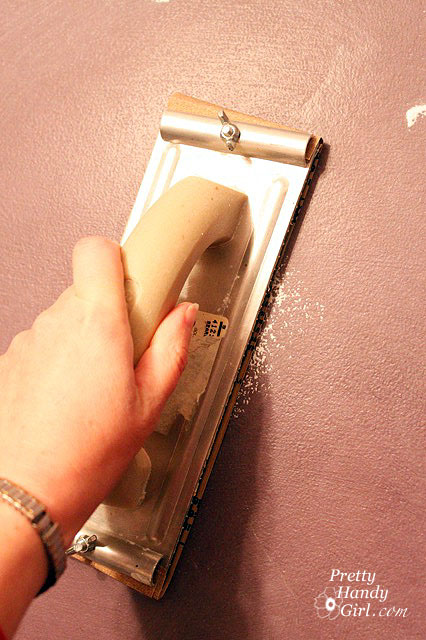
Now that you have completed the first coat (and it is dry to the touch), pull out the sanding block. Lightly sand all the walls. You are just knocking down any bumps (or bugs) and giving your paint layer a little “tooth” for the next coat to adhere to.
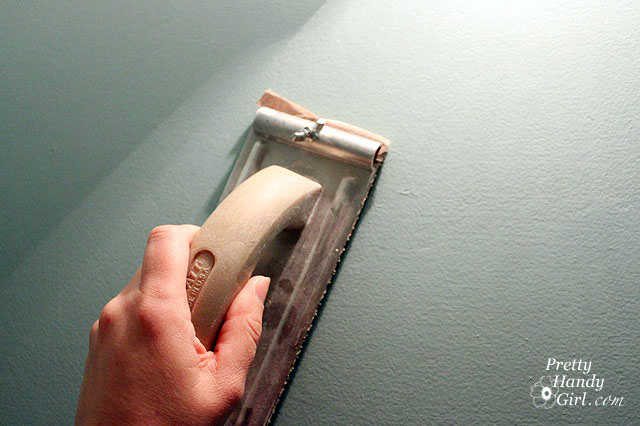
Then wipe down your walls with a damp sponge to remove all the sanding dust.

The sanding between coats may seem like overkill to you, but trust me, the sanding step makes a difference! And you wanted to know how to paint like a professional, didn’t you?!

Now, go ahead and paint your second coat of the wall color repeating Steps 1-4 above, for  painting a border and rolling the paint inside.

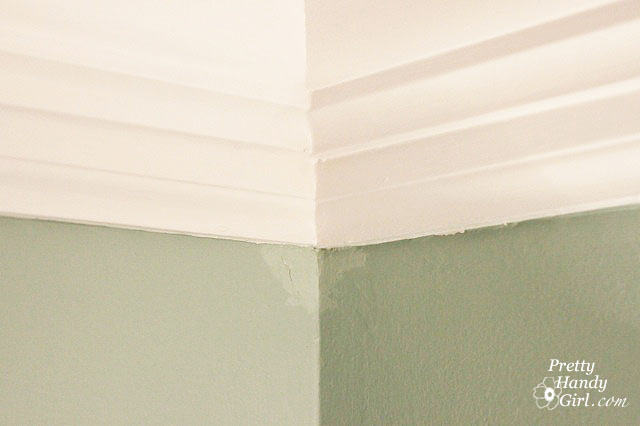
Done? Well, not quite. Remember when I showed you this the other day?
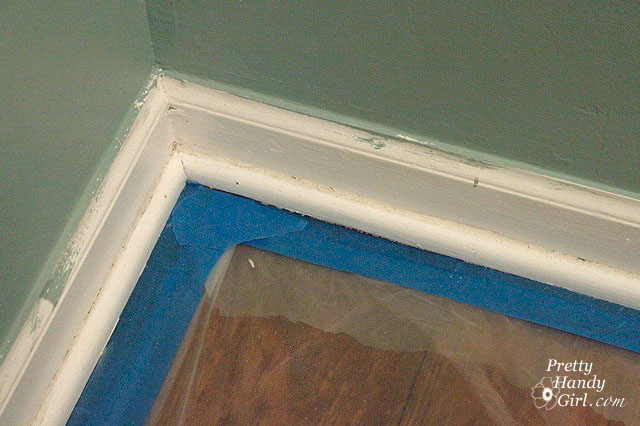
Yes, the wall paint is on the trim. That is okay, I want it like that. I knew I was going to paint the trim and wanted to make sure that the wall color went right up to my trim, it’s all by design baby, trust me.

At this point you have painted the ceiling and all of the walls in your room. If you are sure your walls are dry (at least 1 hour or more), then you can move on to the trim.


Painting the Trim:

Now you can go ahead and tape off the edge of your walls where they meet the moulding. Then use the matte medium  trick I showed you HERE (or you can use a small amount of wall color if you like) to seal the edge of the tape on the wall side.
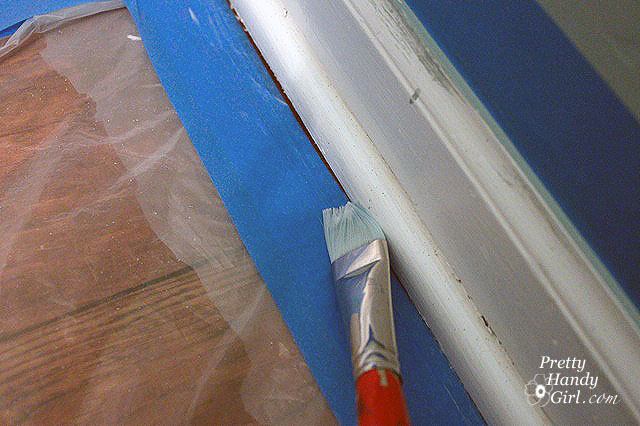
room with painting tape and paint brush

Go ahead and paint all your trim with a 2 1/2″ paint brush dipped in a small bucket of trim paint. I prefer Purdy brushes because they last for years! See my post on cleaning brushes HERE to see how I protect them from wearing out.

Be sure to put two coats of paint on the trim, this will help to keep it looking new and stand up to the “Matchbox Demolition Derby” games that ensue in your home. (What? You don’t have those games in your house? Lucky for your home.)

When the paint has dried partially (don’t wait too long), go ahead and remove all the tape.

If you don’t have any imperfections, you better go play the lottery right now! If you are human and normal you will have a few. No big deal. You can use one of two techniques (I use both).

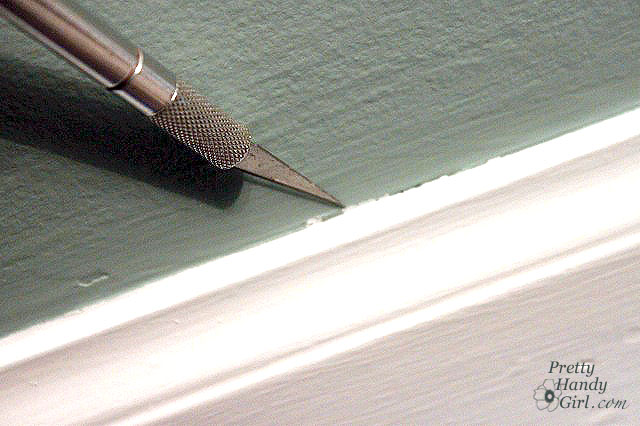
1.Gently scrape any excess paint off with an x-acto blade.
2. Use a small square artist’s brush and paint over any seepage. I like to shake my can of paint and remove the lid to expose just enough paint on the lid for touch ups.
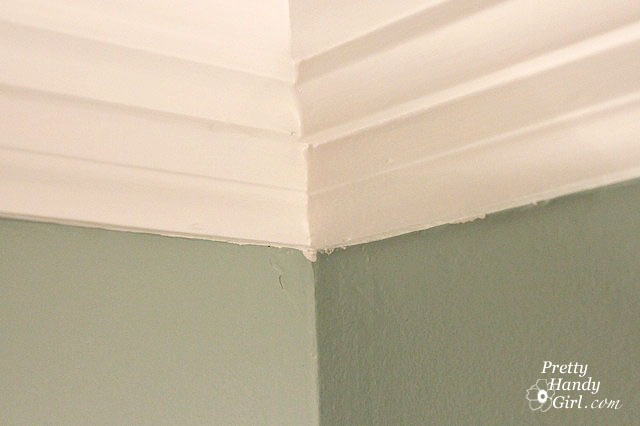
Horray, you are done! Now you can tell your friends, “I’m sorry I can’t give you the name of my painter, because I painted the room myself!”

Here are the before and after pictures of our half bathroom. I am LOVING the results. I have a few more tutorials for you from this project. I promise, they will come in due time.
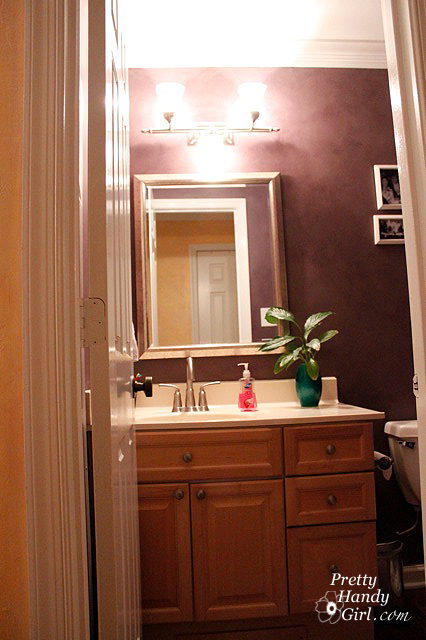
Before – Beech Wood Vanity
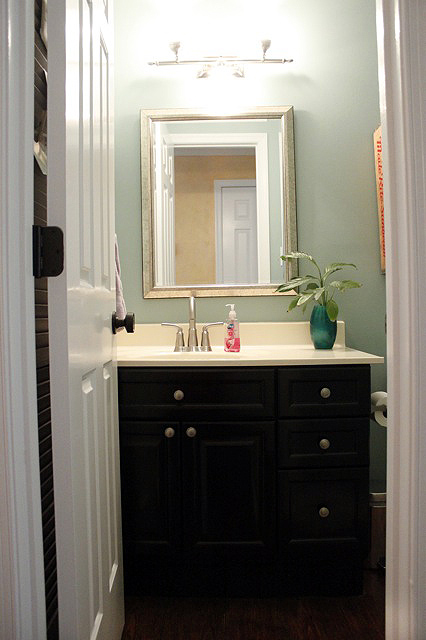
After- Painted Vanity Black
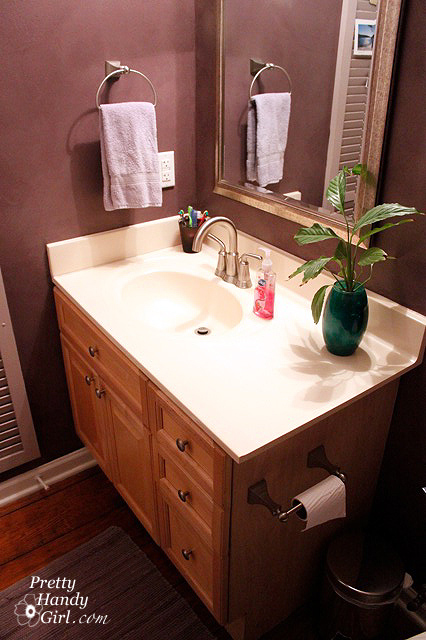
Before – Towel Ring on Wall
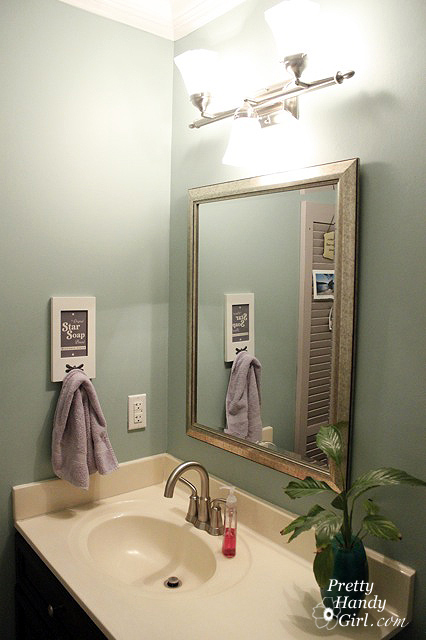
After – New Towel Hook on Wall
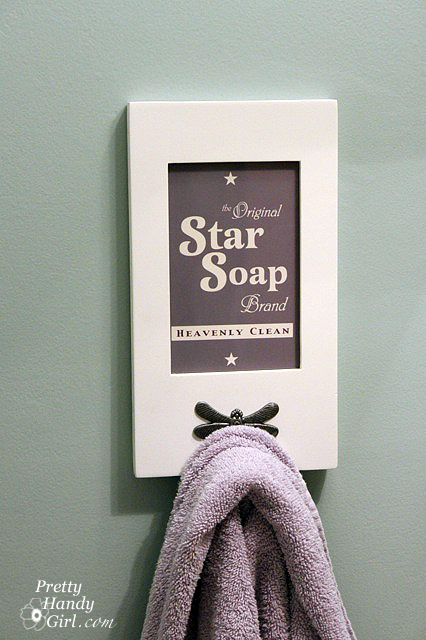
DIY – Vintage Soap Sign
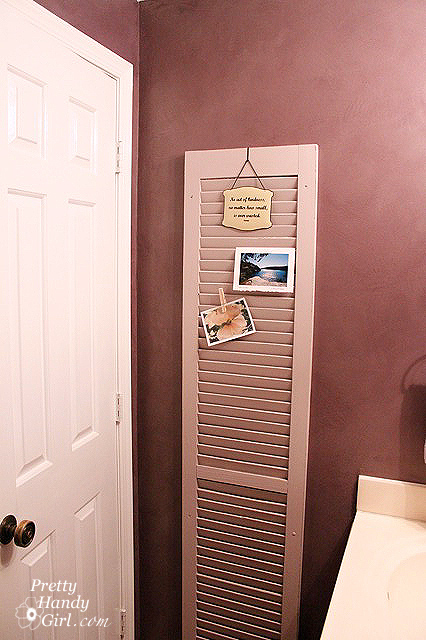
Before – Shutter on Wall behind Door
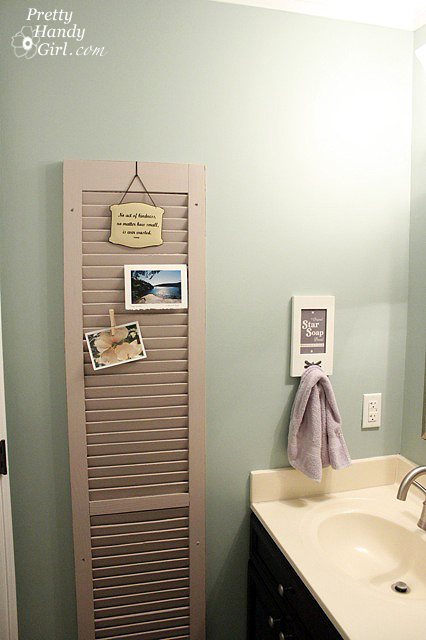
I would love to know if you paint a room using my Painting Like a Pro tutorial. And how it worked for you!

Other Steps in this Series:

Step 1. Prep work

Step 2. paint and sheen

Painting Like a Pro

Let’s talk about Paint, Baby…

Before we start, let’s talk paint. One factor for a perfect paint job is the quality of the paint you choose. Do yourself a favor, don’t settle for the cheap store brand paint. You may save yourself a few bucks, but you will be looking at streaks and imperfections from the cheap paint for years to come. Or worse, the paint won’t hold up to wiping or moisture (not good!)

Painting Like a Pro

Painting Like a Pro

Benjamin Moore Aura Paint – Love this stuff! Serious love affair here. Not only is it low VOCs and low odor, but the coverage is amazing and you don’t see any of the roller marks. It is thick like a chocolate milk shake and spreads slightly after it is rolled on. This is the only paint I’ve been able to get away with only using one coat. But, it was because I was painting a lighter shade of sage over a pine green color. Other rooms where I was going from a much darker color to a light color, I had to use two coats, but I definitely didn’t use as much paint as I would have if I used another brand. Be prepared for the sticker shock, this paint isn’t cheap at $56 a gallon, but you will use less and you will be saving the environment!

Painting Like a Pro

Valspar – Hi Def Paint – Before we were spoiled by the Benjamin Moore Aura paint, Pretty Handsome Guy and I used to paint with Valspar paints for all our walls. In fact, we still use the Flat Ultra White for our ceilings. We were always happy with the results, but the idea of using a Low VOC paint really appealed to me.  Last week, as I eyed the “oops” paint at my local Lowe’s (a normal habit of mine), I was lucky enough to spot a color that was very close to a color I was craving for our bathroom. I grabbed it up for $5 ($10 at register with a $5 rebate. Normally $32). The paint was a gallon of the new Valspar Hi-DEF paint. I have to say, I was impressed by the coverage. It almost covered all of the old color in one coat (I was covering dark purple with a light aqua.) This paint would be a good option if you didn’t want to shell out the $56 for the Aura paint.

Painting Like a Pro

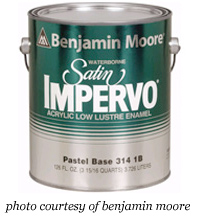
Benjamin Moore Impervo paintThis is my new favorite trim paint! This stuff goes on smooth and spreads like an oil paint. It also has a durable finish that resists chipping and really stands up to our kids’ shenanigans. Before I found the Impervo, I thought I was doomed to use an Alkyd (oil paint with a dryer added) paint for our trim. If you’ve ever had the misfortune of using oil based paint, you know that it has a strong odor and the brushes have to be cleaned with turpentine. Not at all good for you or the environment.  You can imagine my excitement (and skepticism) at finding a water based trim paint that is supposed to hold up like oil. Our living room trim paint has lasted 1.5 years and it still looks great! Again, this amazingly durable paint isn’t cheap, it costs $48  a gallon, but at least you don’t have to paint your trim every year if you have little devils boys in your home.

Please note: There are other good paints available (Sherwin Williams is also a favorite of many other DIY bloggers.) This is just a list of the paints that I love to use.


Let it Shine, Let it Shine (or maybe a little less shine) – Flat, Eggshell, Satin, Semi-Gloss, or  Gloss. How do you know which one to choose?

Gloss – The only time I use gloss or high gloss is for trim and cabinetry. (Or the things that get grubby fingers ALL over them.) The gloss surface cleans up much better than non-gloss, and it doesn’t hold onto oils or grease like the other finishes.

Semi-Gloss – This sheen is great for painting a bathroom, kitchen or walls that will see a lot of moisture, water and basic abuse.  Similar to the gloss, it will be easier to wipe clean and water splashes won’t show as much on this surface.

Satin – I know I just said you should paint kitchens and bathrooms with semi-gloss, but I rarely do. Why? Well, because my walls are far from perfect. We have two rooms that had wallpaper painted over (not my decision.) After spackling and sanding the seams (doing my best to smooth them), I used a satin paint.  Satin has most of the durability of a semi-gloss, but less sheen. If you use paint with a sheen you will see highlights wherever there is a seam, bump or edge.Therefore highlighting your imperfect walls.

Eggshell – Low sheen, but not flat. Eggshell is best for rooms with imperfect surfaces or bedrooms. Eggshell has an almost matte or flat appearance and is very smooth and hides bumps and dips fairly well. It’s not as easy to clean, but will stand up to an occasional wiping better than flat paint.

Flat – I never use flat, except….when painting ceilings. Then we grab our favorite ceiling paint: Valspar Flat Ultra White for maximum light reflection. (Read more about bright white ceilings HERE.) So, unless you are painting ceilings, don’t use flat, it is too chalky and hard to clean.

Just call me Ms. Mix-a-lot. How to Save $ by Mixing Your Own Paint:

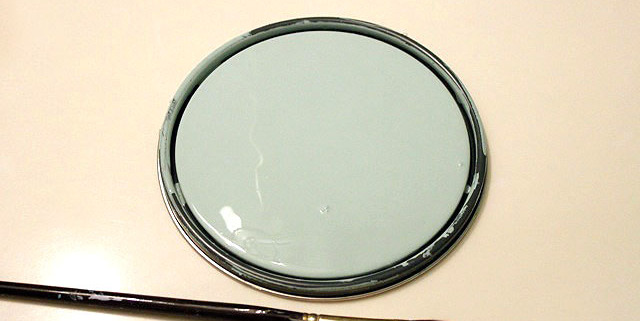
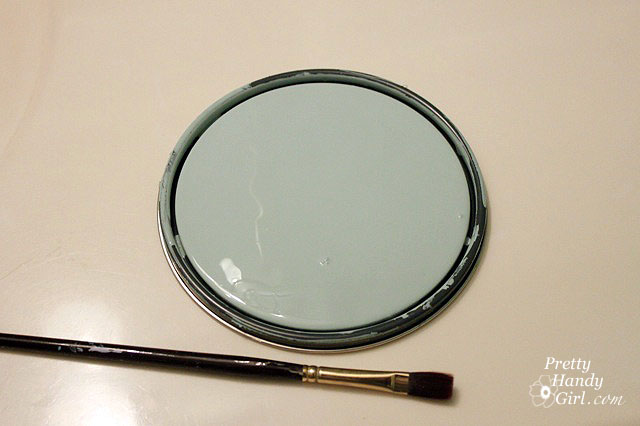
Some of  the paints I mentioned can cost quite a pretty penny. So, I thought you might like to know the way I save money on paint. I frequently scour the “Oops” or “Mistint” paints. If I see a color that is close to what I want, I grab it. For my downstairs bathroom I spotted this sea green color and knew it was close to the color I wanted, but just a shade darker. All I needed to do was purchase an empty paint can and use some leftover white paint to mix a prefect color.

You can mix any two sheens as long as they are next to each other in the list above. In other words mixing gloss and semi-gloss is fine; semi-gloss and satin; satin and eggshell; or in my case eggshell and flat paint.  You definitely don’t want to mix a semi-gloss with a flat or eggshell. You might get some streaks and it is hard to mix.

Painting Like a Pro

To mix paint, I like to use this paint mixer attachment that fits on my drill. It is a dream come true for a custom paint mixer like myself.

Painting Like a Pro

Without going into too much color theory, here are two mixing formulas I like to use.

Keep in mind your paint color has to be fairly close to the final color you want before attempting these mixes.

Too vibrant, intense or bright – Let’s say you find a color that you like, but it is too intense and you want to dull or tone it down. You can add either black or brown paint (I use acrylic craft paint) to tone down the color. Pour some of your paint into an empty bucket or paint can, then add a big squeeze of black (or brown.) Mix it, put a dab on a piece of paper and dry it with a hair dryer (because I’m too impatient to wait.) Still too vibrant? Add more black (or brown) until it is the color you want. I used this method for my dormer hallway shutters. You’ll have to play with the mixing until you get the desired results.

Too dark, need a shade lighter – Add white paint to a bucket, then slowly add small amounts of your paint color and mix it. Put a dab on a piece of paper and dry it to check the color. Still too light? Add more color or if it is too dark, add more white.

I hope this post helps you find the perfect paint for your next paint job.

Other Steps in this Series:

Step 1. Prep work

Step 3. painting your room and finishing touches


Painting Like a Pro

After years of painting rooms, I have perfected the process and can tell you that 80% of a professional paint job is in the preparation. Today’s post will be about properly prepping your room before painting. Then I’ll post next week on how to paint your room like a pro.

Start by removing everything from your room that isn’t bolted down to the floor (notice how I said “floor”.) You will be removing anything that is attached to the wall. That includes towel bars, TP holders, pictures, outlet covers and switch plate covers. I will allow you to leave a light fixture if it is a sconce style. But, otherwise, get it out of there, ALL of it! We are doing it we’ve started painting like a pro.

painting like a pro outlets

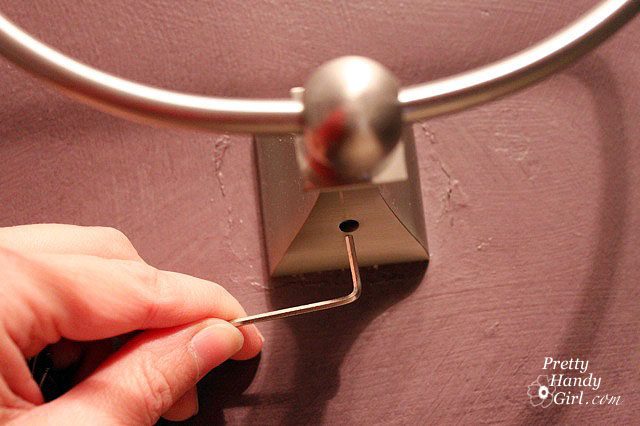
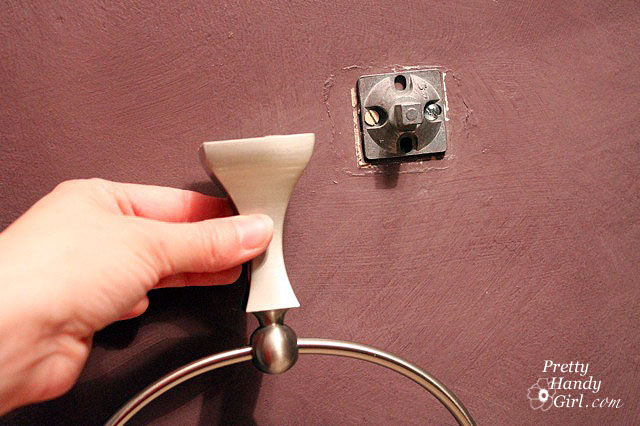
But, how do you remove those toilet paper holders and towel rods if you can’t see the screw?

painting like pro towel rods

Here is the top secret, hidden location of those wall mounted accessories. Get down on your hands and knees and look up. Underneath there is a teeny tiny hole.

painting like pro diy tip

And inside that hole is usually either a hex screw or a flat head screw. You will need a little hex wrenches or flat head screwdriver to undo the screw. A flashlight may also be helpful. Turn the screw until you can pull the fixture off the mounting bracket.

painting like pro fixtures

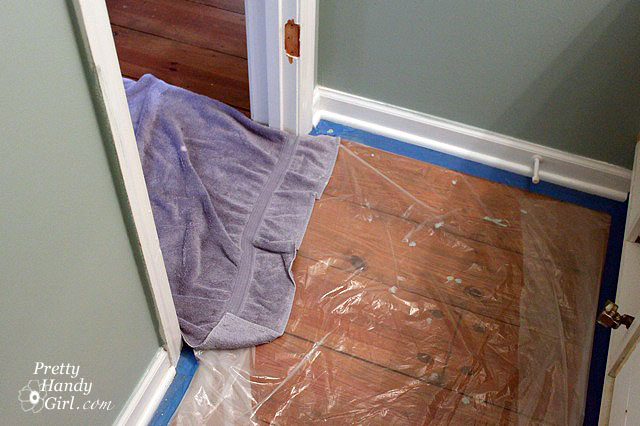
Once your room has been emptied, bring in the tarps, towels, newspapers or plastic. Cover anything that is left in the room. Painter’s drop cloths work the best, but they can be expensive. I usually use plastic drop cloths, then put a folded towel in the entrance of the room to wipe my feet on should I step in any drips.

Even the neatest painter will drip paint! And if you are a klutz like me, you may even step in the paint tray. (Not a good thing.)

pro painting floors

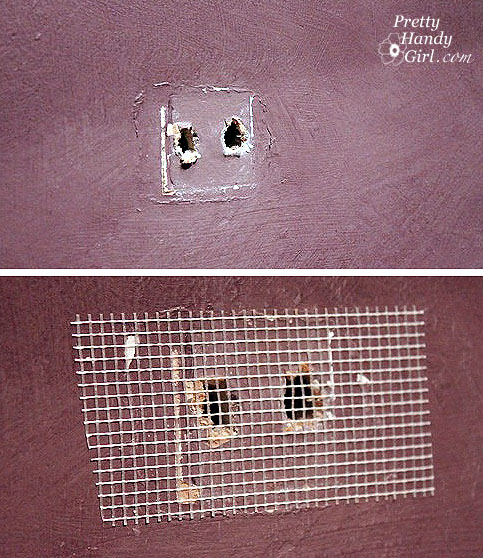
Are you paying attention? This next task is the most important to truly achieve a professional paint job (in my opinion.) Have you assessed the condition of your walls. Do you have any holes or dimples in it?

patch dywall holes for painting

You will need to patch any and all holes (unless it is a picture hanger and you are going to use the same hanger after painting), HERE is the tutorial for patching all types of holes.

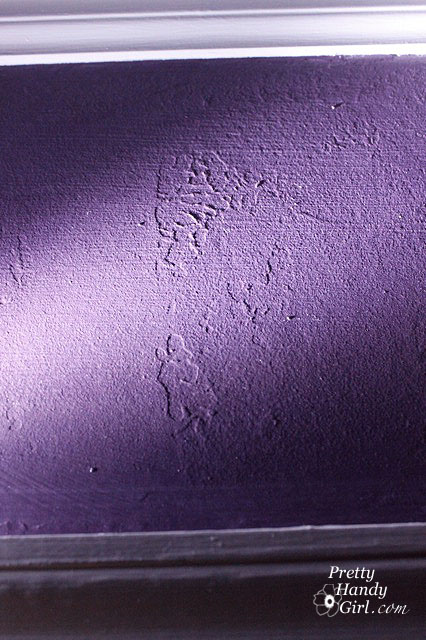
Okay, no holes now, but do you really know how smooth your walls are? Well, turn off the lights to find out!

smooth pro painting tip

And don’t forget to bring a flashlight. Aim your flashlight parallel to the walls and let the light beam skim the surface. Suddenly you will see all the imperfections. The bigger ones need to have some spackle or joint compound added to smooth them out. Any hills or bumps need to be sanded down.

Soon your walls will look like this!

pro painting tips spackle smooth

Yikes, looks like some kind of pox virus.

After your spackle or joint compound is dry, be sure to sand it smooth.

pro painting sand smooth

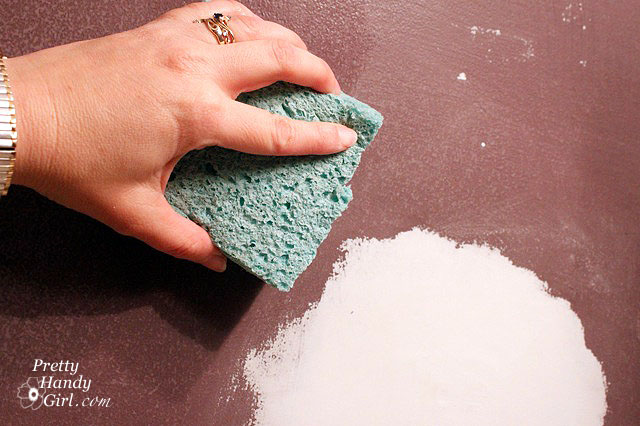
Then use a damp sponge and a pail of fresh water to remove any and all dust. You will probably need to rinse out your sponge frequently. (Especially if you patched as much as I did.)

painting tips clean patches

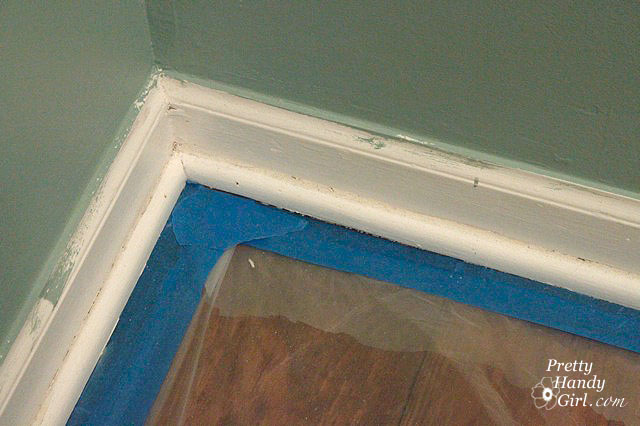
Time to tape!  Start by taping any light fixtures or permanent fixtures in the room. If you are re-painting your entire room (ceilings, trim and doors) I’d wait to tape the molding and door or window trim. For our downstair’s bathroom I knew I was going to repaint the trim too, so I left it exposed to be sure I got the wall color all the way down to the trim and even onto it. Tomorrow I’ll show you why I do this.

painting molding

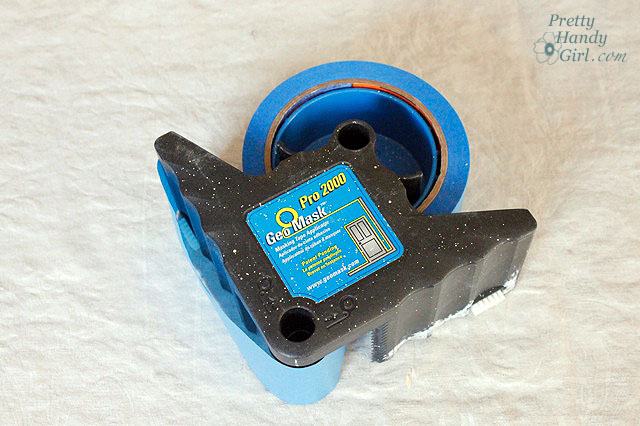
If you don’t need to paint your trim, you can use a handy dandy tape dispenser like the one below, but honestly, I can tape off the trim just as fast by hand (after years of practice).

painters tape tips

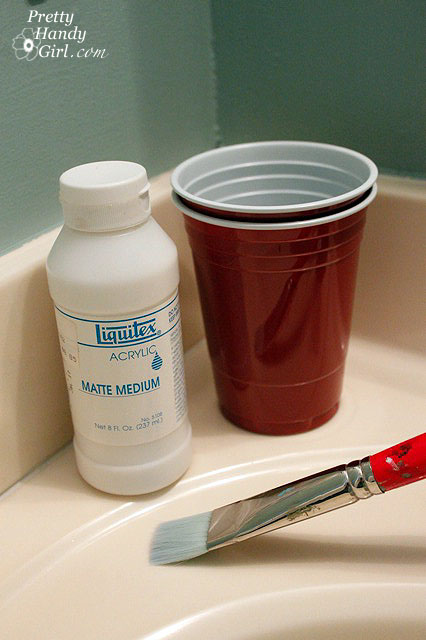
Here is another little pro painting secret, if you want to keep the paint from bleeding under the tape, you can seal it with matte medium (available at artist supply stores.)

painter tape tricks

Simply pour a small amount into a cup and then brush it on the edge of your tape where it meets the surface you are going to paint.

sealing painter tape

This puts an invisible seal over your tape edge. It won’t work ALL of the time, but it will really cut down on any seepage and therefore any touch ups you have to do later. You’re well on your way to painting like a pro!

Other Steps in this Series:

Step 2. paint and sheen

Step 3. painting your room and finishing touches

pretty handy girl painting like a pro

No truer words have ever been spoken. I LOVE PAINT! I will always profess my undying love to this amazing mood changer! In the course of over three years (the time we’ve owned our house), we have repainted almost every room in our home. Each room must convey a single emotion when we enter.

Kitchen = Sunny
Living Room = Cozy
Our Bedroom = Relaxing
Office = Calm
Mudroom = Inviting
Laundry Room = Fresh

Being an artist makes me a bit of a perfectionist when it comes to color.

I’d love to share some of my tips for picking out the perfect paint colors. Hopefully this will protect you from making a bad decision. But, rest assured that if you really don’t LOVE the color after you have painted one wall, you can take your paint back to the store and ask the “paint guy” to tweak the color for you. Or worst case scenario, you have to buy a new gallon. (Well, okay, that can get expensive.)

But, if you find a color you truly “LOVE”, it will translate into loving your home. So worth it in my book!


Before I paint any room, I go to several paint departments and gather several color chips that appeal to me. The colors that I REALLY think I’m going to like, I will grab a few extra chips of (shhhh, don’t rat me out for stealing paint chips.)

When I get home, I tuck the chips behind the switch plate cover, in the molding, or tape them on several different walls in the room. It is important to place the chips next to your trim moulding so you can see if the color will work well next to it.

After looking at the chips for at least a week during different times of day and different lighting (sunny or cloudy days) I am usually able to narrow down my choices to 2 or 3 choices.

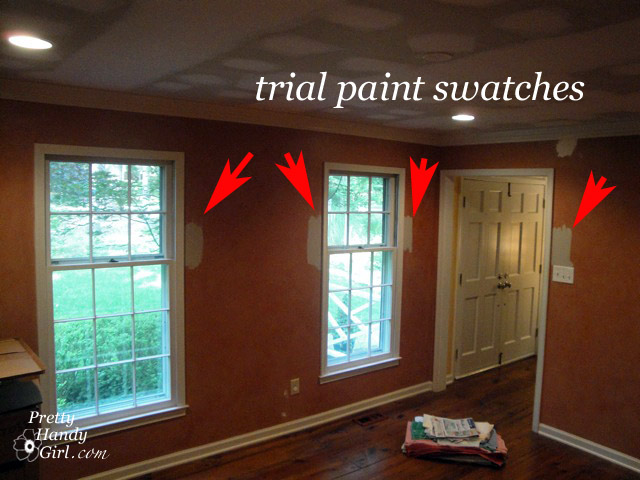
Next I run back to the paint department and buy or have samples mixed up of the colors I like. Because I am a “work until I get it done” type person, I go ahead and paint big swatches on the wall next to the moulding on all four walls.  This is important because a color that looks good on your sunny wall may not look so good on a shady wall. And you need to see the colors and how they coordinate with the wall color in an adjoining room. If you aren’t quite ready to commit to painting your wall, go ahead and buy some poster boards and paint the swatches on the poster board and hang or prop them up in your room.

A few things to keep in mind while you are looking at a color. Just be aware that the color may change as the seasons change. Winter yields brighter and cooler colored light in our home because the trees are bare. In the summer, our light changes to a greener cast and less harsh lighting as the trees fill out with leaves. I can tell you right now, that I wait for summer to roll around before choosing any colors in the green or yellow family. I need to make sure they look good with the light reflecting off the leaves and into the room.

If you are still having trouble choosing a color, invite a friend over who will give you their HONEST opinion.

If you STILL can’t decide, never fear – Pretty Handy Girl is here! “Here I come to save your color dilemma!”

Introducing Paint Preview:

Some of us are visual people, we REALLY need to see the room painted before we know what a color is going to look like up on all four walls. A special thanks to Emily at Decor Chick for testing my new venture last week. I’m calling it Paint Preview. Thanks to the wonder of technology, I can now virtually paint any room in your home or the exterior of your home! Save yourself time and money by previewing your painting project before the first drop cloth is laid.

Emily’s Living Room Before – SW Baguette
Emily’s Living Room Paint Previewed – SW Anew Gray

Want more information about Paint Preview? CLICK HERE TO LEARN MORE.

Until then, I’m thinking about repainting our garage doors and adding grills to them. What do you think?

Our Home Before
Our Garage Paint Previewed


Welcome back. Many of you may participate or read a weekly WIWW (What I Wear Wednesday). Those women in blogland, they really know how to put an outfit together. I am seriously jealous because sometimes I feel wardrobe challenged. Maybe you can help me. Here is what I wore Wednesday:

Ladies, if you want to copy my looks, here is the breakdown:
1. Hooded Knit T-shirt Top bought 15 yrs. ago at Gap
2. Gap Jeans bought about 5 yrs. ago. Those are authentic knee rips!
3. Dansko Clogs with the heels worn down to a hollow core.
4. Latex gloves (the better to paint with.)

This Pretty Handy Girl can’t wear her good duds on a painting day (although I’ve been known to do that occasionally.)

Painting is a nice segue into the first secret for “Falling in Love with Your Home”. Our home started out dark and dreary on the inside. Most of the rooms had dark wall colors, but the biggest problem was the dingy white popcorn ceilings. Those suckers are light sponges! They absorb the natural light and keep it all to themselves.

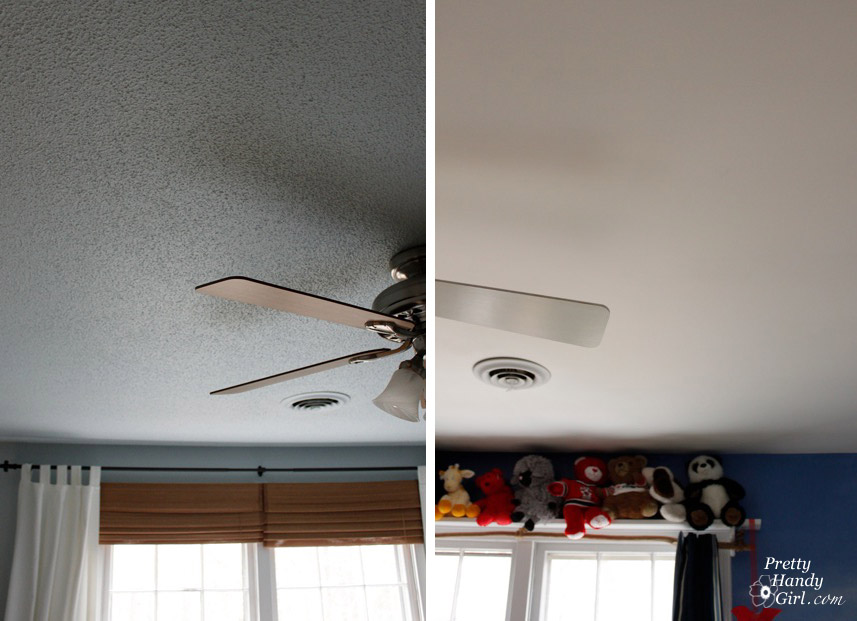
Here is a good example of the light difference between a smooth ceiling and a textured ceiling:

Both pictures were taken minutes apart in adjoining rooms that have the same south facing windows. The rooms are identical in size. The room on the left (master bedroom) has popcorn ceilings and light blue walls. If you look closely, you can see how each pock has a shadow. The texture effectively stops the light from being reflected. Meanwhile the ceiling on the right is smooth but the walls are a dark blue (son’s room). Despite the darker walls, the ceiling appears lighter because the light is reflected due to the lack of texture.

As you can see, we are able to lighten our rooms about 10 – 15% by scraping and painting just the ceilings! (Imagine what painting the walls a lighter color will do!)

Two more benefits of a smooth ceiling:

  • A smooth ceiling will visually raise the ceiling, while the textured ceiling draws your focus to the texture and makes the ceiling feel lower. You’ll have to trust me on this one.
  • And, a smooth ceiling will not collect as much dust. I don’t have to tell you how important that is for allergy sufferers (ahhh- choo! I’m allergic to dust mites.)

In summary, why do you want a bright and smooth ceiling? Because, it will reflect more light and natural light is a mood booster.  And during the seemingly never-ending winter months, we all need more sunlight to avoid mild depression or gloom. Translated: Better mood = Loving Your Room!

This is how we do it:

We have the popcorn (textured) ceilings scraped. Notice how I said, “Have” them scraped. I am handy – as you know – but there are certain tasks that I won’t do. I successfully scraped the ceiling in our pantry, but my neck was in pain for a week afterwards. I vowed never again. It is also a good idea to pay a professional if you live in an older home. Textured ceilings may contain asbestos. (Thank goodness ours didn’t.)

Now, even if you don’t have textured ceilings, you likely can still benefit from adding a fresh coat of paint. Ceilings are usually neglected for years. They are often painted with a builder’s grade white paint. The builder’s white is a dingy off white color compared to an Ultra Bright Flat White. It also doesn’t age as well and will tend to yellow or dull over the years. Here is an approximation of how a builder’s white might look next to an ultra bright white color:

AND, let’s say you really don’t want to mess with those texture ceilings, if you buy a thick nap roller and repaint the ceiling with an Ultra Bright White, you will still notice a big difference. (One word of caution when painting textured ceilings. Paint over one spot and move on. If you go back over that spot while it is still wet it can pull the texture down.)

Tutorial for painting ceilings like a pro

Materials:
  • Valspar Flat Ultra Bright White Latex Paint
    (this is the brightest white we have found. Valspar is sold only at Lowe’s)
  • Latex Primer
  • Paint tray
  • Paint roller
  • Roller extension rod
  • Edger
  • ScotchBlue Painters tape
  • Tarp
  • Fine grit sanding block
  • Car Wash sized sponge and bucket
  • medium size flat artist’s brush

Begin by covering every bare inch of floor with plastic or thick canvas tarps. And cover any furniture left in the room (although you should try to remove everything from a room when you paint, it is just easier that way, trust me.)

Remove blades on a ceiling fan, simply unscrew the arms from the motor:

Then cover your light fixture with a plastic bag and painter’s tape.

Next, apply painter’s tape around the top of the walls of your room. If you are going to re-paint your walls after the ceilings, you can skip this step.

Start with the primer (a must for newly scraped ceilings, but not necessary for previously painted smooth ceilings).

1. Use your edger around the perimeter of your room. I like this handy-dandy edger that has a hole for the extension pole (especially helpful if you have high ceilings or neck issues.)

2. After the perimeter of the ceiling is done, edge around any light fixtures or vents.

3. Reach for your roller. I like to work in 5′ sections. Start by rolling out a letter “W”. Then roll back and forth, up and down and in random directions until you have that section of ceiling covered.

This will insure that you don’t have racing stripes on your ceiling.

4. Continue working next to the section you just finished. Try to work into the previous section while the paint is still wet. Otherwise, let that section dry before trying to roll into tacky half-dry paint.

5. Allow the primer to dry, then lightly sand your ceiling to remove any specks that got into the paint. Wipe the ceiling with a damp sponge.

Now repeat steps 1-5 using the ultra bright white paint.

Let your ceiling dry and then add a second coat of the ultra bright white (yes, definitely use two coats to leave your ceiling looking like it was painted by a pro! Don’t skimp.)

When you are done, remove the painter’s tape and pull out a small flat artists brush.

Pour some wall color paint into a small cup (I like to keep spare paint for each room in small jelly containers or jars. That way if one of my boys (adult and child alike) should happen to mar a wall, I can fix it in a jiffy.) Use the flat brush to create a smooth line at the top of your wall. Then finish by touching up any ceiling spots that were missed.

Take a look at the difference in our office! The top picture shows the room right after the ceiling was scraped. During the day!

And this next picture was taken of the same windows (different angle) at night!

Wow, brighten my world! View more pictures of this room HERE.

Okay, so I really like the ultra bright smooth white ceilings, but I did come across this gorgeous ceiling over at Not Just a Housewife, that would also make you swoon over your room if you were to try it. Check out Stacy’s tutorial HERE.

P.s. If you are renting, please don’t despair. I will have some tips that don’t involve painting your home.

I leave you with a glimpse of hope for those of you snowed in this week:

Daffodils Popping Through the Ground
Daphne Buds Getting Ready to Sprout

I just took those pictures yesterday, February 2nd! I live in Raleigh, NC, so thankfully spring is on its way. (Don’t hate me.)


5-Piece Nonstick Coated Paint Tray Set

00500 - Premium Paint Edger 00500 – Premium Paint Edger[635870] UPC: 022384005006 10L x 7.63W x 9.5H 0.2 LB 0.42 Cubes