raised garden bed with cucumber trellis

It’s spring-time and the perfect time to start a garden. Build this raised garden bed with or without a cucumber trellis and start gardening tomorrow!

Raised planter bed and cucumber trellis
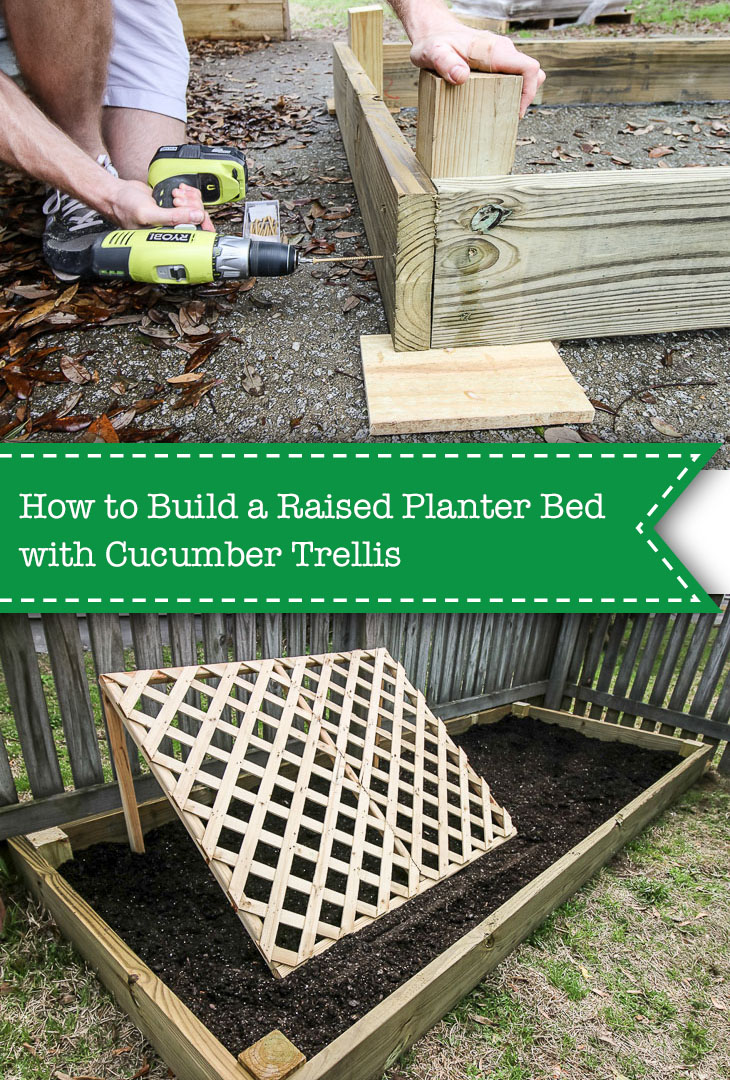
How to Build a Raised Garden Bed with a Cucumber Trellis

Is there anything better than vegetables grown in your garden? They are hard to top! Cucumbers are very easy to grow, but do best if you give them a little extra care. When we decided to build a second raised vegetable garden, we decided to plan in advance to make it a strategic cucumber garden with a raised wooden trellis. We’re excited to show you how to build a DIY raised cucumber garden.

Hey y’all! We are Morgan & Sean McBride, and we blog at CharlestonCrafted.com where we are crafting our first home into our dream home and empowering you to try DIY. We share with our readers a variety of projects aimed at helping new homeowners make their homes their own. Some highlights include: our completely DIY coastal kitchen makeover; our tropical hammock oasis; and our budget laundry room refresh! Our most recent big project was our DIY concrete stone-look patio, which we are obsessed with. I’m likely to be found sharing behind the scenes and lots of laughs over on Instagram Stories, so pop over and say hey!

How to select a location for your cucumber garden:

raised garden bed with cucumber trellis

The number one thing to remember when selecting a location for your cucumber garden is to make sure it receives plenty of light. At least five hours of morning sun is ideal, and afternoon sun on top of that is good too. You also need to be prepared to water your cucumber garden a lot because they need a lot of water, plus they are growing in the summer, when it is hard to keep these things hydrated.

Materials:

(I’ve included affiliate links for your convenience. I earn a small percentage from a purchase using these links. There is no additional cost to you. You can read more about affiliate links here.)

Instructions:
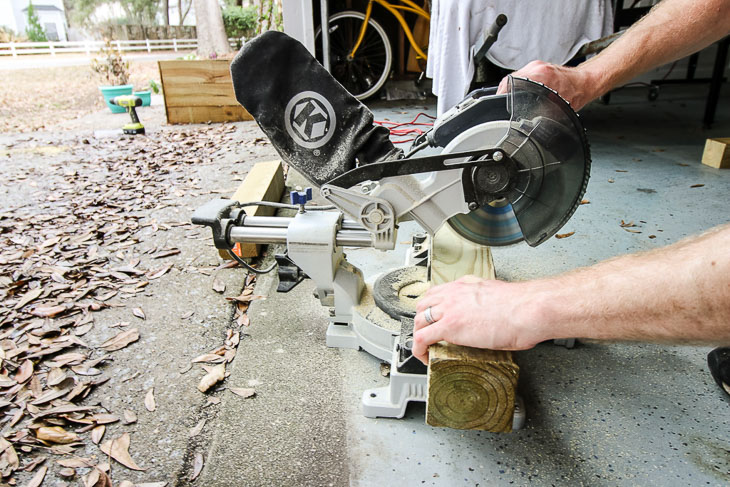
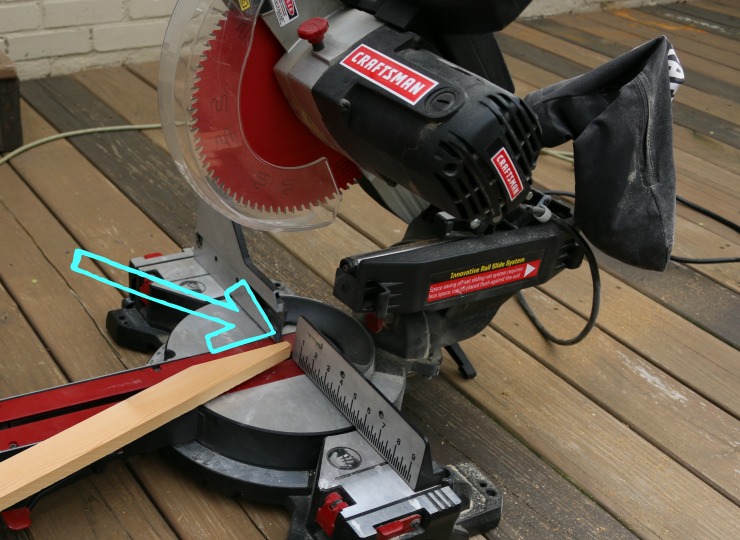
Build your garden upside down. Start by cutting your 4″x4″ into four equal pieces one foot long each using a miter saw.

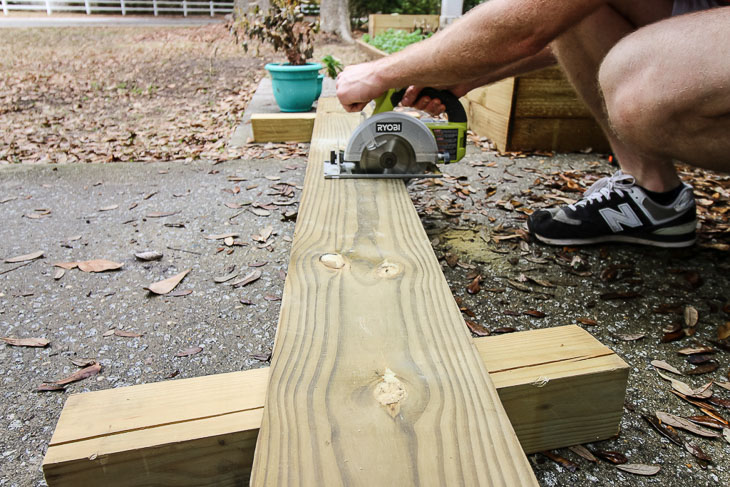
Cut your 8-foot-long 2″x8″ in half with a circular saw or miter saw.

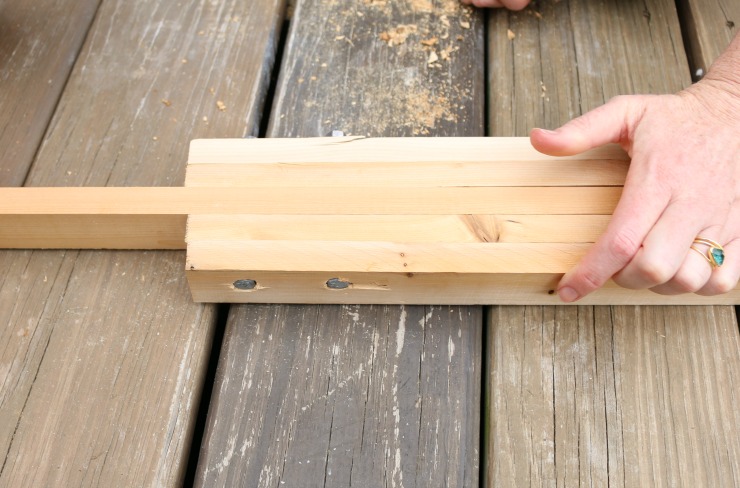
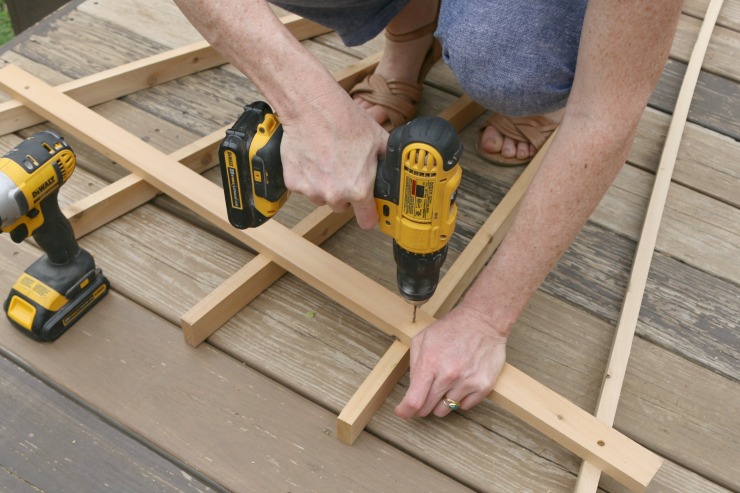
Lay out your 10′ boards with your now-4′ boards on either end and place your 4″x4″ pieces in the corner. (It helps to lay a small piece of scrap wood in each corner to keep the 2″x8″s raised a half inch or so, but make sure the posts stay on the ground.)

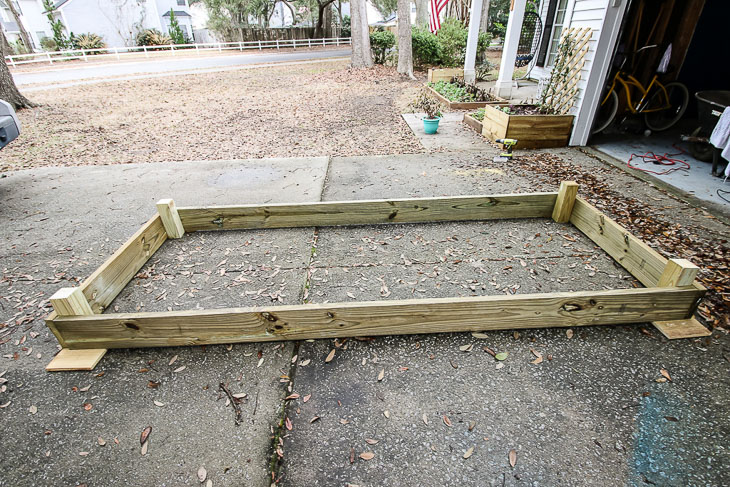
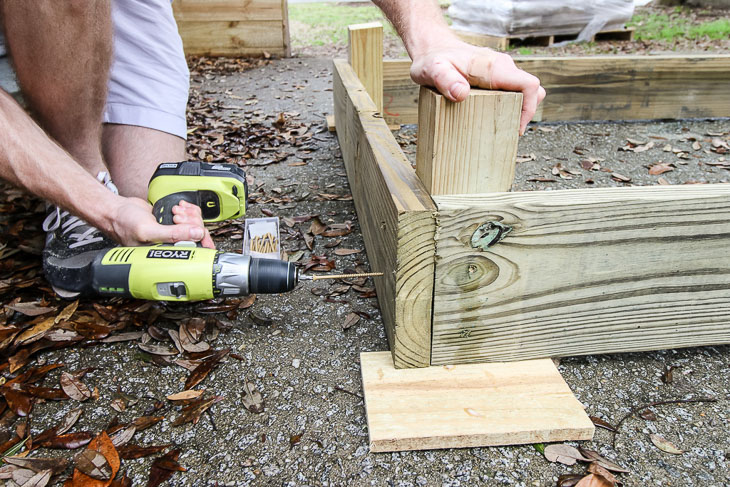
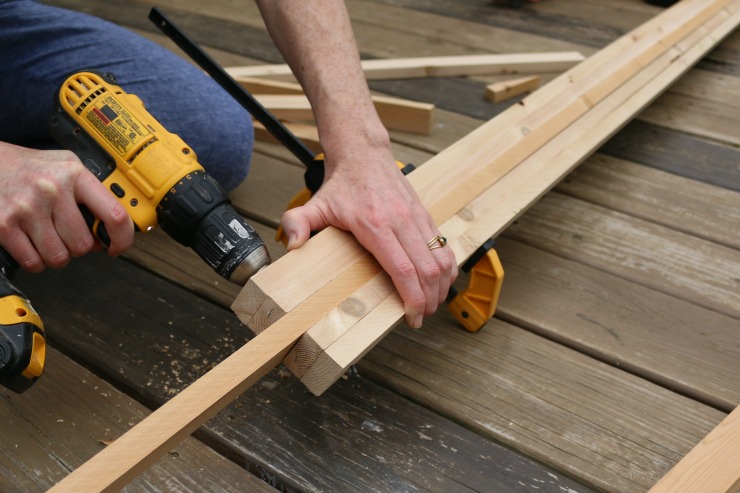
Attach your four posts to the inside of each board keeping corners flush using the decking screws.

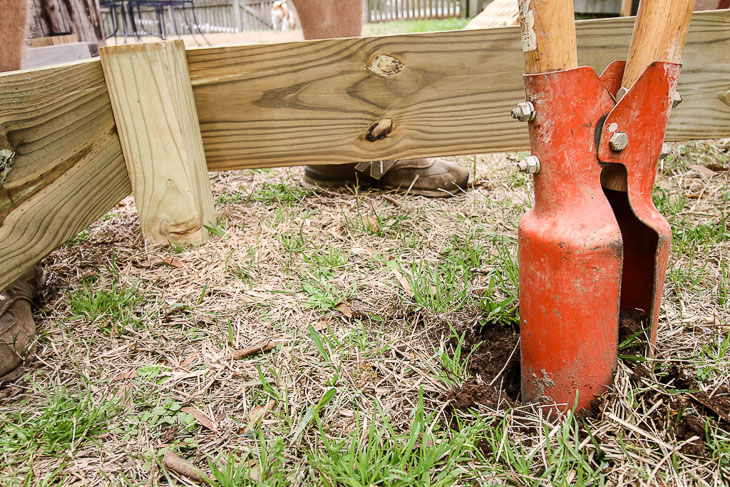
Dig four post holes in your garden location and install your flipped over, constructed raised bed by placing the long ends of the posts in the holes.

How to build a cucumber trellis:

Materials:

  • Three- 2″x2″x8′ boards
  • One- 2’x8′ lattice
  • Brad nailer
  • 1″ brad nails
  • Circular saw

Instructions:
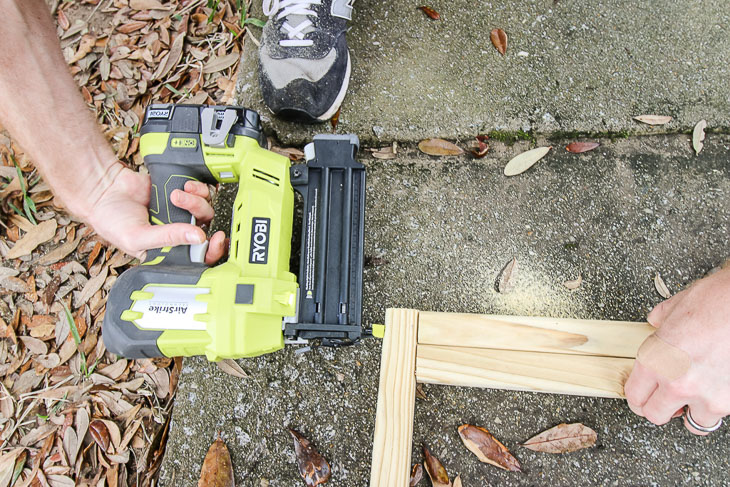
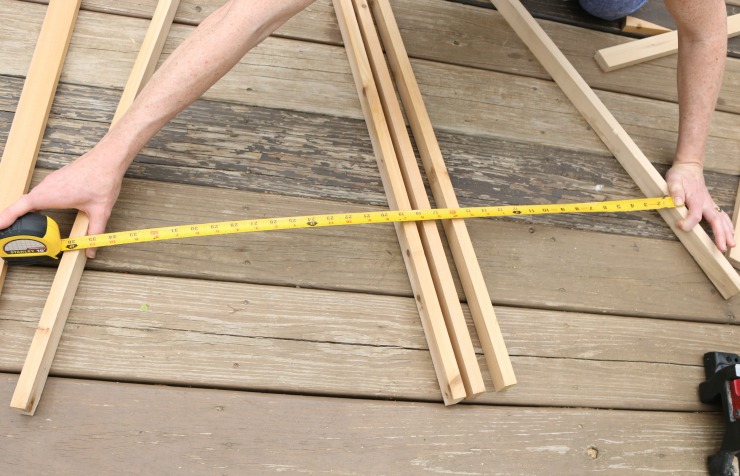
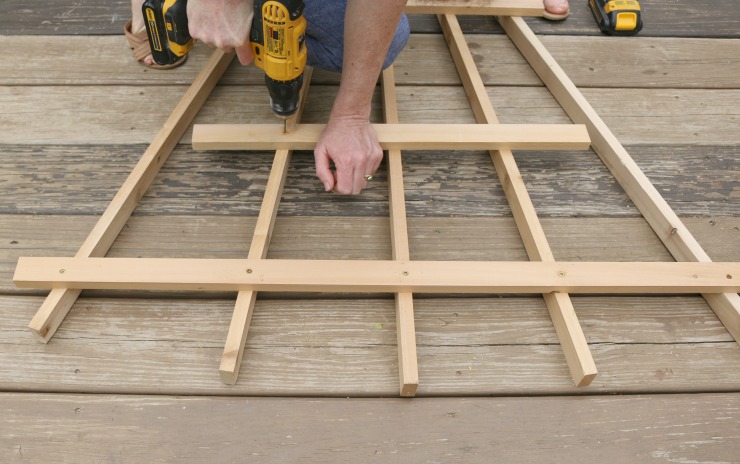
A cucumber trellis is super easy to build. First, build the frame by cutting two 4-foot-long pieces out of one of the boards and three 3-foot-long boards out of the other two.

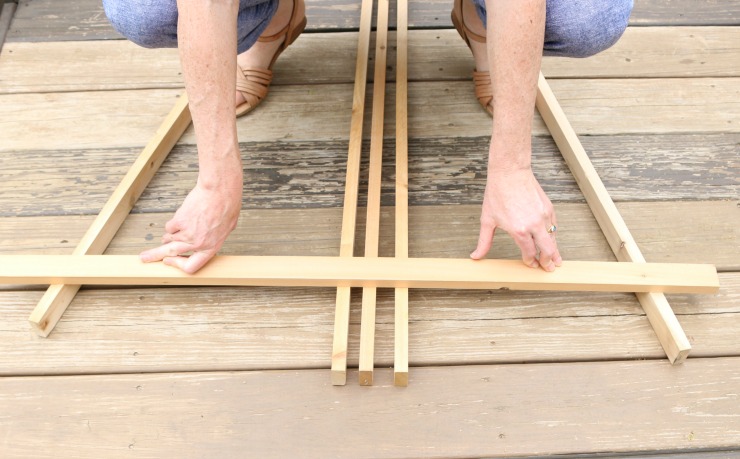
Use your nailer to attach the three foot boards to the inside of the four foot boards with two lining up on the outside edges and one exactly in the center.

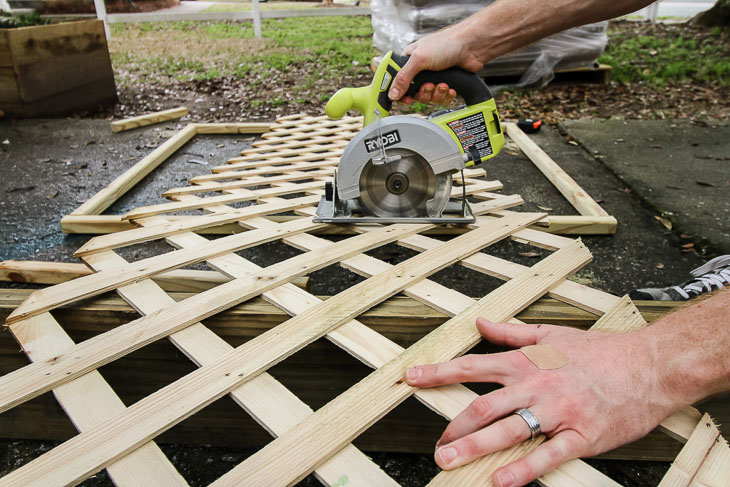
Next, lay your lattice down on the frame and cut it along the edge with your circular saw. It should be 3 feet, 3 inches. Do that again with the excess to create a second piece for the other side.

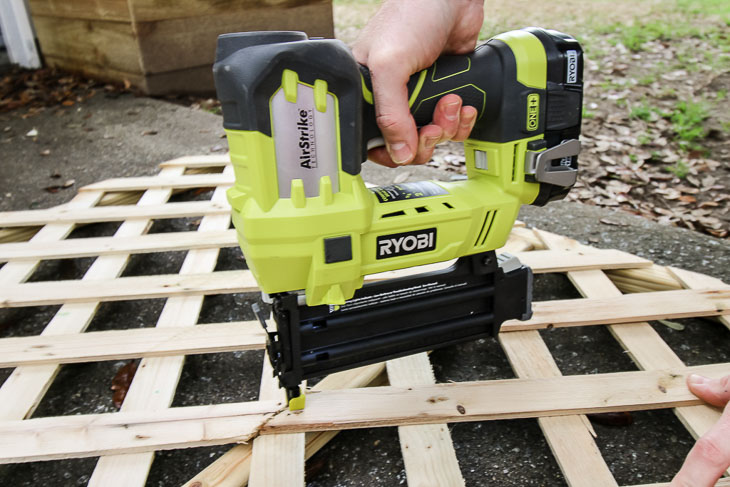
Lay the two pieces of lattice down on the frame, marrying them next to each other in center. Use your nailer to go around and nail down the lattice to the frame.

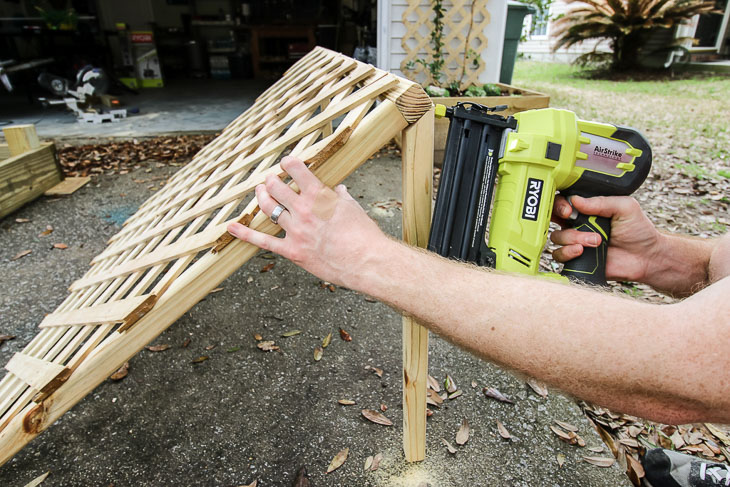
Now, cut two 2-foot-long boards with a 45 degree angle from the remains of the 2″x2″ to serve as your legs.
Finally, position the two legs on the back of the frame and nail the frame down to the legs.

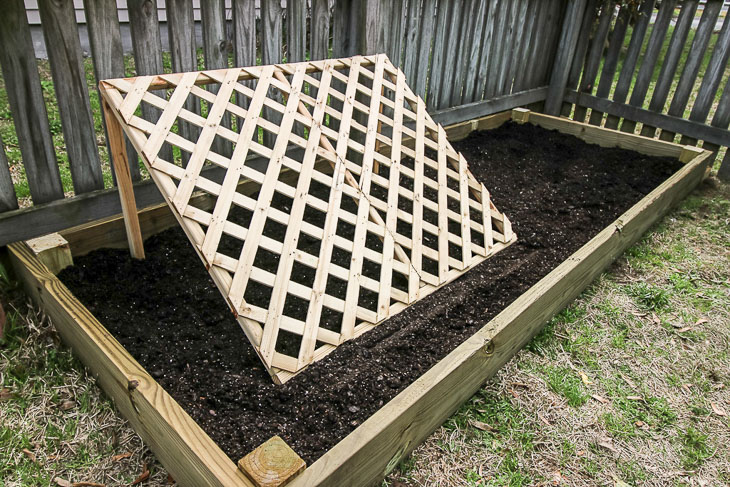
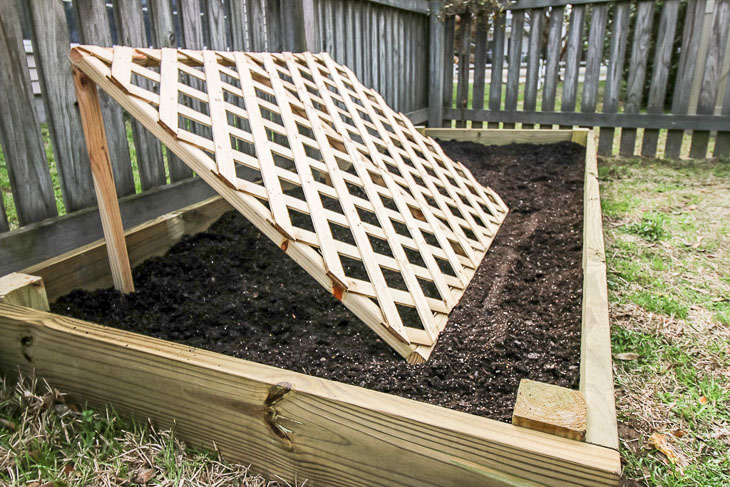
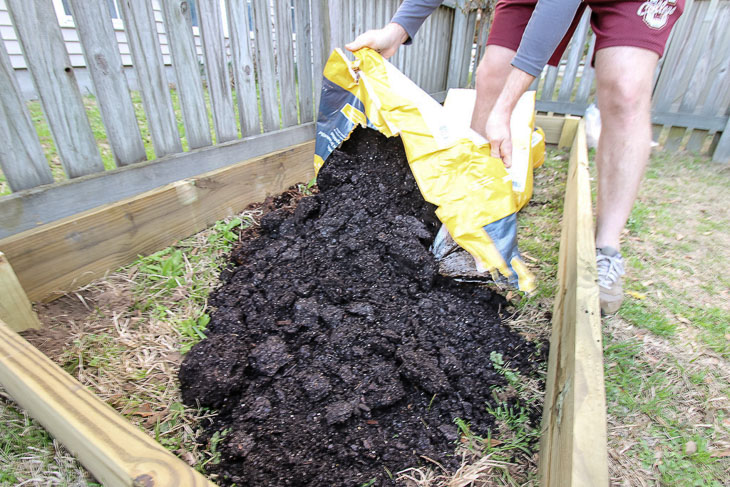
Add garden soil to fill your raised bed about 3/4 of the way full and then add the cucumber trellis on one side. You want to pick a spot that is accessible from the side so that you can easily reach under the trellis.

We are so excited to plant cucumbers in this garden this spring. The trellis will keep them off the ground and give the cucumber plants the support that they need to grow successfully. As a bonus, we also plan to plant lettuce under the shade of the cucumber trellis, where they should thrive out of the direct summer sun.

Thanks for having us and be sure to come visit us at CharlestonCrafted.com.

You can also connect with us on facebook, instagram, pinterest, youtube, twitter, and etsy.

A Note from Pretty Handy Girl:

I love this project that Morgan and Sean built, especially with spring right around the corner. It’s definitely time to start preparing your garden for the growing season.

You may have noticed that the lumber used for the raised planter bed and trellis is pressure-treated lumber. You should know that there is some debate over whether it is safe to use pressure treated lumber for an edible garden. Personally I like to use Cedar or other naturally rot-resistant materials to prevent the chemicals from leaching into your food. You can also choose to prime or line the inside of the bed. I’ll leave the decision up to you.

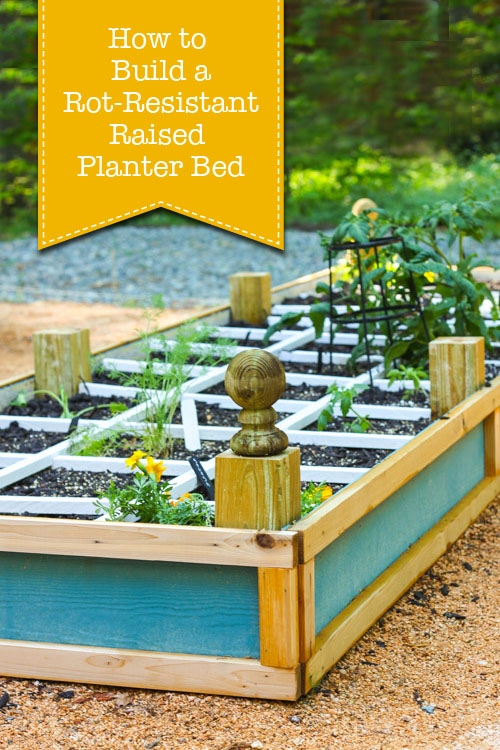
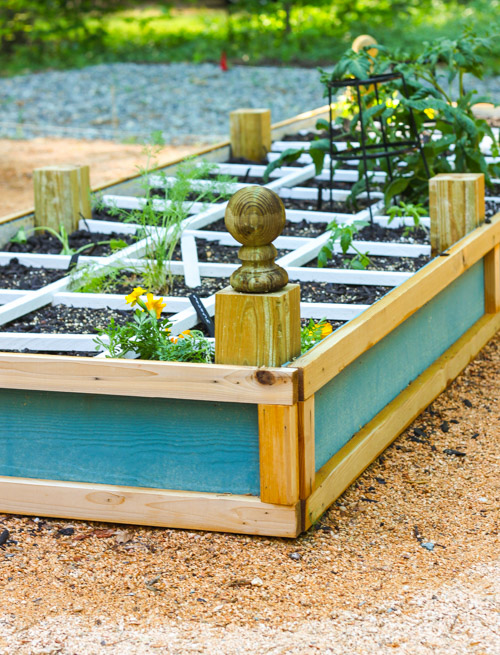
You may also like this tutorial for building a rot resistant raised planter bed:

How to Build a Rot-Resistant Raised Planter Bed | Pretty Handy Girl


It seems to me that we could all use a little distraction during this season of social distancing. I encourage you to step outside and try your hand at one (or two) of these DIY Projects to Get Your Garden Growing! Not only will you set yourself up for some fresh fruits, veggies, or flowers, but you can also soak in some sun yourself to improve your mood.

DIY Projects to Get Your Garden Growing

If you’re itching for some outside time, or need to start thinking about working on your green thumb, I have several gardening tutorials to inspire you! Let’s get growing!

How to Compost - Secret Gardening Formula | Pretty Handy Girl

Here’s the basics for how to compost and get top quality soil for your garden and landscaping for FREE!


Landscaping 101: Tools, Planting, and Adding Color to your Landscaping | Pretty Handy Girl

Choosing the best gardening tools for the job will make it so much easier!  Check out this comprehensive list of gardening tools and what they’re best used for.


It may be tempting to throw out a leaky garden hose, but did you know it’s fairly simple to fix? It is! I have the solution for you in this tutorial on How to Fix a Leaky Hose!


DIY Living wall

Not everyone has an expanse of land for a garden. You can easily plant herbs in this easy DIY Living Wall Planter Tutorial.


Raised Planter Bed with Cucumber trellis

Build this simple raised planter bed with cucumber trellis in no time and start growing cucumbers to eat (or for your DIY beauty routine.)


Quick and Easy DIY Fan Trellis

This easy spring trellis doesn’t require too much time, tools or money.  The best part is, you can make it exactly the size and shape that is right for a wall, by your mailbox, or your raised planter bed.


This fence trellis is easy to build, and will turn a dull fence into a living wall!

Is modern more your design style? Then you’ll want to check out this super simple DIY Modern Trellis.


How to Build a Rot-Resistant Raised Planter Bed | Pretty Handy Girl

Make this Rot-Resistant Planter Bed and never worry about the planter breaking down. This is my fifth year with these beds and they still look beautiful and rot free!


How to Build a Square Foot Gardening Grid that Won't Rot | Pretty Handy Girl

If you square foot garden, you have to see how to create a square foot garden grid that won’t break down and is super easy to lift up when you need to till your soil.


How to Build a Vegetable Trellis on a Budget | Pretty Handy Girl

Now that you have that planter ready to fill, you’ll need to know how to make a trellis (and save lots of money) by following this tutorial.


Love tomatoes? Great then you’ll love learning how to grow an incredible bumper crop of tomatoes this year.


Tips to Create Knock Out Container Gardens | Pretty Handy Girl

Maybe you don’t have much room for a garden. No worries, you can still display your green thumb with knockout container plantings!


How to Install Sprinkler System

Wouldn’t it be amazing if you could water your own garden or landscaping automatically? Yes? Then learn how to install your own sprinkler system.


Get your shed or garage organized with this hanging garden tool organizer!

Once you’re done planting, you could get your organization game on with this simple storage solution for garden tools.

I hope you find several of these tutorials inspiring and hope your weather is cooperating enough to let you get outside and dig in the dirt. Take care!

signature

Growing herbs indoors is not as difficult as it sounds! Whether you are short on garden space, or just want to have fresh herbs available to you all year long, this tutorial for an indoor herb garden using Mason Jars is simple to create.

Indoor Herb Garden

Indoor Herb Garden with Mason Jars

Hello, it’s Amanda from Domestically Creative and I’m back with another simple tutorial. This time we’re creating an indoor herb garden from Mason Jars and a thrift store wooden crate. Here’s how to make one for yourself or to gift to a friend.

Materials:

(I’ve included affiliate links for your convenience. I earn a small percentage from a purchase using these links. There is no additional cost to you. You can read more about affiliate links here.)

Instructions

Step 1—Cleaning and Prepping

If you are using a thrifted find for your indoor herb garden, you’ll want to be sure to clean it really well before painting. If you aren’t using a thrifted box, check out this planter tutorial on building something similar for yourself.

Thrift store box before painting

Decide on which type of paint you’ll be using to paint the wooden box with. I chose to use chalky paint so there is less sanding and prep work required. If you choose to use latex or another type of paint, you’ll want to sand as much of the existing finish off as you can to get a smooth, blemish-free base to paint over. You’ll also need to use a primer before painting.

Painting the Indoor Herb Garden

Step 2—Painting the Indoor Herb Garden

Give the wood box 2-3 coats of paint, letting the paint dry completely between coats. It may be necessary to lightly sand between coats to ensure a smooth finish.

prepped and painted herb garden box

Step 3—Optional Stenciling

My indoor herb garden includes a vinyl applique cut using a Silhouette Cameo. You can find vinyl appliques online, or find a stencil to adorn your own indoor herb garden any way you choose.

hand picked fresh herbs 25 cents vinyl applique

Step 4 —Planting herbs in Mason Jars

To plant herbs in a Mason Jar, you’ll want to add a 1 ½” layer of rock at the bottom of each jar. This will give any excess water a place to drain so the roots of the plant do not rot.

Planting herbs in Mason Jars with rocks as drainage

Next, add a layer of potting soil to fill 3/4 of the glass jar. Create a divot in the soil for the roots, and then place the herb in the jar. Cover the roots with Sphagnum Peat Moss, filling the jar the rest of the way to just below the mouth of the jar.

Planting herbs in Mason Jars

Give each herb a small amount of water or a few spritzes from a spray bottle of water. Do not overwater.

Step 5 — Assembling the Indoor Herb Garden

Put each Mason Jar in the wooden box or crate and arrange to your preference. Place the indoor herb garden in a sunny and warm location for the best growth.

Assembling the Indoor Herb Garden

Step 6 —Caring for indoor herbs

Keep each jar of herbs watered, but not overwatered. It’s best to do a finger test to the soil. If it is dry to the touch, give the soil a few spritzes of water. If the soil is moist to the touch it does not need watering. Harvest herbs as needed with scissors, or as they start to outgrow the container. 

Rosemary and Cilantro indoor herb garden

Next time you have something on the menu that calls for fresh herbs (even in the middle of Winter), you can just walk over to your indoor herb garden with Mason Jars and gather what you’ll need.

Hand picked Fresh Herbs

What are some herbs that would make a great addition to your own indoor herb garden?

I’m Amanda, and I am the creator and voice behind the food and DIY blog, Domestically Creative. What started as a place to share updates with friends and family after we moved from Illinois to Tennessee and then to Texas, turned into a passion for finding creative and frugal ways to feed us and decorate our homes.

I have always had the “make it myself” attitude and I’m not afraid to bust out the power tools or get creative when it comes to decorating our home on a budget. You can usually find me scouring the local thrift stores, garage sales and estate sales looking for my next makeover (like this litter box cabinet), or dreaming up ways to make our new house feel more like home. My most recent project was giving my home office a much needed facelift. Some of the plans included creating a fun inspirational accent wall and adding pegboard to store my craft hoards.

I currently call Missouri home, where I live with my husband, dog, and 2 cats in a pretty dull, late 90’s split level. My husband and I both love to travel the U.S and recently purchased a small travel trailer to tag along in our journeys. In our free time together we can usually be found working together on a home project, exploring a new place, or just lounging with our pup, Delilah.

I’d love for you to connect with me on social media via Facebook, Instagram, Pinterest and Twitter!

See all of Amanda’s tutorials HERE.

15 ways to make a DIY vertical gardenA vertical garden can be a perfect solution for a small porch, apartment, or any other space-limited space that needs a little sprucing up. You can build one to plant herbs, succulents, flowers or whatever else you want to use to bring a little greenery to your space. And if you create one indoors you can enjoy your garden year round! Here are 15 Easy Ways to Make a Vertical Garden to inspire you and give you ideas on how to can customize the perfect vertical garden for your home.

diy vertical garden with drip watering system by houseful of handmade

Build a large vertical garden for herbs and plants that includes a drip watering system.


diy vertical gardenRepurpose an old ladder an some galvanized buckets to create this rustic vertical garden.


tower garden

Give your garden some modern style by creating this unique DIY Tower Garden.


Repurpose an old shutter then add hooks and small buckets to create this whimsical vertical garden for succulents.


Build this amazing DIY Vertical Garden Wall Planter using cedar boards and french cleats.


diy wall planterOld wire shelving is the perfect material to repurpose to make this modern DIY Living Wall Planter.


vertical herb garden planter

Use some boards and metal brackets to create this amazing rustic Vertical Herb Garden Planter.


tiered garden planterWith lumber, lattice and corner braces you can make this beautiful DIY Tiered Garden Bed.


Make a chic DIY Vertical Plant Hanger with a board and some terra cotta plants.


hanging herb garden

Make a Custom Potted Hanging Herb Garden for any room of your house.


pvc pipe vertical planterCreate this unique colorful vertical garden using PVC pipes.


Build this rustic DIY Wooden Hanging Planter to hold any number of plants or succulents.


Make this simple and pretty DIY Wall Planter Ladder and add gorgeous flowers to any fence.


Build this tall and skinny DIY Vertical Planter with a strong base and fun, colorful pots.


Use a rustic old ladder and make this lovely DIY Vertical Ladder Flower Garden.


I hope you loved these ideas and found inspiration on how you can create something similar for your home. Comment and let me know what you think! Which is your favorite?

Hi, I’m Sheri from Hazel + Gold Designs. Here are a few fun stats about me: I like love chocolate and peanut butter (together of course.) If you like stats, I have been crocheting for about 16 years, crafting for 20, and woodworking for about 4 years. I found a passion in making and being creative and began documenting my projects online at Hazel + Gold Designs.

When not working on projects, I enjoy spending time with my husband, four children, perfect dog, and ornery cat. You can find me on Facebook, Pinterest, Instagram and Twitter.

Read all of Sheri’s tutorials.

~Find more of Sheri’s projects here ~

Trellis on shed

Quick and Easy DIY Fan Trellis

Every spring I find myself making a new fan trellis to replace my worn, weathered and rotting trellis that was left out over winter.  This year, I am going to use the right materials (cedar and exterior screws) to allow me more than one season’s use of my trellis.  This is an easy project that doesn’t require too much time, tools or money.  And the best part is, you can make it exactly the size and shape that is right for your space.  Follow along and you’ll be ready to plant cucumbers, clematis, or (my personal favorite) hops!

Materials:

  • 6 – Cedar 1x2s (8 feet for a large trellis)
  • 2 – Galvanized bolts long enough to fit through 5 of the 1x2s stacked together.  (4 inches should work.  Mine were too short so I had to improvise and counter sink the heads.
  • 25 – 1 ½ inch exterior screws
  • Drill
  • Tape measure
  • Pencil
  • Screwdriver or impact driver
  • Miter saw or hand saw

Optional: Clamp (nice to have but not totally necessary)

Instructions:

A note about lumber used for this project. It is important to use cedar because cedar resists weather and insects.  You could use pressure treated lumber, but it is treated with chemicals so you may not want to use pressure treated lumber if you are growing vegetables.

Step 1: Cut your vertical 1x2s

Cut four of your cedar 1x2s to six feet long.  I like to leave the center 1×2 two feet longer than the rest of the pieces and cut it into a point (as shown below) so that I can drive it into the ground with a rubber mallet.  Cut your middle 1×2 to eight feet long, unless you are not sinking your trellis into the ground. In this case, cut the fifth 1×2 to six feet long also.

Cut into point

Step 2- Secure the 1x2s

Stack the five vertical pieces making sure they are equal at the top.  The middle piece (if longer) will stick out at the bottom as shown below.

Connect 1x2s

Clamp the 1x2s at the bottom and drill two pilot holes about two inches apart.  Push the galvanized bolts through the stack and tighten the nuts.  (You may notice my bolts were a little short, so I had to counter sink them. Get longer bolts and you won’t have to do this.)

Messy bolts

Step 3- Create the fan

With the five 1x2s secured at the bottom, fan out the outer pieces at the top to the distance you prefer.

Measure fan distance

Add 6 inches to this measurement. Cut one of the remaining 1×2 to this measurement.

Places vertical 1x2s

Using your feet to keep the outside pieces fanned out, drill pilot holes, and attach the cut piece near the top of the outer 1x2s. This will hold the trellis shape while you measure and eventually attach the rest of the horizontal trellis pieces.

Drill fan trellis

Now determine where to place the other vertical 1x2s.  Feel free to skip measuring and eyeball the sizes and spacing.  Nothing needs to be exact with this project, that’s what makes it fun! Cut your horizontal pieces and attach the vertical supports by pre-drilling and securing with the screws.

Place additional vertical 1x2s

When you are done, your trellis will look something like this:

Fan trellis against shed

If you made your trellis to stake into the ground, pound the long, pointed piece of your trellis into the earth with a rubber mallet.  For added stability, you can wrap a wire loop around one of the top supports and attach to the wall.

I wish I had an after picture of a beautiful vine covering my ugly shed, but that will have to wait a few months.  Happy building and planting!Quick and Easy DIY Fan Trellis

Quick and Easy DIY Fan Trellis

Quick and Easy DIY Fan TrellisHi!  I’m Lara, the creator of The Unprofessional blog and YouTube channel. I am an aspiring handy-woman with little to no experience building, tiling, landscaping, demolishing, and what have you.  I’ve drilled holes in the wrong places, cut on the wrong lines and stripped more screws than I care to count.  And yet, I’m on my way to customizing my home, project by project.  I believe you can do pretty much anything with a few good tools, a stack of wood and a half-baked
idea.

I like to find challenges and solve them with my miter saw. When my 3-year-old son complained that he couldn’t reach the picnic table, I designed an easy-to-build folding booster seat perfect for camping trips and beer gardens. When the low ceilings in my cape cod wouldn’t accommodate a bulky barn door, I found an alternative approach to turn any interior door into a space-saving barn door. I love to share these solutions with others in hopes that the empowerment and love of power
tools spreads.

You can connect with me on Instagram, YouTube and Pinterest.