
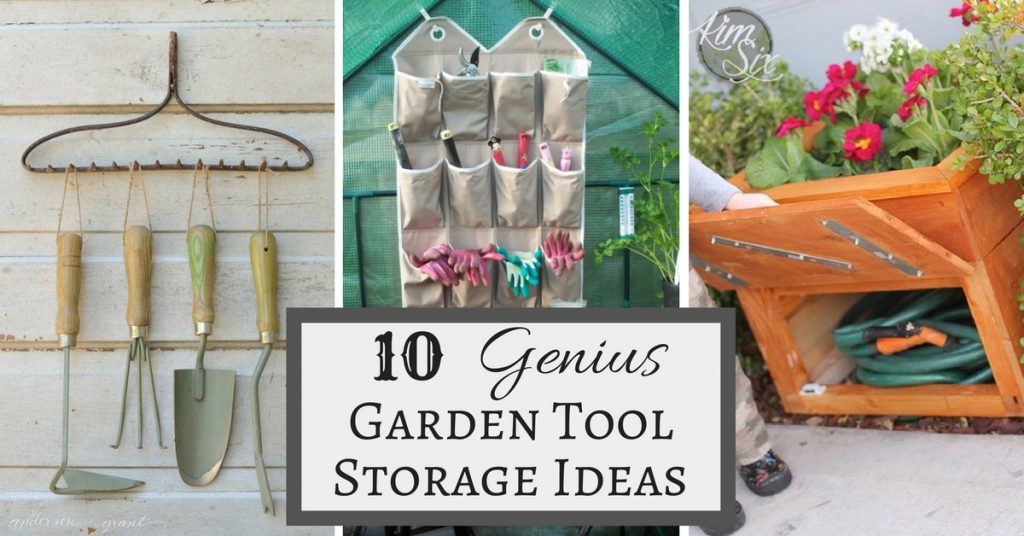
Hanging Garden Tool Organizer

Hi again, I’m Vineta from The Handyman’s Daughter and I’m back this month with a smart idea for organizing your garden tools. My garden tools were always scattered throughout the shed making it hard to get started on a gardening project. Thanks to this Hanging Garden Tool Organizer, there’s now a place for everything.
Seattle’s Spring got off to a slow start, so as soon as the sun came out I was anxious to get new plants in the ground. I recently built a garden trellis and it was time to add climbing vines! Unfortunately, when I opened the garden shed, I faced this disaster . . .
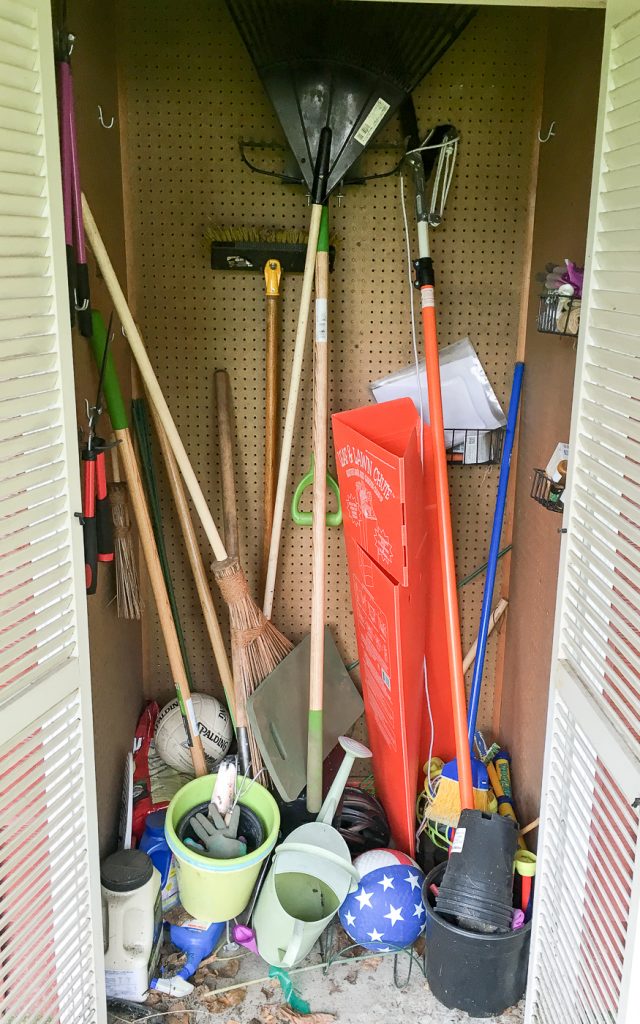
Toys, leaves, and even my husband’s long lost bike helmet littered the floor. Sadly half the hooks on the pegboard walls were empty. Obviously I needed a better organizational system before someone got a rake to the head!
I cleared everything out (including too many spiders) and took inventory. Toys were relocated to the new storage bench I built for the backyard; plastic pots were recycled; and broken tools were tossed. Bigger shovels and rakes went back on the hooks, but I needed to create a home for the small hand tools and gloves.
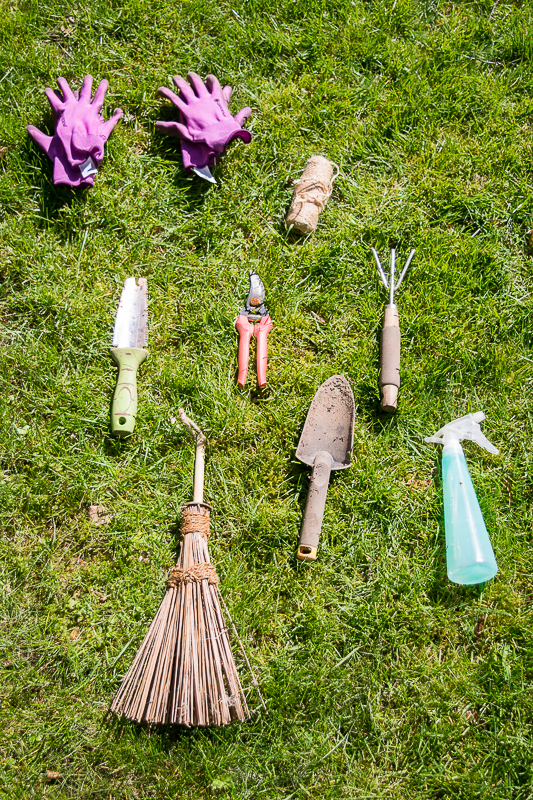
I didn’t want to throw all the smaller items in a bucket where they would get lost again. An inexpensive shoe organizer was the perfect solution. Adding labels to each pocket helps keep everything in its place.
Materials:
(I’ve included affiliate links for your convenience. I earn a small percentage from a purchase using these links. There is no additional cost to you. You can read more about affiliate links here.)
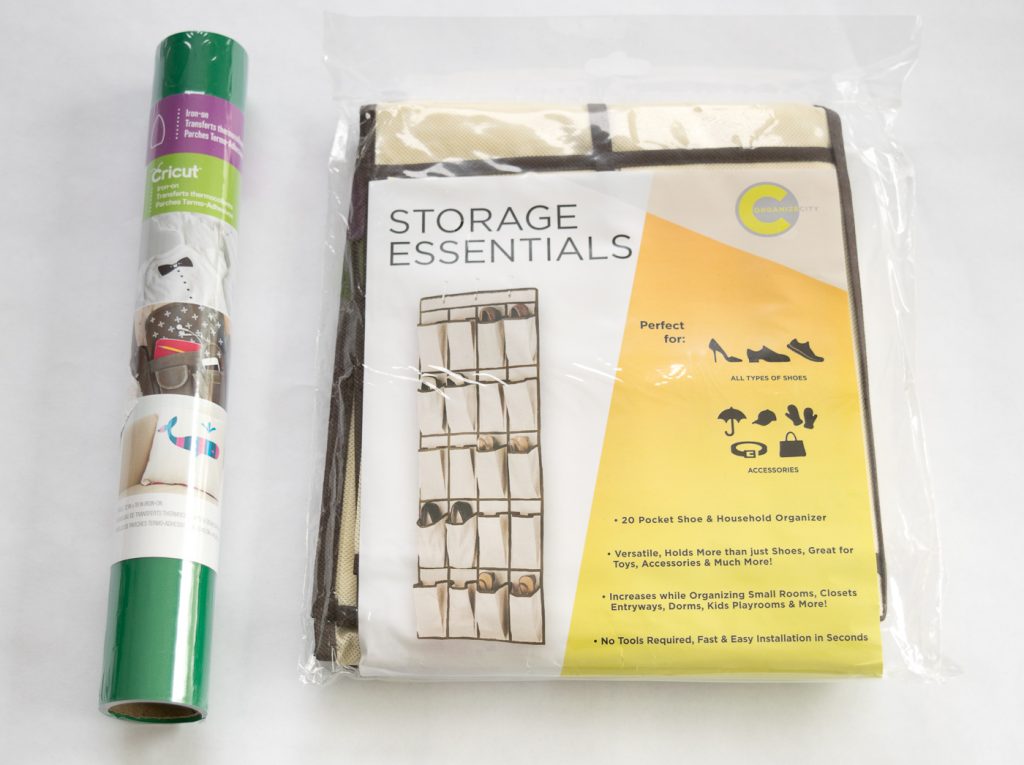
- Fabric over-the-door shoe organizer
- Iron-on vinyl
- Silhouette or Cricut machine
- Iron
- Cotton cloth or tea towel
How to Make a Hanging Garden Tool Organizer:
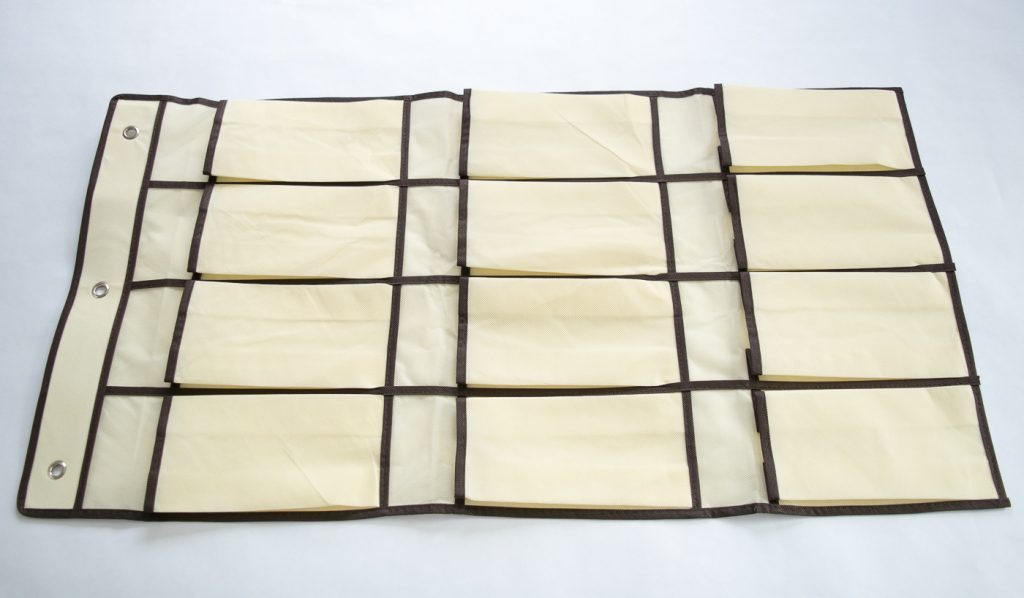
Start by measuring the size of one pocket of the shoe organizer. (Mine are a little over 4 inches wide and 7 inches long.) If you don’t want to use all the pockets, feel free to trim off the extras. I only needed a dozen for all my small items, so I cut off the bottom two rows.
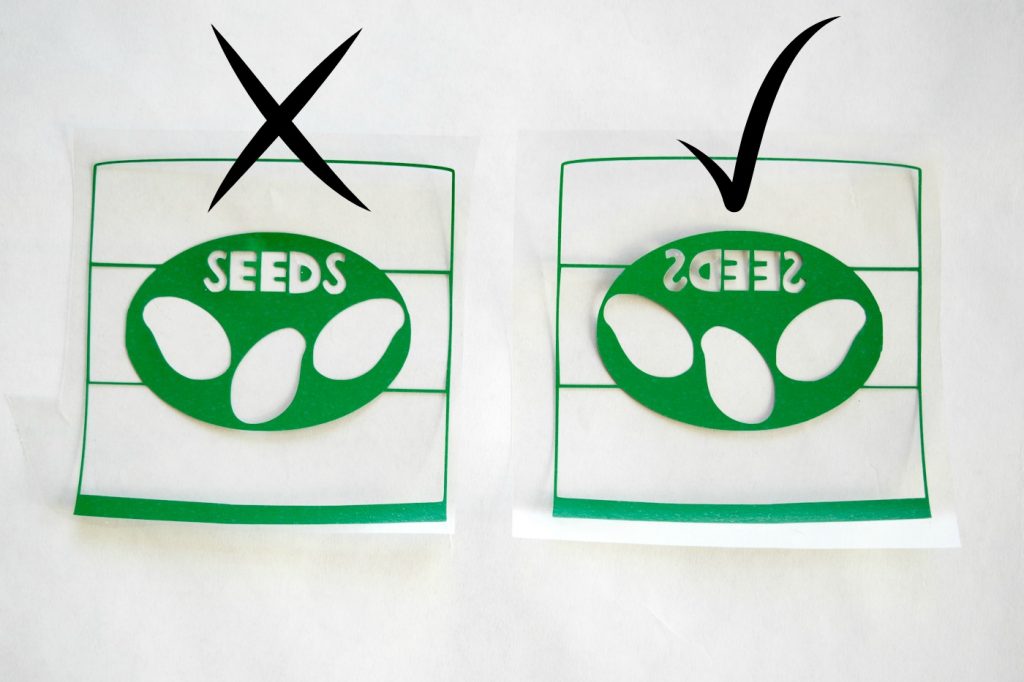
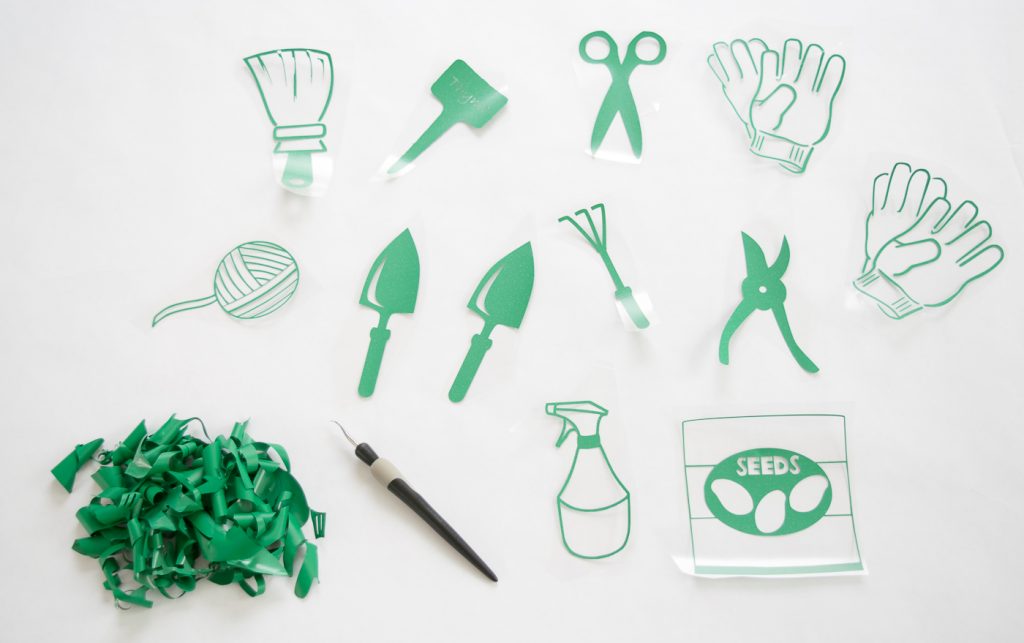
Make a list of all the tools you want to store in the pockets. Using the software that comes with your vinyl cutting machine, create labels with text or images. (Mine are a combination of this design and clip art I found online.) Don’t forget to mirror the image if it has text!
Place the iron-on vinyl onto the sticky mat (shiny side down) and feed the mat into the machine. Send your design to cut. Cut apart the individual designs and weed out the negative space.
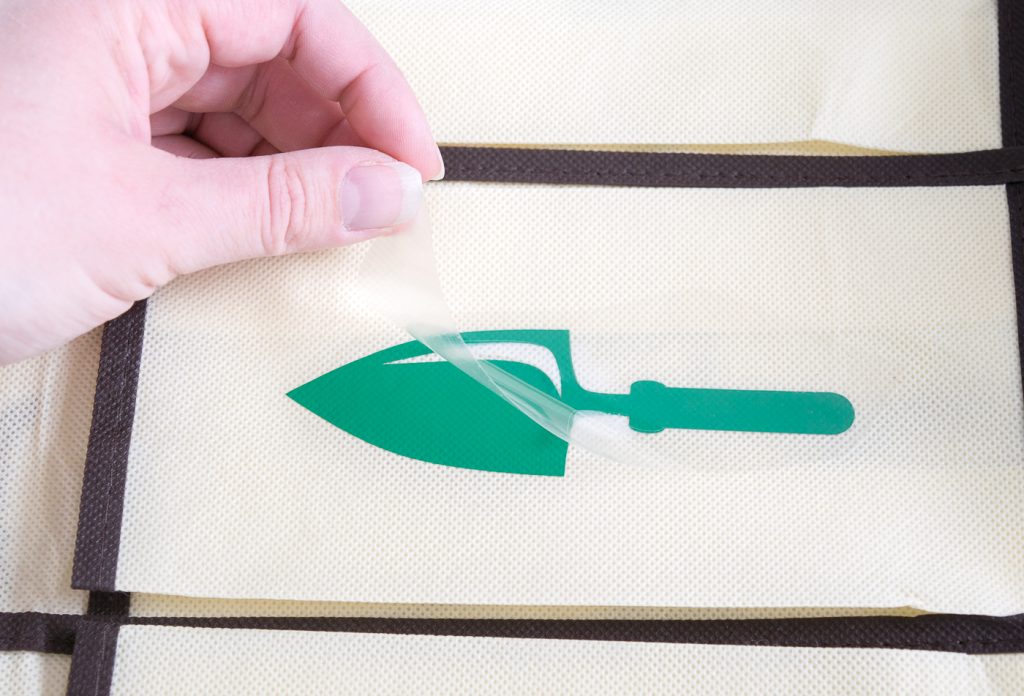
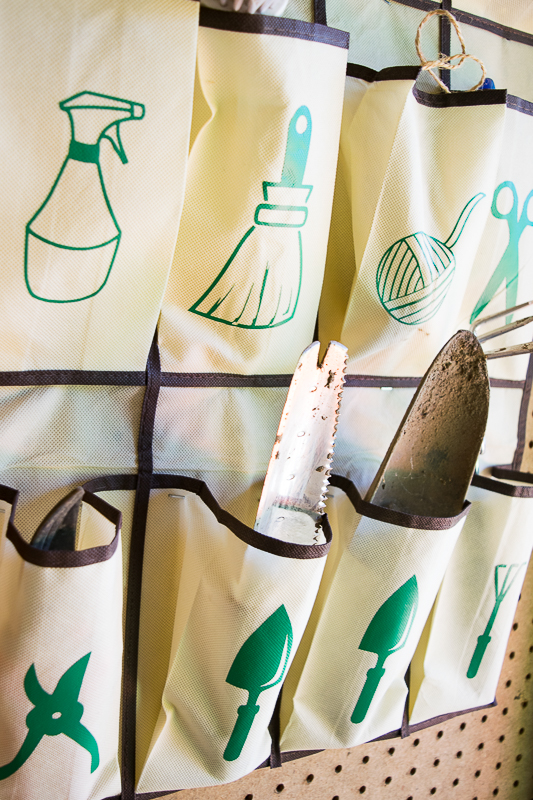
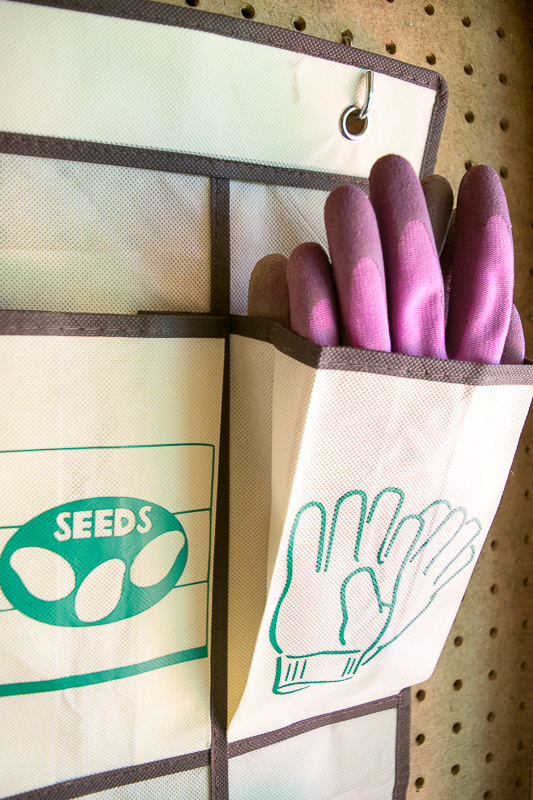
Place each design (plastic side up) on a pocket of the shoe organizer. It’s a good idea to keep heavier tools like the trowel and pruning shears at the bottom and lighter items like seeds and gloves at the top.

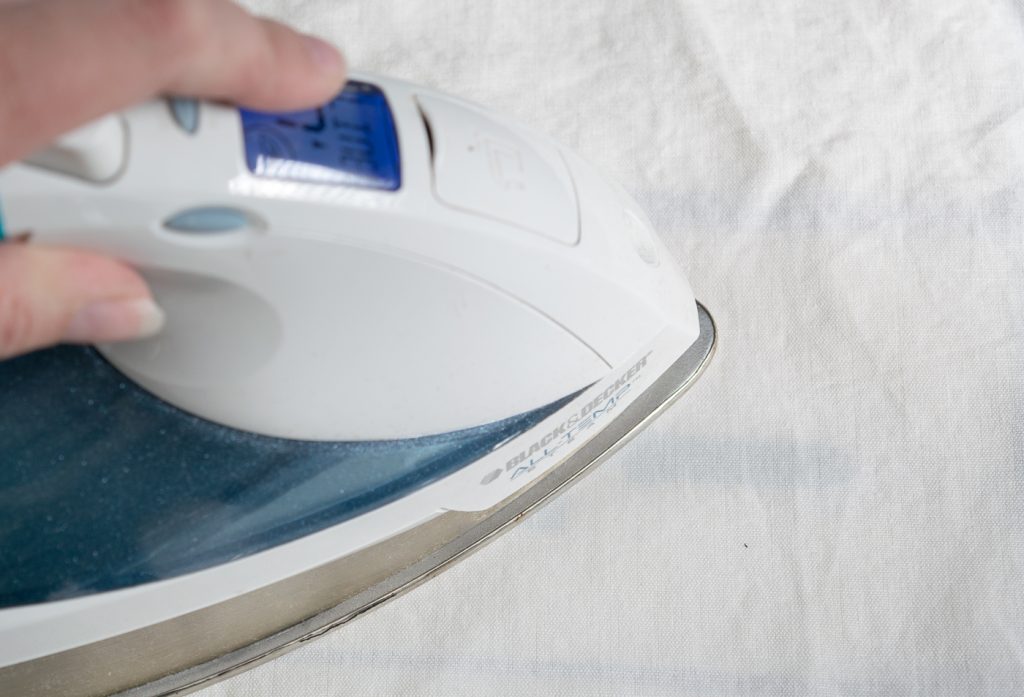
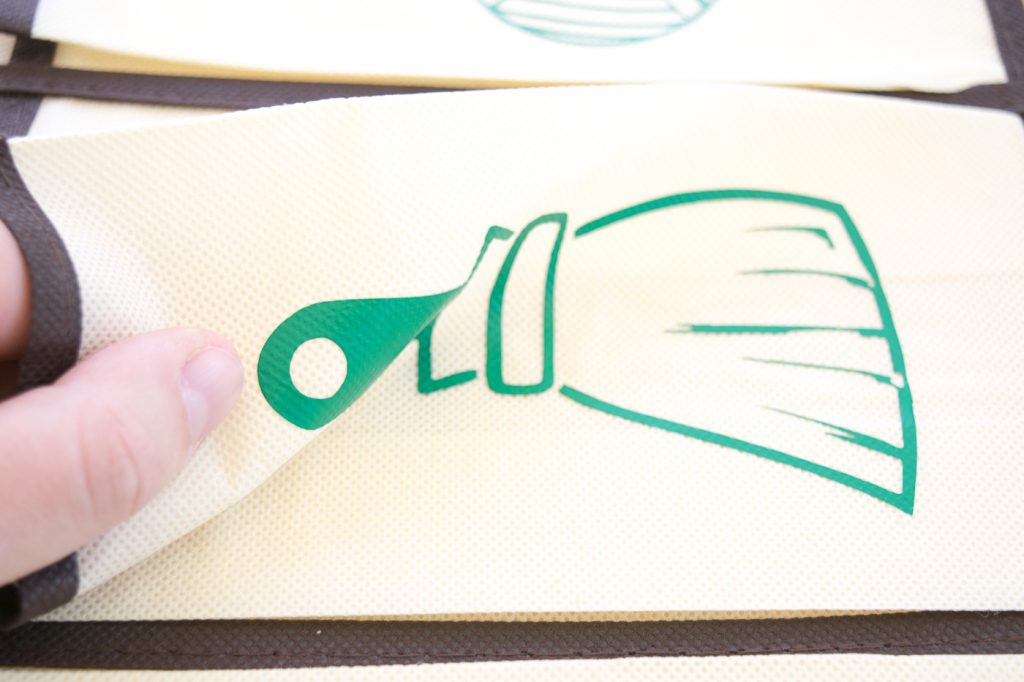
Set your iron to the highest setting. Lay a piece of cotton cloth (a thin tea towel or even a t-shirt is fine) on top of your design. Iron it in place. Move the iron around over the design for 30 seconds to adhere the vinyl to the pocket. Be careful not to leave the iron in one spot too long or you risk scorching the fabric.
Your design is adhered properly when the clear plastic peels away cleanly. If it still sticks, iron more!
Once the iron on is cool, move on to the next one. I had never used iron-on vinyl before and was pretty impressed at how flexible it is. The vinyl looks like it would peel up easily, but it adhered firmly.
Hang your organizer. My organizer came with over-the-door hooks, but they were too big for the louvered doors of my shed. I used hooks to hang it on the pegboard wall. Time to fill up your organizer.
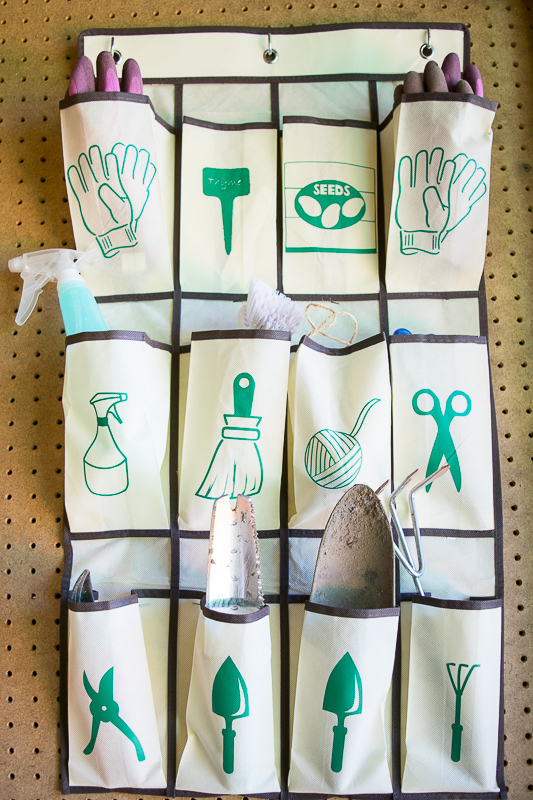
The heavier tools flopped forward so I stapled the fold of the pockets to the pegboard to keep them straight.
No more hunting for that matching glove! They always have a home now.
Now my garden shed is neat and organized! I can instantly see what tools are missing and hunt them down in the garden before they turn to rust. The images on the garden tool organizer make it easy for even the little kids to help with clean up.
Need more garden tool storage ideas? I’ve found some genius garden tool storage ideas, including the inspiration for this project, here.
Thanks for reading and don’t forget to check out my blog at The Handyman’s Daughter for more projects!
 ~
~ 


You always have the neatest, easy does it ideas to make life so much easier! Thank you!
So cute, love this idea. Thanks, as always.
I want this organizer. So cute