Quarterly Reminders on Google | Pretty Handy Girl

31 Days of Handy Home Fixes | Pretty Handy Girl

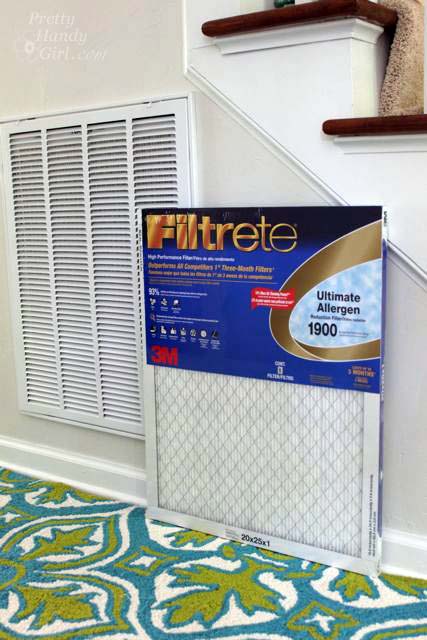
I’m sure you already know how important it is to change your air filters in your home. As a Filtrete Ambassador, I’m happy to remind you why you should replace your Filtrete Healthy Living Ultimate Allergen Reduction MPR 1900 filters on a regular basis:

  • Helps improve air quality in your home
  • Allergen reduction from air passing through the filter
  • Clean filters allow better air flow and less stress on your heating and cooling system
  • Capture airborne microscopic particles that can carry bacteria and viruses
  • Regularly maintenance and filter changes can help maintain your system

ultra_allergen_filtrete_filter

If you’re like me it’s hard to remember when it’s time to change your air filters. I have a solution!

Two tips to help you remember to change your air filters regularly.

1. Write the date you changed the filter on the new filter. That way you can peak at the filter to see if you need to change them soon.

date-on-filter-watermark

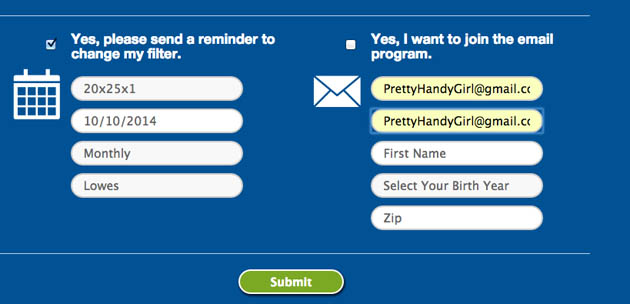
2. Sign up for a reminder email. You can sign up for the Filtete Clean Advantage Club to get reminder emails when it’s time to change your air and/or water filters. It’s easy and they’ll email you at your preferred intervals to help you remember to change your filters.

Get Reminders to Change Your Air Filters | Pretty Handy Girl

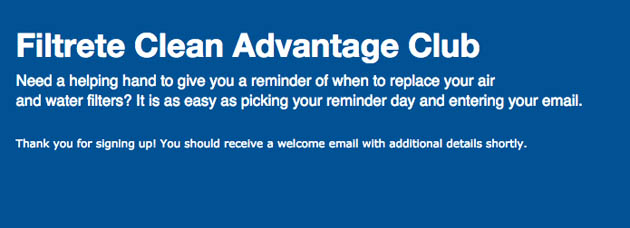
Simply enter your filter size, the date you need your first reminder (or the date of your last filter change). Then choose how often you replace your filters (or should I say how often you should replace your filters.)

Get Reminders to Change Your Air Filters | Pretty Handy Girl

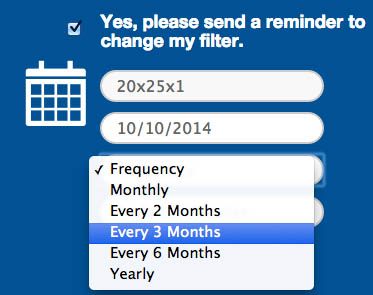
Don’t forget to add your email address and click submit.

Get Reminders to Change Your Air Filters | Pretty Handy Girl

Now sit back and don’t worry about remembering to change your air filters ever again! When it’s time, you’ll get an email from Filtrete!

Now you can spend time trying to remember other important things, like what time is Flip or Flop on? Anyone else watching this show? Is is just me or does it bother you that Christina doesn’t ever get her hands dirty. Must be a Handy Girl pet peeve. 😉

Follow Filtrete via social media on Facebook or Twitter for more tips and tricks to help create a healthier home.
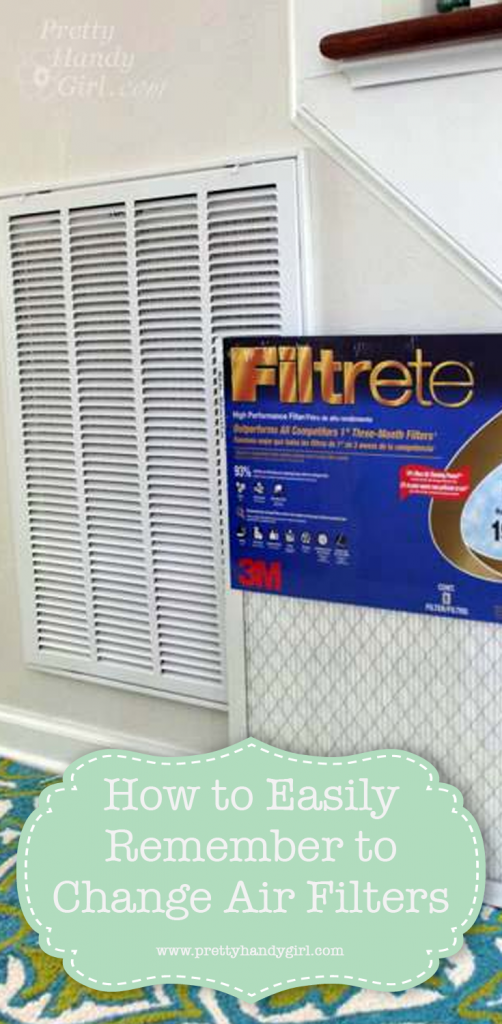
PHGFancySign

Pin for later!

white air filter in home

filtrete-brand-ambassador-Badge_sm

Disclosure: This is a sponsored post for Filtrete Brand. I have the honor of being an ambassador for them and have been sharing information from  Filtrete Brand. I was given key messages to share, but all the words and thoughts are my own and additional products used in the project were selected by me.  I have been compensated for my time and for this post. I continue to work with certain brands  like the Filtrete Brand that I believe in, because of their quality and because I feel they have helpful messages for my readers. I will always disclose to you if you are reading a sponsored post. #HealthierHome #Ad


Other tips in the 31 Days of Handy Home Fixes series:


Is Your HVAC Choking? | Pretty Handy Girl

31 Days of Handy Home Fixes | Pretty Handy Girl


Is your refrigerator running? Then go catch it. Is your HVAC choking? Time to administer CPR! When was the last time you looked at your HVAC unit? Specifically the condenser which is the big box usually located outside the house.  At first glance it doesn’t look too bad, but if you peek around the back…

Is Your HVAC Choking? | Pretty Handy Girl

…you’ll find a stray vine trying to make its way inside.

Is Your HVAC Choking? | Pretty Handy Girl

In order for your HVAC system to work efficiently and live longer, it’s important to keep vegetation and leaves away from the condenser. Never plant bushes or shrubs too close to the unit.

To discourage weeds and plants from growing back lay down some mulch, rocks or other weed resistant materials. I used leftover slate slabs around our unit. It’s what I had on hand and it was FREE.

Is Your HVAC Choking? | Pretty Handy Girl

Go check your condenser and if it’s choking give it some CPR by pulling back all the weeds and shrubs.

PHGFancySign

Pin for later!

outdoor air conditioner & HVAC

5 Ways to Find a Wall Stud (without a stud finder) | Pretty Handy Girl

Using a stud finder is the quickest and easiest way to find a stud. But, if you don’t have one or are too lazy to find yours (I’m often guilty of this), you can use one of these ways to find a stud.

5 Ways to Find a Wall Stud (without a stud finder) | Pretty Handy Girl

5 Ways to Find a Stud (without a Stud Finder)

1. Measure from an outlet – remove an outlet cover and inspect the outsides of the box. One side will usually be nailed to a stud.

stud-visible-from-outlet-box

Then measure out to the left or right at 16″ intervals. US building code requires wall studs to be spaced at least 16″ on center (meaning the center of the studs.) This will help you locate studs. However, recognize that in locations near doors/windows or openings there may be a stud at less than a 16″ interval.

5 Ways to Find a Stud

2. Look for popped nails or dimples on the wall – It doesn’t always happen, but in older houses you might see nail pops where the drywall was nailed to a stud. In newer construction this is less likely to happen because screws are used.

3. Look for nails in your baseboard or crown moulding – inspect your crown or baseboard moulding for nails that might indicate where it was attached to a stud.

locate-nail-in-moulding

4. Knock on the wall – You should use this method in conjunction with the methods described above. Use your knuckle to knock along the wall horizontally. A stud location will have a higher pitched sound and feel hard against your knuckle. Lack of a stud will have a lower pitch and hollow sound.

5. Use a small pin – Once you think you’ve located the stud, use a small quilter’s pin to verify that you found the stud.

Wall-mounted IKEA LILLÃ…NGEN Mirrored Cabinet turned Stuffed Animal Storage | Pretty Handy Girl

If the pin sinks in up to the head, there is no stud there. If the pin sinks in about 3/4″ and then stops, you found the stud.

pin-locating-studs

The pin method will save you the hassle of creating a larger hole only to realize that you missed the stud.

Okay, now go find your stud! {snicker, hee hee}

PHGFancySign

Pin for later!

how to find a stud without a stud finder

2 Ingredient Ant Killer | Pretty Handy Girl
31 Days of Handy Home Fixes | Pretty Handy Girl

It’s no picnic when you realize your home has been invaded by sugar ants. Instead of spraying your kitchen (or wherever you find them) try this Two Ingredient Ant Killer.
2 Ingredient Ant Killer | Pretty Handy Girl
Photo by Stephen Ausmus – https://www.ars.usda.gov/is/graphics/photos/dec04/k11622-1.htm
Licensed under Public domain via Wikimedia Commons

Day 17 – Two Ingredient Ant Killer

2 Ingredient Ant Killer | Pretty Handy Girl

Mix equal parts sugar and Borax into a small disposable lid. Set it out near the area of largest ant concentration or near the location they are entering your home. Caution: DO NOT put this mixture where children or pets can get to it.

Leave the mixture out for 24 – 48 hours or until you have no more ants. The ants will take the sugar and Borax back to the nest where the colony will have a feast and consequently die after intestinal distress.

Lest you think buying a box of Borax is wasteful, I’ll have another use for Borax later this month.

PHGFancySign

I’m participating in Nester’s 31 Days Challenge. Check out all the other bloggers who are participating!

31 Day Writing Challenge

Don’t miss a single tip! Sign up to get all the tips in your email:


Sign Up for Email Subscription


Other tips in the 31 Days of Handy Home Fixes series:


31 Days of Handy Home Fixes | Pretty Handy Girl

Take out the papers  and the trash…ummm take out the trash?

foot_on_trashcan

Grrr, don’t you hate when the trash bag gets stuck in the trash can? No worries, I have an easy fix that will make taking out the trash a much easier chore. It may sound a little crazy, but it involves drilling holes.

Day 16: Put Holes in Your Trash Can

To release the suction created by a full trash bag in the trashcan you need to add some air holes. If you put the holes about an inch up from the base you won’t risk any drips on the floor if the bag leaks.

Simply drill three to four air holes into the bottom of your trash can.

drill_holes_in_trash_can

Now you can take out the papers and the trash or you don’t get no spending cash. Yakkety Yak, don’t talk back.

before_after_trashcan

This year we’ve added several chores for the kids to handle. Taking out the trash and recycling is one of their responsibilities. I’m curious, what chores do your kids have?

PHGFancySign

Pin for later!

how to remove a trash bag that gets stuck in trash can

I’m participating in Nester’s 31 Days Challenge. Check out all the other bloggers who are participating!

31 Day Writing Challenge

Don’t miss a single tip! Sign up to get all the tips in your email:


Sign Up for Email Subscription


Other tips in the 31 Days of Handy Home Fixes series: