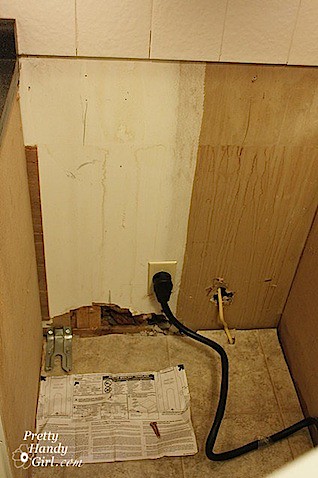
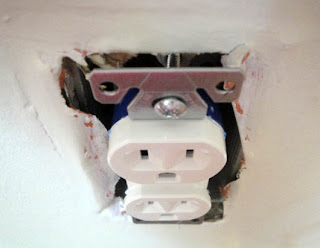
I hate to break up the holiday glamour-fest, but it is time to put on my tool belt and share with you an important safety device. As some of you may remember, we had an oven fire this past September. We ended up replacing our oven and when the new one was delivered it came with an anti-tip device. All new free-standing and slide-in ovens should come with one. Be aware that most stores that deliver your stove WILL NOT install the anti-tip device when they deliver (shame on them!)
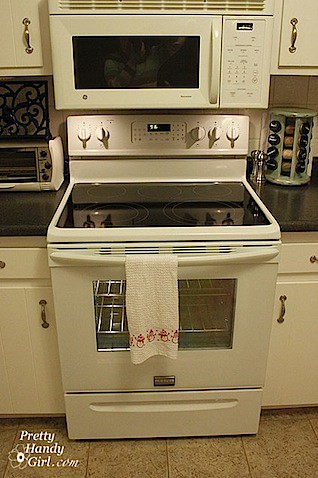
Oven.jpg

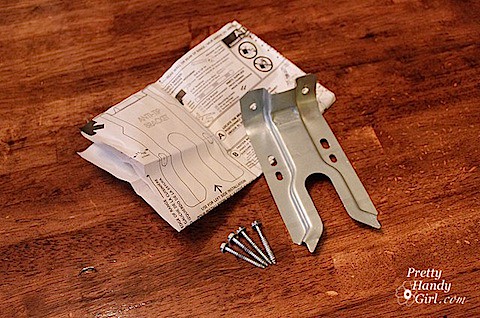
If you don’t know what an anti-tip device is, let me show you:
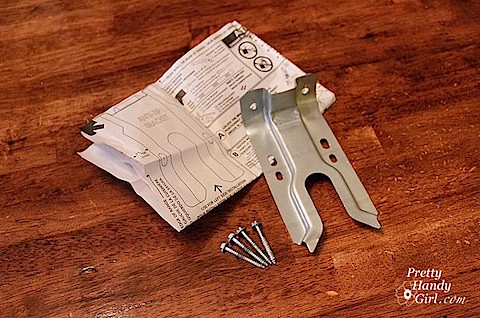
BracketParts.jpg

That’s it! Just a bracket and a few screws. But, that little device can prevent this:
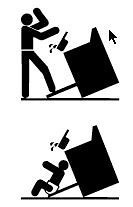
TippingPics.jpg

The whole oven can and will tip very easily with very little weight on the open oven door. Stop reading RIGHT NOW and go open your oven door. Then press down to see if you can tip your oven!

If you can tip it, you can call the manufacturer of your oven and they should send you a device for free or just a shipping charge. To find an anti-tip device for your stove, contact the manufacturer.

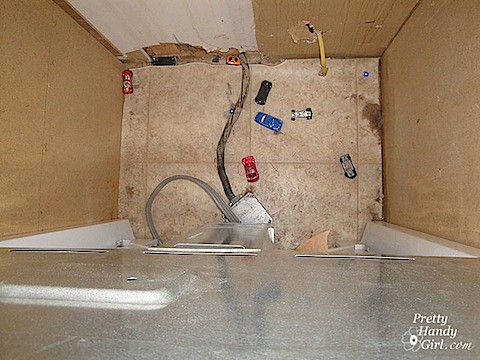
Installation is super simple. The hardest part is pulling the stove out and cleaning all the goodies that have fallen beneath the stove for years. Apparently our stove doubles as a matchbox car garage!

CarGarage.jpg

Safety Alert: If you notice in the picture above, there is a metal box lying loose on the floor with black and grey wires entering it. This is the junction box where our wiring for the stove is hardwired into the house. The fact that this junction box is lying loose on the floor is dangerous! Should we (or the firemen) had pulled hard enough when removing the stove, the connections could have come loose and there would be 240 volts of live (or should I say life-ending) power exposed! Therefore we hired an electrician to wire an outlet into the wall before we installed our new stove.

One more safety tip, if your oven catches on fire (specifically the heating element is burning) you will need to stop the oven from receiving any power. Be sure to turn off the circuit at your circuit breaker! This probably would have saved me from having to call the fire department, I thought just turning the oven off would stop the element from continuing to ignite and burn, BUT NO IT DID NOT!

Anti-Tip Bracket for Your Oven Installation:

If your oven is hardwired, before installing the bracket be sure to shut off the power to the appliance. Even if you have an outlet, be extra safe and turn off the power to that outlet. Once you have removed all foreign objects from under the stove and cleaned the floor. Layout your template lining up the corner of the sheet to the corner of your cabinet and the wall.
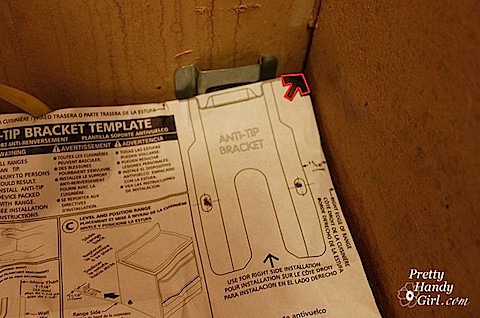
LineUpTemplate.jpg

Drill through the crosshairs marking the location of the screws (remember to use a drill bit slightly smaller than your screws.)
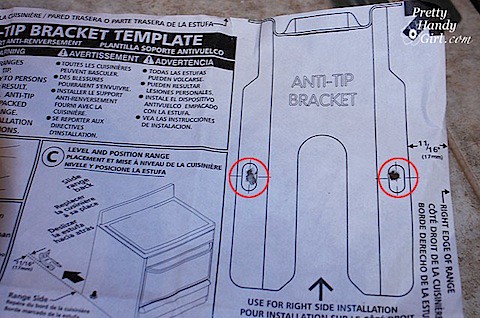
DrillHoles.jpg
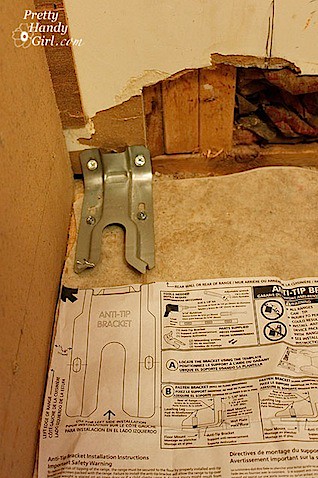
Remove your template, line up your bracket with the holes and drive the screws through the holes on the base of the bracket and then into the wall at the back of the bracket.
LineUPBracket.jpg
Once your bracket has been installed, grab a helper to help you guide your oven back behind the wall.
InstalledBracket.jpg

If you are having trouble lining up your stove with the bracket, you may need to remove the storage drawer and look underneath your oven. You also might need to adjust the feet on your oven up or down to give enough clearance for the whole foot to slide into the bracket. (You do this by screwing or unscrewing the feet.) Be sure to adjust the foot on the opposite side to level your oven.SlideFootUnder.jpg
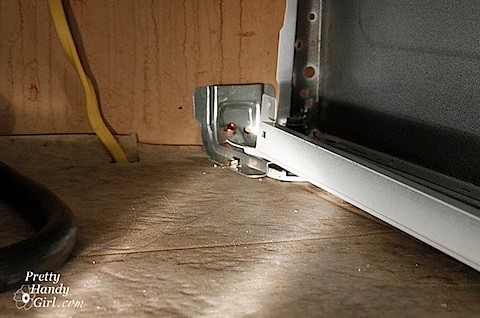
And you are done, this installation is relatively easy as long as you don’t encounter things like electrical code violations (aka improperly hard-wired appliances.) Feel free to email me with any questions and I will try to assist you. Again, I have one extra anti-tip device for a GE stove if you would like it.

Now it is time to bake some cookies! YUM!

I spent the weekend in Norfolk, VA with my two wonderful sisters (Alana and Caitlin) and Alana’s boyfriend, Eddie. We had fun kicking some DIY butt! Who knew you could have so much fun installing cabinet knobs!
Most of the projects were centered around Alana’s kitchen. The kitchen was remodeled a few years ago, but it was never really finished. Our mission this weekend was try to complete some of those unfinished projects.

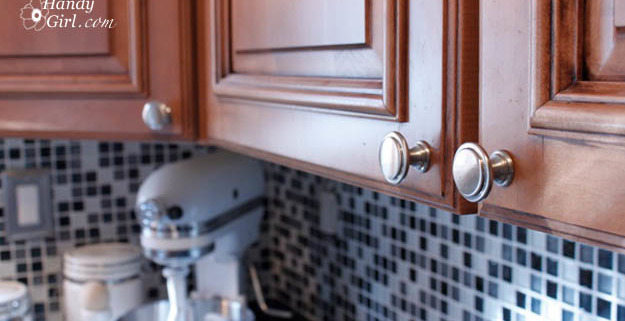
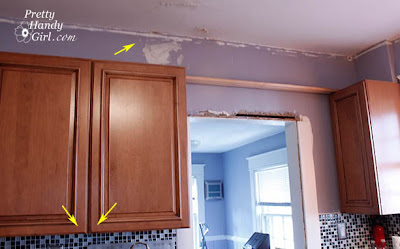
One of the tasks we accomplished was installing cabinet knobs on the kitchen cabinets. Another was touching up paint on the walls (but that is another post for another day.)


Caitlin made a template out of cardboard that made it a snap to install the knobs.

First she measured the corner square on the cabinets. It was 1.5″ square.

Then she made a hole in a piece of cardboard 3/4″ from two edges of the template. So, this way we knew our hole would be centered in the square every time! And she marked the outside corner with a little arrow.

Making sure the arrow was pointed at the outside corner, I lined up the template at the corner of the cabinet. (We used the edge of the raised panel, instead of the actual corner of the cabinet.)

Then, I used my drill to make a mark where the hole would go.

After that, I removed the template and slipped a piece of scrap wood behind where the hole was being drilled.

Then I drilled into the cabinet until I felt it enter the scrap wood.

Can you name my facial expression? a) I just got a whiff of old yeasty bread. b) I’m really concentration on my drilling. c) I’m trying not to laugh at my sister taking my picture.

Then Caitlin threaded the bolt through and screwed on the knobs. Perfectly beautiful and those of us with fat fingers and short fingernails can get into the cupboards now. Who knew you could have so much fun installing cabinet knobs!

For your viewing pleasure, I thought you might get a laugh out of one of the outtakes of our  Charlie’s Angels inspired picture. We were doing our best at making a sexy face. Caitlin said  “sexy facial expressions” must not run in the family. Not sure what’s with that fish face I’m sporting. So much for my sexy look.

How often have you removed a screw, accidentally dented your drywall, or had a hole that couldn’t hold a screw anymore? And, how long has that hole stared glaringly at you? Let’s talk about repairing holes.

Today, I will empower you to fix that hole! Or give you the tips and tutorial to handle that future hole.

A month ago, you probably saw this post on turning a closet into a reading nook. I removed the closet doors and needed to patch the screw holes left behind.

Repairing Holes

Patching small holes in wood (or drywall):

Materials:

(I’ve included affiliate links for your convenience. I earn a small percentage from a purchase using these links. There is no additional cost to you. You can read more about affiliate links here.)

1. Use your putty knife or utility knife to scrape off or cut away any edges of the hole that are not flush with the wall or trim.

2. Put a small amount of putty (or spackle) on your putty knife.

3. Push the putty (or spackle) firmly into the hole as you slide the knife over the hole.

4. Scrape the excess off the surface.

5. Use the damp rag to wipe excess putty (or spackle) off.

6. Wait for putty (or spackle) to dry, and sand smooth.

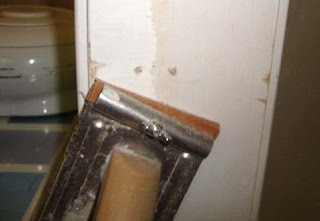
On the same project, my three year old had nearly pulled the tie backs out of the door casing, leaving two stripped holes. I wanted to hang the tie back up in the same location, so I had to repair the holes and leave it strong enough to hold up to a 3 yr. old!

How to fix a stripped hole in wood:

Materials:
Toothpicks
Wood glue
Damp rag
Hand saw
Sandpaper

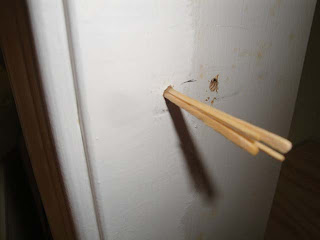
1. Dry fit toothpicks so they are snug in the hole.

2. Remove toothpicks in one bunch and add glue to the tips of the toothpicks and more glue in the hole.

3. Push the toothpicks firmly into the hole.

4. Wipe any excess glue up immediately.

5. When the wood glue dries, saw off the toothpicks as close to the hole as possible (without damaging your trim.)

6. Use the sandpaper to smooth the toothpicks flush with the wood.

7. Follow up with putty if necessary for cosmetic appearance. (You can use the above directions for patching a small hole.)

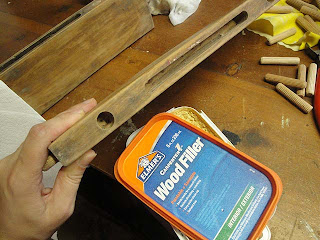
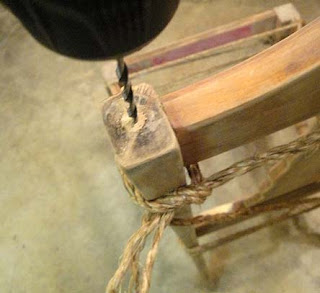
Yesterday I showed you the transformation of a curbside chair named Daisy. She had a few holes that needed filling where I had removed the spindles.

How to fill a hole in wood (non-structural):

Materials:
Wood Putty
Putty Knife
Damp rag
Sandpaper

1. Clean out hole of any dirt or debris.

2. Roll wood putty in hand to fit in hole.

3. Insert putty in hole and then push it in using a pencil or similar blunt object.

4. Continue filling the hole until you are almost flush with the top.

5. Use your putty knive to apply final topping of putty.

6. Wipe excess off with damp rag and create a flush top with the surrounding wood.

7. Putty will shrink slightly when dry, so you may need to add another top layer of putty.

8. Once putty is thoroughly dry, sand it smooth.

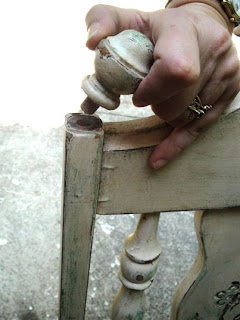
Also in the transformation of a curbside chair named Daisy, I had to add new finials to the top.


How to fix a slightly larger hole in wood (that needs to be structurally sound):

Materials:
Wooden peg (to size of hole)
Gorilla glue
Wet rag
Hand saw

Sandpaper

1. Dry fit wooden peg so that it fits snug in the hole.

2. Remove peg and dampen inside of the hole.

3. Squeeze in a small amount of Gorilla glue (this glue will expand as it cures.) And insert peg back into hole.

4. Wipe any excess glue up immediately.

5. Clamp peg in place until Gorilla glue is dry.

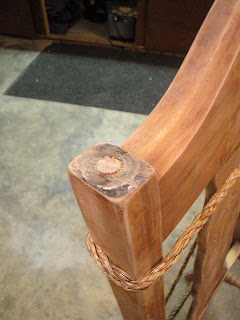
6. After the glue dries, saw off the top of the peg as close to the hole as possible.

7. Use the sandpaper to smooth the peg flush with the wood.

Screwing into repaired hole:

1. Choose a drill bit that is slightly smaller than the screw you are using.

2. Predrill your hole.

3. Screw in your screw (or in my case, the finial).

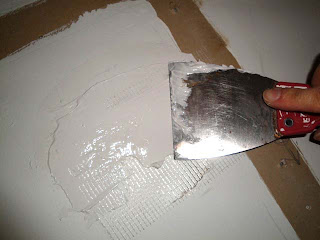
Also, during the making of the closet turned into a reading nook. I accidentally knocked a hole in the drywall. The hole was too big for just spackle.

Repairing larger drywall holes (up to 3 inches):

Materials:
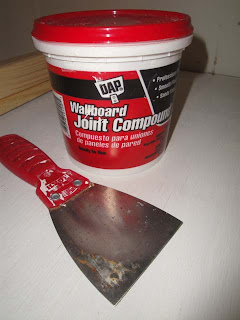
Joint compound
6″ taping knife
Utility knife
Webbed tape (or webbed patch kit)
Sandpaper

1. Use your putty knife or utility knife to scrape off or cut away any edges of the hole that are not flush with the wall or trim.

2. Adhere webbing over the hole.

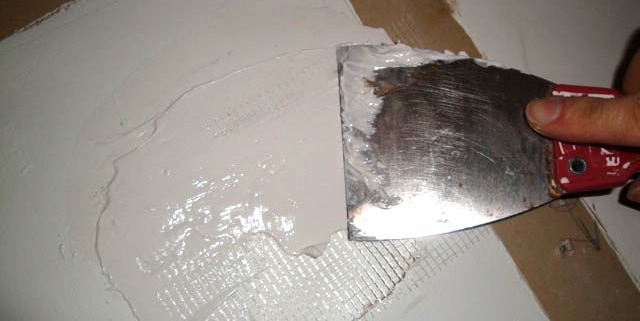
3. Put a small amount of joint compound on your taping knife and push the compound gently into the hole as you slide the knife over the webbing.

4. Extend the compound beyond the taping.

5. Scrape the excess off the surface.

6. Wait for compound to dry and add another layer. Your goal is to have a smooth layer on top that hides the webbing and bumps out ever so slightly above your wall surface.

7. Use damp rag to wipe excess compound off and to smooth any visible edges.

8. Again, wait for compound to dry, and sand smooth so the patch is flush with the wall.

9. The best way to paint over a larger patch job is to use a paint roller and paint at least 2 thin layers of matching wall paint over the repair area.

Repairing holes is easier than it sounds. If you have larger holes or need more information on patching drywall holes, check out this video tutorial.

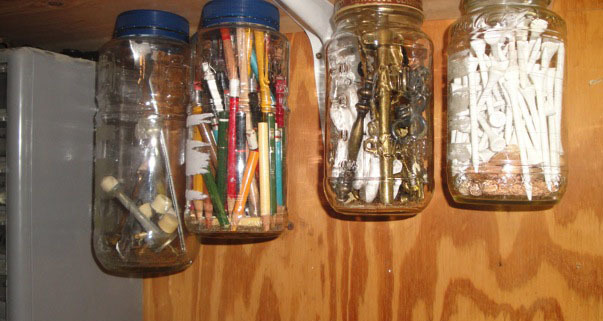
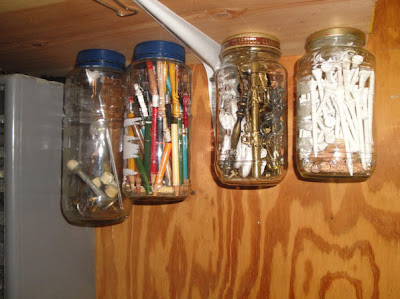
Over the weekend I finally cleaned up our garage. This is our multi-purpose space, so it had multi-multi-multi items strewn everywhere. Check out this cool Hanging Jar Storage.

Because our garage is small (fits 1.5 cars) space is a premium and I knew where I could find more space. One place I found space is under the shelves. Another place was inside my workbench (but, I’ll show you that in another post.)

I had been saving jars and lids (which I had to fish out of the trash a few times. Ewww!) for storage of odds and ends in the workshop/garage.

This project turned out to be a super easy and quick project (unlike taming the wild multi-beast our garage had become.

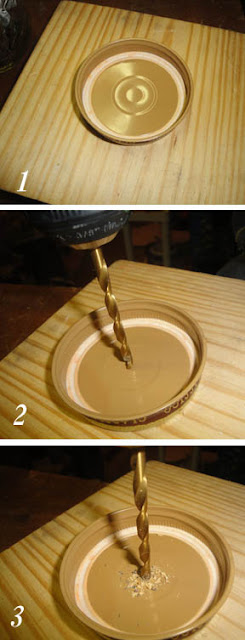
1) First I put the jar lid on top of a scrap piece of wood. 2) Then I centered my drill. 3) And drilled through the lid (check the size of your screw to make sure you choose a drill bit that equals the diameter of the screw, but not large enough for the screw head to go through.

Then I used a screwdriver and attached the lid to the underside of my shelf.

Then simply screwed the jar into the lid! Repeated that process three more times and filled the jars with the odds and ends that needed a place to be stored.

Ultimately, I finished cleaning the garage so I have room to set up a spray tent and start working on this sad little chair I found on the curb. Look here to see her transformation! I have to tell you, it is going to be quite a job. I took her completely apart, but I can rebuild her. I have the technology. Better, stronger, faster than before! (oops, The Six Million Dollar Man started playing in my head.)

Update: I was feeling pretty embarrassed after showing you my messy garage. So, here is proof that I really did clean it up. We still have a lot of stuff to fit in a small area, but at least I can walk around and find things now!

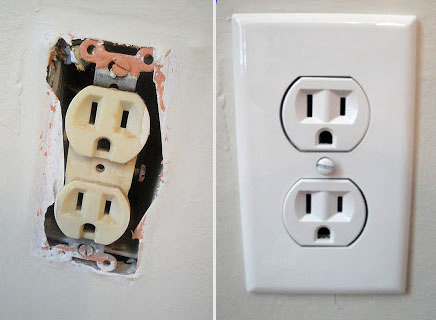
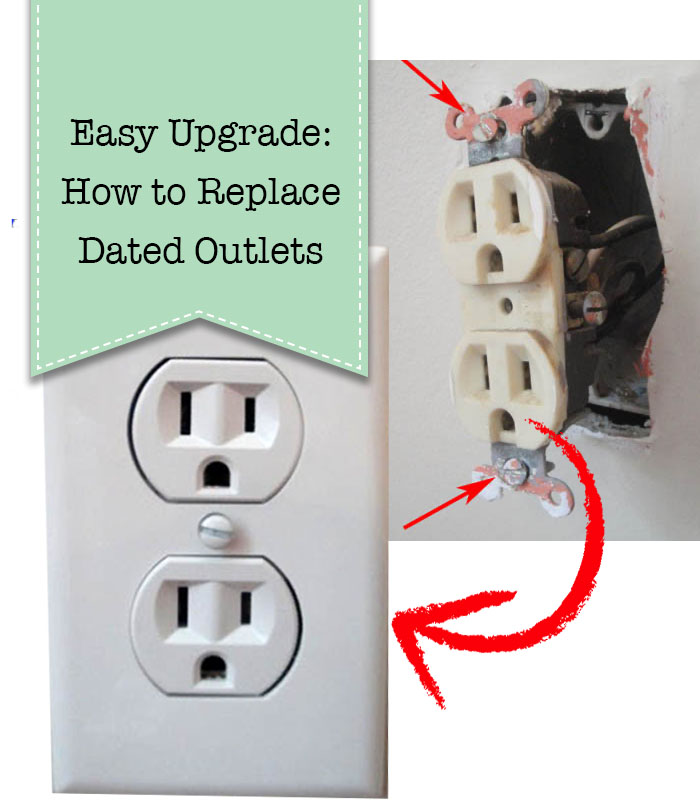
old outlet to new outlet

So, this is one of those not so pretty posts, but I promise it is Oh So Handy! Learn how to easily change out an old outlet.

tutorial for updating an old outlet

Changing Out an Old (UGLY) Outlet

Our home was built in 1978 and most of our outlets are almond colored and many are so worn that they won’t hold a plug anymore. I used to get annoyed EVERY TIME I vacuumed downstairs and turned the corner only to have the vacuum plug slip from the outlet. Not only is this frustrating, but it is also a fire hazard. Old outlets should be replaced for safety reasons (but, hey, I’m okay if you just want to change them to a pretty white outlet.). Changing Out an Old Outlet is easy!

old outlet to new outlet

I distinctly remember my father showing me how to wire an outlet when I was about eight years old. I didn’t remember exactly what he taught me, but I do remember the feeling that – yes, I can do this myself! Being the father of three girls, Dad taught us all the things he would have taught a son. This is a picture of my Dad, my sisters and me teaching him all we knew about bows, barrettes and bobby pins.

Changing Out an Old (UGLY) Outlet

I know several of you would never think of taking apart your outlet. You might say electricity scares you. Well, that is a good thing! A healthy fear of electricity will make you more cautious, so don’t lose that fear. It is a good thing to double and triple check your safety when working with electricity. Now, are you ready to update your outlets? Changing Out an Old Outlet is a relatively easy task to do. And, I promise I will show you step-by-step instructions.

I highly recommend performing outlet replacements during daylight hours (or have a lamp that you can plug into an extension cord from another room.) Also, don’t let your little ones watch you, we don’t want them to stick a screwdriver in the outlet when you aren’t looking. Therefore, it is best to handle this fix during nap times.

Materials needed:

(I’ve included affiliate links for your convenience. I earn a small percentage from a purchase using these links. There is no additional cost to you. You can read more about affiliate links here.)

Changing Out an Old (UGLY) Outlet

* It is safest to work with tools that have rubber or plastic handles that won’t conduct electricity.

Changing Out an Old (UGLY) Outlet

Optional tools:

  • vacuum to clean out the receptacle box (there will be dirt and dust in there and this may be the only opportunity you will have to clean it!)
  • cushion to sit on
  • power drill with screwdriver bits to speed up the process

Required Safety Instruction:

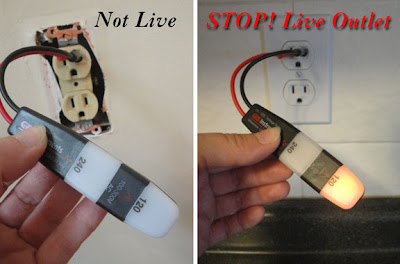
Turn off the power to the outlet you are working on. I highly recommend putting a night light or light in the outlet and turn it on. Then shut off the circuit at your circuit breaker and check to see that the light has gone out.

Also note that just because two outlets are in the same room, it doesn’t necessarily mean that they are on the same circuit. Plus, it is possible for the top and bottom of one outlet to be on separate circuits. Always check both the top and bottom of an outlet before you work on it.

Instructions:

Okay, let’s begin. Take a deep breath and realize that if an 8 yr. old can do it, so can you!

1. First, turn off your power, double check both outlets with your light to make sure the power is out to both top and bottom outlets.

2. Then take out your voltage tester. Insert a probe into each of the top two holes.  If the tester lights up, you need to back up and turn off the power to the outlet! If it doesn’t light up, then check the bottom outlet as well. Still no light? Perfect, the power is off to your outlet.

Changing Out an Old (UGLY) Outlet

3. If you haven’t done so already, remove the face plate from your outlet by unscrewing the middle screw.

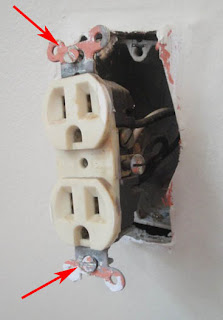
4. Unscrew the two mounting screws as shown below.

Changing Out an Old (UGLY) Outlet

5. Gently pull the outlet out of the receptacle box. Inspect the outlet and see if you have the same amp replacement outlet. (Usually there are marking denoting 15A 125V or 20A 120V on the silver tabs, on the back or near the screw hole in the middle of the outlet.)

6. Note which wires are attached to the outlet and where. Then make a drawing if you need to of their position. Or work by transferring one wire at a time.

Changing Out an Old (UGLY) Outlet

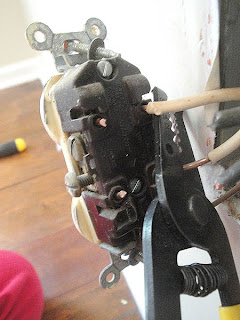
7. If the wires are wrapped around screws (lucky you), unscrew your wires and skip to step 10.  If your wires are poked into holes in the back of the outlet, you may choose to try to release them by poking a flat head screwdriver into the slot next to the wire, or you will need to cut the wires as close to the outlet as possible.

Changing Out an Old (UGLY) Outlet

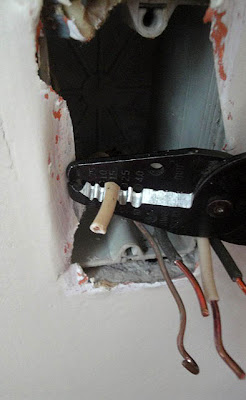
8. Now strip about 1/4 inch of the insulation from the end of your wire.Then gently use your wire strippers to clamp down on the wire being sure it is scoring the insulation. If you need to, rotate your wire strippers 90 degrees and cut through the insulation again. then while the strippers are still around the wire, pull gently towards the end of the wire to remove the cut insulation.

Changing Out an Old (UGLY) Outlet

9. Next take your needle nosed pliers and grasp the end of your wire and twist the end to make a shepherds hook shape. Do this for all your remaining wires.

Changing Out an Old (UGLY) Outlet

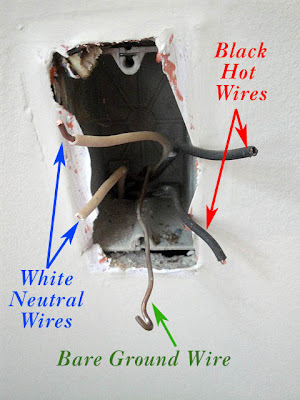
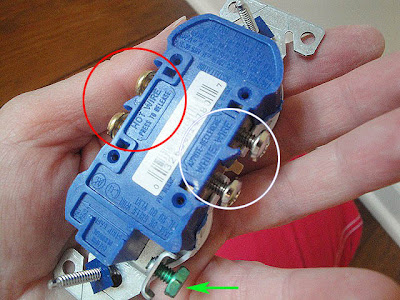
10. Looking at the back of your new outlet, you will see that one side has silver screws and/or markings on the back that says white wire. The other side of the outlet should have gold screws and/or markings indicating hot wires (the black wires). And one screw towards the bottom that is green, this screw is for your bare or ground wire.

Changing Out an Old (UGLY) Outlet

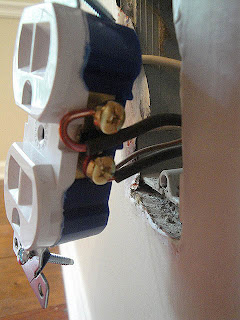
11. Hook each of your wires around the appropriate screw (Gold Screws = Black wires;  Silver screws = White wires;  Green screw = bare or green wire).

Changing Out an Old (UGLY) Outlet

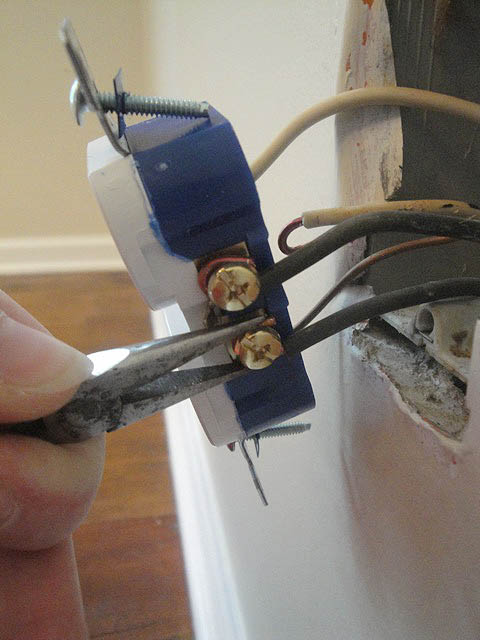
12. Further, using your needle nosed pliers, pinch your wires tightly around the screws attempting to close the loop.

Changing Out an Old (UGLY) Outlet

13. After that tighten each screw being sure that the wire stays tightly wrapped around the screw.


Changing Out an Old (UGLY) Outlet

14. If all your wires have been screwed tightly onto the outlet you can gently push your outlet back into the receptacle box. Try to rock the outlet in by alternately pushing on the top and then the bottom. If your outlet doesn’t go in, pull it out and rearrange the wires so they fold neatly behind the outlet and try again.

Changing Out an Old (UGLY) Outlet

15. Screw in the mounting screws.

16.  Finally, replace the faceplate.


Changing Out an Old (UGLY) Outlet

Now you can turn the power back on and use a nightlight or lamp to make sure your outlet works!

Hey, you are done! Congratulations, you did it. Reach up and pat yourself on the back because I’m proud of you! Now that you know Changing Out an Old Outlet is easy as can be, I have a next level swap for you! You can use the same tutorial to install a USB Charging outlet!

Let me know how you did. Changing Out an Old Outlet was easy, wasn’t it?!