I’ve been keeping a secret from y’all and I just can’t live with it anymore. I have a miracle stain remover recipe that has time and again proven to work on some of the most stubborn stains. Plus, find out why we don’t need dryer sheets anymore!

miracle stain remover

Miracle Stain Remover and a Healthier Alternative to Dryer Sheets

Recently, Pretty Handsome Guy came back from a business trip with a stained button-down shirt. It had wing sauce on it AND it had been allowed to settle for a few days AND he hadn’t pre-soaked it or used any stain remover. (Have I not taught him anything?! Sigh.) I thought for sure the shirt was a goner. But, I decided to put my miracle stain remover recipe to the test. Low and behold after 24 hours of soaking in the concoction, the stain was magically gone! No scrubbing, it was simply gone. Can I apply for a magic wand now?

I can’t lay claim to the recipe. I found it on our local “Mommy” message board back when I was a new mom. But, this recipe has worked on more stains than I can count.


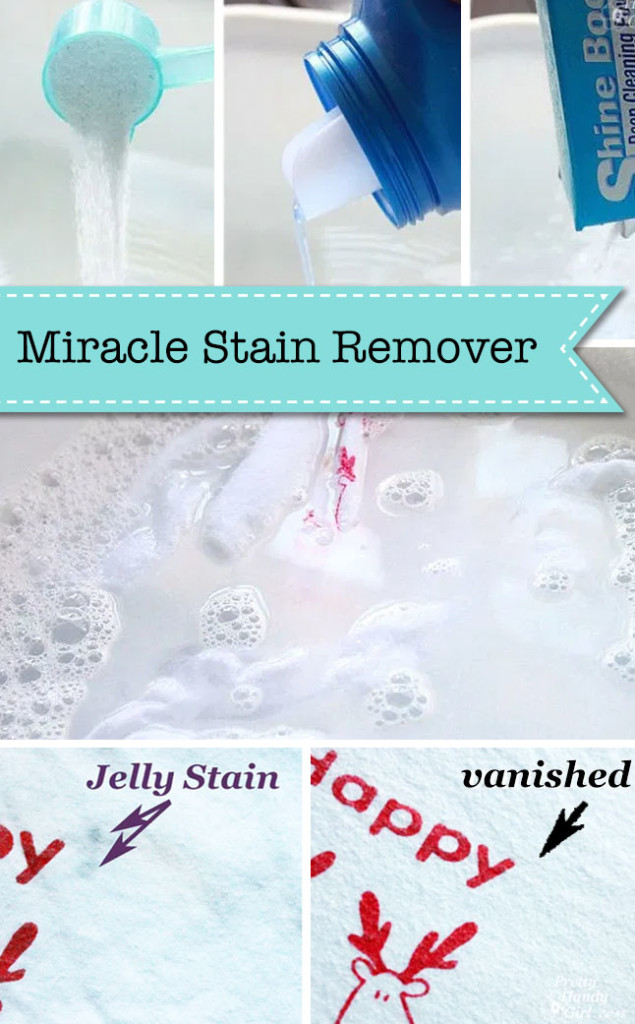
I mixed up a batch today to try on one of my son’s shirts that got blueberry jelly on it. My mom tried to wash it to get the stain out, but it was still there after laundering. Normally once a stain goes through the dryer it is set in. But, that didn’t deter the me from trying my Miracle Stain Remover. Sit back and learn young Jedis (we watched Star Wars last week, so it is on my brain.)

Miracle Stain Remover…

Ingredients:

(I’ve included affiliate links for your convenience. I earn a small percentage from a purchase using these links. There is no additional cost to you. You can read more about affiliate links here.)

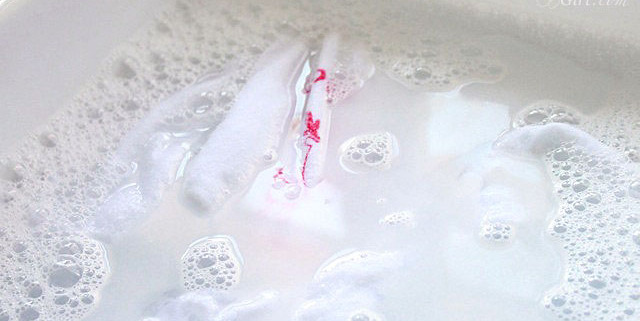
Fill your basin with warm water then add the Oxi-clean, Clorox 2, and powdered Dish Detergent. Give it a swirl and mix until the powders dissolve and bubbles form.

Place the stained garment into the mixture, being sure the stain is submerged. After two hours you can take a peek! My stain was gone.

For tougher stains, let it soak overnight. Remove the clothing to behold the miracle! Normally I will throw the garment into the wash, but you could simply rinse and dry it.

And, this formula is also safe for colors as well!

Laundry Detergent…

In the spirit of sharing, I also have this recipe for Making Your Own Laundry Detergent for only $1.25 per year! I mean, have you seen the price of laundry detergent lately?! 200 oz. for “gulp” $35! Whereas the recipe I made yielded 250 oz. for….are you ready for this…$0.61! This is a 97% saving on detergent by making your own.

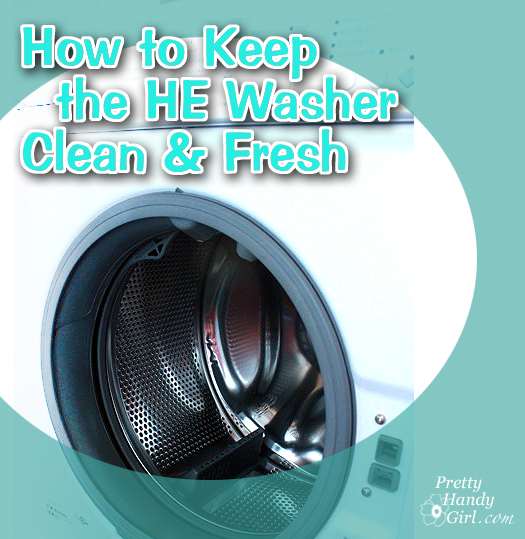
And the best news is that it is safe for HE washers. You only need 1/4 cup per load. Click Here to Get the Recipe for Making Your Own Laundry Detergent for $1.25 per year!

Drying clothes…

And since I’m talking laundry today, this post wouldn’t be complete without mentioning my secret weapon for drying clothes.

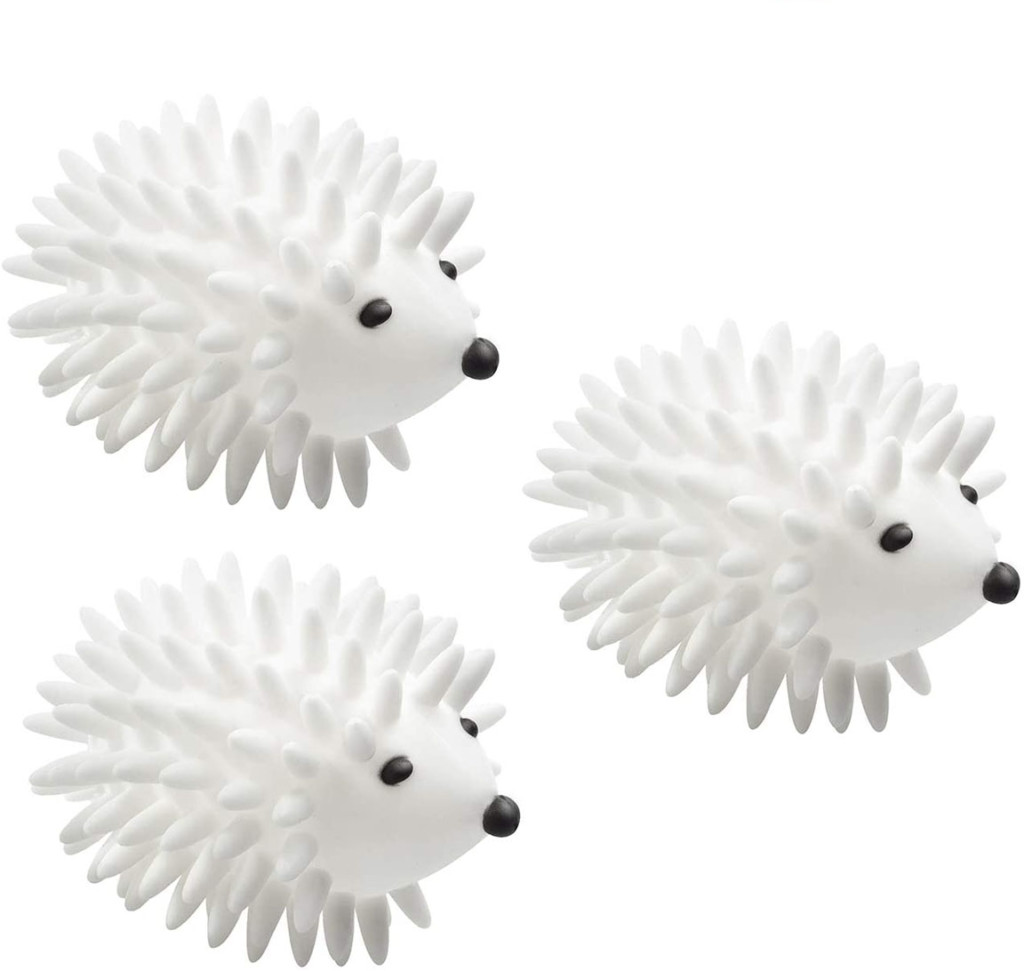
I use two of them! They may look like medieval torture devices or rabid animals, but these little hedgehog dryer balls have completely kicked our fabric softener sheets to the curb! I haven’t used dryer sheets in over 9 years now! At first I was concerned about static (the bane of my hair’s existence), but then a friend told me that you can eliminate static by not letting your clothes over dry. Simply shut off the dryer when your clothes are about 95% dry. Don’t let the dryer run and run and run until the clothes are piping hot and there isn’t a spot of dampness on them. Instead, let the moisture sensor (if you have one) do its job and it should shut off right before the clothes are dry. The waistbands in jeans or sweatpants may feel slightly damp, but everything else feels dry. And most importantly, pull out fleece, polyester, or synthetic clothes about halfway through the cycle.

The dryer balls (you should use two) work together to punch, separate, fluff, and dry your clothes. They also help keep wrinkles to a minimum, but I’m not afraid of a few wrinkles (see my no iron solution to wrinkles post.) The Dryer Balls cost less than $10, but the cost savings of not using dryer sheets is definitely worth it. Plus, you don’t have to stress about the chemicals that are in dryer sheets. These little wonder balls (I can’t believe I just typed that) last for a long time, but it’s good to have three in case one hedgehog loses a nose (it can happen.) I have been using mine for over nine years. They start to get darker on the nubs from dye in your clothing, but it doesn’t transfer and it doesn’t hurt their effectiveness.

I hope you found these laundry tips helpful. Please share with a friend!
miracle stain remover

Removing a door’s hardware (knobs, latch assembly, hinges) is really a piece of cake if you know what you are doing.

There are several reasons you might need to remove a door from its hinges:

  1. The lock is broken and you can’t open the door.
  2. You want to replace your door.
  3. You want to replace the hinges.
  4. Your six year old was warned that if he slams his door one more time he will lose the door (true story).
  5. You want to repaint the door.

When I decided to give my downstairs half bathroom a makeover, I knew I needed to paint the door as well. The easiest way to repaint a door is to remove it from the hinges, remove all the hardware, and lay it flat on sawhorses and paint horizontally.

Before I show you how to paint the door, I will share with you how to remove the door, hinges, and the door knobs (or locksets if it has a key hole). How to remove the locksets is a helpful skill to learn should you wish to replace your door knobs, deadbolts or locksets.

Letting you in on a little secret: Speaking of replacing locksets, did you know that if your house has several different locks you can have them rekeyed to just one key as long as they are all the same brand? When we moved into our home we had three different locks (2 Schlage and 1 Kwikset) and keys to only ONE lock! Arrggghhhh!  Unfortunately, I didn’t have the keys for either Schlage locks.) But, I really wanted to change the locks for the whole house. When I got a quote from a locksmith, I nearly passed out. $250 to get all our locks to match and to cut a few spare keys!

I thanked them and hung up. So, here is what I did. I bought one new Schlage lockset (handles and deadbolt set) for the Kwikset door. Then I took the locksets off the other two doors and brought them to a local locksmith (Busse’s Lock Service in Raleigh.) They were able to rekey both locks using my new Schlage key. The cost was under $50!

Photo courtesy of Handlesets.com

Later when the old lock on our front door broke, I ordered new ones from Handlesets.com (they sell all types of door hardware) and the customer service rep helped me enter the code from our master key when I placed the order. That way my new locks would match the rest of our house. Best of all they didn’t charge extra to for that service!

Sorry for the diversion, but I really wanted to let you in on that little secret.

Removing the Door Handles and Latch Assembly:

There are several types of door handles, you will need to inspect yours to determine how to remove it. Most door handles have screws on the interior side (for safety reasons, you definitely want them on the interior) that you unscrew to release the handles. Our door handles are a little different, but almost as easy to remove.

Insert a flat head screwdriver into the little slot on the side of the handle.

Pull the handle out and away from the door until it releases.

Unscrew the collar (also called a trim piece or escutcheon – yup, there is that word again!) that is up against the door until it comes off. You might need to use pliers to coax it free.

When it releases from the threads, remove the collar (ring, trim piece, escutcheon, WHATEVER.)

Gently pull the other handle off.

To remove the latch assembly, unscrew the two screws above and below the latch.

Gently pry the latch assembly out.

And remove it being sure to keep the screws with the latch.

Removing the hinges:

If you have the type of door hinges that the pin can be removed from, follow these instructions. If not, you will have to unscrew the hinges from your door (but don’t worry, I’ll show you how to do that in a minute.)

Removing the hinge pin is a snap. I use a flat head screwdriver and a hammer. Set the screwdriver just below the head of the pin and tap it lightly with the hammer until the screwdriver can fit below the head. If you can’t get the screwdriver under the head of the pin, insert the screwdriver into the bottom of the hinge and tap the bottom of the pin up slightly. Then angle the screwdriver end up and the handle down. Continue to tap on the screwdriver handle with the hammer until you can release the pin*.

*Oh, and before you remove all the pins, you may want to ask someone help hold the door while you remove the pins from the other hinges. Not that I’ve ever made that mistake (uh, okay, maybe I did.)

Remove the other two hinge pins and gently pull the door off the hinges.

Use a screwdriver or cordless drill with a screwdriver bit to remove the hinges from the door and door frame if you are painting the trim as well.

I ran into a few painted over screws that I couldn’t turn. Here is how to deal with those little buggers.

Lay your door on it’s side with the hinge facing up. Fit a screwdriver into the screw slots as best you can.

Then use a hammer to bang on the other end of the screwdriver.

This will either crack the paint or make enough of an indentation that you can turn the screw.

Be sure to keep all your hinges and screws in a separate bowl or bag.

Now you are ready to paint your door or paint your hardware (Like Beckie at Infarrantly Creative did HERE) or both! More tutorials to come.

Our downstair’s bathroom is a little retreat for me from the boys. It is a great place to catch up on my Country Living magazines and if I bring my iPhone with me I can check email. Best of all the boys know to respect my privacy (well, most of the time.)

When we first moved in Pretty Handsome Guy accidentally leaned against the TP holder and pushed it through the wall. I patched it and painted the brush stroke texture on the walls trying to hide the poor condition of the walls.

Unfortunately, spending that much time in that bathroom gave me lots of time to focus on all the imperfections. The uneven paint where the trim meets the wall, the dinged, scratched and pocked wall, the beech veneer vanity, and the NASTY RUSTY ESCUTCHEON.

Es-car-go what? An escutcheon is the metal collar that covers the hole in the wall where a plumbing pipe extends out of the wall.

So, in a spur of the moment decision, I decided to give the whole room a facelift. I know, from one little escutcheon to an entire room refresh, that’s how I roll.

First things first, I told that rusty eyesore that he was coming out TODAY!

I’ve replace the escutcheons on several of our shower heads. They are really easy to replace. Simply unscrew the shower head, slip off the old U-G-L-Y escutcheon and slip on the new one, then screw the shower head back on. Easy peasy!!! So, I figured replacing the toilet’s water supply line escutcheon would be just as easy.

First, I turned off the water to the whole house. Then I drained all the faucets (if you don’t drain the upstairs faucets as well as the downstairs, then you will have a lot of water being pulled down by gravity when you open up your supply line.

When the faucets ran dry, I placed a bucket under the water supply line (some water will still drip out), then removed the braided line going to the toilet.

Next l grabbed my super strength Irwin groove lock plyers. With the long handles and adjustable grip, these are my new “go to” pliers. I began to turn the water supply line, lefty loosey. I turned, and turned, and turned, and turned.

Finally, I realized that it wasn’t unscrewing. Ooops! I guess it wasn’t a threaded nut. (I will be checking that nut for the next few months to make sure that it isn’t leaking now that I loosened it.)

Okay, on to Plan B (because I am good to my word and I promise that escutchen that he was gone, TODAY!) I went back to my tool stash and I grabbed these suckas! That’s right escutcheon, quake in your boots!

These are my tin snips (okay they really need a more macho name like Tin Destroyer!) Escutcheon, say your goodbyes! And within one easy snip, that rusty, nasty ring was HISTORY!

To put the new one on I made a cut through the new ring and then rotated the two edges in opposite directions.

I slipped it over the supply line and bent it back into shape. By positioning the cut section on the bottom, you don’t even notice it!

AND WOW, look at how that new escutcheon just brightens up that little corner under the toilet. It even distracts your eye from the uneven trim paint and the dark purple walls! Ha, ha, yes, this is a true after pictures. I’ll be sharing with you more this week on “How to Prep a Room for Painting”; “How to Paint a Room Like a Professional”; “How to Paint Doors, the Right Way”; and maybe more.

Okay, gotta go, I have a few more finishing touches to put on my retreat half bathroom. Check back soon to see the progress.

How to Retrieve Items from the Drain

While I was working on my Goodwill sweater, I accidentally dropped one of the pins down the drain.

Now, I could have just left it there, but my “Ms. Fix-It” brain knew that I couldn’t do that. If I left it, I would be dealing with a clogged drain in a month since it would trap all kinds of hair and unmentionable gunk. So, I did the “right” thing and set about retrieving it myself. (And, blogging about it so you know what to do as well.)

Here’s How to Retrieve a Item Dropped Down the Drain

IMPORTANT! If you do happen to drop anything down the drain, turn off the water IMMEDIATELY! You don’t want the water to wash the item beyond the drain, because then it is gone forever (unless you want to explore your city sewer lines.)

Tools:
(contains affiliate links)

 Instructions:

1. Put on your rubber gloves (who knows what’s hiding in your drain!)

2. Set the basin under your sink’s P-trap.

3. Then grab some channel lock type pliers. Irwin recently sent me this quick release Irwin GrooveLock Pliers
that are a snap to open and close the jaws. Just push the button, slide the handle up or down and release. Super quick and easy!

4. Loosen the lower slip nut ring.

Then slide it up to release one end of the P-trap.

5. Loosen the upper /upper slip nut ring (pay no attention to the slip nut I’m loosening, I actually had to loosen the one above it to free my P-trap.)

6. Then pull down on the P-trap to remove it (you will see in this picture that I had loosened the slip nut higher up to release the drain assembly.) Ewww, gross, don’t look at that string of hair hanging from the drain.


7. (Here comes the next disgusting part.) Turn your P-trap upside down to empty the contents into the basin. Oh and be sure you are wearing your rubber gloves (do as I say, not as I do!)

8. Remove your object. Luckily my pin fell out immediately. If your drain is really gunked up, you may need to run some water or use an old bottle brush to clean out the P-trap and release your object from the yuckiness. In fact, it’s probably a good idea to clean it out anyway while you have it off (if you can stomach it.)

9. Reverse the steps to re-assemble the P-trap. With plumbing I usually hand tighten the nuts and then use the pliers to give it an extra 1/4 turn (but I’m a weakling. If you battle me in arm wrestling YOU WILL WIN!)

10. When your spouse comes home, brag about how you retrieved something from the drain all by yourself!

PHGFancySign

I just finished cleaning the bathroom. The mirror is spotless, the sink is clean, and the toilet is cl… ARGH! I just cleaned the toilet and that flaking hinge just dropped another metal flake on the seat!

Do any of you have a similar problem? Or is your seat old and looks dirty no matter how much elbow grease you use?
Don’t put up with ugly toilet seats any longer! This fix is inexpensive and takes about 15 minutes.
New toilet seats start at $20. I splurged on this soft close lid for $35. I’ll tell you why later.
You will need pliers and a phillips or flat head screw driver (depending on your bolts).
I received the adjustable Irwin Groove Lock pliers from Irwin to test, and I do have to say that I like the convenience of adjusting it with the push of a button. That sure beats looking for the right size socket or crescent wrench! {I was not paid to say that, see my product review disclosure here}

Locate the bolt and nut under your toilet bowl. Use your pliers to loosen the nut (remember lefty loosey to unscrew.)

Once the nuts on both sides have been removed, you should be able to lift the old seat straight up and off the toilet.
Locate the two seat bolts for your new seat. (Be sure to familiarize yourself with the instructions for your new seat since they may vary slightly from this post. Some seats have the bolts attached to the seat already.)
Insert them into the holes in the toilet.
Thread the nut onto the bolts from underneath. Then tighten the bolts with a screwdriver and hold the nut with your pliers. Be careful not to over-tighten the bolts or your toilet bowl could crack.
The seat I bought has a quick release hinge so you can thoroughly clean the seat and around the hinges. Simply snap the seat on top of the bolts and then rotate the hinge cap clockwise to lock it in place.

And the seat is installed. I love that our toilet seat has a soft close feature.

Now the true reason I bought the soft close seat:

These two boys in training think it is pretty cool and are MORE likely to lift up the toilet seat when using it and return it to the down position when done! Any of you who have little boys in your home, you know what I’m talking about, right?! You have to start training them young! (I never want to sit down in droplets of pee ever again. Ewwww!)