How NOT to Replace an Escutcheon
Our downstair’s bathroom is a little retreat for me from the boys. It is a great place to catch up on my Country Living magazines and if I bring my iPhone with me I can check email. Best of all the boys know to respect my privacy (well, most of the time.)
When we first moved in Pretty Handsome Guy accidentally leaned against the TP holder and pushed it through the wall. I patched it and painted the brush stroke texture on the walls trying to hide the poor condition of the walls.
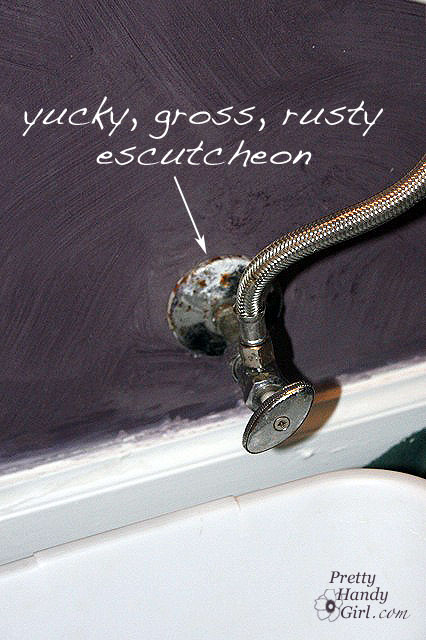
Unfortunately, spending that much time in that bathroom gave me lots of time to focus on all the imperfections. The uneven paint where the trim meets the wall, the dinged, scratched and pocked wall, the beech veneer vanity, and the NASTY RUSTY ESCUTCHEON.
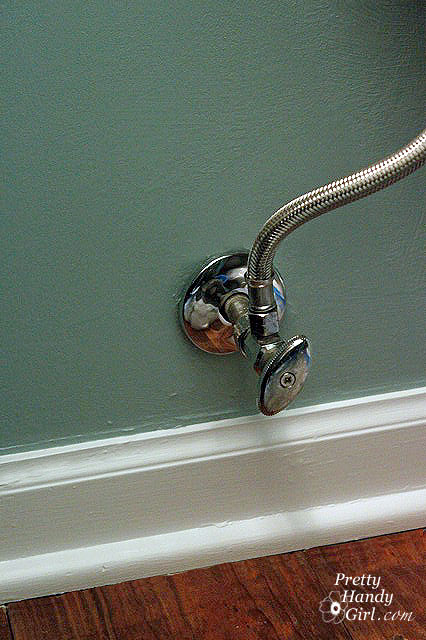
Es-car-go what? An escutcheon is the metal collar that covers the hole in the wall where a plumbing pipe extends out of the wall.
So, in a spur of the moment decision, I decided to give the whole room a facelift. I know, from one little escutcheon to an entire room refresh, that’s how I roll.
First things first, I told that rusty eyesore that he was coming out TODAY!
I’ve replace the escutcheons on several of our shower heads. They are really easy to replace. Simply unscrew the shower head, slip off the old U-G-L-Y escutcheon and slip on the new one, then screw the shower head back on. Easy peasy!!! So, I figured replacing the toilet’s water supply line escutcheon would be just as easy.
First, I turned off the water to the whole house. Then I drained all the faucets (if you don’t drain the upstairs faucets as well as the downstairs, then you will have a lot of water being pulled down by gravity when you open up your supply line.
When the faucets ran dry, I placed a bucket under the water supply line (some water will still drip out), then removed the braided line going to the toilet.
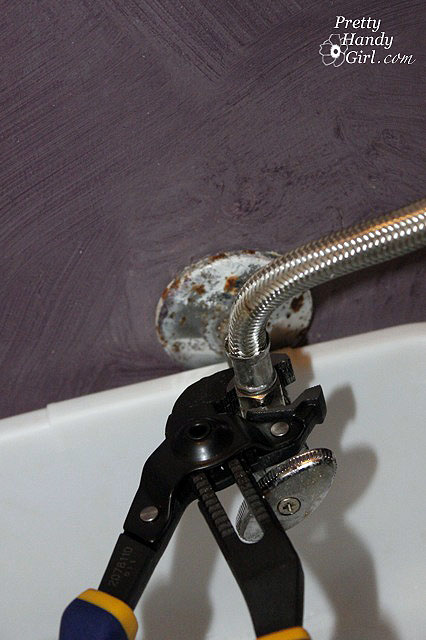
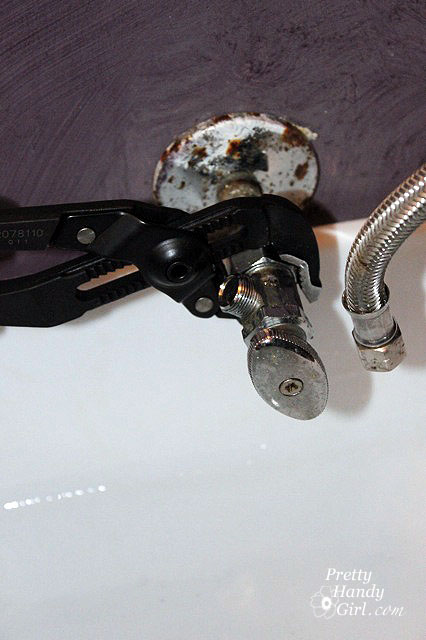
Next l grabbed my super strength Irwin groove lock plyers. With the long handles and adjustable grip, these are my new “go to” pliers. I began to turn the water supply line, lefty loosey. I turned, and turned, and turned, and turned.
Finally, I realized that it wasn’t unscrewing. Ooops! I guess it wasn’t a threaded nut. (I will be checking that nut for the next few months to make sure that it isn’t leaking now that I loosened it.)
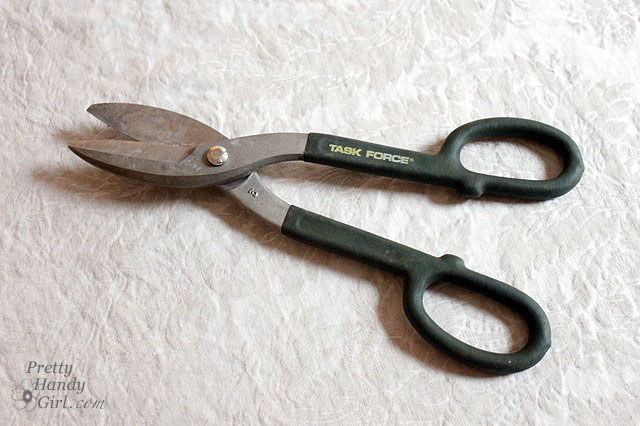
Okay, on to Plan B (because I am good to my word and I promise that escutchen that he was gone, TODAY!) I went back to my tool stash and I grabbed these suckas! That’s right escutcheon, quake in your boots!
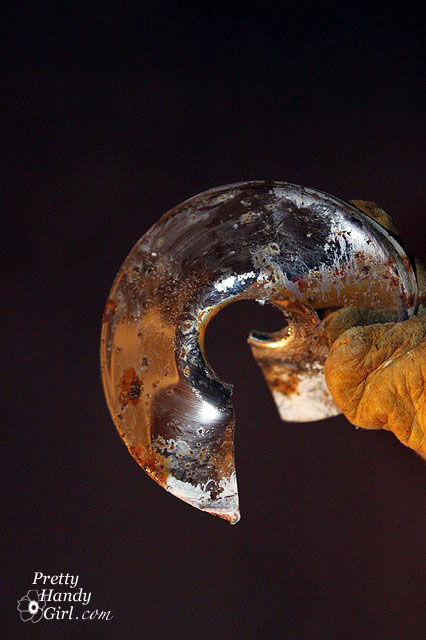
These are my tin snips (okay they really need a more macho name like Tin Destroyer!) Escutcheon, say your goodbyes! And within one easy snip, that rusty, nasty ring was HISTORY!
To put the new one on I made a cut through the new ring and then rotated the two edges in opposite directions.
I slipped it over the supply line and bent it back into shape. By positioning the cut section on the bottom, you don’t even notice it!
AND WOW, look at how that new escutcheon just brightens up that little corner under the toilet. It even distracts your eye from the uneven trim paint and the dark purple walls! Ha, ha, yes, this is a true after pictures. I’ll be sharing with you more this week on “How to Prep a Room for Painting”; “How to Paint a Room Like a Professional”; “How to Paint Doors, the Right Way”; and maybe more.
Okay, gotta go, I have a few more finishing touches to put on my retreat half bathroom. Check back soon to see the progress.



I am having difficulty in removing my wall cover (escutcheon) on my Pfister shower control – similar to the Georgetown model. I do not want to cut it off as you did above, so how do I remove it carefully? this sucker is stuck well as I have tried to pry it off and pull it off with needle nose pliers. Do you think I can use a hot hair dryer? Any help will be appreciated. thanks.
Yeah, if you just turn the nut you’ll be turning forever… The nut and valve are two pieces that squeeze together over a little brass ring that provides the seal. Next time, hold the valve with one hand, so it doesn’t spin, and then turn the nut. The way you did it is 10x more work.
Thanks for the information. Next time I won’t bother trying to turn it ;-D.
I have to ask, are your escutcheon’s rusting again? I’m planning on doing mine here soon but I’m going to nickle plate the dam things! In fact I’m planning on making a business on ebay selling the nickel plated escutcheon’s. I was actaully goolgling around to see if this was a issue, you know rusty escutcheon’s. Obviously it is, a problem. The question I now have is are they rusting again already? seems to me that the will. Hence why I’m going at this bussiness opertunity of nickle plating the dam escutcheons. 🙂
You actually should have spun that nut clockwise/righty tight. Just ran into this last night. I made the same mistake on those compression style valves. Don’t think that you are “supposed” to re-use them but as long as you clean up all the surfaces it should be okay.
Thank you for this tip! Am retiling my bathroom, and was looking for some way to replace that ugly looking cover !!
I recently replaced a leaking hot water valve stop for the first time and learned this in the process — the reason your water line valve stop would not come off no matter how much you rotated it “left loosey” is because it is a compression nut style valve, and compression nuts actually fit the opposite way. It’s as if you should look at the nut from the wall’s viewpoint rather than your viewpoint. By turning the nut counterclockwise you were actually tightening the valve onto the pipe. To remove the valve, you should turn the nut clockwise. However, even after the valve came off, you would still need to remove the compression ring/sleeve under the nut, which after that much tightening and subsequent deforming, would likely be difficult to do without a compression sleeve puller tool. So cutting the escutcheon or using a hinged one seems to have been the right thing to do anyway.
OH JT, where were you when I needed you. Thanks for the pointer. Yes, I think you are correct. However, I had turned it both ways to no avail. Anyway, at least this is a temporary fix for an ugly escutcheon ;-).
Just one more thought — again, your pics and this website are excellent — but I didn’t initially read the comments. I think it would be helpful to edit and suggest the hinged escutcheon as an option. Maybe also a link to a site w/ them for an example (e.g. one web site had a link to plumbingsupply dot com — being a VERY newbie DIY’er, it was helpful to see a picture of them; note: I don’t have any experience with this supplier). Thanks, again — very helpful
This is excellent — first site that came up. By the way, another site recommends the same thing you did — for when it’s a ‘soldered-on’ pipe as opposed to a ‘threaded on’ pipe. And … I found the path that I’m goin to take in a diy forum: cut off the old escutcheon and buy a hinged one instead. The hinged ones are more money but not much more (plumbingsupply dot com looks like they have some). One guy said to cut off the old one using a dremel but … I’d rather see if I can use the tin snips. Thanks, again — this was bothering me and … it was nice to see that you tackled it.
Before going all ninja on this, take some light steel wool (Brillo pad works great) and try lightly buffing the surface, you may be pleasantly surprised and save some time.