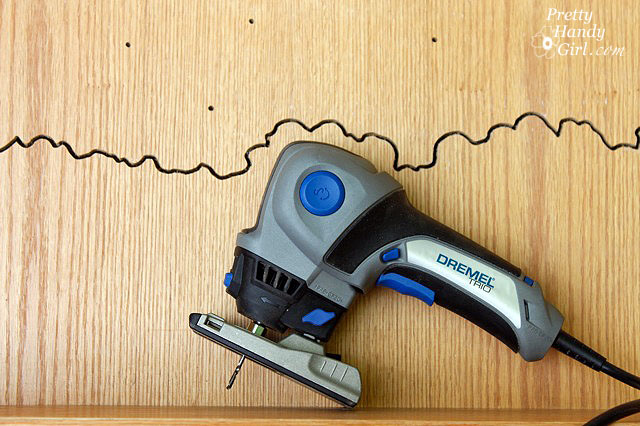
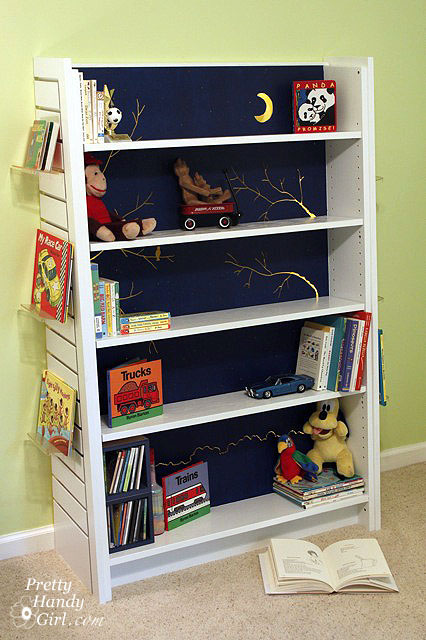
I hope you will take a moment to view how I test drove my Dremel Trio. This is seriously a really fun power tool! Just be sure you are safe so as not to ruin the fun. Eye protection, face mask, and ear plugs. Check.

For those of you who like to skip to the end of the book and see the ending, here you go:
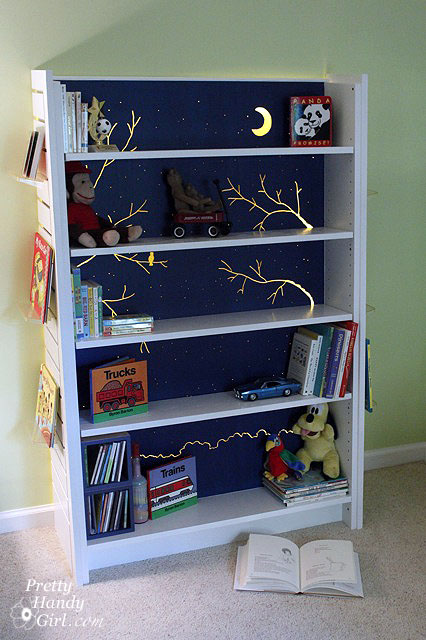

For the rest of you, here is how I created this cut out/back lit bookshelf that started life as a bookshelf from a closing Borders bookstore.


Tutorial for creating a cut out bookcase:
Almost any bookcase will work for this project, but the ones that have a thin wood (can be masonite) backing will work best. Set up a work area that you don’t mind getting dusty and dirty. Remove the shelves from your bookcase.

Cutting the endcap:

Materials:

  • circular saw
  • level
  • clamp
  • scrap wood
  • screws
  • drill

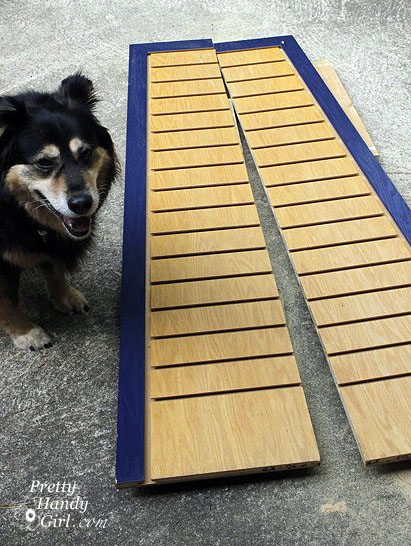
I cut the endcap in half lengthwise so I could use half for each end of my bookshelf, and to position it flush against the wall. To cut a straight line using a circular saw, I clamped one end of a level to the endcap. My level wasn’t long enough, so I drilled a scrap piece of wood on top of the level and into the end cap to support the other end.


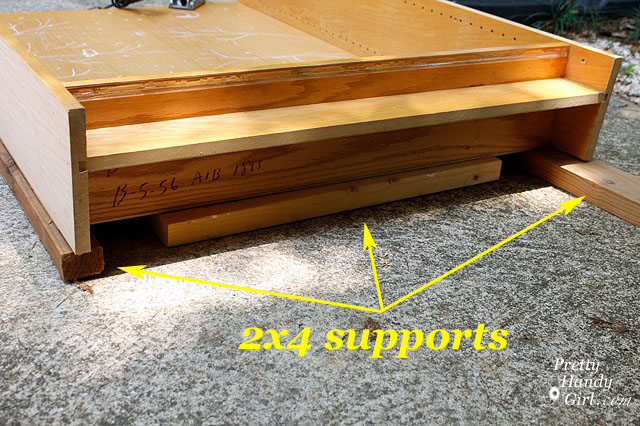
I set the circular saw blade just below the depth of the endcap. By resting the endcap on two 2×4″ boards, I was able to creative a gap below the endcap for the sawblade to pass through.Then I ran the circular saw along the level for a straight cut. Straight as an arrow, and it met Pretty Handy Dog’s approval.

Cutting out the backing design and painting:

Materials:

  • Dremel Trio
  • Palm sander
  • Sandpaper (100 grit & 220 grit)
  • Scrap 2×4 lumber
  • Chalk or pencil
  • Wood putty
  • Putty knife
  • Primer
  • Paint (white and navy blue)
  • 3M Clean Edge technology painter’s tape
  • Newspapers
  • 2″ paint brush
  • Small paint roller and tray

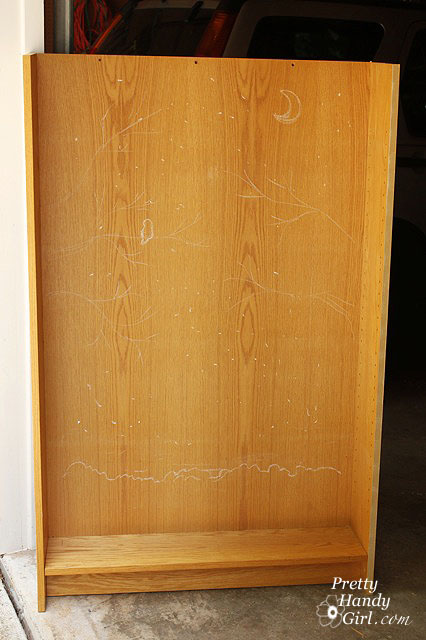
Sketch out the design on your bookshelf (using chalk or pencil) before beginning.

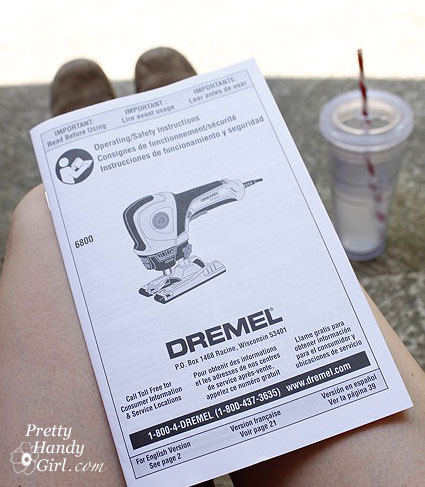
Before using any new power tool, take some time to read through the manual.

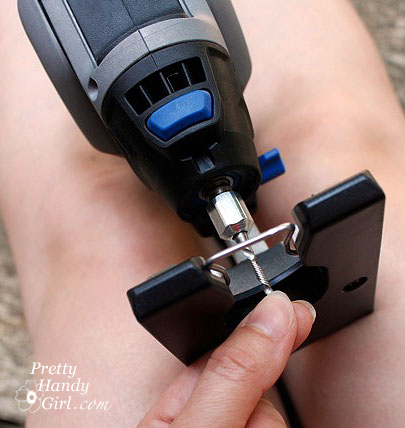
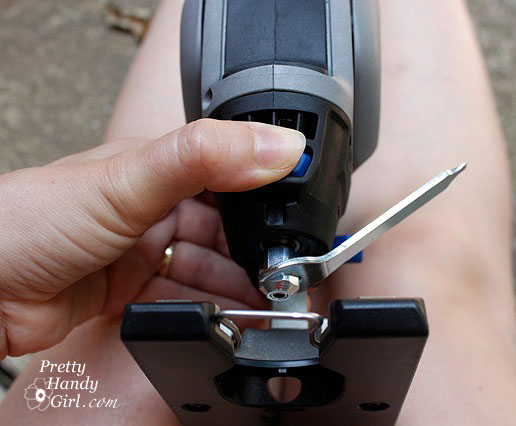
To insert a bit into the Dremel Trio, you push in the blue (shaft lock) button on the front and use the enclosed wrench to loosen the collet nut on the tool.

Insert the cutting bit into the Trio. (The trio also comes with a sanding drum bit and a routing bit!)

Tighten the collet nut with the wrench.

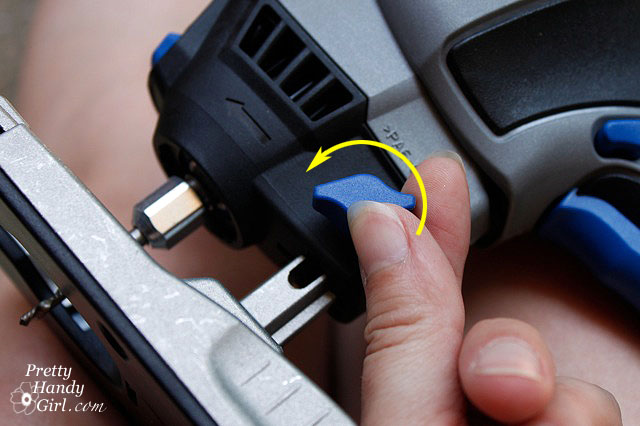
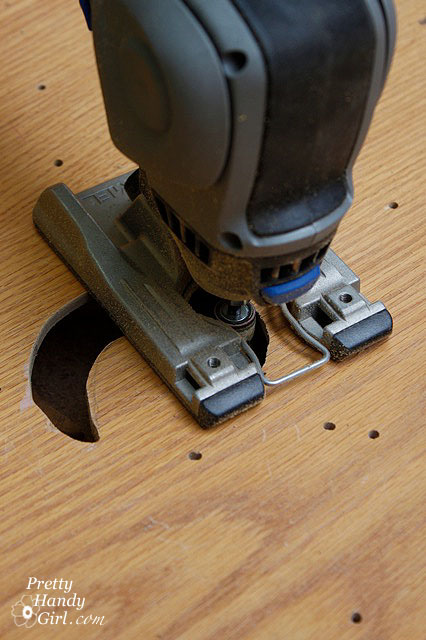
Turn the blue handle on the side of the TRIO to raise or lower the base plate.

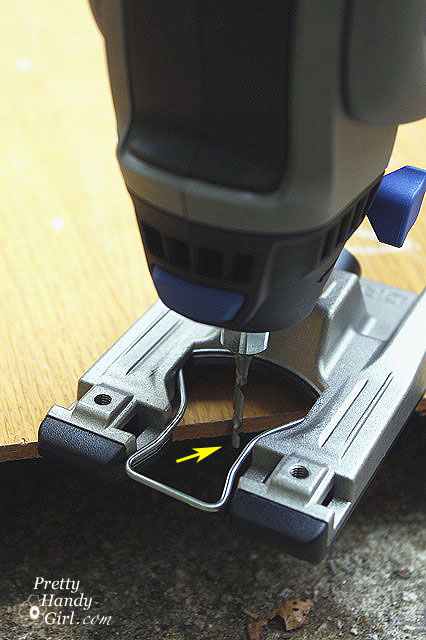
Adjust the base plate until the cutting bit extends slightly below the wood backing of your bookcase.

Lay the bookcase down on its back. Position 2×4 boards under the edges of the bookcase (or you will be cutting into concrete. I’m pretty sure the TRIO is not capable of that, but I could be wrong.)

Plug in your Trio and get ready to have some FUN! You may want to practice on a scrap piece of wood before working on your bookcase. The TRIO allows you to change directions quickly and easily. Creating fanciful cuts is a breeze!

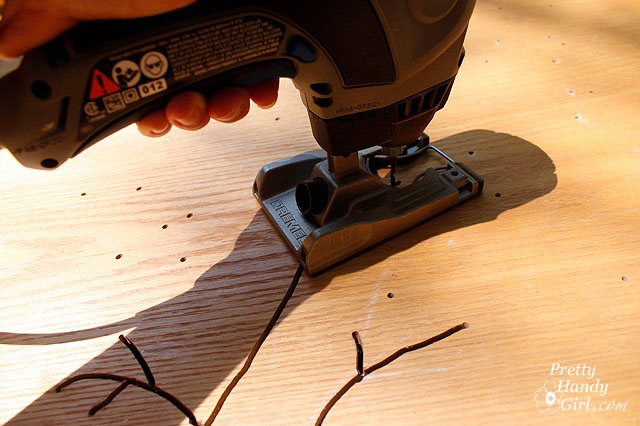
Squeeze the trigger and when the bit reaches full speed you can plunge it into the workpiece. For the pin holes hold the Trio steady, insert the bit and then lift it back out of the same hole.

To cut trees and other designs, plunge the TRIO into the wood and then slowly move the tool through the wood to carve your design. Be wary of long “V” shape cuts as they will make the backing weaker.

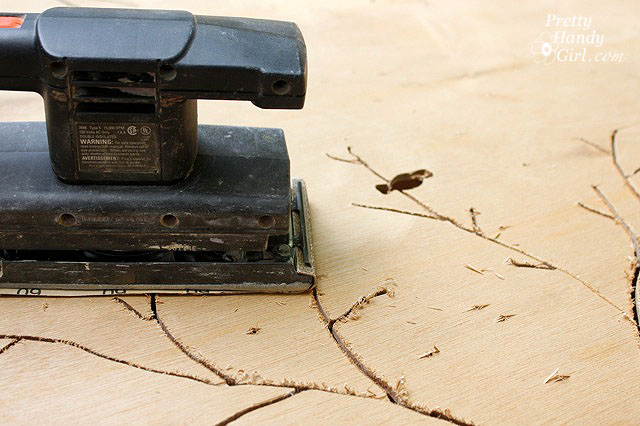
When your design has been completed, use the power sander to sand the back of the bookcase (where the majority of the splintering will have occurred.)

Insert the sanding drum bit into the TRIO and sand any large cut out areas.

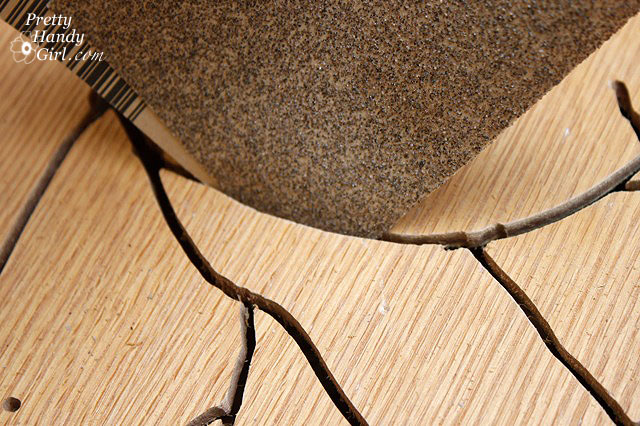
Fold a piece of sandpaper in half and feed it through the thin lines of the branches to sand any rough edges that can’t be reached with the sanding bit.

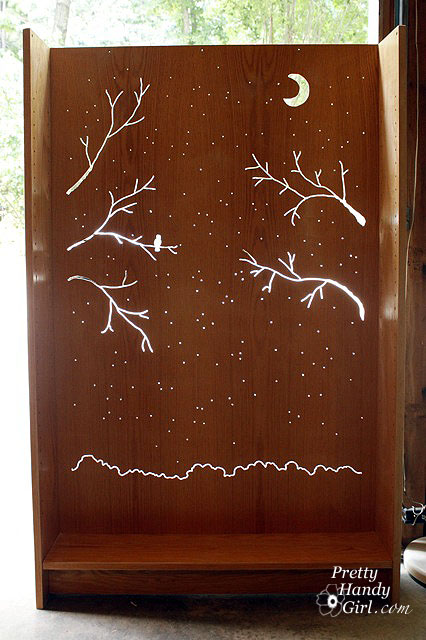
Set the bookcase upright and inspect the cuts for more splinters. You can preview what your design will look like when lit up. Lookin’ good, huh?!

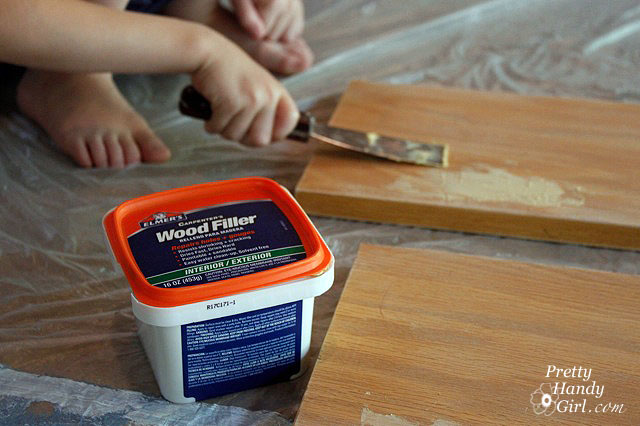
Before sanding the rest of the bookshelf, repair any dents or holes with wood putty. (This is a post I wrote about repairing all types of holes if you need help.)

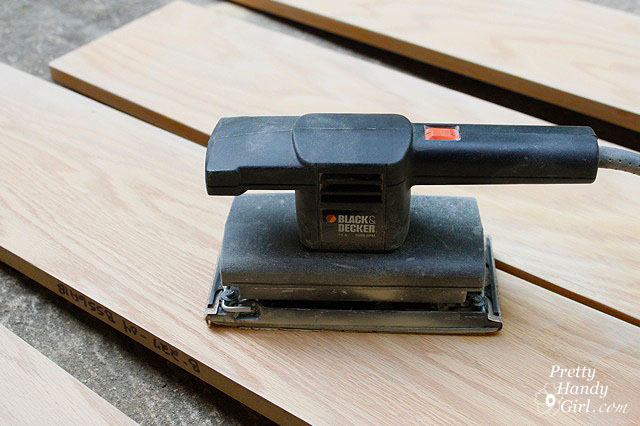
Use the palm sander and a fine grit (220 grit) sandpaper to rough up the rest of the bookshelf.

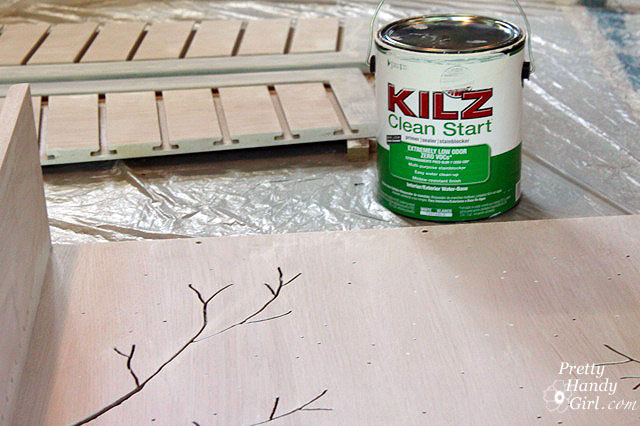
Apply a coat of primer to the bookcase, shelves and sides. (Still working on emptying that can of KILZ Clean Start primer! Love that stuff.

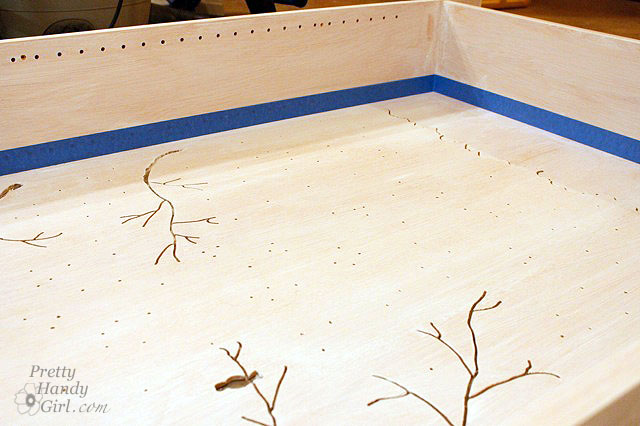
When the primer has dried, mask off the sides of the bookcase where they meet the back.

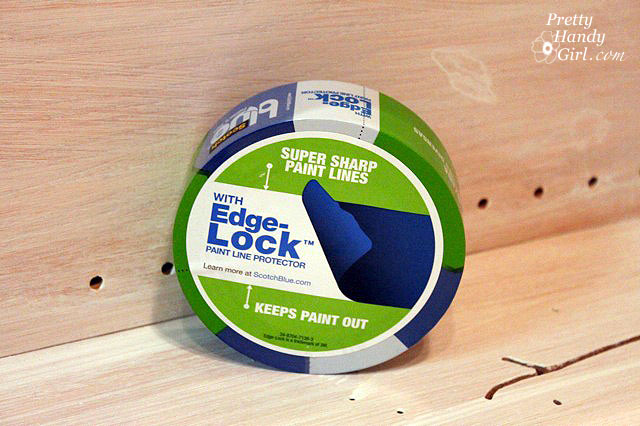
3M sent me this Scotch Blue Painter’s tape with Edge-Lock protector to try. I was skeptical, but when I pulled the tape off it did give me a clean edge. The only place I had a little bit of seepage was in the corners where I didn’t press the tape tightly into the corner. The key to using this tape is to firmly press the edges with your finger to engage the “Edge-Lock” seal. I haven’t tried it for painting walls, but you better believe I have a wall project coming up that I can try it on.

Paint the back of your bookcase. I chose a very dark navy blue. To save paint, I used a medium blue paint for my first coat to darken the back and hopefully save paint.

Then paint one coat of the navy blue.

Follow up with a second coat to eliminate any streaking.

When the navy paint has dried, tape along the edges of the navy blue backing, where it meets the sides. Slip pieces of newspaper underneath to catch any paint splashes. (Will you get a load of my lazy supervisor! You think he’s been working hard in the heat? Uh no, that would be me doing all the work and him snoozing away the day.)

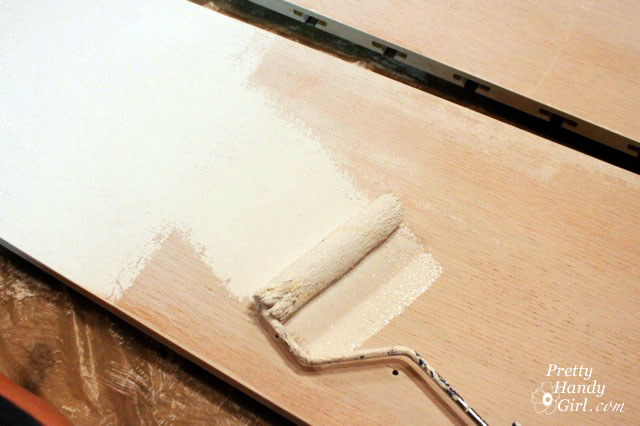
Paint the rest of the bookcase, the sides and the shelves white. I used two coats of Benjamin Moore Impervo Semi-gloss white.

Once the paint has dried completely, re-assemble the bookcase. And screw the end cap halves onto either side of the bookcase.

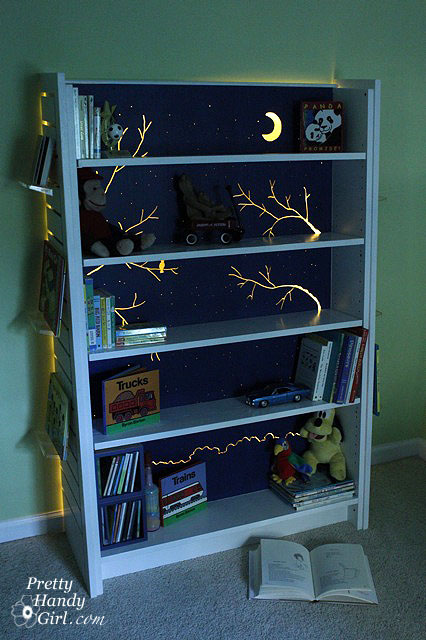
I installed a light rope behind the bookcase (tutorial to come at a later date) and set the lights on a timer. The rope light comes on at dusk and illuminates all the cut outs.

There is a very soft glow emitted from the back of the bookcase.

It provides the perfect amount of light for my son who HAS to have a light on at night.

My only complaint about the rope lights is that they give off a strong plastic odor. But, after a week the smell has dissipated.

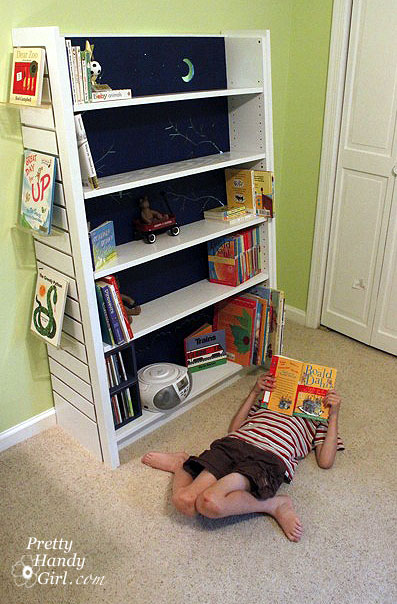
I had the foresight to purchase a few of the clear display stands that slide into the end caps of the bookcase. It makes it easy to display books to pique my son’s reading interests.

Oh look! There he is now! Mission accomplished, reading interest piqued. Yes, I think he is double-jointed and a teacher pointed out that both my son’s sit like that. Must be in the genes.

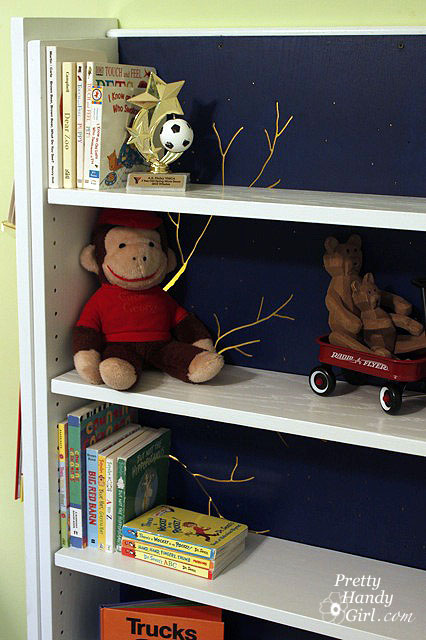
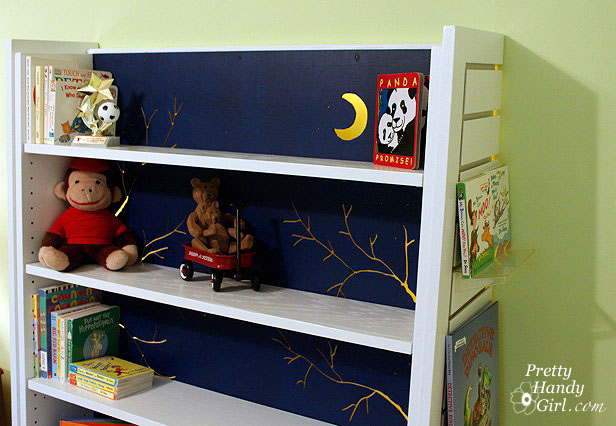
A few more detailed pictures of the bookshelf. This has to be one of my favorite projects I’ve created recently. And it wasn’t very difficult to complete.



I had the pleasure of talking to Meri-K Appy the other day. She is the president of the Home Safety Council and has over 30 years experience talking about home safety. Meri-K has a wealth of knowledge about preventing injuries while working on and around your home.

I recorded my talk with her and hope you will take some time to listen. It is very valuable information! Feel free to put the audio on and then do something else while you listen.

You may also want to take some time to browse the Home Safety Council website. The site is filled with loads of information about how to keep you and your family safety (not just during DIY projects.)

SafetyTalk.mp3


Cliff Notes:

I took some notes during the talk. These sum up some of the important information:


There are 3 Parts of the Body that are Most Important to Protect:

1. Eyes (Vision) – Wear safety goggles when doing any type of DIY project

No need to look like Professor Scientist! You can wear eye protection that is fashionable and comfortable!

3M Tekk Tortoise Shell Safety Glasses

3M Tekk Fuel Light Safety Eyewear

When should you wear eye protection?

a. Using Power Tools

b. Mowing the Lawn

c. Sanding, cutting glass

d. Any activity where objects can become airborne

2. Ears (Hearing) – About 30 million people are exposed to dangerously high levels of noise. Anything over 85 decibels can damage your hearing.
Some examples of common decibel levels:

    • City Traffic Noise (inside a car) – 85db
    • Lawn Mower – 107db
    • Power Saw – 110db
    • Rock Concert – 115 db

When should you wear ear protections?

Ear protection should be worn anytime you are participating in an activity that has loud noise. Even noises that don’t seem excessively loud can cause hearing loss when sustained exposure occurs.

Ear protection is cheap! Foam inserts cost only a few bucks and will protect your hearing.

Inexpensive Ear Protection – Foam Ear Plugs

For better protection and comfort, use ear muff style ear protectors. Check out these! They have a am/fm radio built into them. So you can rock out (at a safe decibel level) while working on your projects.

3M Digital Work tunes ear muffs

Be aware, that one danger while wearing hearing protection is not being able to hear a child come up to you. So make sure your children are being attended to when you need to use power tools and hearing protection.

3. Lungs (Breathing) – Great care should be taken when working with anything that has dust or chemical particulates.

    • Some examples of when you should wear a mask or respirator:
    • Sanding
    • Scraping
    • Spray Painting
    • Using Chemicals
    • Disturbing anything that contains lead, asbestos or other potentially dangerous particles

You’ve seen the scary chemical warfare respirators:

You don’t have to wear that fashion for home repairs (unless you are working around lead or asbestos.)

Protection can be as simple as this dust mask:

8661Pc1-A/8661 - Dust Mask 5Pk

Better yet, 3M has a cool flow valve dust mask for a few dollars more that is more comfortable and less hot:

3M 8511 N95 Particulate Respirator Mask (10 pack)

Test lead paint in your home with these easy to use Lead Check testers:

3M Lead Test Kit – 2 pk – $12.45

Top Causes of Home Improvement Injuries:

  1. Falling from a height (beyond broken bones you could receive head trauma)
  2. Harsh chemicals and poisons (Using and not following the warning labels)
  3. Electricity (electrocution and/or fire if wiring is done improperly)
  4. Power tool injuries (cuts, burns, lacerations, etc.)
  5. Fatigue (tired, using medications, or controlled substances)
  6. Poor Lighting (Unable to see what you are working on.)

Home improvement Injuries are Completely Preventable:

  1. Be sure to 3 points of contact on ladders ( i.e. one hand and two feet on a ladder at all times.)
  2. Always read labels and follow directions (ventilation, safety gear, disposal, etc.)
  3. Electricity (hire a licensed professional if you are unfamiliar with building codes and wiring safety.)
  4. Get trained on how to use power tools (don’t trust an instructor that isn’t wearing proper safety gear.)
  5. Be alert, awake, healthy, and not taking any substances that can impair you when DIYing.
  6. Work in a well lit area.
  7. Consider hiring a professional for lead paint remediation, plumbing, electrical or any profession that requires a license.


Important Websites and Phone Number:

If you ever have any questions about lead in your home and how to deal with it:

3MLeadCheck.com

National Lead Information Center: 1-800-424-LEAD(5323)

If you have any questions about the presence of lead, asbestos or radon in you home, contact the EPA or go to their website for more information. These organizations have been set up to protect your health. Not to make your life more difficult!

EPA.gov

National Center for Healthy Housing

More information about 3M safety gear and where you can get your own:

3MTekk.com


Disclosure: Meri-K Appy and Pretty Handy Girl are not paid sponsors of 3M. However, 3M made a donation to the Home Safety Council to fund more research and development preventing injuries.

Some of the images above are linked to affiliate links which pay a very small percentage to Pretty Handy Girl. Other images simply link to online stores where you can purchase the product for your convenience.


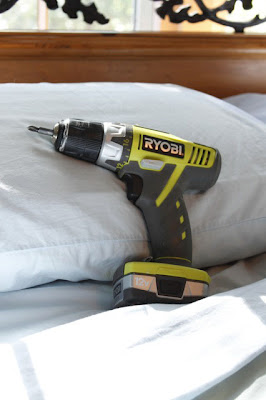
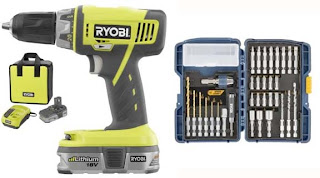
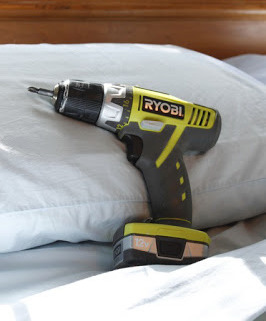
Recently I was asked what my favorite tool is. My Ryobi 12 volt Lithium Ion battery cordless drill was the first thing to pop into my head. Barely a week passes that I don’t reach for my drill to assist with a few loose screws (not that I personally have any of those.) For a homeowner or DIYer, this tool is indispensable. It allows you to drill holes, remove or drive screws and – well – just look like you know what you are doing.

I don’t just like this power tool, I love my cordless drill! Shhhh, don’t tell Pretty Handsome Guy, he might be offended. My drill is my right hand man, helping me breeze through projects with power and speed.

About 15 years ago my father-in-law asked what I wanted for Christmas, and I boldly told him that I wanted a cordless drill. He kind of chuckled and said, “Heh heh. Okay.” You see we didn’t own a house at that time, and I was still a young woman in my 20’s. But, I had big DIY dreams and I knew I wanted a power tool.

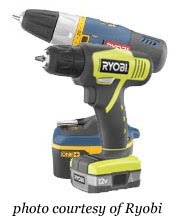
Christmas morning I opened a present to reveal a brand new 18 volt Ryobi Cordless Drill. It had loads of power, two torque settings and the whizzing whir that made me feel like I was one mean carpenter! Plus, it came with a flashlight attachment that would make any nighttime lurker look like a deer caught in the headlights.

I have owned two more Ryobi cordless drills since that Christmas present. The first one had to be replaced when the battery no longer held a charge (and buying a new battery cost almost as much as a new drill.) The second one met its demise when I accidentally drove a screw right up against a fence post and didn’t notice that the chuck was winding the opposite way until the collar was stuck wide open.

So, it was back to my super box home improvement store to shop for a new drill.

As I was checking out the drills and learning about the merits of the lithium ion batteries, I asked about the voltage difference since I had been using a 14.4 volt drill. The salesman at the “Big Orange” told me that I wouldn’t notice the difference between a 12 volt and a 14.4 volt. Pisshwah! I did notice a difference, especially when trying to drive screws into hardwoods! (My DIY abilities are sometimes underestimated by a few.) But, the salesman was correct, under normal daily use I don’t notice the difference.

Two things that I DO really love about this new Ryobi 12 volt Lithium Ion drill:  

1. Battery Life: Yes, yes, yes! What you have heard is true. The battery does last much longer. I’ve told you how much I use my drill, and I have only charged the battery on this drill three times since January 2010. That is 11 mos. of use including laying a sub-floor in our living room. The only downside to the lithium ion battery (but also could be considered an upside) is that the drill doesn’t slow or lose power until a few seconds before the battery is dead. Therefore there is very little warning that the battery is about to give up. At least this drill comes with a spare battery, so I always keep it charged.

2. Size and weight: 3.5 lbs. of cordless drill made me feel like I had some serious power in my hands! That is how much the old 18 volt Ryobi weighed. When I held the new 12 volt Ryobi drill, I embraced the lightness of its lithe 1.8 lbs! I can really appreciate the difference when reaching overhead to use the drill. Plus, this new drill with its smaller size and smaller grip fits perfectly in my hand.

As you can see below, my drill shows signs of being loved used frequently. But, it still works like the day I lifted it out of the box.

Some other features about this little green mean machine: 

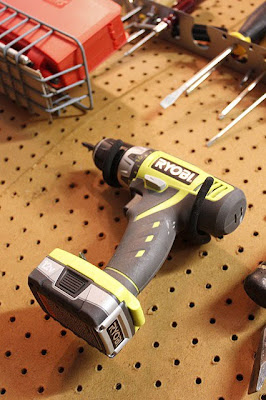
It comes with a charger, extra battery, a phillips and flat head bit. There is a magnetic bit shelf right above the battery. And a canvas storage case. But, my drill doesn’t get that much time stored away. It usually rests right here…

…ready to leap into action at a moments notice.

If you don’t own a cordless drill, I implore you to add this DIY essential to your holiday wishlist!

(I was not paid or compensated to write this post. This is my honest opinion and true feelings about my beloved cordless drill!)

When Miss Mustard Seed and I were junkin’ on Black Friday, she asked what I was looking for. I immediately answered rustic, rusty, and anything that looks aged and has a story to tell. I am so wacky like that, I could care less how well something is made or if it is an expensive antique. When I die, my kids are going to be sadly disappointed that all these antiques I’ve collected over the years aren’t worth a dime. C’est la vie, right?

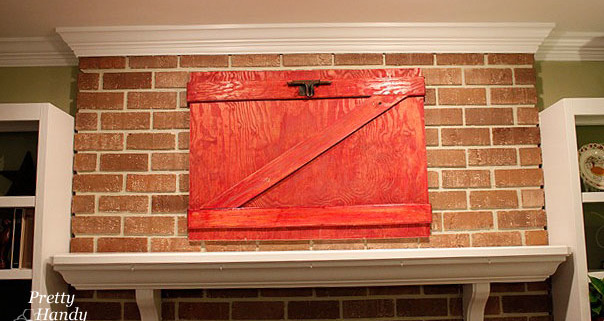
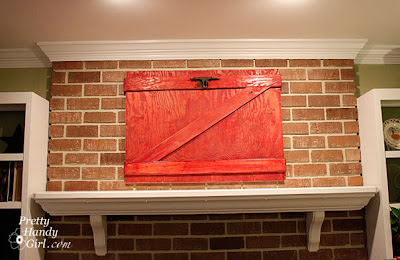
So, this year for our Christmas décor, I decided to create a natural rustic country inspired theme. What better way to invoke that spirit than with an old barn door. The only problem was that I didn’t own one. No problem, I’d just make one!

Materials:
Plywood board – painted or stained red
3 – 1″ x 4″ boards – painted or stained red
Nails or screws
Wood glue
D-ring picture hangers
Picture Wire
optional: Rusty door parts

In my “I can’t throw anything away scrap pile” I took some old plywood scraps that had been stained with red stain.

You will need to measured the space above your mantle, subtract a few inches from the top and bottom, then cut the plywood down to size (using a circular saw or table saw.)

Lay two 1″ x 4″ strips of plywood as cross pieces.

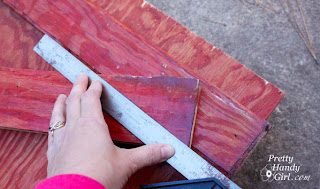
And one 1″ x 4″ piece at an angle. Draw a line where the horizontal pieces intersected with the diagonal piece.

Use a miter saw, circular saw or jig saw* to cut the angled cuts.

Liberally appy glue to the back of the 1″x4″ strips to secure them to the plywood base and then nail some finish nails into the strips to secure them. You can use a pneumatic nailer* if you have one, but screws or regular nails hammered in will work just as well! No need to buy any new tools for this project.

Hopefully you have a nail or hook already installed on your fireplace. Luckily I did, but in the past I have also just leaned artwork against the brick. So, if you choose to lean, ignore the next few steps.

Measure the location of the hook on your mantle. For example, if the hook is 20 inches from the ceiling, and you want your barn door’s top to hang 12 inches from the ceiling, then you will need to install the hooks 9 inches down from the top of the barn door. This will allow an inch for the wire to slack. Get out your D shaped picture hooks and screw them to the back of your barn door using a cordless drill* or just a screw driver and some muscles. Repeat on the opposite side.

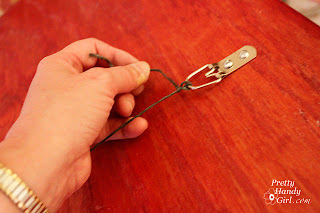
Feed some metal picture wire through one D ring. Twist once…

…then feed the wire back through the D ring and twist the rest of the wire tightly against itself.

Pull the wire taught and repeat on the opposite side.

This is the best way to attach picture wire so it doesn’t slip. If you are hanging something super heavy, you might need to loop the wire back through the D rings a few more times.

If you have some old gate handles, hinges, or latches, attach them to your door. I screwed this old RUSTY gate lock to the top of my barn door. It makes a convenient hanger for…

…my Christmas wreath!
That’s all I’m going to show you of our mantle today.

Did you like this post? Want to be notified when there are more fantastic tutorials by Pretty Handy Girl? Sign up to receive emails in your inbox:

Enter your email address:


Delivered by FeedBurner

Or follow me on Twitter or Facebook so you can be the first to know!


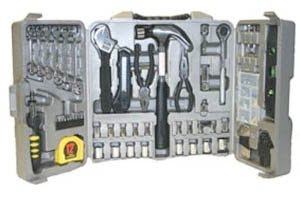
When I was 18, and bought my first car, and thought I was the coolest girl in town with a little zippy sportscar – sorry, just a little trip down memory lane.  My parents gave me my first tool kit. That tool kit is still with me today and I do use it a lot. The set has a series of sockets, crescent wrenches, interchangeable screwdriver bits, allen (hex) wrenches, needle nose pliers, and locking pliers.
 
That set got me through several repairs (both auto and home). Now, as a homeowner, I have found that there are a few more tools to have on hand.
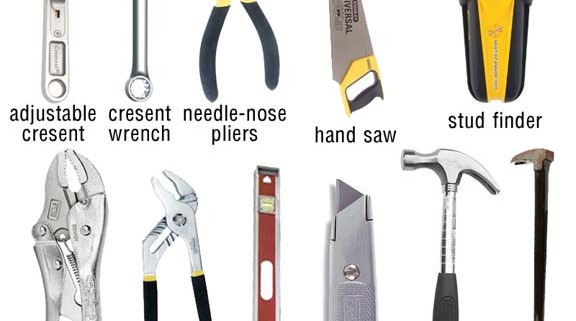
You will likely want to look for a multi-piece set like this one:
This will give you a wide variety of tools for a low cost. If you want a deal, try shopping for these sets around Father’s Day or Christmas. The set above was listed on Amazon.com for approximately $50 – $60.
Regardless if you are buying these items in a set or separate, these are the tools I recommend:
Homeowner essentials:
  1. Hammer
  2. Screwdrivers – Phillips head and a flat (straight or slotted) head. Try to buy a small and medium size of each.
  3. Allen (Hex) Wrenches in several sizes
  4. Adjustable Crescent Wrenches – I suggest buying at least two. One 6″ and one 10″
  5. Slip Joint Pliers (handy for overall gripping)
  6. Needle-nosed pliers
  7. Vice grips (Locking pliers)
  8. Tape Measure
  9. Level – 24″ is preferrable
  10. Utility knife (mat knife)
  11. Safety glasses
  12. 12″ Handsaw
  13. Stud Finder
  14. Flashlight
  15. Pry bar (must have a flat sharp side and the other side a notch for pulling nails.)
  16. Tool box or case to keep all of the above in 
  17. My favorite DIY guide to my home: Home Depot’s Home Improvement 1-2-3 – the best $15 I ever spent!
 Screwdriver bits:
 

Last but not least, the most indispensable tool I’ve ever owned:
Cordless Drill with screwdriver bits and a small set of drill bits 

For Electrical DIY:
  1. Wiring instruction book or guide
  2. Wire Cutters/Strippers
  3. Electrical Current tester 
    • You only need the simple tester with two probes and an indicator light to test if the power is on. 
For the committed DIYer:
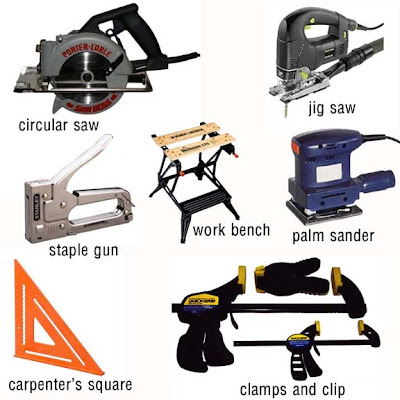
  1. Palm sander
  2. Carpenter’s square
  3. Staple gun
  4. Power Circular Saw 
    • Be sure to hold one in the store and feel how the grip feels in your hand. This is especially important as a woman with a smaller hand size. (more on power tool shopping in another blog post – coming soon!)
  5. Jig Saw
  6. Saw Horses or Folding Work Bench
  7. Clamps – A Variety of Adjustable Clamps and Clips

I hope this list gives you some good information so you won’t feel overwhelmed when buying tools. Definitely ask a sales person for help or opinions. Don’t tell them you are new at this. Ask them for the tool they would purchase if they were buying one for their shop. You should aim to buy a quality tool (especially power tools) that will last your lifetime. A cheap tool will either break or not have the power to do the job you need it to do. However, you don’t need to buy top of the line or break the bank to get a good tool.
Savings Tip: Many of the big box home improvement stores will usually price match tools that are priced cheaper at a competitor if it is the same make and model, plus take 10% off the price. Be sure to bring the ad with you or they will need to call or look up the price online.
 
Home Depots price guarantee:  
NOBODY BEATS OUR PRICES
If any competitor tries, we’ll beat their price by 10%. Guaranteed.*
*If you find a current lower price on an identical, in-stock item from any retailer, we will match the price and beat it by 10%. Excludes special orders, bid pricing, volume discounts, open-box merchandise, labor and installation, sales tax, rebate and free offers, typographical errors and online purchases.
Lowe’s price guarantee:
Everyday Low Prices, Guaranteed
We guarantee our everyday competitive prices. If you find a verifiable lower everyday or advertised price on an identical stock item at any local retail competitor that has the item in stock, we’ll beat their price by 10% when you buy from us. Just bring us the competitor’s current ad or we’ll call to verify the item’s price that you have found. Cash (charge card) and carry purchases only. Competitor’s closeout, special order, discontinued, clearance, liquidation and damaged items are excluded from this offer. On percent-off sales, Lowe’s will match the competitor’s percent-off offer. Limited to reasonable quantities for homeowner and one-house order quantities for cash and carry contractors. Current in-store price, if lower, overrides Lowe’s advertised price. Price guarantee honored at all Lowe’s retail locations. Labor charges for product installation are excluded from our price guarantee offer in our stores with an Installed Sales Program. Visit store for complete details.
Sear’s price guarantee:

If you find a lower price on an identical branded item with the same features (in Home Electronics identical brand and model number) currently available for sale at another local competitor retail store, Sears will match that price plus, give you 10% of the difference. Just bring in the original advertisement to a sales associate at the time of, or within 14 days after, your purchase. More fine print…

Happy Shopping!


Â