Valentines Day Wreath

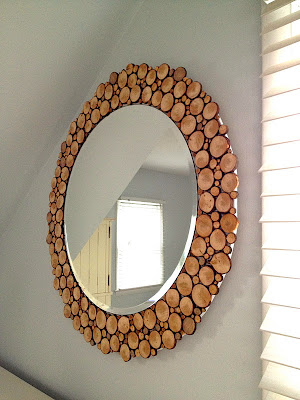
When I saw this mirror frame Jaime from That’s My Letter made, I was instantly head over heels in love with the branch circles.

Valentines Day Wreath

Valentine’s Day Wreath

So much so, that every branch I passed by I would think, “Hmmm, I wonder what the disks on that branch would look like. It’s a sickness y’all.

So, this past weekend, I hauled in a bunch of branches and began to formulate a design for my Valentine’s Day Wreath that wasn’t overtly cutesy.

Valentines Day Wreath

I even called my neighbor to ask if I could have one of their logs from their woodpile. (Yes, I was coveting thy neighbor’s wood. Sheesh.)

I am thrilled with the final results. Although I had to engage in a few extra spray painting steps to get here, I’ll spare you the details. Let’s just say that no matter what color you paint thin wire, it just doesn’t show up on top of wood disks.

Valentines Day Wreath

Here is the tutorial y’all. Take it or leave it, but just be sure you ask before cutting down your neighbor’s cherry tree.

Valentine’s Day Wreath Materials:

(I’ve included affiliate links for your convenience. I earn a small percentage from a purchase using these links. There is no additional cost to you. You can read more about affiliate links here.)

Start by setting up a stop block by clamping a small piece of wood against the fence of your miter saw. (Or be prepared to be diligent about measuring every slice you cut. My slices are 1.5″ wide.) IMPORTANT: Wear your eye protection and hearing protection!

Valentines Day Wreath

Hold your branch against the fence and cut into the log. The larger logs cut fine, but the smaller branches and sticks tended to kick back all over the place, so be sure you stay on the right side of the saw and the slices are on the left. This way you’ll be out of the path of the flying disks. Cut, until you have a large collection of wood slices in a variety of sizes.

Valentines Day Wreath

It was at this point that I looked down and noticed this little worm squeezing out of the log!

Valentines Day Wreath

Ewwww. I rushed inside to research killing bugs in wood. I read you can either bake your wood in the oven at 175˚F – 200˚F for a few hours. Or microwave the wood for a minute. Being the perfectionist and neurotic termite-fearing person I am, I did both!

Valentines Day Wreath

After roastin’ and nukin’ those little buggers, you can lay out the slices onto the plywood in a heart shape.

Valentines Day Wreath

Trace roughly around the shape.

Valentines Day Wreath

As I said I’m a perfectionist, so feel free to skip this next step.

Fold a piece of scrap paper in half and cut out a half heart shape to give you a symmetrical heart shape. Trace around the template onto the plywood.

Valentines Day Wreath

Use a jigsaw or Dremel TRIO to cut out around the shape.

Sand the edges until they are no longer jagged.

Lay the scrap paper template back on top of the heart shaped plywood. Fold it in half. Drill a hole through the top of one of the sides of the heart (through paper and wood.) Open the template back up and mark where the hole is in the paper. Drill through the other side.

Valentines Day Wreath

Thread a length of ribbon through one hole. Tie a washer onto the end of the ribbon on the back side.

Valentines Day Wreath

Hang the heart up in your desired location. Adjust the length of the ribbon and then tie another washer onto the ribbon.

Valentines Day Wreath

Begin to lay the wood slices back onto the plywood and start gluing each one using Liquid Nails.

Valentines Day Wreath

It may take a little maneuvering and trials to get the slices to fit neatly within the heart shape. But, hey it wouldn’t be fun without a little trial and error.

Valentines Day Wreath

After your shape is filled, lay a folded towel, some scrap wood and heavy weights on top. Do a few bicep curls before setting them down, just because.

Valentines Day Wreath

While your wooden heart is drying, bend the word “Love” into the wire using needle-nosed pliers.

Valentines Day Wreath

Wrap white pipe cleaners around the word.

Valentines Day Wreath

Then wrap red pipe cleaners around leaving space so the white pipe cleaner shows through.

Valentines Day Wreath

Tie a bow at the top of the hanger ribbon. Thread another length of ribbon through the bow and secure it to the “L” and “e” in Love.

Valentines Day Wreath

Find a spot to hang your unique wreath.

Valentines Day Wreath

I wonder if I can put another word on there for St. Patrick’s Day? Maybe “Luck” with some green ribbon.

 Valentines Day Wreath

Valentines Day Wreath

Valentines Day Wreath

Matchbox Car Racing Ramp

Do you have a little free time over the Christmas break? How about taking some time to make a wooden racing track with your kiddos!

DIY Matchbox Racing Track

If you have boys, I’m sure you have Hot Wheels cars in your home. They go hand-in-hand. My boys play with their race cars for hours!

They have several of the plastic tracks. And even a curly-Q racing ramp. But, honestly they seem to play with my scrap pieces of wood more than the plastic tracks. Chances are, if you or your spouse build things, you will have all the scraps of wood on hand to make this racing ramp.

My 7 year old and I worked together on this project. (He was my design consultant and he also helped with some of the assembly.) But, imagine the surprise on a child’s face if you made this ramp as a holiday or birthday gift!

Materials:


  • 2 – 1 x 4 x 13″ boards (tower sides)
  • 1- 1 x 4 x 9″ board (tower roof)
  • 2 – 1 x 8 x 33″ boards (ramp sides)
  • 1 – 1 x 6 x 33″ board (ramp)
  • 1 – 3/4″ dowel rod (cut to 12″)
  • 1 – 1/8″ dowel rods
  • 1 – thin rectangular strip for a divider 33″ long
  • 1 5/8″ screws
  • 1″ finish nails
  • 2″  finish nails
  • Gorilla Glue
  • Sandpaper
  • Primer
  • Spray paint
  • ScotchBlue Painter’s Tape
  • X-acto knife
  • Clamps
  • Cordless drill
  • Handsaw or miter saw
  • 3/4″ spade bit
  • 1/8″ drill bit

Start by cutting all your boards to length. Grab the ramp board (1 x 6 x 33″) and cut one end of the ramp at a 30˚ angle.

Glue the narrow strip onto the center of your ramp using a small amount of Gorilla Glue.

Clamp the strip and add a few 1″ finish nails to secure the strip.

Set up your boards as shown. Tilt the ramp up at the back, the angled cut will rest on the floor (not shown.)

Drive a few screws through the side walls and into the ramp with your drill.

Line up the tower sides approximately 2″ from the back edge of the ramp walls. Then secure them in place with a few more screws.

DIY Matchbox Racing Track

Drill a hole into each tower side large enough for the 3/4″ dowel rod to fit through.

Slide the dowel rod through and center it on the ramp.

Mark the location of the center of the left and right tracks onto the dowel rod. Measure the distance between the dowel rod and the ramp. Use this measurement to cut 2 pieces of 1/8″ dowel rod 1/2″ longer than that measurement.

Remove the 3/4″ dowel rod. Drill holes 1/8″ wide halfway through the big dowel rod at the locations you marked for the centers of the tracks.) Wrap a piece of painter’s tape around the drill to indicate a depth 2/3 of the way through the 3/4″ dowel rod. Then don’t let the bit go further than the tape into the rod.

Mark the location where the dowel meets the outside of the tower wall.

Drill a hole all the way through the large dowel rod. Insert the 3/4″ dowel rod through the holes in the tower walls. Glue the 1/8″ cut dowels into the halfway holes. Then cut and glue two more 1/8″ dowels to go through the 3/4″ dowel on the ouside of the tower walls. These will anchor the large dowel rod and keep it from slipping out of alignment.

Nail finish nails through the tower roof and into the walls of the tower.


That completes the building portion of this tutorial. Hopefully your ramp resembles this one:


Now it is time to add some pizzazz! Ka-chow!

My design consultant demanded fiery red flames and black on his ramp. (And what he wants, he gets!)

I lightly sanded the wood race track. Added a coat of primer and some red and yellow spray paint.

Then I cut out a flame design using ScotchBlue painter’s tape (4 pieces overlapping) and an x-acto knife on a cutting board.

I gently lifted the tape and adhered it to the side walls.

After a coat of metallic hammered metal spray paint, I removed the tape to reveal:

What do you think? Do I have a shot at a job on Orange County Choppers??!! The “logo” on the top was made by pressing letter stickers over the primer, then I taped off around the words and sprayed some red and yellow spray paint. The lines are made with black graphic adhesive lines.

On your marks…get set…

and GO!


Nice two wheel stunt!

I hope you will make one of these for your little stunt driver.

Sleigh Gift Wrap

This is it, the last day of the Creative Gift Wrapping tutorials. I hope you have had fun with some of these creative gift wrap ideas. In case you missed any, here are the previous days of gift wrapping:

Day #1 – Monogram & Name Plaque

Day #2 – Frosty & Rudolph gifts

Day #3 – Butterflies & 3-D Tree 

Day #4 – Chalkboard Tags

Today I have my favorite gift wrap! I have to admit that the polar bear is my favorite animal, so I might be biased. But, it is a really easy look to re-create.

Materials:

  • Wrapping paper
  • White card stock paper
  • Snowflake hole puncher
  • Key tag
  • Satin ribbon
  • Jingle bell
  • Black & white pom poms (nose & tail)
  • Small black button
  • Elmer’s glue
  • Hot glue gun

Wrap a present with gift wrap.

Using the template below (click on the photo for a larger version and then print it out), cut out the polar bear shape on white card stock. Better yet, if your printer can handle it, print it out on card stock and then flip the bear over to the white side.

Glue the bear onto the gift package.

Punch out some snowflakes. (I used some white and some light blue that would show up better on top of the white bear.)

Cut one piece of red ribbon for the bears collar. Glue the collar and snowflakes onto the package using Elmer’s glue. Use hot glue to attach a button and pom pom for the eye and nose.

Thread a jingle bell onto some satin ribbon, then tie a bow onto a key tag.


Hot glue the bow/jingle bell onto the bear’s collar.


Factoid: Did you know that a polar bear’s skin is actually black? And the bear’s hair is actually transparent hollow tubes. This serves three purposes:

  1. The tubes are hollow so they store air in them. This acts as an insulator.
  2. Plus, it helps the polar bears buoyancy while swimming.
  3. Remember how I said their skins is black? Well, because the fur is actually transparent, it allows the sun to reach the bear’s skin and help warm them. Cool, huh?!

Materials:

  • Wrapping paper
  • White card stock paper
  • Satin ribbon
  • Sprig of rosemary or other evergreen twig
  • Hot glue gun

Wrap a present with gift wrap.

Add a ribbon on the diagonal corners.

Click on the dove silhouette below to see the full size image. Print it out on the cardstock paper and cut out the shape to use as a template, or use the reverse white side of the shape.

Use a hole punch to cut out the eye. Hot glue the dove to the package and hot glue the rosemary underneath the dove’s beak.

Have fun with this creative package. Add the words PEACE, or bend the wings up to make them three dimensional.

This dove will work on a variety of sized gifts. Try one on a vertical present.


“Peace on Earth, Goodwill Toward Men”

Bonus: Here are two more creative gift wrappings to try. The holly leaves are simply pieces of scrapbook paper folded and glued onto the package.

The sleigh was so much fun to create! I wrapped pieces of foam board and cut out a scrapbook paper sleigh.

Glued cotton balls for snow and some buttons and buckles make this a gift the recipient will want to stare at instead of open.

I hope you have a wonderful Christmas day, a Happy Holiday and a terrific New Year!

Chalkboard Tags for Gift Wrap

What is better than a creative gift wrapped package? A creative gift wrapping that can be re-used again and again and again! Chalkboard tags made from foam board are adorable and can be used after the gift has been opened.


Materials:

  • Chalkboard paint
  • Foam board
  • Chalk or chalkboard pen
  • Wrapping paper
  • Ribbon
  • Hole Punch
  • X-acto knife
  • Pencil
  • Ruler

Measure and cut out a 4″ x 6″ rectangle of foam board. The trick to clean cuts in foam board is to use a brand new x-acto blade! It is that simple.


To make perfect diagonal corners, measure 1″ from the corner (across and down) and make  marks. Then draw a diagonal line connecting the two points. Cut off the triangle.

Use the hole punch to put a hole in the middle of the top edge.

Spray paint or paint chalkboard paint onto the foam board. Let it dry.

Season the chalkboard rectangle by rubbing chalk all over the board. Then wipe it off. This will eliminate the chalk message “burning” into the chalkboard and will allow the recipient to re-use the board.


Write a message on the chalkboard tag.


Wrap the present with wrapping paper and a big bow. Attach the tag to the bow.


Now your gift recipient has a cute little re-useable chalkboard tag.


 Merry Christmas, Renee!


Materials:

  • Chalkboard paint
  • Foam core
  • Chalk or chalkboard pen
  • Wrapping paper
  • Ribbon
  • Hole punch
  • X-acto knife
  • Pencil
  • Ruler
  • Clothespin
  • Silver or Gold acrylic paint
  • Paintbrush
  • Hot glue gun (or Elmer’s glue spots)

Follow the instructions above for making a foam core chalkboard. Eliminate the steps on cutting diagonal corners and adding a hole for this one.

Take apart a clothespin and paint both sides using the silver or gold acrylic paint.

Wrap the present with wrapping paper.

Wrap ribbon around the present, but don’t tie a bow. Just make a knot.


Make a separate bow out of the same ribbon and use hot glue (or Elmer’s glue spots) to attach it to the clothespin.


Clip the clothespin over the knotted bow on your package and slide your chalkboard into the clothespin.


“Merry Christmas, Baby!”

Only one more day until Christmas! Better get wrapping people! I’ll have a final wrapping paper tutorial for you tomorrow, I bet you can’t wait!

3D Tree Gift Wrap

Last night I invited two of my girl friends to wrap our Christmas presents together. We decided it was waaaaayyyyy more fun to wrap together than by ourselves Christmas Eve. We chatted and talked for hours! Before we knew it the clock had struck midnight and the cell phones began to ring as husbands wondered “What the heck are you doing?! Why does it take so long to wrap presents?”

Here are just a few of the reasons why it takes a little longer:

Making a gift look extra special for the recipient takes time and care. Pretty Handsome Guy would poo poo our efforts, but so be it. We had fun and that is all that matters!

Using Martha Stewart craft paint and holiday stencils on plain brown craft paper.

I set out some supplies, some water — and most importantly — Renee brought some Trader Joe’s Holiday Joe Joe’s! Mmmmm!

We had fun wrapping and crafting and creating!

I encourage you to invite a friend or two over to wrap with you this year. Enjoy some “down time” with some special friends. Or just pull up a chair in my dining room as I create a few more creative gift wrappings!


Materials:

  • Wrapping Paper
  • Wire Ribbon
  • Butterfly hole puncher (or other hole punch shape)
  • Colored scrapbook paper or other colored paper
  • Snowflake embellishment sticker
  • Elmer’s glue

Start by using the butterfly hole puncher and punch out oodles of little butterflies.

Crease and fold the butterflies in half to give them some dimension. It is okay to leave a few butterflies flat.


Gift wrap your present as you normally would. And add your ribbon and bow on diagonal corners.

Use Elmer’s glue to place random dots onto your package.

Lay your butterflies on top of the glue. Keep adding butterflies until your cluster is done.


Add a snowflake embellishment and one butterfly on the bow.

Think how adorable snowflakes or stars would look on dark blue wrapping paper!

“These are a few of my favorite things (butterflies in December!)”


Materials:

  • Wrapping paper
  • Curly ribbon
  • 1 – 12″ x 12″ scrapbook paper
  • Shiny embellishment dots or stickers
  • Elmer’s glue
  • Optional: Green construction paper or scrapbook paper for fringe grass at the bottom


Wrap your gift in wrapping paper.


Cut a small square out of craft paper for the trunk. Fold your scrapbook paper into quarters…


…and cut along the fold(s) using the template below.
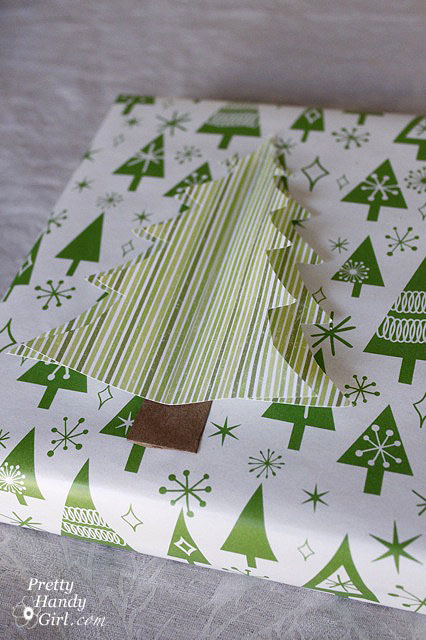
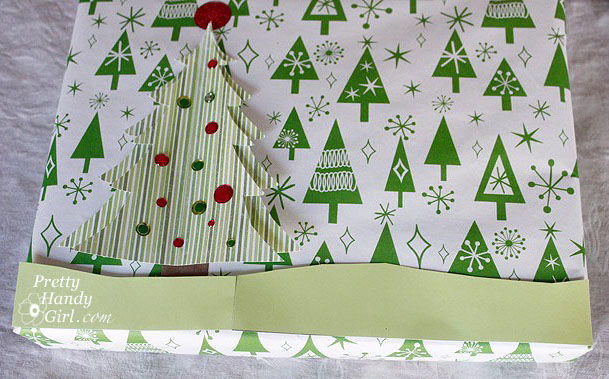
When you are done you should have two identical trees.

Glue the tree trunk down using Elmer’s glue. Run a bead along the spine of the tree and glue the first tree down on top of the trunk. Run a second bead of glue along the spine of the first tree and lay the second tree on top but slightly lower than the first.

Fold the left and right sides of the tree up to give them some dimension.

Add some embellishments or stickers to decorate your tree.

Optional: Adding Fringe Grass

Cut out a strip of green construction paper or scrapbook paper for your grass line. Tape two pieces together if you need to make it longer.

Cut fringes into the top edge of the green strip.

Using a pencil, roll the fringes over the pencil. I found this worked best on my thigh.

Glue your strip of fringed grass onto the package using Elmer’s glue.

Use your finger to push some fringes up and others down until you like the look.

Finish off your package by tying some curly ribbon onto it.

“Oh Christmas Tree, Oh Christmas Tree”

Please join me tomorrow for some more creative gift wrapping ideas!