I am a lucky gal to have a very wonderful friend in my life.

 This is my good friend Renee
Isn’t she beautiful? I wish I could have her hair and smile.  Renee has been a motivational force in my life. She talked me into doing my first triathlon two years ago. She was also a motivator for this blog! (So you should definitely thank her for that.) But, overall, she is just a fabulous friend who I enjoy spending time with.

A few months ago Renee called me with some super exciting news. She was pregnant with her second child. This was a much anticipated pregnancy and the phrase, “Good things come to those who wait” enters my thoughts when I think about how long she and her husband Toby have wanted this baby.

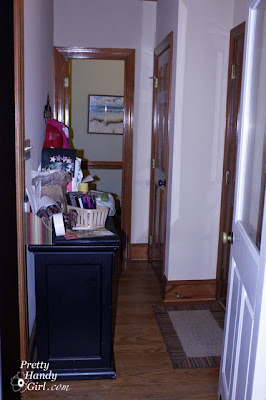
I wanted to do something very special for my good friend. Especially something to help with those pesky pregnancy nesting tendencies.  I knew that she had been struggling with storage solutions for the hallway between her garage and kitchen. This was her catch-all location and it was a narrow 38″ wide hallway I might add.

Plus, there are six doorways coming off this hall. Yup, talk about a challenge! This hall has access to a bathroom, a storage closet, the garage, the bonus room, the back deck and the kitchen.

Smack dab in the center of this hallway was a console unit that she bought in an effort to get some storage and organization. Well, needless-to-say, it wasn’t working for her.
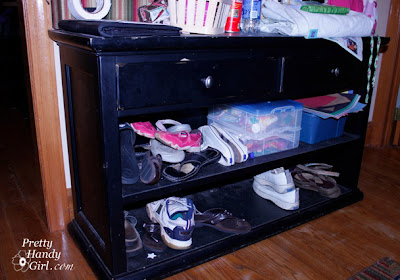
She bought this console off of Craig’s List to help organize the hallway.

Renee, really needed a highly functioning location to store anything and everything that didn’t need to come into her home.

Initially I drew up some quick sketches and showed them to her and her hubby. They both liked the idea, so the next step was to take some measurements and tape out our plans.

We taped the outline of two storage towers, a bench with storage underneath, and coat hooks. (Do you like our hanging coats? The vertical strips of tape.)

Plus, we taped the footprint of the unit. It was very important to keep the shelves as shallow as possible, so as not to impede the traffic flow.

Renee was tasked with buying some baskets to use on the storage towers and picking out a paint color for the back of the towers. She knew she wanted bead board behind the coat storage and she wanted black coat hooks. Buying triple hooks allowed her to maximize the amount of coats and bags that could be hung.

Then we got to work. (Yes, I said we! Renee helped with all the steps, because she wanted to learn some new DIY skills. I think she learned a lot on this project!)

We used Ana White’s blog (previously Knockoff Wood) plans for the storage towers, but altered them to fit our size requirements. The tutorial for the rest of the storage unit that we built is here. In the meantime, I hope you will enjoy these after pictures!

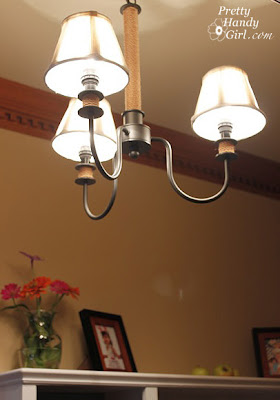
First off, you might notice that the before pictures weren’t just cluttered. The lighting in their hallway was pretty dismal. Thanks mostly to a builder grade flush mount light fixture and one CFL bulb. But, we fixed that too.

So, do you recognize that chandelier?! My twitter followers saw the picture here. $10 at the Habitat ReStore! What a steal!

A pretty place for flowers and pictures on top of the unit.
Coats and bags have plenty of hanging space.
The cranberry red baskets allow each family member a place to put their things.
Plenty of shoe storage for the whole family.

Here is the tutorial for that cute little blue striped storage box above. Its purpose is to halt all the junk mail. Renee can flip through the mail and put the junk mail in there to be recycled.

So, what did we do with that big console? 
 

It is sitting happily around the corner in her large kitchen. Renee bought some storage bins that we used in the lower half for more storage.

Now Renee’s daughter has plenty of access to her arts and craft supplies.
And, because who doesn’t love a really amazing before and after!
Before:
After:
creative-gift-wrapping

I have so much to tell and show you, I can hardly contain myself! If you follow me on Twitter (PrettyHandyGirl), you may have seen this photo of the light fixtures I scored from our Habitat ReStore last week! (Yes, I also have a Facebook Fan page.)

I was ecstatic to find another light that I turned into a Pottery Barn inspired lantern. And it is identical to the one I showed you here!

In addition, I finally found a foyer light fixture that I love (after a little spray paint magic). And I also grabbed a three arm chandelier that looked like it could have been in Ballard Design’s catalog! This treasure was promptly installed in my girlfriend’s mudroom (which I can’t wait to show you!) She and I worked for several days on a storage and shoe solution for her narrow hallway. My goal is to get the final pictures of the project to share with you shortly.

In other news, I’m very excited to have been mentioned in November’s Family Handyman magazine.

Definitely not me on the front cover.

My son’s closet turned reading nook is pictured on page 94. If you don’t subscribe to this magazine, it is a great DIY and repair resource. But, if you don’t want to subscribe, you can still access most of the tutorials on their website.

Running out of breath here…

Finally, By Your Hands has a Q&A feature post on me today.

Check it out here if you are curious to learn how I got my start at being handy.

Anyway, let’s just say I’ve been a busy Pretty Handy Girl the past two weeks.

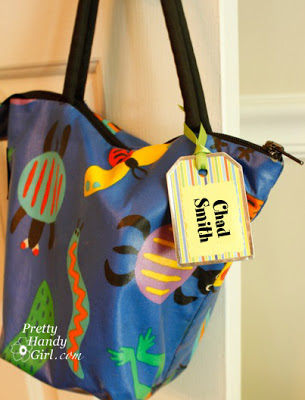
One of the reasons I’ve been busy is because both my sons had birthday parties to attend this week. I decided to make a few special gift tags that would double as luggage tags for the lucky birthday munchkins. They were very easy to make and really looked fab on the gifts.

Without anymore blah, blah, blah, here is the tutorial:

Supplies:
Metal Tag Maker Rims (bought at Michael’s)
Scrapbook paper (cardstock weight)
Mod Podge
Wax Paper (did you know you can use your recycled cereal bags for this?)
Paint brush
Paper cutter or Scissors
Decorative scissors (optional)
Ribbon
Regular pliers – I used glass nibbling or grozing pliers but any kind should work (DO NOT BUY the special tag crimper tool that the store wants to sell you for $25!)

1. Measure your metal tags (the set I bought came with a template).

2. Print out your gift recipient’s name on cardstock paper. Skip a few lines and print out their address and phone number on the same sheet. (In fact, I ganged up several names including my son’s so I could make many tags at once.) Be sure the names and addresses will fit inside your tag dimensions.

3. Using the tag template, cut two coordinating papers for the background of your tags.

4. Trim the name and addresses smaller than your tag dimensions. (I used deckled edge scissors.)

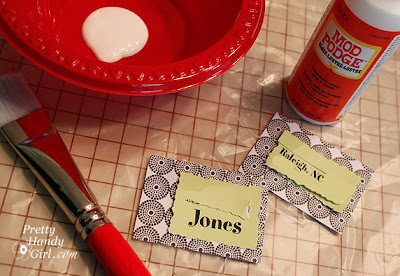
5. Line up all your cut paper and supplies on top of wax paper (cereal bag). Poor a small amount of Mod Podge into a bowl and dip your brush in it.

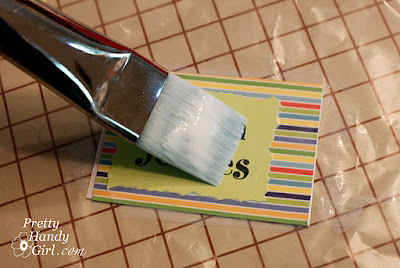
6. Coat the back side of one of your coordinating background papers. Place the other sheet of decorative background paper on top of the first one (backs together.)

7. Next coat the back of the name sheet with Modge Podge and adhere it to one side of the background label. Be careful to leave space for your hole punch on one end. Brush Mod Podge over the top of the name and the background paper to seal it.

8. After the front side has dried, flip it over and repeat step 7 for your address label. It is very important that you position your address on the same edge of the tag as the name on the opposite side. Otherwise you will end up punching a hole through one or the other.

9. Once the tag has dried, use your template to trim the corners off your tag and punch a hole through the middle.

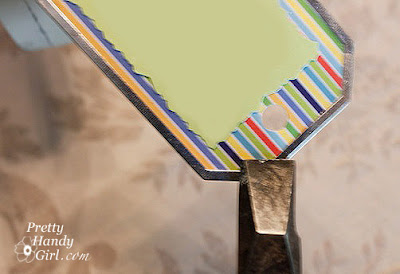
10. Gently insert your tag into a metal tag frame (some trimming may be necessary). When you tag fits snuggly inside the frame, pull out your pliers and start squeezing around the edge of the metal frame. Work your way all the way around.

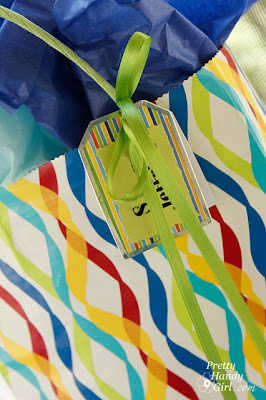
11. Thread your ribbon through the hole and tie it to your gift! Your tag can be re-used on a lunch bag, backpack or luggage!

I also cut an extra piece of scrapbook paper the same size as the metal tag;
put my son’s name on it;
and threaded it on with the gift tag
so the birthday child would know who gave the gift.
Who wouldn’t want one of these cute tags on their lunch bag?

Here is the decoupage tutorial I promised you from the Diva of a Dresser makeover.

Materials:
Wrapping Paper, Decorative Paper or Wall Paper
Fresh Sharp Exacto blade
Mod Podge
Spray Adhesive (optional)
Paint Brush

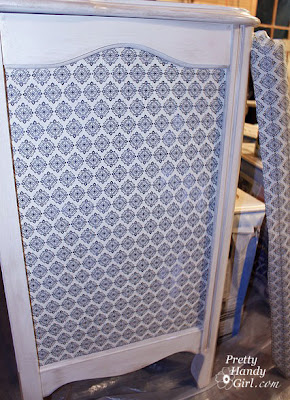
I started by unrolling a section of wrapping paper large enough to fit in the side pane. Using my fingernail (hmmm, maybe that is why I can never grow my nails longer), I scored the edges of the wrapping paper along the edges of the panel.

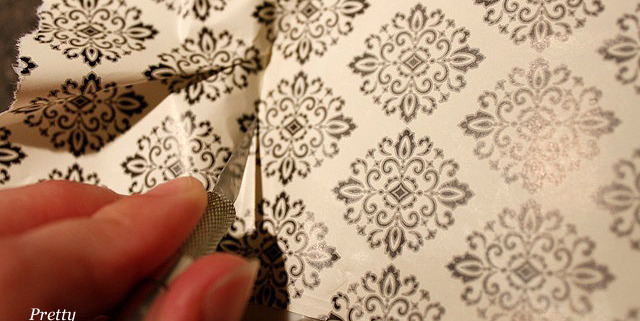
Next I used a fresh exacto blade and carefully cut along the score lines in the wrapping paper (while still holding it against the dresser.) Set the paper panel aside.

Using my paint brush, I worked quickly to put a coating of mod podge inside the panel on the dresser, while being careful to cover every square inch.

Center the wrapping paper on top of your modge podged dresser panel and smooth the paper with your hands, working from the inside center of the panel out. Getting the wrapping paper lined up in the panel was probably the trickiest part of the process.

Then I followed up with a top coating of Modge Podge to seal the paper. I knew the paper was going to wrinkle, and I convinced myself that I was okay with it (being a perfectionist is tough sometimes.)

However, if you want to avoid the wrinkling, I tested the same wrapping paper on a wooden “W” and used spray mount adhesive on the back of the paper instead of Mod Podge.

After top coating the “W” with mod podge there were still a few wrinkles but not as bad as the dresser. (See, I couldn’t squash my perfectionist ways. I had to solve that minor imperfection.)

This concludes my decoupage tutorial, but if you are curious about the lengths I took to give my decoupaged panel some age, keep reading.

I didn’t like the stark black and white paper on my dresser. In the middle of drinking my instant coffee I had a lightbulb moment!

I decided to rub the instant coffee bag all over the panel. It worked, and gave the panel a nice warm “instant” age.

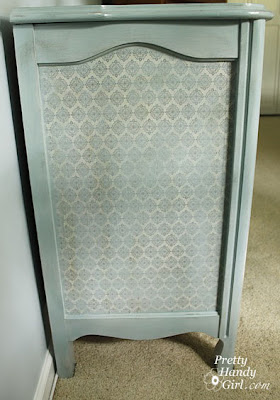
Later that day, I added my beachy blue glaze (all the while not being able to figure out why I kept smelling coffee. Duh!)

I played with adding the glaze and wiping some off until I achieved a hazy blue look with the wrapping paper design peeking through.

If you missed it or wanted to read more about this Diva of a Dresser makeover, click here.

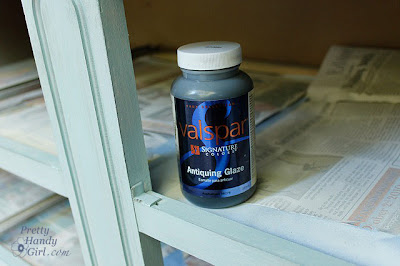
I’ve seen several talented furniture rescuers (Miss Mustard Seed comes to mind) using Valspar Asphaltum glaze on their shabby chic creations.

Valspar Asphaltum Antiquing Glaze

I have to tell you right now, I had not been very successful with this glaze. Every time I tried to use it, I ended up wiping it all off and ditching my efforts. However, I finally figured out the technique for using this glaze (on this project). The trick can be summed up with “less is more”!

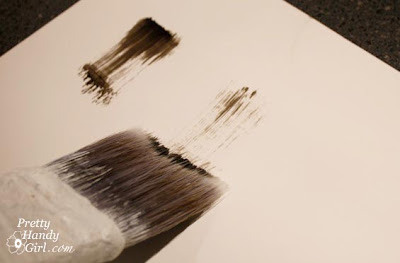
I poured out a quarter size dollop of the Valspar Asphaltum glaze.

Then gently dab your paint brush into it. Dab almost all of the glaze off onto a rag.

Next, lightly brush the glaze over your surface. The picture below shows using TOO MUCH!

Too Much Glaze

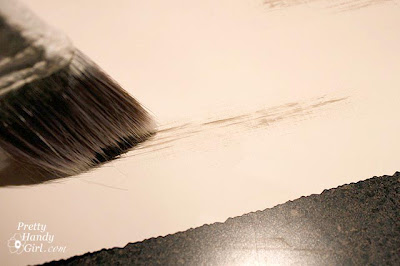
This is the amount you should see when you drag your paintbrush over the surface. Very dry brush and hardly any glaze on it:

Just Right

If the results still look too dark to you, go ahead and wipe the glaze off with a rag.

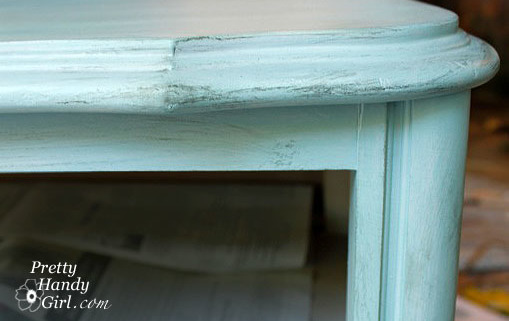
You can also drag your brush sideways. This works especially well on furniture edges.

Just Right, Sideways Dragging

Here are the results of using the asphaltum glaze on this dresser.

Now that you’ve seen the technique, what do you want to try this out on?

Dear fellow mouse loving bloggers who have adorned your homes with these adorable mice silhouettes,

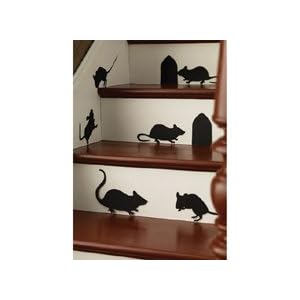
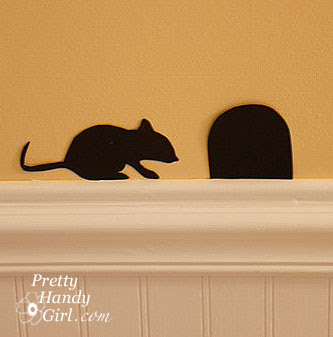
I admit it, I’ve been envious of your vermin. But, I knew I didn’t want to look all over town for those Martha Stewart mice silhouettes. So I thought I could buy them online. Low and behold, I stumbled across the tutorial to make your own! Thank you Martha. So, I downloaded the template here.

And, we set about cutting our own out of construction paper. I remembered that I had saved the excess chalkboard vinyl material from this Wallies set.

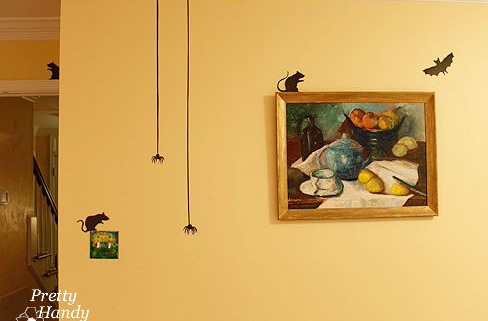
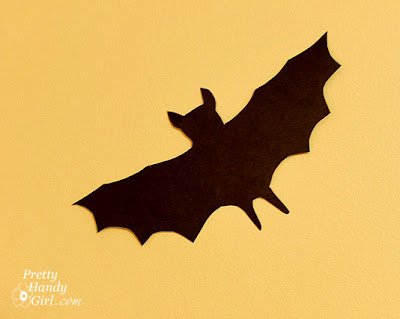
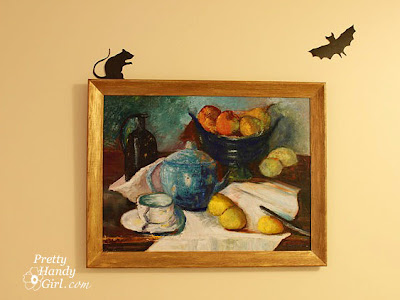
So, we used the excess to cut the mice and some other creepy critters I drew.

I’m sharing the template with you so you can make your own out of construction paper or if you happen to keep everything have some black vinyl laying around. (Simply click on the image below to view a larger size template.)

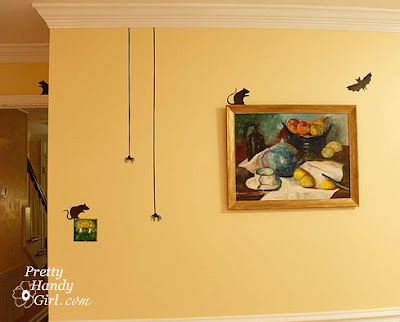
The boys had fun decorating.

And they just love trying to pet the spiders.

I just adore how my boys are fearless of creepy crawlies (both wall art and the real deal.)

Anyone else not afraid of spiders? I don’t like them in my house (and I’ve been known to kill a black widow), but I recognize that they are necessary in my yard (NOT IN MY HOUSE!)