Hanging Curtains

Glad you came back to see how I hung the curtains in our bedroom. If you are just joining us, I hung some blinds the other day in a mini-makeover for our master bedroom.

Hanging Curtains

Hanging Curtains

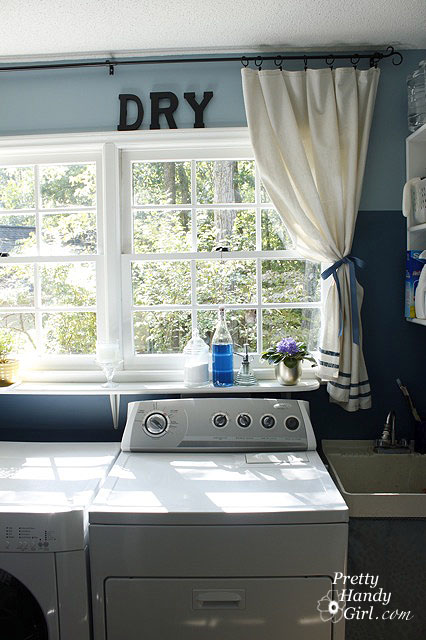
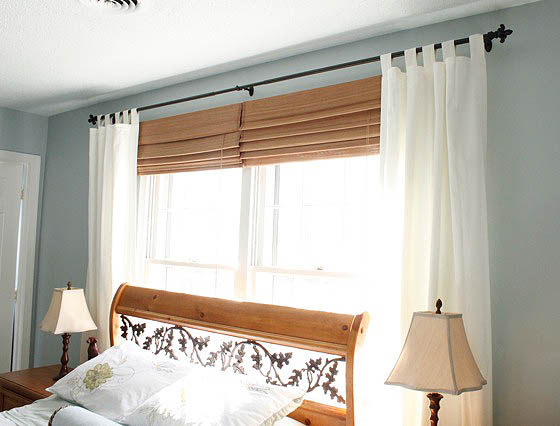
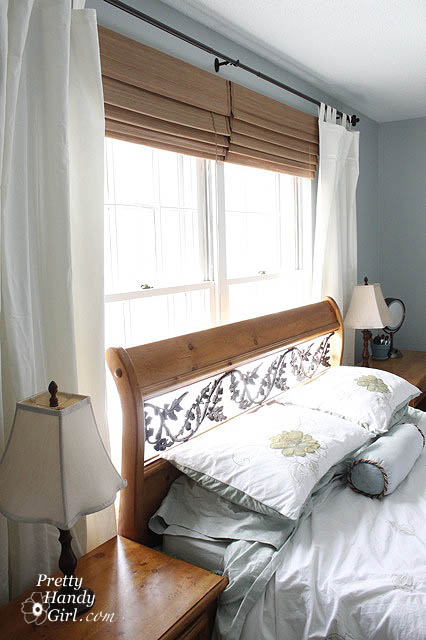
Then I hung a curtain rod and flanked both windows with some billowy white cotton curtains. I still can’t believe what a difference this made in the room.

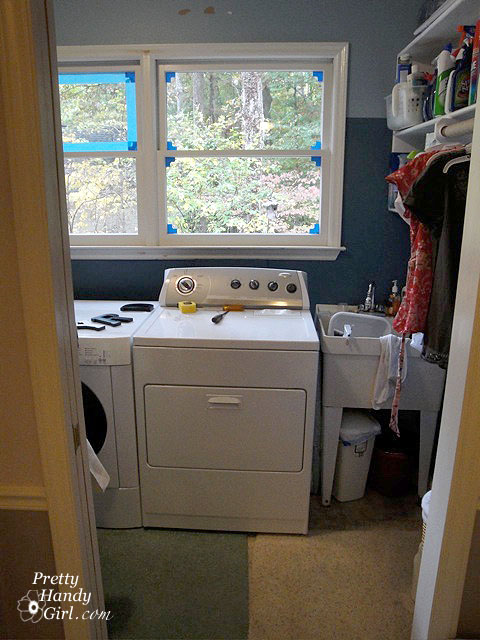
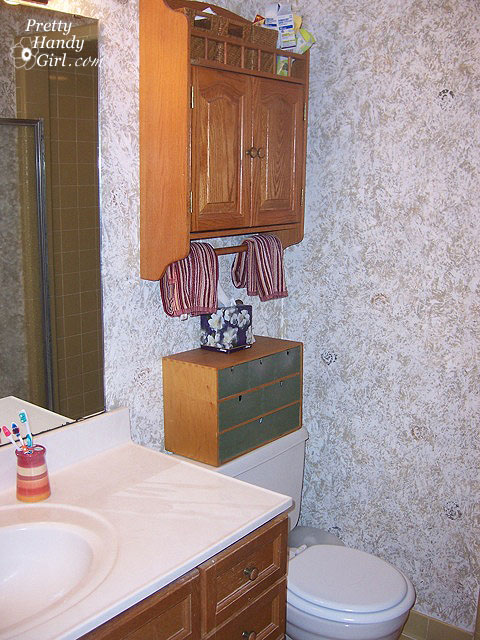
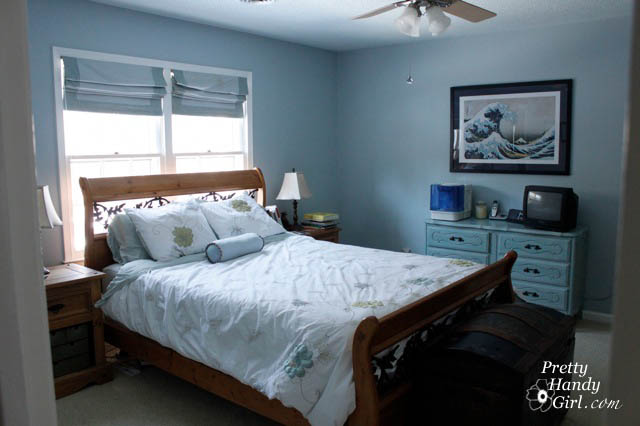
Here is the dark and drab before:

Hanging Curtains

So, you want to hang your own curtains? I’m here to help you along with that.

By the way, if you have a Tuesday Morning near you, check out their curtain rods! This extra wide one for spanning two windows was only $24.99!

Start out by holding up your curtain rod (preferably with a friend holding and you looking.) And mark the height of your rod on the wall.

Hanging Curtains

Take the time to check and see if there is a stud behind where your bracket will hang. If there is, check out my post HERE for hanging the bracket into a stud. All my brackets landed in locations without a stud behind them.

Hanging Curtains

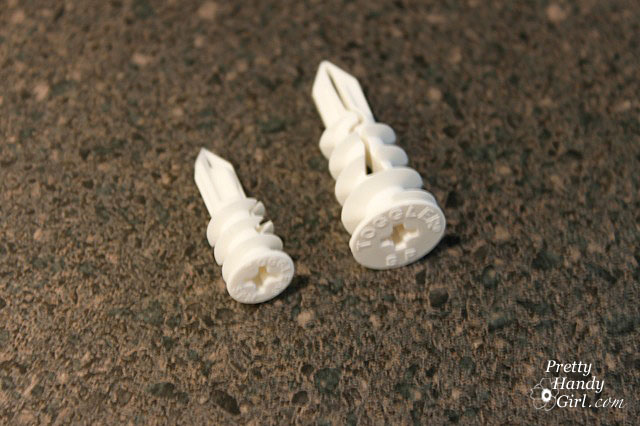
So, I grabbed some Toggler anchors and used them instead of the screws that came with the curtain rod.

Hanging Curtains

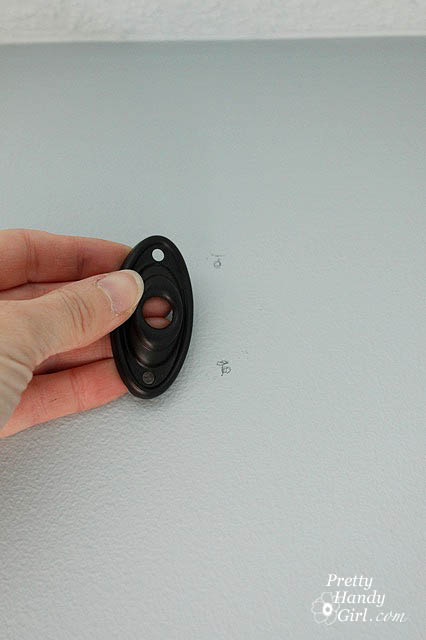
Start by tracing the screw holes in your bracket.

Hanging Curtains

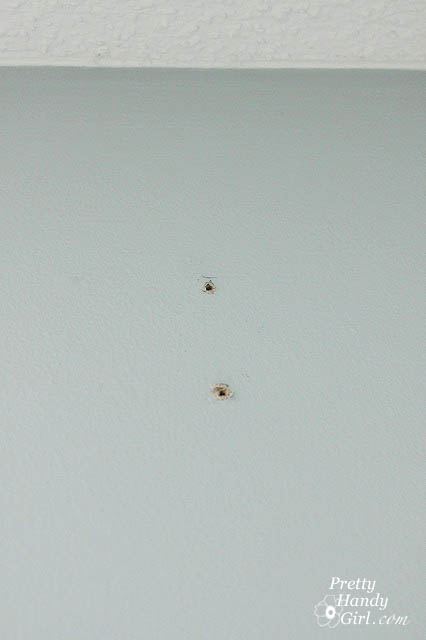
Next screw the two screws that come with the Toggler anchors partially into the wall. This creates starter holes for the anchors.

Hanging Curtains

Remove the screws.

Hanging Curtains

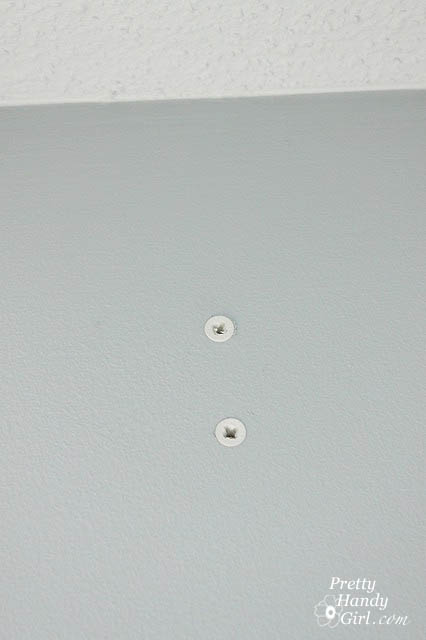
Use a philips head screwdriver and screw the anchors into the wall until they are flush with the wall. Be careful not to over-tighten.

Hanging Curtains

Line up your bracket on top of the anchors, and then insert the screws that come with the anchors into the wall.

Hanging Curtains

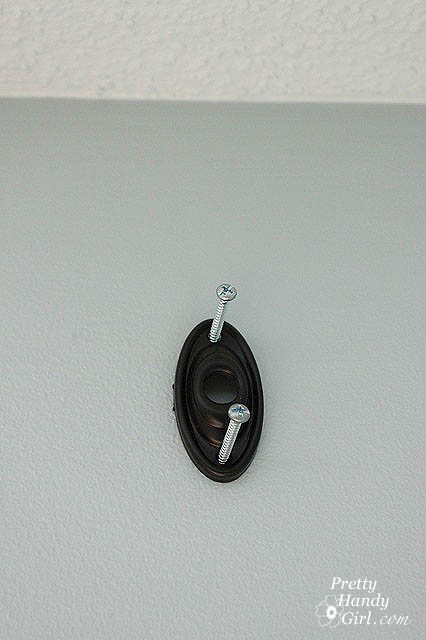
As you can see, the toggler screws are silver, but not for long! Grab a permanent black marker and color them black.

Hanging Curtains

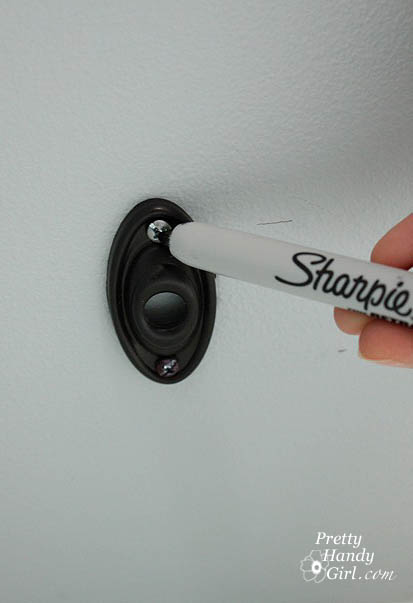
Or if you are using white or brown brackets, you can simply paint them with acrylic craft paint, stain or primer. Your choice.

Next, using your level, rest it on top of the first bracket and make a mark on the wall where your next bracket will be mounted. This will insure that it is level with the first.

Hanging Curtains

Repeat the steps to install the second and third bracket (if you have a wide span of windows like I do.)

Hanging Curtains

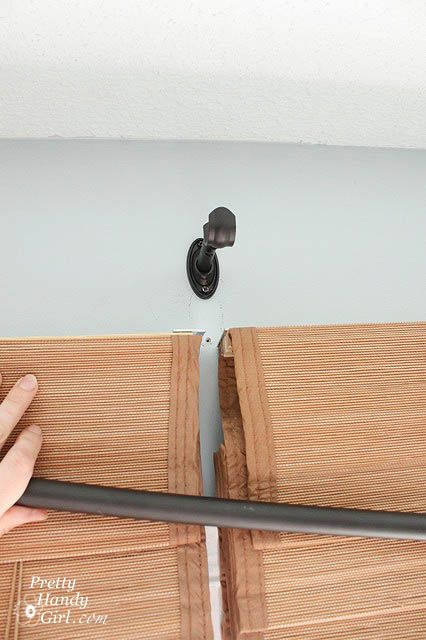
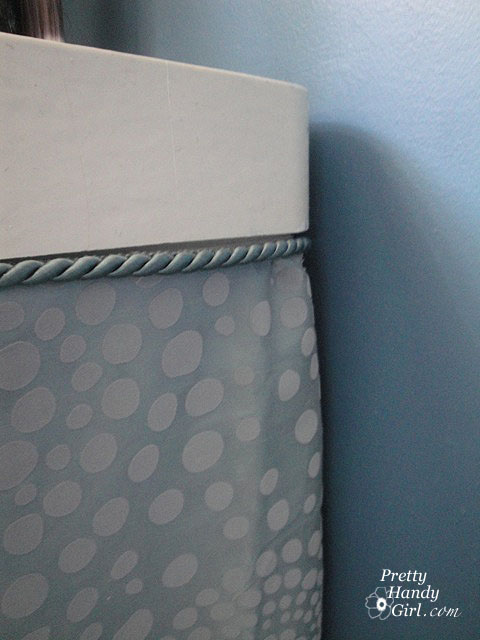
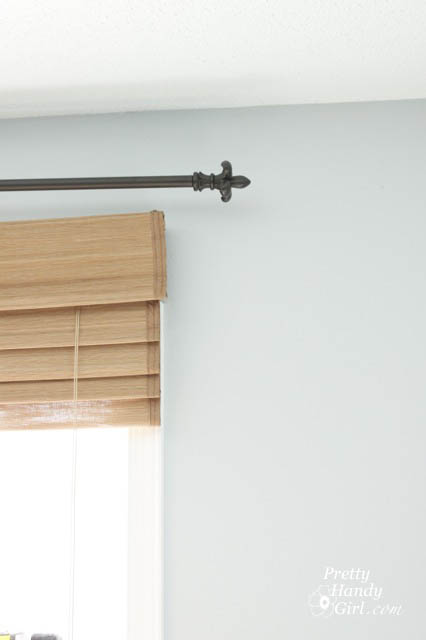
Assemble the brackets per the instructions that came with them. And hang your curtains!

Hanging Curtains

You may have noticed how far the rod extends beyond the window. This is a design trick to make the windows appear bigger, plus it allows for the maximum amount of natural light to enter the room.
 Hanging Curtains

Okay, less you think that everything I do is perfect – remember how I said to have a friend hold the rod when you first decided how high to hang the rod. Well, I didn’t! I was too impatient. So, I ended up having to re-do the first bracket and was left with this.

Hanging Curtains

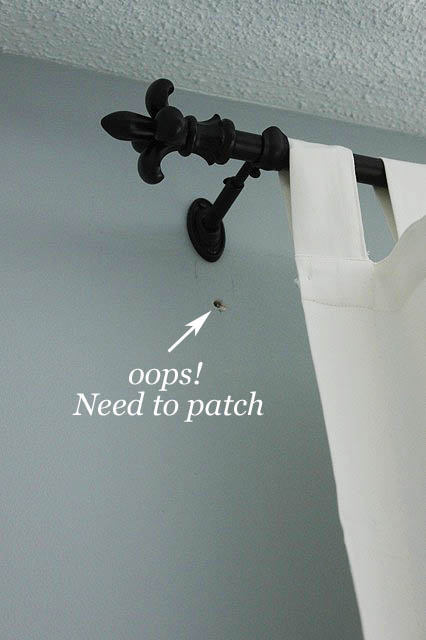
No biggie. I just patched the hole and applied some touch up paint. Good as new!

Except, I was too lazy to iron the curtains before I hung them. (Yup, I’m an instant gratification kind of gal, couldn’t you tell?!)

Hanging Curtains

So, I have for you a two-fer post. Two posts in one! Wow, your lucky day right?!

A No Iron Technique for Removing Wrinkles!

This is my favorite technique for removing wrinkles. I use it on everything! Slipcovers, curtains, sheets, and clothing I am already wearing.

You will need one of these:

Hanging Curtains

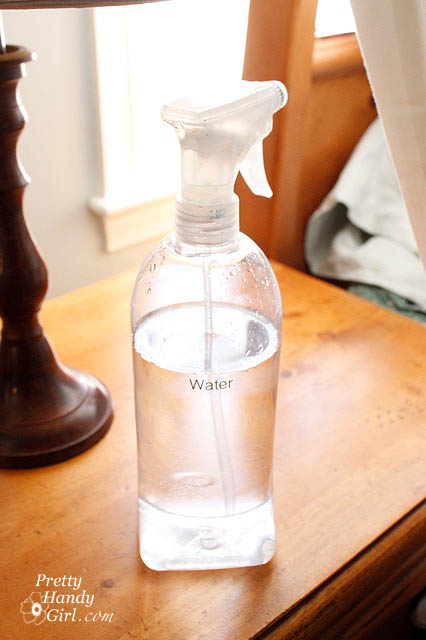
Just a squirt bottle with plain old H2O in it. Nothing fancy. Set the nozzle to mist.

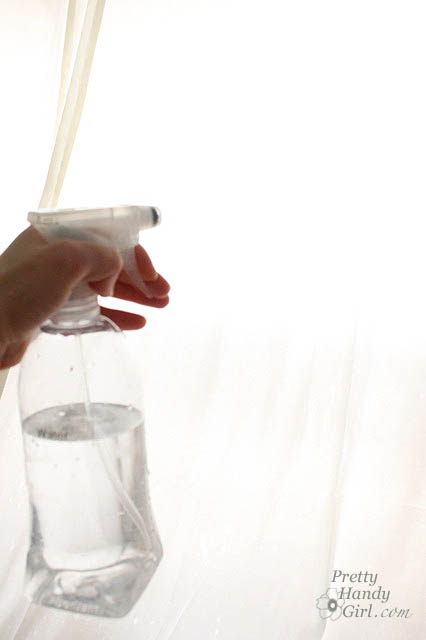
Spread out your curtains.

Hanging Curtains

Then go to town spraying your wrinkled areas. When it dries the wrinkles are magically gone.

Hanging Curtains

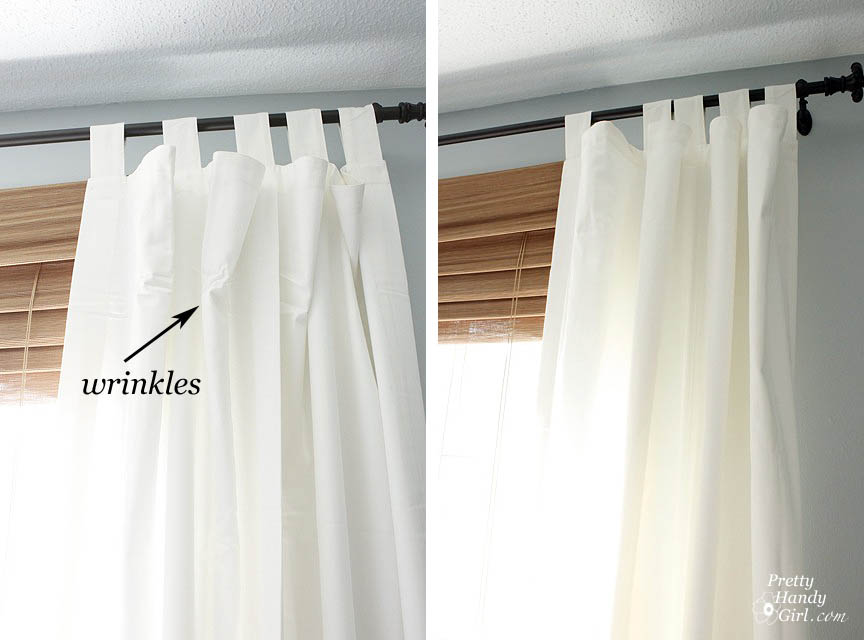
Sometimes they might need another spray and some smoothing with your hands, but ultimately they usually come out.

Hanging Curtains

Only the stubborn wrinkles get to meet my iron.

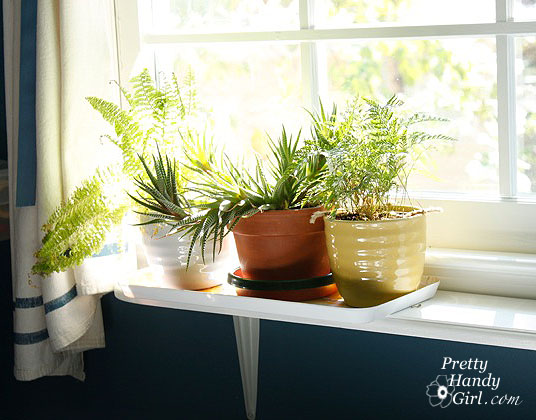
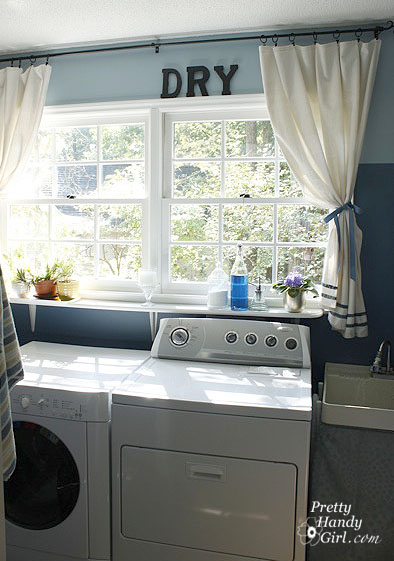
As you can see below, most of the wrinkles came out, but we had party guests arriving in 15 minutes, so I left them as is and will iron them another day. Maybe.

Hanging Curtains

And one more look at my new curtains and blinds.

Hanging Curtains

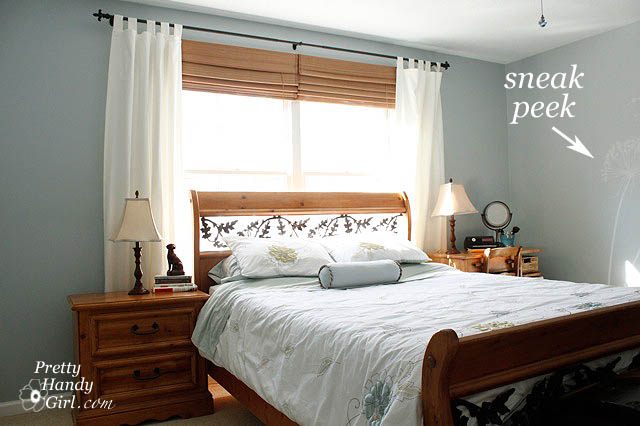
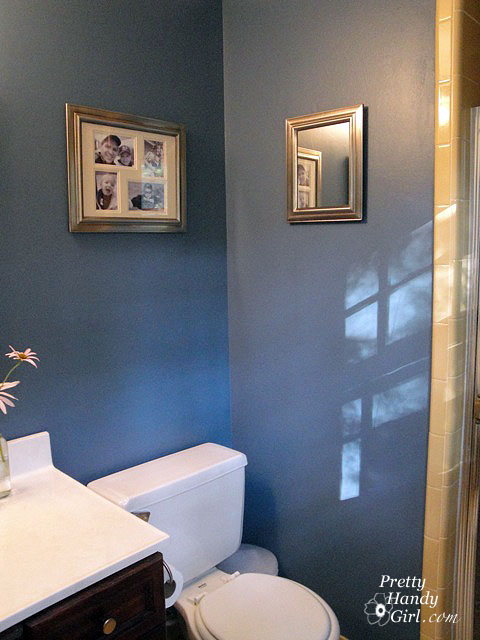
Hey! Are you peeking at my new wall graphic I painted? You cheater, you’ll have to read my post where I will show you how to paint a wall graphic. In the meantime, I posted a picture of me working on it on my Facebook fan page.

 Wash…Rinse…Dry…Repeat…Wash…Rinse…Dry…Repeat…

This is the story of my life. We are a family of four and yet, I wash three loads of laundry two times a week. That is six loads per week! Or broken down, it is 1.5 loads per person per week. Is this a lot for a family of four? Maybe I’m too clean? Regardless, with all the time I spend in the laundry room, I wanted it to be attractive.

Our My laundry room looked like this right before we bought the house:

 
If you look up “blah” in the dictionary, you’ll see that picture.

So, I set to work and painted dark blue on the bottom 2/3 of the room and the same color with some white mixed in to the top 1/3 of the room. I also painted the windows and trim a glossy white. It is amazing how much easier it is to dust a newly painted surface (a definite must in a lint-filled laundry room.)

Next, I bought several sections of peg racks and painted them the same color as the trim. I screwed them into studs, or

if there wasn’t a stud to screw into I used Toggler anchors:

Then I set forth to cloak the biggest eye-sore in the room, the utility sink. All I did was cut a curtain down to size and used double-stick velcro. Then I hot glued some roped cording to the top. Abra-ca-dabra, it was sufficiently hidden.

Next I cut a piece of 1″ x 6″ pine to the length of my two windows. I rounded the corners with my jig saw and then used a router to give the edge a decorative finish.

After painting the shelf to match the windows, I mounted it to the wall with metal shelf brackets.

This gave me a sunny spot to rest my plants…

…and laundry supplies (Oxy clean powder, liquid laundry detergent and water spritzer for ironing wrinkles).

I also hung some drop cloth curtains that I painted stripes on (tutorial to come);

added a few letters above the windows;

and now I have a laundry room that I want to spend time in!

This makeover was very low budget. I had the paint leftover from our master bathroom. And the sink cover was one panel on clearance at Target for $3. The letters were $1.50 each and the drop cloths were $5 each. The curtain rod was stolen from another room in our house. And the shelf was from my wood pile. So, all-in-all, I spent about $25.

Some day I’d love to install cabinets with doors on them to hide all the supplies. But, until that day, I’m happy with the transformation.

So, am I the only one doing loads and loads and loads of laundry?

I can’t believe I’m about to show you my dirty little secret. But, I feel bad for my friend Sandra from Sawdust and Paper Scraps. She has some work to be finished in her master bathroom. So, I hope she’ll feel better after I share my awfully tiny and incredibly outdated bathroom.

I’m warning you now, what you are about to see is disturbing. If you have children, please escort them from the room.

Exhibit A. Harvest Gold Tile
 Exhibit B. Jackson Pollock sponge paint and stamping
Exhibit C: Ugly Wall Cabinet on the Wall
Exhibit D. Outdated Oak Cabinet and Light Fixture
Exhibit E. Coffin-like shower.
 I know, SCARY, right?!

Pretty Handsome Guy and I knew that one day we would be gutting this bathroom. Therefore, we decided not to do anything to the bathroom knowing that it was going to be euthanized renovated at some point.

Well, after about a year, I couldn’t stand it anymore. As a surprise for Pretty Handsome Guy, I gave our teeny 1970’s bathroom a minor face lift while he was away on business. I spent about $100 to give us a calmer start to our morning.

First I took down that ugly wall cabinet. Then patched all the holes in the wall. I sanded the walls to remove some of the bumps from all the random paint. I painted all the trim a glossy white. And the walls got a fresh coat of Ralph Lauren Durango Blue. I chose a deep color to draw attention away from the harvest gold tiles.

Then I hung some pictures…
…and a new mirror (bought on clearance at Target).

I ditched the Hollywood strip lights and replaced them with this very affordable Craig’s List find.

I really did not want to spend a lot of time on the vanity (stripping and sanding), so I roughed it up a little and put some Brazillian Rosewood gel stain on it. And left it for 24 hours to dry. Yup, that’s right, I didn’t wipe off the stain.

You know what else I didn’t do? I didn’t put a protective coating of polyurethane either!
I also didn’t bother staining the inside of the cabinet. This is so opposite to my DIY code of conduct! I’m usually a perfectionist and I do it right the first time or I don’t do it at all. But, as I said, this bathroom is slated for demolition one day, so why put a lot of time or money into it.
Finally I installed some new towel bars and put new knobs on the cabinet.
Okay, sure the ugly tile is still there. And the shower still looks like this.

But, we now have a bathroom that we can enter without the risk of leaving with a migraine.

I am able to live with the bathroom as it is, until the happy day when I can knock down some walls, haul out some outdated tile and build my dream master bathroom.

Here are my plans for this dream:

Existing Floor Plan: Luckily an old washer and dryer closet backs up to the other side of this bathroom. This will give us another 3′ of space along one wall!

Renovation Floor Plan:

And this is what I envision our bathroom will look like one day!

Thanks to Lori Gilder of Interior Makeovers, Inc., who somehow has a window into my mind to see what I want our master bathroom to took like. She posted these photos from her portfolio on Houzz.com. She’s a fabulous interior designer who lives in Beverly Hills. Check out her blog and portfolio.

Sooooo, do you have a room or a space that is hideous? But, you don’t have the time, money, or effort to give it a full renovation? Why not make a few frugal changes so you can live with it until you can DESTROY IT (and then rebuild it of course.) It is amazing what some paint, new towels, pillows and/or a few fixtures can do.

If you are an addicted blogosphere surfer, you are probably aware that there are two contests being sponsored by Home Goods right now. If you blog or write about your own personal Mom Cave, you could win $250 to spend at Home Goods! And what Mom couldn’t use that?!

Enter Your Mom Cave at Centsational Girl or at Between Naps on the Porch.

So, I wracked my brain trying to think of a space I could makeover into my own personal Mom Cave. Then I realized – HELLO – I already have a Mom Cave! My guest room is just that, a retreat from the 3:1 boys to girls ratio in our home!

From the moment I enter my Mom Cave I smell sweet blooming roses,

and a potpourri of floral soaps in a dish by the window.

This is the room where I sit to sew and create,
or read a new design magazine.
This is the room I can lock myself inside and stop being Mom for a while.
Among the fluffy pillows is where I sleep…
…when Pretty Handsome Guy is sick.
(Secretly, I can’t wait for him to travel for work so I can sleep in my girl’s retreat again.)
 
The walls are the perfect english cottage garden green.
A perfect palette to display fresh flowers and greens against.

Lest you think I spent a lot of money in this room, you will be surprised to learn that almost everything in this room was a trash-to-treasure creation. You can read more about my finds for this special room here.


A small desk and chair both broken and discarded.


And this little trash bench was made new again and given a  home by the window.
 

So, do you have a Mom Cave? If so, definitely show it off! Give us mamas something to drool over!

Whether you do have a Mom Cave or not, I encourage you to enter the Mom Cave contest here or here. Good luck y’all!

I’ve been super busy this weekend finishing up some projects. I’m very excited and can’t wait to show you some of them.

However, because several of them are tutorials (which take a little longer to write up), I decided to share with you a guest bathroom makeover from our old house.

This poor bathroom had an identity crisis.

With its 1970’s light fixture, 
 
Harvest gold laminate counter top and dark wood vanity,
 
Sunburst shaped handles that hurt your hands to use them,


and Laura Ashley style wallpaper.

The first thing we did was strip the wallpaper in this room. If you have never stripped wallpaper, there are two types of wall paper stripping projects. The easy ones and the hard ones! Luckily we had an easy one.

Awww, doesn’t Pretty Handsome Guy look happy?!  

The walls had been primed before the wallpaper was attached (as opposed to gluing the wallpaper on top of the drywall (or sheetrock as some people call it.)
Forget the steamer, forget the chemicals, we used these tools:

  • Cheap, cheap, cheap pink fabric softener mixed 1:1 with water
  • Spray Bottle to pour your fabric softener mixture in
  • Paper Tiger or wall scoring tool
  • Wallpaper scraper – We really liked the Piranha shaver since it has a razor sharp blade
  • Or Wallpaper Trim Tool

You start by scoring the wall with the Paper Tiger or similar tool. The more holes the better, so put on some dancing music and get busy.

Then you spray the walls with your fabric softener mixture. Really saturate them! Wait 15 minutes, then spray them again. Now, use your scraper to start peeling. I truly hope your sheets come off in nice big sheets like ours did. If not, you may have to have your walls re-skimmed with spackle or joint compound.

Or, I hate to mention this, but you could paint over the wallpaper. We have two rooms in our current home that this was done in (we know for a fact that the wallpaper was glued to the drywall without priming first.) If you take this route, I want to let you in on two secrets:

  1. Use an eggshell or satin finish paint (it will not show the edges or imperfections as easily.)
  2. Take the time to make sure all the wallpaper seams are glued down and then spread some joint compound or spackle over the seams and sand it smooth. This will get rid of the tell-tale seam lines when you paint over wallpaper.

After you have removed all the wallpaper you need to wash your walls really well to remove the glue. We saturated the walls again with the fabric softener and then cleaned it off. Finally, we used TSP cleaner (available at any home improvement or hardware store) to get the walls perfectly cleaned.

Then I painted the walls a bright Nickelodeon slime green. I kid you not, but I didn’t take a picture of it in that state. My friends thought I had flown the cuckoo’s nest. But, I went back with a creamy lemon glaze and ragged it on top. The result was a beautiful lime sherbert color (perfect for a little boy or girl’s bathroom.)

Next, the light fixture had to go, and it went quickly!

 I replaced it with a four light chrome fixture.
Then, I had to paint over that ugly vanity cabinet:
 
Now that is looking better! I added new chrome/porcelain pulls.

But, that harvest gold vanity would not stop shouting “groovy dude” whenever I saw it. So, it had to go too. Unfortunately, we were on a limited budget, so I had to get creative.

 
I fixed the chipped corner and seams with wood putty.
Then I sanded and primed the countertop with Zinser Oil based primer
(A necessity to get the  surface prepped with a super adhesion coat of primer)
so I could do this:
 
 Beautiful blue water reflections
I painted the vanity top and then added five coats of polyurethane to seal it. I recently had the opportunity to visit our old house and couldn’t wait to see how the vanity top held up over the years. It really held up better than I expected. There was some slight chipping where the back of the sink met the back splash. I should say that our neighborhood has very hard water and this is where the splashed water would hide and sit. So, for the cost of paint, we had a new vanity top that has held up to use for over three years so far.
 
So, are you ready to see the final reveal? Here it is:
Before: 
After: 
In case you are wondering what ever happened to those sunburst tub faucet handles:
Yes, that is me, installing new valve stems at 8.5 months of pregnant bloated-ness. 
That was also THE day I went into labor!
Anyone else have some crazy last minute pregnancy stories?