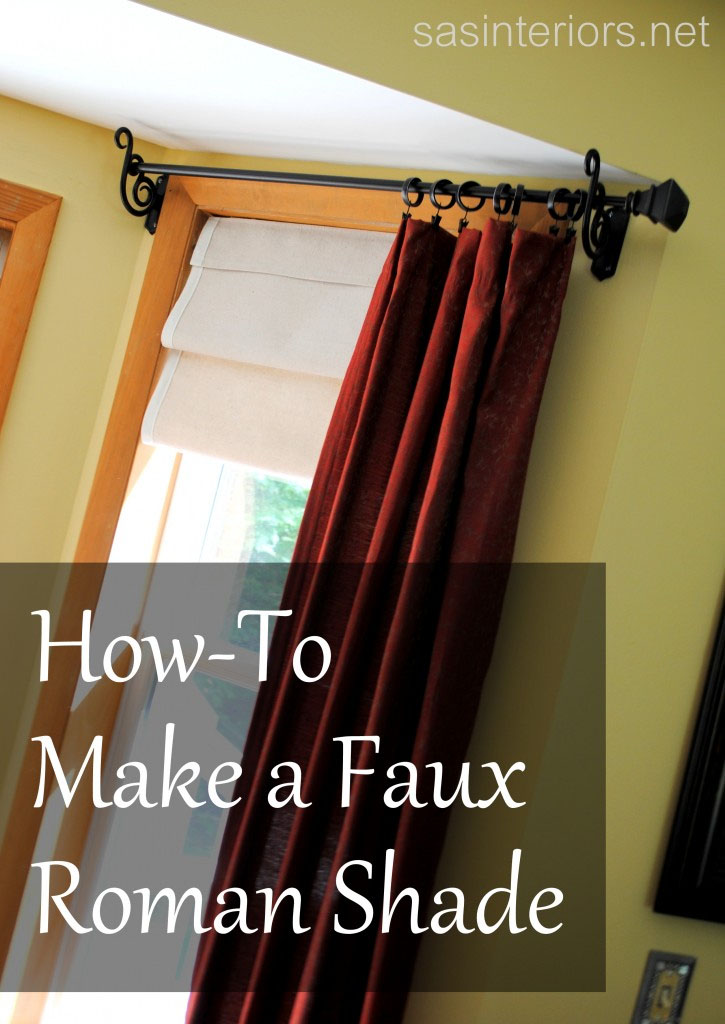
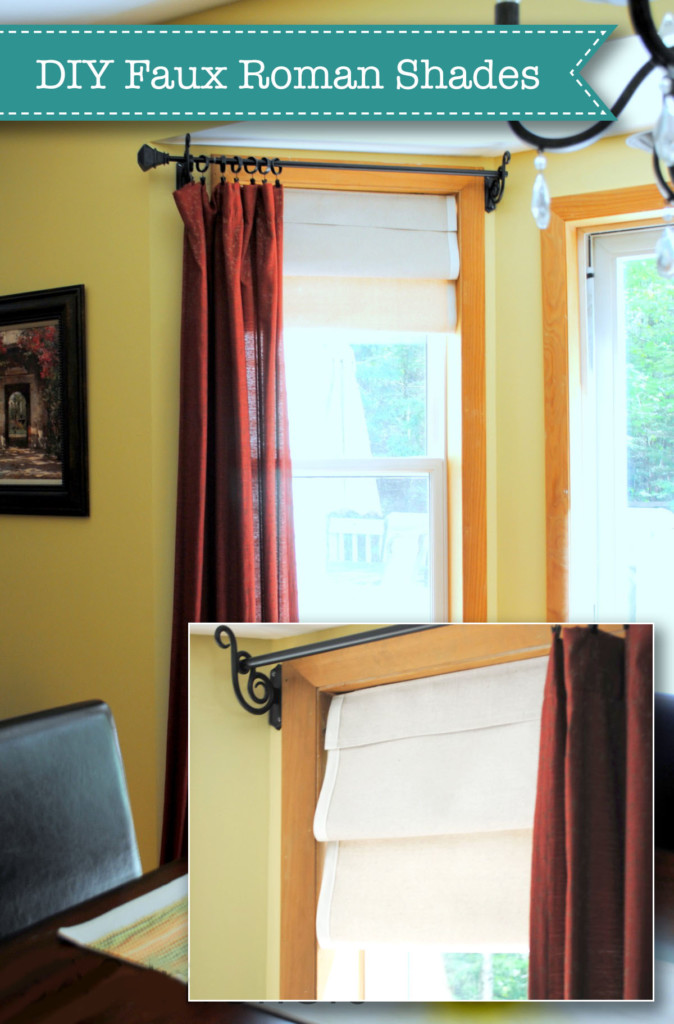
Learn how to make these designer-looking Faux Roman Shades to elevate your window appearance.
I’m honored to have Jenna from SAS Interiors on the blog today. She is an interior designer, blogger and Mom from upstate New York. This is one busy gal! Please put those hands together and give Jenna a warm welcome.
Thanks so much Brittany for having me guest blog today at Pretty Handy Girl! I’m Jenna and I am an Interior Designer & Home Decor Blogger of SAS Interiors.

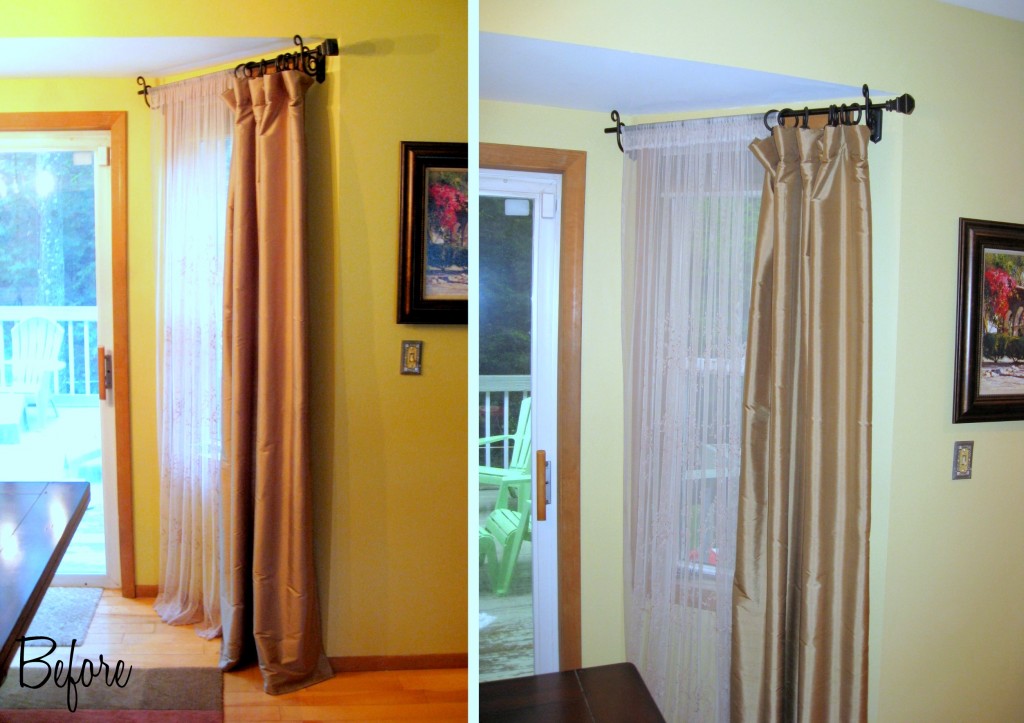
My home has a lot of warmer tones and for the past year, I have slowly been transitioning to a more casual aesthetic with cooler hues. With updated fabrics on the pillows and windows, and some stylish new accessories and repurposed pieces, my interior is changing into my desired style.
One DIY project that I created to transition into this new look was to use drop cloth material to make faux roman shades for my dining room windows. I am a little crazy-in-love with drop cloth material. And not for it’s intended use of covering furniture while painting, but instead to create DIY projects with. Drop cloth is truly simple, affordable, & stylish, as well as durable, chic, and a great neutral palette for any accent color.
With that, check out how I made my faux roman shades…


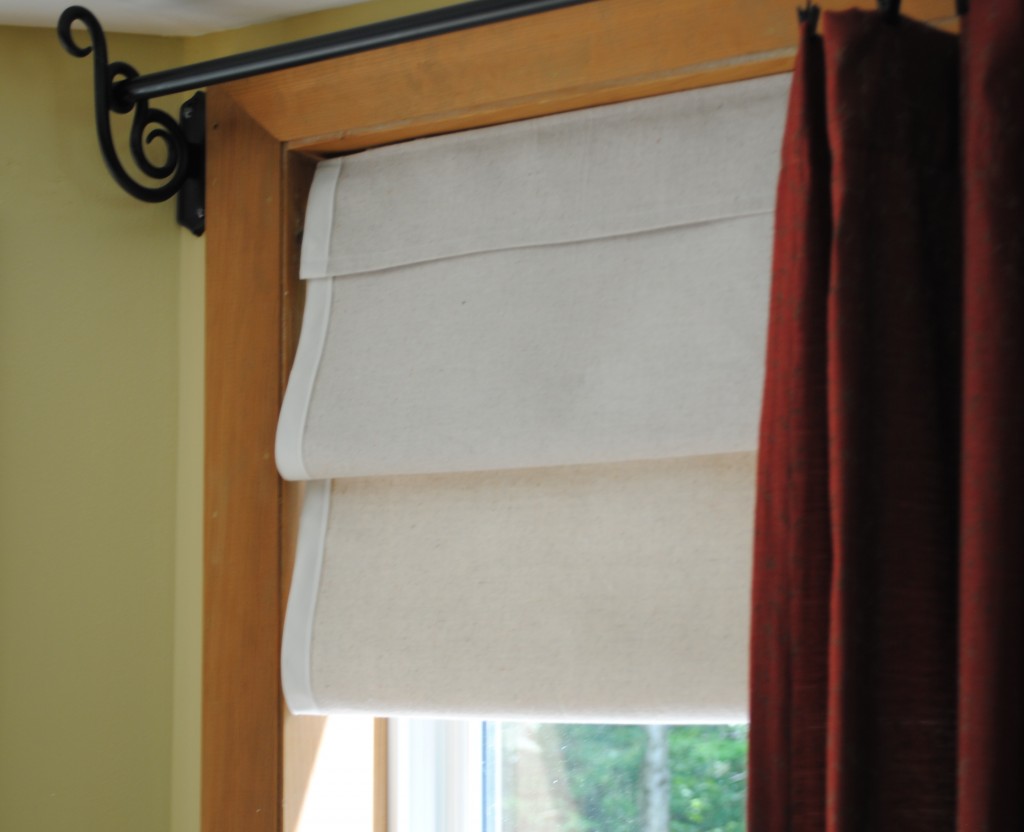
These faux roman shades are not functional (I’m not that good, hehe), but are a great neutral backdrop to complement the long drapery side panel.

These are some of the suggested supplies to make the faux roman shades:
- Fabric of choice (obviously I prefer drop cloth, but any heavy weight fabric will do)
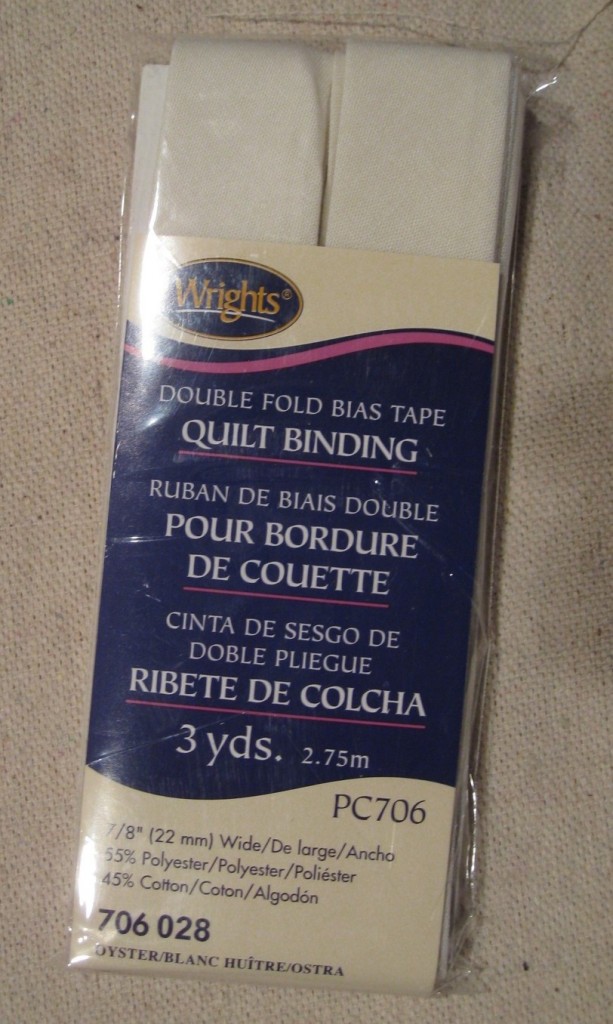
- Double Fold Bias Tape
- Sewing Machine
- Typical sewing supplies (pins, scissors, measuring tape, etc)
- Velcro
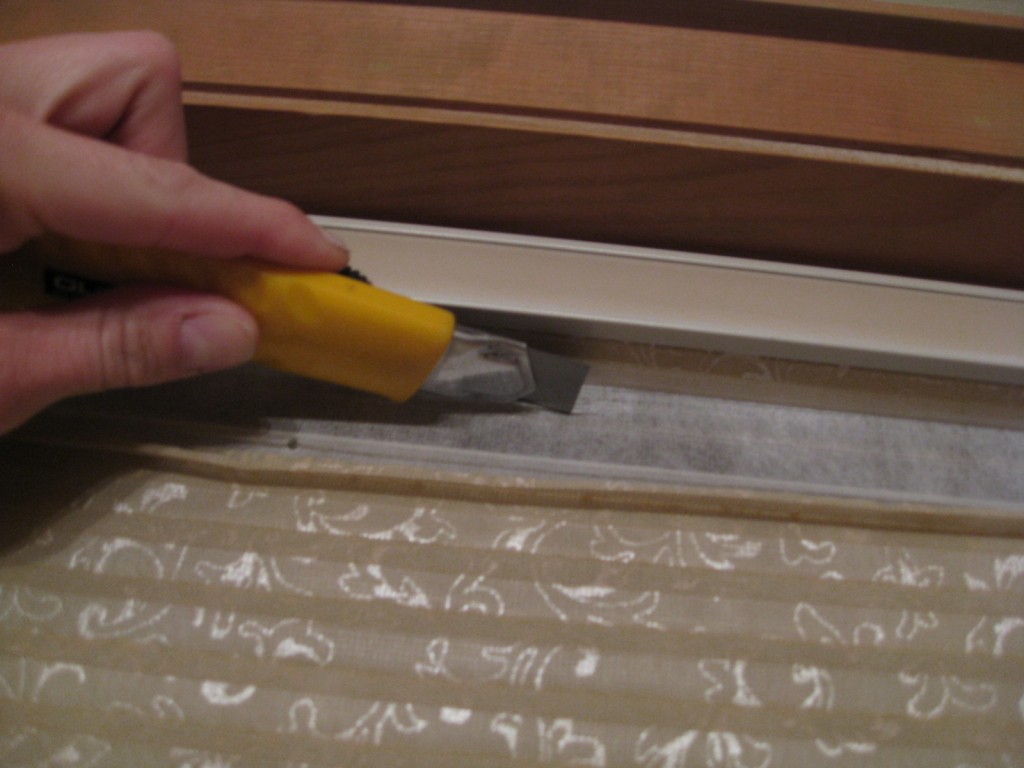
Before I begin the tutorial, I wanted to mention there was an existing honeycomb-style shade where I wanted to install this new faux roman shade. I removed the fabric shade using a straight edge but left the bar in place. This is what I later used to attach the faux roman shade with the Velcro. **If you are starting from scratch, you could put the Velcro directly on the window OR get a tension rod and Velcro the shade to it.

Here is the step by step:
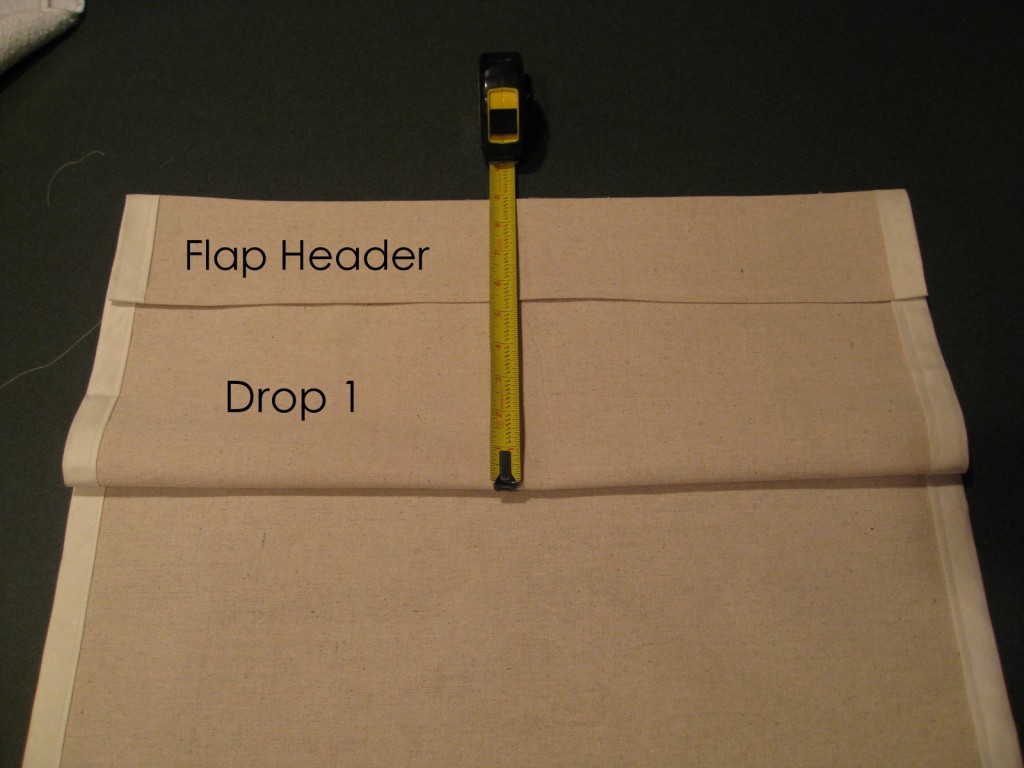
1. Decide how many ‘drops’ you want for your roman shade. I decided on 2 drops, and then I added a Header Flap on the top. Each drop is 5-1/2” and the top flap is 3-1/2”.
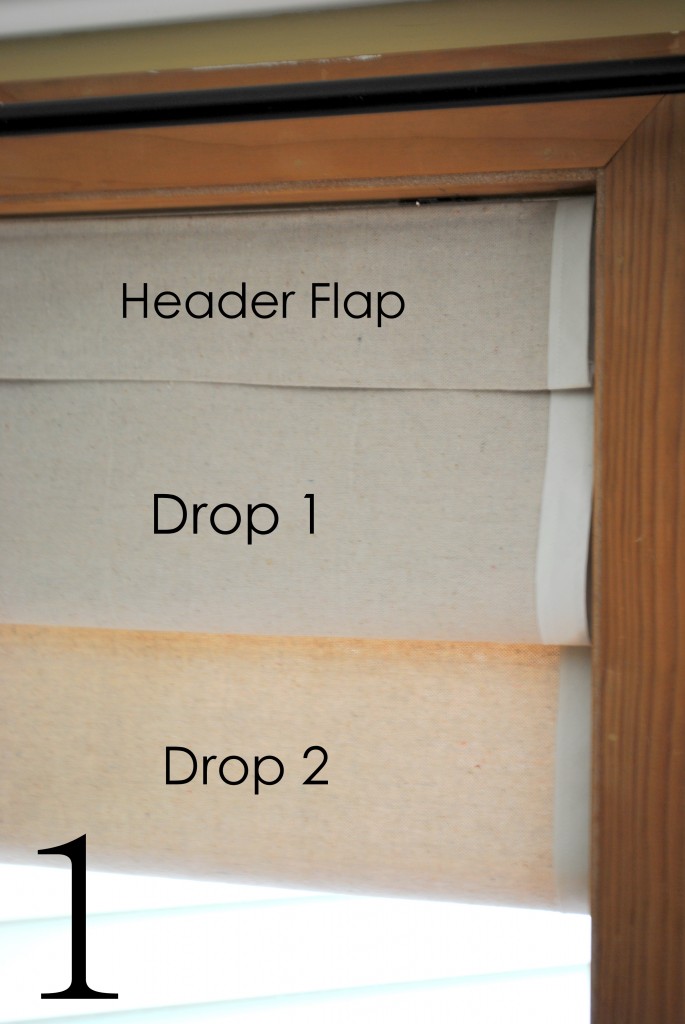

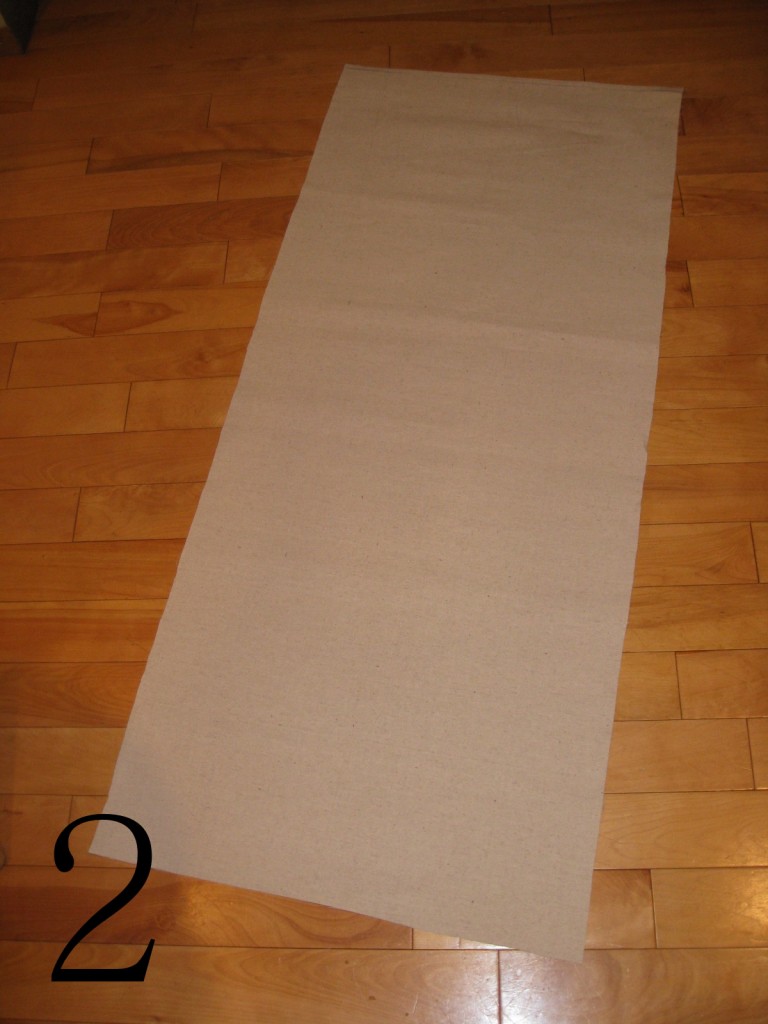
2. Measure the width of your window and cut your material. With regard to the length, I cut my material to be about 36” long. It’s important to leave a lot of extra material on the length, so you have enough to create the drops. (Read on and it’ll help you determine your length).

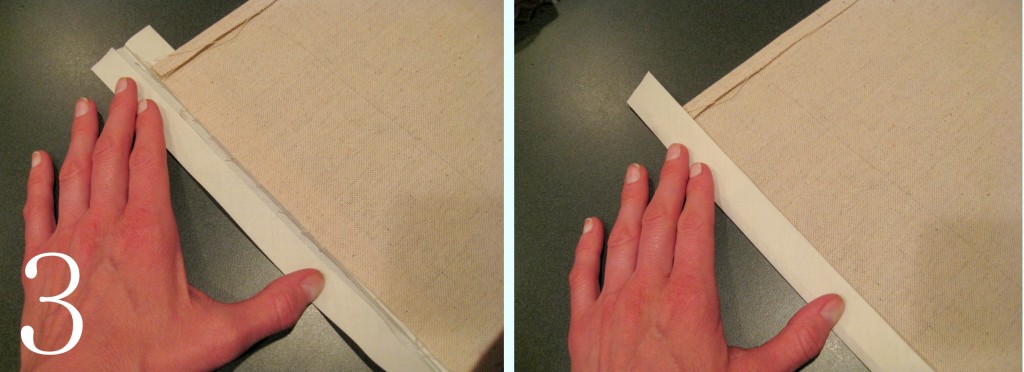
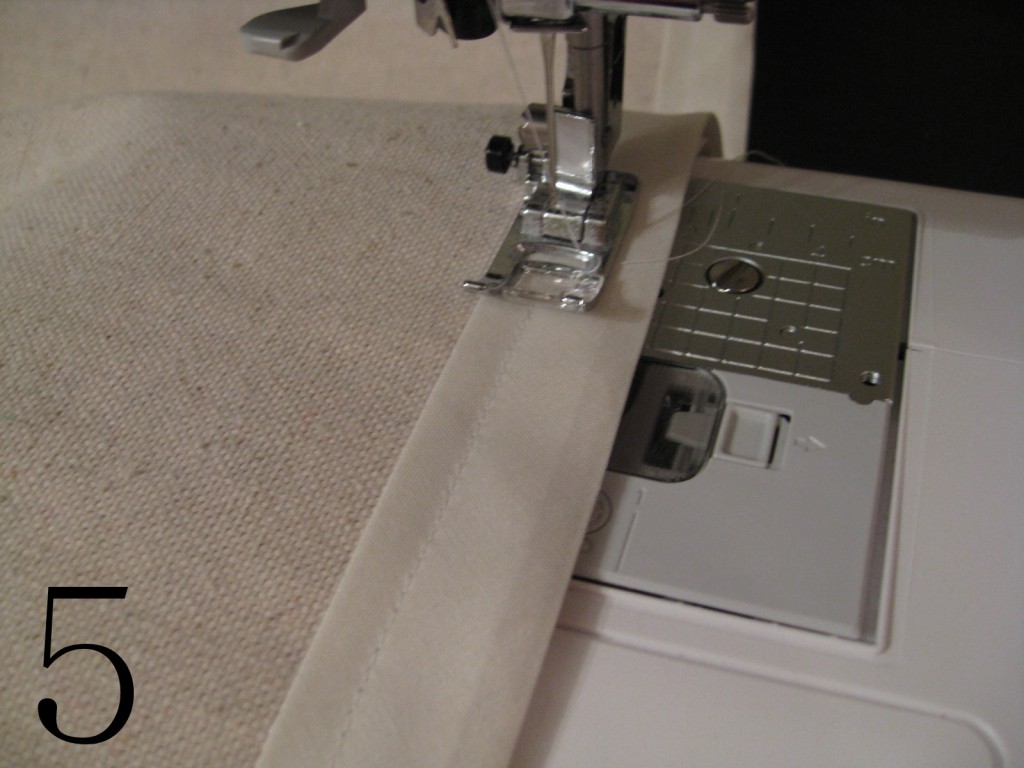
3. Take your Double Fold Bias Tape and edge the length of the roman shade.


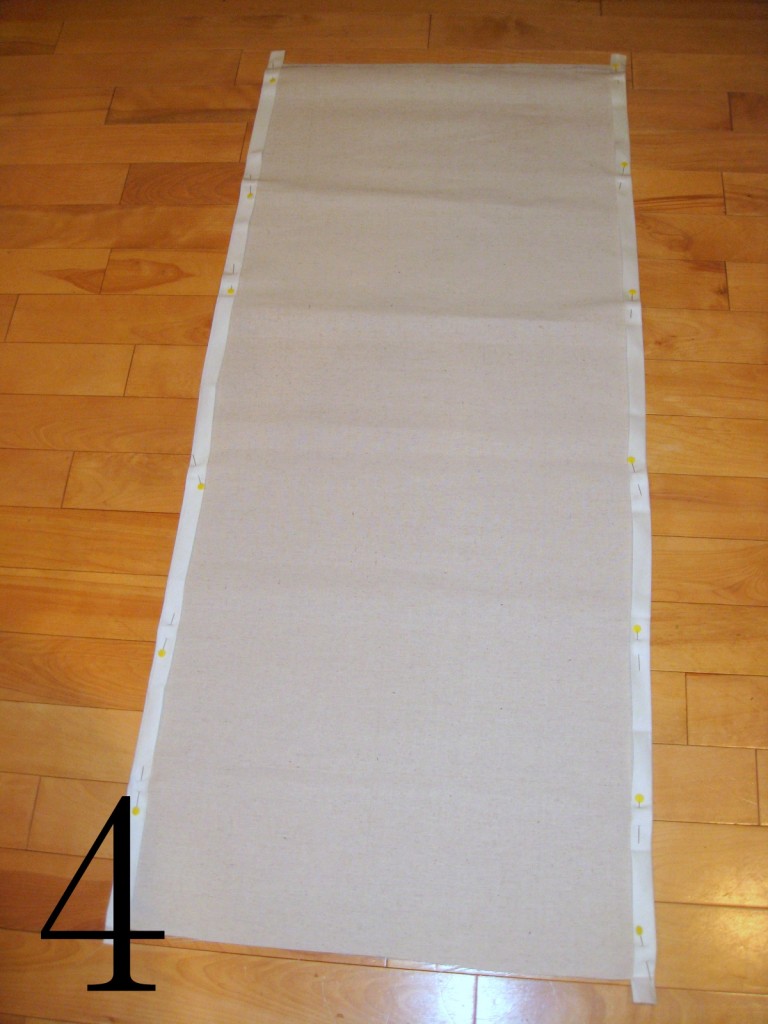
4 and 5. Pin and Sew the bias tape onto your fabric. If your top edge is not finished, fold over and sew, so you have a finished edge.
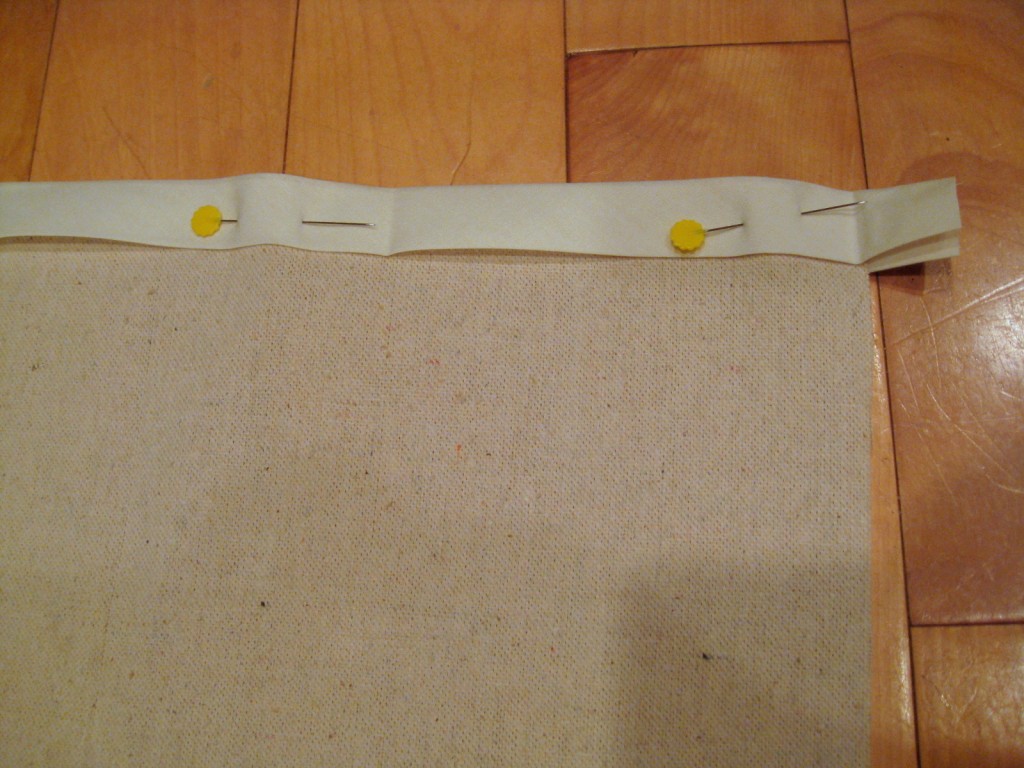


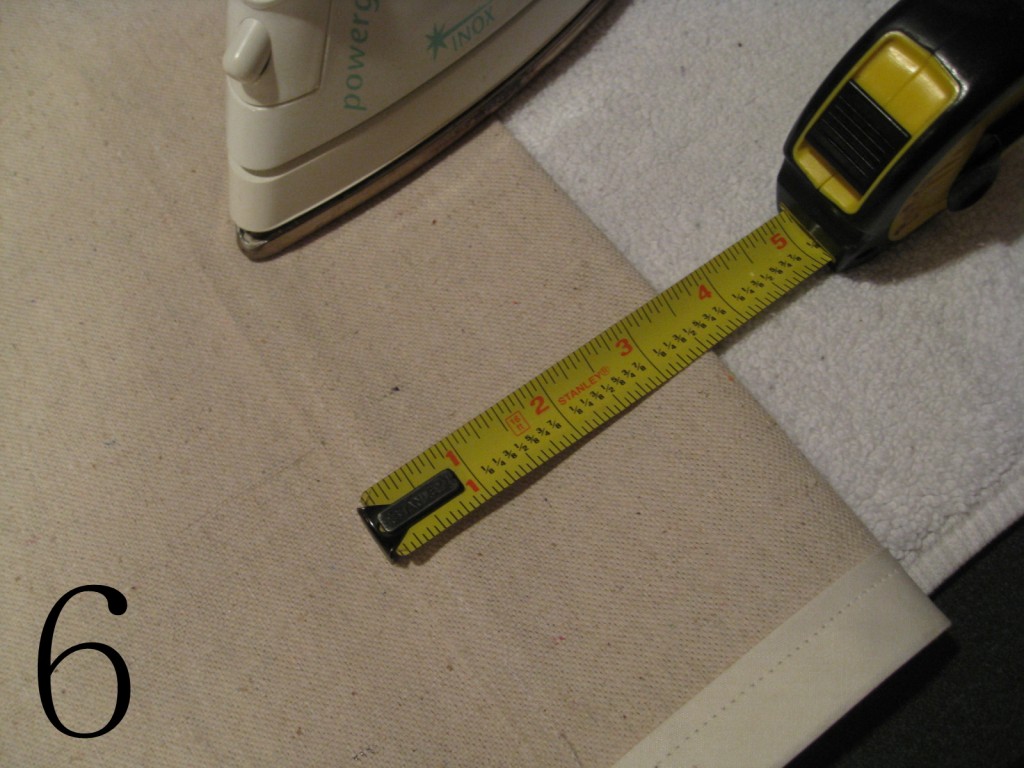
6. Fold over your fabric to create a 3-1/2” Header Flap; Iron the edge and sew along the top with a ½” inseam.

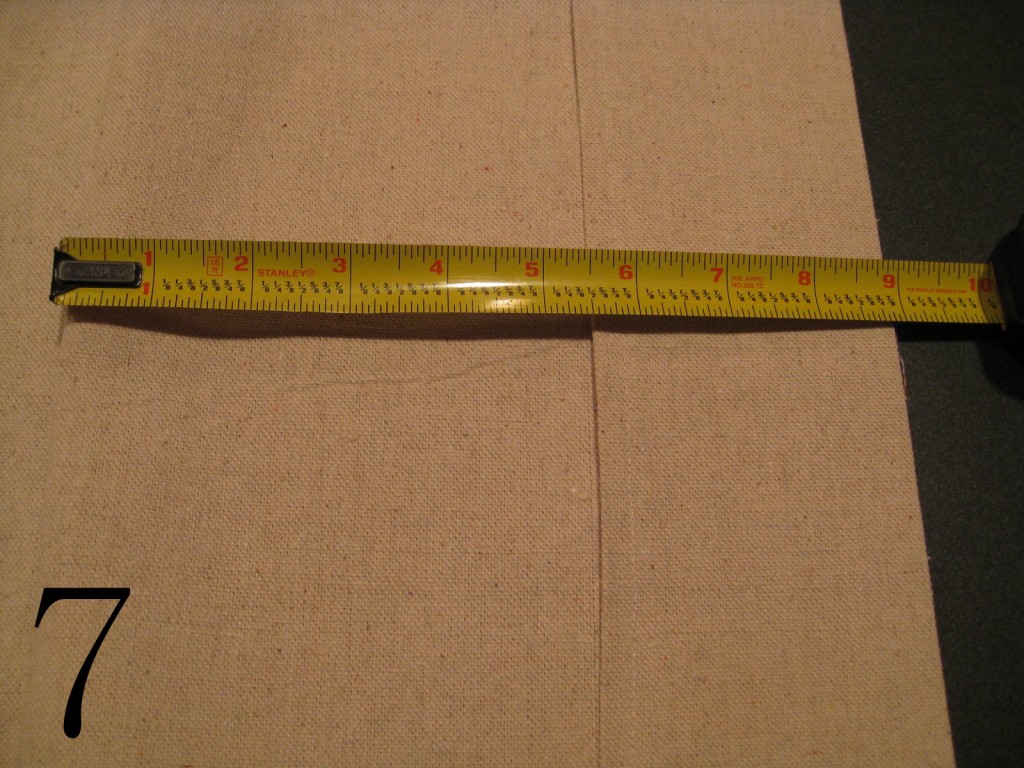
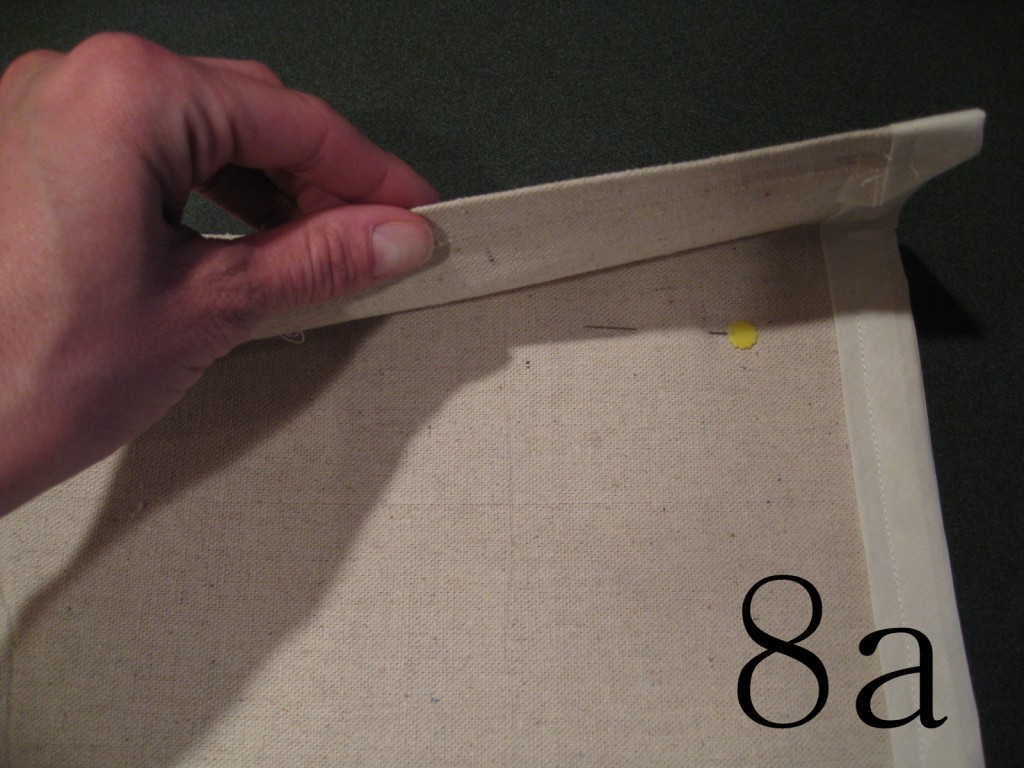
7. It’s time to start your first drop: Measure 9” from the top (3-1/2” for the Header Flap + 5-1/2” for the drop) and then fold the fabric under to create the drop of the roman shade. Bring the fabric all the way to the top of the back.


8a and 8b. Flip over the Header Flap. Pin the drop and sew the fabric underneath the flap (along the pinned line as shown in the picture).
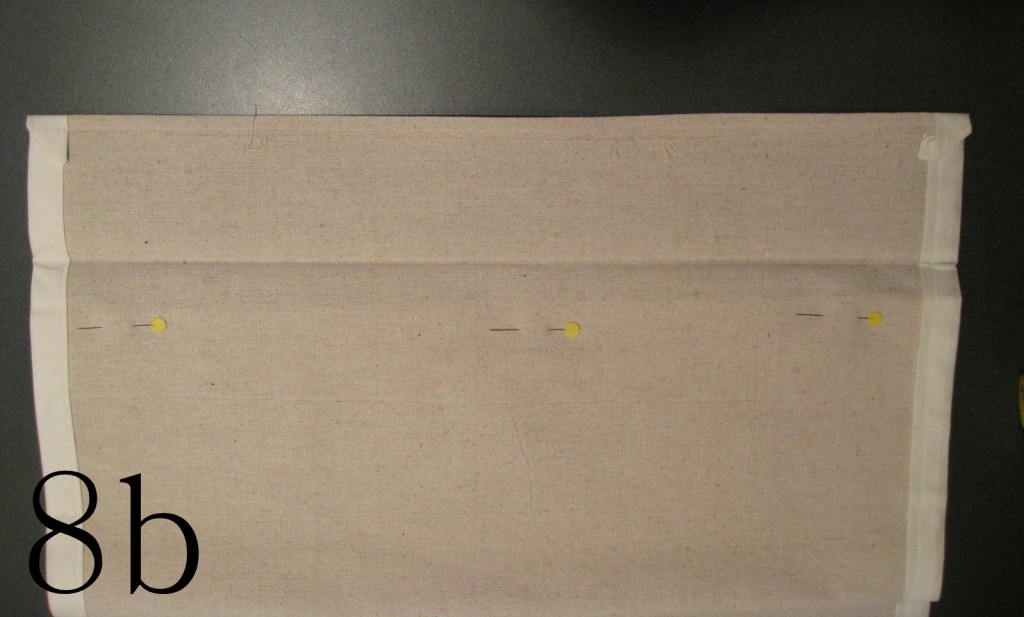


9. Onto the second drop: Measure another 5-1/2” for the next drop (which is now 14.5 from the top). Repeat step 8.

You can make as many drops as you’d like to create a longer roman shade. 2 drops worked perfectly for my size window.
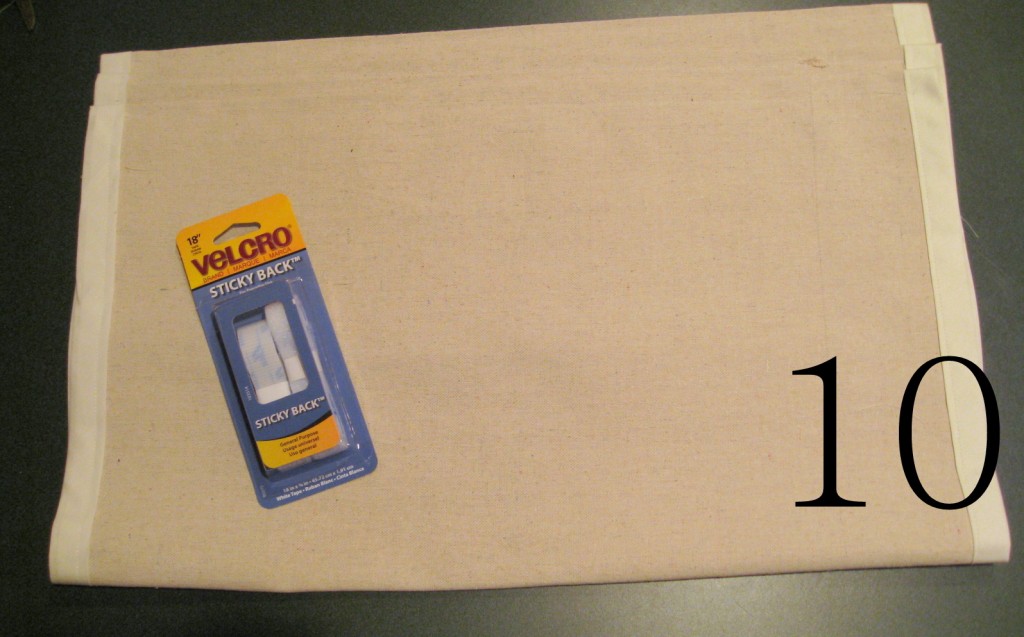
10. When you are complete with your roman shade, flip it over and attach the Velcro to the top edge of the shade.

11. As I mentioned above, I used the existing bar that was already in place. If you are starting new, you can either attach the Velcro right to the window or use a tension rod and attach the Velcro to it.
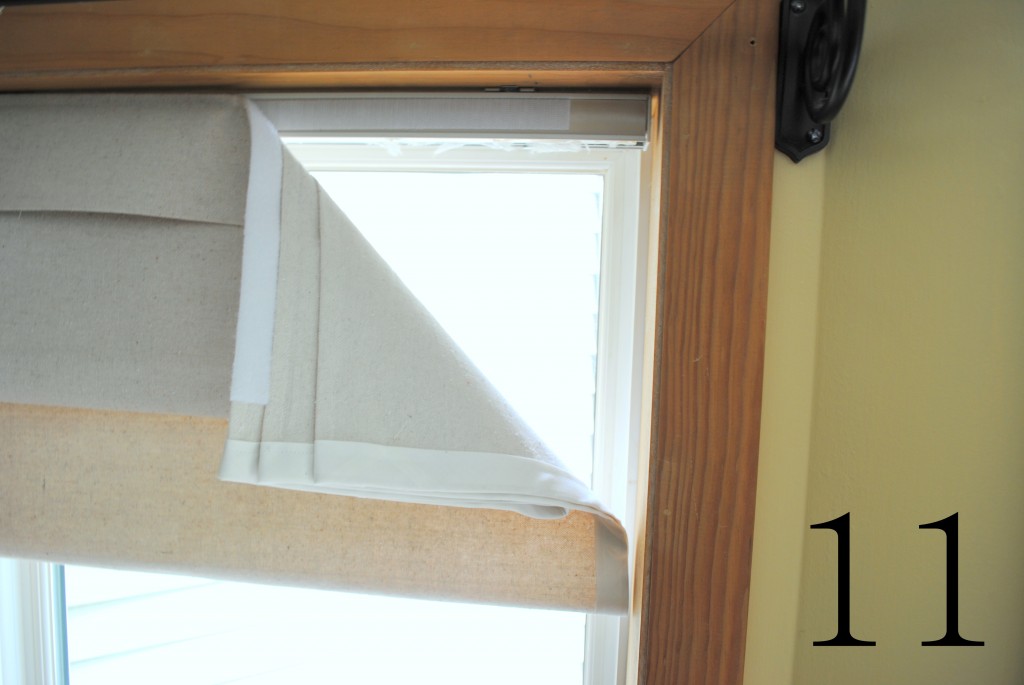

The faux roman shade is complete!
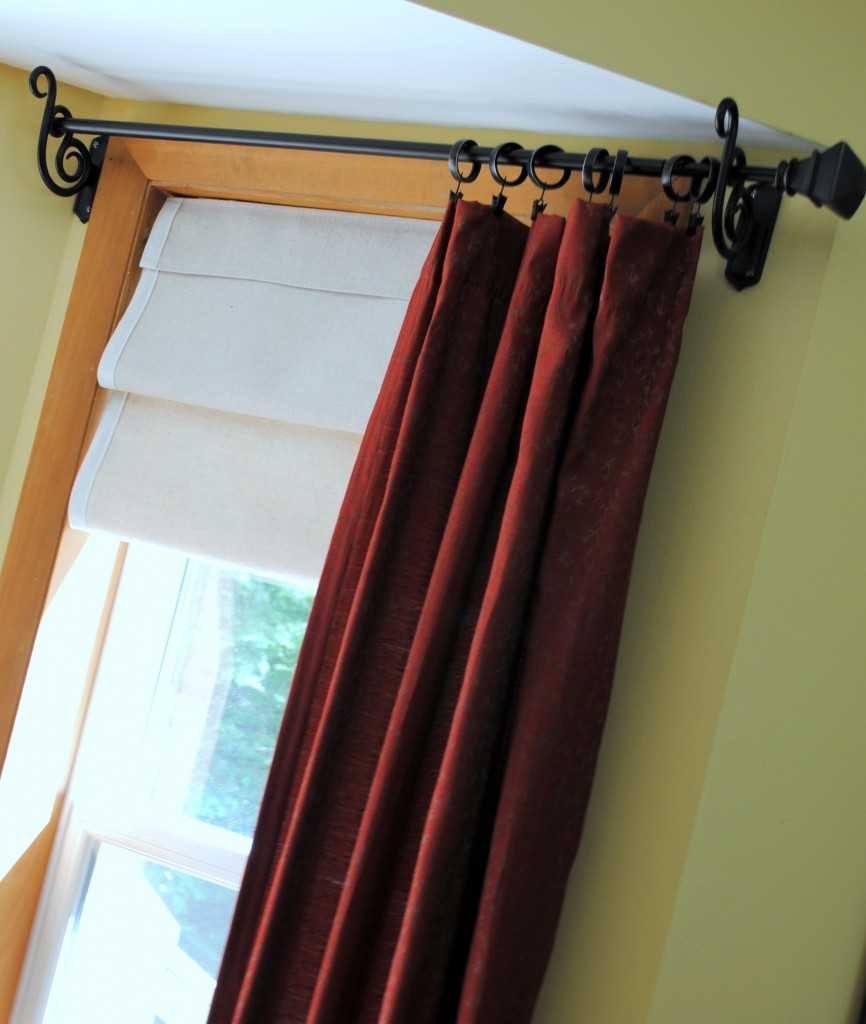

And here is the overall space.

So much lighter and brighter than before, plus the linen-like look of the drop cloth material gives the space a finished, tailored look. If you want to see more DIY projects or decorating ideas & tips, visit me at SAS Interiors. Thanks again Brittany for having me here today – it was so enjoyable to share this project with your readers!

What talent! Thank you SAS Interiors for a great tutorial. I’m so excited to use this technique to sew my laundry room curtain. Anyone else rushing off to the fabric store right now? I’ll see you there.