Y’all are so sweet to welcome Buddy onto my blog. I appreciate your kind comments and encouragement to include some of my personal life. There was not a single comment asking me to “stick to business.”

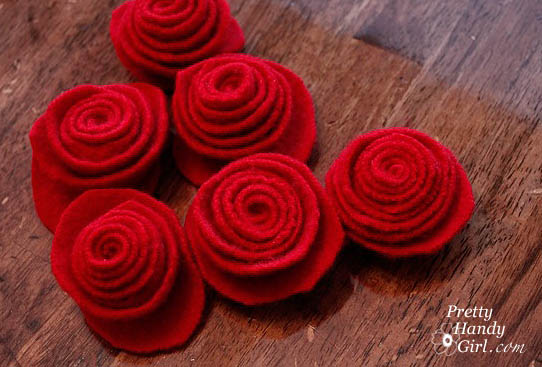
But, getting back to business, I have the felted wool roses tutorial for you today.

Last week when I saw THIS ADORABLE WREATH that Stephenie made. I knew that I wanted to make my own roses.

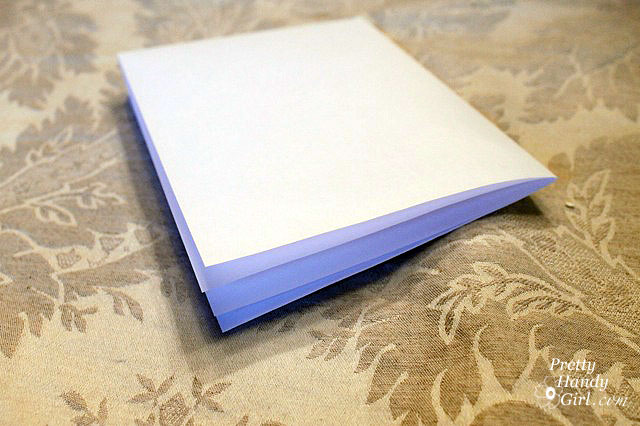
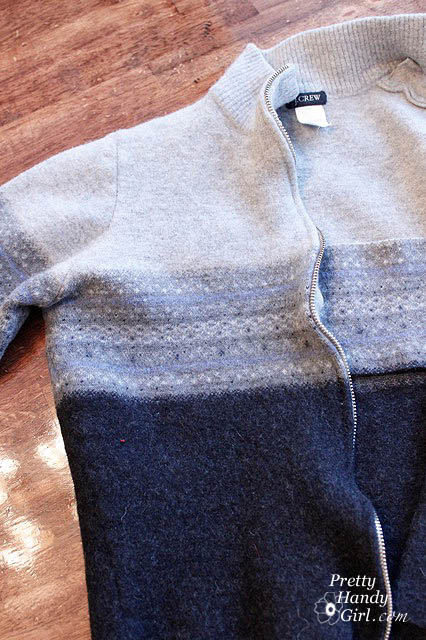
You need to start with a 100% wool sweater (or other wool fabric). Run it through your washing machine using hot water and then dry it on a medium or high heat setting. When you open the dryer you will find a shrinky dink version of the sweater (raise your hands if you remember Shrinky Dinks! Click HERE to learn how to make your own.)


Grab a pair of sharp scissors and a round object. I used a can of chicken and a cereal bowl for slightly larger ones.

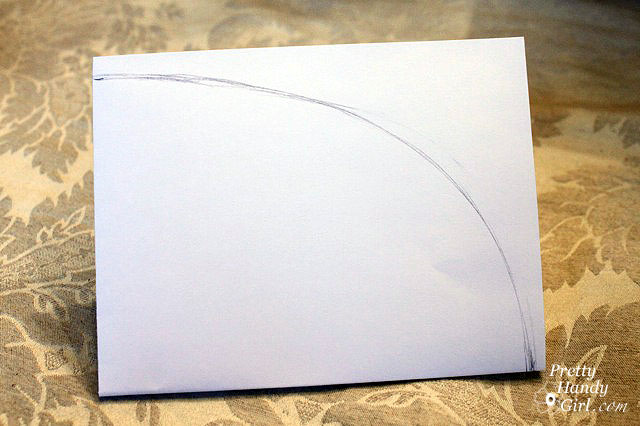
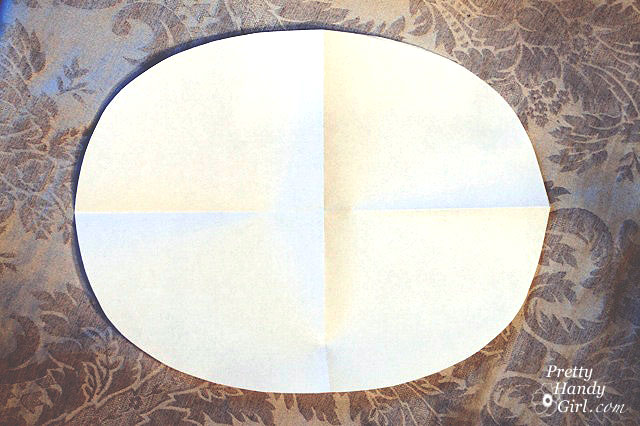
Trace a circle around your round object. As you can tell, I like to use those slivers of leftover soap.

Cut out the circle.

Start from the edge of your circle and cut a spiral towards the center of your circle. Try to keep the rows consistent, but it is okay if they aren’t. You can give your rose a “haircut” in the end if needed.

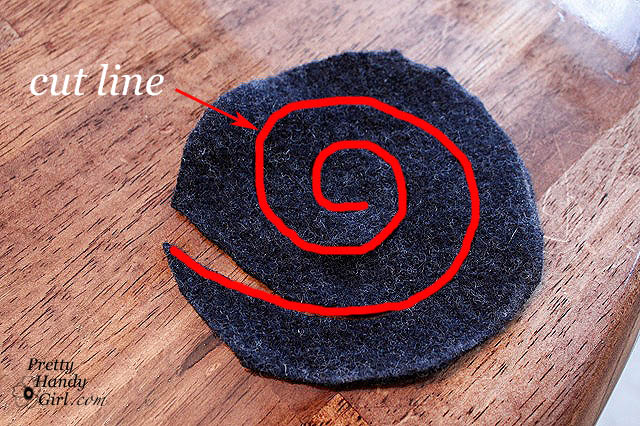
At the center, leave a small circle.

Grab the outside starting point of your spiral and begin to roll the wool. Keep rolling until you reach the end.


To secure the rose, use some needle and thread to sew several passes back and forth through the center of the rose.

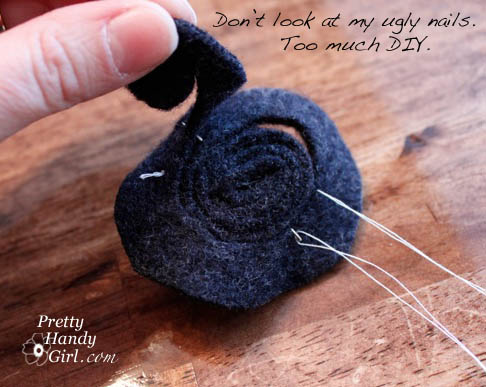
(I’ve used contrasting thread so you can see the stitches, but you should use coordinating thread for a cleaner look.)

Here is a video tracing the stitching pattern I used. Pretend that you don’t notice the radioactive shape I’m about to draw. I guess it could be worse (like a devil symbol?)

If you want to learn how to turn these into roses on a stem, click HERE.

If you will be securing your roses to a flat surface, continue reading:

Lay down the flap and stitch around the edges to secure it.

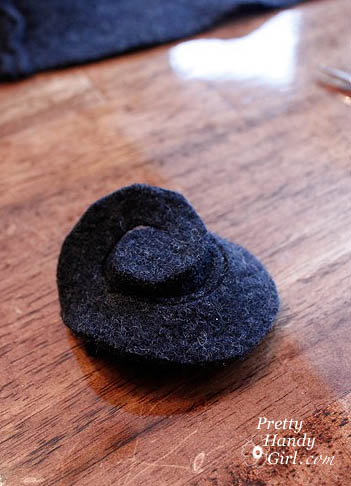
And you are done! Here is the size of the finished rose in comparison to the can I used as my circle template. About half the size, wouldn’t you say?

Now posted: a tutorial for felted rose stems and embellishing a Goodwill sweater with roses. I can’t wait to show you them!

In the meantime, what could you do with these adorable roses?

Felted Wool Rose Wreath
Felted Rose Adorned Knit Hat
Faux Chippy Painted Metal Pail with Liner

I was strolling through our local Goodwill last week looking for goodies donated by people trying to claim a last-minute tax write-off. I came across a bucket with a $1 price on it and knew I could transform it into a beautiful aged painted pail.

DIY Aged Painted Metal Pail Tutorial

Aged Painted Pail Tutorial

Recently I found myself browsing our local thrift shop looking for a last-minute gift idea for a friend. I spotted a dated pail for only $1 and quickly grabbed it and ran to the register.

little red buffalo check painted pail

The pail had the original $9 price tag still on it, so I prayed the cashier wouldn’t scrutinize the major markdown to one dollar!

$1 markdown on pail with $9 original sticker

I knew exactly what I wanted to do with it. Miss Mustard Seed’s aged painted pails have been stored in my memory banks since I first saw them in August. (And that is saying a lot, considering I can’t remember what I ate for lunch today!) Marion used crackle medium, but I remember seeing a tutorial for crackle medium using regular Elmer’s glue mixed with a little water instead. Me being the frugal DIYer I am, I decided to give it a go. Are you curious to see if it worked? Me too.

How to Create a Faux Aged Paint Technique on Metal:

hand painted "A" monogrammed pail

Let’s gather a few supplies and get to work creating a beautiful bin for storage or a gift basket.

Materials:

(I’ve included affiliate links for your convenience. I earn a small percentage from a purchase using these links. There is no additional cost to you. You can read more about affiliate links here.)

Instructions:

adding elmer's glue to empty jar

I only used enough H20 to water down the glue so it would be easier to paint on.

mixing glue with water

I brushed it all over the outside of the pail (bottom too!) And let it dry.

painting watered down glue onto pail

Next I pulled out leftover flat white paint that we use on our ceilings and painted one coat on the pail. I had to work quick, because the paint got gooey quick and you don’t want to keep brushing over the paint when it starts to dry (trust me on this one.)

closer up painted chipping pail

After the white paint dried, I took out some acrylic paints and painted some stripes, flowers, and a monogram.

hand painted "A" monogrammed pail

To protect the paint from chipping off, I added a coating of matte mod podge. I have to admit, I’m still amazed a little Elmer’s glue and water worked to create a chippy crackle finish!

Isn’t it cute? Much better than the original.

Faux Chippy Painted Metal Pail with Liner
Purple print pants hanging on a hanger.
Can you believe it? That cute liner used to be a pair of second-hand pants.
pants leng hanging out of painted pail
The liner was super easy to make, tutorial HERE.
Spa-themed gift bucket on hand-painted chippy pail
This Aged Painted Pail can be filled with anything, but I chose a spa-theme for this gift basket. What would you put in this vintage painted pail?
signature
Want more ideas for gift baskets? Here are 31 Last Minute Gift Basket Ideas!
31 last minute gift basket ideas social media images

Now that the Christmas hype has died down and my cold has lost its grip on my sinuses, I’m back with a quick little tutorial on creating a special silhouetted gift for your child.

Thank you to my dear Pretty Handsome Guy for his guest post. I’m glad you all enjoyed a good laugh at his expense.

Christmas morning my boys were greeted by magical North Pole snow footprints (baking soda) leading up to the tree.

In an effort to keep the Santa myth alive, the two presents from Santa were constructed in a different style from the other presents under the tree.

My six year old exclaimed Christmas morning, “MOM! Santa knows what we look like!” So, I think I fooled them again this year.

Materials:
Scissors
X-acto knife (optional) and cutting surface
Profile picture of your child
Spraymount
White sheet of letter size paper
White cardstock paper
Black cardstock paper or construction paper
Chalk, Bistro marker, or White paint pen
Pencil
Glitter spray
Glitter glue

Start by creating your child’s silhouette. (My silhouettes took many steps in Adobe Photoshop, but I’ll give you instructions for the easy way.) Simply take a photo of your child turned sidewards (preferably in front of a blank wall.) Then enlarge the photo on a copier to the size you want to use. Lay the paper on top of the black cardstock and cut them both at the same time. I prefer to use an X-acto knife for the cutting, but you can use scissors if you like.

Unless you have a graphic program or a template to draw perfect ovals, you will need to draw one freehand. Wait, wait, don’t freak out. You can do this!

First, fold a letter sized paper into fourths.

Draw a curve on the paper with the fold sides inside the curve.

Cut along the line.

Open up your paper to reveal your oval. If you don’t like it, try it again.

Once you are happy with your oval, trace the folded oval onto white cardstock paper and cut it out.

Wrap your present (be sure to use wrapping paper that your child has never seen in your home!)

Spray the back of your cardstock oval with spray mount and adhere it to the present.

I added some glitter spray to the wrapped package to give it a little extra sparkle! (I know, it doesn’t really show up in the photo.)

So, here is a close up of the glittery goodness:

Spray the back of your silhouette head with the spray mount and lay it inside the oval.

Next, add a bead of glitter glue around the edge of the oval. Note of caution: Allow the glue to dry before setting your package upright or it WILL run. Of course I learned the hard way and had to unglue my package from the shelf it was sitting on. Drat!
Here are the presents before I added the “To & From” on them.
You can write your child’s name on the silhouette using chalk, bistro marker or white paint pen. Or leave it blank if you wish, your choice.
That’s it, not too hard, but the results are stunning. You could use this gift wrapping technique for any special present.
I have to share with you a little something that warmed my heart Christmas morning. My oldest carefully cut off the fronts of all the presents that I gave him to preserve the creative gift wrap designs.
He saved them all including his silhouette from Santa.
In stark contrast, my youngest tore into the packages as any other eager four year old boy would.
creative gift wrapping

This is it, the last day of my Creative Gift Wrapping Tutorials. I saved these adorable silhouetted animals for last.

Snowy Polar Bear
Materials:
 
Wrapping paper
White card stock paper
Snowflake hole puncher
Key tag
Satin ribbon
Jingle bell
Black & white pom poms (nose & tail)
Small black button
Elmer’s glue
Hot glue gun
Wrap your present as you normally would.
Using this template (click on the photo for a larger version and then print it out), cut out the polar bear shape on white card stock. Better yet, if your printer will handle it, print it out on card stock and then flip your bear over to the white side.
Glue your bear onto the gift package.
Punch out some snowflakes. (I used some white and some light blue that would show up better on top of the white bear.)
Cut one piece of red ribbon for the bears collar. Then glue the collar and snowflakes onto the package using Elmer’s glue. Then glue the button and pom poms using hot glue.
 Thread a jingle bell onto some satin ribbon, then tie a bow onto a key tag.

Hot glue the bow/jingle bell onto the bear’s collar.

 Factoid: Polar bears are my favorite animal! Did you know that a polar bear’s skin is actually black? And the bear’s hair is actually transparent hollow tubes. This serves three purposes: 

  1. The tubes are hollow so they store air in them. This acts as an insulator. 
  2. Plus, it helps the polar bears buoyancy while swimming. 
  3. Remember how I said their skins is black? Well, because the fur is actually transparent, it allows the sun to reach the bear’s skin and help warm them. Cool, huh?! 
Dove of Peace
Materials:
 
Wrapping paper
White card stock paper
Satin ribbon
Sprig of rosemary or other evergreen twig

Hot glue gun

Wrap your present as you normally would.

Add your ribbon on the diagonal corners.
Click on the dove silhouette below to see the full size image. Print it out on the cardstock paper and cut out the shape to use as a template, or use the reverse white side of the shape.
 
Use a hole punch to cut out the eye. Hot glue your dove to the package and hot glue the rosemary underneath the dove’s mouth.

Have fun with this creative package. Add the words PEACE, or bend the wings up to make them three dimensional.

This dove will work on a variety of sized gifts. Here she is on a vertical present.

“Peace on Earth, Goodwill Toward Men”


handmade projects

Welcome back. If you are up for some more creative gift wrappings, let’s get going.

Hanging Ornaments
Materials: 
Wrapping paper
Curling ribbon
Buttons
Snowflake Embellishments
Hot glue gun
Elmer’s glue
Circle template: jar, glass, compass

Scissors

Wrap your present in wrapping paper.
Using your circle template, trace different sized circles on colored paper and/or wrapping paper. Cut out the circles. Lay them onto your package with a few buttons to determine the desired layout.
Cut curling ribbon to the lengths needed to meet the ornaments and glue them with Elmer’s glue onto the package. Glue the ornament circles and buttons next using hot glue. Add stickers or snowflake embellishments on top of the circles. Finish by tying some bows with the curling ribbon and attach them just above the ornaments with hot glue.
“Deck the Halls”
Here is my girlfriend, Renee’s ornament package.
I love the little “x’s and o’s” she added for her daughter.
Musical Snowman 
 
Materials:
Wrapping paper
Printed sheet music (do a google image search for: sheet music)
Snowflake hole puncher
white or scrapbook paper
Snowman sticker or embellishment
Elmer’s glue
 
Limber up those thumbs and get to work punching out mini snowflakes. Or better yet, let the kids do it (my boys had a ball making all these snowflakes.)
Wrap your package as you normally would. Using a solid color or wrapping paper with less detail seems to work best.
Tear the printout of sheet music to make the snowy hill. Lay it on top of the package and crease the edges so it wraps around the box.
Glue on the music sheet first. Then layout your snowflakes and snowman and glue them on.
 
 Feel free to add snowflake embellishments or circle hole punches if you want.
Tomorrow is the last day of my SIX days of Creative Gift Wrapping.

Click HERE to see an adorable polar bear and dove!