Okay, so I know you all think I’ve gone off my rocker. I bought a bunch of silverware (err, excuse me flatware) from Goodwill recently. I made some Fork Photo Holders (which I absolutely adore!) And had been thinking of some cool projects to do with the knives.

Inspiration hit when my chickadee’s birdhouse roof caved in. I knew I had to act quickly and build a new birdhouse for my repeat nesters! Here is a look at the dynamics surrounding the chickadee’s annual nest location.

I had no idea that the little chickadees could continually defend their bird house from the larger birds, but they do. Every year!

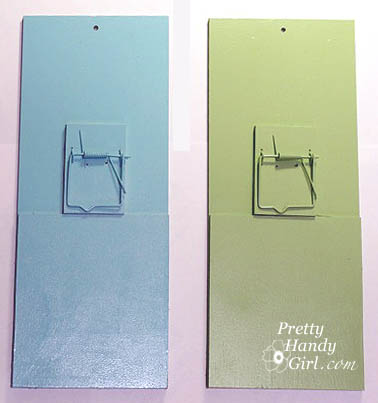
I bought this $3 unpainted birdhouse at AC Moore and painted it a pretty blue;  gave it a white wash; and put a few coats of protective polyurethane on it.

Then, because I can’t leave well enough alone, I decided that the birdhouse needed something extra. Knives!!! Of course, right?!

So, here is what I did:

Materials:

Painted and Polyurethaned Birdhouse
Knives (about 14)
Wire
Wire cutters
Staple Gun
1/4″ Staples
1 Spoon or Fork Handle
Dremel power tool (with metal cutting disc, drill bit, and engraving tool)

Instructions:

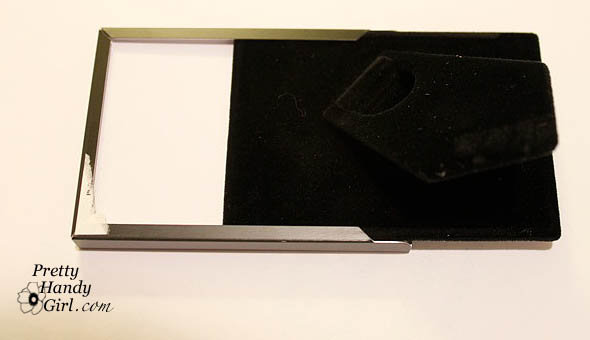
Begin by removing the standard perch (yes, I really can’t leave well enough alone!)

I used my Dremel 8000 that I got for Christmas. Love it!

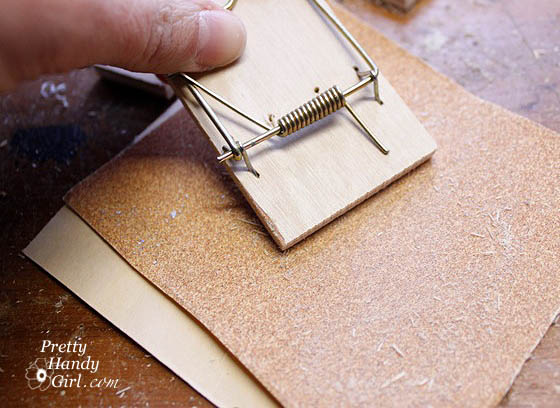
Then clamp the spoon or fork to a work surface and use a metal cutting wheel attachment on the Dremel to cut off the handle (those sparks will fly, so be sure to use safety goggles and keep the work area clear.)


Mark the width of the handle on the birdhouse.

Use a drill bit attachment to drill a series of holes to fit the spoon handle (perch) into.

I got tired of drilling holes and eventually cleared out the leftover material with the engraving tip. (If anyone is a Dremel expert and has a recommendation for a better bit to use, I’m all ears!)

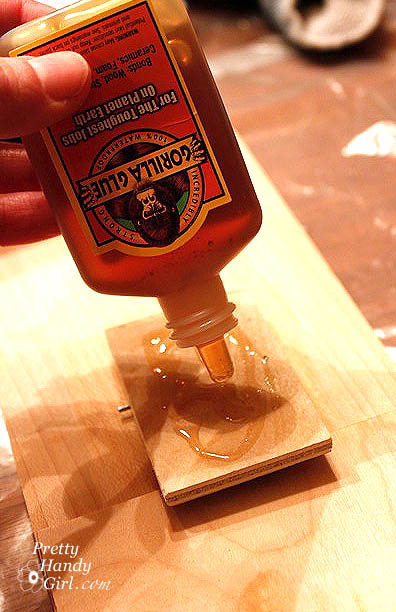
Dip your handle (perch) in the E-6000,

and insert it into the slot you made in the birdhouse.

Now, time to play with the knives! Oooo, that sounds so sadistic! Measure the height of your birdhouse roof and then line up your knives to double that length (to cover both sides of the roof.)

Wrap a wire around the first knife a few times, then wrap it around the second knife a few times to connect them.

Continue connecting the knives together until you reach the double height length of the roof.

Repeat tying the knives together on the opposite side.

Drape the knives over the birdhouse roof and adjust any that have fallen out or are not lined up.

If some of the knives want to fall out, add a drop of E-6000 to the underside to secure the wire to the knife.

Load your staple gun with 1/4″ staples and staple the wire to the roof. Tap any that didn’t sink into the wood with a hammer.

Finally, add a hook to the top of your birdhouse and hang it up outside! I hope the chickadees appreciate their new home.

Note: At first I wanted to use more knives so that you couldn’t see any space between the knives, but those suckers were so heavy that I had to modify my plans.

PHGFancySign

Fork Photo Holder

I want to share with you how to make an alternate base for that Fork Photo Holder you see above. If you will give me a few minutes, I’ll show you how to do that.

Materials:
Fork (.25 each from Goodwill)
Wooden base from craft store (cost me .69 each)
Beads, corks, or other items to thread onto the base of your wire (corks were free, beads I had on hand)
Scrapbook paper
Mod Podge
Multi-Purpose Utility Wire 16 Gauge ($7.99 for a huge roll of it, I only used a few inches per project)
Wire cutters
Needle-nosed pliers
E-6000 glue
Felt
Drill with 1/16″ drill bit


Instructions:

Start by sanding any rough edges off your wooden base. Then prime and paint them.

Measure and mark the center of your wooden base.

Using your 1/16″ drill bit, drill through your base (be sure to put a piece of scrap wood underneath to avoid drilling into your table, etc.)

Lay a piece of scrapbook paper on top of the base and use your finger to score around the edges of the base.

Cut out the shape scored on the scrapbook paper.

Using mod podge, brush one coat onto the top of the wooden base. Lay your scrapbook paper cutout onto the base and follow up with another coat of the mod podge to seal the paper to the base.

Assemble your fork onto the wire as shown HERE.

Thread on your beads for the base. (Alternatively, you can use a wine cork or a solid end bead and drill a hole through them.)

Then dip the end of your wire into the E-6000.

And insert it into the base. Some of the glue should squeeze out of the base. You can use the excess glue to adhere the beads to the base. (Yes, you should wear gloves when working with E-6000 glue. Do as I say, not as I do!)

Protect your table with newspaper, craft paper, or wax paper while the glue dries.

Using a sliver of soap, draw around the base of your photo holder onto the felt.

Cut the felt slightly smaller than the traced shape.

Use a little E-6000 to glue the felt to the bottom of the base. Let it dry on wax paper (I use old cereal bags because they were free and I like to recycle.)

And you are done!

I raided my neighbor’s recycling bin for that beautiful cobalt blue wine bottle. It works well as a base too! Don’t you think it would be a cute place to hold “Today’s Specials” at a restaurant? Or a reminder note. Or just a beloved photo.

What would you use one of my fork photo holders for?

PHGFancySign

Mousetrap-MemoTrapFinal

I’ve been dying to show you this project, but didn’t want to give away any secrets. You see, I made them for a few bloggers out there in the home décor blogland. And as luck would have it, most of these special women are here at Blissdom! As a tiny token of my appreciation for their inspirational blogs, I put together a little gift bag. Inside (among other things) was this one-of-a-kind memo pad.

With a note attached.
“My mouse is hooked on your blog!”
Get it? The notepad holder is a mousetrap and I was playing on the word, mouse (the one for your computer). Corny, I know.
So, you want one for yourself? I’m happy to share with you the tutorial.
The memo pad started life as a mousetrap (4 for $1) and a mini picture frame also $1 at the Dollar Store!

Materials:

Wooden mousetrap
Small picture frame
Cabinet Toe kick boards or other thin scrap wood (1 – 4.5″ x 4.5″, 1 – 4.5″ x 10″)
Wire
Ribbon
Notepad
Corrugated cardboard
Small 2″ x 3″ picture
E-6000 glue (optional)
Gorilla glue
Primer
Paint
Sandpaper
Needle-nosed pliers
Saw (hand saw is fine)
Drill and bit (for hole)

Start by removing the hook and trap hold parts with pliers. Then remove the bait hook.
All that will remain is the spring and snapping bar.
Cut the excess wood from your mousetrap with a handsaw.
(I used mine in a miter box for a straight cut.)
Sand down the rough edges.
You will need to cut down your scrap wood to the dimensions below.
The 4.5″ square piece is the same thickness as the mousetrap.
This insures an even surface for the memo pad to rest on.
Following the directions for the Gorilla Glue,
I wet each piece of wood and then added the glue.
Glue the 4.5″ square piece to the bottom of the larger piece of wood. Then glue the mouse trap right above the square piece. Make sure your snapping bar is facing down, as shown below.
Set a weight on top of the wood to “clamp” it while the glue dries. (About an hour or so.)
Anyone know what these hand weights are good for?
Beats me, I only use them to weigh down projects.
After the trap is dry, spray your boards with 1 or 2 coats of primer.
Then follow up with your favorite color paint.
At this point, you will want to drill a hole through the top of your board.
Take apart your picture frame and discard the backing.
Replace it with a piece of corrugated cardboard cut to size. Slide in your picture.
Carefully add a small line of E-6000 glue* to the back of the frame and glue it just above the mouse trap. If you use too much glue, it will glue the cardboard to the frame and you won’t be able to switch out your picture from time to time.
*You could use Gorilla glue for this step, but the glue expands and might glue your frame shut so you can’t change the pictures.
Create a bow with the ribbon and slide a piece of wire through the bow knot.
Secure the bow by threading both ends of the wire through the hole at the top of your mouse trap memo holder. Twist the wires together to make a loop for hanging.
Add your memo pad and you have a unique little note center.
So do you think those wonderful bloggy ladies will like it?
It isn’t too cheesy is it? (Pun definitely intended!)

Hello my sweets! I’m definitely getting down with the sugar lingo just in time for Valentine’s Day. And in honor of that day devoted to love, don’t you think these felted wool roses would make a nice gift for that someone special in your life?

If you haven’t already, learn how to make the rose heads, in the tutorial HERE.

Materials:
Hot Glue
Tacky Glue (or E-6000 but that is overkill)
Cardstock Scrapbook paper
Scissors
Sticks

Turn your roses over and snip off the middle flap.

Squeeze a fair amount of hot glue into the back center of the rose.

Then insert one stick into it.

Next fold your scrapbook paper in half.

Cut out a leaf shape with the stem landing on the fold.

Bend the stem down slightly.

Next make a crease along the length of your leaf.

Put a small dollop (I just love that word) in the middle of the two leaves to secure them together.

Next glue the stem of your leaf to the stick. I used hot glue, but half my leaves fell off. Therefore, I recommend using a tacky glue instead.

Who would you give these everlasting roses to?

Next up on Pretty Handy Girl: The same roses used to embellish a Goodwill sweater HERE.

Y’all are so sweet to welcome Buddy onto my blog. I appreciate your kind comments and encouragement to include some of my personal life. There was not a single comment asking me to “stick to business.”

But, getting back to business, I have the felted wool roses tutorial for you today.

Last week when I saw THIS ADORABLE WREATH that Stephenie made. I knew that I wanted to make my own roses.

You need to start with a 100% wool sweater (or other wool fabric). Run it through your washing machine using hot water and then dry it on a medium or high heat setting. When you open the dryer you will find a shrinky dink version of the sweater (raise your hands if you remember Shrinky Dinks! Click HERE to learn how to make your own.)


Grab a pair of sharp scissors and a round object. I used a can of chicken and a cereal bowl for slightly larger ones.

Trace a circle around your round object. As you can tell, I like to use those slivers of leftover soap.

Cut out the circle.

Start from the edge of your circle and cut a spiral towards the center of your circle. Try to keep the rows consistent, but it is okay if they aren’t. You can give your rose a “haircut” in the end if needed.

At the center, leave a small circle.

Grab the outside starting point of your spiral and begin to roll the wool. Keep rolling until you reach the end.


To secure the rose, use some needle and thread to sew several passes back and forth through the center of the rose.

(I’ve used contrasting thread so you can see the stitches, but you should use coordinating thread for a cleaner look.)

Here is a video tracing the stitching pattern I used. Pretend that you don’t notice the radioactive shape I’m about to draw. I guess it could be worse (like a devil symbol?)

If you want to learn how to turn these into roses on a stem, click HERE.

If you will be securing your roses to a flat surface, continue reading:

Lay down the flap and stitch around the edges to secure it.

And you are done! Here is the size of the finished rose in comparison to the can I used as my circle template. About half the size, wouldn’t you say?

Now posted: a tutorial for felted rose stems and embellishing a Goodwill sweater with roses. I can’t wait to show you them!

In the meantime, what could you do with these adorable roses?

Felted Wool Rose Wreath
Felted Rose Adorned Knit Hat