This post has been running around in my head for quite a while now. I feel like you don’t really get to see the real me when you read my posts. You don’t get to see the me in my pajamas and messy desk (and dirty dishes) as I proof read the post I finished at 1am in the morning.
You don’t get to see the real me who rushes out the door to pick up my kids in my paint and sawdust spattered clothes.
And you don’t get to see the family that has been behind me from the beginning. You can thank my friend Roeshel from The DIY Showoff for giving me the old kick in the pants to finally share those pertinent details with you ;-).
Have you ever wondered who the real Pretty Handy Girl is? Is she tall is she short? I’m 5′ 6″. What’s her favorite food? Definitely dark chocolate! Is she a coffee or tea drinker? Coffee. Mac or PC? Been a Mac girl since 1990! And what really scares her? Read more to find out: Read more
Becoming a Junk Warrior doesn’t happen overnight. It takes a lot of training and effort to achieve toughness and the ability to withstand the elements while junkin’. It was touch and go, but I eventually passed all ten tests to become a full fledged Junk Warrior.
Want to take the online lesson to become one too? Follow these video tips to earn your Junk Warrior status: Read more
https://prettyhandygirl.com/wp-content/uploads/2021/07/PHG-logo-tagline-2020-1030x211-R.jpg00Brittany Baileyhttps://prettyhandygirl.com/wp-content/uploads/2021/07/PHG-logo-tagline-2020-1030x211-R.jpgBrittany Bailey2012-08-13 07:00:452012-08-25 01:14:13Lessons on Becoming a Junk Warrior
Wow, y’all knocked my socks off with the response to my front door color survey! Over 350 people responded. With that kind of a response I should ask for your help more often!
https://prettyhandygirl.com/wp-content/uploads/2012/05/red_door.jpg384576Brittany Baileyhttps://prettyhandygirl.com/wp-content/uploads/2021/07/PHG-logo-tagline-2020-1030x211-R.jpgBrittany Bailey2012-05-25 12:22:282021-08-20 19:49:50The Results are In, But the Front Door Dilemma Continues
Happy Day After Thanksgiving! I don’t know about you, but despite the week I had last week, I am very grateful and thankful for modern medicine and trained surgeons who can take all the broken pieces and put them back together again. Humpty Dumpty never had it so good!
My seven year old is thankful for something completely different. When asked yesterday morning what he was thankful for he said (very seriously), “My bottom.” I tried so hard not to laugh, and was able to utter a quick “Why?”. He replied, “So we won’t explode!” Oh the thoughts of a seven year old boy. ;-D
I hope everyone got their fill of food and family time! And most of all I hope you got a little R&R. You may be looking around wondering where Tool Tutorial Friday is. Well, I’m sorry to tell you that it is on break (no pun intended.) After all the stress from my son’s broken his arm last week, I decided to give myself a much needed reprieve from blogging. No worries though, Tool Tutorial Friday will be back next week as previously scheduled.
I hope you won’t be too mad and disappointed with me. But, seriously, you don’t want to sit here and learn how to use another power tool today! You want to take some time to unwind and enjoy your family, right?!
In the meantime, I do have the Tomboy Tools magnetic hammer winner: Roxanne Lucchesi!
She says, “I have been wanting to tell you how much I love your blog. And now I REALLY love it. It is so great that you are taking the time to post these tutorials. I cannot tell you how much I appreciate them. I recently added a table saw to my collection of tools. Mind you, I have never used a table saw, but have always wanted one. Now you have empowered me to actually get out there and use it. Thank you!”
Thanks so much Roxanne, comments like yours are what make all the efforts I put into my blog worth it!
And a big thank you to my sponsor:
Laura from Tomboy Tools, who graciously offers a hammer a week for the Tool Tutorial Friday series. Laura is a super sweet mompreneur who also wants to empower women to take on their own DIY project. If you get a chance, check out the other tools she sells!
We had a great turnout at the Habitat ReStore demonstration on Saturday! Thank you to everyone who showed up. It was nice meeting some new friends. There will be another talk at 1 pm on Saturday, December 10th at the Cary, NC Habitat ReStore! I hope you can make it, because I’ll be showing how to turn some common ReStore items into holiday gifts and décor.
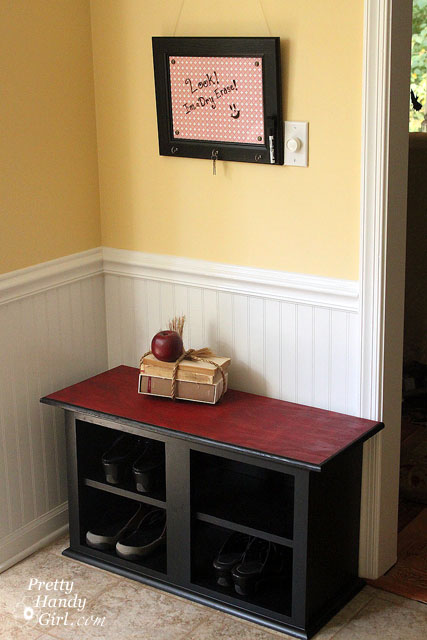
And now for the tutorial that you really wanted to see — but couldn’t make it to see — making a shoe storage bench out of an kitchen wall cabinet!
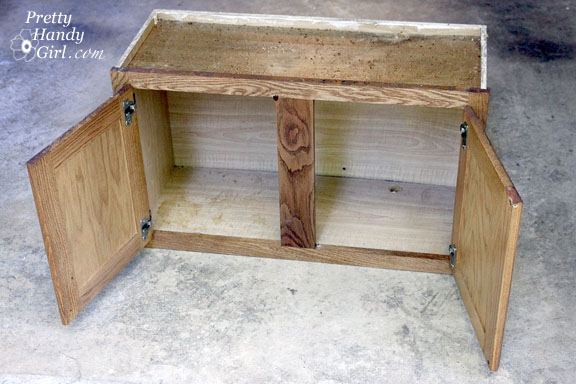
Wall cabinets that fit over your fridge or stove work really well for this shoe storage bench project. Ideally the cabinet will be 18″ in height (standard seat height). If it is shorter, you can build a base for your bench to raise it up a little.
It is more than likely that these cabinets will be coated with about 5 lbs. of grease. But, have not fear, I found THE BEST cleaner for removing grease. Hot water and ammonia! You must work in a well ventilated area when working with ammonia. Sponge on the ammonia and hot water concoction and wait about 10 minutes. Wipe off the cabinet and repeat until clean.
Materials:
Ammonia, hot water and a sponge or rag (to clean off grease)
Screwdriver
Hammer
Nail set
Miter saw
Pencil
Level
Tape measure
Wood putty
Sandpaper
Construction or thick wood glue
Primer
Paint
Paint brush
2″ finish nails
1 and 1/4″ finish nails
Quarter round moulding for base of cabinet
Cove moulding for top of cabinet
1″ thick board (cut to fit inside cabinet dimensions)
1×4″ pine firring strips
Plywood or pine board cut to fit 3″ wider and 1.5″ deer than finished dimensions of the cabinet (after moulding is added.)
Optional: Thin plywood to use as a filler strip
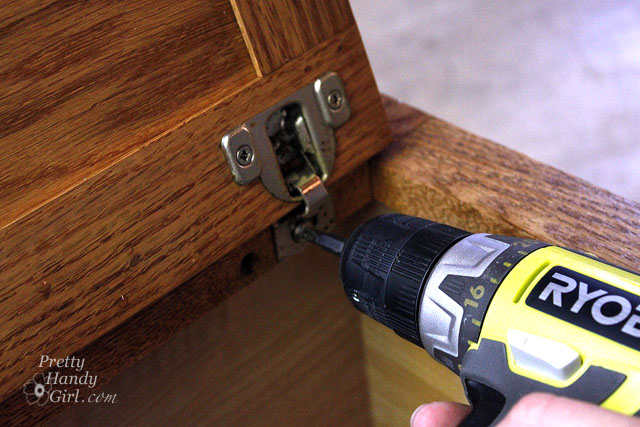
Remove all the hardware and the doors. Remove any nails that are poking out or hammer them flush with the wood.
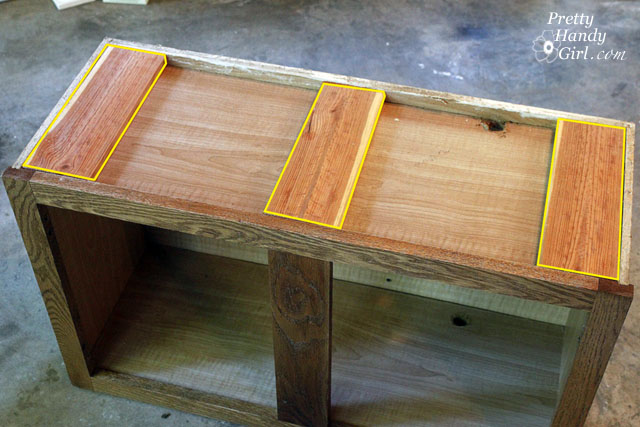
Measure the inside depth of the top of your cabinet.
Cut three 1×4″ boards to sit on top of the cabinet and use for the bench support and to give your nails something to grip when attaching the bench top. (Without these supports it would be very difficult to nail or screw into the particle board cabinet without it flaking and chipping.)
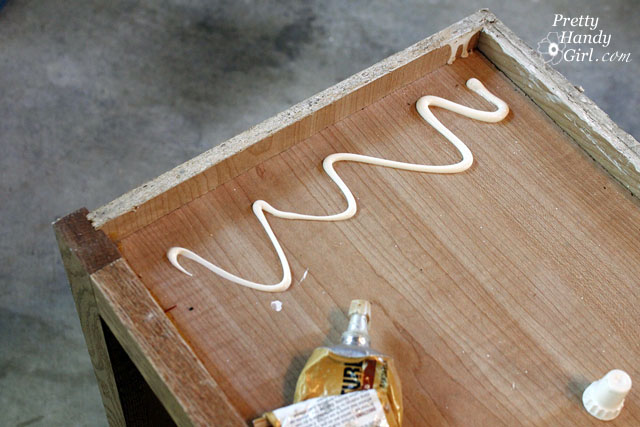
Use thick construction glue to attach the boards. (Glues that have a toothpaste consistency.)
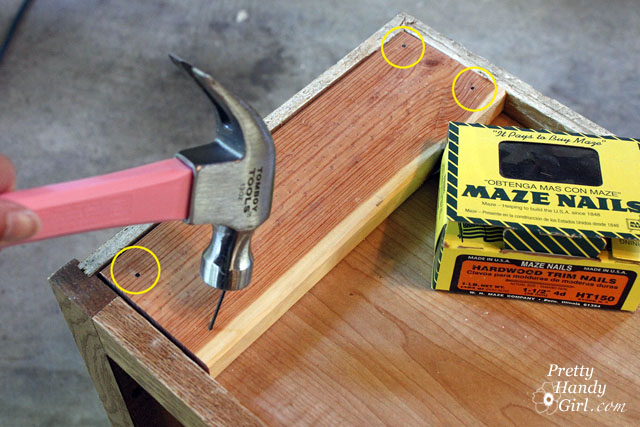
Nail finish nails into the boards at an angle to secure them.
For good measure, nail two more finish nails through the back of the cabinet and into the ends of the support boards.
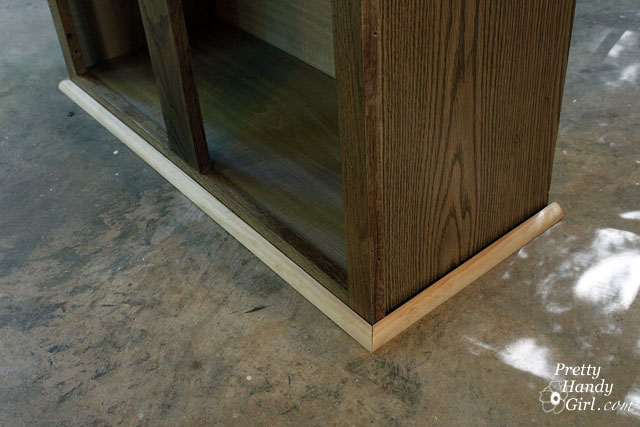
Measure your cabinet sides and front. Cut quarter round (convex shape) for the base of your cabinet and cove moulding (concave shape) for the top of your cabinet.
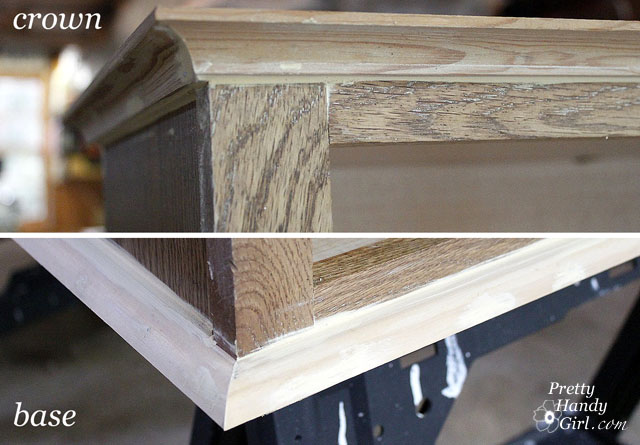
Here is a close up of the moulding I used for the base and crown of the cabinet.
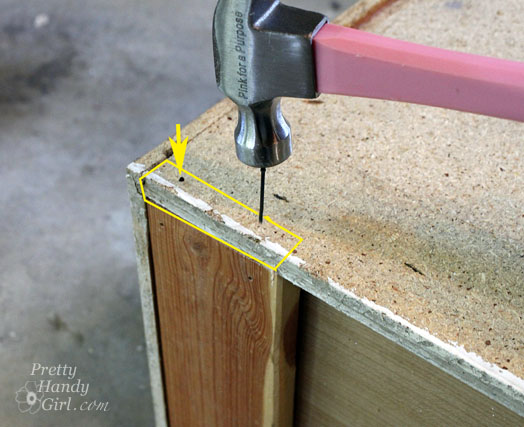
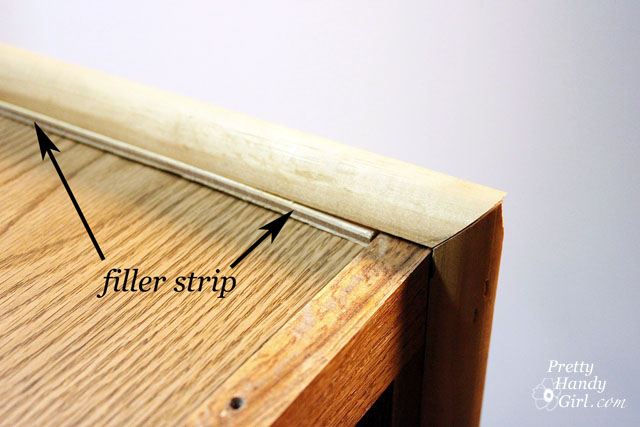
If the face frame of your cabinet juts out past the side, you’ll have a gap (see below). No worries, we can fix that!
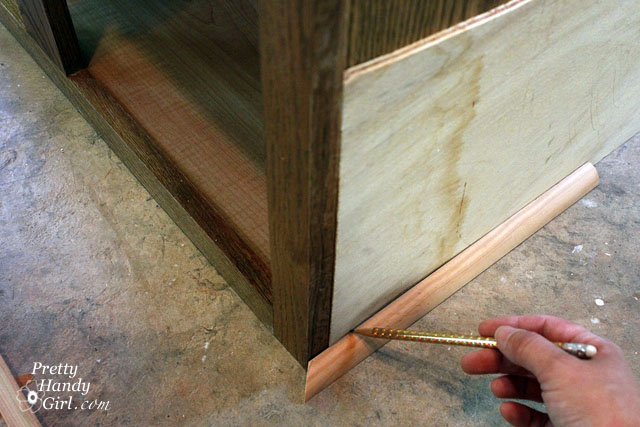
Slip a piece of thin plywood to fit behind the quarter round (and cove moulding). Draw a line at the top of your quarter round (and bottom of the cove moulding). Cut the plywood piece with a jig saw.
Glue the thin plywood strip onto the cabinet.
Rest your moulding on top of the filler strip.
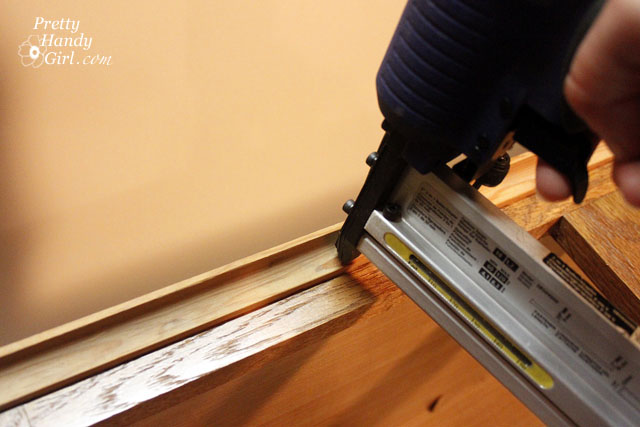
Predrill holes in your trim moulding, then hammer finish nails to secure the trim. If you are using a finish nailer to secure the moulding pieces, you won’t need to pre-drill.
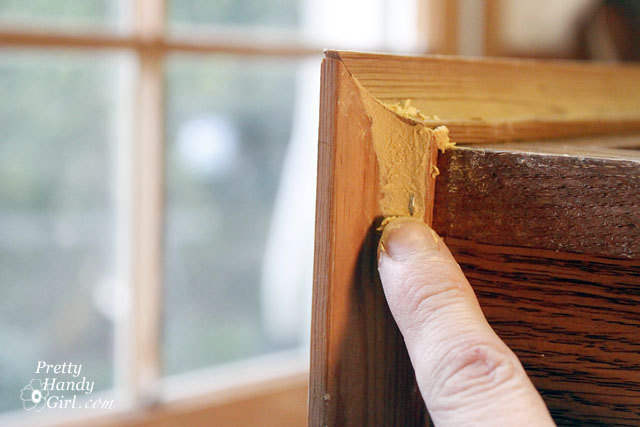
Fill any nail holes or cracks with wood putty.
Fill the seams of the filler strips with wood putty too.
Allow the wood putty to dry and then sand it smooth.
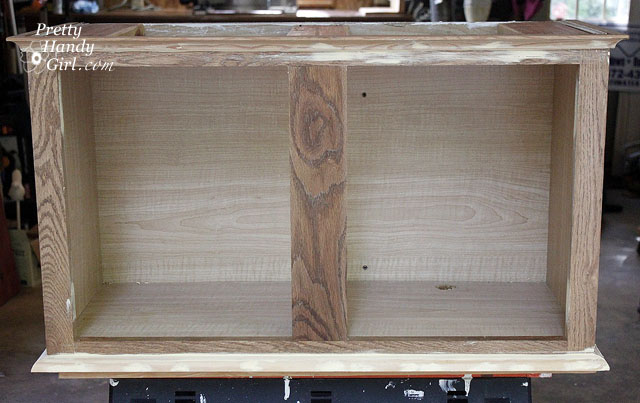
Your cabinet should look something like this:
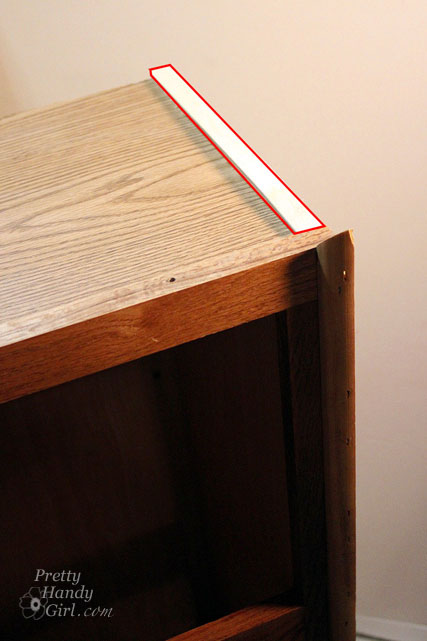
For the top of your bench, cut a piece of wood that is 3″ wider and 1.5″ deeper than the top dimensions of the cabinet (be sure to measure to the edge of the crown moulding.) Sand it smooth. Stain or paint the bench top.
At this point, you can attach your bench top by screwing a few screws from inside the cabinet up through the support pieces and into the bench top.
*For demonstration purposes, the video will show how I attached the bench top with glue and finish nails from the top: Add some construction glue to the wood supports. Then, nail the top into the three support boards on top of the cabinet. Fill the holes left by the nails. And touch up the spots with stain or paint. Either way will work, but the screws from below will save you the work of adding wood putty and/or touching up the nail holes.
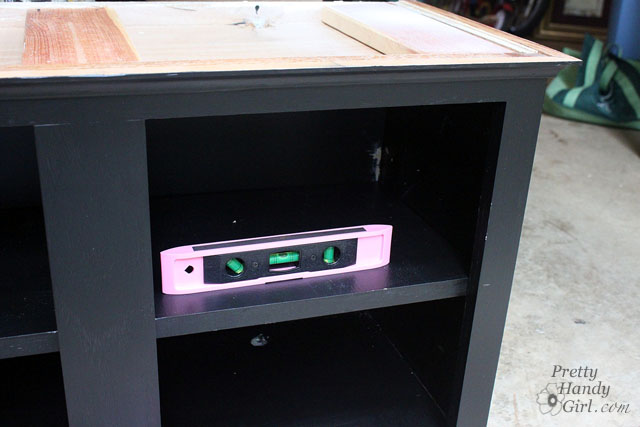
To install the shelf, level the board you cut to fit inside the cabinet (or shall I call it a bench since we are almost done!)
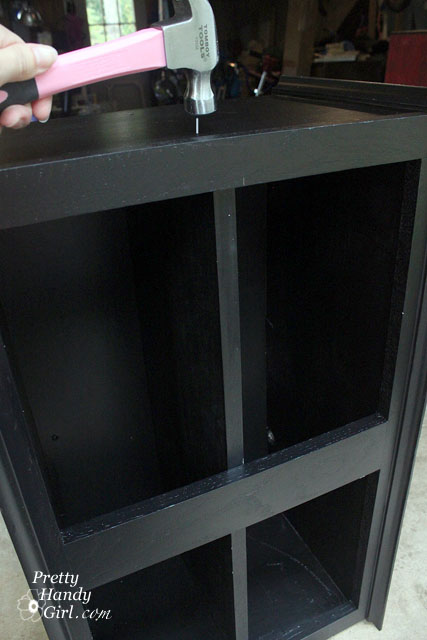
Use either “L” brackets inside the cabinet to hold the shelf or hammer nails from the side and into the ends of the shelf to secure it. Luckily shoes aren’t super heavy, so you can get away with using finish nails to hold the shelf in place.
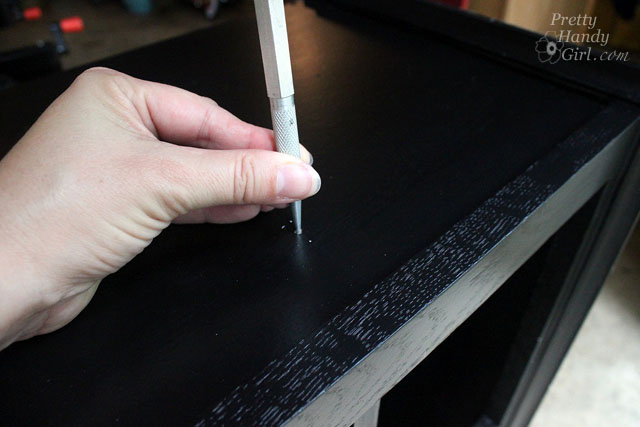
Use a nail set to sink the nail below the wood surface.
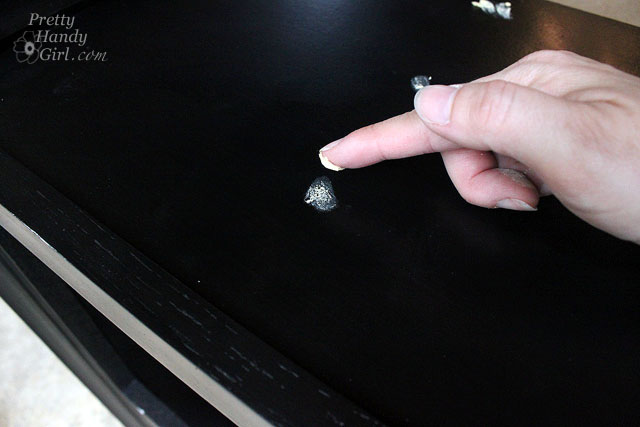
Add a small amount of wood putty to the nail hole.
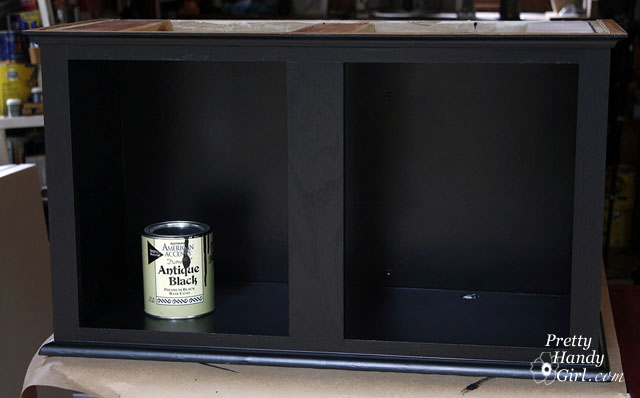
Gently sand the cabinet and shelf to scuff up the surface and give it a “tooth” for the primer to adhere to. Prime the cabinet and bench.
Paint the cabinet, shelf and bench.
Protect your bench with a few coats of polyurethane and you are done!
Room for about 8 pairs of shoes! If you wanted a larger bench or more storage, you could attach two cabinets side by side.
Here is the video from my Habitat ReStore talk. (I apologize about some of the background noise.)
By the way, thanks to my sponsors Bogs Footwear (boots) and Tomboy Tools (tool belt.) I need to lower that belt a little ;-). I was rushing in and just buckled it on me without adjusting it.
https://prettyhandygirl.com/wp-content/uploads/2021/07/PHG-logo-tagline-2020-1030x211-R.jpg00Brittany Baileyhttps://prettyhandygirl.com/wp-content/uploads/2021/07/PHG-logo-tagline-2020-1030x211-R.jpgBrittany Bailey2011-11-14 14:00:262011-11-17 11:25:27How to Make a Shoe Storage Bench out of a Habitat ReStore Wall Cabinet