Changing Out a Light Fixture

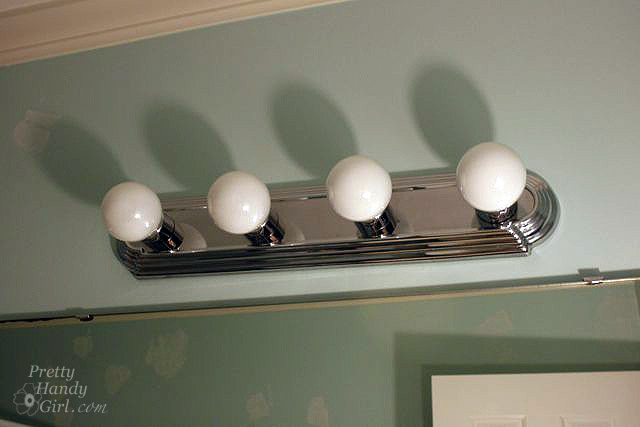
Have you had it with those ugly Hollywood light fixtures? The ones where the bulbs are lined up in a straight line staring you in the face? Did you know that you don’t have to live with them? Even if you live in an apartment, you can switch light fixtures out fairly easily. (Be sure to keep the old fixture and all the parts so you can re-install it before you move out.)

Light fixtures range in price from $20 to well over $200. Sometimes you can luck out and find some nice light fixtures on Craig’s List or eBay for less.

I hope you can benefit from this tutorial. I think you’ll agree, it is neither difficult nor challenging changing out a light fixture.

Instructions:

Before beginning the installation you MUST turn off the power to your fixture.


Changing Out a Light Fixture

Required Safety Instruction:
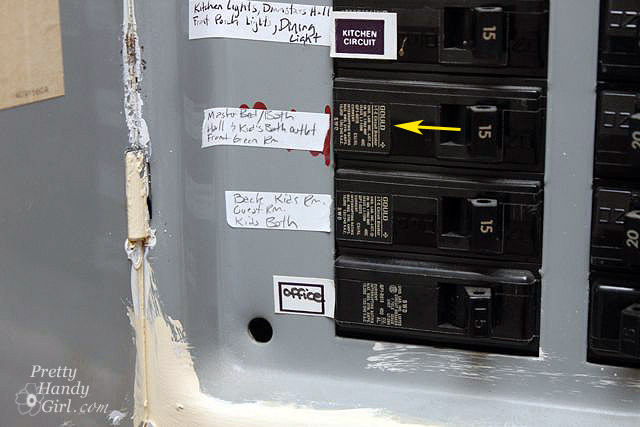
Turn off the power to the light fixture you are working on. I highly recommend turning on the light you will be working on, then shut off the circuit at your circuit breaker and check to see that the light has gone out. Also note that just because the light fixture power is turned off, it doesn’t necessarily mean that other outlets or lights in the same room are on the same circuit. Always check for the presence of power before you work on it.

Tools:

(I’ve included affiliate links for your convenience. I earn a small percentage from a purchase using these links. There is no additional cost to you. You can read more about affiliate links here.)

Unpack your new (or slightly used) light fixture. Read through the directions as some steps may vary from this installation tutorial.

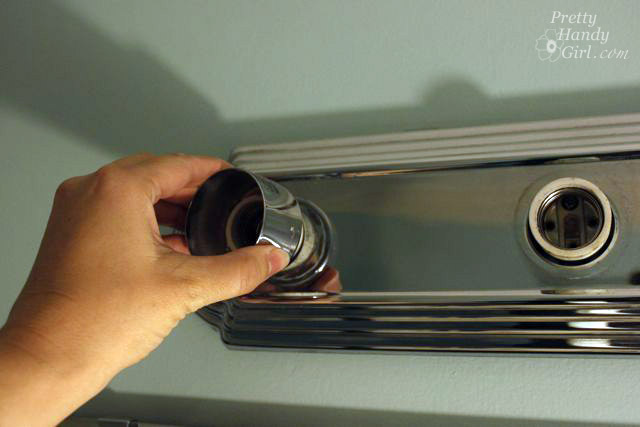
Begin by unscrewing the light bulbs and then remove the collars around the light bulb sockets.

Changing Out a Light Fixture

Locate any other screws that might be holding the fixture in place. This fixture simply popped off.

Changing Out a Light Fixture

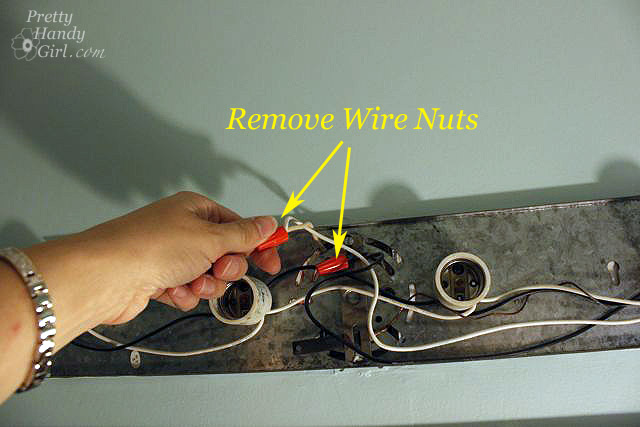
Untwist the wire nuts holding the wires together.

Changing Out a Light Fixture

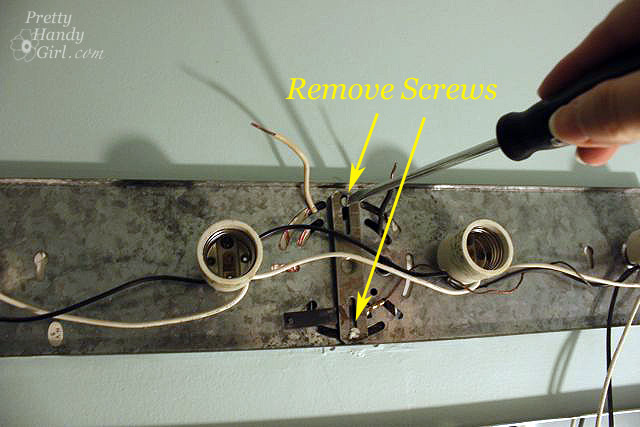
Once all the wires are disconnected, unscrew the two screws holding the mounting bracket.

Changing Out a Light Fixture

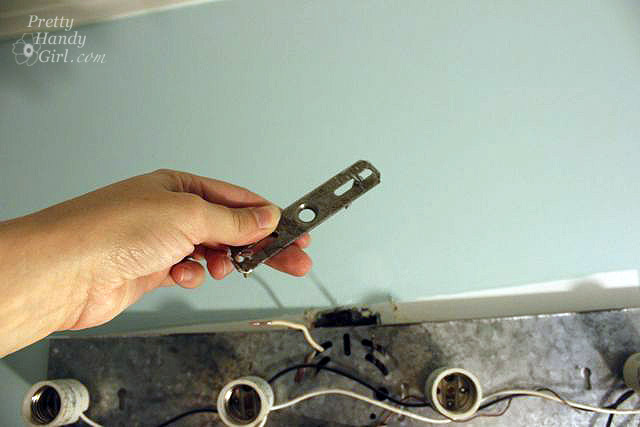
Remove the mounting bracket…

Changing Out a Light Fixture

…and now you should be able to remove the light fixture. Laugh at any hidden colors and wallpaper beneath the fixture. (Toile! Ah, not so bad.)

Changing Out a Light Fixture

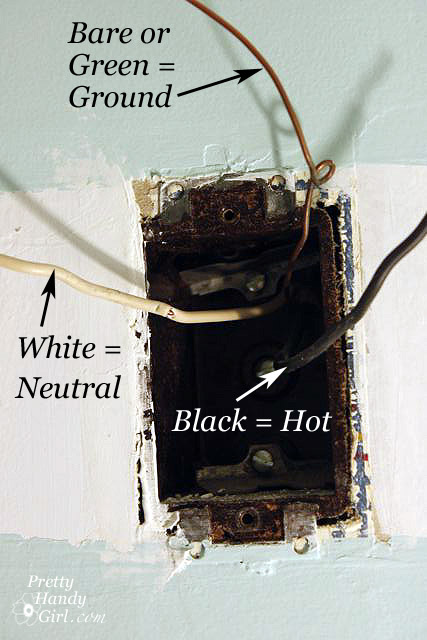
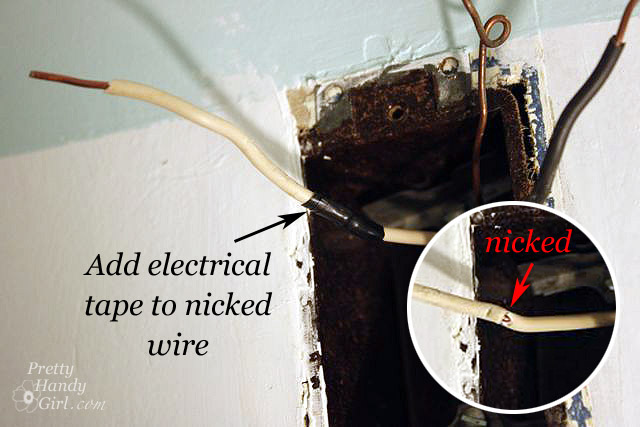
You should be left with just the junction box and three wires protruding from the box. The bare or green wire is your ground wire. The white is your neutral wire and the black is your hot wire.

Changing Out a Light Fixture

If you were eagle eyed, you might have noticed a small nick in the insulation of the neutral wire. This could cause a short, so I wrapped some electrical tape around the nick.

Changing Out a Light Fixture

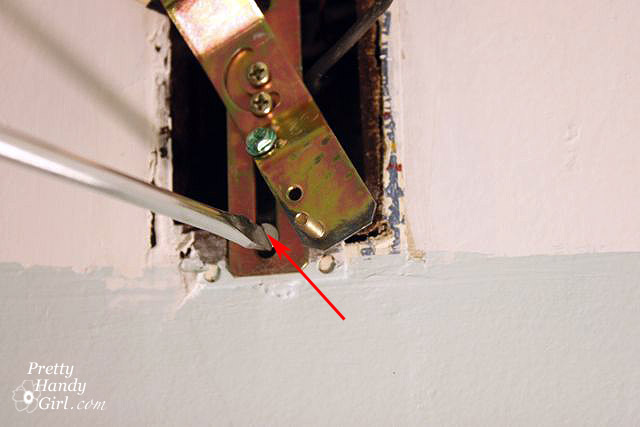
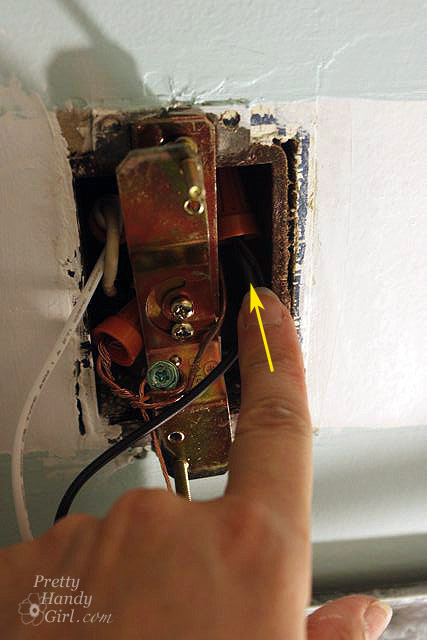
Install the new mounting bracket that came with your fixture (if you bought a used one, you may have to use the old mounting bracket from the Hollywood Strip). Attach the screws through the bracket and into the junction box.

Changing Out a Light Fixture

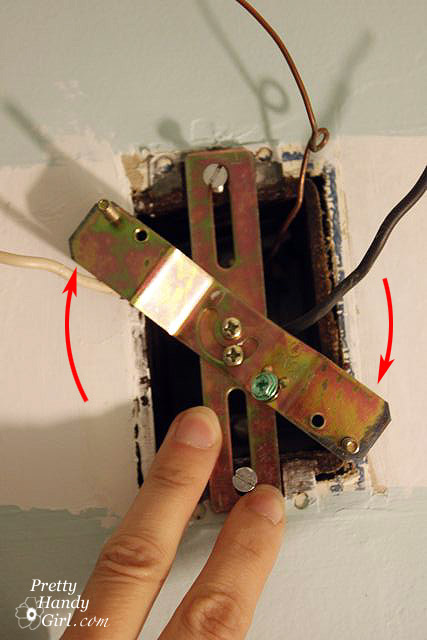
The mounting bracket that came with my fixture has a rotating bar that can swing 180 degrees. Position this bar so the fixture will hang level.)

Changing Out a Light Fixture

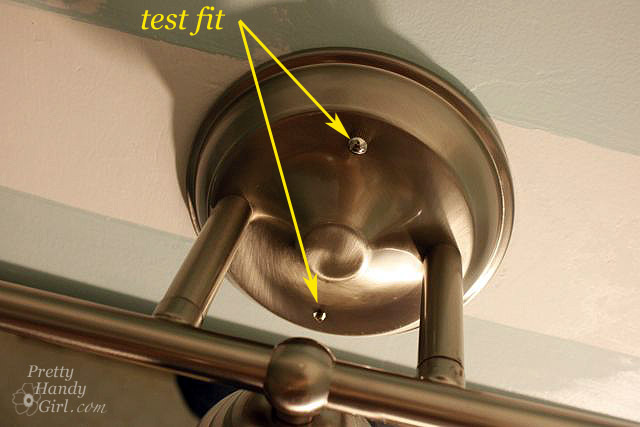
Test fit your fixture and adjust the depth of the mounting screws (the “no head” screws on the mounting bracket) and the angle of the swinging bracket arm. Once the bracket is level and fits snugly with only a small portion of the headless screws poking through; remove the light fixture and tighten the screw in the middle of the mounting bracket to secure the rotating bar.

Changing Out a Light Fixture

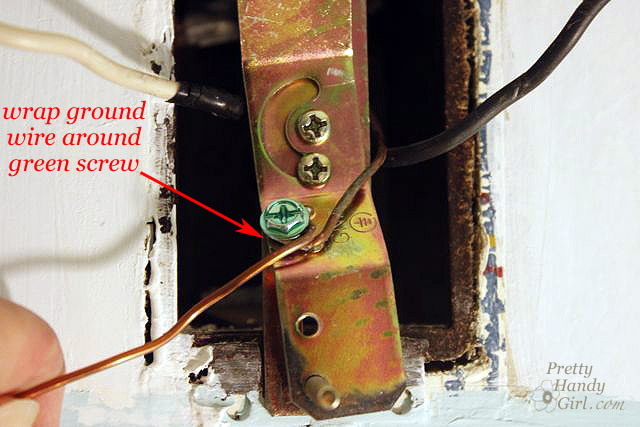
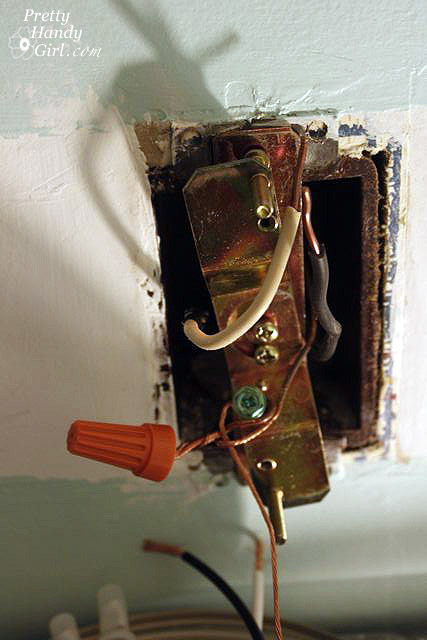
Wrap the ground wire from the junction box around the green or bare screw on the mounting bracket.

Changing Out a Light Fixture

Connect the ground wire from the light fixture to the ground wire from the junction box. Twist them together and secure them with a wire nut.

Changing Out a Light Fixture

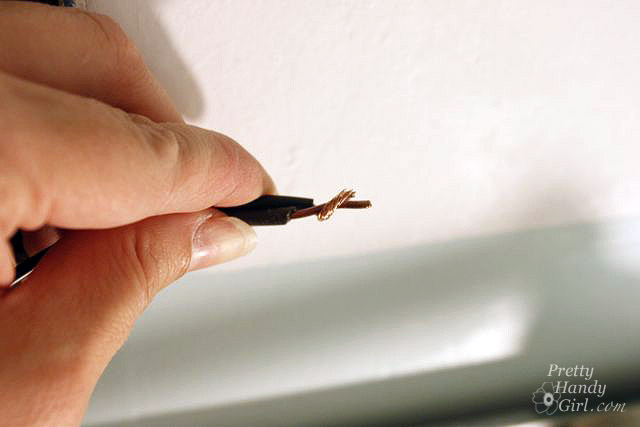
Twist the black wires from the junction box and the light fixture together.

Changing Out a Light Fixture

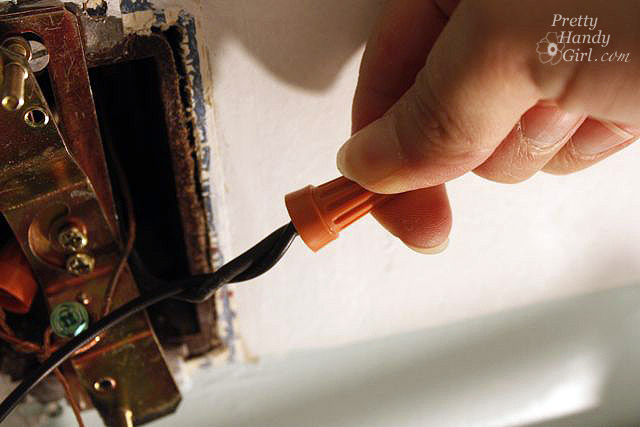
Twist a wire nut on to secure them.

Changing Out a Light Fixture

Repeat the same process to connect the white wires.

Changing Out a Light Fixture

Gently fold and tuck the wires back into the junction box. Try to position the white wires on the opposite side as the black wires.

Changing Out a Light Fixture

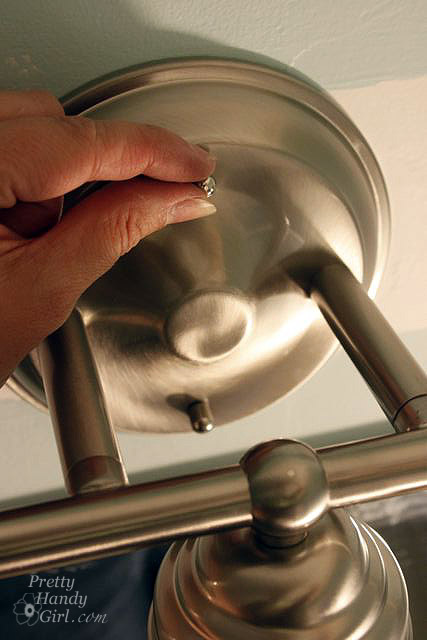
Place your light fixture onto the headless screws and secure the fixture by screwing on the small ball caps.

Changing Out a Light Fixture

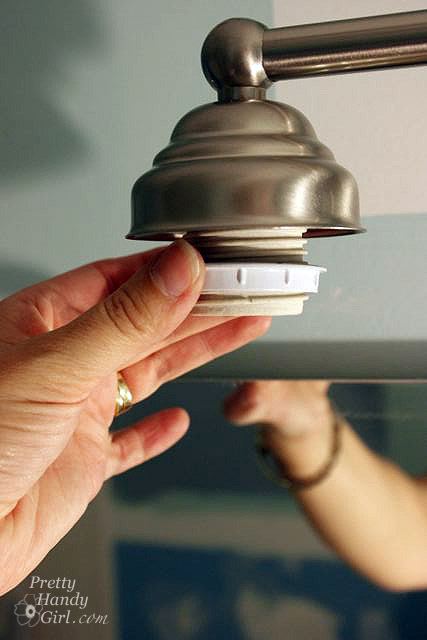
Remove the shade ring from the light bulb sockets.

Changing Out a Light Fixture

Slip the glass shades onto the socket and then screw the collar back on to hold the glass light shades.

Changing Out a Light Fixture

Repeat for the remaining light sockets.

Changing Out a Light Fixture

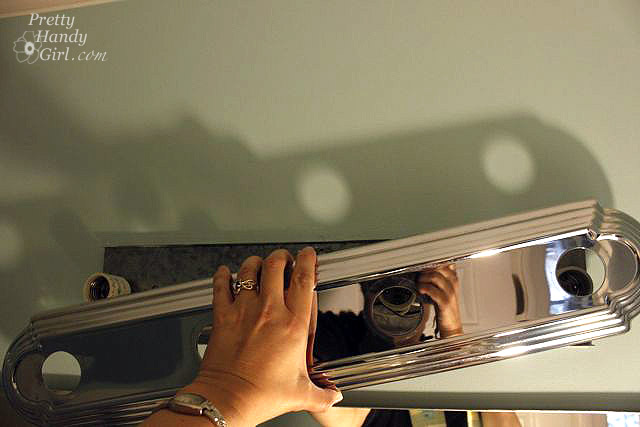
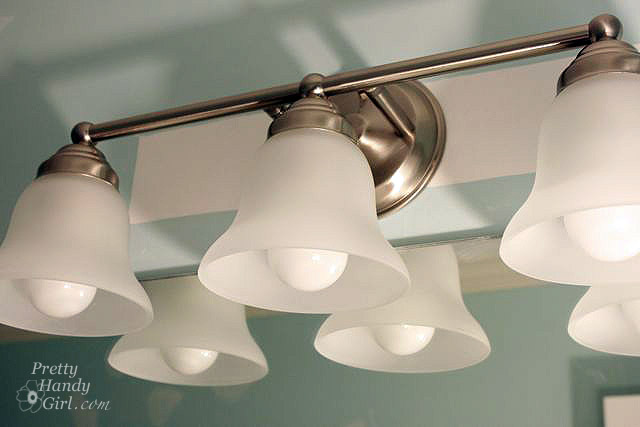
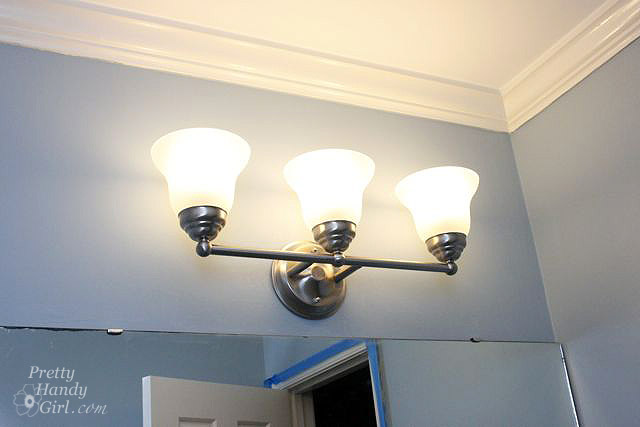
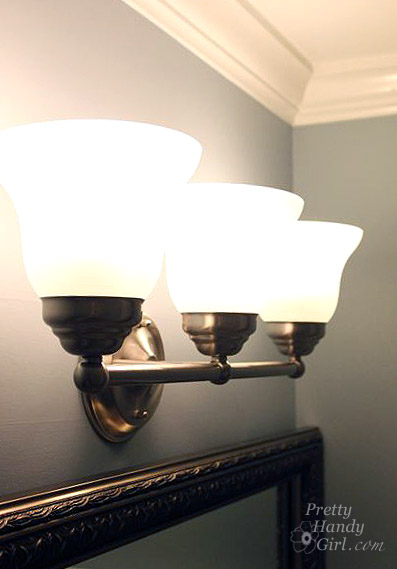
Many vanity light fixtures are reversible.

Changing Out a Light Fixture

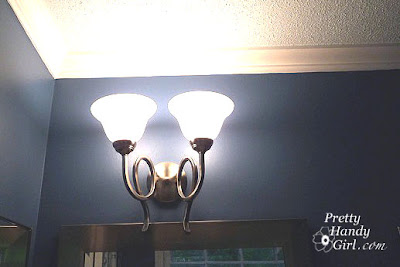
I decided to rehang my fixture facing up for less direct light and to avoid bumping into the mirror frame.

Changing Out a Light Fixture

What do you think? Do you like the new look? Do you think you will try it yourself?  I hope so, it was easy!

Changing Out a Light Fixture


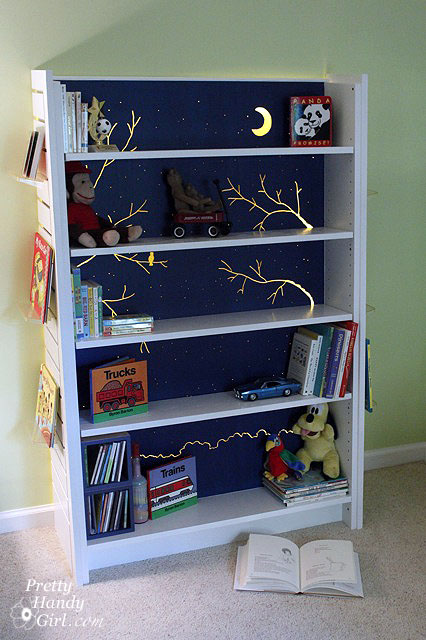
I promised to show you how I lit my son’s bookcase. It really isn’t anything fancy.

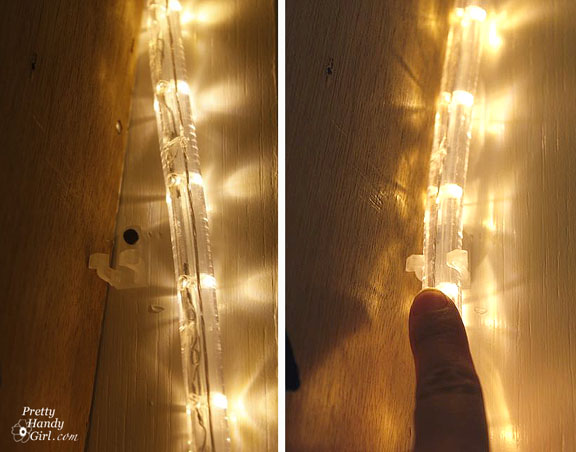
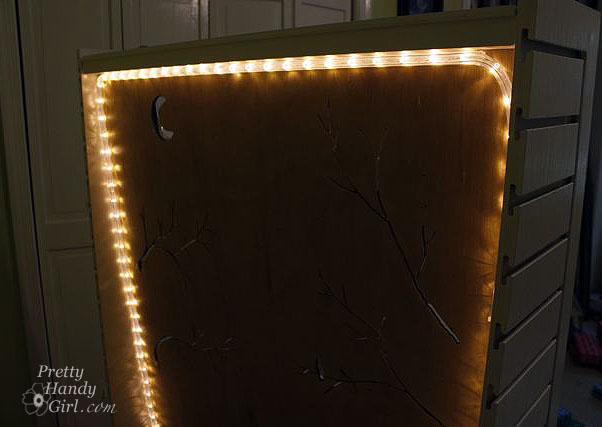
But, a promise is a promise. Here is the view of the back of the bookcase:

I purchased the LED rope lights at Home Depot. They came with little snap in holders. You simply drive a screw into the mounting hole. Then snap the rope light into the holder.

On the top edge, I used a long channel strip (sold separately near the rope lights. It has a self adhesive backing. Then you firmly press the rope light into the channel. This took some serious strength, but I finally got the length of the rope light inside the channel.

Finally, I plugged the light into a timer.

The lights are set to come on at bedtime and turn off shortly before sunrise.

That’s it! And this is probably the shortest tutorial I ever wrote.

So, I’ll share a few pictures from my sister’s flower garden in California. Check out all the pollen on the back legs of this bee! They are the orange masses hanging from his legs.

The bees were loving the agapanthus as well.

The pink blossoms are from a lemon tree that grows in their back courtyard. Sadly none of them were ripe while I was there. I can only imagine how fresh and sweet lemonade from those fresh picked lemons would taste. Mmmmm!

Be back later this week with more DIY tutorials!

Earlier in the “Falling in Love with Your Home”series, we talked about increasing natural light. Today I will be expanding on the topic, but this time I’m talking about the man-made type of lighting!

As I mentioned in my previous post, in the quest to fall in love with our home, we have painted almost every room in our home, but I have also replaced almost all of the light fixtures as well!

There is no excuse for putting up with dated, dim, or just plain ugly light fixtures! (Although, I will accept “but, I have 25 foot ceilings” as an excuse.)

I know that sounds like it would cost a fortune, but honestly the average cost I’ve paid per light fixture is $30. I’ve paid as little as $5 and at most I paid $125 for the drum shade pendant in my office.

My sources for lighting are: Craig’s List, Habitat ReStore, Overstock.com, eBay and friends! A new source you might also try is DiggersList.com, it is kind of like a Craig’s List for building supplies.

One day’s haul from the Habitat ReStore!
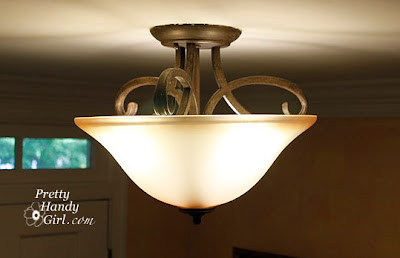
$20 Semi-flush light fixture from Craig’s List.

And, you do not to spend money hiring an electrician. Removing and rewiring a light fixture should not stop you “Dead in Your Tracks.” Sorry, bad pun, I know. But, seriously, it isn’t rocket science. As long as you are safe and Turn Off the power (flip the circuit breaker) that your fixture is on, you should be able to replace your own light fixture.

Here is a good instructional video for replacing a ceiling light fixture:


Note: They mention you will need a helper in the video. I’ve only needed help when removing a heavy fixture (for example a ceiling fan.)

Still a little scared? Well, think of it this way, all you are doing is unscrewing screws, paying attention to how the light that you are removing is installed. Then repeat the same set up when installing the new. Easy peasy. Oh, and I don’t use the circuit tester (although I should). I turn the light on before I flip the circuit breaker. That way I can see when it is off.

To view another tutorial from Pretty Handy Girl for replacing wall mounted fixtures, CLICK HERE.

Now let the lighting parade begin:

In our foyer I wanted an open glass hanging fixture to light up the small space.

Before: Foyer Brass Light

But, I hated the brass light so much that I settled on a Costco semi-flush light that I paid $45 for.

Interim Foyer Light

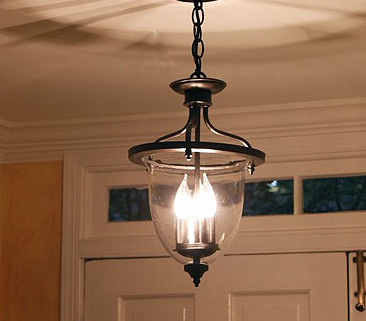
Little did I know that I would find the perfect fixture a year later at our Habitat ReStore. A little Oil Rubbed Bronze spray paint and I was in love with my new foyer light.

$10 Spray-painted Habitat Light Fixture. Tutorial HERE

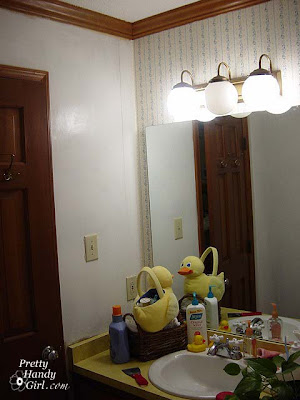
We have all seen the hideous Hollywood style strip lights in a bathroom. That is exactly what we had in our master bathroom. I ended up finding this temporary fixture on Craig’s List.

Brushed Nickel wall mounted sconce from Craig’s List.

You have to love to hate this dated 1970’s fixture. Antique Brass and globes as big as duckpin bowling balls make for an interesting bathroom fixture.

An inexpensive wall mounted light fixture from Lowe’s really brought this bathroom into this decade (not to mention some paint and other updates. Details HERE.)
This shiny brass chandelier was the last of our light fixtures to be converted. I knew what I wanted here, but couldn’t find an affordable black chandelier.
Before: Dining Room Shiny Brass Chandelier
As luck would have it, I saw this baby hanging from a friend’s ceiling and remarked how much I liked it. Right there and then he told me I could have it. I’m only kicking myself for not installing it months sooner!
After: Black Chandelier
(FREE because it wasn’t a friend’s style! I know – seriously – don’t hate me.
Because I would if your friend gave it to you for free!)

When we moved into our home, the light fixture over the kitchen table was a dim 60 watt bulb fixture that really left me craving more light.

Before: Kitchen Brass & Glass Pendant Light

Okay, I really hesitated to post this next picture, but I refuse to hide any of my flaws from y’all. Well okay, maybe just a few.

I bought this light fixture off of Craig’s List hoping to improve the light on our table. BIG MISTAKE! It was such a harsh and direct light that I turned around and sold it a month later.

Interim Light: Modern Glass & Brushed Nickel.
“Ummm, Mr. Spielberg, I have something you might be interested to see in my kitchen.”
WHAT WAS I THINKING?

A few keystrokes on the keyboard brought me to this little gem for our kitchen. I just love the quaintness of this light fixture that I found on Overstock.com. Small, whimsical, yet not too cutesy. To center the chandelier over our kitchen table, I installed a ceiling toggle style hook and sewed a swag cover to hide the chain.

After: Rustic Bronze and Silver Leaf Chandelier $65 from Overstock.com

Chandeliers aren’t just for your dining areas. I’ve seen them in laundry rooms, bedrooms, and even mudrooms!

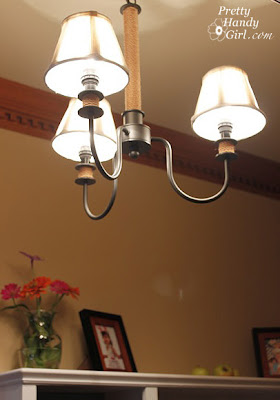
Black iron & rope 3-arm Chandelier.
Renee’s $10 Habitat ReStore light that we installed in her mudroom.

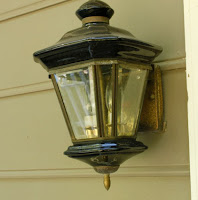
Don’t neglect your exterior lighting. These wall mounted lights were so small and looked very weathered.

Before: Dirty Brass & Shiny Black Exterior Lights

I finally found some beautiful old world lanterns at Lowe’s for $24 each! SCORE!

After: Copper Wall Mounted Exterior Lights. Installation Tutorial HERE.

Light fixtures don’t have to be hard wired. Some ambient lighting in our home comes from plug-in style lighting. Like these pendant lamps I made from minnow (fish) traps:

They started life as a $5 fisherman’s trap.
And now they have a new life on our screened porch.
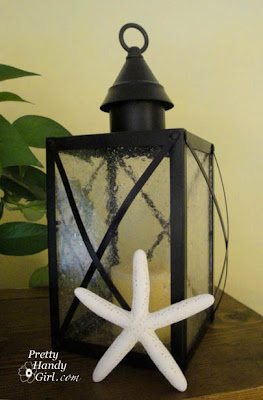
$3 Thrift Store Lantern retrofitted with a plug in light kit.
Perfect for reading stories in Pretty Handsome Son #1’s bed.

I saved my favorite light for last. This star light hangs in our upstair’s hallway. The light is on a timer and gives off just enough illumnation for our little late night sleepwalkers.
Paper star light plugs into nearby outlet and is set on a timer.

So how about your home? Do you have any light fixtures you detest? Have you scoured Craig’s List? Be sure to check weekly for new postings.

I have been looking for the perfect foyer light about three years now. In the search, I removed an ugly dated hanging light and replaced it with this:

Okay, it is a little better, but I still wasn’t in love! And that is the key to the right lighting, you have to LOVE it EVERYTIME you see it.

So, when I saw this Pottery Barn fixture, I knew I loved it!

Amanda at The Hand Me Down House made one that looks very similar. I always thought I might copy her design, until I found a hanging light that had similar lines at our local Habitat ReStore.

See that brass beauty in the front? Well, ignore the brass because I had plans to paint it. By the way, the iron chandelier went in my friend’s hallway.

And that cute little fixture hiding in shame at the back was turned into another Pottery Barn knockoff lantern.

But, on to the star of this post. My new foyer light! I disassembled the foyer light and set the glass globe aside. Then I attacked her with a one two punch using my new dynamic duo of spray paints.

Automotive primer first and then two coats of Rustoleum Oil Rubbed Bronze!

After putting the glass globe back on the fixure, I installed the light fixture (you can follow the same instructions as I showed in this post.)


Check out that beautiful new/old light fixture! I know it isn’t exactly like Pottery Barn’s but I love it none-the-less. How about you?

If you were here the other day to see my dormer window transformation, you may have seen my exterior lights. I’ll be talking about Installing New Exterior Lighting today!

Then again, maybe you didn’t because they are miniscule! Not only are they tiny, but the light sockets were cracked, the brass trim was dated and rusty, and they just weren’t making me smile. And that is what it is all about, isn’t it!

I’ve been looking for affordable exterior lights that fit the style of our home for about a year now. I didn’t want anything too trendy or contemporary because our house has an old world feel, it is a dutch colonial.

I happened to be at Lowe’s buying our new stove (yep, the one that caught fire in this post) and I spied these beauties on clearance for $24! I snatched them up in an instant and high tailed it out of the store before I could find any more things I “needed”.

Materials:

Flat head screwdriver*
Phillips head screwdriver*
power drill with screwdriver bits (if you wish to speed up unscrewing and screwing)
Wire Strippers*
Wire cutter*
New light fixture with instructions

* When working with electricity, It is safest to work with tools that have rubber or plastic handles that won’t conduct electricity, should you forget to turn off the power.

Required Safety Instruction:

Turn off the power to the light fixtures you are working on. Turn your lights on and visually inspect they are lit before turning off the circuit. Then shut off the circuit at your circuit breaker and check to see that the light has gone out.


Remove your new light from the packaging. Check for the instruction manual and all the parts. I like to put screws and small parts in a bowl so I don’t lose them.

Okay, now comes the easy part. Disassemble your old light. Take the top off and keep removing parts until you are down to the bare bones.

Unscrew the mounting plate from the wall by turning the small ball cap nuts (okay, no snickering, that is what they are really called!)

Watch out for critters that might be living behind your fixture! This cute little tree frog jumped out at us. Poor little guy. We actually found him in our house later that day and had to shoo him back outside.


Pay attention to which wires are connected to the white and black wires on your fixtures.


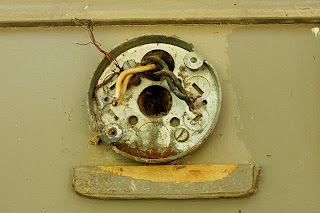
Now you can remove the wire nuts and free your old fixture. (Don’t forget to clean out your junction box (the round, square, or octagon shaped box that is mounted to the wall and contains your house wires.)

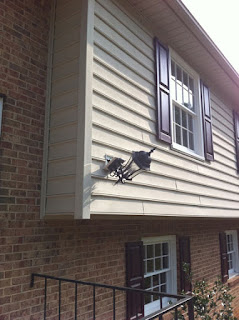
Also, take a moment to make sure your junction box is attached firmly to the house. And/or that you have something solid to attach your mounting bracket to. Case in point: this poor light fixture is hanging on by a wire because the mounting bracket was screwed into the foam insulation!

Locate the mounting plate for your new fixture. Thread the machine screws that will attach to your new light from the back of the mounting plate so they are sticking out towards you. Make sure the screws line up with the holes in your light fixture canopy (the metal cover on your light fixture that will rest flush against the wall.)

THEN you can attach it to your junction box. Honestly, this took me the most amount of time because I wanted to move my fixture up a little to compensate for its larger size. It took me too long trying to determine which holes to use for mounting. I did end up putting one screw into the junction box, and then used a wood screw to attach the other side to the siding on our house (which I then caulked to keep it from rotting the siding.)  You will probably be lucky and won’t need to do this step.

Double check to make sure that the plate is snug and attached firmly to the junction box and/or a solid surface.

These next few steps will be much easier if you have an assistant to hold the light fixture while you make the wire connections.

Unless your fixture comes with short wires, trim the excess and strip about 3/4 inch of the insulation from the end of the wires using your wire cutters and wire strippers. Making sure that your wires will fit inside your junction box, go ahead and connect the bare wire (ground wire) from your house to the green ground screw. If your new fixture has a bare or green wire, wrap that around the green ground screw as well.

Separate your white and black wires from your house, ideally you want them to be on opposite sides of the junction box so there is no risk of them touching. Go ahead and use a wire nut to connect your white wires. Then do the same for the black wires. Gently push the wires into the junction box (keeping them apart from each other).

Line up the holes in the canopy on your light fixture with the machine screws sticking out of the mounting plate. Use the ball cap screws that came with your fixture to cap the ends of the machine screws.

Hopefully everything looks good at this point (straight, no exposed wires, etc.) I would recommend turning on the power to check your wire connections and make sure your fixture works before the next step, and before installing the second light (if you have one.)

Caulk around the edges of your light fixture to keep water from entering the junction box. Use clear or paintable exterior grade caulk.

Don’t forget to turn off the power again before removing and installing your second light fixture.

You can see both the old and new light fixtures in the photo below. The one on the left is the new one, and the right is the puny old one.


Once you get the second fixture up and check to see that it works, stand back and admire your handywork!

Here are the after pictures of our new exterior light fixtures:

We’re still getting used to the size of the new lamps, but I definitely think they fit the scale of our house better than the old ones.


What do you think? I’m curious if anyone else likes copper (instead of Oil Rubbed Bronze.) Don’t get me wrong. I like ORB, I just didn’t think it fit our home’s style.