How to build a DIY Pottery Barn Teen-inspired Monogram Jewelry Storage

Today, I’m super excited to have Jen Woodhouse here to present the tutorial to make this Pottery Barn Teen Inspired Jewelry Organizer.

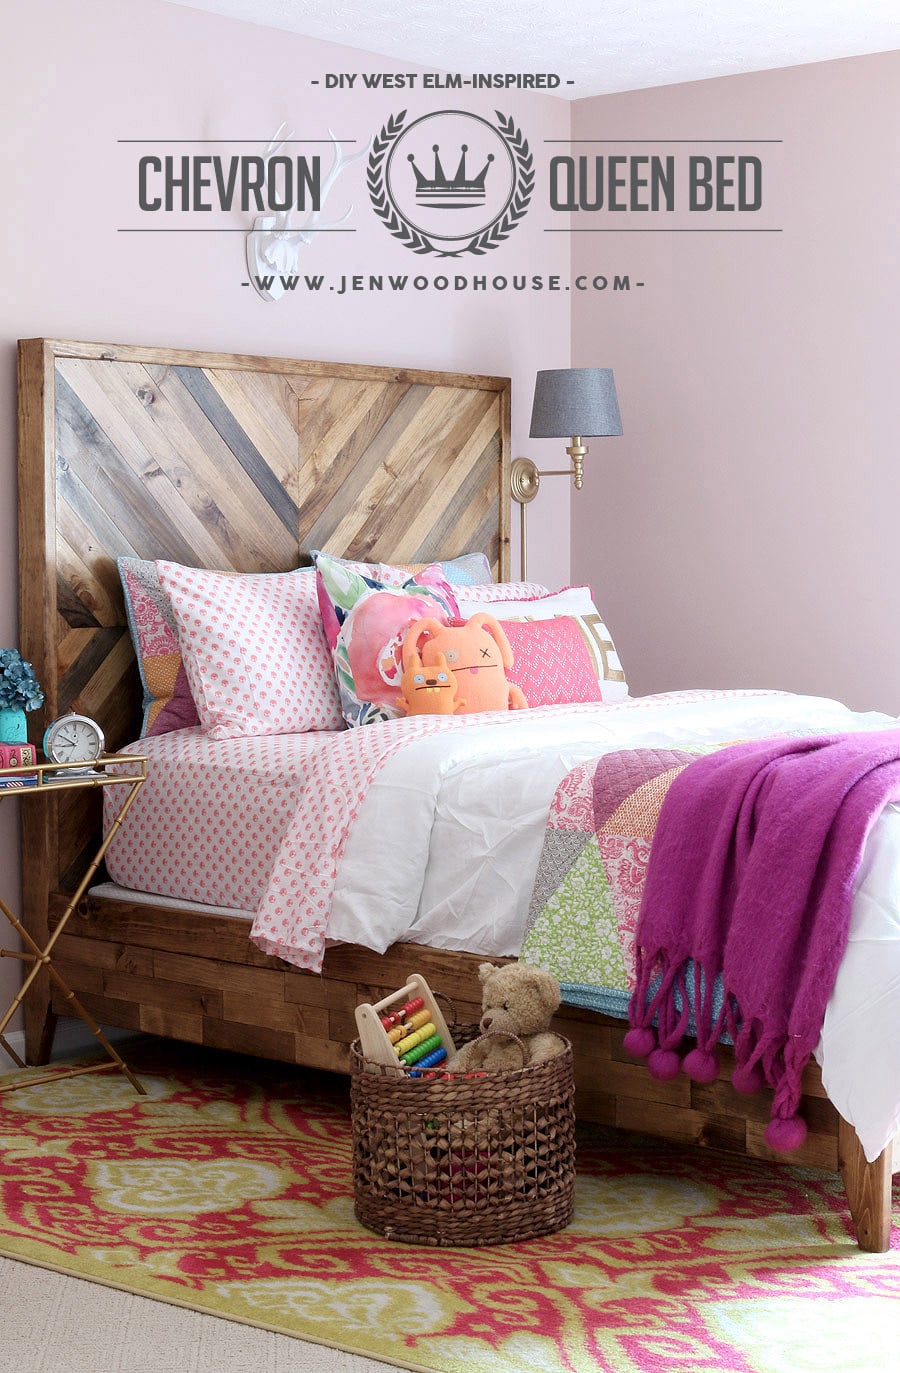
Jen is the creative muscle behind The House of Wood. She recently knocked my socks off with this West Elm Inspired Queen Bed.

And let me tell you, besides being a kick ass builder and crafter, she can sign! Whoa, can she sing. But, today we’ll find out if she can sing and build at the same time!

Rockstar DIY Series

So, put your hands together and let’s hear it for our next Rockstar to take the stage! Take it away Jen.

page_break_2

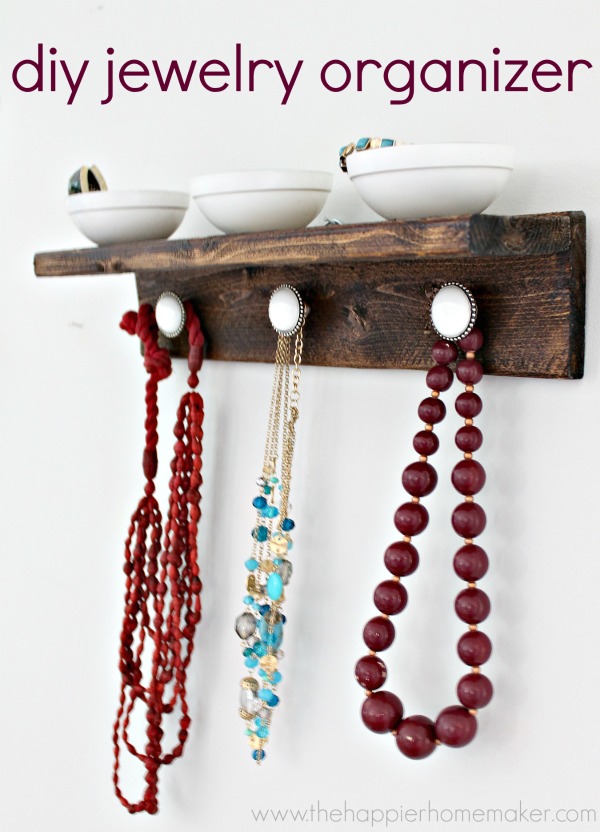
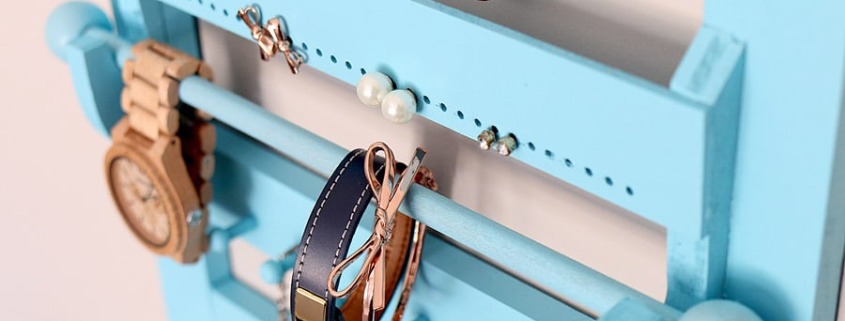
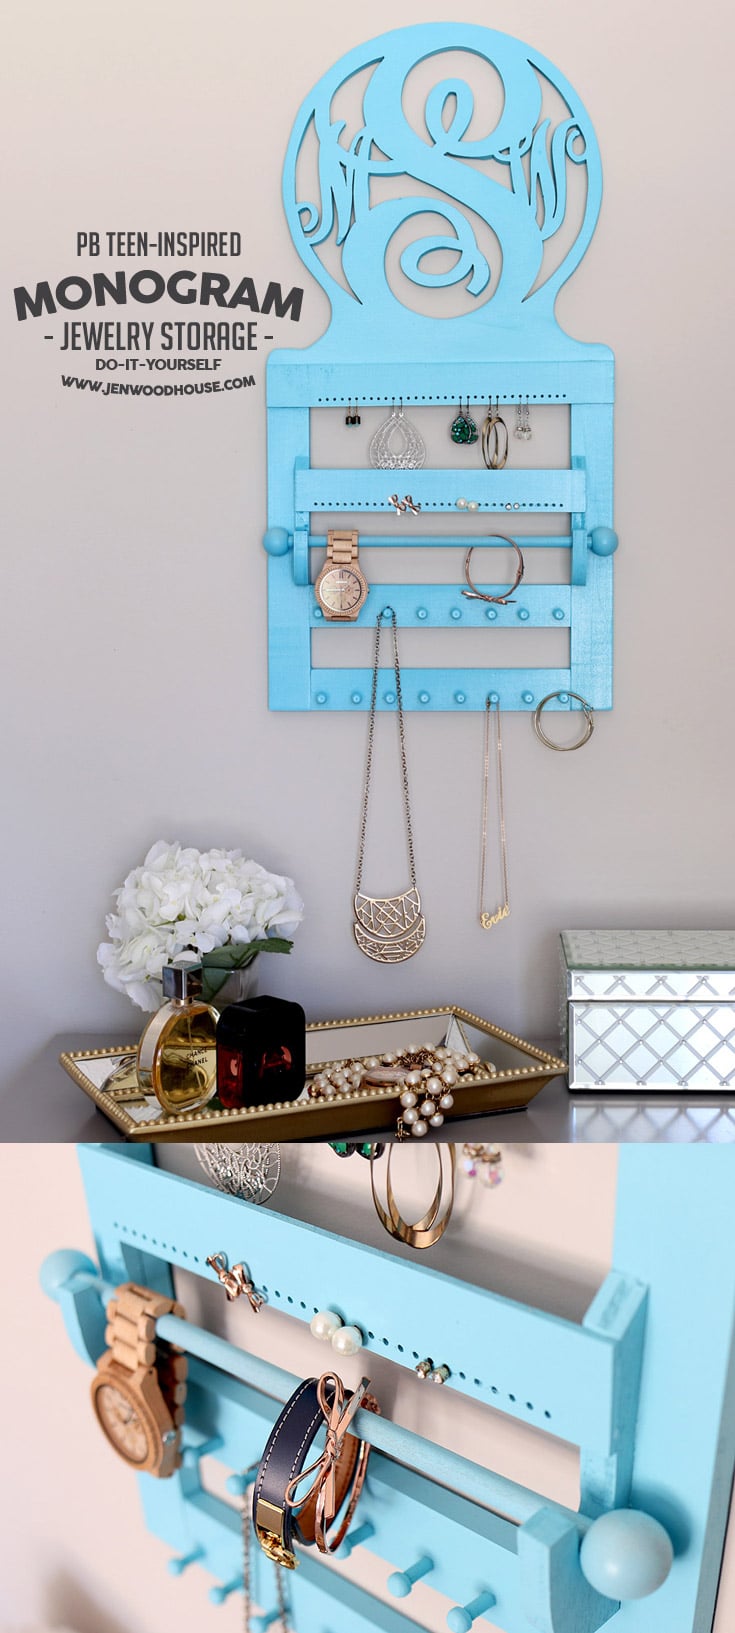
Hi Pretty Handy Friends! Jen Woodhouse from The House of Wood here, thrilled to be hanging out with y’all today, sharing my PB Teen-inspired monogram wall jewelry storage. While flipping through the PB Teen catalog, I spied this pretty jewelry organizer and instantly thought, “I bet I could make that!”

So I did.
The End.

How to build a DIY PB Teen-inspired Monogram Jewelry Wall Organizer #DIY #PBTeen #monogram #PotteryBarn #jewelry #organizer
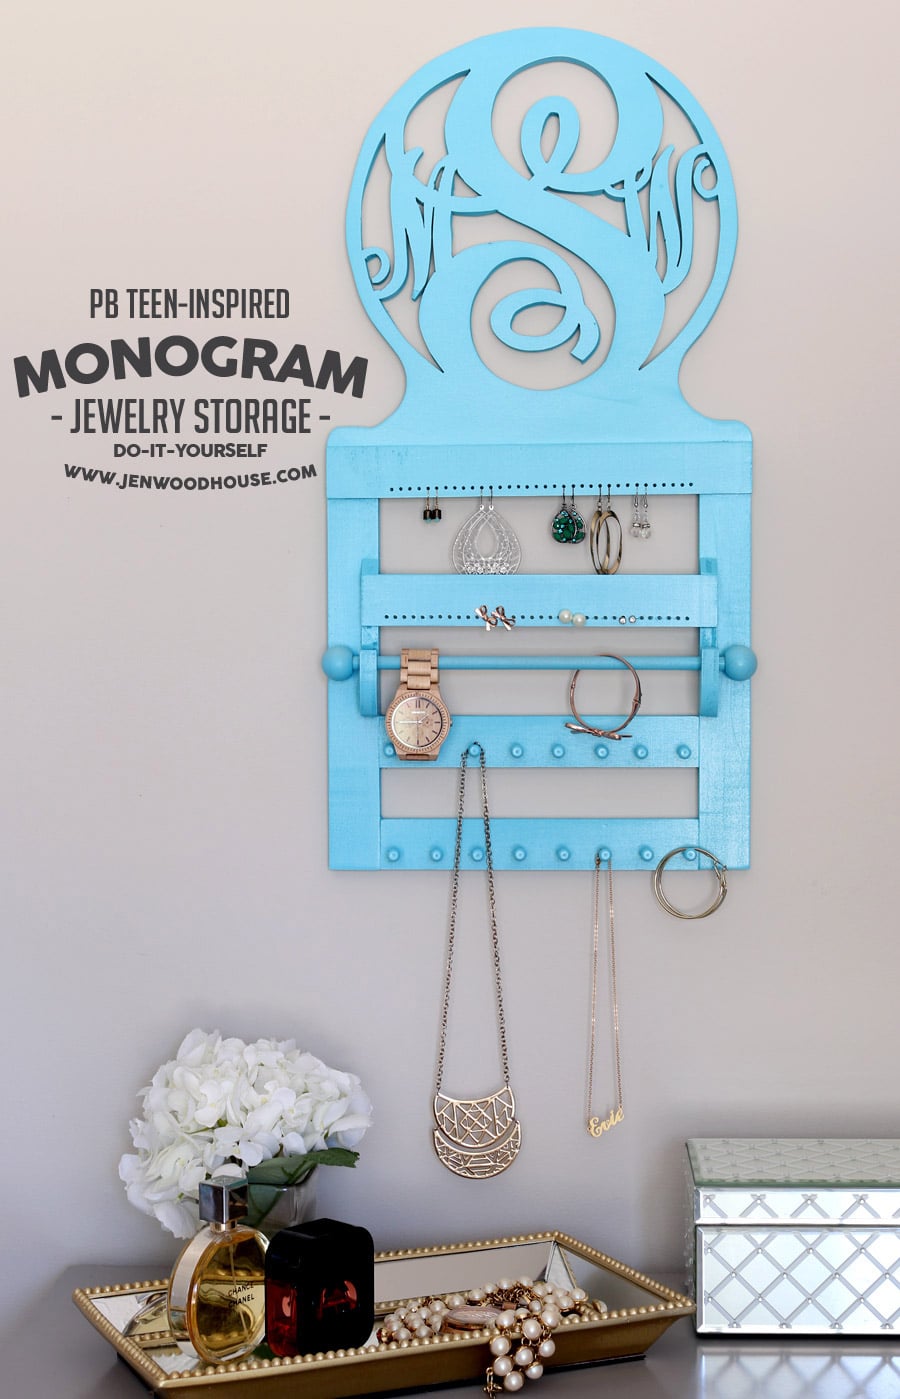
Only kidding. I’ve got you covered with free plans and a tutorial so you can build it yourself!

Click here to download the PDF plans for this PB Teen-Inspired Monogram Wall Jewelry Storage.

How to build a DIY PB Teen-inspired Monogram Jewelry Wall Organizer
*This post contains affiliate links.

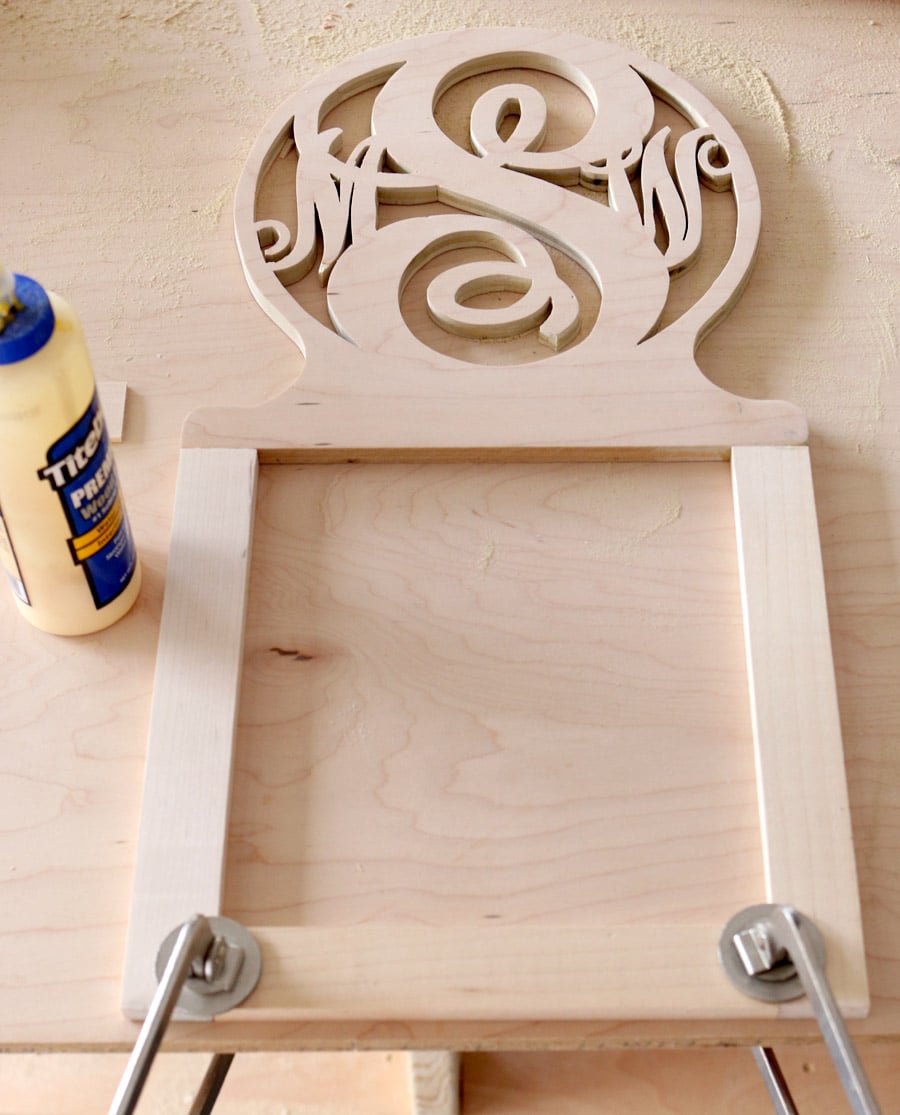
I’ve gotten pretty handy (see what I did there?) at using a jigsaw because I sell these custom wood name signs in my Etsy shop, so I knew cutting out the monogram wouldn’t be too difficult. It was a bit time-consuming, especially because I had to break out the scroll saw for those teeny tiny spaces, where my jigsaw blade wouldn’t fit. As you can see, I am less adept at using a scroll saw.

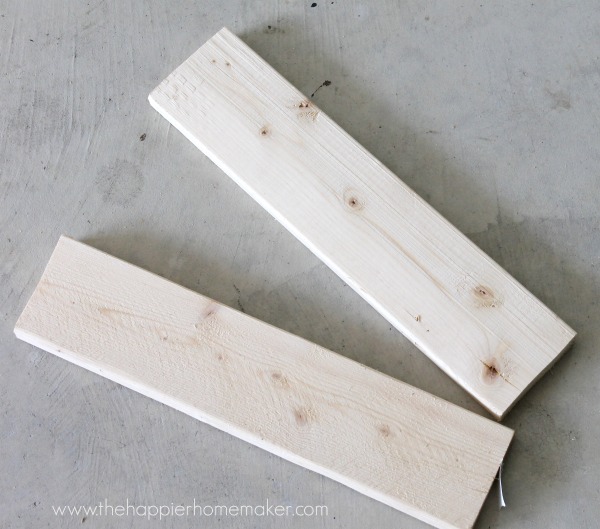
Then I dug through my scrap wood pile and found a few 1×2 boards, which I planed down to 1/2″ thickness, to match the thickness of the plywood. I used only wood glue to construct this entire thing – no screws or nails! Cut, join, glue, clamp, and dry.

Then I picked up a couple packages of wooden pegs, round wooden balls, and a 3/8″ wooden dowel at the home improvement store. I found it in the hardware section, where all the different types of screws and fasteners are kept in those long metal drawers.

monogram03
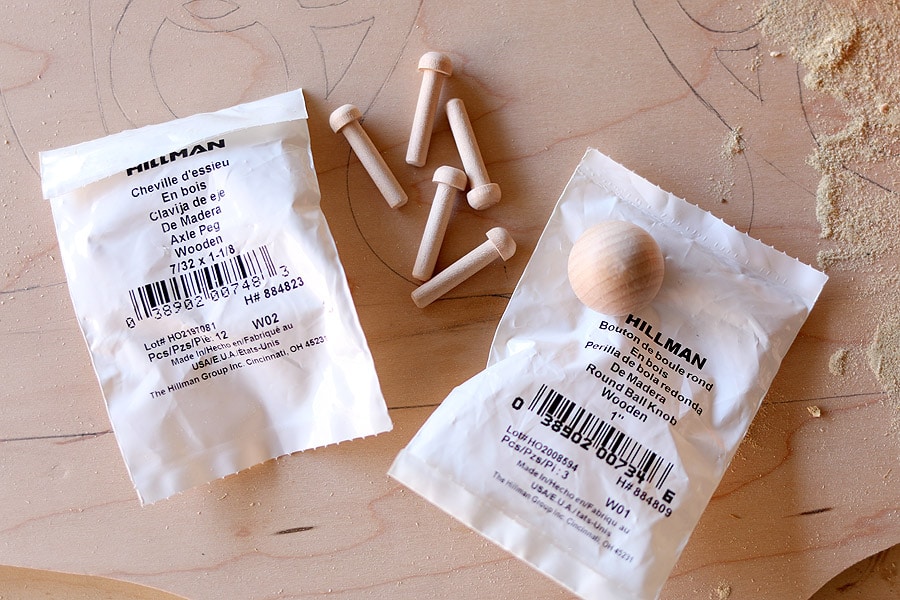
Next, I made a drilling template out of a piece of scrap wood, so that my drill holes would be evenly spaced and perfectly aligned. I used a 3/32″ drill bit for the small earring holes and a 13/64″ drill bit for the wooden pegs then hammered the pegs into place. Read more

leather heart necklaces

Hello Pretty Handy Readers!  We survived the holidays! Yes, January can be quiet but February will be here before you know it and that means Valentine’s Day. Jaime here today from That’s My Letter sharing this DIY leather heart necklace, no sewing necessary!

I’m a huge fan of giving valentines that are NOT CANDY and this project certainly fits the bill.  I used leather scraps and waxed hemp cording to make these simple leather heart necklaces.

leather heart necklaces 1

Add a lot of hearts or only one. It’s completely up to you!

leather hearts necklace 2

My necklaces are finished with adjustable sliding knots so the person wearing the necklace can have it loose and dangly or more snug up on the collarbone.

Materials:

leather heart necklace supplies

  • Leather (small pieces or scraps)
  • Cardstock (small piece for heart template)
  • Pen
  • Scissors
  • Waxed hemp cording
  • Hot glue gun & glue sticks

Step 1: Make a pattern for a heart shape similar to the one pictured above – two hearts with their points together.  Cut the pattern out of cardstock. Using a pen and your leather scrap trace around the pattern then cut out desired number of hearts.

leather heart necklace step 1

Step 2: Cut 34″ of cording for one necklace.  Place one heart shape under the cording as shown. Read more

Stamped-Spoon-Necklace

Stamped Spoon Necklace

Today I have the honor of introducing the extremely creative KariAnne from Thistlewood Farms. She’s showing us one of my favorite gift ideas from her idea farm ;-). DIY Stamped Spoon Necklaces!

page_break_2

Hello Pretty Handy Girl readers! My name is KariAnne from Thistlewood Farms and I am so excited to be here today! In our family….every year is a handmade Christmas and I just love getting handmade gifts from family and friends.

Today, I want to show you how to make a simple gift for someone special this Christmas by transforming a vintage silverplate spoon into a necklace. You can personalize it with a date or names or a quote or an anniversary. Just be sure and stamp it from the heart.

How to Make a Spoon Necklace

Spoon-Necklace

Supplies:

Silver-stamps

  • spoon (at the risk of stating the obvious)
  • steel stamping block
  • hammer
  • silver stamps
  • jump ring
  • chain

Instructions: Read more

DIY jewelry organizer | Pretty Handy Girl

Hey there! I’m so excited to be here today and share with you a super easy way to keep your jewelry organized.  I have three little boys, the youngest of which is two and he thinks it’s great fun to ransack my jewelry box now that he’s tall enough to reach it.  I realized I needed to move my storage up onto the wall pronto! I’d love to show you how to make this super easy rustic wood organizer!

Materials

  • scrap wood (I used a 30″ long piece of 1 by 3 board leftover from a previous project)
  • circular saw
  • safety glasses
  • wood glue
  • finishing nails
  • hammer
  • medium grit sandpaper
  • wood conditioner
  • wood stain/polyurethane
  • drill
  • knobs of your choosing with coordinating washer and nut (3)
  • drill bit (width depends on the width of your knob screws)
  • small glass kitchen bowls (I purchased a 4 pack at the dollar store)
  • white spray paint/primer
  • hot glue gun and glue
  • large D-Ring hangars (1-2)

Instructions

Cut your wood into two 15″ long pieces using a circular saw (be sure to wear your protective glasses!)

jewelry organizer wood

Apply wood glue to the long edge of one of your pieces-be sure to apply it towards the back edge and use only a thin line as it expands as it dries. Read more

Did you pass your Junk Warrior testing? Congratulations if you did! And now I assume you want one of these highly coveted gear bracelets that will identify you as a Junk Warrior. Get set to follow this easy tutorial to make your own!

Read more