Galvanized Metal Tree Form | Pretty Handy Girl

Galvanized Metal Cone Tree | Pretty Handy Girl

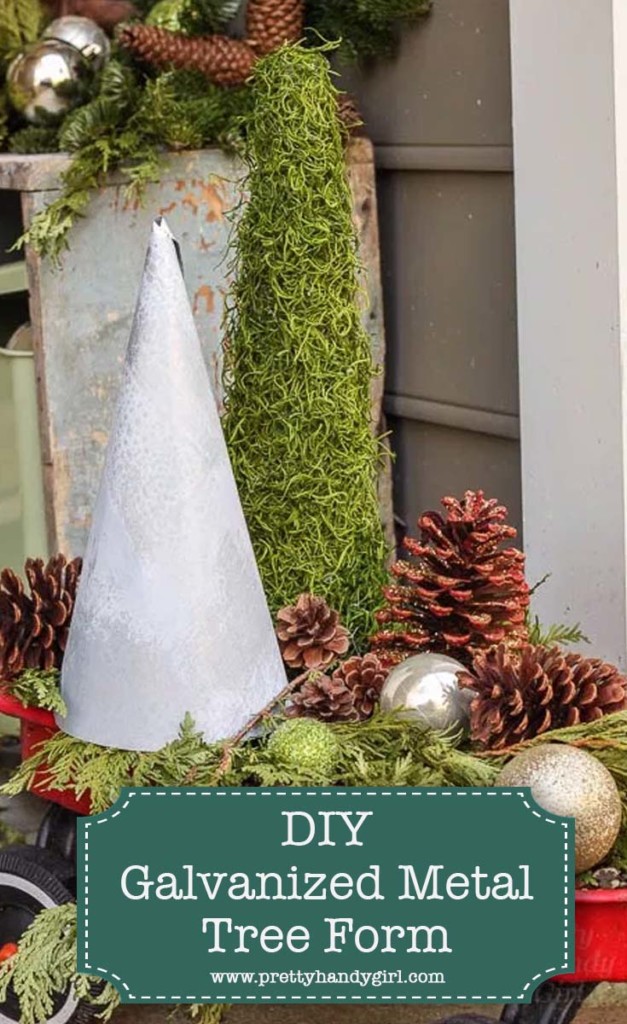
Want to make a super cute and fast galvanized tree form? This little galvanized tree will fit in with some of your holiday vignettes, especially if you like the rustic look.

Rustic Metal Magnetic Window Frame | Pretty Handy Girl

Last year I had fun playing with DIY galvanized metal (otherwise known as aged quickly sheet metal). I made these cute galvanized magnetic windows. . .

Galvanized Metal Star Garland | Pretty Handy Girl

. . . and a galvanized star garland.

Galvanized Metal Star Garland | Pretty Handy Girl

After cutting out the star garland, I had some leftover galvanized metal. I decided to use it to make a galvanized tree form. Ready to learn how to make your own?

Materials:
(contains affiliate links)

Instructions:

Put on gloves when working with sheet metal. It’s a sharp material and can easily cut you.

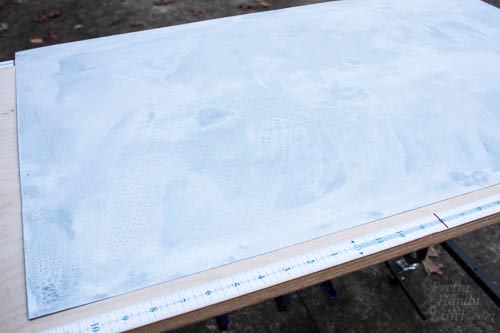
Follow the instructions to age metal quickly in this tutorial. After the metal has aged and dried. Cut off a large corner from the sheet metal material.

Galvanized Metal Cone Tree | Pretty Handy Girl

Begin to manipulate the two corner edges rolling in toward each other.

Galvanized Metal Cone Tree | Pretty Handy Girl

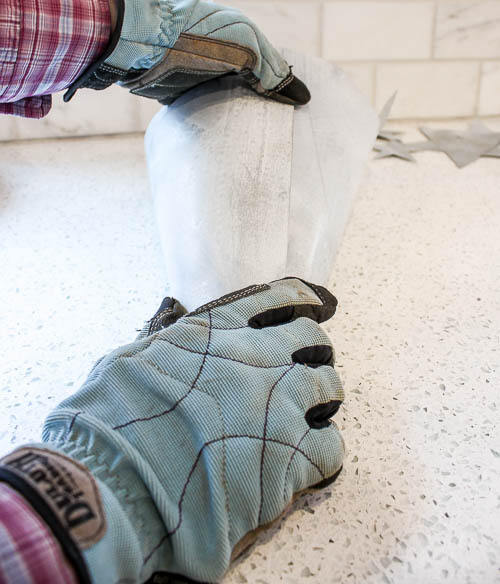
Tightly roll the corner into a cone shape. Roll the metal tighter than you want the shape to appear.

Galvanized Metal Cone Tree | Pretty Handy Girl

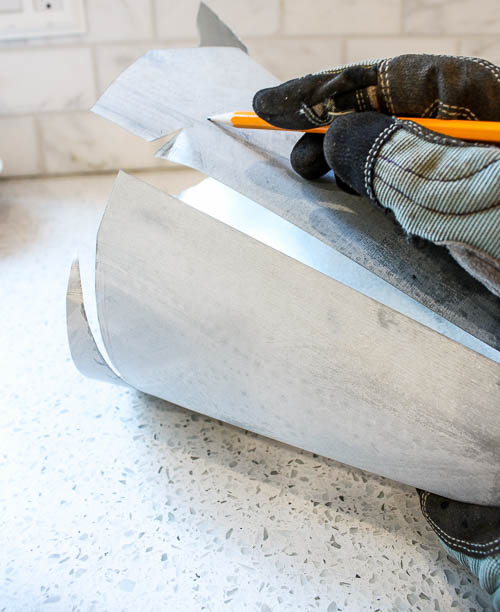
Mark a straight line along the bottom edge of the cone shape to the height you want. Cut along the line with tin snips.

Galvanized Metal Cone Tree | Pretty Handy Girl

Set your galvanized tree form with a grouping of other tree forms or natural materials and enjoy!

Galvanized Metal Cone Tree | Pretty Handy Girl

Hope you have fun making a whole forest of galvanized trees. 😉

PHGFancySign


Pin for later!

Easy to Make Hot Air Balloon Decorations | Pretty Handy Girl

This year I’m helping out with the school book fair decorations again. The theme for our fair was air travel. We made cute hot air balloons, clothespin airplanes, a giant “Welcome” word cloud, and cut out book clouds (tutorial to come soon.) We had the most fun making these adorable hot air balloon decorations using Chinese lanterns and Dixie cups.

Easy to Make Hot Air Balloon Decorations | Pretty Handy Girl

They cost next to nothing to make, but were a big hit with the kids. Ready to make your own hot air balloon decorations?

Materials:

(I’ve included affiliate links for your convenience. I earn a small percentage from a purchase using these links. There is no additional cost to you. You can read more about affiliate links here.)

Easy to Make Hot Air Balloon Decorations | Pretty Handy Girl

Instructions:

Assemble the Chinese lanterns.

Easy to Make Hot Air Balloon Decorations | Pretty Handy Girl
Pre-heat your hot glue gun. If you’ve never used a hot glue gun before or always get burned, read this article first!

Place one Dixie cup upside down on your working surface. Squeeze a dollop of glue into the center of the bottom of the cup. Place the end of your rope into the glue and wait a minute for the glue to harden.

Easy to Make Hot Air Balloon Decorations | Pretty Handy Girl

Add a little glue around the end of the rope. Fold the rope back and start to shape it around the center point. (Use a popsicle stick or tweezers to hold the rope as the glue cools. Do I as I say, not as I do.)

Easy to Make Hot Air Balloon Decorations | Pretty Handy Girl

Keep adding glue and wrap the rope around the center until you have covered the bottom of the Dixie cup.

Easy to Make Hot Air Balloon Decorations | Pretty Handy Girl

Add glue around the sides and wrap the rope around the sides of the Dixie cup. Be sure to firmly press the rope toward the bottom of the cup to avoid gaps.

Easy to Make Hot Air Balloon Decorations | Pretty Handy Girl
When the entire cup is covered, cut the rope and secure the end with more hot glue.

Easy to Make Hot Air Balloon Decorations | Pretty Handy Girl

Tie one end of sisal twine to the bottom of the Chinese lantern.

Easy to Make Hot Air Balloon Decorations | Pretty Handy Girl
Measure the length you want for the twine and cup to hang from the lantern and cut the twine. Tie the other end to the lantern. Fold the twine in half to find the center.

Easy to Make Hot Air Balloon Decorations | Pretty Handy Girl

Put a dollop of glue inside the bottom of the Dixie cup. Press the center of the twine into the glue. Let harden for a minute. Run glue up both sides of the inside of the cup and press the twine into the hot glue. Make sure to adjust the twine until the cup hangs level under the lantern.

Easy to Make Hot Air Balloon Decorations | Pretty Handy Girl

Once the hot glue hardens, you can hang your hot air balloon!

Easy to Make Hot Air Balloon Decorations | Pretty Handy Girl

It could be fun to prop little lego people into the baskets. Or add a tea light into the baskets and light them at night.

Easy to Make Hot Air Balloon Decorations | Pretty Handy Girl

Making Hot Air Balloon decorations is an easy craft project with big cuteness factor!

Easy to Make Hot Air Balloon Decorations | Pretty Handy Girl

Hope you find somewhere to hang these mini hot air balloons because they will bring a smile to your face.

PHGFancySign


Woodland Fairy Garden in a Jar | Pretty Handy Girl

Woodland Fairy Garden in a Jar | Pretty Handy Girl

Have you been following Stacy Risenmay’s Styled x3 series? It’s addictive y’all! It’s kind of like the “who wore it best” in the home decorating world, but there’s no shaming. The way it works is Stacy buys three of one item and ships two of them to selected bloggers and keeps the third for herself. Then it’s time for all three recipients to get creative and use it or transform it. It’s so fun to see how each blogger uses the item. Wait until you see how I transformed my item into a Woodland Fairy Garden in a Jar!

styledx3-banner

This is what arrived on my doorstep:

Woodland Fairy Garden in a Jar | Pretty Handy Girl

A big ole empty glass container. But, it had so much potential! I could fill it with anything. Part of me wanted to turn it on its side and build a little miniature ship inside. But, then I wised up and decided to create a Woodland Fairy Garden in a Jar. I’ve been dying to create a fairy garden. There’s a fun coffee shop near us that also sells fairy garden supplies. The boys and I love seeing all the fairy gardens there and longed to make one of our own.

Woodland Fairy Garden in a Jar | Pretty Handy Girl

It was a lot fun picking out decorations and creating this fairy garden. Want to make your own? Let’s get to it!

(I’ve included affiliate links for your convenience. I earn a small percentage from a purchase using these links. There is no additional cost to you. You can read more about affiliate links here.)

Materials:

Woodland Fairy Garden in a Jar | Pretty Handy Girl

Optional:

Instructions:

If you want, paint the lid for your glass container using chalk paint. Set it aside to dry.

Woodland Fairy Garden in a Jar | Pretty Handy Girl

Add pebbles to the bottom of your jar for drainage.

Woodland Fairy Garden in a Jar | Pretty Handy Girl

Add a layer of potting soil on top of the pebbles.

Woodland Fairy Garden in a Jar | Pretty Handy Girl

Place succulent plants into the soil.

Woodland Fairy Garden in a Jar | Pretty Handy Girl

Place moss on top of the dirt and around the plants. Leave room for a water feature if you want one.

Woodland Fairy Garden in a Jar | Pretty Handy Girl

Pour blue beads or crushed glass for your water feature.

Woodland Fairy Garden in a Jar | Pretty Handy Girl

Place the bench and any other large pieces in the container first.

Woodland Fairy Garden in a Jar | Pretty Handy Girl

Create a walking path with wood slices, bottle caps, or other flat objects. Add the smaller decorations. Am I forgetting anything? Oh “deer”! For a woodland fairy garden, you should have at least one animal. Add a deer. 😉

Woodland Fairy Garden in a Jar | Pretty Handy Girl

I placed our garden on a candle holder. You don’t need to add the lid unless you are worried about little fingers getting into the garden. Succulents actually don’t need a ton of moisture.

Woodland Fairy Garden in a Jar | Pretty Handy Girl

Woodland Fairy Garden in a Jar | Pretty Handy Girl

It’s fun to move the deer around from time-to-time.

Woodland Fairy Garden in a Jar | Pretty Handy Girl

Woodland Fairy Garden in a Jar | Pretty Handy Girl

I added some battery powered fairy lights to our garden.

Woodland Fairy Garden in a Jar | Pretty Handy Girl

If you place the fairy garden in a child’s room it would make a whimsical night light.

Woodland Fairy Garden in a Jar | Pretty Handy Girl

Woodland Fairy Garden in a Jar | Pretty Handy Girl

Aren’t you curious to see the other Styled x3 transformations with the same glass container? Go visit Not Just a Housewife and Uncommon Designs.

Hope you enjoy making your own fairy garden. Jillian and her crew made this fun Ghostly Fairy Garden for Halloween.

Ghostly Fairy Garden Planter

Have a great rest of your week!

PHGFancySign

How to Make a Striped Wood Block | Pretty Handy Girl

Make a Striped Wood Block | Pretty Handy Girl

I’ve always wanted to experiment with different color woods and make a striped wood block. Normally this technique is used for creating beautiful cutting boards. But, you can use this technique for much much more! Ready to learn How to Make a Striped Wood Block?

Begin by choosing your wood. All the wood should have the same thickness. I worked with some weathered cedar and new pine boards to get beautiful contrasting gray and white colors on my board.

Rustic Industrial Dog Bowl Feeder Stand | Pretty Handy Girl

Squeeze a liberal amount of wood glue onto the wood edges being glued together.

glue-wood-strips

Spread glue along the entire edge of each board with the exception of the outside edges.

Rustic Industrial Dog Bowl Feeder Stand | Pretty Handy Girl
Clamp the boards together. Wipe off any excess glue that squeezes out.

Rustic Industrial Dog Bowl Feeder Stand | Pretty Handy Girl

Let the glue dry overnight and remove the clamps in the morning.

What’s left is a beautiful striped wood block. This could be a tray, a backdrop, a plank or board for building and much much more!

Make a Striped Wood Block | Pretty Handy Girl

I can’t wait to show you what I made with this striped block. Can you guess? You’ll have to check back on Monday to find out.

PHGFancySign


Pin for later! 


bunny place cards

Spring is in the air so let’s make some bunny place cards for the table.  Jaime here from That’s My Letter sharing this easy scrap project that adds a touch of cuteness and color to your Easter or spring table.

I used spring colored spray paints on the front side of the bunnies and then decoupaged fun fabrics onto the back side:

bunny place cards 1

You can imagine once the table is all set just how festive and fresh all these bright colored bunnies will look against the place settings!  I added the little clothespin to hold the name card:

bunny place cards 4

Supplies:

  • 1/2″ MDF scraps
  • Bunny template (search google for lots of options)
  • Scroll saw or jig saw
  • Spray primer
  • Spray paint
  • Cotton fabric scraps
  • Decoupage for fabric & brush
  • Scissors
  • 1×2 wood scraps
  • Wood glue
  • Nail gun & 1 1/4″ finish nails
  • Mini clothespins
  • Super glue

Instructions:

Read through all steps before beginning.

bunny place cards step 1

Step 1: Trace bunny template onto MDF and cut out.  Sand edges smooth.  Spray with primer then colored spray paint (one side only). Read more