Up on the rooftop click click click, down through the chimney with Good St. Nick!
AngledFireplace.jpg
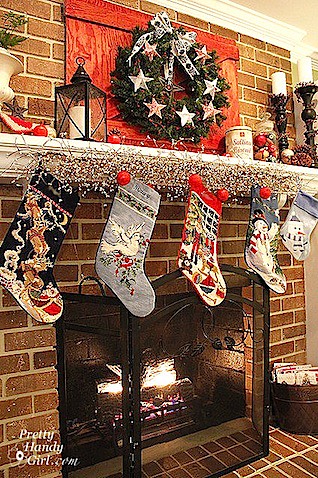
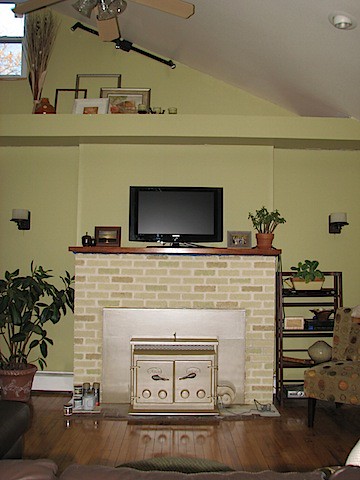
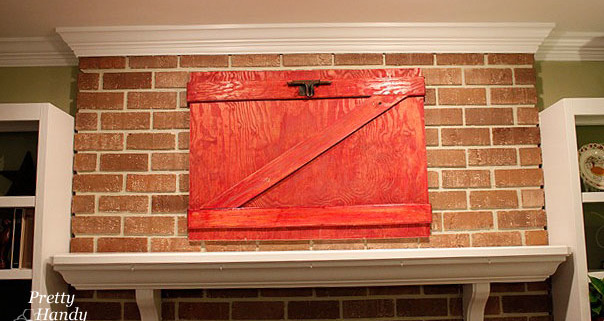
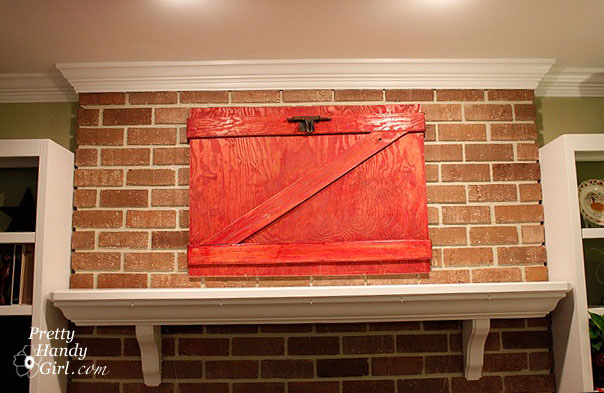
I think about this song when I gaze at my beautifully painted fireplace. That’s right, I said painted! Those bricks you see – well – they are bricks, but that isn’t their real color. It is faux painted!

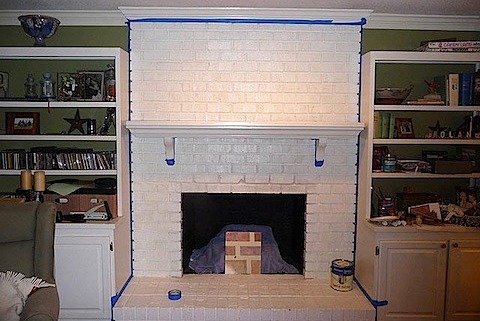
Last year this is what my fireplace looked like:
BeforeBrick.jpg

If you want to see how I did it, hop on over to Remodelaholic on Friday for the tutorial.

In the meantime, I want to share with you some other fabulously faux painted fireplaces. These three readers each contacted me after reading my post on faux painting brick and sent me photos of their fireplaces!

I think you will agree that they all did a fabulous job. Way to go gals!

“I came across your website looking for ideas on what to do with my painted white fireplace. After a year of living in the house, I couldn’t take it anymore. The layers of paint were too thick to strip and refinishing would have cost too much right now. So I gave your helpful hints a try. I am amazed how great it turned out. Next, get rid of the awful tiles and put in wood flooring. Thank you so much for posting your refinished fireplace and how-to.”
 
Thank you.
Pam Blackburn
Levittown, PA

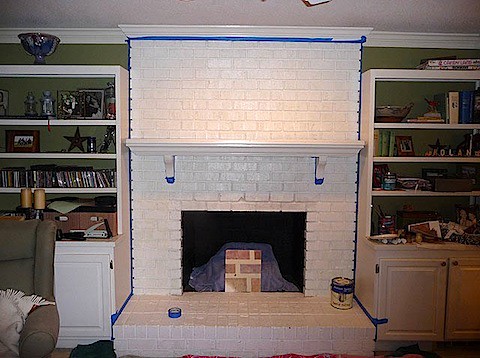
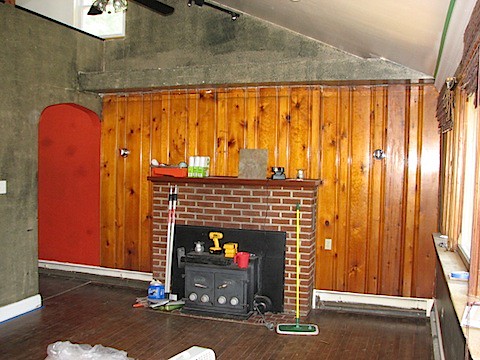
Pam’s Fireplace Before:
IMG_1548.JPG

Pam’s Fireplace After:
IMG_2335.JPG

“Thought you’d be interested in seeing how your idea worked for me. Attached are before and after pictures. Thanks for your help – my fireplace looks awesome now – just have to buy a mantel.”
 
Louise Russell

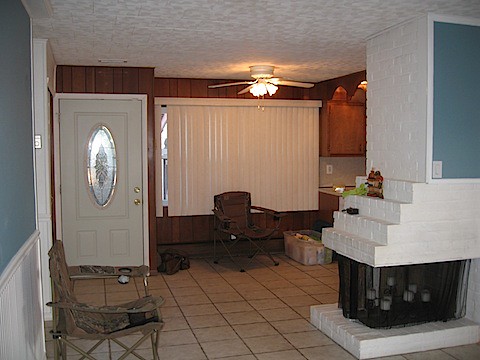
Louise’s Fireplace Before:
127.JPG

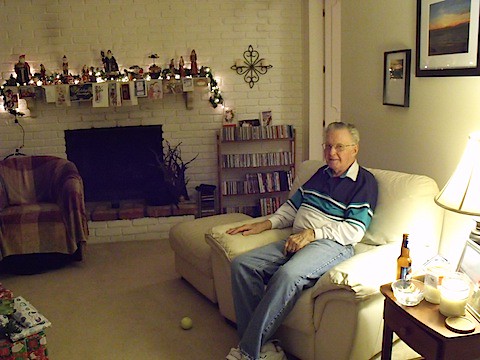
Louise’s Fireplace After:
IMG00006-20101127-1535.jpg

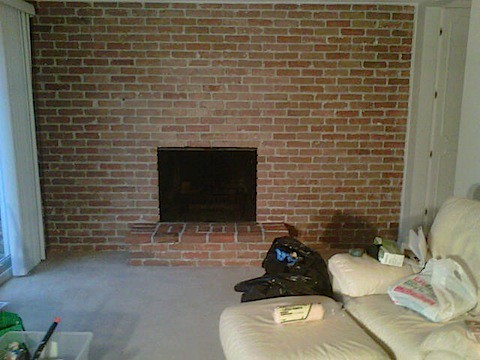
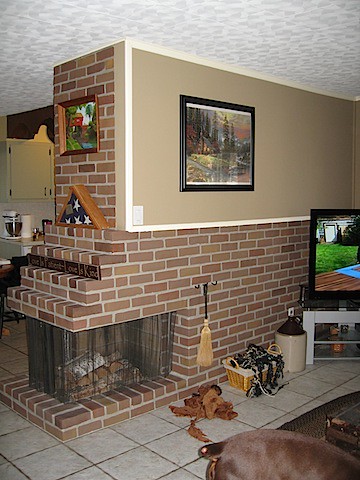
And finally, Megan took her fireplace in a different direction. She had an ugly red brick fireplace and turned it into a light taupe beauty.

“I found your great blog on the internet a few weeks ago and just wanted to thank you for giving my husband and I the courage to paint the fireplace in our new house! You really gave us the confidence we needed to try and brighten up our fireplace on our own! Thank you so much!! We had been quoted $1200 to have the bricks refinished, and I ended up spending about $30 with your method! The attached “after” shot was taken before I was completely finished, but it’ll still give you an understanding of where everything was headed and how much of an impact your tutorial made on us! Thank you!!”

Megan Cahill

Megan’s Fireplace Before:
Living Room Before.jpg

Megan’s Fireplace After:
Living Room After.jpg

So what do you think? Are those amazing transformations or what? I think all three are definitely Santa-worthy now.

Thank you to everyone who left me such wonderful comments on my rustic Christmas décor! I may not have been able to reply to all of you, but I DID read each and every comment! And thank you to the rest of you who took time out of your day to look at my post.

As promised, I am sharing with you the tutorial for creating the shutter screens that I display my Christmas cards on.

I am completely obsessed with decorating my home using shutters (only I use them on the inside instead of the outside!) I have one hanging in our half bathroom and two more in our upstairs hallway dressing up a dormer window. Luckily I still had two pairs laying around.

I began by attaching three hinges to hold a pair of shutters together.

I mixed two colors of red acrylic paint together (cadmium red medium & Lucas madder red) to get the perfect Christmasy red.

A perfect Christmas red is neither too orange nor too cranberry. It is very similar to Coca-Cola red.

Factoid: Did you know that Coca-cola red is so special that the company does not share the formula for the color?

Using a 2″ Purdy paint brush, I dabbed the brush into the paint and then wiped it off on the plate. Then dry brushed the paint onto the shutters, letting the bristles skip over the slats.

I kept dry brushing the shutter until I had enough paint for it to appear red, and yet some of the dark green color still peeked through.

Here is a close up of the green paint showing through:

Then I set each screen up in the corners of our living room and used clothespins to attach the cards.

The red shutters really bring in the holiday spirit!

I’m curious, how do you display your cards each year?

Did you like this post? Want to be notified when there are more fantastic tutorials by Pretty Handy Girl? Sign up to receive emails in your inbox:

Enter your email address:

Delivered by FeedBurner

Or follow me on Twitter or Facebook so you can be the first to know!


Pin for later!

displaying christmas cards on shutters

“SANTA CLAUS IS COMIN’ TO TOWN!” Cover your ears because a very tone deaf woman (myself) was belting out the Christmas songs this weekend. With Thanksgiving behind us, I released the restraints and broke out the Christmas décor. The kids are loving it and counting down the days until old St. Nick comes down our chimney!
Christmas Morning 2009 – Magic North Pole Snow Footprints (Baking Soda y’all!)
As I told you the other day, I wanted to create a rustic country theme this year in our living room. So, without anymore restraints….here it is!
I spy with my own two eyes, a Pottery Barn Inspired Lantern from the Habitat ReStore!
I told you I had a plan for those old pool balls!
Do you think I achieved my goal? Rustic? Country?
Goal or not, I think I like it.
Although it took me four days of noodling to decide I have to let it be.
I can’t tell you how long I’ve been looking for an affordable cake stand.
Thieve’s market in Raleigh had THREE! Count them…1…2…3!
Of course I only bought one, so if you need one, head on over there.
Yeah, Baby! You know I couldn’t pass up those rusty sleigh bells at SuzAnna’s!
An old cheese grater (you can’t see it but it has a candle inside.)
An old sports stop clock and one of two large acorn decorations.
I couldn’t resist them, after all Raleigh IS the City of Oaks.
Another PB Inspired Lantern. Love these $5 finds!
Each year I try to think of a new and creative way to display all our holiday cards.
This year I put together two shutters to make a screen.
The tutorial is HERE!

That concludes the living room tour. If you aren’t bored to death,
I’ll show you a small vignette I have in our kitchen on top of the pie safe.
Isn’t she adorable? That little angel found her way into my shopping bag at SuzAnna’s.
I hope you all have a fabulous holiday season!

Now cover your ears again as I sing to Santa Baby (because I’m no Eartha Kitt!)

Pin for later!

rustic christmas home decor on mantel


When Miss Mustard Seed and I were junkin’ on Black Friday, she asked what I was looking for. I immediately answered rustic, rusty, and anything that looks aged and has a story to tell. I am so wacky like that, I could care less how well something is made or if it is an expensive antique. When I die, my kids are going to be sadly disappointed that all these antiques I’ve collected over the years aren’t worth a dime. C’est la vie, right?

So, this year for our Christmas décor, I decided to create a natural rustic country inspired theme. What better way to invoke that spirit than with an old barn door. The only problem was that I didn’t own one. No problem, I’d just make one!

Materials:
Plywood board – painted or stained red
3 – 1″ x 4″ boards – painted or stained red
Nails or screws
Wood glue
D-ring picture hangers
Picture Wire
optional: Rusty door parts

In my “I can’t throw anything away scrap pile” I took some old plywood scraps that had been stained with red stain.

You will need to measured the space above your mantle, subtract a few inches from the top and bottom, then cut the plywood down to size (using a circular saw or table saw.)

Lay two 1″ x 4″ strips of plywood as cross pieces.

And one 1″ x 4″ piece at an angle. Draw a line where the horizontal pieces intersected with the diagonal piece.

Use a miter saw, circular saw or jig saw* to cut the angled cuts.

Liberally appy glue to the back of the 1″x4″ strips to secure them to the plywood base and then nail some finish nails into the strips to secure them. You can use a pneumatic nailer* if you have one, but screws or regular nails hammered in will work just as well! No need to buy any new tools for this project.

Hopefully you have a nail or hook already installed on your fireplace. Luckily I did, but in the past I have also just leaned artwork against the brick. So, if you choose to lean, ignore the next few steps.

Measure the location of the hook on your mantle. For example, if the hook is 20 inches from the ceiling, and you want your barn door’s top to hang 12 inches from the ceiling, then you will need to install the hooks 9 inches down from the top of the barn door. This will allow an inch for the wire to slack. Get out your D shaped picture hooks and screw them to the back of your barn door using a cordless drill* or just a screw driver and some muscles. Repeat on the opposite side.

Feed some metal picture wire through one D ring. Twist once…

…then feed the wire back through the D ring and twist the rest of the wire tightly against itself.

Pull the wire taught and repeat on the opposite side.

This is the best way to attach picture wire so it doesn’t slip. If you are hanging something super heavy, you might need to loop the wire back through the D rings a few more times.

If you have some old gate handles, hinges, or latches, attach them to your door. I screwed this old RUSTY gate lock to the top of my barn door. It makes a convenient hanger for…

…my Christmas wreath!
That’s all I’m going to show you of our mantle today.

Did you like this post? Want to be notified when there are more fantastic tutorials by Pretty Handy Girl? Sign up to receive emails in your inbox:

Enter your email address:


Delivered by FeedBurner

Or follow me on Twitter or Facebook so you can be the first to know!

What better way to spend Black Friday than with a kindred spirit? This creative genius; thrift and antique loving blogger was so much fun to hang out with today.
Her name is Marian, but you may know her as the fabulous Miss Mustard Seed. If you haven’t been to her blog, you have been deprived! She has the best tutorials for furniture refinishing and her photos are pure mouth-watering candy for the eyes.
When I heard she was in Raleigh for Thanksgiving I asked her if she would like to meet. Little did I know that we would spend the day together along with her sweet mother and mother-in-law.
We had a fun morning wandering through SuzAnna’s Antiques in north Raleigh. I’m embarrassed to say that I’ve lived here for 10 years and never knew about this spot. The owner, Jenny assured me that they’ve only been open a few years, but I will be sure to stop back by her place someday soon.
So, here is what we enjoyed feasting our eyes on:
Can’t you just see a family of bluebirds moving into this bird hotel?
John Deer Birdhouse
You could definitely re-create this by using Mod Podge and some color copies.
Then be sure to charge $39!
His and Hers Birdhouses
Okay, I admit it, I have a serious addiction to birdhouses, but you already knew that, right?
Chippy Green Porch Swing
Old Stove
This trough full of rusty treasures made me think of Donna at Funky Junk Interiors.
Loads of Shabby Chic Beauties
Crisp clean white plates on a white washed wall.
This is so easy to achieve, and yet the impact of all these white buttons in a jar is stunning.
If kisses were snowflakes, I’d send you a blizzard.
I am such a snow-lovin’ southerner (yes, I realize that I’m in the minority!)
You see that cute little angel? Well, she’s not there anymore, she’s in my home now!
While we’re at it, don’t even drool over those Christmas colored pool balls,
because, they are MINE!
I bought them and am trying to incorporate them into my Christmas mantle décor.
I’ll give you just a quickie sneak peek at it.
I built a mini barn door out of wood scraps I had lying around. As usual, the tutorial will come shortly. And then made this wreath using paper stars that I learned how to make here.

Today was a real treat for me, I don’t normally get to hang around with famous bloggers.

A few things I learned about Marian (aka Miss Mustard Seed):

  1. She likes Panera’s home style macaroni and cheese.
  2. She IS as sweet as she seems on her blog.
  3. If she has any spare time (which she rarely does) she will veg out in front of Survivor.
  4. Show her some vintage scales or ironstone and she is sure to buy them.
  5. She has no problem parting with the furniture and treasures she finds. I, on the other hand, can’t bear part with mine.
  6. She will be attending Blissdom 2011 in Nashville, TN (which makes me happy – because, so am I and I can’t wait to see her again!)
One more visual from SuzAnna’s before signing off.