
How to Faux Finish Weathered Wood Grain
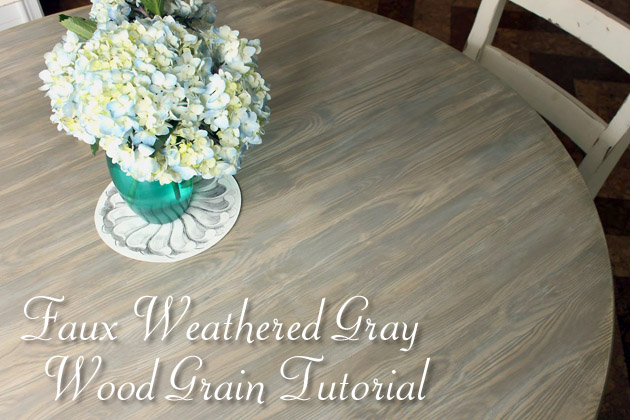
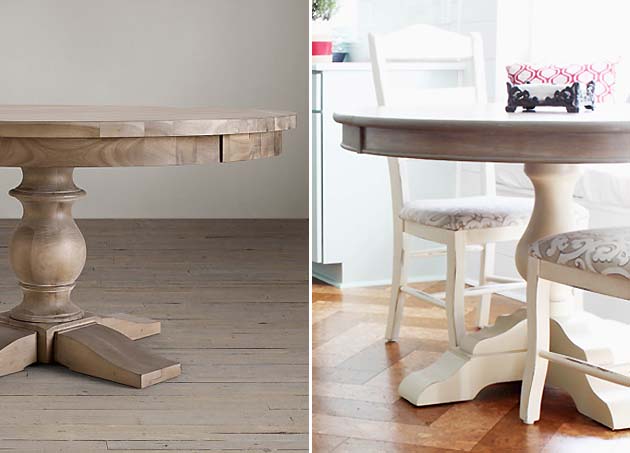
Do you love the Restoration Hardware tables that have that beautiful gray (driftwood-like) weathered wood? Me too. But, I can’t justify spending thousands of dollars on their furniture. Instead, I found a Craig’s List pedestal table that had the right shape and size for our kitchen. It was a cherry veneer finish, but after some paint you’d never know!
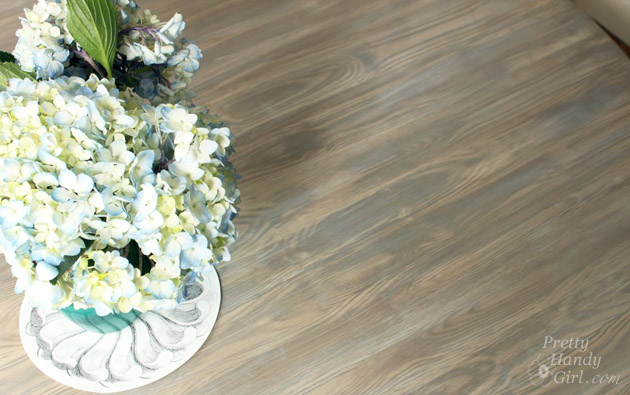
And then, I created my own Faux Weathered Gray Wood Grain top. All you need are some Valspar paint samples, some wood grain tools and a dry brush to achieve this look.
Ready to get started?
Faux Finish Weathered Wood Grain Materials:
(I’ve included affiliate links for your convenience. I earn a small percentage from a purchase using these links. There is no additional cost to you. You can read more about affiliate links here.)

- 3 empty containers
- Wood Grain tool (I also used Martha Stewart craft comb for the sides of the table top)
- Valspar 6006-1A Woodrow Wilson Putty
- Valspar 6007-2A Arid Plains
- Valspar 6005-1A Asiago
- Clear mixing glaze
- 4″ chip paint brush
- 2.5″ Paint brush
- Wet wipes for clean up and mistakes
- Paper towel or dry rag
- Minwax wipe on Polyurethane (the paint on will be more durable, but takes much longer to dry)
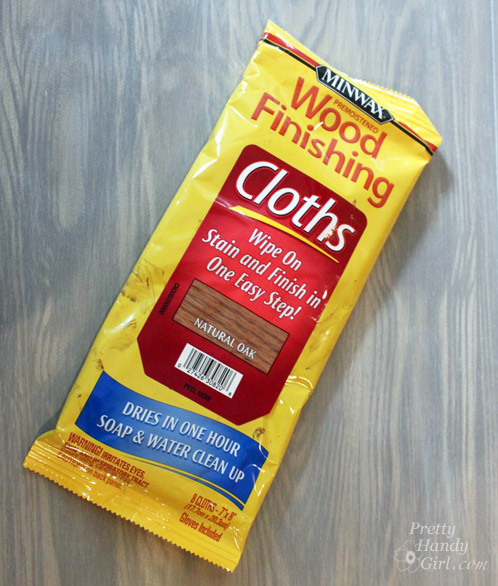
- Optional: Minwax Natural Oak Finishing Wipes
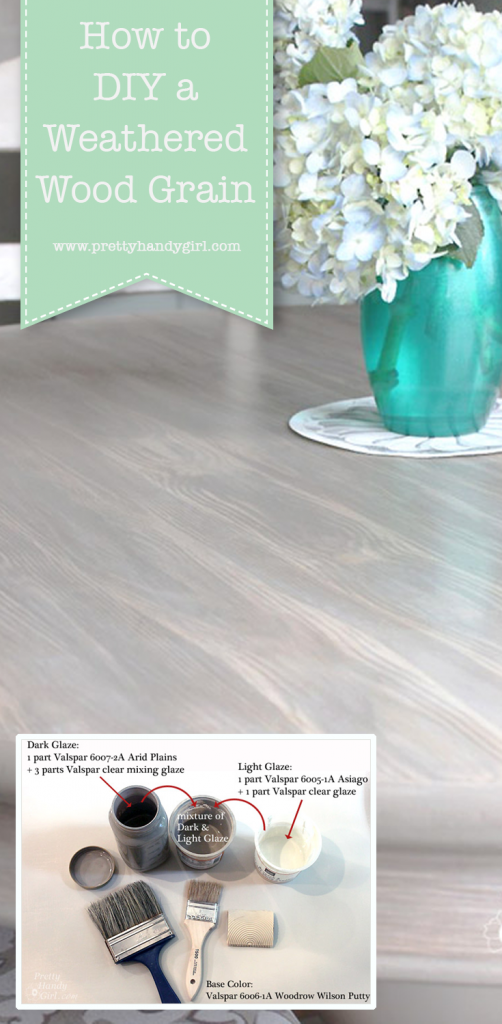
Faux Finish Weathered Wood Grain Base Coat and Glazes:
Before you begin creating your wood grain, you should paint your surface with Valspar Woodrow Wilson Putty and allow it to dry.

If you are painting furniture, lightly sand the piece. And be sure to use Valspar Paint + Primer in one. This will allow you to paint directly onto the furniture and skip the primer.
While the base coat is drying, pre-mix your glazes in the empty containers.
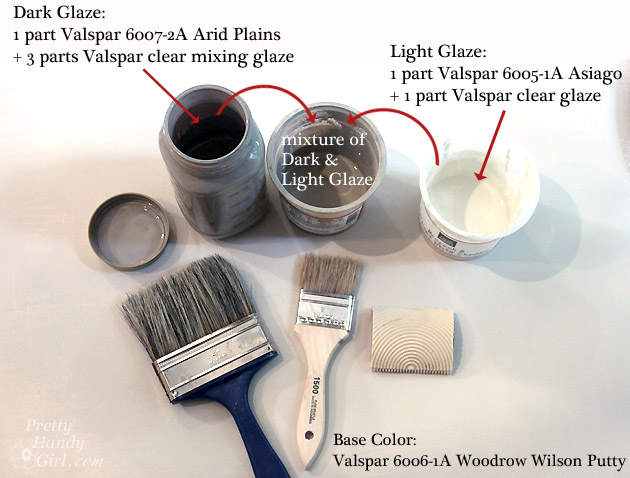
Here are the Glaze Formulas:
- Dark Glaze: 1 part Valspar Arid Plains mixed with 3 parts Valspar clear glaze
- Light Glaze (for white washing): 1 part Valspar Asiago mixed with 1 part Valspar clear glaze
- Medium Glaze: Mix both the light and dark glaze together to get a nice in between glaze.
Faux Wood Grain Tutorial:
I created a video tutorial for this project. So, feel free to watch this short video or read the instructions below (if you can’t see the video, click here.):
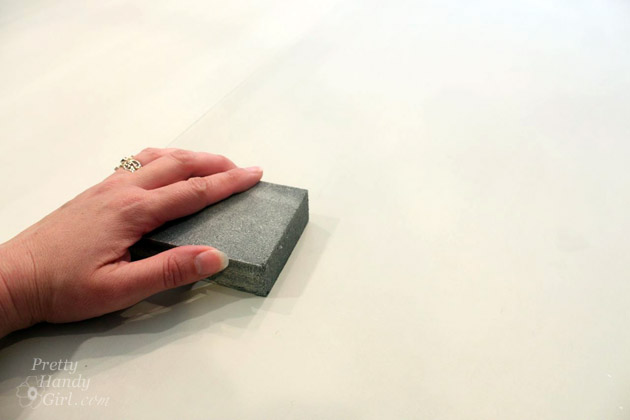
Start by dipping your dry brush into the medium glaze. Blot most of the glaze off onto a paper towel or rag.
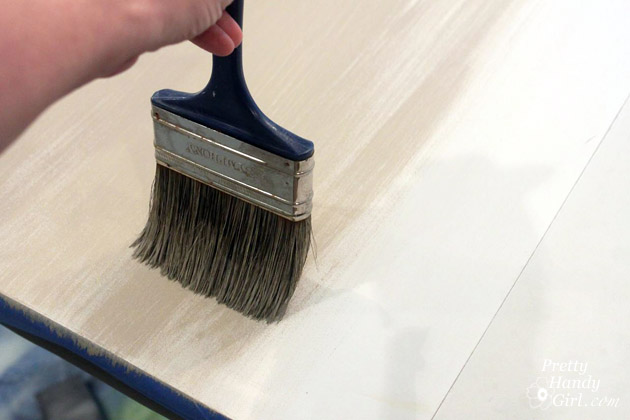
Drag the brush in long vertical stripes (working in the direction you want the grain to run.) When the surface is covered, it should have some darker and lighter areas as shown below:

When the medium glaze has dried, you can start creating the knots and grain using the darker glaze. Paint the darker glaze on top of the medium glaze stripes. Work in 2-3 board width sections.
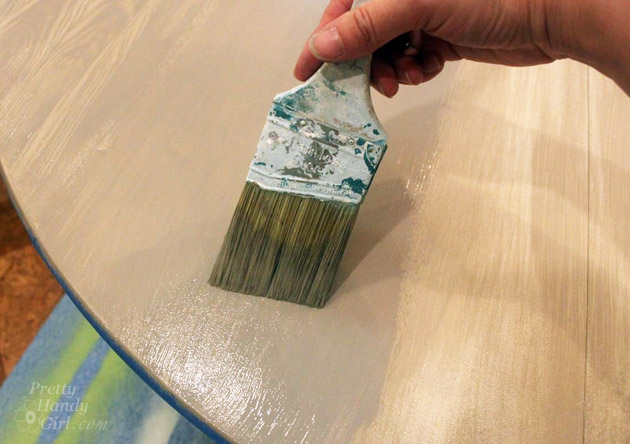
Before the glaze can dry, drag and rock the wood grain tool through the dark glaze. When starting on the next row, I like to flip the wood grain tool around.
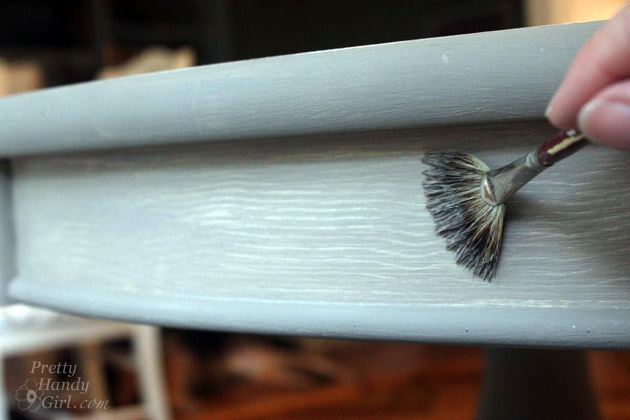
Use a clean dry brush to lightly feather the grain edges. If you mess up, no worries, just re-drag the wood grain tool through the glaze again.
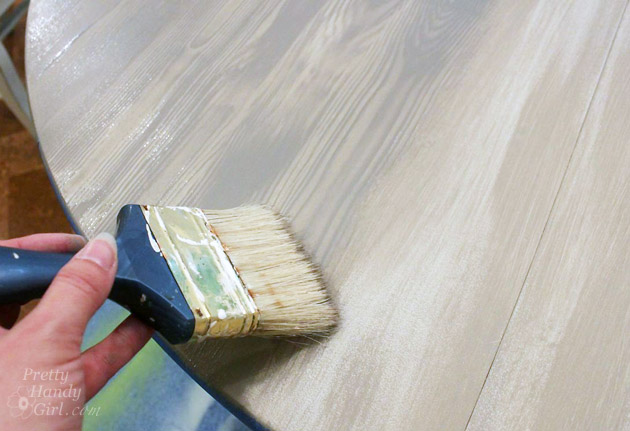
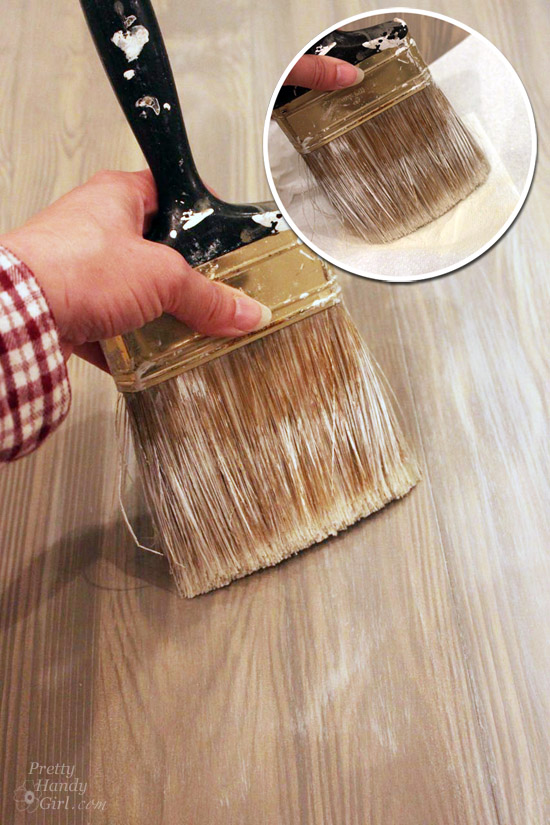
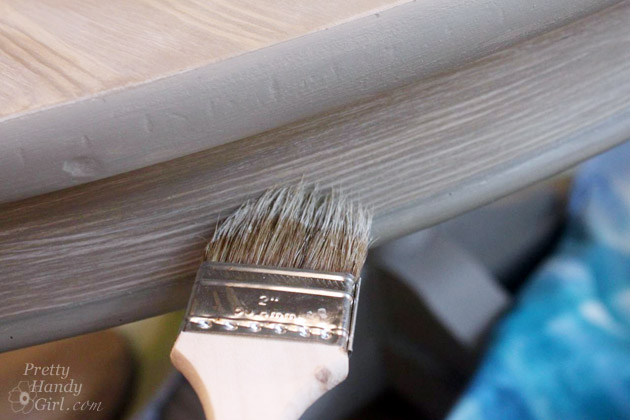
Wait for your grain to dry thoroughly. Then add the white wash layer to your surface. Dip the dry brush into the light glaze and blot most of it off onto a rag. Then VERY LIGHTLY drag the white-wash glaze over the table. This layer should skip over areas and be as random as you can manage.
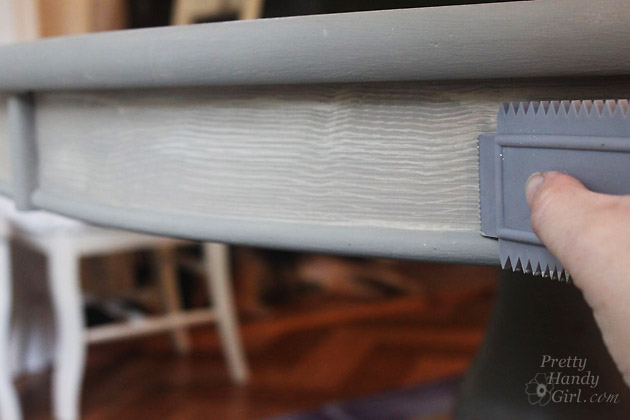
Wood Grain Effect on Small Sections:
The side of my pedestal table has an apron that is too small for the wood grain tool. So, I used a Martha Stewart wood grain comb for this area. It works well, but you won’t be able to create knots like the other tool can.
Repeat the same process as above:
1. Base coat with Woodrow Wilson Putty.
2. Apply the medium glaze with a dry brush.
3. Apply the dark glaze and drag the comb through the glaze. Be sure to angle and wiggle the comb slightly to achieve the uneven lines that are indicative of real wood grain.
4. Use a small dry brush or fan brush to feather the wood grain.
5. Dry brush the white-wash (Asiago) layer.
Finishing and Protecting Your Furniture:
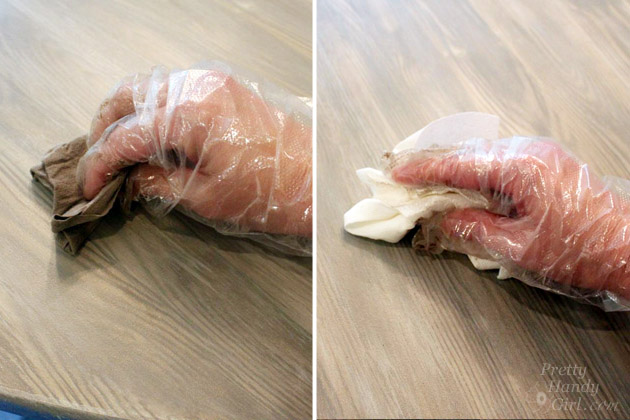
After you’ve spent all that time creating the perfect weathered wood grain look, you’ll want to protect your furniture. For my table, I wanted to add a slight bit of warmth back into the table. I chose to use the Minwax Wood Finishing Cloths in Natural Oak. The cloth is a stain and polyurethane in one.
Simply wipe the stain cloth onto your surface. Let it sit a minute and wipe the excess off with a dry rag. For a deeper color, wait one hour and wipe with a new cloth. Remove the excess.
Because the table I finished was for our kitchen, I chose to add a few more layers of polyurethane. Wipe on, let dry and repeat at least 4-5 times.
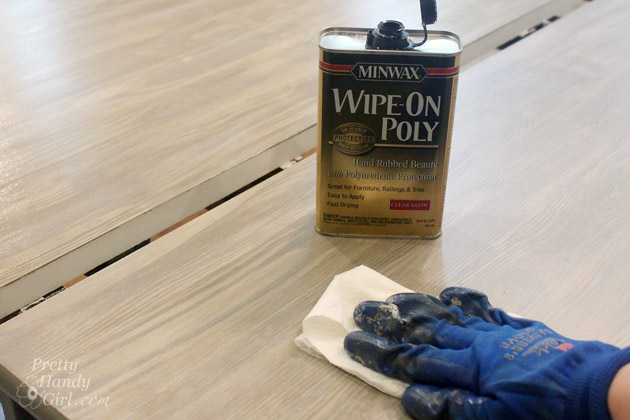
For a more durable surface, I recommend using the brush on polyurethane. It goes on thicker and creates a nearly impenetrable coating that will stand up to the worst messes your kids can dish out. However, you will need to brush on the poly in a well ventilated area and wait at least 24+ hours before using the table.
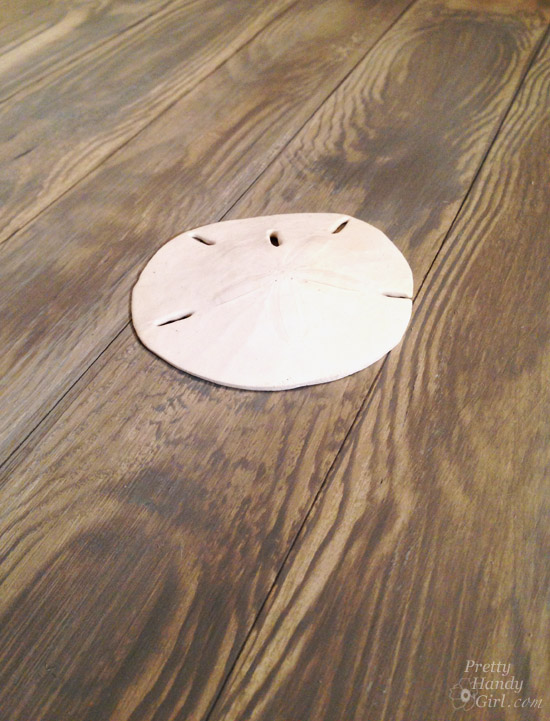
I used this wood grain technique on a piece of poster board and can use it as a back drop for photography:
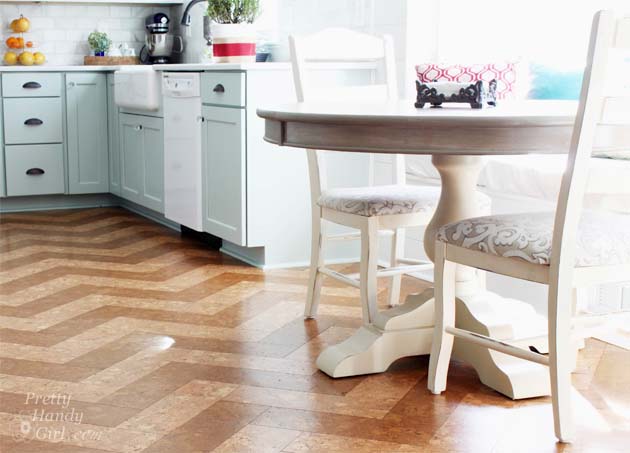
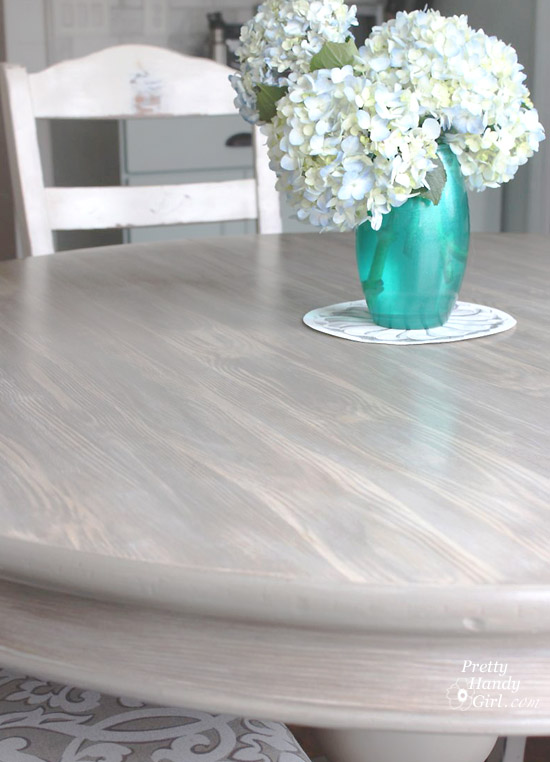
What do you think? Is this a good knock off of the $1,000 R.H.’s pedestal table? Or at least a close resemblance?

I love this technique. I can’t wait to use it on something else. Where else would you use the driftwood wood grain technique?

Pin for later!
Disclosure: As a #LowesCreator, I was provided with a Lowe’s gift card to purchase supplies for this post. I was not told what to write. All ideas and words are my own.

hello – what color were the chairs painted?
Tara, I spray painted them years ago using Rustoleum Heirloom White.
curious what color you painted the chairs – also the putty color? I didn’t see this in any of the earlier questions or posts. Thank you!
Hello, was the Woodrow Wilson Putty a flat sheen? Also, what type of brush on Minwax polyurethane would you recommend?
Yes, it is a flat sheen. The oil based urethane will be more durable, but will yellow with age. I’ve recently been trying the General Finishes Water-based polyurethane (in matte) and like the results.
Are you sure the dark color was Arid Plains? It looks darker in the how to video, and more gray. We sanded our table down, and come to find out the top is a thin sheet of wood, and sides are mdf board. So frustrated because we can’t stain the sides! We are h oping to use weathered grey for the stain on the top, but try your technique on the sides.
Mike, yes, it’s definitely Arid Plains for the darker color. The video lighting is a bit darker than the tutorial photos.
Hey Girl! You rock:-) I want to pick your brain and ask for advice. You know the hollow core faux oak texture doors… what would you do to make them look like distressed aged oak wood. They’re already painted white semi-gloss too. Please let me know your thought on that. Thanks!
Hi Brittany!
Such a lovely end result! Its exactly what i am looking for and looks doable.
So my circular table is oak veneer; its not solid. So it has the graining in it already. Also the veneer was laid in triangle strips (tips in the center) then fanning out.
I’m wondering if i should skip the faux wood graining part?? Would it be too much for an already well-grained wood?
Would love to hear your thoughts!
I am wondering the the same thing! From how you describe your table, I believe it is the same one that I am trying to refinish now. The colors in this tutorial are the exact look I’m trying to achieve with my table. Creating fake grain just seems like more work than I would prefer to do especially when the table already has a beautiful grain pattern. Is there a way to achieve this look without that step?
You might want to check out this tutorial instead: https://prettyhandygirl.com/gray-restoration-hardware-stain-recipe/
Just keep in mind that the stain will show the wood grain and any other stain color that it goes on top of, so your results may vary.
Love this finish Brittany, what a great job you did! Since none of those colors are available anymore do you have suggestions on what colors to buy for this?
Lisa, I’m sorry for the confusion. I meant to say that the glazes weren’t available anymore but I updated the post to link to products that are available. You can ask the Lowe’s employee to look up those colors in the computer.
You are awesome. I am in love with your table and this is the best tutorial Ive found, hands down! I have a question for you since this post is a bit older. Have you tried doing this technique on any other pieces? I have 2 oak end tables that I picked up from a thrift store. They are solid wood and currently stained a golden oak color. I had originally planned to strip, sand and refinish. But I REALLY hate refinishing furniture. The wood grain is beautiful. The current color is not. I want to achieve the same coloring as your table… But I’m wondering if you (or anyone else) has suggestions? Would you still start by painting it the putty color? Or is there a way to use its oak-ey color and wood grain to add to the dimension of the final “look” without covering it all up first? Thoughts? Has anyone else had this dilemma and wanted to start with a solid wood piece?
Laura, actually I think your table would come out better than mine because of the grain texture your table has. Our table is a smooth veneer. If you look close you can tell it’s faux painted. I used the same technique on a pine cake stand and it looks great. Yes, I would paint it the base color first and proceed with the faux wood graining.
I would like to try this tutorial but all the products here are no longer sold at Lowe’s. How would I find these particular products now? Thanks!
Alina, I just updated the materials list with links to the products on Amazon. I hope that helps you.
Thanks Brittany!! The 3 Valspar products on your list are still linked to a discontinued Lowe’s link, but I can try to match the colors to current products 🙂
I just purchased the 3 colors at lowes last week. They still had the little color cards and everything. And they still come up on the Valspar website. So as long as you can tell them the color code it can be made. Hope that helps!
Love this look! I’m attempting to do a similar affect on a coffee table I have but i’m curious what sheens did you use for the paints? Matte, Flat, Semi-gloss, etc. That’s the only thing I cant figure out lol
Flat and Eggshell paints.
I love your tutorial! I did my pantry french doors with this finish, and added a combination of Oak and gray stain over it! LOvE LOVE LOvE. We’ve gotten so many compliments and my husband loves it so much, he convinced me to refinish our kitchen table and 6 chairs this same. Way. All I have left is the stain and poly which of course will be stinky and take some time, but I cannot wait for the final product to match the doors!!!! THank you again!
Can you please post a picture of your french doors? Did you do anything different than the tutorial?
I want to create the weathered white wash look to my painted walls. Would this method work on an already painted sheetrock wall. If so my bedroom is already painted a light country white. Kind of looks like a light cream. What colors would you recommend to create this look using the country white as a base.
Rhonda, sure! Try skipping the Woodrow Wilson Putty base (since your base is similar) and use the other colored glazes as directed. Maybe work in a small area to determine if you like your base color or not.
I love this! I’m on my way to pick up my materials & was wondering how much paint I need? I know you say “samples,” but do they truly sell samples or do I need to buy, say a quart of each? It’s for two side tables. Thanks so much for your help!
Nicole, they sell small $3-5 little 8 oz (I think that’s the size) samples at Lowe’s and other paint departments.