
How to Faux Finish Weathered Wood Grain
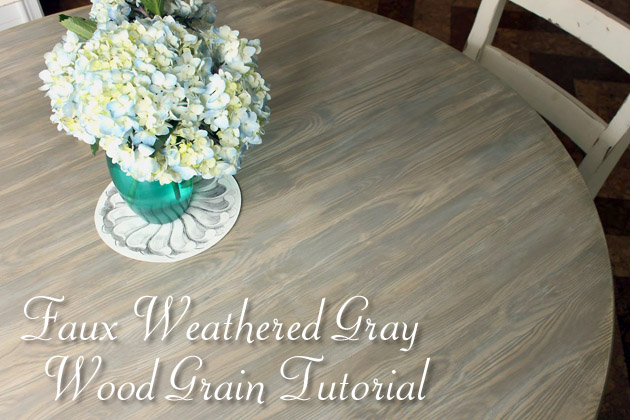
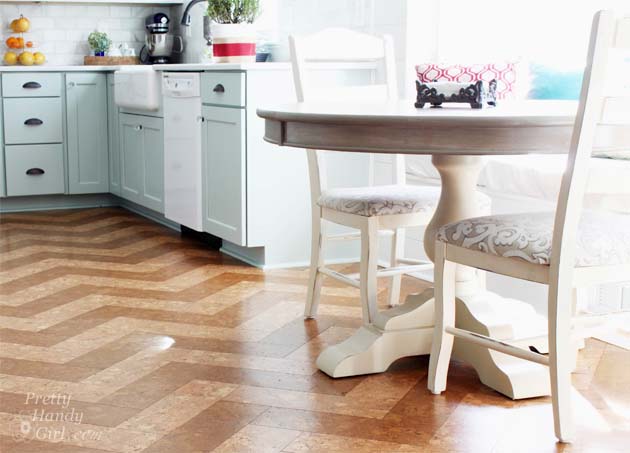
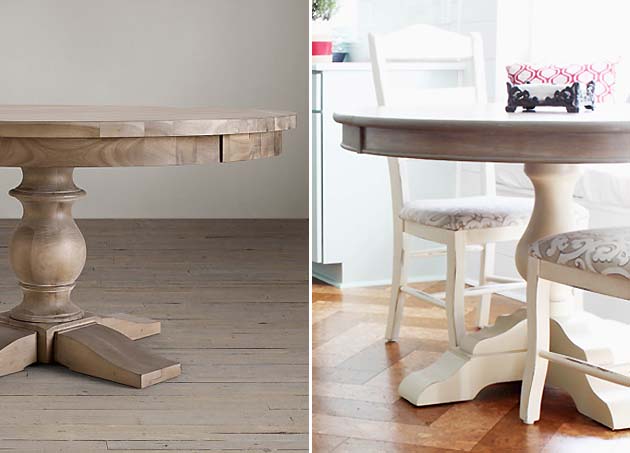
Do you love the Restoration Hardware tables that have that beautiful gray (driftwood-like) weathered wood? Me too. But, I can’t justify spending thousands of dollars on their furniture. Instead, I found a Craig’s List pedestal table that had the right shape and size for our kitchen. It was a cherry veneer finish, but after some paint you’d never know!
And then, I created my own Faux Weathered Gray Wood Grain top. All you need are some Valspar paint samples, some wood grain tools and a dry brush to achieve this look.
Ready to get started?
Faux Finish Weathered Wood Grain Materials:
(I’ve included affiliate links for your convenience. I earn a small percentage from a purchase using these links. There is no additional cost to you. You can read more about affiliate links here.)

- 3 empty containers
- Wood Grain tool (I also used Martha Stewart craft comb for the sides of the table top)
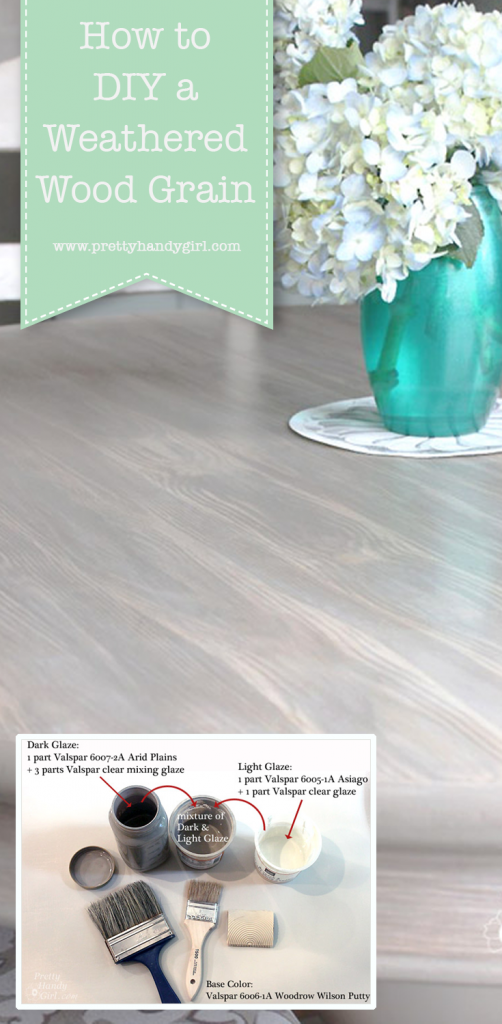
- Valspar 6006-1A Woodrow Wilson Putty
- Valspar 6007-2A Arid Plains
- Valspar 6005-1A Asiago
- Clear mixing glaze
- 4″ chip paint brush
- 2.5″ Paint brush
- Wet wipes for clean up and mistakes
- Paper towel or dry rag
- Minwax wipe on Polyurethane (the paint on will be more durable, but takes much longer to dry)
- Optional: Minwax Natural Oak Finishing Wipes
Faux Finish Weathered Wood Grain Base Coat and Glazes:
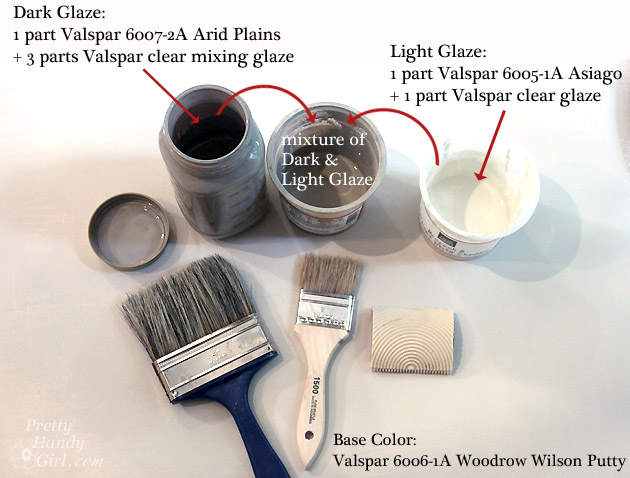
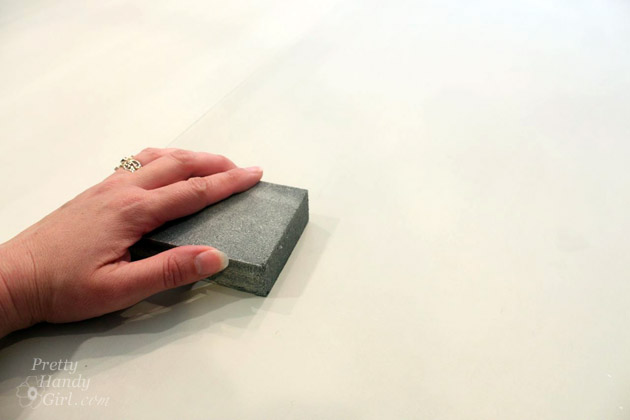
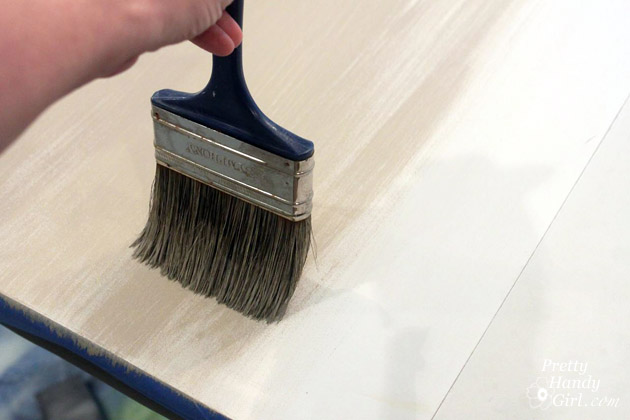
Before you begin creating your wood grain, you should paint your surface with Valspar Woodrow Wilson Putty and allow it to dry.

If you are painting furniture, lightly sand the piece. And be sure to use Valspar Paint + Primer in one. This will allow you to paint directly onto the furniture and skip the primer.
While the base coat is drying, pre-mix your glazes in the empty containers.
Here are the Glaze Formulas:
- Dark Glaze: 1 part Valspar Arid Plains mixed with 3 parts Valspar clear glaze
- Light Glaze (for white washing): 1 part Valspar Asiago mixed with 1 part Valspar clear glaze
- Medium Glaze: Mix both the light and dark glaze together to get a nice in between glaze.
Faux Wood Grain Tutorial:
I created a video tutorial for this project. So, feel free to watch this short video or read the instructions below (if you can’t see the video, click here.):
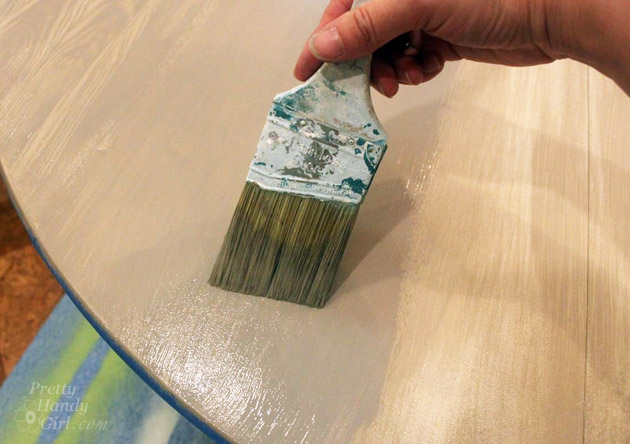
Start by dipping your dry brush into the medium glaze. Blot most of the glaze off onto a paper towel or rag.
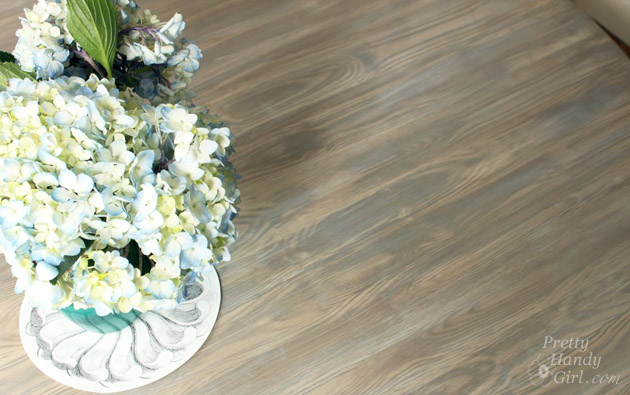
Drag the brush in long vertical stripes (working in the direction you want the grain to run.) When the surface is covered, it should have some darker and lighter areas as shown below:

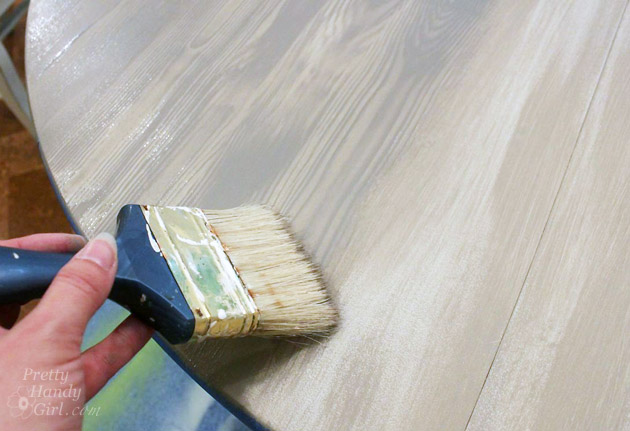
When the medium glaze has dried, you can start creating the knots and grain using the darker glaze. Paint the darker glaze on top of the medium glaze stripes. Work in 2-3 board width sections.
Before the glaze can dry, drag and rock the wood grain tool through the dark glaze. When starting on the next row, I like to flip the wood grain tool around.
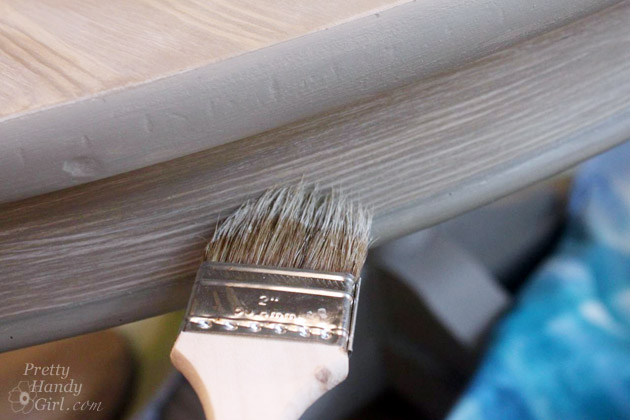
Use a clean dry brush to lightly feather the grain edges. If you mess up, no worries, just re-drag the wood grain tool through the glaze again.
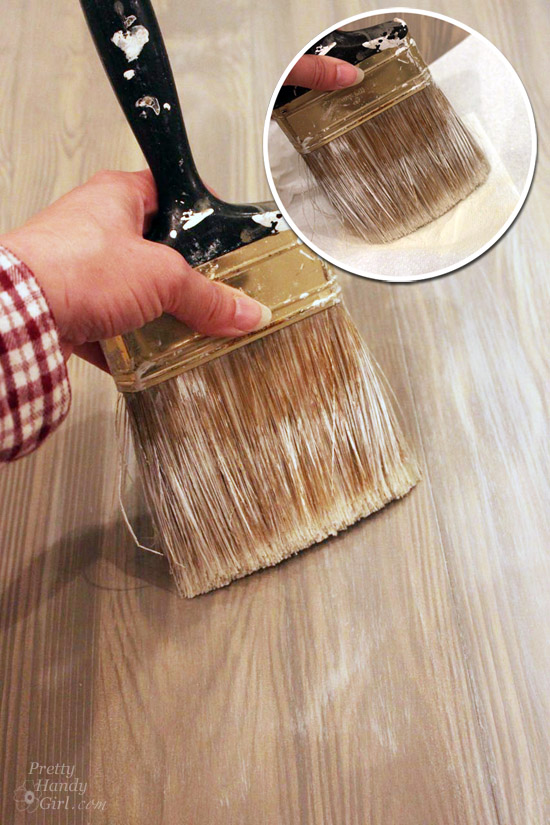
Wait for your grain to dry thoroughly. Then add the white wash layer to your surface. Dip the dry brush into the light glaze and blot most of it off onto a rag. Then VERY LIGHTLY drag the white-wash glaze over the table. This layer should skip over areas and be as random as you can manage.
Wood Grain Effect on Small Sections:
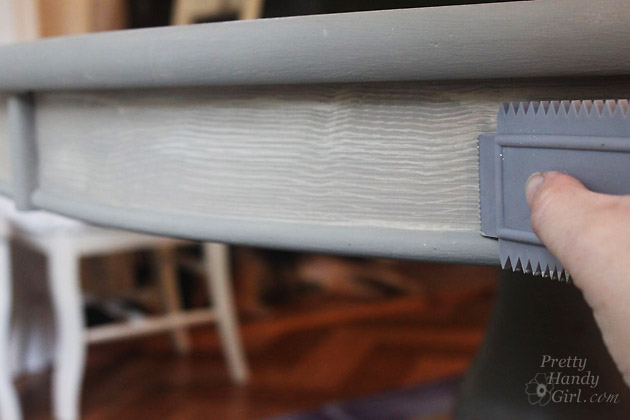
The side of my pedestal table has an apron that is too small for the wood grain tool. So, I used a Martha Stewart wood grain comb for this area. It works well, but you won’t be able to create knots like the other tool can.
Repeat the same process as above:
1. Base coat with Woodrow Wilson Putty.
2. Apply the medium glaze with a dry brush.
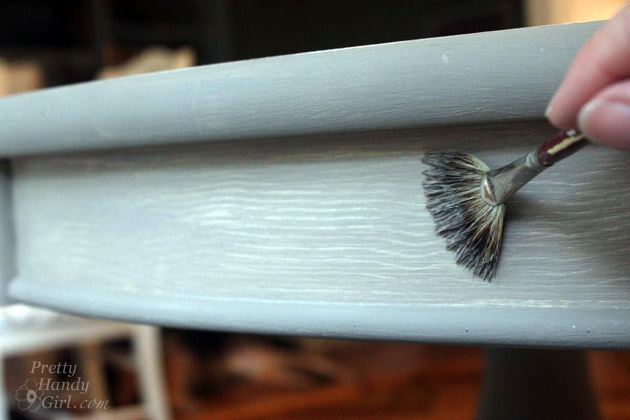
3. Apply the dark glaze and drag the comb through the glaze. Be sure to angle and wiggle the comb slightly to achieve the uneven lines that are indicative of real wood grain.
4. Use a small dry brush or fan brush to feather the wood grain.
5. Dry brush the white-wash (Asiago) layer.
Finishing and Protecting Your Furniture:
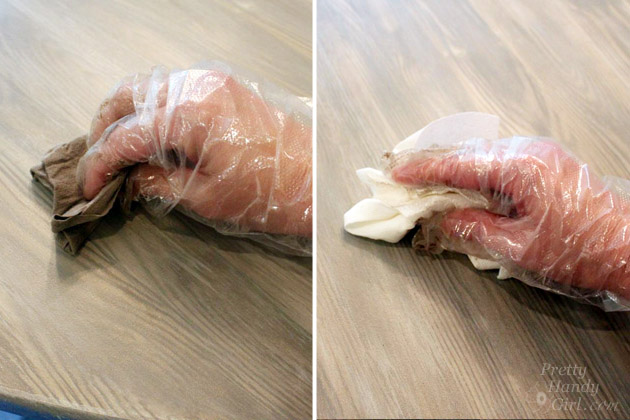
After you’ve spent all that time creating the perfect weathered wood grain look, you’ll want to protect your furniture. For my table, I wanted to add a slight bit of warmth back into the table. I chose to use the Minwax Wood Finishing Cloths in Natural Oak. The cloth is a stain and polyurethane in one.
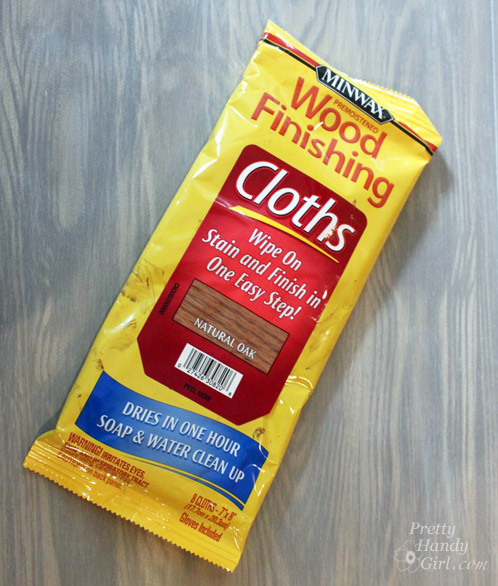
Simply wipe the stain cloth onto your surface. Let it sit a minute and wipe the excess off with a dry rag. For a deeper color, wait one hour and wipe with a new cloth. Remove the excess.
Because the table I finished was for our kitchen, I chose to add a few more layers of polyurethane. Wipe on, let dry and repeat at least 4-5 times.
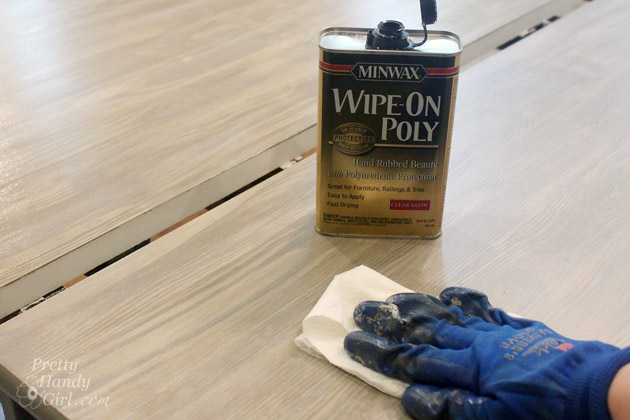
For a more durable surface, I recommend using the brush on polyurethane. It goes on thicker and creates a nearly impenetrable coating that will stand up to the worst messes your kids can dish out. However, you will need to brush on the poly in a well ventilated area and wait at least 24+ hours before using the table.
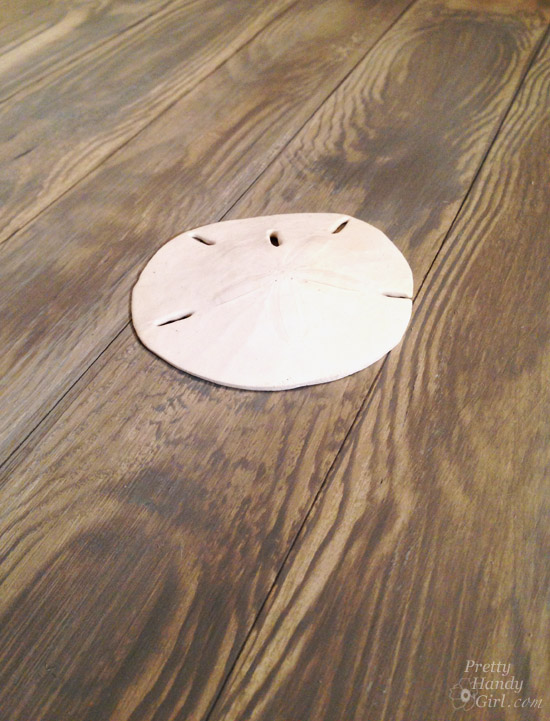
I used this wood grain technique on a piece of poster board and can use it as a back drop for photography:
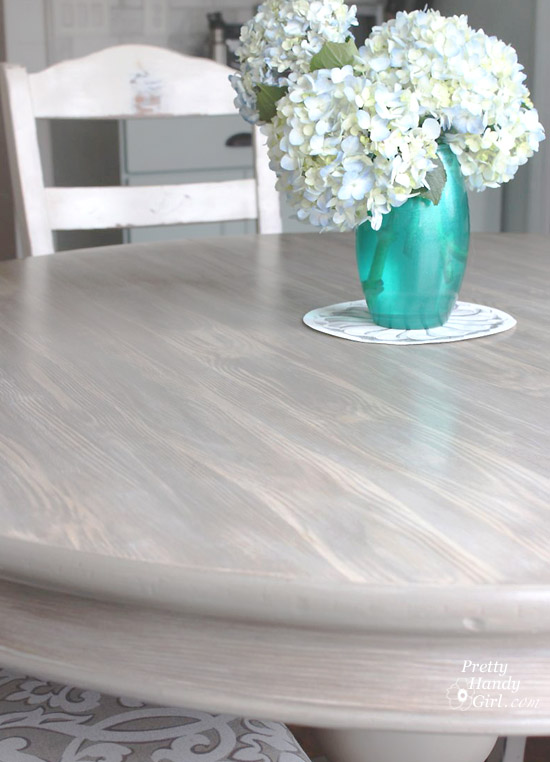
What do you think? Is this a good knock off of the $1,000 R.H.’s pedestal table? Or at least a close resemblance?

I love this technique. I can’t wait to use it on something else. Where else would you use the driftwood wood grain technique?

Pin for later!
Disclosure: As a #LowesCreator, I was provided with a Lowe’s gift card to purchase supplies for this post. I was not told what to write. All ideas and words are my own.

I used this for my kitchen table with the exact colors you used, and mixed with the glaze in the same proportions, but mine came out much lighter. The Asiago is barely darker than the Woodrow Wilson Putty. So it turned out pretty, just very different.
Mary, that’s the beauty of hand-paining. Each is unique and no two are alike. It depends on how heavy your hand is, and many other factors.
Hey Mary! I literally just finished my table with this method, and I had the exact same result you did, the table was beautiful but not dark and varied in color as much as I thought it would be… UNTIL I used the Minwax Wood Stain Wipes that were recommended, They totally took my table to the next level and achieved that dimension in the pictures, and added a whole lot of warmth back into the table! I’m not sure if it’s worth it as your post was about a year ago, but you might consider going over your table with the wipes, then re-applying the poly etc? Hope this helps!
I know that I am very late in asking you this but did you do the base differently than the top? It looks like you did and if you did, what color did you use? I practiced on the leaf to the table and it looks pretty good. Now I want to proceed to the table. I am having a hard time finding the wipe on poly cloth so I just bought some stain and appears to have the same affect. I will give it 2 or 3 coats of varnish after. Your table looks marvelous!
The base is a light off white color. I mixed various paints I had on hand.
Thanks very much. A translucent gel consistency, but what are they? Do they have a specific purpose? Obviously to glaze, but to glaze what? I ask because I know our hardware store will look at me with exasperation! 🙂
Elisabeth, I found this video which will hopefully help you. Your craft stores or paint stores should carry it: https://www.youtube.com/watch?v=edxLm2OeD3A
PS Nearly forgot… Is the putty which you painted on, actually putty, or is that the name of the colour of product you use? I can’t imagine a use for a liquid putty really (we use a mouldable putty for holding glass in window frames).
Hi Brittany,
That table is just amazing!! I’ve been struggling with my dining table for some time, and what I tried (bleaching, liming, then in desperation staining!), all turned out pretty disastrously. We are beach-side (NSW, Australia), and yours is the exact look I was trying to achieve! As our products are all different here, could you please just explain to me what you mean by ‘glazes’ as opposed to paint? Is that like a varnish? I will definitely give this a go!
When I grew up (loooong time ago!), my Mum had one of those wood grain tools in a drawer, but I never saw her use it. Now, thanks to your very clear video, I get it! Wow! Who knew? Ha ha.
Thanks so much Brittany!
Elisabeth, the glazes are not a varnish. They are a very translucent gel consistency. They are often used in the technique of washing a color over another one. And you are correct, the putty is the name of the color. Good luck!
Wow, I think I love your table more than your inspiration piece!! Good job Brittany!
Girl, this is beautiful!!! And your comment was so sweet I had to head on over to see what you’ve been up to. Beautiful work, sweet lady…and beautiful family!
🙂
shaunna
I have a table with a solid ivory laminate smooth top that I have disliked forever. The table is great but not that smooth ivory. I almost committed to stenciling but kept thinking wood. The legs are a dark blue, almost navy color. I think this weathered look would be the prefect solution. Thank you so much for the inspiration and enough info to practice a little and hit this table…a soon to be masterpiece I am sure! 🙂
Linda, sounds like you have a perfect candidate for a faux wood grain! Good luck!
Great finish Brittany, you are very talented.
I would never have guessed by the look of your table that it was fauxed. Excellent job & Yes, it definitely looks like the real thing. I’ve fauxed doors in the past for clients but never a table. Sweet tutorial!
Great job on the painting, Brittany, looks fabulous!
Thanks Julie! I love how it turned out and was shocked at how real it looks.
It looks amazing! I love the colors you chose.
Thank you Julie. I like how muted the grays are so I can add pops of color in the form of flowers and more around it ;-).
This look fabulous!!!! I was JUST starting to look for a tutorial on how to create the gray, weathered look of RH because we are going to decorate our home office with those colors. Thanks for posting! I may have to try this out on our desk
Heather, I hope you try it! It was fun and relatively easy. And if you mess up, you can either re-try the wood graining or wipe and re-apply the glaze. Send me pics if you try it!