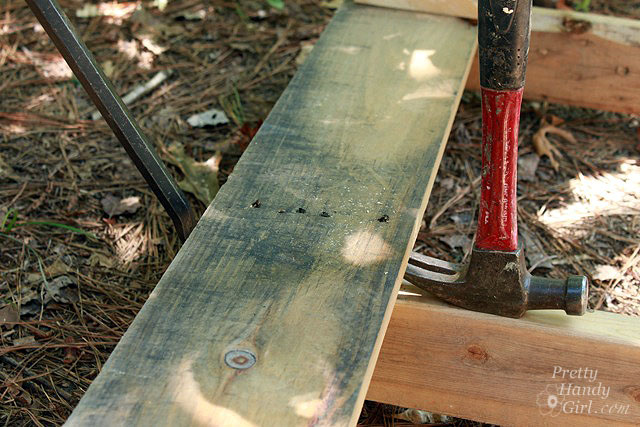
Pallet upcycling is all the rage today. But, if you’ve ever tried to actually remove wood planks from a pallet, you know that it is not an easy task. The nails that are used are typically spiral nails and are designed to really grip that wood. And if that’s not enough, they usually shoot 4-5 nails per joint. Sheesh, you’d think they were building a foundation for a 10 ton elephant. Okay, actually it is the foundation that has to hold tons of product as it is lifted by a fork lift. Which explains why harvesting pallet wood can be a labor intensive task.
I figured you’d appreciate it if I shared with you the quickest and easiest way I’ve found to salvage this beautifully rustic pallet wood. Read more
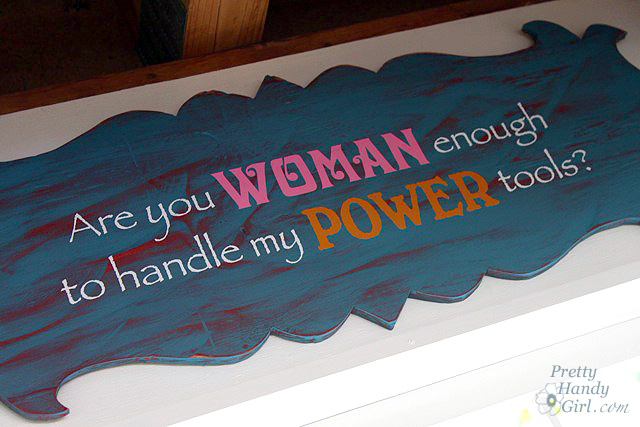
There is a joke on our street that Pretty Handsome Guy isn’t allowed to touch my power tools. Okay, it isn’t really a joke, it’s a fact. He knows he is not allowed to use them without me around (smart guy.) 😉
Before the Woman’s Day shoot I decided at the last minute that I wanted a sign that really labelled the workshop as a “Woman’s” workshop. In an instant I had a creative spark and came up with this question, “Are You Woman Enough to Handle My Power Tools?” Then I called my good friend Leen the Graphics Queen and asked her to make a wall decal for me. (Did you know she can create custom wall vinyl for you too?! And you don’t even have to be a close friend! But, I’m sure she’d be your friend immediately if you met her because she’s a sweetheart like that.)
Once the vinyl arrived, I set about creating a fancy and feminine sign with some scrap plywood. Here’s how to create your own custom wooden sign. Read more
https://prettyhandygirl.com/wp-content/uploads/2012/06/sign_at_slant.jpg427640Brittany Baileyhttps://prettyhandygirl.com/wp-content/uploads/2021/07/PHG-logo-tagline-2020-1030x211-R.jpgBrittany Bailey2012-06-22 07:00:242021-08-06 16:04:17Are You Woman Enough to Handle My Power Tools? – Plywood Sign Tutorial
Today we’ll be learning about the Dremel TRIO! This smaller power tool fits comfortably in your hand. The tool is a cross between a jigsaw, router, and regular dremel. Further, it has a rotating bit that cuts into drywall, wood, plastic, steel and alumimum (with the appropriate bit). With a quick change to a sanding bit, the TRIO can be used as a sander for smoothing fine details and edges. Finally, the TRIO is a router, but only with the small routing bits that come separately. In my opinion, the TRIO is good for small projects that don’t use hard or thick woods. Anything larger than 1/8″ and it is very difficult to control the tool. (Disclosure: I have not tried the TRIO with the hardwood and sheet metal bit sold separately, but I haven’t used it to cut hard woods.)
The TRIO comes with a cutting bit (I call it a scroll bit) and a sanding mandrel with three grit sanding drums (60, 120 and 240 grit). Plus, a wrench for loosening and tightening the collet.
A regular baseplate and a compact foot baseplate are also included.
Below is the anatomy of the TRIO to help familiarize you with the tool.
There is a speed adjustment on the handle of the tool. Typically you would leave it on 10 – 12 for cutting wood. A lower speed may be necessary when cutting plastic to avoid melting the material.
One of the nice features is that it can be use in a horizontal grip like a jigsaw. Or, simply press the button on both sides to …
raise the handle and use it with a vertical grip.
Changing bits is fairly simple but requires two hands (my photo is not 100% accurate). One finger pushes the button on the front of the TRIO to lock the collet. The other hand uses the wrench to loosen the collet.
Then, remove the bit. Insert the new bit and tighten the collet. (First by hand and then with the wrench.)
The TRIO does not come with router bits, but a Dremel 5-piece Specialty Router Bit Kit can be purchased for about $40 from Amazon (affiliate link.) There is also a tile cutting bit, piloted point cutting bit, and a hardwood and sheet metal bit (all available for separate purchase.)
Be forewarned that you CANNOT use bits for a regular dremel in the TRIO. The shafts are different sizes.
And here for your viewing pleasure is a video tutorial for using the Dremel TRIO:
You know the old saying, “No question is a dumb question.” Well, I have to say that about this tutorial, “No tutorial is a dumb tutorial.”
I realize that a caulk gun isn’t a big scary power tool, and yet I still think learning how to use a caulk gun is a very valuable skill for any handy person.
So, let’s get right down to some Caulk Talk.
How to Use a Caulk Gun
A caulk gun is a necessary tool for any homeowner. Sealing gaps in siding, replacing the seal around the tub and shower surround when the old caulk gets dry and brittle is a must. Caulking around the trim around windows and doors will improve your homes energy efficiency and get rid of unsightly gaps. You can also use it for spreading construction adhesive and any other substrate that is sold in tube form. A caulk gun saves your hands from cramping, especially if you have a lot of caulking to do.
A basic caulk gun costs about $10 – $20, but you could buy a power version which run up to $200! Sheesh!
Starting a tube of caulk:
Cut off the tip of your tube by inserting it into the hole at an angle.
Poke the stick attached to the gun into the tube to puncture the seal.
Loading a caulk gun:
Pull the hooked rod all the way back. Insert your tube base first. Then tilt the nozzle end into the top of the gun.
Rotate the hook so it is facing up and the teeth are facing down.
Pull the trigger and you’re good to go!
Be prepared to pull the hook rod back when you finish or the caulk will continue to flow out of the nozzle.
Watch these videos for more details on using a caulk gun (also called a caulking gun) and why it is important to fill any cracks or seams in your siding!
https://prettyhandygirl.com/wp-content/uploads/2012/01/caulk_gun.jpg341525Brittany Baileyhttps://prettyhandygirl.com/wp-content/uploads/2021/07/PHG-logo-tagline-2020-1030x211-R.jpgBrittany Bailey2012-01-13 07:00:292021-08-06 16:09:55Tool Tutorial Friday – How to Use a Caulk Gun
Today is Friday! And you know what that means…it’s time for another Tool Tutorial Friday! Today I’ll be introducing you to the circular saw.
But first, how are you? I don’t know about your week, but I’ve had a busy one. If you follow me on Twitter (I’m not sure why anyone would), you would have been privy to the rainbow of color casts my son has been collecting. He received his 4th cast yesterday. But, who’s counting, right?! Anyway, I learned two things about casts in the process.
Little boy arms will swell to adult proportions post surgery, but will eventually return to normal size…eventually. At that point, a new cast is desired to keep the arm from finding a way to wiggle out.
If you put two brothers in the bathtub and leave the room for one nano-second they will find a way to water log a tightly plastic bagged and saran-wrapped cast that is merely 5 days old!
Mr. Green up there, he only lasted a mere 5 days! You could probably tell by the one signature on it. My mom is trying to convince us to paint white stripes around his current red cast to make it into a candy cane. Hee, hee.
And now let’s plug in some power and start this tutorial!
A circular saw is essentially a portable power saw that can make easy cross cuts like a miter saw. But, it can also rip long boards like a table saw. This little hand held bad boy is a necessity if you are working on an exterior project like a deck or a fence, or anything that is too big to put on the miter saw or table saw work surface. Trimming the varied lengths off newly laid deck boards would be near impossible without a circular saw.
Before I owned either a table or miter saw, this was my power saw. And this baby has cut a lot of wood in its life.
If you are familiar with circular saws, this particular model may look a little bit backwards to you. That is because this is a left-sighted circular saw. I think Porter Cable is one of the few companies (if not the only one) to make one. I am right handed, but for some reason, this saw seemed more comfortable to me. When I was shopping for my circular saw, I spent about an hour or so picking up, holding and imagining using the saw. What I liked about the Porter-Cable is that it had a smaller grip and I was able to span my hand width between the hand hole and the guard lever while cutting.
If you go shopping for a circular saw, spend some time holding them and see what feels most comfortable to you.
Circular saws range in price from as low as $30 up to $300 or more. They come in a variety of sizes (5 3/4″ – 9″) which refers to the blade size. The most common size people buy is a 7 1/4″.
Before you make any cuts with a circular saw, you must set your depth of cut. If cutting through a board, set the blade about 1/8″ – 1/4″ lower than your lumber. Support your lumber on saw horses or a raised surface (4″ x 4″ posts on the ground work well.) It is imperative that you think through your cut before you actually saw a board. Make sure that your waste end will fall away from the saw after it is cut. Otherwise, the blade will get pinched between the boards and can kickback (see the example in the video.)
You can also change the bevel angle of your cut by adjusting the base of the saw after loosening the bevel adjustment knob.
As with any other power tool. Take the time to familiarize yourself with your power tool. Read the manual and only use a power tool when you are alert and not distracted.
DISCLAIMER
The viewer assumes all responsibility and liability associated with the hazards of woodworking. Pretty Handy Girl is not responsible for any errors or omissions that may be present in this tutorial. She also assumes no liability for any action or inaction of a viewer.
Please use extreme caution when using power tools. Read your tool manual thoroughly and wear protective safety gear. Take your time familiarizing yourself with a tool before using it. (If you are missing the manual, you can easily find it online by going to the manufacturer’s website or google your saw’s make and model + manual.)
Please recognize that I have tried to put together a basic circular saw usage tutorial to get you started. I have tried my best to show the safest way to use a circular saw. That being said, I am not a professional (I only play one on this blog .)