After yesterday’s diversions, we were all feeling the pressure to purchase the final items on our wish lists. This would be our last day on the yard sale and the last day to prep any items we purchased before placing them into the Habitat house.

We decided to create a master wish list for everyone so we could all be on the lookout for each other. There was a lot of texting with photos attached as we shopped in the in the morning.

Read more

Today I am going to show you how to Make Your Own Fall Wreath. If you’ve been following me for long, you were witness to my one wreath with many different looks for one year. Well, I’m ready for a change. So, I decided to create something completely different.

When I think of fall, I think of cooler weather, sweaters, autumn leaves and flowers. This wreath encompasses all those elements.

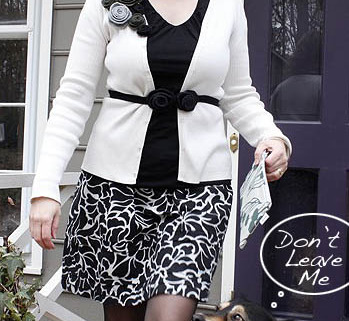
Lucky for me I had all the materials on hand. Especially the XL cable knit sweater that I picked up at Goodwill thinking I could make sweater vases out of it.

Materials:

(I’ve included affiliate links for your convenience. I earn a small percentage from a purchase using these links. There is no additional cost to you. You can read more about affiliate links here.)

Instructions:

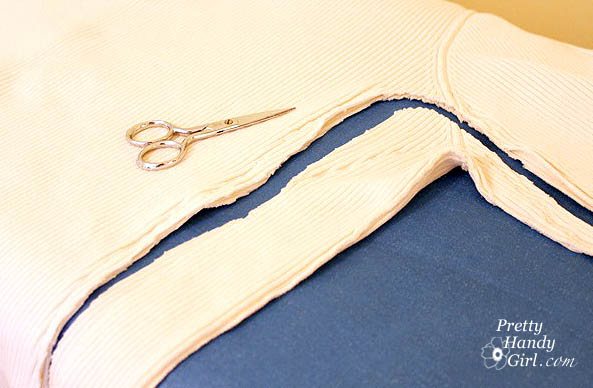
Start by cutting off the sleeve of the sweater.

Cut, the sleeve in half lengthwise. Then put the right sides together.

Stitch the ends together (try to line up the stripes or cable knitting.) Trim off any excess.

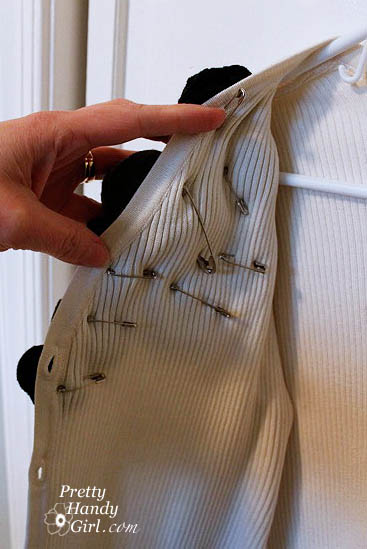
Open your sleeves up to give you one long length of sweater material.

Preheat the hot glue gun. Lay the wreath form on top of the sweater material.

Put a bead of hot glue on the back side of the wreath form and glue one edge of the sweater material to the wreath.


Squeeze out another bead of hot glue, wrap the other side of the sweater material up and glue it against the already glued piece.


Realistically, this is the backside of the wreath, but if you have a see through door like I do, you will want to roll under your raw edges to hide the seams.


Work in 3-4″ sections, adhering one side and then the other until you reach the end of your wreath. Cut your sweater material slightly longer than you need, then roll under the raw edge and glue it down.


Your wreath should resemble something like this:


Hot glue some leaves onto the wreath covering one of the seams.


Then add some flowers. And more leaves, and more flowers, until you have burned your fingers to smithereens!


Next tie one loop of ribbon to cover the top seam.


Tie more ribbon to the loop to give your wreath a more “substantial” bow.


And now you have a warm, cozy and colorful fall wreath! What do you think? I just want to snuggle up to it every time I walk through the door.


Have you started to decorate for fall? Do you have your wreath yet? I’d love to hear about your unique wreath project. And if you need more ideas, enjoy these 24 more Fall wreath ideas:

24 Creative Fall Wreaths | Pretty Handy Girl
Y’all have a fabulous weekend!


As promised, I have a tutorial for making a cake stand using a plate and a candlestick. This is nothing new, and if you’ve hopped around the blogosphere, you have probably seen some variations of this project.

These are a few of the projects that sparked my creativity when I found a striped candlestick at a my friend Su’s yard sale.

Centsational Girl’s sherbert colored dessert stands are pure and sweet eye candy:

Crafty Nest used simple clear vases, candlesticks, and dishes to make single and multi-level cake stands:

And House of Hepworth’s turned a cheese dome into a cloche!

So, armed with my striped candlestick, I scoured my local Goodwill for a plate that had some citrus color for my stand. I finally found the perfect plate, but had to give myself a pep talk to buy it. It was perfect, except for the meal that was baked onto it. Ewww. Seriously, it looked like someone had just eaten off the plate and then donated it. GROSS PEOPLE!

But, alas, it was the perfect  color, and when I got home I drenched it in Get Clean Basic H2 Degreaser and wiped it clean BEFORE cleaning it in my sink. (I think I might be a tad germ phobic.)

Tutorial:

Materials

  • Plate
  • Candlestick (or other base)
  • Sandpaper
  • E-6000 glue
  • Rubbing Alchohol
  • Paper towels
  • Books or weights

Begin by thoroughly cleaning the plate and candlestick.

Using a fine grit sandpaper, rough up the top of the candlestick and the base of the plate where you will be bonding them.

Clean the plate and candlestick with rubbing alcohol to remove any residues.

Squeeze out E-6000 on the rim of the candlestick.

Center the candlestick in the middle of the bottom of the plate.

Set books on top of the candlestick to weigh it down while the glue dries.

Let the glue dry overnight, then turn your cake plate over. And, serve up some wonderful dessert…


…or simply make some fruit more appealing, …

…or use it as a plant stand…

But, personally, I prefer the dessert!

What about you? How would you use this citrus striped cake plate?
Sharing with:
I owe a huge hug of gratitude to Kathleen at Grosgrain Fabulous. She posted 30 days of sweater embellishments on her blog. In those tutorials she took the most ho-hum sweaters from Goodwill and turned them into Cinderella-worthy tops.
Re-Sizing and Dressing Up a Goodwill Sweater
Because of her inspiring transformations, I was able to re-vamp two sweaters for the Blissdom conference, saving my bank account some precious pennies. (I used the savings to buy two pairs of cute PJs. Apparently PJs are mandatory after conference hours.)
And now, on to the transformation!
I started by resizing the sweater per Kathleen’s tutorial HERE.
Put the sweater on inside out and pin excess starting under the arm and ending at the hip.
Carefully (very carefully unless you want to become a pin cushion) remove the sweater. Stitch along the pinned line.
Re-Sizing and Dressing Up a Goodwill Sweater
Put the sweater back on to check the fit.
Re-Sizing and Dressing Up a Goodwill Sweater
If it looks good, go ahead and trim off the excess. (This reminds me of a nip and tuck surgery. {Sigh} If only trimming fat was this easy.)
Re-Sizing and Dressing Up a Goodwill Sweater


Next, grab some of those adorable felt roses we made the other day. (Rose tutorial HERE)  Lay them onto the sweater and play with the placements.


Re-Sizing and Dressing Up a Goodwill Sweater

When you are happy with the roses, pin them on with safety pins.

Re-Sizing and Dressing Up a Goodwill Sweater


Sew on the roses with needle and thread.
And remove the safety pin once the rose is secure.
That’s it. Beautiful new cardigan from a $3 Goodwill sweater!
Re-Sizing and Dressing Up a Goodwill Sweater


I added a knit belt that I sewed some roses and a hook and eye clasp on.


Re-Sizing and Dressing Up a Goodwill Sweater

Poor Buddy (aka Pretty Handy Dog), he’s not so sure about me leaving for Blissdom tomorrow.

Check out some more Goodwill and thrift store fashionista outfits at Balancing Beauty and Bedlam.

Sharing also at:
Visit thecsiproject.com