I am in love with those adorable french provincial dressers. The flourishy handles are what really get my heart pounding.When I saw this dresser on Craig’s List for $35 dollars, I pounced!

 Disclaimer: I stole this picture from the previous owner’s Craig’s List Ad.

Oooo baby, don’t you just love that faux gold outlined accents and off white laminate top. Yes, I said laminate. But I wasn’t afraid of it. For $35 who cares if it gets messed up. If you never take the risk, you’ll never learn anything new, right?!

The drawers were still in good shape, but a little loose around the joints, so I squirted my new favorite Gorilla Glue into the joints and clamped lassoed them up!

Then I used newspaper to protect any of the areas I didn’t want sprayed.

After sanding all the surfaces to rough them up, I put a coat of primer on everything. Loving that crisp clean white, but the dresser told me to “Keep Calm and Carry On.”  So, I cooperated and continued on to another color.

Next, I sprayed Rustoleum Heirloom White and distressed the surface with a wood stain.

The drawer pulls got their own treatment of automotive primer followed by Oil Rubbed Bronze paint. Thank goodness they were happy with their new color because – I’m telling you – that dresser was certainly acting like a diva! She was still demanding a new color.

I have seen many Nantucket Fog makeovers and decided to make a run to Ace Hardware to pick up a small sample of that blue gray color. And I grabbed a can of artistic glaze.

After two coats of the Nantucket Fog glaze, that little dresser still wanted something else. Sheesh! So I pulled out some leftover blue paint from my dormer window shutters.

Finally, she shut up! It’s a good thing too, because I LOVE this color. I love it so much that I hauled my tired hiney back over to Ace to match the color just for you.

Does anyone else get starry eyed and entranced by all these fabulous colors?

The closest match is Buxom Blue from Benjamin Moore. Not too far off from Nantucket Fog, but you know those divas they want what they want!

Now, all important divas need something to wear that gets them noticed. Thus, I decoupaged some wrapping paper on the side (tutorial is here.)

And then because I liked the pattern so much, I blew it up and added it to two corners of the dresser top (tutorial for adding a sharpie stencil.)

I added some beachy blue glaze over the wrapping paper and the top graphic.

And I have to tell you that – halleluiah – I finally figured out the proper technique when using the valspar glazes (the tutorial is here.)

I finished up with three coats of a semi-gloss polyurethane.

And here is that stunningly beautiful diva of a dresser. Transformed from Cinderella to the Belle of the ball!

Isn’t it amazing what a little oil rubbed bronze can do!
 
 Hard to believe this was wrapping paper in a previous life!
 Peek-a-boo I see a cute stencil.

Now, I have to convince Pretty Handsome Guy that our master bedroom furniture doesn’t have to be all matchy matchy!

 Because I LOVE our Pottery Barn Sleigh Bed. 
But not the matching dresser.
 I love the new-old dresser! What do you think?

Any helpful hints on using Jedi mind tricks on unsuspecting Pretty Handsome Guy?

Update: Thank you to my readers that pointed out that I installed the handles upside down. They have been fixed now ;-).

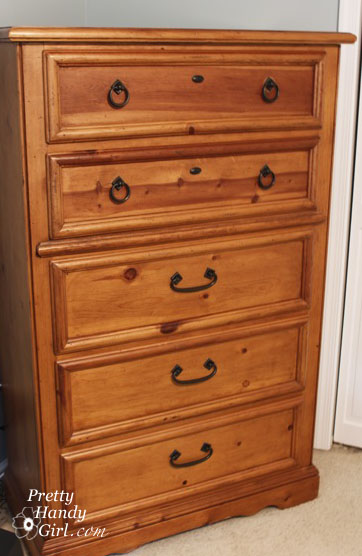
Okay readers, so the truth is out, I just can’t seem to pass up discarded furniture. They look so sad and pitiful awaiting the trash trucks. They plead with me to rescue them from life in the dump. That is how I found this coffee table.

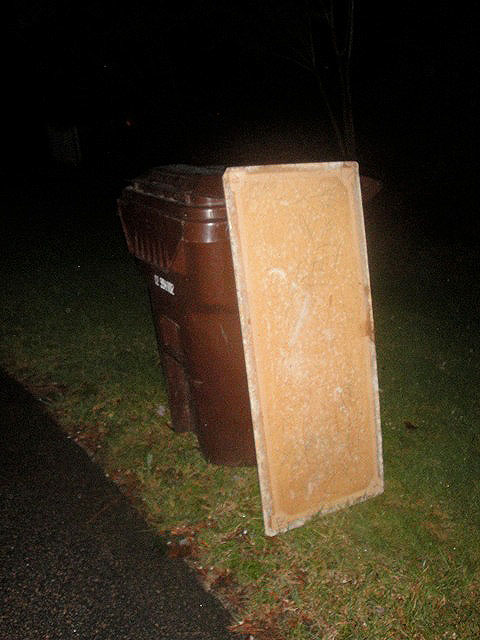
It was resting against a dumpster. The legs and skirt of the coffee table were in good shape structurally, but the top was cheap masonite (compressed and glued fibers of wood.) This type of wood will swell and absorb water like a sponge. I’m one of those unfortunate homeowners who’s house is sided with hardboard (essentially the same as masonite.) Now you can see why that isn’t a good thing:

Moisture causes mold to grow, and the retained moisture also causes the wood to swell, become misshaped and will eventually rot away. The first thing I did was unscrew the top and throw it away! Yuck.

Sorry Mr. Tabletop, there was no rescuing you.

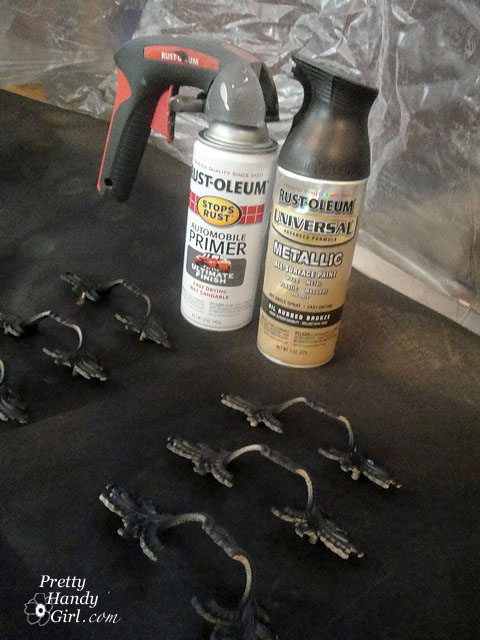
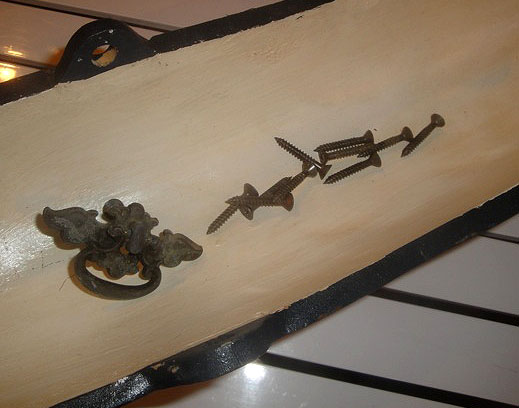
I also removed the hardware from the table skirt and saved it with the screws.

I cleaned the base of the coffee table with bleach cleaner to get rid of all the mold.

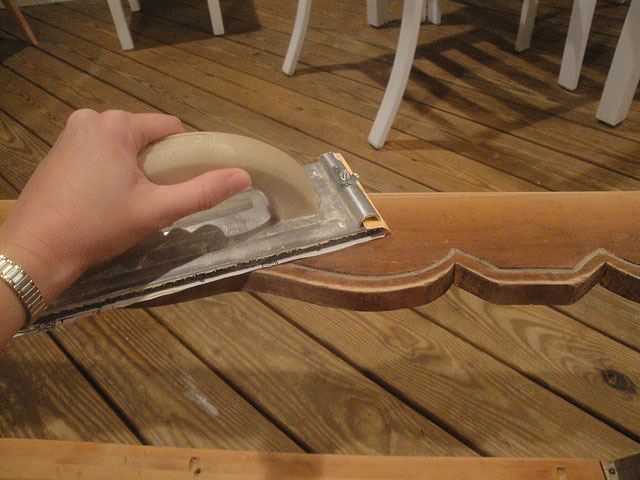
After it dried, I roughed up all the surfaces on the legs and base.

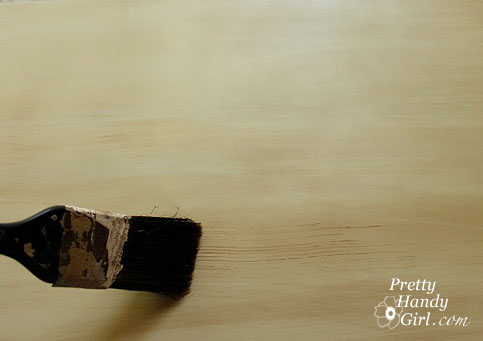
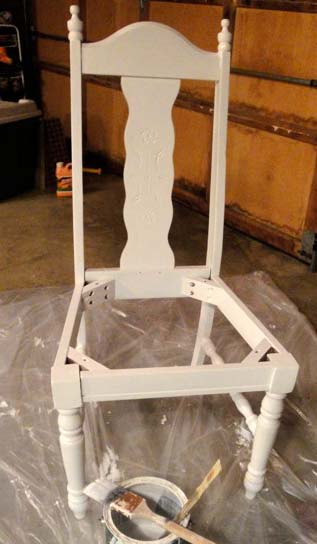
Then I primed it to seal the wood and prepare it for painting.

I painted the legs and skirt with two coats of Benjamin Moore Impervo white paint (leftover from our living room trim.)
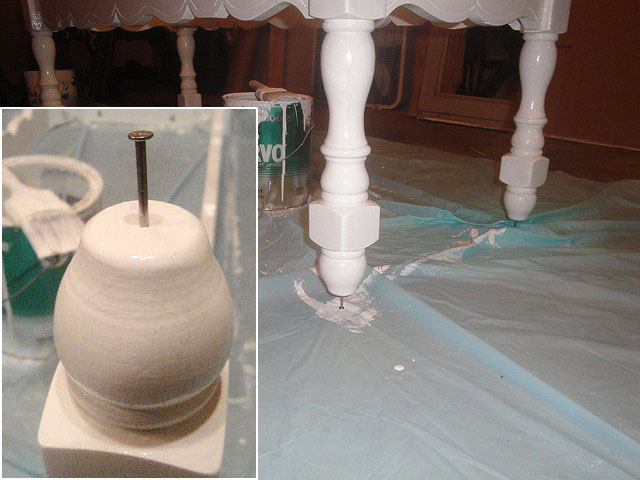
I always paint the undersides or the hidden side first, then I use a technique for elevating my object and keeping it from sticking to the drop cloth.

Simply tap a nail into each leg after you have painted the foot. Then turn the table over and continue to paint. Some other bloggers have found the Rockler painting pyramids, but I have yet to find any in my local stores to try them out. Hey Rockler, if you are reading this, send me some painting pyramids so I can give them a spin and see if they work better than my nail technique!

After the paint dried, I removed the nails from the bottom of the legs and hammered floor protectors in their place.

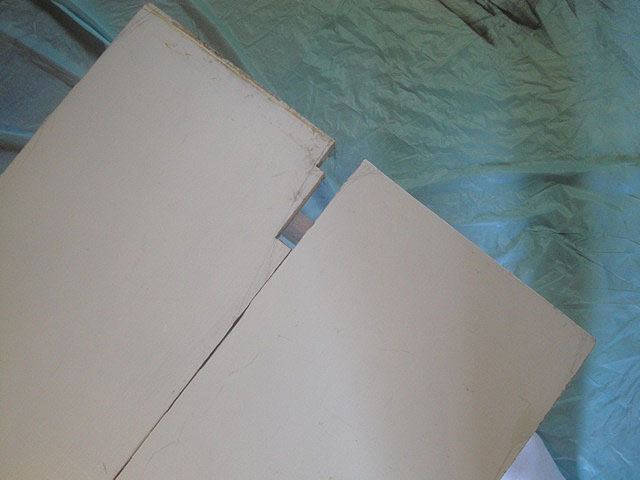
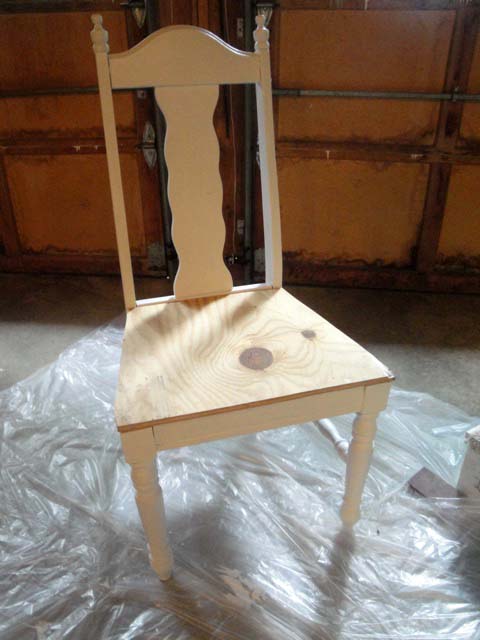
Now, to replace the masonite top with something with more age and character. I searched through my wood stash and found these two discarded boards that I think used to be in someone’s closet or pantry.

The boards fit well on the skirt of my coffee table, but it had a funny cut out on the edge of one of the boards. It was probably a profile cut.

It didn’t look very old or interesting to me, so I drew a line diagonally along the board and cut it off with my jigsaw. That looked much better! More like a salvaged board. Then I flipped the cut board to the inside edge.

I distressed my new table top with a heavy chain, pry bar, and hammer (read more here.)

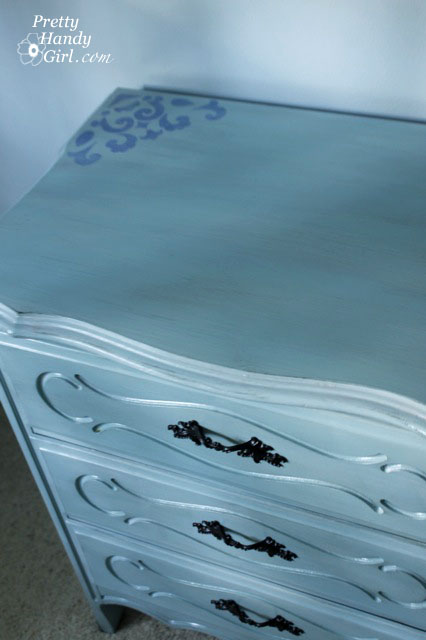
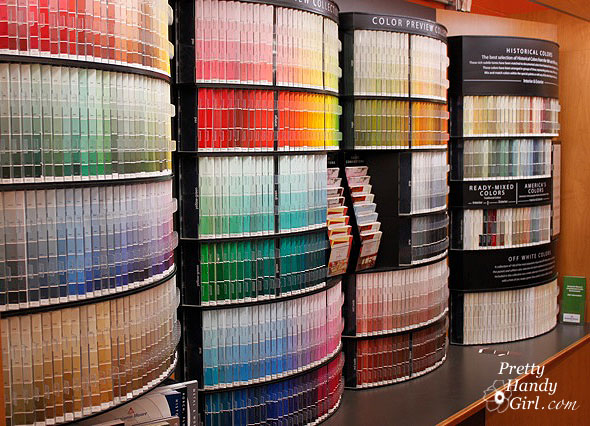
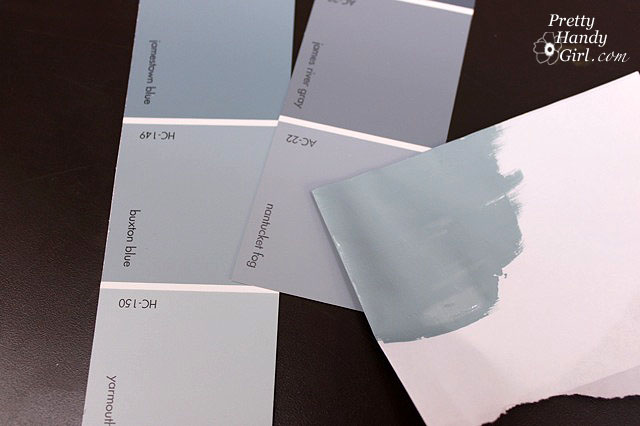
At this point, I went to my “oops” paint stash and chose this gallon of $5 baby blue color.

I know it looks like a nursery color, but I wanted something vibrant to show through after glazing and antiquing. I painted the whole table top this light blue color. Luckily I was able to skip the priming step because the boards had previously been painted.

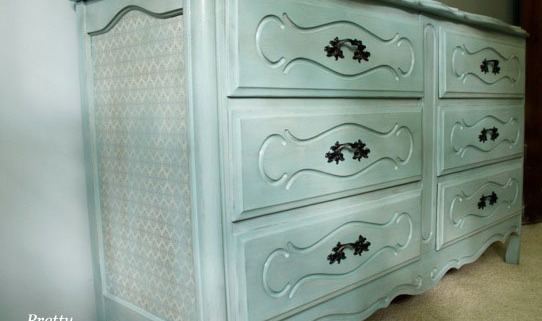
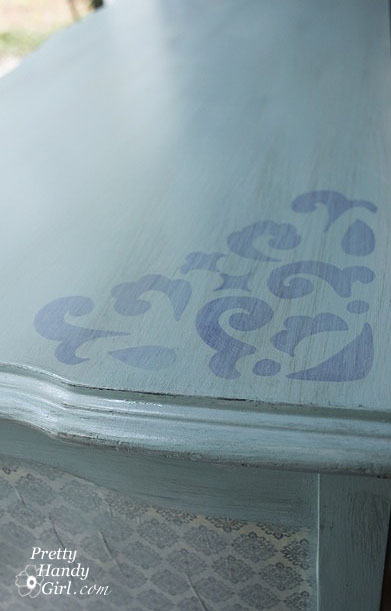
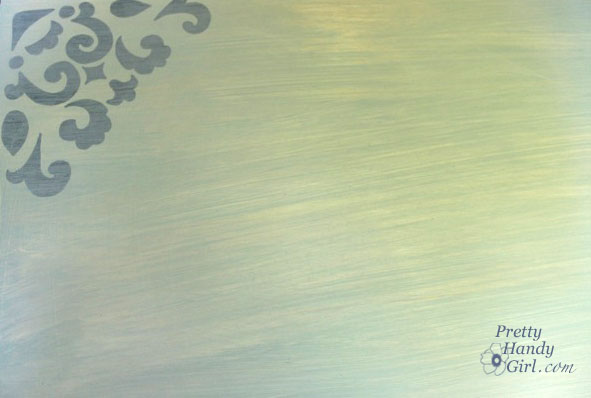
After the boards were dry, I sanded, glazed and then applied a stain to antique it (more on these techniques here).

Then I turned the boards upside down, and used the screws I set aside to attach my boards to the table skirt.

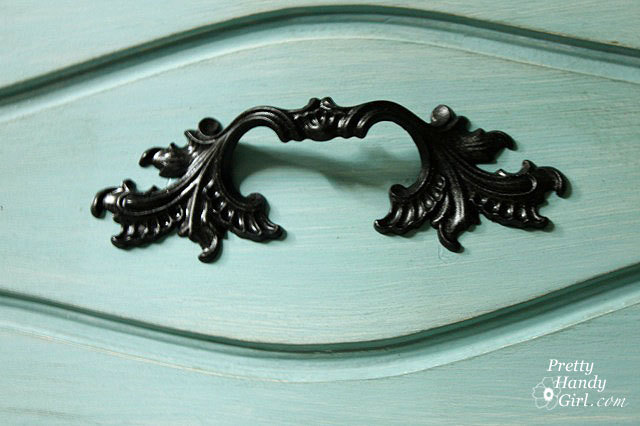
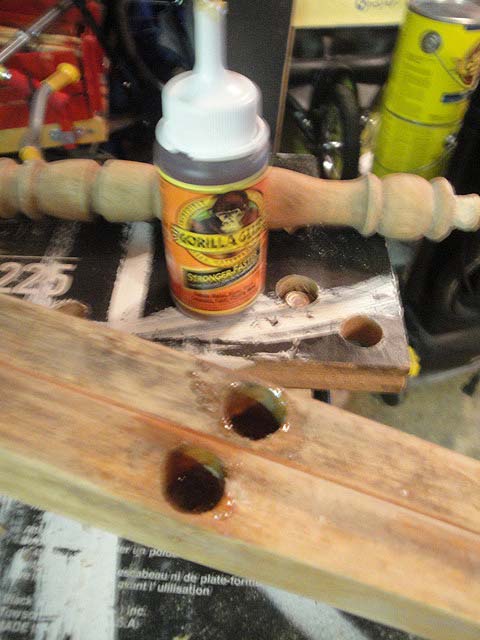
I decided not to re-use the handle hardware that was originally on the coffee table.  Instead I wanted to give this table a beachy look. So, I added some shells to the front of the coffee table using my new favorite glue, E-6000 glue. This glue holds super strong, I even set the table down on the shell edge (forgetting they were there,) and the shell broke, but all the shells remained glued to the table. Now that is a strong bond!

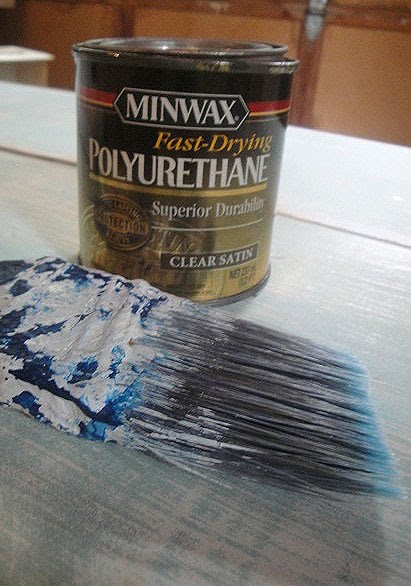
My last step was to put a protective coating of polyurethane over the whole coffee table. I used an old can of oil based polyurethane that had yellowed. This added the perfect age to my coffee table.

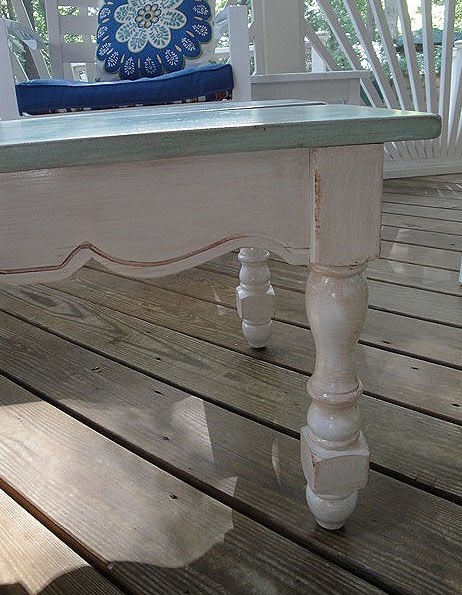
And here is my Trashy Coffee Table turned into a Beautiful Beachy Babe!

Uneven boards = instant character


Glazed legs and table skirt


Now isn’t she beautiful?
One more look at the before and after:
 

Not bad for a new coffee table for our porch that essentially cost me NOTHING, since I already had all the paint and supplies leftover from other projects. What do you think? Do you like her color? Or too baby blue for you?

Next Up: More tips on antiquing, distressing and adding age to objects. I hope you come back soon.

(I’ve included affiliate links for your convenience. I earn a small percentage from a purchase using these links. There is no additional cost to you. You can read more about affiliate links here.)

My best friend from elementary school will be flying in today from New York. I have a sweet little retreat all made up for her in our guest room. I promise to post pictures of the whole room in the near future (when the sun – and sons – cooperate with me.)
 
Our guest room is full of discarded treasures: a rebuilt curbside chair, an upholstered bench, a full size bed, and a little curved desk. But, one of the focal pieces in the guest room is a night stand made from a discarded door and leftover picket fence pieces.

 Isn’t it fabulous?!

So, here is the tutorial for you. I hope you will excuse my first attempt at using Google Sketch Up. These sketches should give you a pretty good idea how to construct the night stand.

I started by cutting two boards for the shelves. They were cut to the width of the door and the depth of the picket fence sections.

I cut two cleats out of 2″ x 4″ boards (shown in green).

And screwed them to the door (purple circles), making sure that the top of the cleats were level with the top of the horizontal cross boards on the picket fence.

I braced the picket fence pieces to the door using L-brackets.

I laid the two shelves on top of the cleats and cross boards. And drove screws down to hold it in place (purple circles).

Next, I cut some face boards (shown in aqua below) to the same width as the nightstand front.

I used finish nails to nail them to the front, then added some decorative moulding to the face boards.

I used wood putty to fill all the screw and nail holes, and caulk to smooth the seams of the moulding (see here for more details on caulking and filling nail holes.)

Then I painted the nightstand white and accessorized it. I’m still deciding whether I should distress and glaze the nightstand. Feel free to give me your opinion. I am all ears.

Here is my door & picket fence nightstand, all ready for our first guest since re-decorating the guest room.

Glass knob and door plate was purchased at NoFo in Raleigh.
If you are ever in the Raleigh, NC area, you MUST eat at NoFo,
then shop upstairs after your meal. 
 
Some books written by my favorite author, Diane Chamberlain.
A goodwill lamp and a picture of my niece who lives too far away!*

*(bold comment solely for the purpose of guilting my sister into moving closer.)
Fresh towels and my Country Living magazines.

All beautified and ready for our visitor!

Sharing with the CSI Project White Challenge:

Visit thecsiproject.com

I have a serious problem. I can’t bear to see a piece of furniture being thrown away. It could be the ugliest, most broken down chair and I still feel the need to save it from Mt. Trashmore. That was the case with “Daisy” this poor ugly chair that I found on the curb awaiting the trash trucks a few weeks ago. I threw her in the back of my car and brought it home.

Two missing parts

Only when I got home did I assess her condition. Moldy seat, chipping and peeling paint, structurally falling apart, cobwebs, missing parts…

GROSS! Stained and moldy seat.

…and then a dead roach dropped out! Ewwww! I must be insane.  But, I still saw potential through all the disrepair.

This chair had some serious structural issues. I knew it was a case of tear her down and rebuild. This intro kept playing in my head the during the whole process:

I pulled apart the chair (mostly with my bare hands and then with some assistance from a hammer.)

Until I was left with a skeleton of a chair.

I stripped the paint layers off the chair using the same technique as I did for this chair (see details here.) Unfortunately this chair had 5 layers of paint, therefore it took several hours and several re-applications of Citri-strip to get down to the wood.

If you remember, there were several missing parts on this chair. I had a lightbulb moment when I realized that I could used the spindles from the chair back for the missing parts to connect the legs.

I removed the back spindles.
Almost a perfect size and I had two of them!

I cut down the spindles on the miter saw (but these could easily be cut with a hand saw).

And then notched the ends so they would fit into the holes on the legs. (I did have to enlarge the holes on the legs slightly using my drill and a 3/4″ spade bit.)

Notching the spindles. Cut around the diameter, then cut from the end in towards the first cut. Repeat on all sides.

After dry fitting all the pieces back together, I used Gorilla glue to glue the chair back together.

I clamped the chair tight by using rope to wrap around the chair.

Daisy had also lost one of her decorative corner finials. So, I bought two new finials at Home Depot for $5.

In order to screw on the new finials in, I had to plug the hole with wood. (As promised: a tutorial on filling holes in wood.)

I also filled the holes where the spindles used to be with wood putty.

Next, I primed Daisy. Just a side note here, one reason the original five coats of paint on Daisy were peeling and flaking is that the proper prep work wasn’t done. No sanding to scuff up the glossy polyurethane and no primer. It is so important to sand (rough up your surface) and use a primer. If you cut corners here, you might as well kiss your beautiful finish goodbye in a few years. Especially if the chair is exposed to the elements.)

Finally, I added two coats of white paint (sanding lightly between coats.)

The chair seat was in really bad shape. Therefore I decided to cut a new one out of plywood using my jigsaw.

Trace old seat on plywood, use ruler to make straight lines, cut out seat using jigsaw.

I checked my fit and then re-upholstered my chair. Check out this post to see how to re-upholster a chair seat.

Then for the finishing touches or the frosting on the cake. You can definitely do this step! The inset carving controls your brush for you. Kind of like bowling with bumpers.

And my chair is finished. Isn’t she beautiful!

Hard to believe that 48 hours ago this chair was definitely worthy of Mt. Trashmore.

The chair is super solid now, and doesn’t move at all thanks to the Gorilla Glue.

How about one last look at the before and after pictures?

Want to see more furniture in my guest room? Take the tour here!

If you stuck through my ugly post yesterday. I have some pretty pictures for you today!

Two years ago I happened upon a cute little bench being thrown out with a neighbor’s trash. (I am addicted to trashed furniture. In fact, I have a NASTY chair in my garage that needs a lot of help structurally and asthetically.)

The roadside bench was painted a very blah beige color. I brought her home and gave her some decorative lines and a monogram. At the time we didn’t have anywhere to sit in our mudroom, so this little bench served the purpose well. Later I built a big mudroom hallway bench with built in shoe storage (I promise to create a tutorial for that at a later date.) So, this little bench was moved to the guest room where she sat by the window until this week.

The first thing I did was give her a little rub down with some sand paper. Then I laid down 3 coats of fresh shiny white paint (leftover from trim and moulding painting).

I used some old foam I saved from our move (only 3+ years ago). This foam was the packing material used to ship ice cream cones! I received it from a nice woman off of FreeCycle.org and thought it could be used for a cushion at some point.

I cut some batting to fit over and wrap around the foam (so as to hide all the seams in the foam).

Then cut the arms off of an old t-shirt of Pretty Handsome Guys (don’t worry, he had already said goodbye to it.) And cut up the sides so I could use just the back of the shirt.

And finished off with the decorative fabric cut slightly larger than all the other layers.

I carefully folded my decorative fabric under being sure that I had the old t-shirt hidden in the fold. And put in two staples with the staple gun to hold the fabric on the one side.

Moving over to the other side, I cut the t-shirt, batting, and decorative fabric down to size being sure to leave about an inch excess on the decorative fabric.

Then I repeated the same fold under and put in two staples.

Now for the bling! I had plenty of leftover nailhead trim from this project (check that link out if you need a better tutorial on adding nailhead trim.) I began at the corner of the front of my bench and added the starter nail.

At this point my 6 yr. old had come over to my side telling me how bored he was and, “What can I do now?” I asked if he wanted to help me hammer. Once I started each nail, he was able to hammer it into the nailhead trim for me. (I did have to finish a few off myself.) We worked together adding the nailhead trim to the front and back of the bench.

Before adding the trim to the sides I neatly folded and tucked under all the layers (cutting excess off when necessary.) Until it looked like this. Then I added the trim on top to hold the fabric in place.

And there she was, my beautiful cushioned bench for our guest room. I’ve been busy trying to finish a few projects (rebuilding a curbside chair and making a night stand from a door and picket fence) in this room before my best friend from high school comes to visit. Nothing like a visitor to get your DIY butt in gear!

 Sittin’ pretty
Sweet smelling soaps in a coordinating bowl
My trash to treasure bench is now a sweet spot to land