Winter is almost over, and not a moment too soon! I have been hanging onto my Christmas cards and warm fuzzy pillows and throw (from Pier One). But, I have been feeling the Winter blues. So, I decided to make a quick change to the line up in our living room. (Hey, Pretty Handsome Guy, did you like how I used a football term?! ha, ha.)

By the way, speaking of Pretty Handsome Guy, today is his birthday! He’s the big 4-0! Woohoo! I have four months to tease him about being 40 until my counter ticks over too. Then I’ll have to shut up about it.

Okay, sorry for the diversion, back to the topic at hand, falling in love with your room by changing out pillows.

Couch Before – Christmas Pillows and Throw

Sometimes falling in love with a room again is simply a matter of changing out your fabrics or pillows, throws, place mats, runners, a rug, etc. (Especially if you have an old couch that you are hiding under a slipcover.)

I had a few minutes without the kids the other day and suddenly found myself at the back of Steinmart in the pillow section. Within 15 minutes I had grabbed several discounted pillows and was running for the register before I had to pick up Pretty Handsome Boy #2. (Anyone else been in that mad dash to the register using up EVERY single minute before it is time to reclaim your children? Yeah, I figured I was the only one.)

When I got home, I performed transformation magic on the two chairs and sofa in our living room.

Wingback Chair Before

Wing Back Chair After

Club Chair Before

Oh – you eagle eye you – Yes, I know you just saw that pillow in the wingback chair above. I just moved it. FREE transformation Baby!

Club Chair After

Couch Before

Couch After (Throw from Club Chair Before)

Couch After – Close Up Pillows

As you can see in the above picture, I FINALLY put away all my Christmas cards that were displayed on the shutters in the background. So, how about your home? Do you have a room that could benefit from just a few new fabrics? Try it, this is the quickest way to transform a room.
I hope you will check out some other ways to “Fall in Love with Your Home Series”. in February!

Yesterday we had a 78F day in NC. I spent most of the day raking leaves out of our planter beds. I was so thrilled to see little green plants poking through the soil. I don’t know about you, but I am sooooo ready for Spring! Old man winter better be packing his bags pronto.

In anticipation of warmer weather, I have a special guest to help us with “Falling in Love with Your Home” on the outside! She took a ho-hum patio and created an outdoor oasis with trellis planters!


She is none other than Jess from Frugal with a Flourish!

Jess is so down to earth and a pleasure to talk to. After 5 minutes talking to her, I felt as comfortable as if I was talking to a long time friend. Her blog is just as warm and friendly. If you haven’t been to Frugal with a Flourish, you have to take a few minutes to peruse her blog.

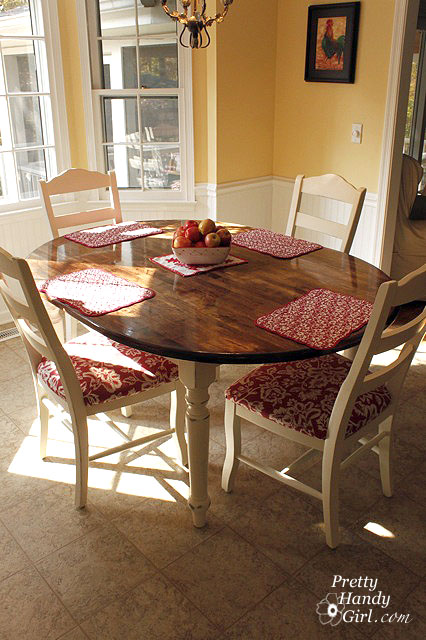
One of my favorite projects that she shared was creating these beautiful bird silhouette plates for $5!!! Yup, you read that right. One Abe Lincoln!

I really need to get my act in gear and make some of these! I can’t wait to see what she comes up with next.

Without further delay, put your hands together and give Jess a big warm Pretty Handy Girl welcome! Yeaahhhh!

Hi guys! I am Jess from Frugal with a Flourish and I am so excited to be guest posting at Brittany’s today! People like Brittany helped to inspired me to take on this project! Today I want to talk about loving your outdoor space even if what you have isn’t a whole lot. We are so close to spring that I know that is going to be an area that will be on all of our minds soon! Because of that, I would like to share with you my Patio Redo I did last spring!

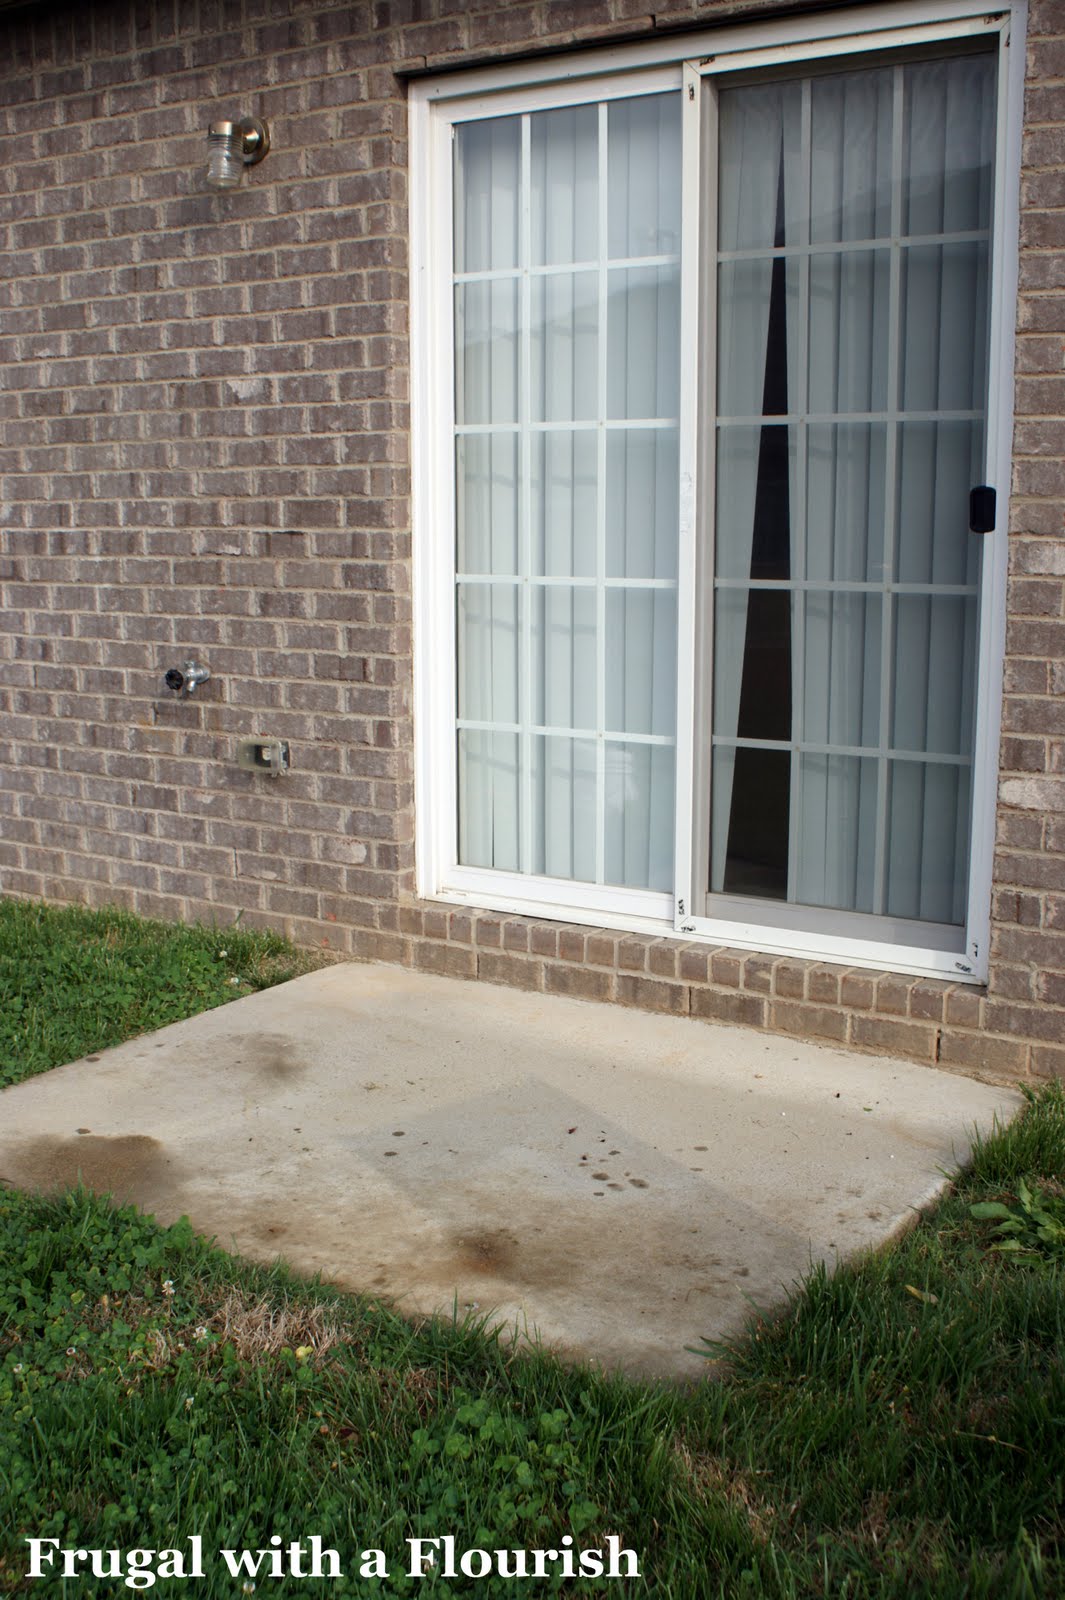
What we started with was this – the world’s smallest patio. Isn’t it just pitiful?? I decided that I wanted to turn it into a book nook, since a single chair was almost the only thing that that would fit out there.

So what did I do to transform it? Check it out!

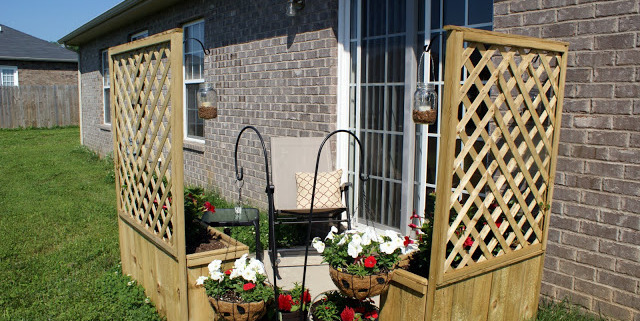
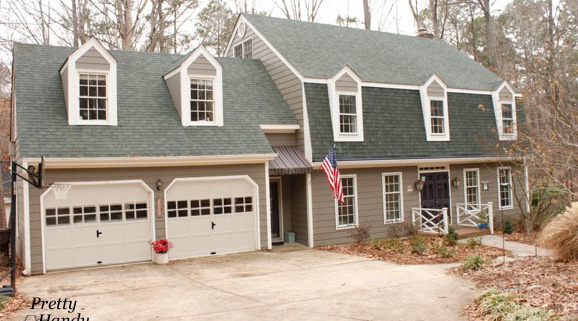
Ta-da! I love it! Here are some more pics! A view from farther away. It looks great from the street! (And per the hubby – my neighbors confessed to being a lil’ jealous of it!)

Now how did I take this from a lonely slab of concrete to a lush little getaway? Let’s break it down.
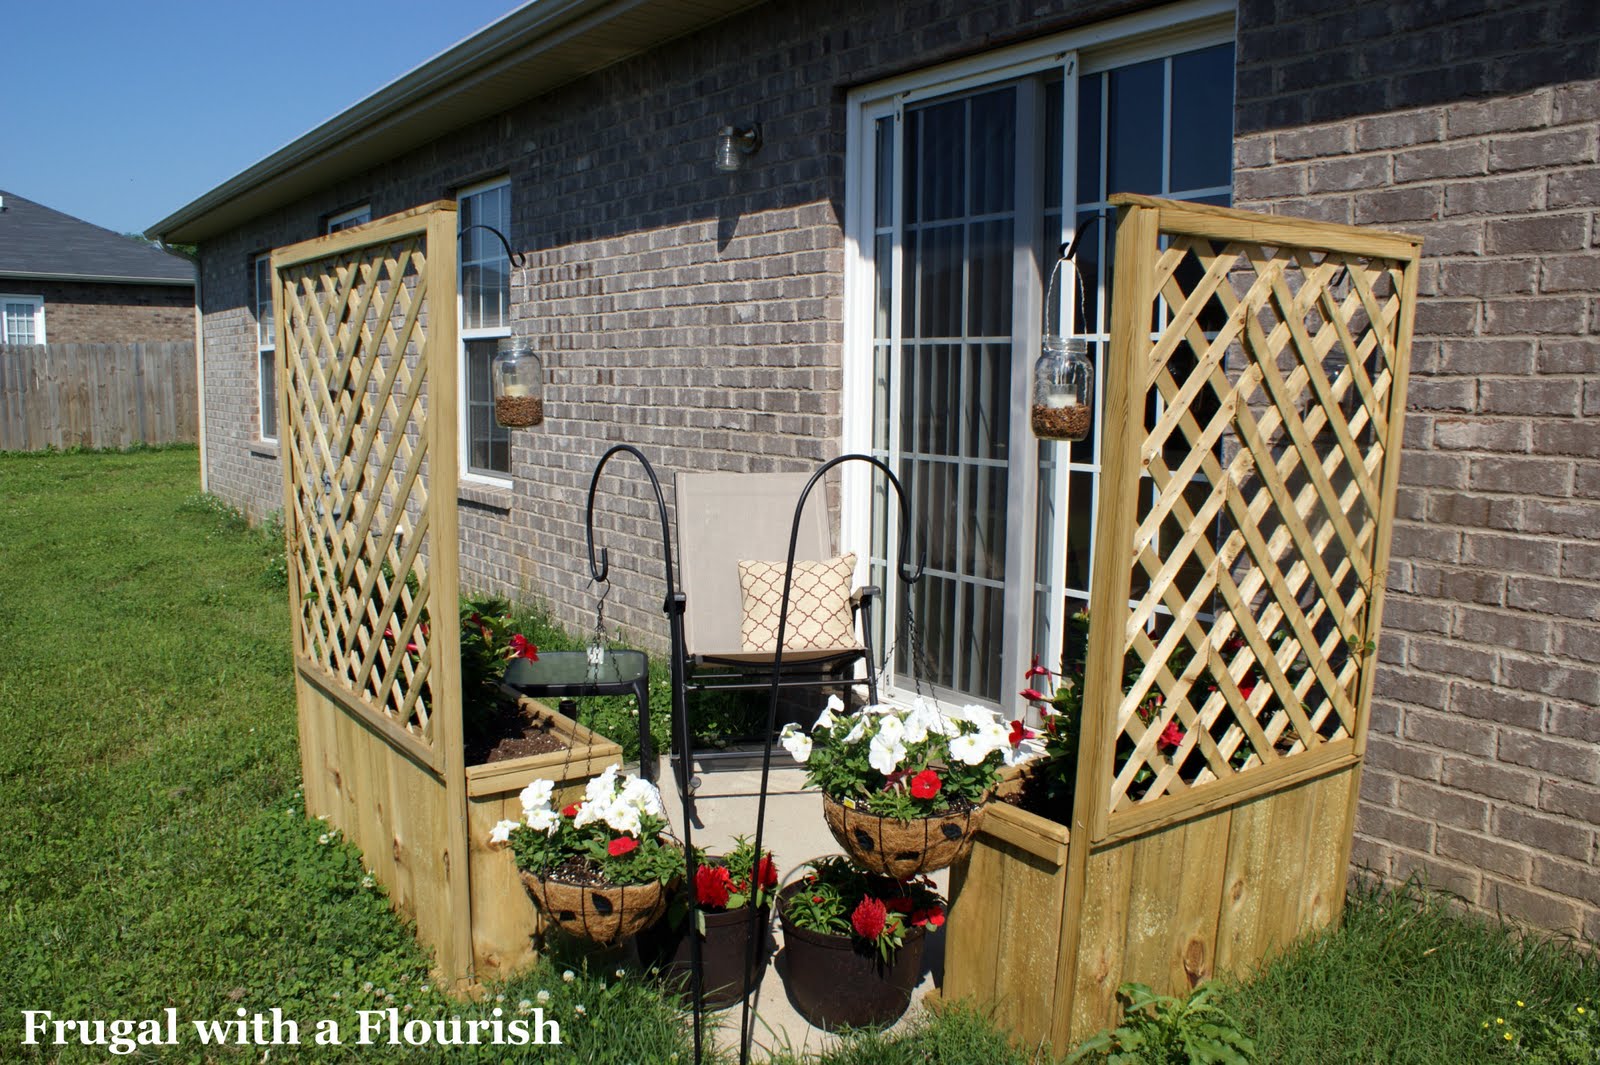
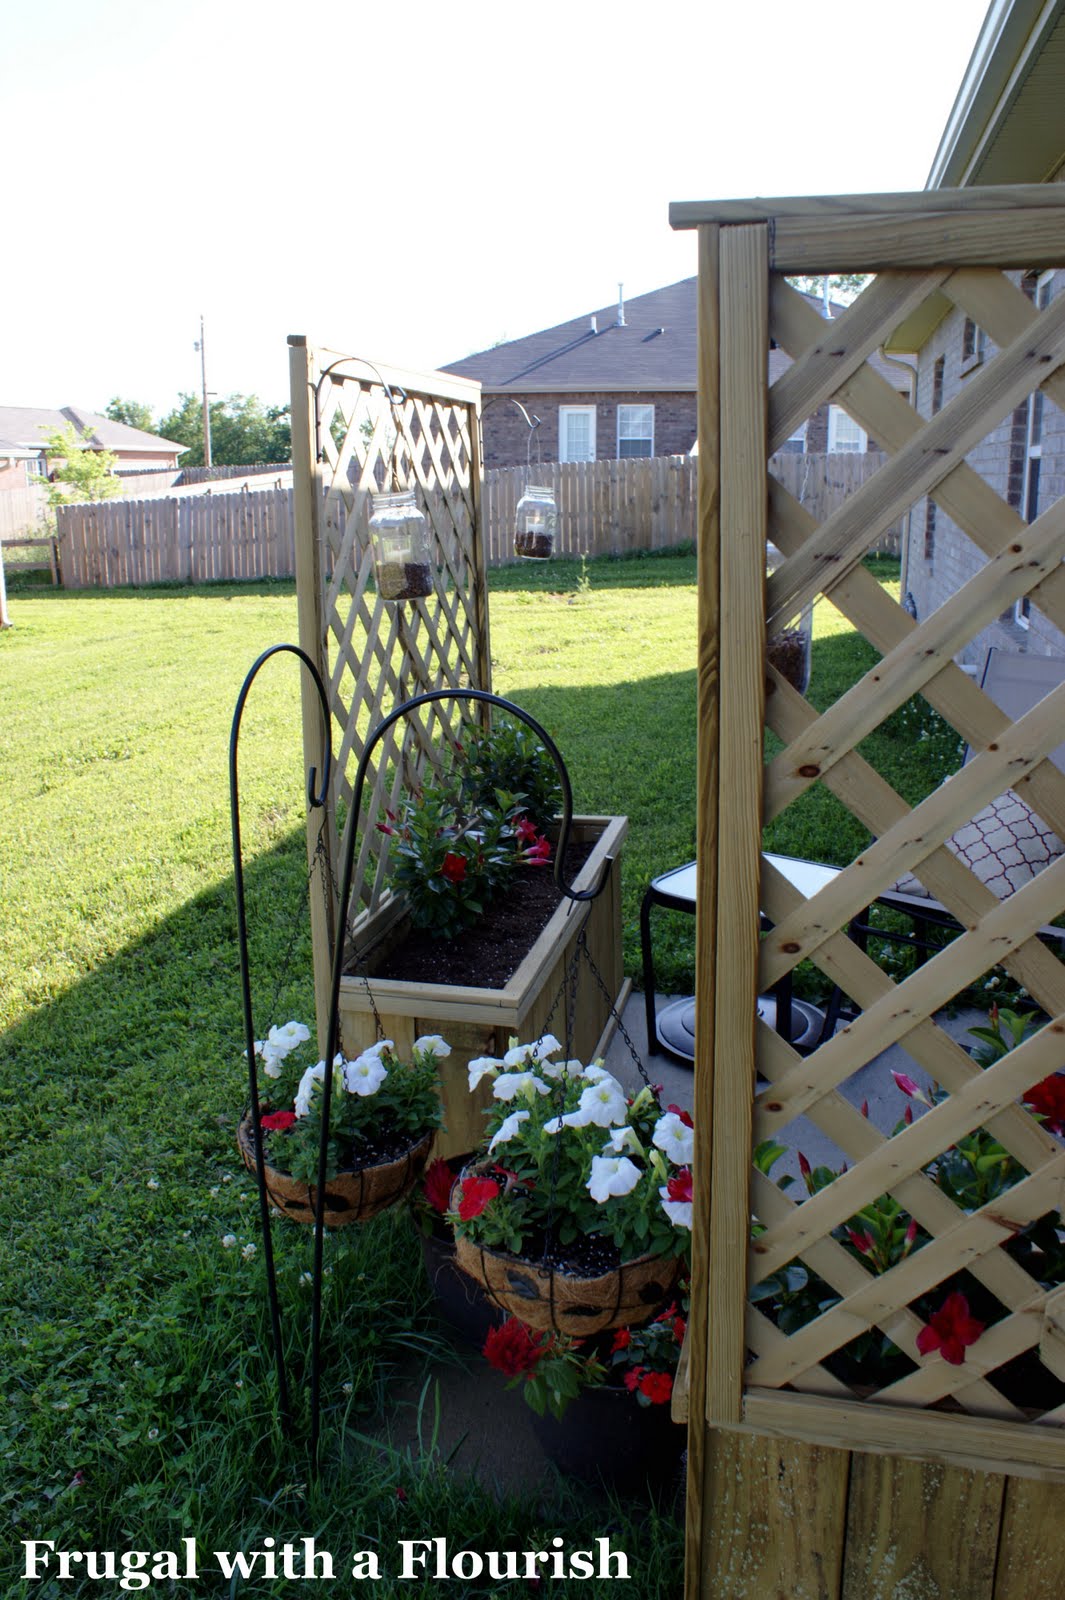
First, I added these fantastic lattice planters. I built these with my own two little hands – with very little assistance from the hubby – mainly moral support!

These planters were the first thing that I had ever built or conceptualized in my head after looking at a picture. And I have to tell you guys that I have been HOOKED on power tools ever since! If you are interested in how to build them – hop over and check out my detailed tutorial. I hope it inspires you to want to get out there and pick up a nail gun too!
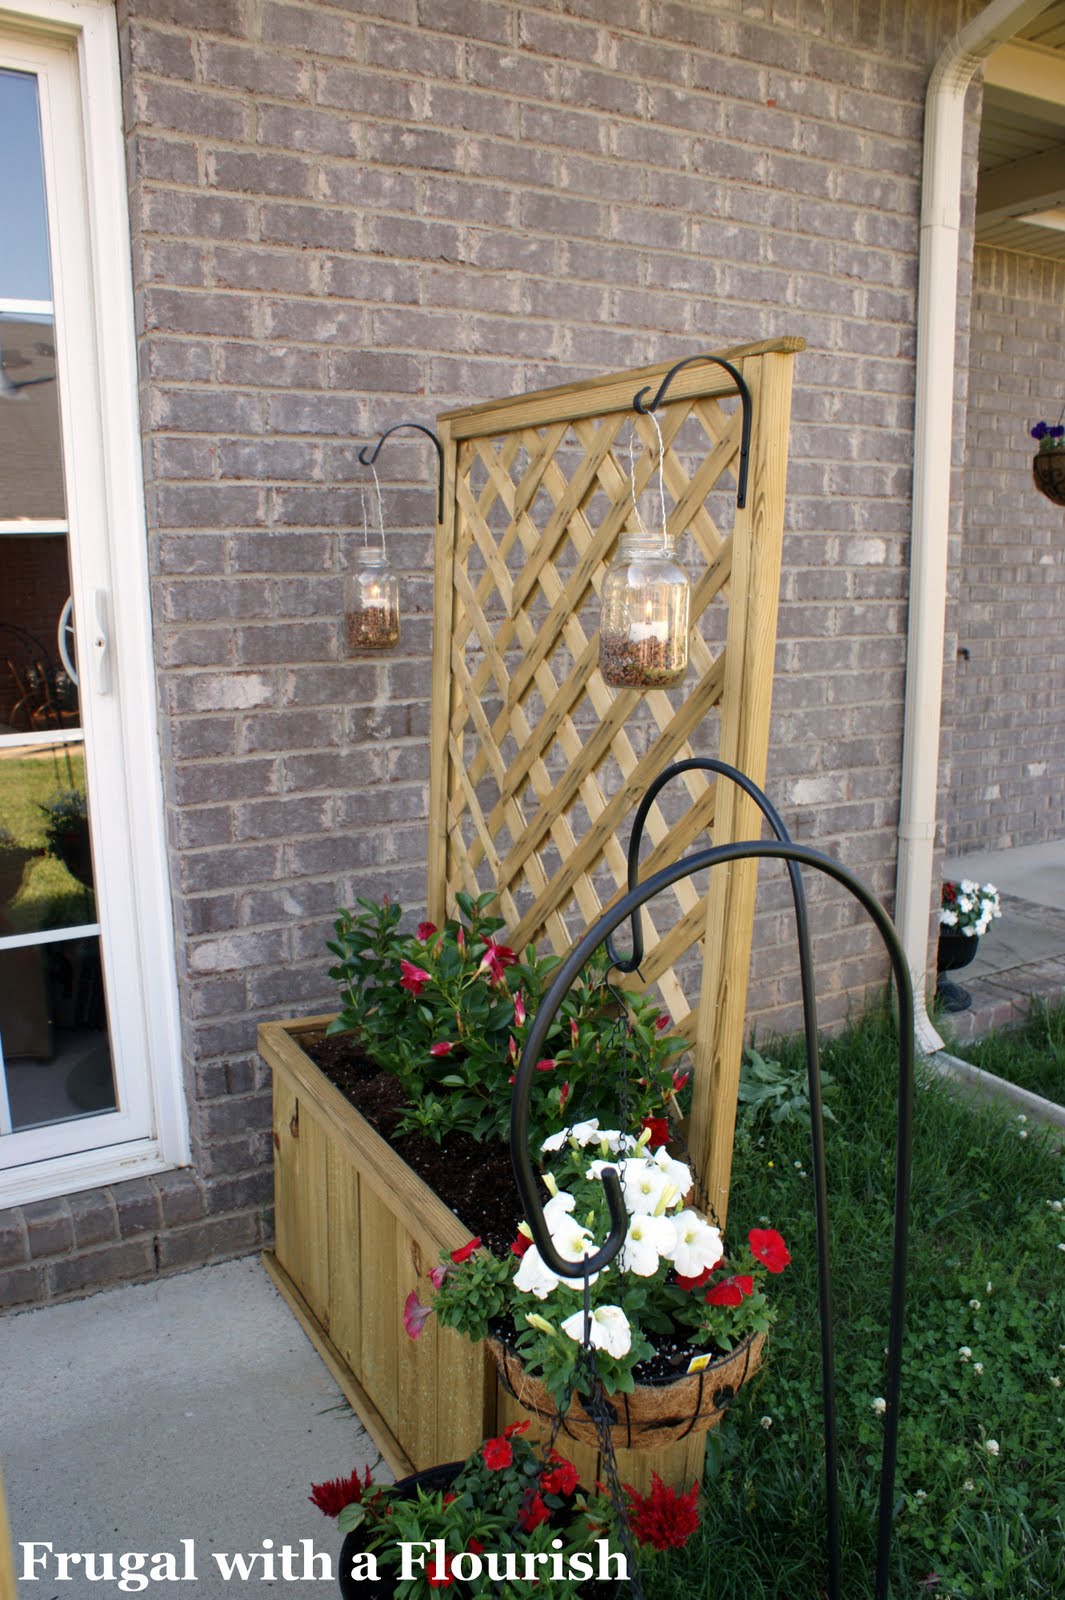
I also got some brackets and hung my PB Knockoff Mason Jar Lanterns out there! This provided two important elements. One, they gave off a lovely glow as it got a little closer to dusk. But more importantly those were citronella candles! So they also provided a little barrier around the patio to ward off those nasty mosquitoes!

Now, to block off the corner a little more from the street, I also added two shepherd’s hooks with hanging baskets and some other planters. Having all the flowers out there was fantastic over the summer months!

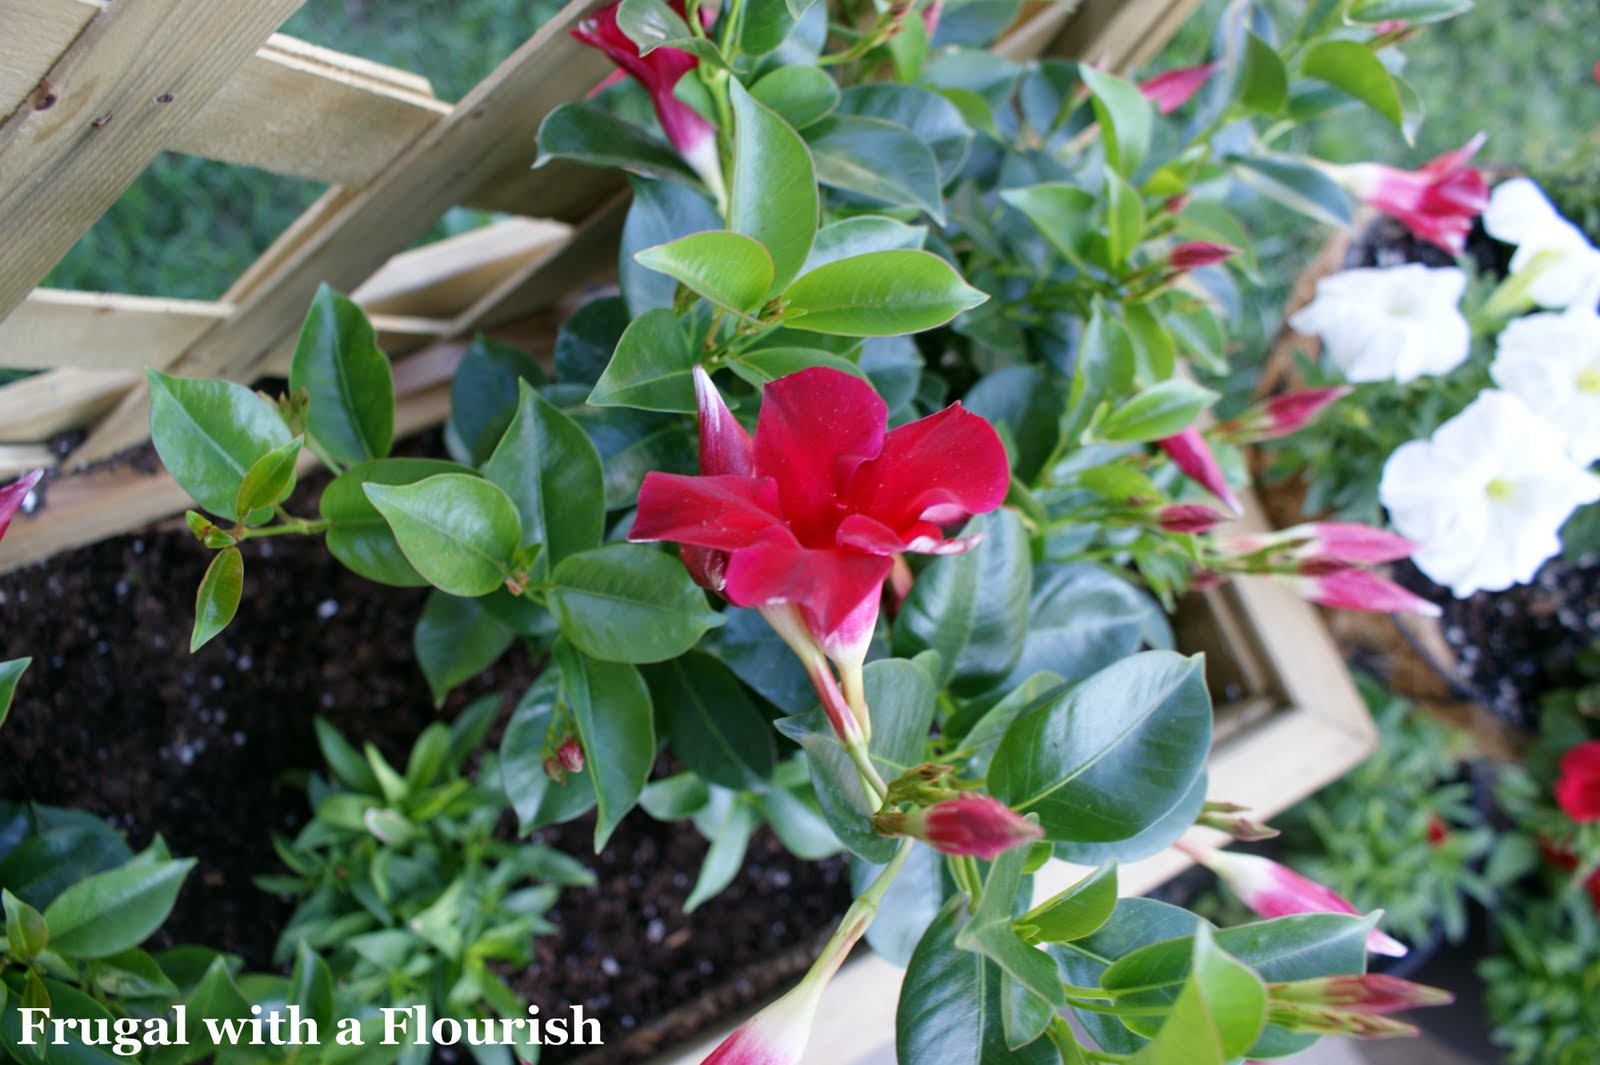
Speaking of flowers – I am in love with the ones I put in my planters! They are called Mandevilla or Brazilian Jasmine. They have the most gorgeous blooms! I am actually trying to winter them. We will see how that works out!

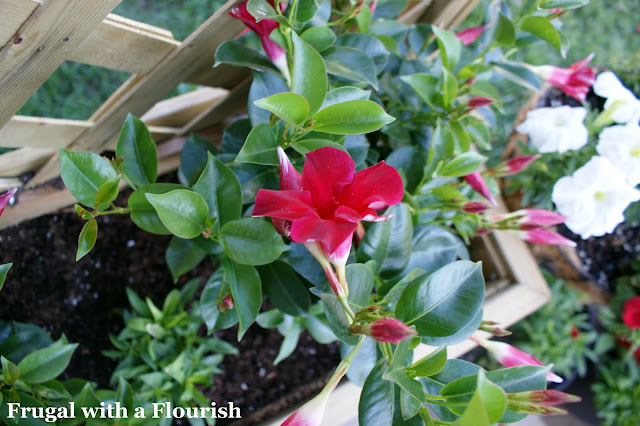
They bloomed all summer long and can climb a trellis to over 15 feet high! Here is a pic from later this past summer to show you how well they grew up! Aren’t they gorgeous?


And of course, every book nook needs a place to sit and read. Here is mine. My chair is a rocker – which I love. I also have an umbrella for the stand under that table that I can use to shade my fair-skinned self if it is too sunny! Oh and I have a comfy pillow! It was a no sew pillow I made with some clearance outdoor fabric – the perfect cozy touch.

Ahhh… I just loved getting away out there this past summer and escaping into a good book! I can’t wait to get it all cleaned up again this spring. I hope this post inspires you to create your own beautiful space outside. Just remember, it doesn’t have to be big to be an oasis! Thanks again for having me Brittany!

Thank you Jess for sharing your backyard oasis with my readers. I too hope you have inspired them to create their own private paradise in their own yard.

No truer words have ever been spoken. I LOVE PAINT! I will always profess my undying love to this amazing mood changer! In the course of over three years (the time we’ve owned our house), we have repainted almost every room in our home. Each room must convey a single emotion when we enter.

Kitchen = Sunny
Living Room = Cozy
Our Bedroom = Relaxing
Office = Calm
Mudroom = Inviting
Laundry Room = Fresh

Being an artist makes me a bit of a perfectionist when it comes to color.

I’d love to share some of my tips for picking out the perfect paint colors. Hopefully this will protect you from making a bad decision. But, rest assured that if you really don’t LOVE the color after you have painted one wall, you can take your paint back to the store and ask the “paint guy” to tweak the color for you. Or worst case scenario, you have to buy a new gallon. (Well, okay, that can get expensive.)

But, if you find a color you truly “LOVE”, it will translate into loving your home. So worth it in my book!


Before I paint any room, I go to several paint departments and gather several color chips that appeal to me. The colors that I REALLY think I’m going to like, I will grab a few extra chips of (shhhh, don’t rat me out for stealing paint chips.)

When I get home, I tuck the chips behind the switch plate cover, in the molding, or tape them on several different walls in the room. It is important to place the chips next to your trim moulding so you can see if the color will work well next to it.

After looking at the chips for at least a week during different times of day and different lighting (sunny or cloudy days) I am usually able to narrow down my choices to 2 or 3 choices.

Next I run back to the paint department and buy or have samples mixed up of the colors I like. Because I am a “work until I get it done” type person, I go ahead and paint big swatches on the wall next to the moulding on all four walls.  This is important because a color that looks good on your sunny wall may not look so good on a shady wall. And you need to see the colors and how they coordinate with the wall color in an adjoining room. If you aren’t quite ready to commit to painting your wall, go ahead and buy some poster boards and paint the swatches on the poster board and hang or prop them up in your room.

A few things to keep in mind while you are looking at a color. Just be aware that the color may change as the seasons change. Winter yields brighter and cooler colored light in our home because the trees are bare. In the summer, our light changes to a greener cast and less harsh lighting as the trees fill out with leaves. I can tell you right now, that I wait for summer to roll around before choosing any colors in the green or yellow family. I need to make sure they look good with the light reflecting off the leaves and into the room.

If you are still having trouble choosing a color, invite a friend over who will give you their HONEST opinion.

If you STILL can’t decide, never fear – Pretty Handy Girl is here! “Here I come to save your color dilemma!”

Introducing Paint Preview:

Some of us are visual people, we REALLY need to see the room painted before we know what a color is going to look like up on all four walls. A special thanks to Emily at Decor Chick for testing my new venture last week. I’m calling it Paint Preview. Thanks to the wonder of technology, I can now virtually paint any room in your home or the exterior of your home! Save yourself time and money by previewing your painting project before the first drop cloth is laid.

Emily’s Living Room Before – SW Baguette
Emily’s Living Room Paint Previewed – SW Anew Gray

Want more information about Paint Preview? CLICK HERE TO LEARN MORE.

Until then, I’m thinking about repainting our garage doors and adding grills to them. What do you think?

Our Home Before
Our Garage Paint Previewed


fall mantel with vignettes

I like to revitalize my love for a room by switching out the décor throughout the year. Decorating for the season gives the room a fresh look. Mantles are the ideal place to begin:

Autumn

 Christmas

Valentine’s Day

Springtime

But, if you don’t have a mantle, you can use any flat surface!

Side Table

Pedestal

Pie Safe Cabinet

Built-in Bookshelf

Recessed Window Seat

Here are six tips for creating successful vignettes:

1. Varied heights

Try to create a visual triangle. Have one tallest object, then a 2nd tallest and a shortest. I use books all the time to help elevate an object that might be at the same height as another object. Attractive wooden crates or boxes covered with cloth can work too.

2. Varied textures

Using a variety of textures creates visual interest. In the picture below I have a ceramic bird sitting on torn strips of newspaper in a plaster container on top of an embroidered linen and some books.

3. Color palette

Choosing a color palette of 3 colors or less is an easy way to create an appealing vignette. For my Valentine’s Day vignette I chose to work with primarily red and white with some black.

The next year, the color palette was red, aqua and white.

4. Odd numbered groupings

Vignettes and small groupings tend to look better when you use an odd number of objects.

For example, in the grouping above, I have assembled:

1. Birdhouse on a candlestick (visually they are one object)

2. Bird nest in pedestal (again visually counts as one)

3. Stack of books

4. Picture frame

5. Felted rose laying in front of the picture frame.

5. Varied Shapes and Scale

Vignettes work well if you can vary the shape and scale of your objects. Grouping many objects of the same size and shape will not give your eye enough to explore and study. Always take a step back from your vignette to make sure that your grouping has different shapes and sizes represented.

6. It’s Your Décor

This is the most important rule! Make sure you create something you like. Use your own objects. And if you love it, that is all that matters. It really doesn’t have to meet someone else’s criteria of perfection. I wrote a whole post on imperfect decorating HERE.

Happy Decorating!


Did you spy Christmas cards in the background? Sure, it is February, but I love them too much to take them down yet. If you’d like to read more “Fall in Love with Your Home” February posts, click on the button below to see a recap of this month’s theme:


On the heels of my de-cluttering post, I have a special guest who is going to show you how you can keep all your books and make them look attractive instead of cluttered! Hooray for book lovers!!! And once you see how she used her books as décor, you are going to run to your bookshelves and create another reason to fall in love with your home!

Without any further waiting, I’d like to introduce Megan from Honey We’re Home
(and her fabulous helper and right hand man, James.) 

Okay, but wait, before I let her talk, I have to tell you that Megan’s home is absolutely gorgeous. If you haven’t visited her blog, do so NOW!

What, you are still here? Seriously! Look, here are just a few pictures from her home:

Okay, so you are back, and NOW without any further delay, Please welcome Megan!

Although I had admired Brittany’s handiwork and especially her boy’s reading nook for a long time from afar, I was thrilled to get to meet her in person at Blissdom.  Needless to say, she is so down-to-earth and personable and really listens to you when you are talking.  Eye contact and all.  And she really is purely intent on showing her readers how they can accomplish the kinds of projects she does in her home in theirs!

What I’m sharing with you today is how I’ve used books as decor in our home.  I love reading and have amassed quite a collection of books over the years.  It’s funny how you can tell a lot about a person by the books they read.  In my house, you would guess I’m into God/religion/spirituality, decor/interior design, parenting/babies, fashion, and cooking.  My husband’s books are all about business, law, and history.

I’ve received a lot of inspiration for decorating with books from blogland and I especially love those “rainbow” bookshelves and wanted to try my hand at it.  I’m pretty familiar with my books, so I’m sure I won’t have any trouble locating them even though they aren’t categorized by subject.

Here’s my rainbow bookshelf in the upstairs hallway.  All I did was group the books into rainbow order by their spines and then arrange them on the shelf.   I reworked it a couple of times, and ended up with this:

basket, book, James, walls, J bath 001
basket, book, James, walls, J bath 002

Here’s the close up:
basket, book, James, walls, J bath 007 basket, book, James, walls, J bath 004 basket, book, James, walls, J bath 006
There’s barely a room in my house that doesn’t have books, for example:
My Office
image
image
image
Kitchen
Books 007
Pantry
image
James’ Nursery
Books 023
 Books 026

Thanks for having me Brittany!!

Be sure to check out some other ways you can “Fall in Love with Your Home!”