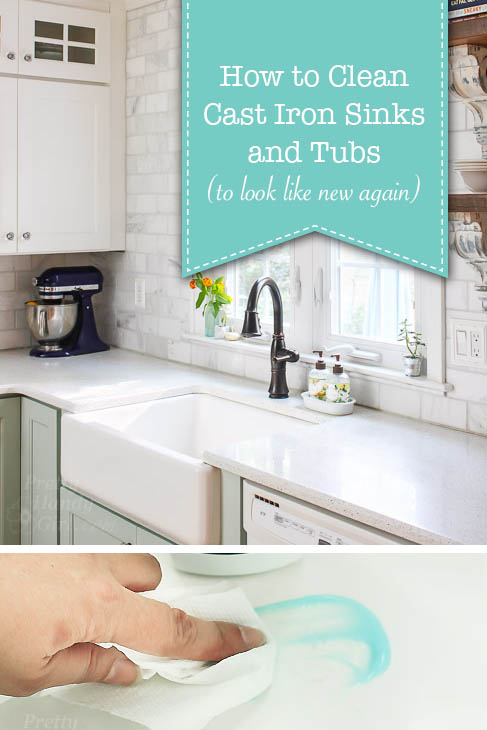
It’s been a decade since we bought our front-loading HE washer and I’ve managed to keep it smelling clean for 10 years! With just three simple steps, you too can banish the funky, mildew, and moldy smelling clothes washer. Here’s How to Keep Your HE Clothes Washer and Laundry Smelling Clean!

How to Keep Your HE Clothes Washer Smelling Clean

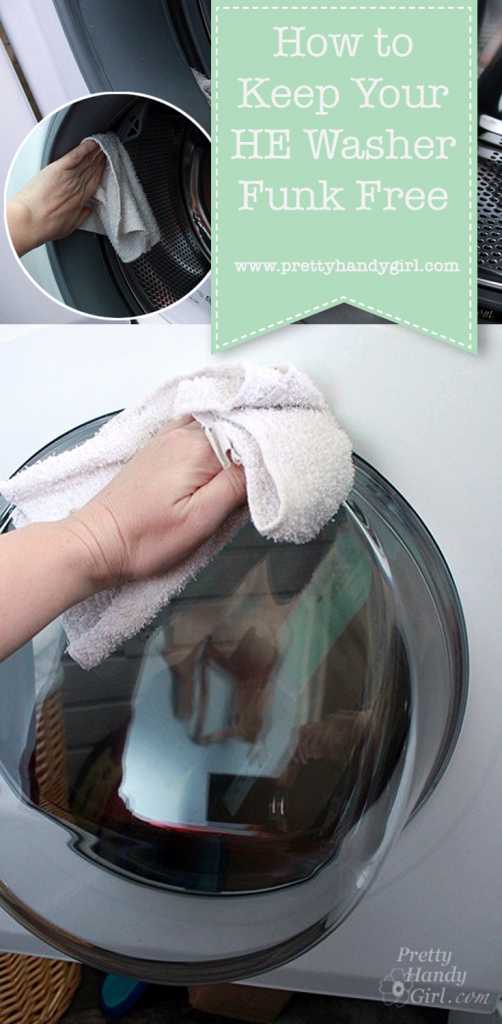
How to Keep Your HE Clothes Washer Mold Free for 10+ Years

We all know the HE (High Efficiency) washer uses a lot less water than the old top load clothes washers. And, they cut down on drying times with a super spin cycle that leaves clothes damp not wet. With all those positives, you’d think everyone would be clamoring for an HE washer. Unfortunately, HE washers can start to stink if they grow mold or mildew inside. What would you say if I told you that after 10 years I’ve cleaned the inside of my clothes washer twice? It’s true, the only times I had to clean it was once when the washer sat in our garage for over a month closed up during renovations. And the second time is when we had a house guest who didn’t know to do three things to keep the washer clean and smelling fresh.

Do These 3 Things After Every Load of Laundry:
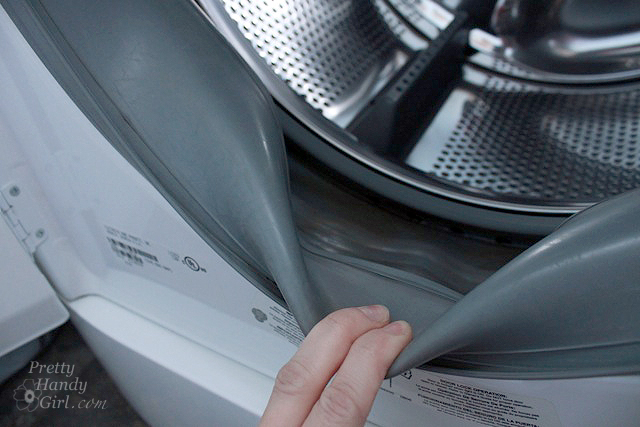
  • Wipe out the gasket
  • Leave door open to dry
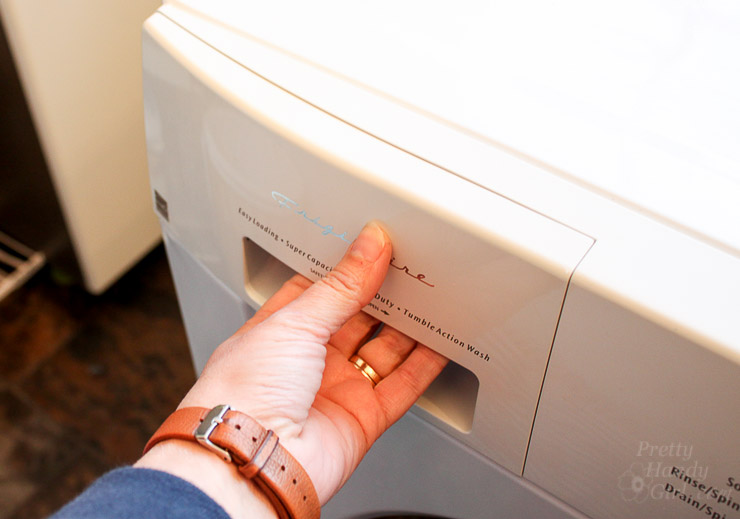
  • Open detergent drawer (or remove to let it drip dry.)

Here’s how to keep your HE front loading washer clean and fresh like the day you bought it:

1. ALWAYS wipe the door off after each load.

he washer freshness cleaning window

2. ALWAYS wipe out the gasket (top to bottom) to remove any water and moisture. This is the main area that will get mildewy first. Gently pull the gasket toward you to wipe inside and behind the gasket. Wipe especially well around the drain holes at the bottom.

washing machine clean upkeep rubber seals

3. Leave the door open after your wash is done to thoroughly air out your washer. Obviously if you have a closet instead of a laundry room, this can be a problem. Your best bet will be to invest in a top load HE washer when it comes time to replace your washer. Until then, try your best to keep the washer open about 30 minutes after you’ve washed a load.

he washer airing out to keep clean

4. Open or remove the detergent drawer to allow it to air out.

Pulling Out detergent drawer on clothes washer

If you still have odors or smelly laundry, try some of these remedies:

Visible mildew

Inspect inside and around the gasket for signs of mildew (usually black spots.)

he washer mildew cleaning bleach, toothbrush and container

Mix a small amount of bleach and water in a container. Dip an old scrub brush or old toothbrush into the mixture. Scrub mildew spots with the brush. Wipe clean with a clean rag dipped in water to remove the bleach mixture. Repeat as necessary. When the mildew has been removed, wipe dry with a clean rag.

smelly washer cleaning using old toothbrush

Smelly Washer:

Does your washer smell like a locker room. To eliminate smells, pour 1/2 cup of baking soda inside the drum. Add a cup of white vinegar into the detergent dispenser.  Press start to run the washer empty on the hot water setting.

If this doesn’t eliminate all the odors, you can run the washer empty again but this time put 1/2 cup of bleach in the detergent dispenser.

Remember to open the washer immediately, wipe out any moisture, and leave the door open to air dry.  (I can’t stress how crucial it is to do this after EVERY LOAD.)

Smelly Clothes:

Do your clothes, or more likely your towels, come out of the washer smelling like a locker room? Believe it or not, you could be using too much detergent. Liquid detergent is often the culprit. Particles from the soap don’t wash out of your clothes completely and bacteria from sweat and more end up sticking to the fabric. Try switching to a powdered detergent or use this DIY laundry detergent which is low sudsing (and also costs pennies). You can also try this Smelly Towel Cleaner (affiliate link) additive to your laundry, that I use when our towels start to get a little funky (especially the dog towels.) It helps get the odor out.

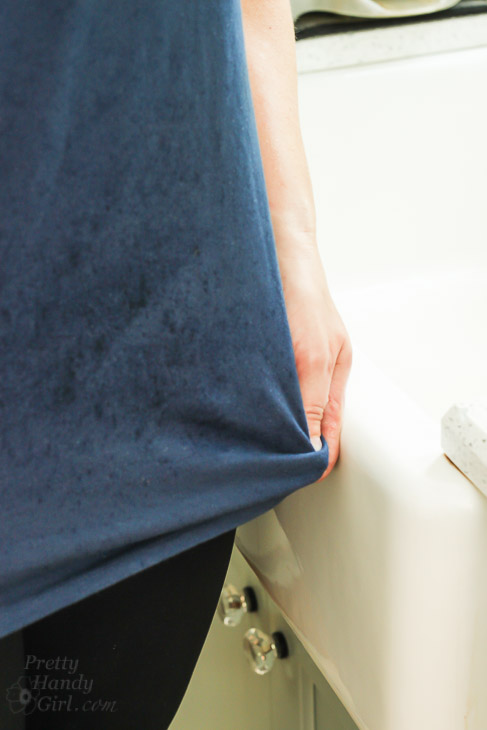
Remember: Never use more detergent than is called for (even if the item you are laundering looks like this jacket.)

super dirty jacket. Clean clothes in he washing machine tips

Speaking of dirty clothes. I must share this hands down BEST Stain Remover recipe with you:

Miracle Stain Remover

I’d love to hear if these tips helped Keep your HE Clothes Washer and Laundry Smelling Clean!

he washing machine cleaning pretty handy girl

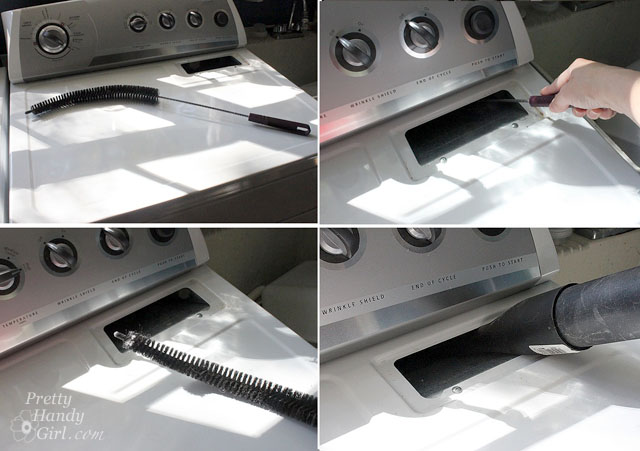
Like this post? You’ll definitely want to learn how to prevent dryer fires:

prevent fires replace dryer hose

And don’t miss How to Clean Out Your Dryer Ducts to Prevent Fires.

how to clean out your dryer ducts


How to build an easy scrap wood multiuse caddy

How to build an easy scrap wood multiuse caddy

Hey everyone!! It’s Shara here again from Woodshop Diaries to bring you a simple, versatile, and really fun project. It’s a scrap wood caddy!

I hesitate to put a label on what type of caddy it could be because you can carry whatever you want inside. Cleaning supplies, tools, craft knick knacks, gardening accessories — the possibilities are endless!

The size is easy to customize and you only need a few tools and some scrap plywood. If you don’t have any scraps, pick up a quarter sheet of 3/4” or 1/2” plywood at the lumber yard or big box store to make this.

If you’re ready to get building, here’s the plan:

Materials:

(I’ve included affiliate links for your convenience. I earn a small percentage from a purchase using these links. There is no additional cost to you. You can read more about affiliate links here.)

Cut List:

(Keep in mind: you can customize for different size scraps or for a larger or smaller caddy)

  • (2) pieces 3/4” x 8” x 19” (front and back)
  • (1) piece 3/4” x 8” x 17 ½” (bottom)
  • (2) pieces 3/4” x 8” x 8” (sides)
  • (1) piece 3/4” x 8” x 12” (middle divider w/ handle cutout)
  • (2) pieces 3/4” x 8” x 6 ½” (middle dividers)

Instructions:

Step 1: Cut out middle divider with handle

Cut your scraps to 8” wide to make the build easier. (If you don’t like 8”, you could make it another size, but the cut list will change slightly.)

Scrap wood DIY Cleaning Caddy

Take a piece of 8” wide x 12” tall and mark the center. Measure and mark 2” to each side of the center and 5” down. Draw diagonal lines to connect the marks as shown:

How to make a multiuse caddy

Use a miter saw to cut the diagonal corners off.

How to make a multiuse caddy

Draw a handle hole. To make this an easy task, drill two holes first (using a drill bit or hole saw) to get the blade in.

How to make a multiuse caddy

Then cut along your line.

How to make a multiuse caddy

Sand your edges smooth.

Step 2: Cut out the front and back sides

Cut two pieces of your plywood to 8” x 19”. Find the center of one of the pieces lengthwise. Flip the middle divider from step 1 upside down and center it on the 8″ x 19″ plywood. The top of the divider should line up 3” from the bottom of the plywood. Trace the diagonal cut out onto the plywood and cut out using a jig saw. Trace the same shape onto the second 8″ x 19″ plywood piece and cut out to match.

How to make a multiuse caddy

Step 3: Assemble the bottom

Cut the bottom piece* (8” x 17 ½”) and 2 side pieces (8” x 8”).

*If you are using 1/2” scrap plywood instead, be sure to add an extra 1/2” to the length of your bottom piece.

Glue and nail the pieces together as shown below. You can use hammer and nails, but a nail gun would be ideal to save time and prevent pieces from moving while you assemble.

How to make a multiuse caddy

Step 4: Attach sides

Glue and nail the front and back pieces from step 2 to the sides and bottom from step 3.

How to make a multiuse caddy

Step 5: Assemble the middle dividers

Cut the 2 middle dividers from the cut list (8” x 12”). Measure and mark the vertical centers of the divider pieces. Make sure that the piece with the handle is centered on the middle dividers. This will make your inside “compartments” the same size.

How to make a multiuse caddy

Glue and nail these pieces to the handle cut out piece from step 1.

How to make a multiuse caddy

Step 6: Add dividers

Slide the dividers into the box you made in step 4 and make sure to center it. Nail the dividers in place through the front and back of the caddy. You can add a couple nails in the bottom as well, just be careful that you don’t miss and have stray nails coming up through the bottom of your caddy.

How to make a multiuse caddy

Give your caddy a good sanding and it’s good to go. You can add paint or stain, but I left mine natural.

How to build an easy scrap wood multiuse caddy

This caddy could be used for cleaning supplies. . .

How to build an easy scrap wood multiuse caddy

. . . craft supplies. . .

How to build an easy scrap wood multiuse caddy

. . . tools or any small things you want to organize.

How to build an easy scrap wood multiuse caddy

Don’t you love a good scrap wood project? Me too! For more fun scrap wood projects, check out this DIY personalized lazy Susan made from 2x scrap boards, or this floating mirror shelf made from a scrap 2×4.

You may also like these simple scrap wood caddies:

Rustic Branch Handled Caddy

Mini Picket Fence Caddy

Until next time, happy building!

Shara's Signature

~ Read more of Shara’s tutorials ~

What No One Tells You About Farmhouse Sinks | Pretty Handy Girl

When we bought our farmhouse sink, I naively thought I wanted one because they looked so beautiful in photos of farmhouse style kitchens. Now that we’ve had our farmhouse sink for three years, I want to tell you What No One Will Tell You About Farmhouse Sinks, especially cast iron sinks.

Fact #1:

You will chip dishes and break glasses if you aren’t careful. It happens. We’ve lost two dishes and two glasses in our sink. Cast iron sinks are made tough to prevent chipping. Honestly, it’s cheaper to replace a glass or dish than the entire sink.

Fact #2: 

You may get wet. We’ve found that when our faucet is on the spray setting it spatters us. I’m not sure if this is a factor of the sink design or the sprayer. We didn’t have this issue with our old two basin sink. To solve the problem we use stream most of the time and put the water on low when spraying.

splashed-shirt

Fact #3: 

It will get dirty. A white sink will definitely show dirt and grime.

dirty-farmhouse-cast-iron-sink

This was a bit of a bummer, as someone who had to constantly shine the surface of our old stainless steel sink with baby oil to hide the hard water spots. But, I’ve come to terms with it and only have to clean it once a week to keep it looking like new.

baby oil shine stainless steel

Fact #4:

It will get scratched. Cast iron sinks will scratch, but I expected as much since we cook almost daily using heavy cast iron pans. Honestly I’m surprised we haven’t chipped the sink yet. It’s held up to a lot of abuse. In three years we have yet to chip our sink, but the marks and scratches have happened.

How to Clean a Cast Iron Sink or Tub | Pretty Handy Girl

Luckily, I have the perfect solution to clean a cast iron sink (or tub) to help it look new again.

How to Clean a Cast Iron Sink or Tub | Pretty Handy Girl

Before:

dark scratched cast iron sink

After:

How to Clean a Cast Iron Sink or Tub | Pretty Handy Girl

Fact #5:

You can’t wash dishes on one side and set the clean ones in a dish drainer in the second basin. With one large sink, all the dishes in it will get wet. This was the one change that was less of an issue for us. We simply put our dish drainer on the counter. When we have company, I put the drainer out of sight under the sink.

casement window over sink

Conclusion:

If we were to go back in time and do it again, would I buy a farmhouse sink again?

Absolutely! I still love the look. Cleaning the scratches every few weeks is no big deal. I absolutely hated our stainless steel sink because of hard water deposits and spots. Scratches are much less noticeable than the hard water deposits.

I LOVE having a big sink to clean dishes in. I feel a bit like Elaine enjoying the extra wide driving lanes Kramer created. Who doesn’t like a little more elbow room?

Best of all, I can hide dishes in it. Little known fact, my coffee mug and a knife were in the sink when I took this photo:

What No One Will Tell You About Farmhouse Sinks

The apron front farmhouse sink we have is this one. (affiliate link) If you decide to buy one, I think you will love it, as long as you are okay with those 5 Things No One Will Tell You About Farmhouse Sinks!

farmhouse sinks

Does your HE Washer stink? Here’s what you can do about it:clean front load washer


Want to save hundreds of dollars a year? Make my tested and approved DIY Laundry Detergent!DIY Laundry Detergent | Pretty Handy Girl


How to Clean a Humidifier

How to Clean a Humidifier

Winter is such a dry season, and the appropriate time to keep the air quality inside of your home healthy with moisture. This can be easily done with a humidifier. During the coldest days of winter it seems like our humidifier is constantly running. All that use can put a lot wear on it, but it’s easy to take care of your humidifier in just a few steps.

Here is How to Clean a Humidifier:

Materials:
(contains affiliate links)

  • Humidifier
  • New filter (find your’s on Amazon)
  • Sponge
  • Water
  • Vinegar
  • Rag

Before you clean your humidifier, consult with the instruction manual that came with it. If you can’t find the manual, do a search online. Usually companies have links to instructions on how to clean their appliances.

Instructions

1. First, unplug your humidifier. Take it apart and empty the water container. Separate the pieces and discard the old filter.

2. You’ll see the parts that need attention. They build up with residue that needs washing.  Make a spray with water and vinegar (or just pour vinegar into the base of the humidifier). Use a wet sponge to wipe down the base.

How to Clean a Humidifier

Read more

12 Tips to Maintain the Value of Your Car | Pretty Handy Girl

12 Tips to Maintain the Value of Your Car | Pretty Handy Girl

We’ve sold a few cars in our lives. Each time we were able to get top dollar for our used vehicles. Today I have 12 Tips to Maintain the Value of Your Car. (Plus an update on this van at the end of this article!)

You’ve all heard the saying that a new car depreciates the moment you drive it off the lot. Although, this is somewhat true, you can prevent your car’s value from depreciating too much and too quickly by following these tips:

1. Keep it Clean – Leaving dirt and debris on your vehicle can cause small scratches. Worse yet, bird poop and splatters can actually damage the paint. A regular cleaning is going to keep your car in tip top shape. I understand finding the time to wash your car can be challenging. And, those inexpensive drive thru car washes don’t get your car completely clean, especially on the inside. No worries, that’s where a mobile car wash can help. They come to your home or place of business and clean your car while you work or chase the kids.

12 Tips to Maintain the Value of Your Car | Pretty Handy Girl

2. No Salt – If you live at the beach or in a harsh winter area, salt can break down your car’s paint and cause metal to rust much faster. It’s important to keep your car protected with frequent car washes and wax your vehicle’s exterior.

3. Change Your Oil Regularly – Help your car’s engine run smoothly for a long time by keeping up with your oil changes. Depending on the age of your vehicle, oil changes are recommended every 3,000 – 5,000 miles. Be sure to keep your receipts to show potential buyers that your car was well cared for.

4. Check Fluids – Make sure to check your car’s fluid levels at least once a month. You can check the fluids yourself or ask a mechanic to check for you. Top off engine oil, windshield wiper fluid, transmission fluid, power steering fluid, coolant, and brake fluid if they are low. As an easy reminder, ask your mechanic to check and top off fluids at every oil change.

5. Maintenance – There is a list of required services to be perform in your vehicle’s owners manual. Keep an eye on your mileage and get those routine services performed on time. Don’t have the manual? Call the dealer and ask them for the maintenance schedule. Always keep your receipts as a reminder of what you’ve done and to show potential buyers that you took great care of the vehicle.

12 Tips to Maintain the Value of Your Car | Pretty Handy Girl

6. Floor Liners – One of the best things you can do for your car’s interior is to put in floor liners. We bought WeatherTech (affiliate link) floor mats the week after we bought the new minivan. They catch all kinds of spills, dirt and crumbs while protecting the carpets.

12 Tips to Maintain the Value of Your Car | Pretty Handy Girl

7. Keep Tires Properly Inflated – For safety and better gas mileage keep your tires inflated  properly. This will also help your tires last longer.

8. Change the Air Filters – Keep the car smelling great and help your HVAC system run more efficiently by changing your air filter with every 1-2 oil changes. This is an easy DIY job, learn how to change your air filters here.

very-dirty_cabin_air_filter

9. Fix Dents and Scratches – Keep an eye on your car’s body. If you get a dent or scratch that goes through to the metal, fix it ASAP before rust can form. It might be as simple as getting touch up paint from the dealer. Or you might need the help from a professional auto body shop.

10. Don’t Trash It – Keep a trash bag in your car to collect any garbage. Kids are especially prone to leaving half eaten food in the car. Train them to dispose of all waste. A simple trash bag that clips to the back of your seat (affiliate link) has worked well for us.

Auto Trash Bag

11. Park it Inside – This is a tough one if you don’t have a garage. Or like me, your garage serves a purpose other than storing your automobiles. If parking your vehicle inside isn’t an option, try not to park under trees (birds and falling limbs can do damage to your car.) And be sure to refer back to tip number 1.

12. Drive It – A car needs to be driven at least once a week to keep the engine and parts in good working order. This will also prevent tires from getting flat spots.

Follow as many of these tips to maintain the value of your car and receive top dollar when it comes time to sell your vehicle!

Update: After 10 years I sold my minivan on Facebook Marketplace and got over Kelly Blue Book value and had 15 people contacting me immediately to purchase the vehicle. The meticulous records, WeatherTech liners, and lack of any accidents made our van a prized vehicle when it went on the market. I urge you to maintain. your vehicle and reap the rewards the day you sell it. Happy driving.

PHGFancySign