How to Finish Raw Plywood Edges | Pretty Handy Girl

How to Finish Raw Plywood Edges | Pretty Handy Girl

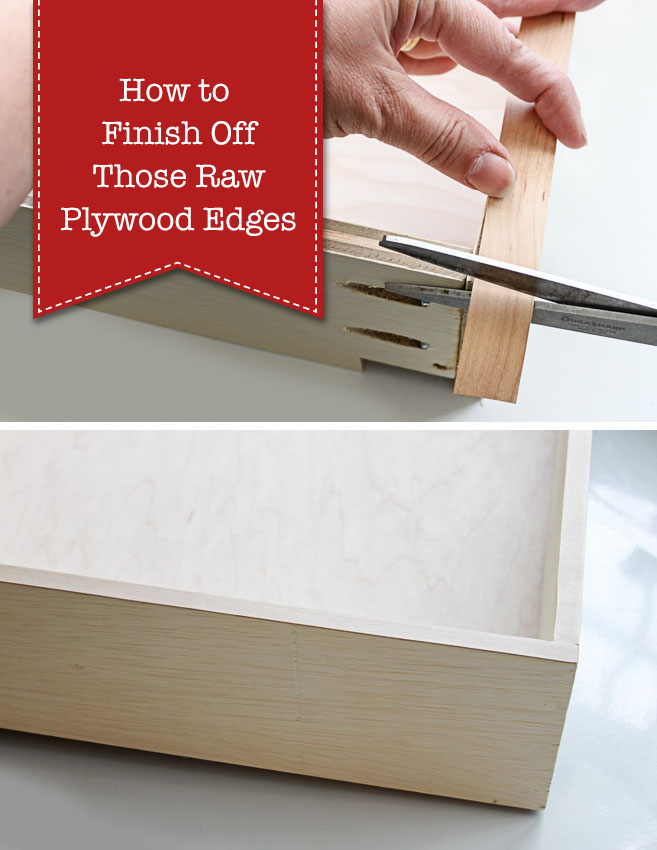
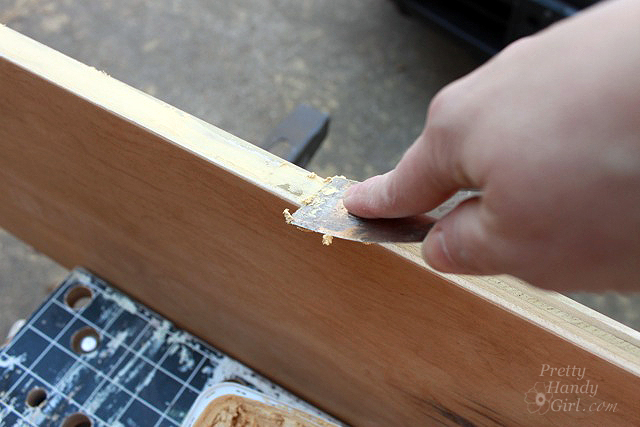
Recently I’ve been working on building drawers for our pantry. The material I chose to use is finish grade plywood. Plywood is strong, but unfortunately it has a raw edge that isn’t the most attractive side of the wood. No problem, it can be covered. You could use wood putty to smooth the raw edges of the plywood, but you won’t get perfect results and it is only recommended if you are going to paint your plywood. Instead, I have a solution for you on How to Finish Raw Plywood Edges to give you a more professional look. In fact, some people may not be able to tell it was plywood to begin with!

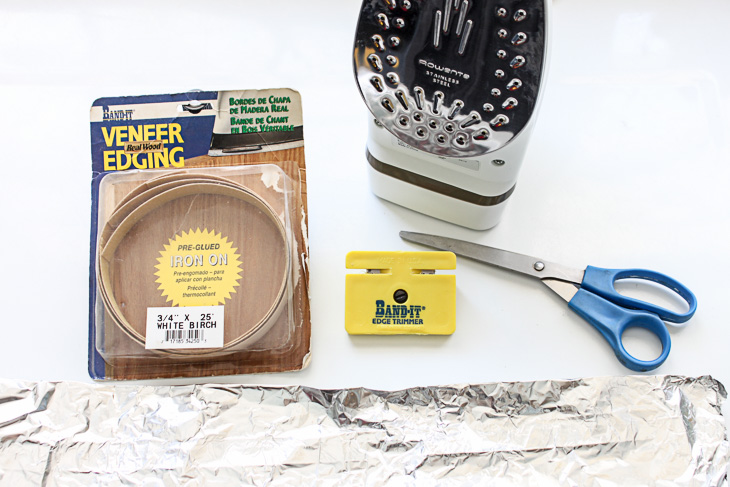
This is an easy tutorial and requires no power tools (unless you consider an iron a power tool.) You will need to purchase veneer edging for this project. Don’t worry if your edging is wider than your lumber, we’ll fix that. Ready to learn How to Finish Raw Plywood Edges? Let’s get this project heated up.

Materials:

(I’ve included affiliate links for your convenience. I earn a small percentage from a purchase using these links. There is no additional cost to you. You can read more about affiliate links here.)

How to Finish Raw Plywood Edges | Pretty Handy Girl

Instructions:

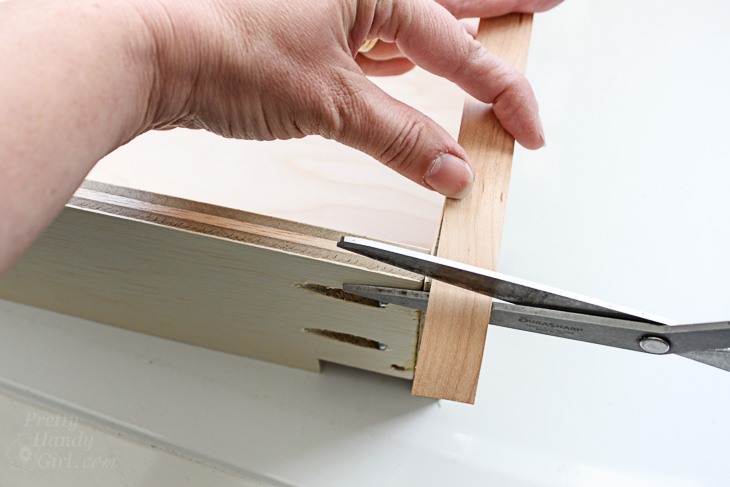
Pre-heat your iron on the cotton setting. Measure the length of your veneer edging on your plywood. (Do not cross your edging over any joints. Keep the veneer piece the same length as the cut wood.) Cut the excess off.

How to Finish Raw Plywood Edges | Pretty Handy Girl

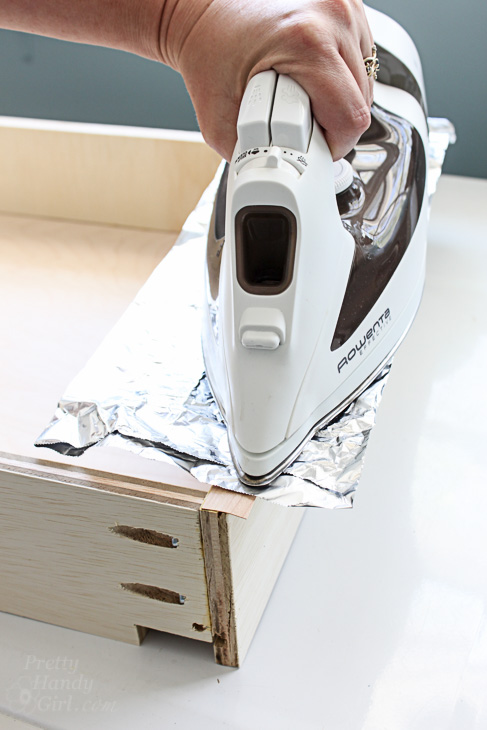
Rip off a piece of foil the length of the plywood or at least the length of your iron. Lay the edge veneer on top of the plywood edge. Lay the aluminum foil between the veneer edging and the iron. Press the iron to heat up the glue on the underside of the edging. Keep moving the iron so as not to scorch the wood. Usually 30 seconds is all you need to activate the glue.

How to Finish Raw Plywood Edges | Pretty Handy Girl

After the entire edge veneer has been glued, use a flat edge on the trimming tool to burnish the veneer firmly onto the raw plywood edge. If any areas still aren’t glued, reheat and repeat the process on that spot.

How to Finish Raw Plywood Edges | Pretty Handy Girl

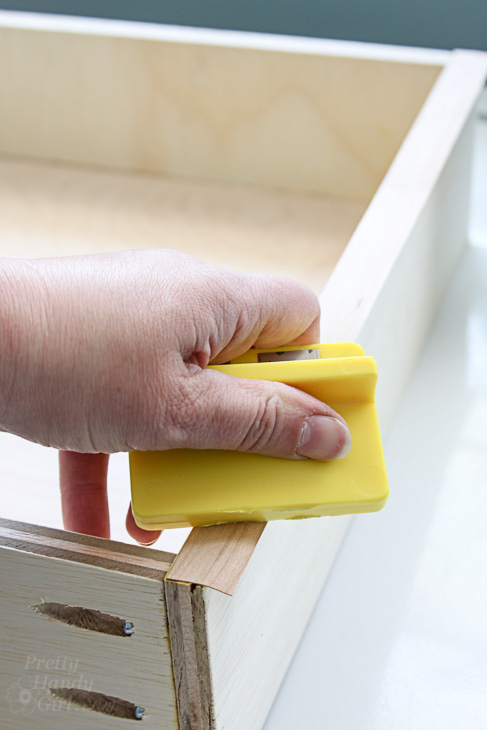
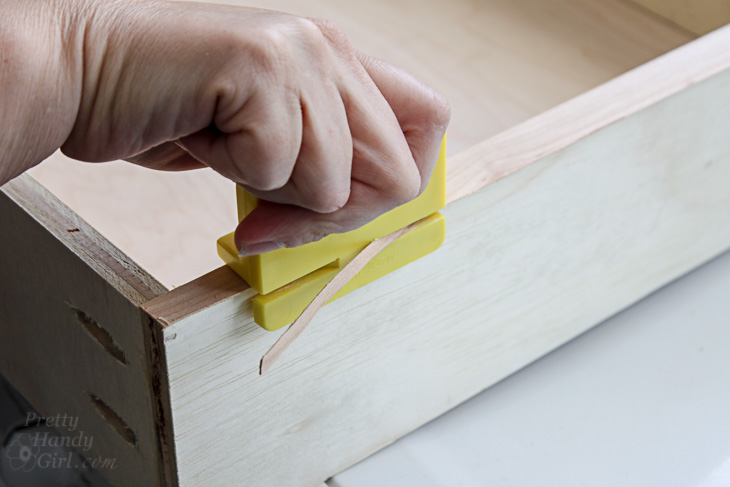
Turn the trimmer tool and run it along the side of your plywood to trim off the excess edging. You may need to make a few passes to remove all the excess veneer.

How to Finish Raw Plywood Edges | Pretty Handy Girl

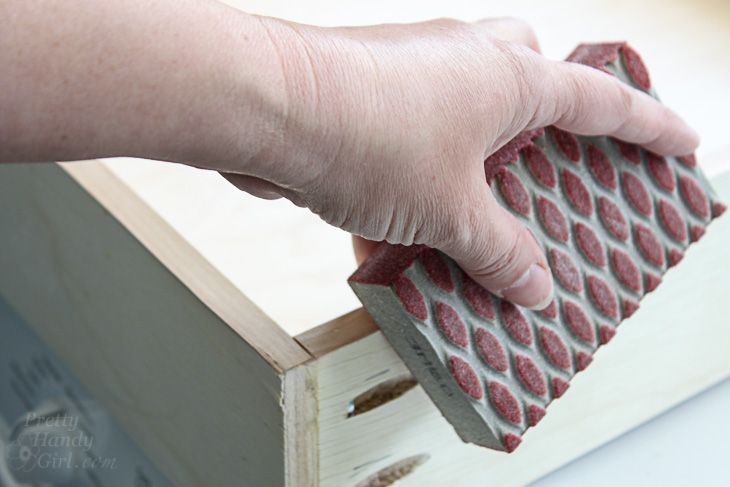
Sand the edges smooth and remove any rough spots.

How to Finish Raw Plywood Edges | Pretty Handy Girl

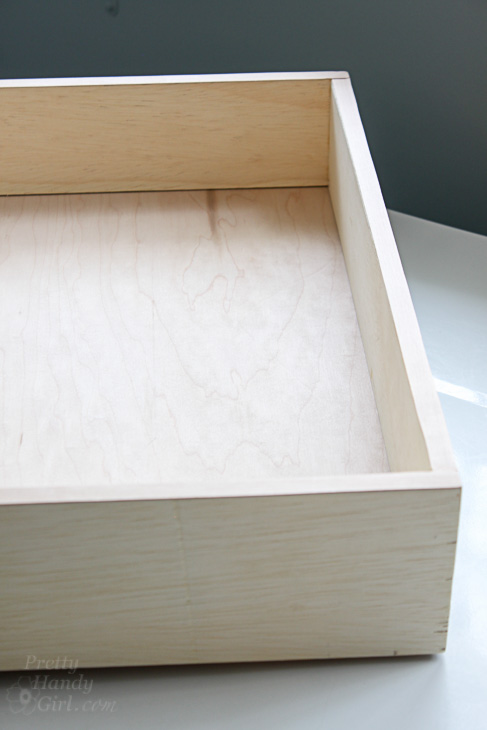
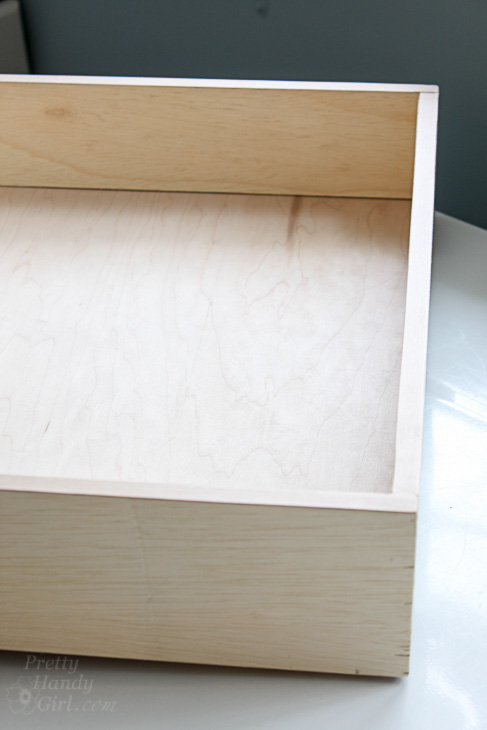
Check it out, you are done and your plywood looks like it was solid wood not plywood!

How to Finish Raw Plywood Edges | Pretty Handy Girl

If you learn better watching a video, you’ll appreciate that I made a Facebook Live video to show you How to Finish Raw Plywood Edges:

Don’t forget to Follow Me on YouTube for more tutorial and tip videos. I’m always bringing you along as I work. 😉

How to Finish Raw Plywood Edges | Pretty Handy Girl

Now that you know this trick, you can build anything using plywood and finish off those raw edges.

How to Finish Raw Plywood Edges | Pretty Handy Girl

Until next time, enjoy fooling people with your clean finished edges on plywood. No one has to know that it’s not solid wood. 😉

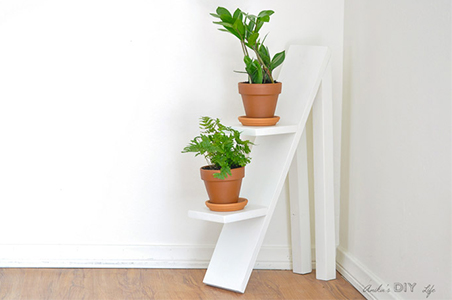
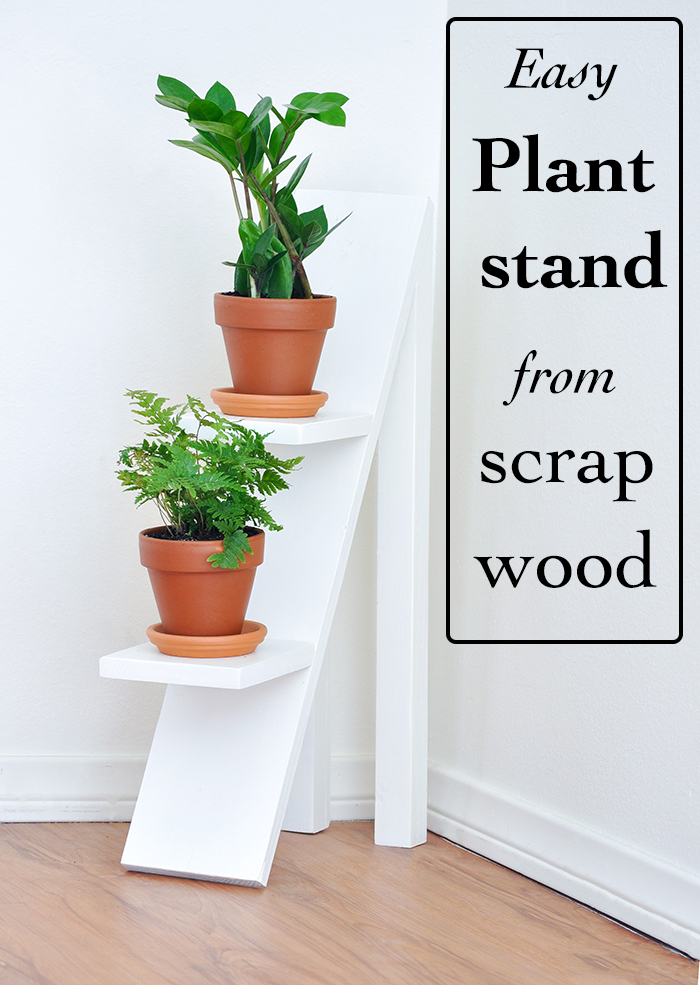
Easy two-tiered plant stand made from scrap wood

Easy two-tiered plant stand made from scrap wood

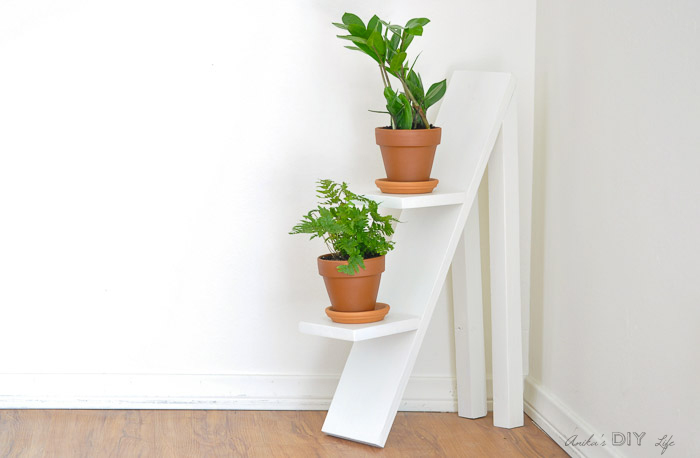
Hi, guys! Anika here again from Anika’s DIY Life. I have a scrap wood problem—if you do any amount of woodworking, I am sure you can relate. I hate throwing away even the smallest of pieces, but every time I build a piece of furniture my scrap pile explodes. Consequently, I used some of my scraps to create a two-tiered plant stand.

Easy two-tiered plant stand made from scrap wood

Recently, I completed my biggest build to date and my scrap wood pile has almost tripled! You can safely bet I am going to be making quite a few scrap wood projects for the next few months! But today I will show you how to make this two-tiered plant stand. It is super simple and makes a great beginner woodworking project.

Materials:

(I’ve included affiliate links for your convenience. I earn a small percentage from a purchase using these links. There is no additional cost to you. You can read more about affiliate links here.)

Instruction:

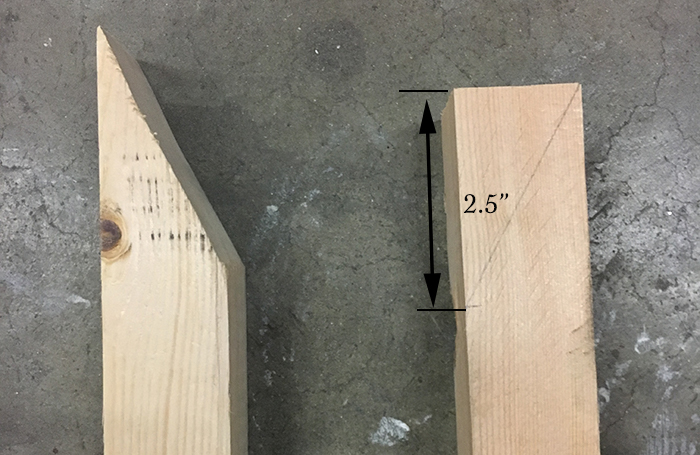
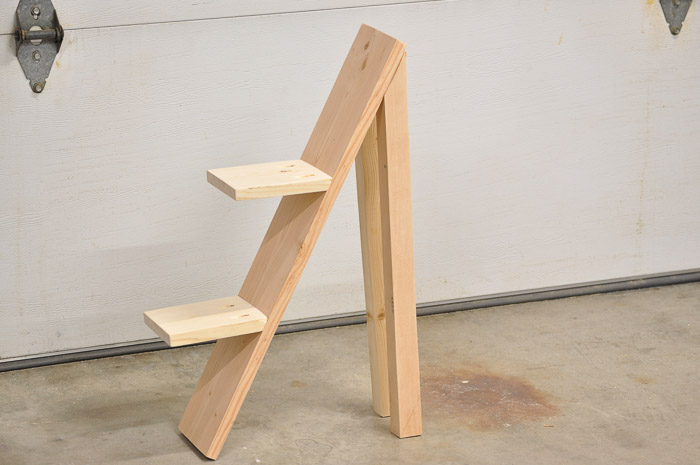
Step 1 – Start by making the cuts. For the 2″ x 2″ boards, make a mark 2½” from the edge and draw a line from the opposite corner. Remove this triangle with your jigsaw.

Easy two-tiered plant stand made from scrap wood

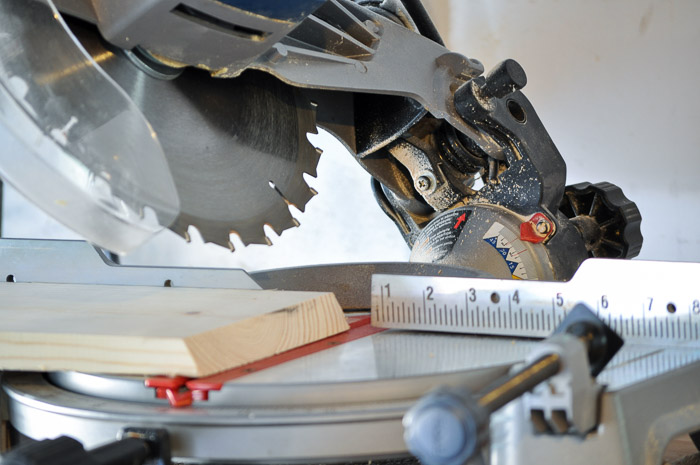
Step 2 – On the 1″ x 6″ x 6″ boards, cut one end of each at a 30 degrees with your miter saw.

Easy two-tiered plant stand made from scrap wood

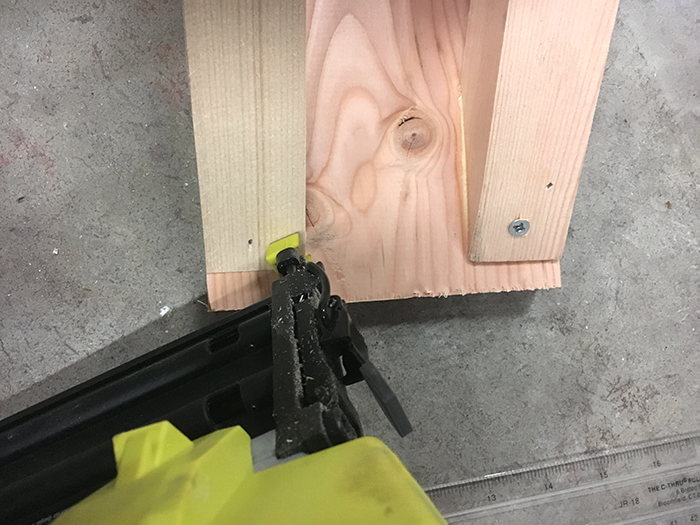
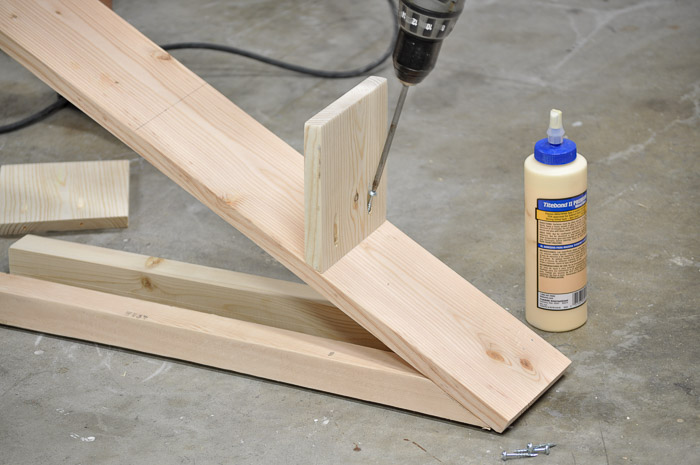
Step 3 -Before attaching the legs, find a spot that is thick enough to attach a screw. Attach the angled cut end of the legs to the 1″ x 6″ x 27″ front board using wood glue and 1 ¼” Spax screws. You can hold the legs tightly in place as you attach with screws or use a finish nail first to hold it in place.

Easy two-tiered plant stand made from scrap wood

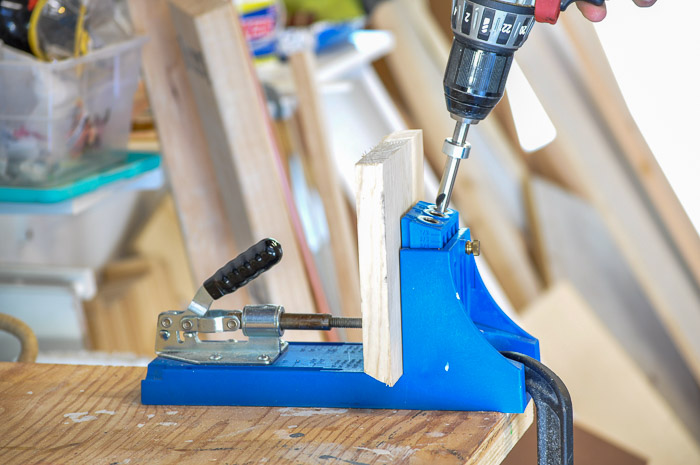
Step 4 – Make two pocket holes in each 6″ shelf. The long end of the cut will be facing you as you drill the 3/4″ pocket holes.

Easy two-tiered plant stand made from scrap wood

Step 5 – Attach the shelves to the front board using 1 ¼” pocket hole screws. The first shelf should be 8″ from the top and the second shelf should attach 8″ from the first shelf.

Easy two-tiered plant stand made from scrap wood

Your shelf is built!

Easy two-tiered plant stand made from scrap wood

Fill the pocket holes with wood filler, sand, and finish with paint or stain. If you paint your shelf be sure to prime first.

Easy two-tiered plant stand made from scrap wood

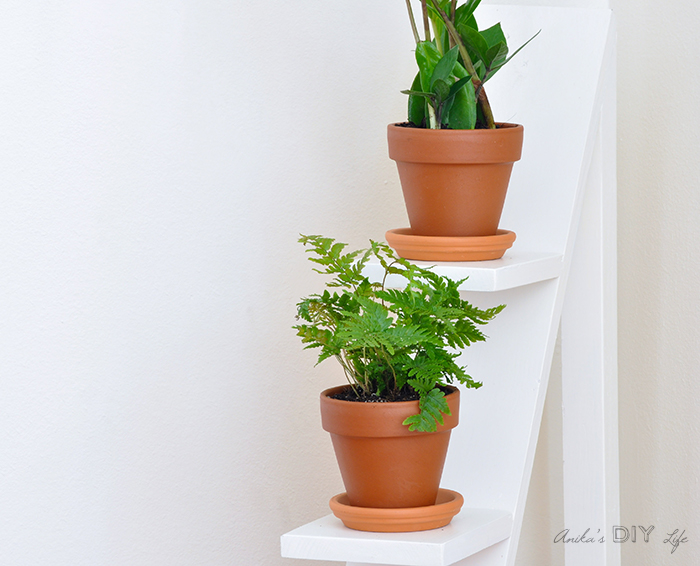
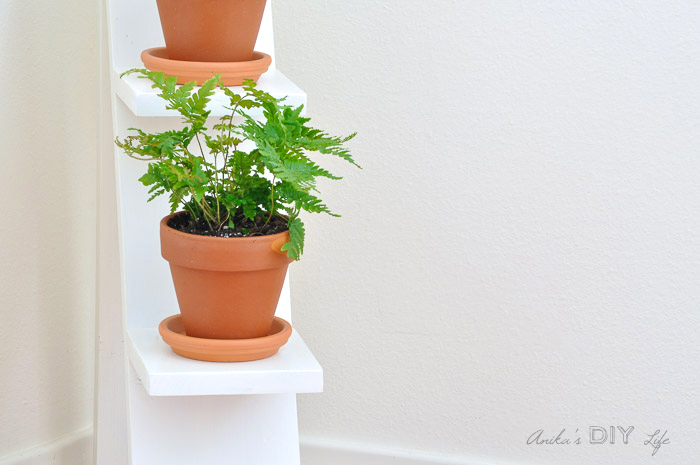
Here is a secret: I don’t have a very green thumb and usually manage to kill all plants (even succulents) in the past! I do have a pothos plant that has survived for 10 years. This year I decided to work on my thumb green when I got an orchid plant as a gift. I thought I had killed it, but it is slowly coming back to life with a bit of care. I think I am ready for more plants, so I got these baby plants . . .

two-tiered-plant-stand-close-up-1.jpg two-tiered-plant-stand-close-up-orig-1.jpg

. . . I will keep you updated on their progress in the future!

That’s how to build a two-tiered plant stand from scrap wood. It barely put a dent in my scrap pile, but I have to come up with quite a few more projects to really get it under control. If you have a scrap wood problem too, you’ll appreciate that I have a whole bunch of projects using scrap wood. I even built a scrap wood organizer using scrap wood! Follow along on my blog so you don’t miss them!

Until next time!

Read More of Anika’s Tutorials ~

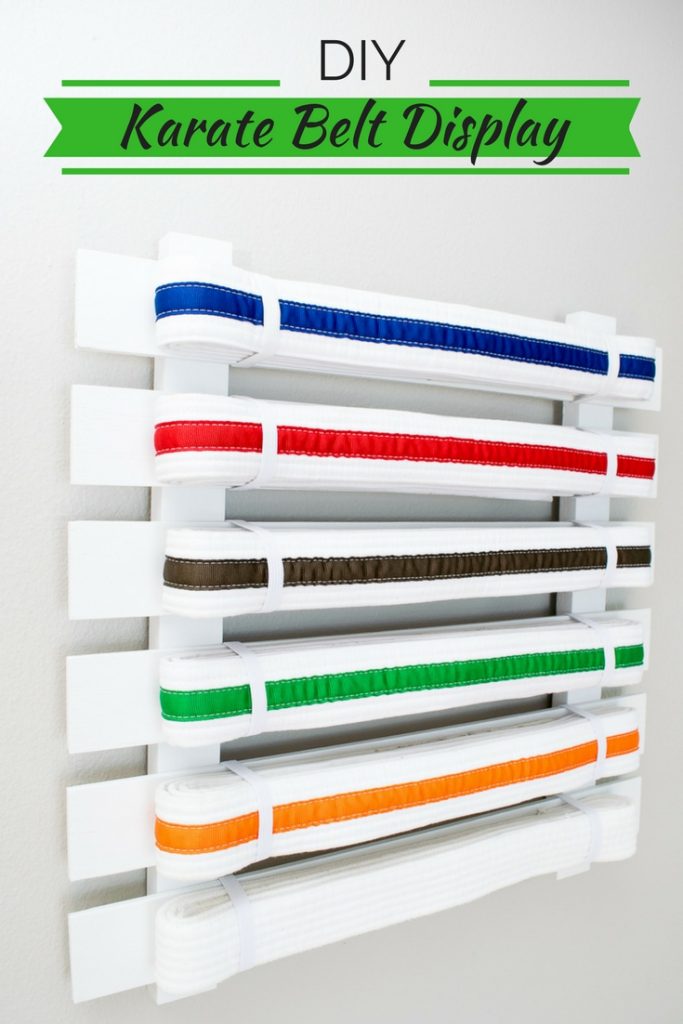
This simple karate belt display is easy to make and customize to any number of belts.

It may take years to earn all the belts, but it will only take you minutes to make this DIY karate belt display!

Hi there, Pretty Handy Girl readers! I’m Vineta from The Handyman’s Daughter, and I’m back with another awesome project to share with you. My son recently completed all the white belts for Tiny Tigers in Tang Soo Do, and has moved up to yellow. He’s so excited! To show off how far he’s come in the last year and a half, I built him this karate belt display rack to hang in his room.

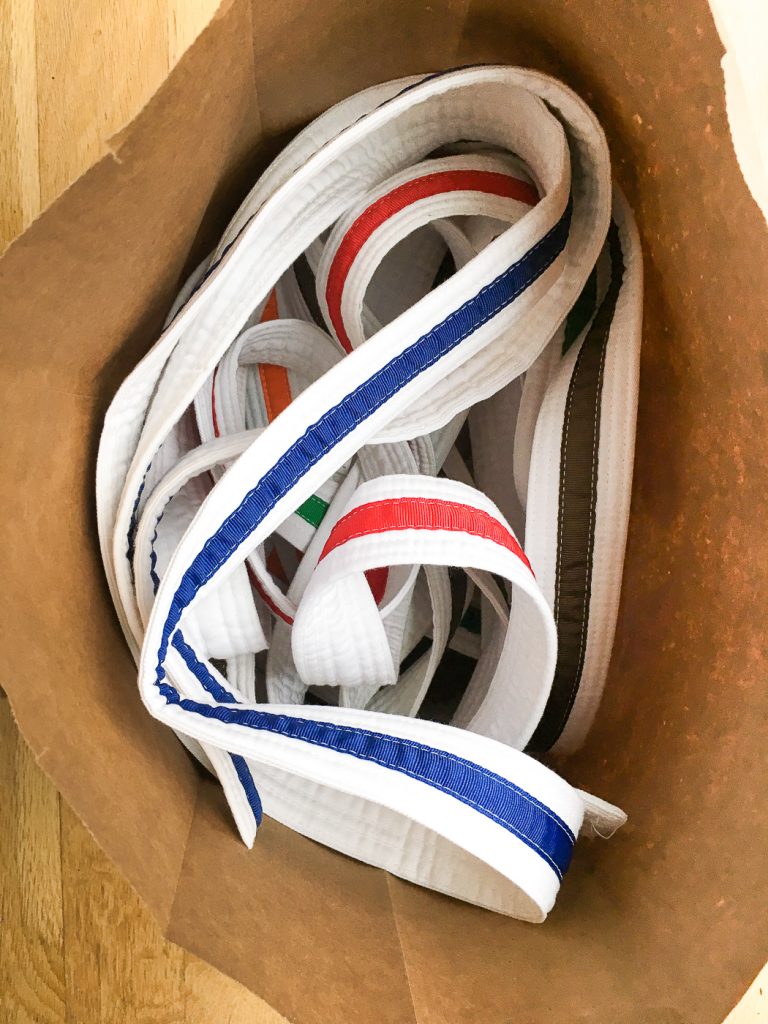
Every quarter, if he met the requirements, he was allowed to test for a new belt. After a few rounds, he had quite the collection! The old belts were tossed into a bag, shoved into the closet and promptly forgotten.

This bag o' belts wasn't exactly the best way to display karate belts.

This karate belt display will show off his progress, and give his hard-earned belts the respect they deserve. Plus, it uses up some of the scrap wood I had lying around the workshop. BONUS!

Materials:

  • 1/4″ plywood (a 2′ x 2′ piece is plenty)
  • 1 x 2 board
  • 5/8″ brad nails
  • Wood filler
  • Sandpaper
  • 3/8″ elastic
  • Staple gun and 1/4″ staples
  • Picture hanging hardware
  • Paint or stain
  • Saw
    • I used a miter saw and a table saw, but you could easily build this with just a circular saw.

Instructions:

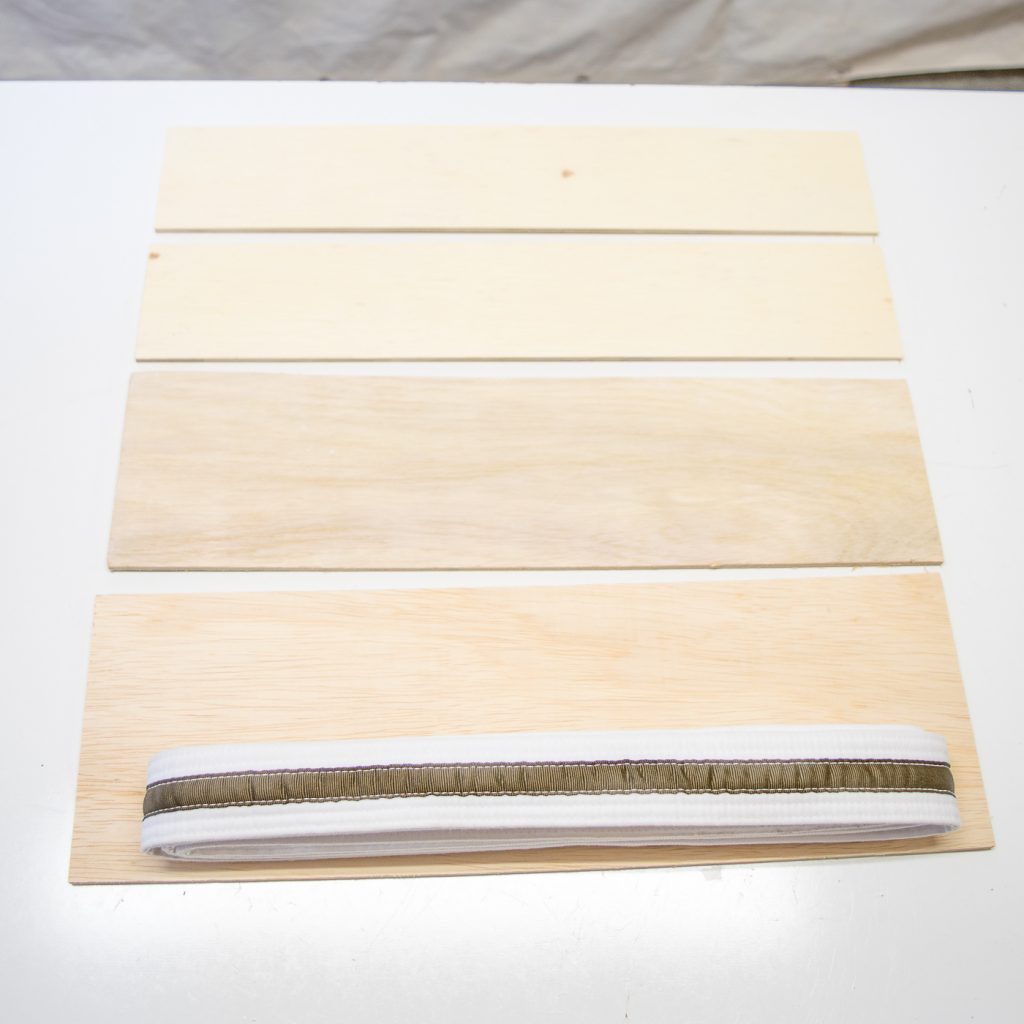
Start by measuring your karate belts. (My son’s are 1 ¾” wide.) Then fold it up to your desired display size. (Mine were approximately 15″ long.)

Measure your folded belt against the plywood to determine what size to cut.

Each slat of the karate belt display should be a little wider than the belt and a few inches longer. I dug out a few pieces of scrap 1/4″ plywood left over from my fireplace remodel that were just big enough for this project. You could also use a 2′ x 2′ project panel from your home improvement store.

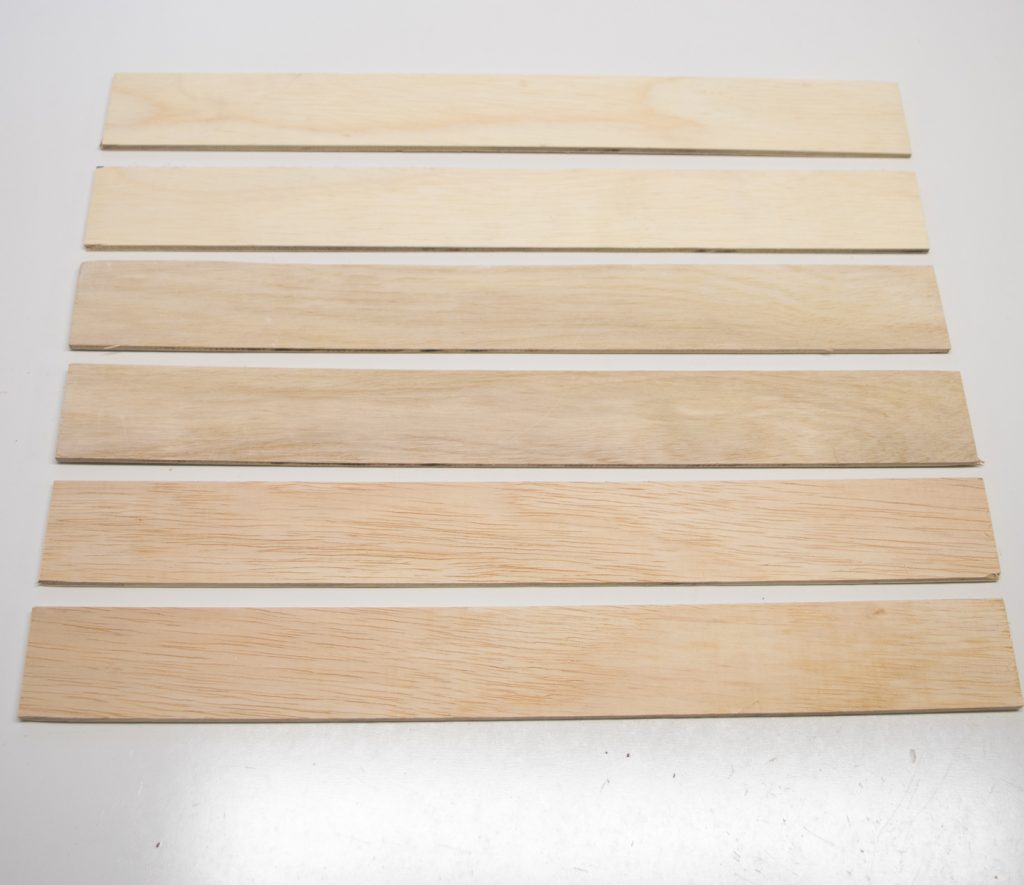
Cut your plywood slats to 2″ x 18″. I used my miter saw to cut all the pieces to 18″ long, then cut them lengthwise on the table saw.

Cut the slats to 2" x 18"

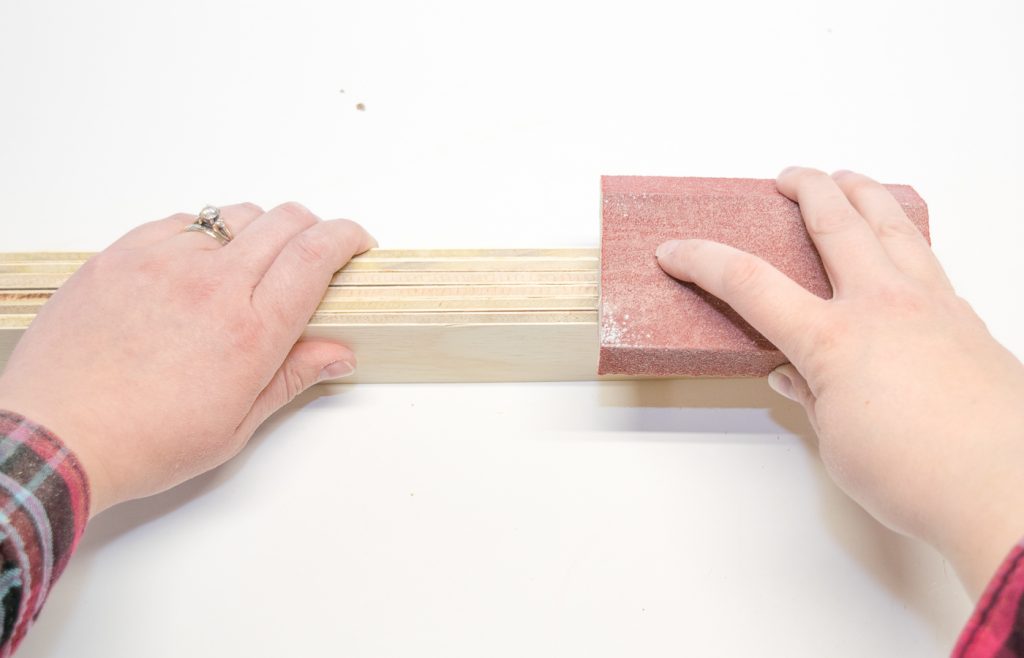
Next, cut two pieces of 1″ x 2″ to 17 ½”. Sand everything smooth with sandpaper. It’s quicker if you stack up all the slats and sand the edges with a sanding block to keep them the same size.

Sand all the slat edges together so they stay the same size.

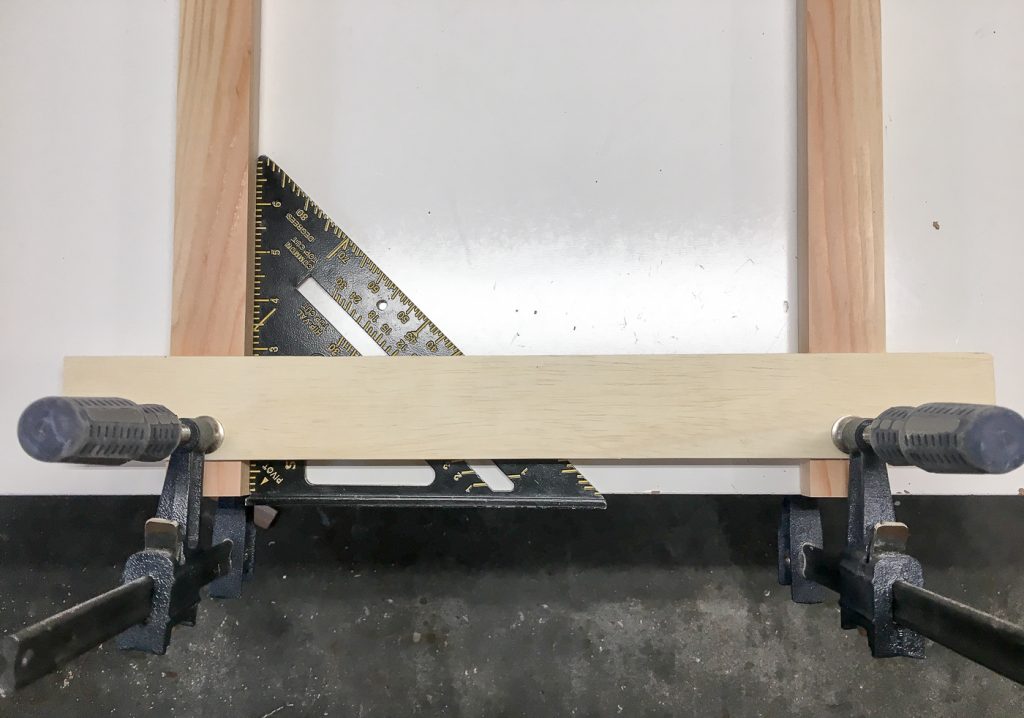
Now, you’re going to assemble the pieces to look like a fence. Start by placing your two 1″ x 2″ pieces on your work surface, then lay your first slat across them horizontally. Position the slats ¾” from the bottom and 2″ inches from each side. Check to make sure everything is square, then clamp them in place.

Clamp the first slat in place, making sure it's square.

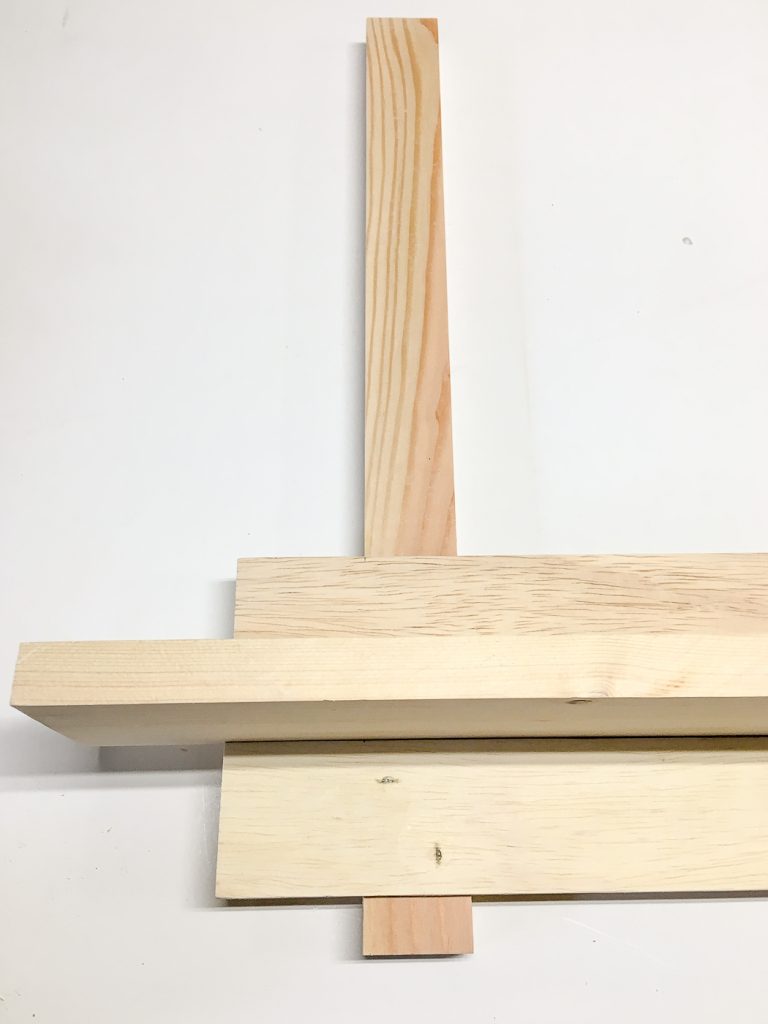
Nail the slats to the 1″ x 2″ pieces with 5/8″ brad nails. Use a scrap piece of 1″ board as a spacer and attach the rest of the slats the same way.

Use a spacer to get the right distance between slats.

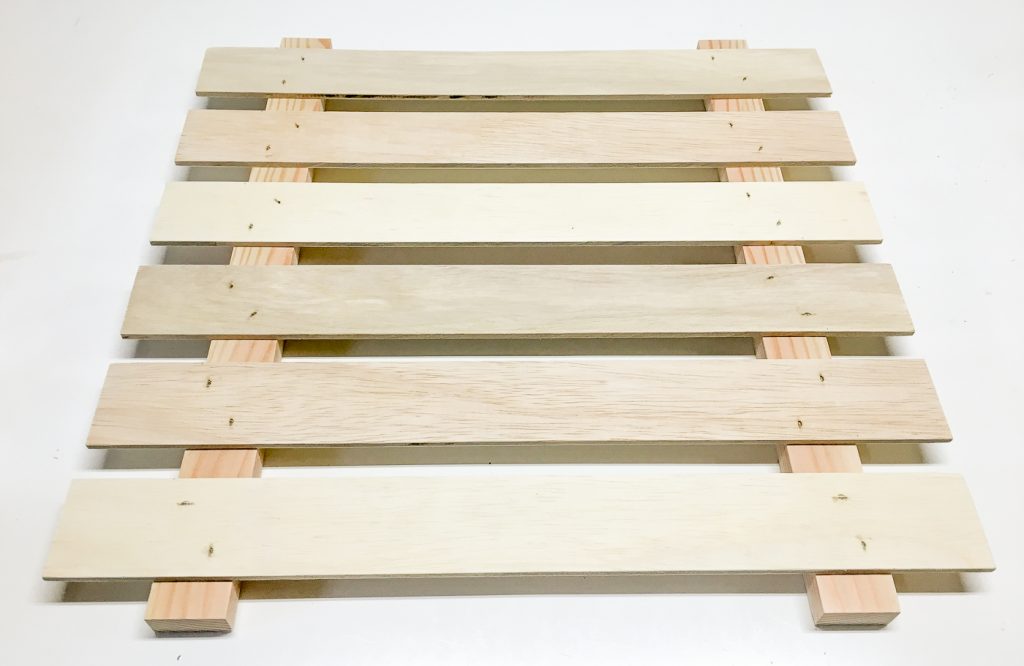
If everything is positioned correctly, there should be ¾” left at the top. When complete, your display should look like this.

karate belt display slats nailed in place

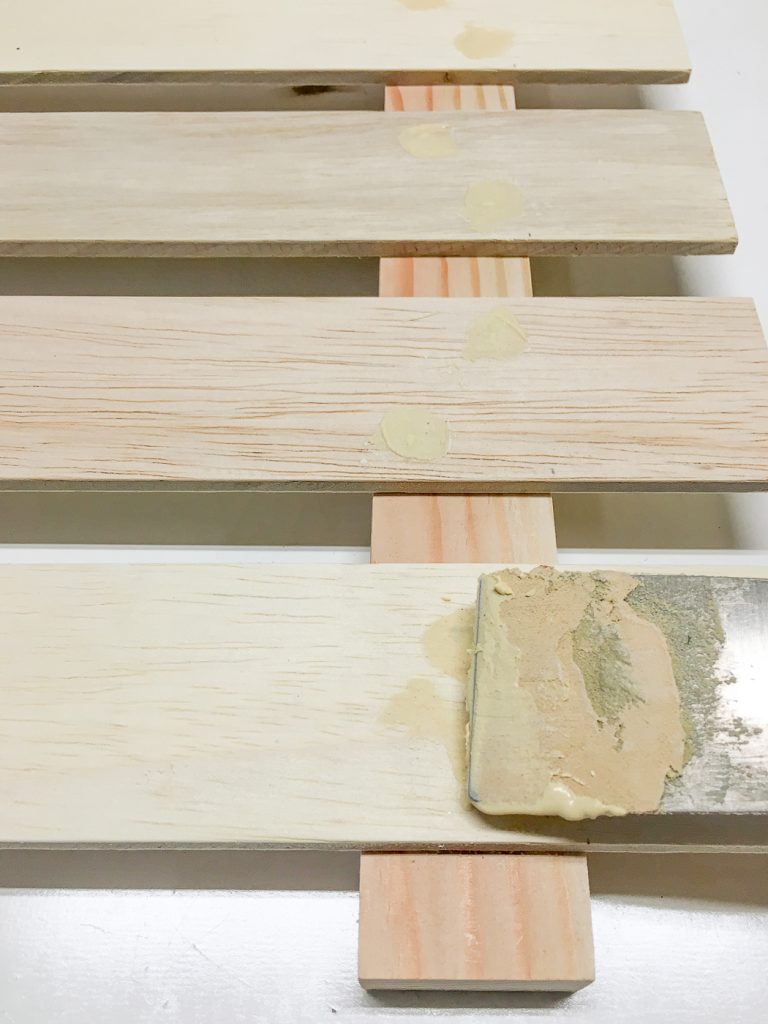
If you’re a perfectionist like me, you can fill the nail holes with wood filler and sand the surface smooth when dry. The holes will be hidden behind the belts, so you could save yourself a step if you wish.

If desired, fill the nail holes with wood filler.

At this point, you could either stain or paint your karate belt display. I chose a white matte spray paint left over from spray painting my window blinds. (Don’t you love it when you can use up old supplies!)

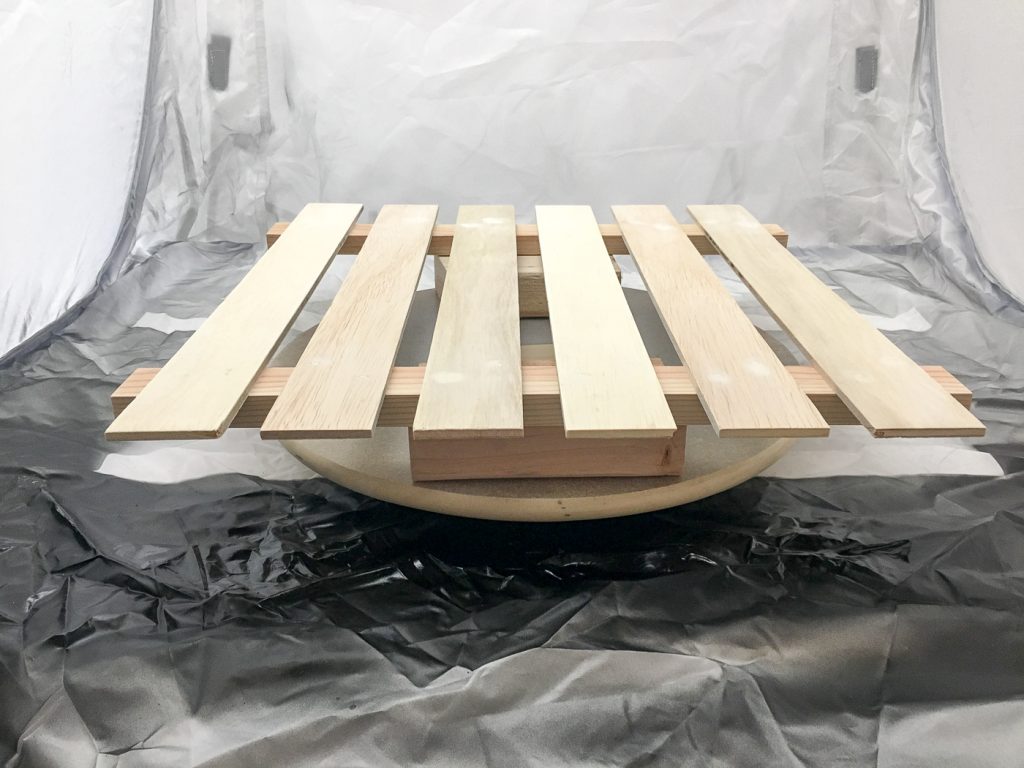
It’s been raining non-stop for months in Seattle, so spray painting outside wasn’t an option. I used a tabletop spray shelter to prevent overspray in my workshop, and a lazy susan to elevate and turn the karate belt rack.

Use a tabletop spray shelter and a lazy susan to make spray painting easy!

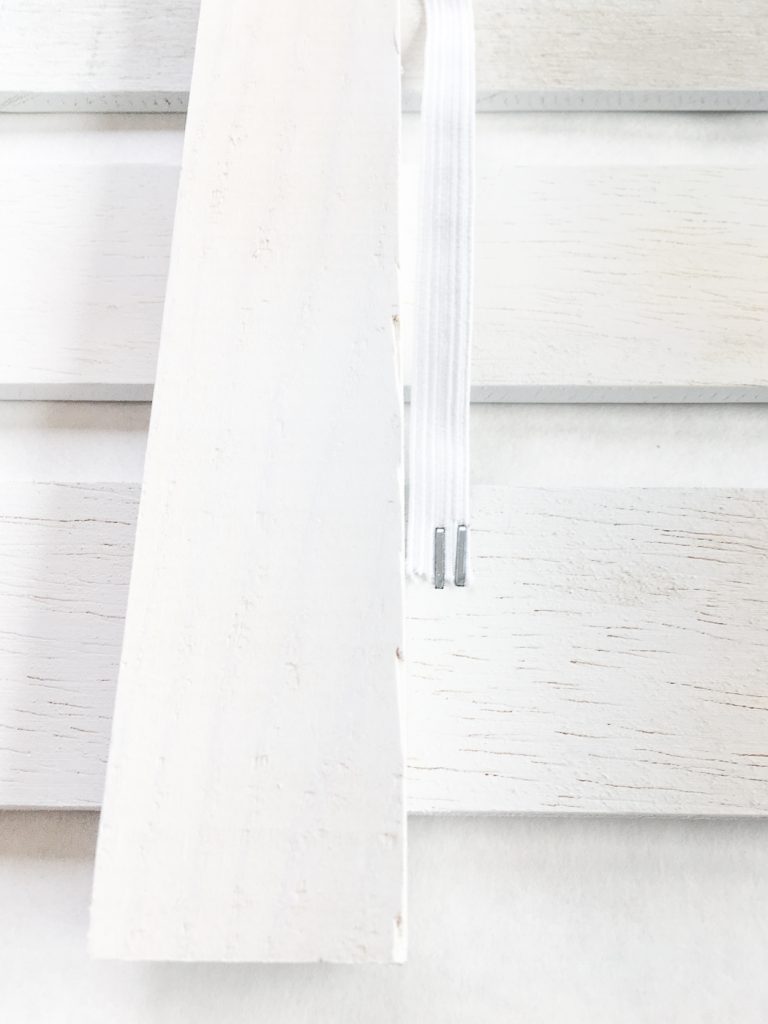
Once the paint is dry, it’s time to attach the elastic to hold the belts in place. Staple one end of the elastic to the back of a slat with a staple gun.

Staple the elastic to the back of the slat.

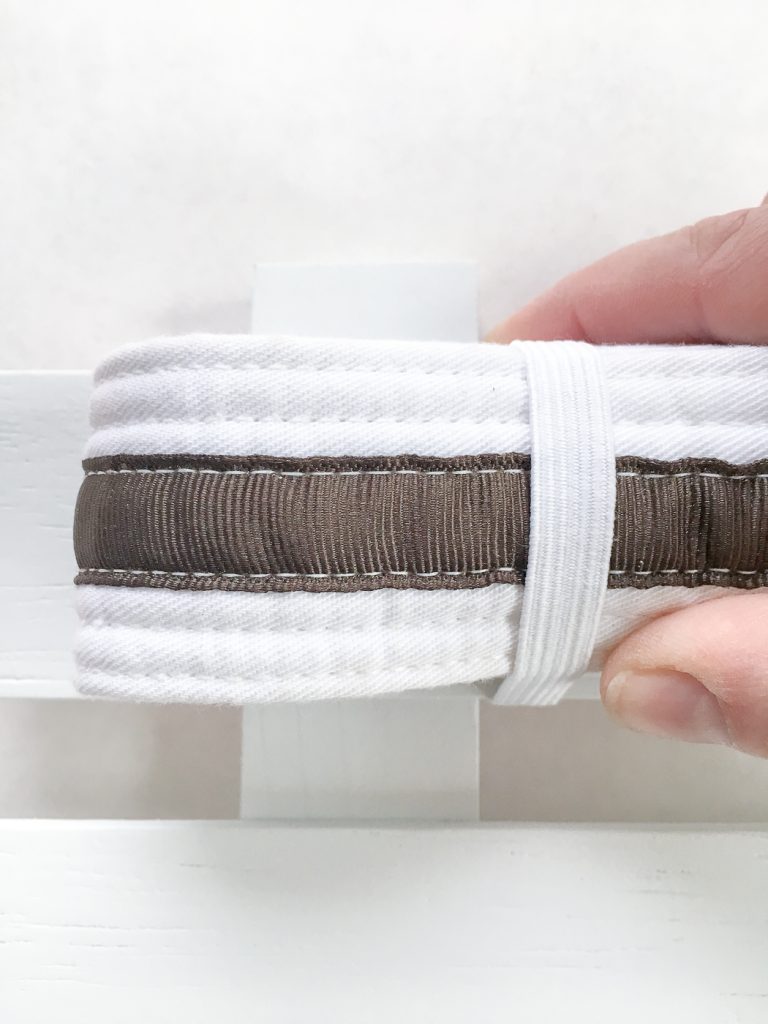
Place a folded belt on the front of the slat, and pull the elastic over it. You want the elastic tight enough to hold the belt in place without sagging. Fold the other end of the elastic to the back of the slat and cut it long enough to staple. (Mine are 5 ½” long.)

Measure the elastic to hold the belt in place.

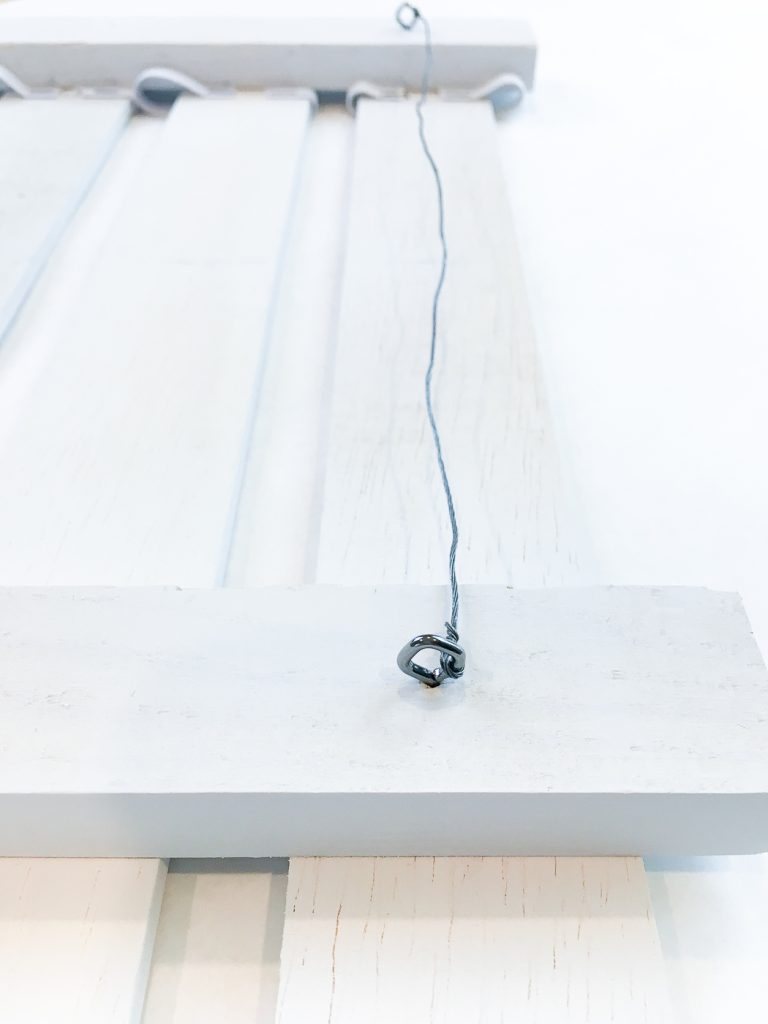
Repeat on the other end, and work your way down the slats. When you’ve attached all the elastic, flip the rack over and attach picture hanging hardware. (This can be as simple as two eye hooks and some picture wire between them.)

Add your preferred picture hanging hardware to the back of your karate belt display rack.

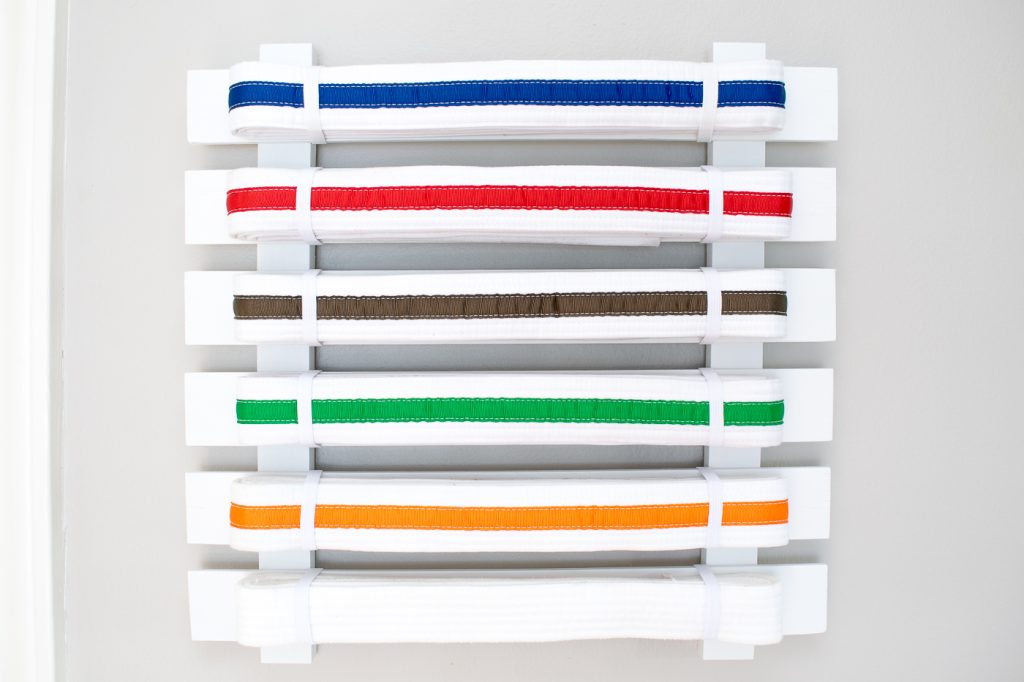
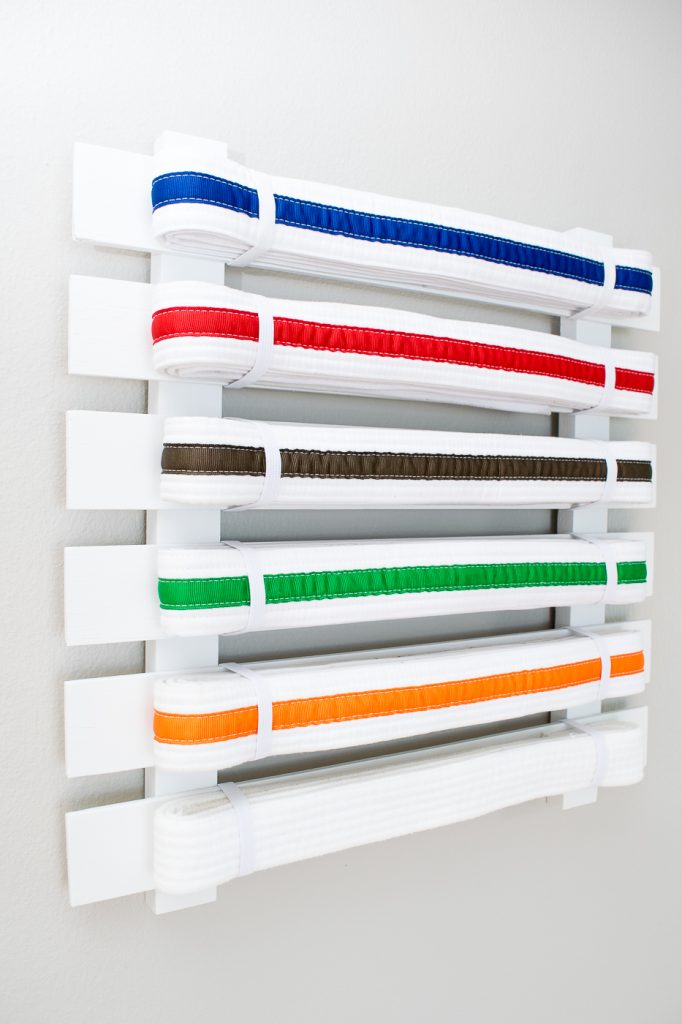
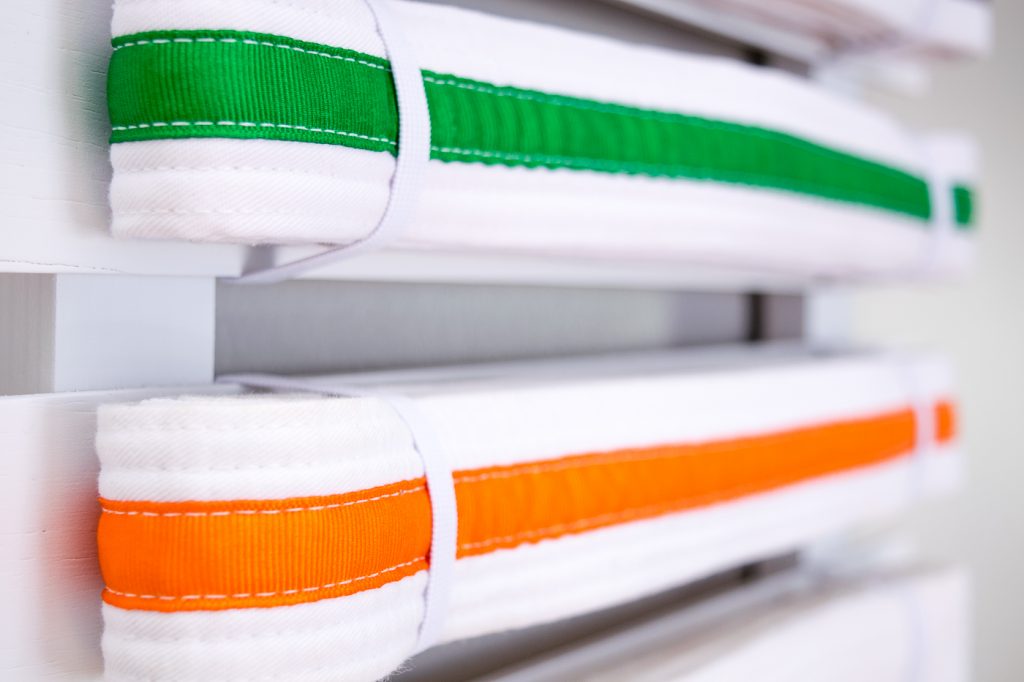
Slip each belt under the elastics, keeping the colors in the order they were earned. I mounted the karate belt display right next to his bedroom door, so he can be reminded of his hard work and get excited to go to practice. It also brings a nice pop of color to his gray bedroom walls.

This simple karate belt display is easy to make and customize to any number of belts.

Make your own karate belt display to show off all your hard work!

Elastic bands hold the karate belts in place.

Hope you enjoyed this tutorial! Don’t forget to check out all my other woodworking projects over at The Handyman’s Daughter!
Until next time!

~ view more of Vineta’s projects ~

DIY Folding Guitar Stand | Pretty Handy Girl

DIY Folding Guitar Stand | Pretty Handy Girl

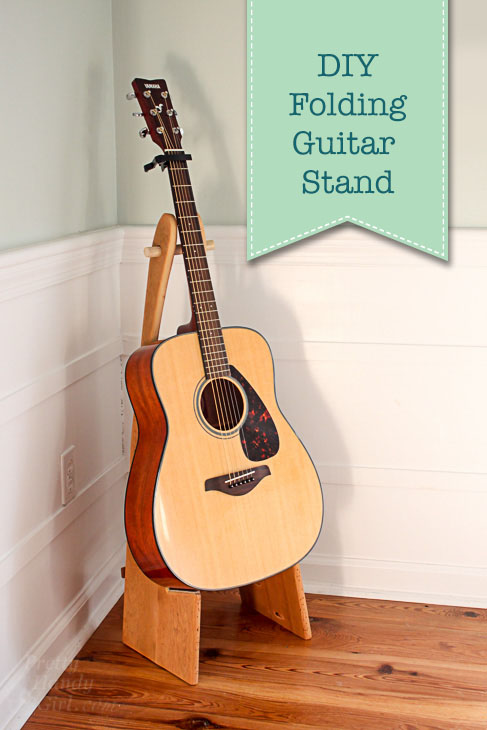
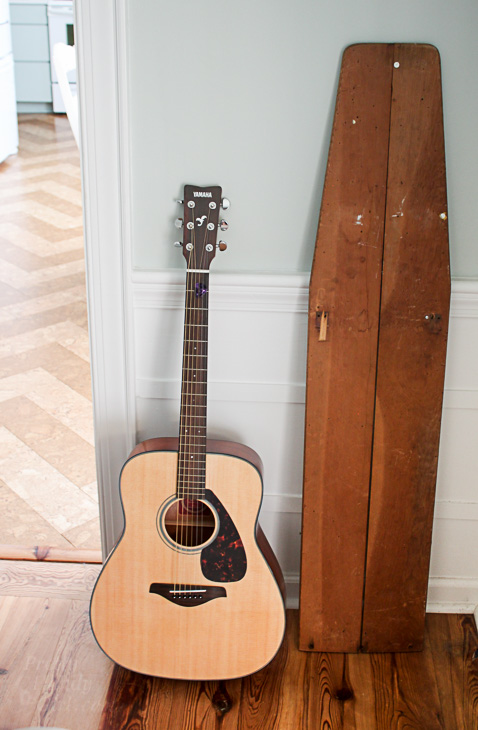
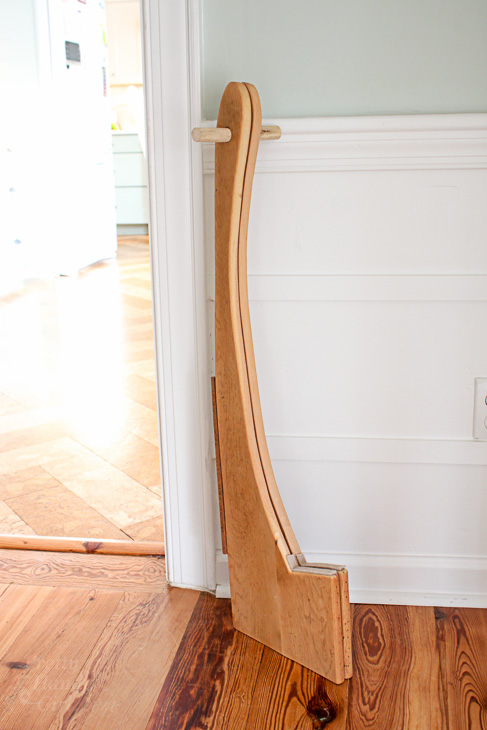
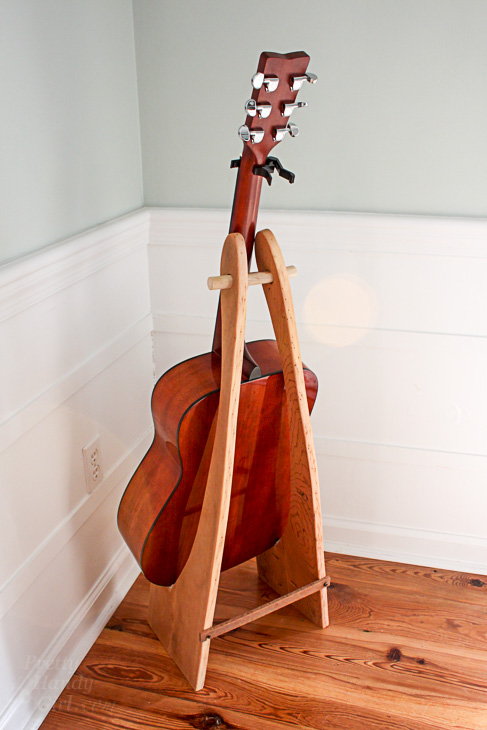
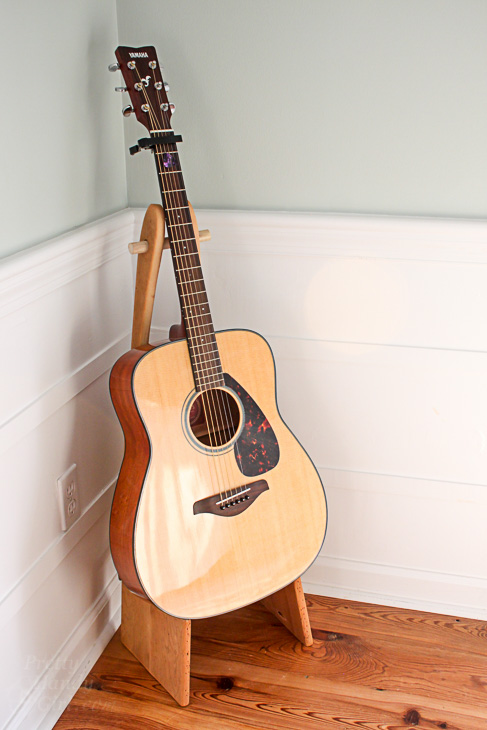
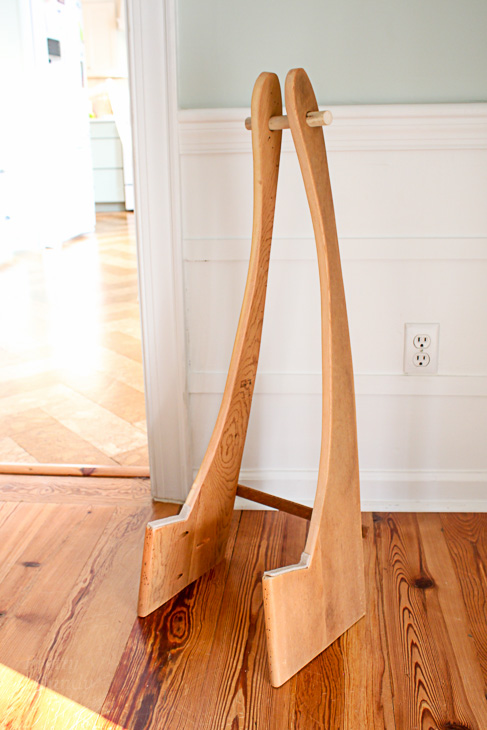
For my husband’s birthday I made him with a curvaceous DIY Folding Guitar Stand! He’s been playing guitar for a few years now and frequently leaves his guitar sitting out in the middle of the living room. I’m always worried the kids or dog will knock it over ;-(. Recently I saw The Crafted Workshop’s portable guitar stand and thought I could easily adapt the design into a curvy stand for my husband’s guitar. The stand was a fun challenge as I worked out the curves and How to Make a Folding Guitar Stand that would fold flat for travel. In my ever constant mission to use up scrap wood, I grabbed an old ironing board that was rescued on trash day in our neighborhood. It had a stained cover, but had beautiful aged wood beneath.

DIY Folding Guitar Stand | Pretty Handy Girl

Don’t worry if you don’t have an old ironing board lying around, you can use store bought pine lumber instead. Let’s get busy making, shall we?

Materials:

(I’ve included affiliate links for your convenience. I earn a small percentage from a purchase using these links. There is no additional cost to you. You can read more about affiliate links here.)

Preparing the Lumber:

If you have scraps lying around, go ahead and join them together to get the appropriate width for this project (9 1/2″).

I was able to make the entire stand out of the ironing board lumber. After cutting your lumber, run one side of each board through a table saw to get a straight line.

DIY Folding Guitar Stand | Pretty Handy Girl
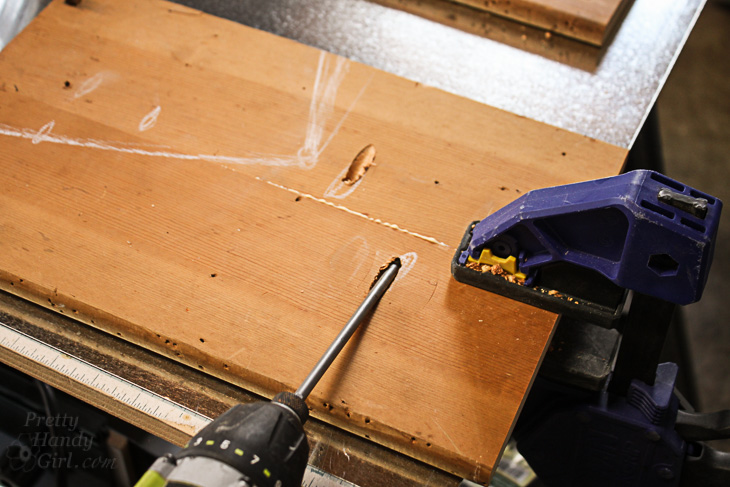
Next, glue up the two boards and secure using pocket hole screws. (Unclear how to use pocket holes and a Kreg Jig? Check out my instructions for using a Kreg Jig.)

DIY Folding Guitar Stand | Pretty Handy Girl

Now that you have your board, let’s build this DIY Folding Guitar Stand.

Instructions:

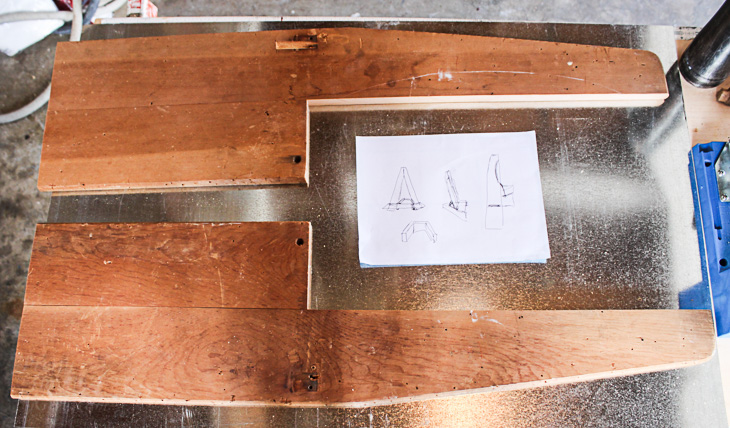
Download and print out this template (or draw your own based on your guitar.) Cut out the template and trace the two pieces onto your 1″ x 10″ boards.

DIY Folding Guitar Stand | Pretty Handy Girl

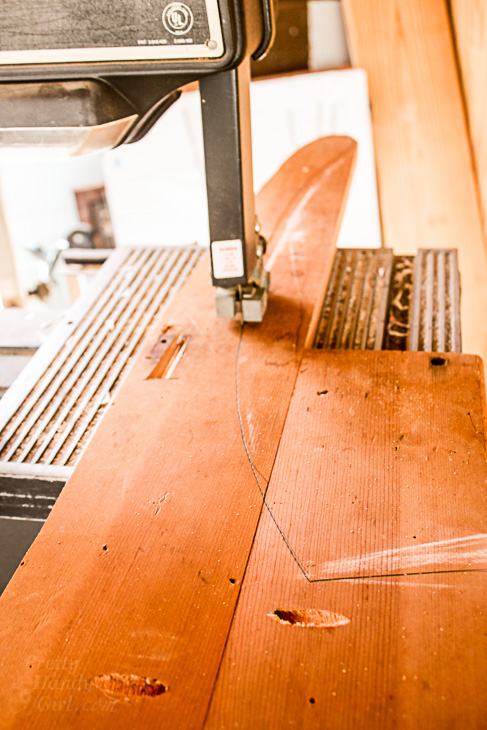
Use a bandsaw or jigsaw to cut along the outline.

DIY Folding Guitar Stand | Pretty Handy Girl

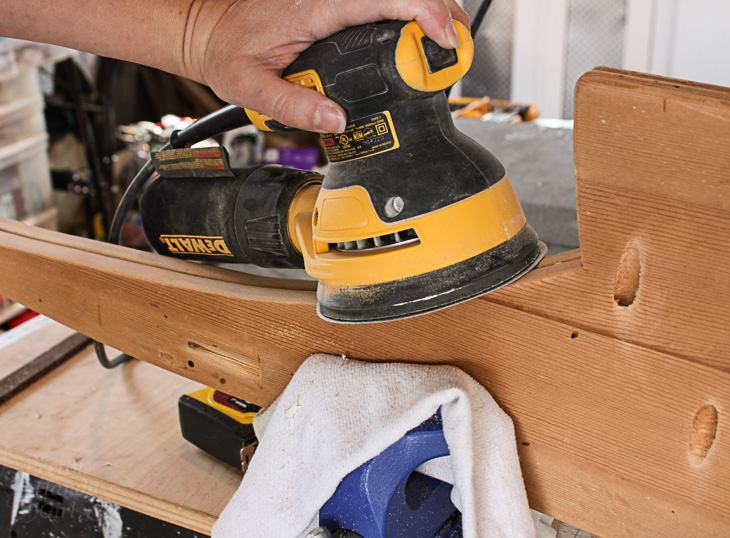
Cut the second side. Sandwich the two sides together and sand any spots that vary. Then separately sand each side to round over any sharp edges.

DIY Folding Guitar Stand | Pretty Handy Girl

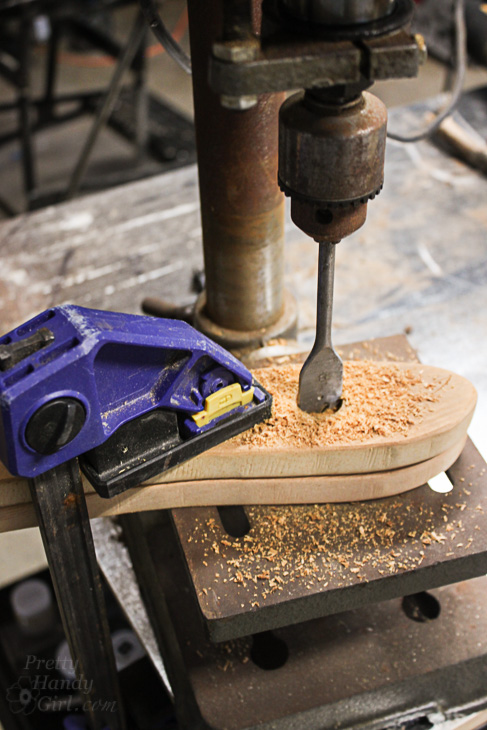
Use a drill and the 3/4″ spade bit to drill a hole through the top of the sides (3 inches down from the top edge.) Sand any splinters off.

DIY Folding Guitar Stand | Pretty Handy Girl

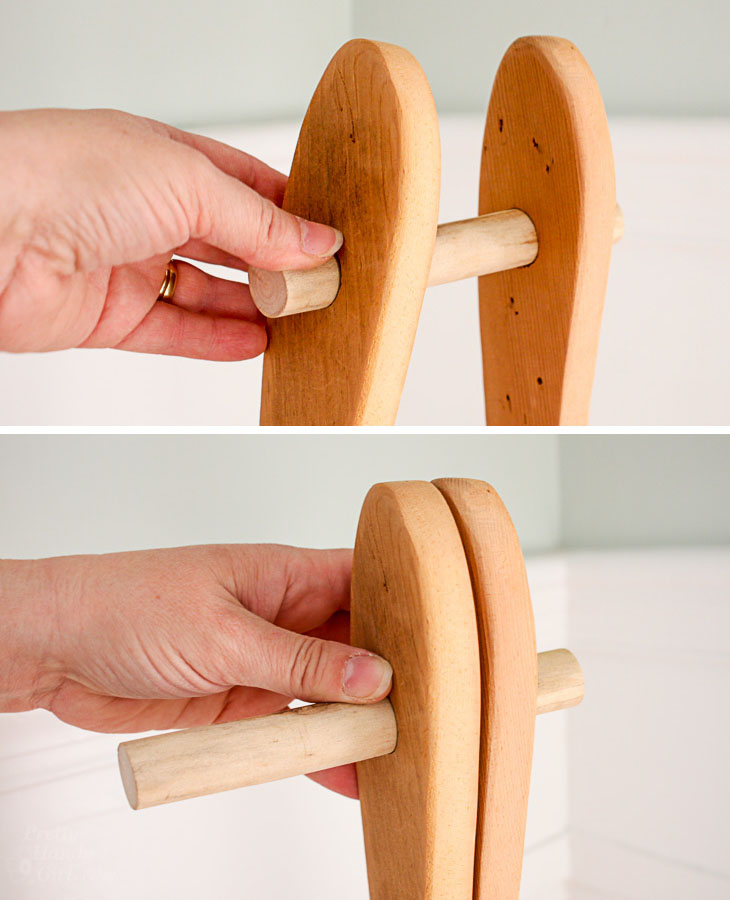
Feed the 3/4″ dowel rod through the holes. The fit should be snug, but you should still be able to press the two sides together to fold flat.

DIY Folding Guitar Stand | Pretty Handy Girl

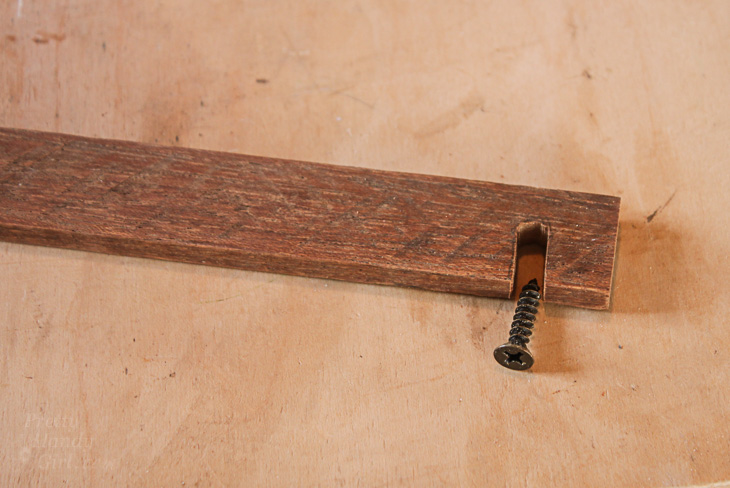
Cut a notch into one end of the 1″ x 1/4″ x 12″ piece. The notch should be slightly narrower than the head of your wood screw.

DIY Folding Guitar Stand | Pretty Handy Girl

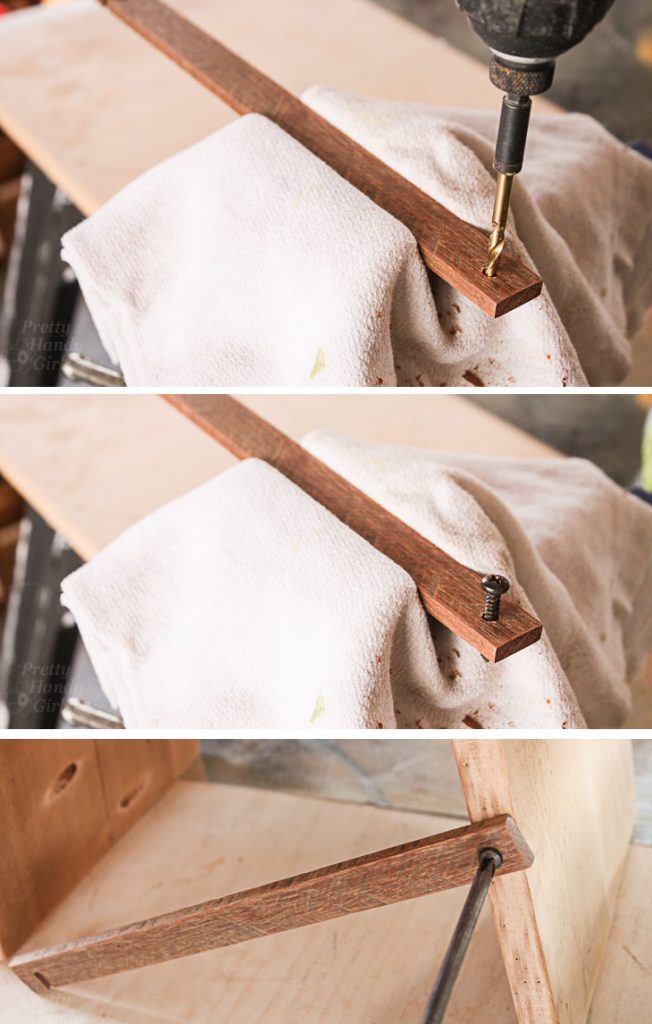
Drill a hole into the other end of the latch board. Feed one 1″ wood screw into the hole (make sure the screw can spin freely.)

Measure up 6 inches along the back side the stand. Pre-drill a hole using the 1/16″ bit. Secure the screw at this location using a screwdriver or philips head bit.

DIY Folding Guitar Stand | Pretty Handy Girl

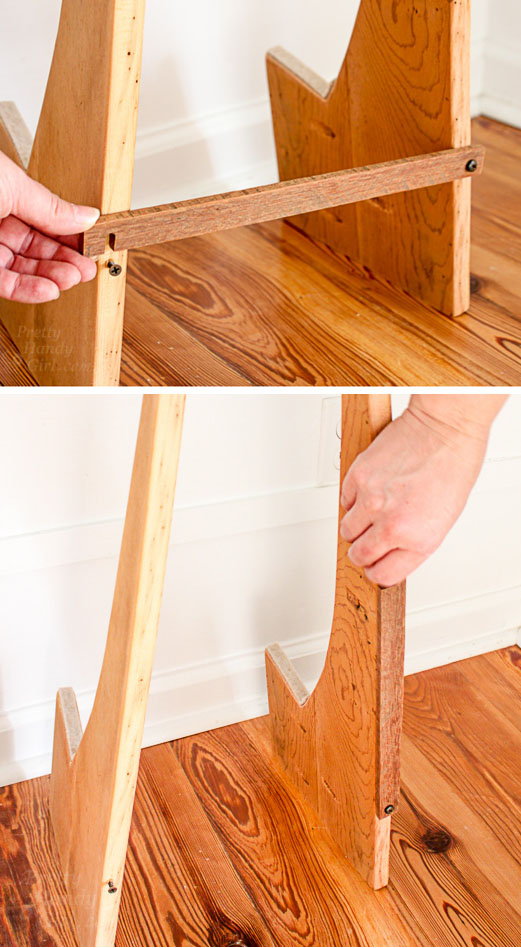
Measure up 6 inches on the other side.Hold the last screw inside the notch and pre-drill a hole in this location using the 1/16″ drill bit. Secure the screw using a screwdriver or philips head bit.

The latch should be easily lifted to fold the stand.

DIY Folding Guitar Stand | Pretty Handy Girl

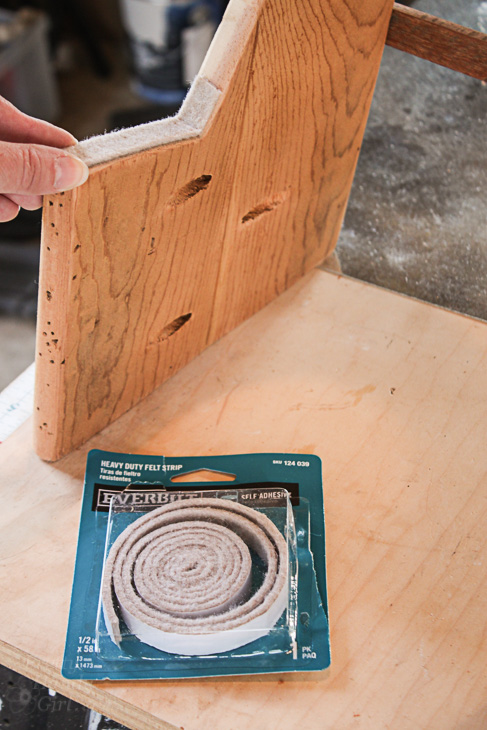
Add felt strip tape to the stand where the guitar rests.

DIY Folding Guitar Stand | Pretty Handy Girl

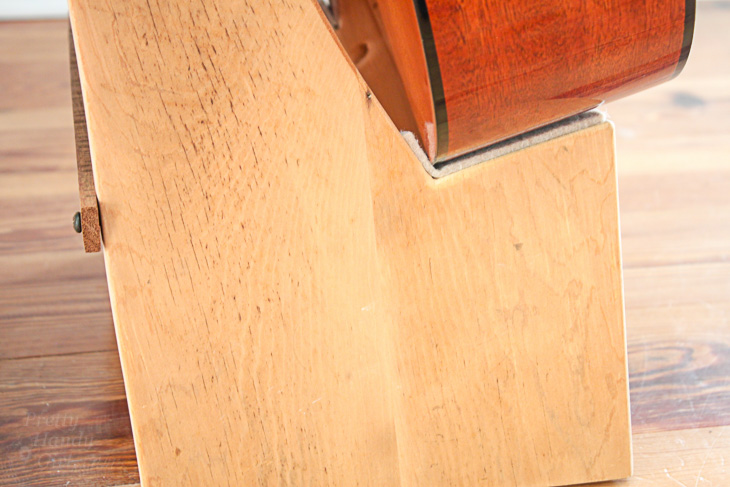
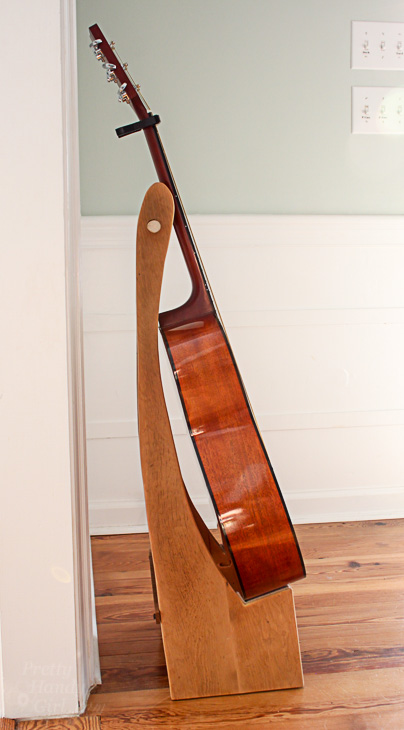
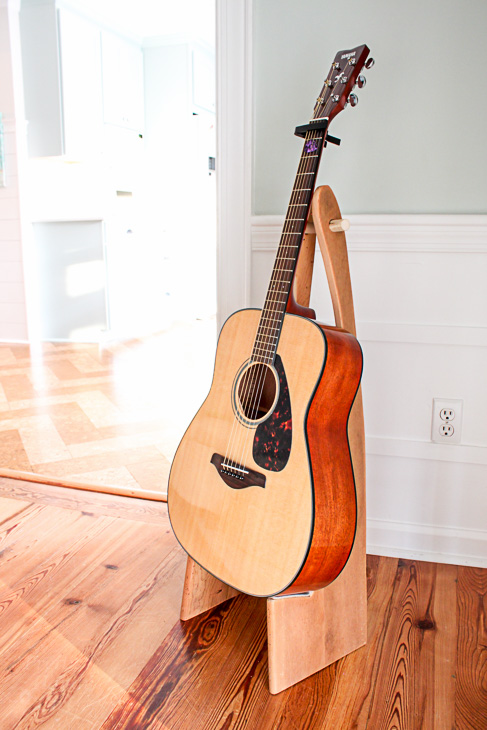
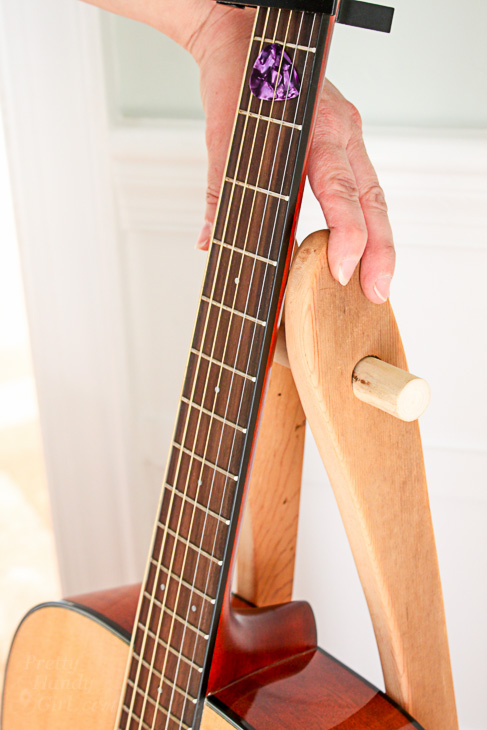
Set the guitar onto the stand and check for fit.

DIY Folding Guitar Stand | Pretty Handy Girl

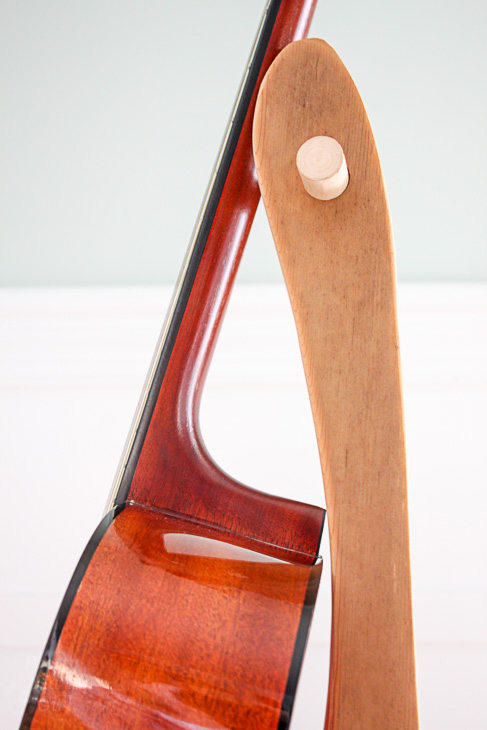
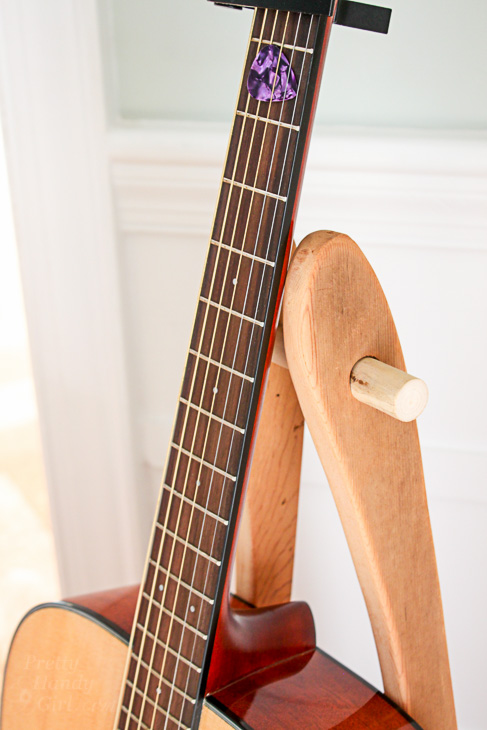
Check that the guitar only rests on the seat of the stand and the neck support. I had to make a few adjustments to the back of the stand where it was touching.

DIY Folding Guitar Stand | Pretty Handy GirlDIY Folding Guitar Stand | Pretty Handy Girl

When you want to travel or put the stand away, it folds flat.

DIY Folding Guitar Stand | Pretty Handy GirlThen it sets back up to hold your guitar.
DIY Folding Guitar Stand | Pretty Handy Girl

When unfolding the guitar stand. Adjust the sides onto the dowel rod until it lightly supports the guitar neck.

DIY Folding Guitar Stand | Pretty Handy Girl

This wood guitar stand is super sleek. It’s also attractive anywhere you want to display your guitar.

DIY Folding Guitar Stand | Pretty Handy Girl

Pretty Handsome Guy seems to really like his birthday present. I’ve noticed he’s been playing his guitar a lot more now that it sits out on display.

DIY Folding Guitar Stand | Pretty Handy Girl

This is an easy DIY project. The only hardware is the two screws for the latch on the back. The rest is just two pieces of wood and a dowel rod and one strip of wood for the latch.

DIY Folding Guitar Stand | Pretty Handy Girl

I assure you, this is a DIY project you can build!

DIY Folding Guitar Stand | Pretty Handy Girl

Happy strumming!

How to install rain gutter bookshelves

Hi, everyone! It is Anika from Anika’s DIY Life again. Today, I want to share an easy and cheap project that is perfect for any kid who loves to read! I have been working on making the kids’ playroom more functional and organized. The room is long and narrow, so I built a toy organizer along one wall. The corner of the opposite wall seemed like a good spot to create a reading nook. Of course, any proper reading nook needs book storage! Enter rain gutters from the home improvement store. I have used rain gutter bookshelves in previous homes to easily and inexpensively add book storage. Get ready to learn how to install rain gutter bookshelves!

It is well known that the best way to encourage little kids to read books is to have the front of books visible to little readers.  Rain gutter bookshelves hold books in this face front view which is perfect to peak a child’s curiosity. The kids’ bedside table with book storage also works great for this purpose!

Here is a step-by-step guide for how to install the rain gutter bookshelves.

Materials:

(I’ve included affiliate links for your convenience. I earn a small percentage from a purchase using these links. There is no additional cost to you. You can read more about affiliate links here.)

  • Vinyl rain gutters (choose from a variety of colors)
  • Vinyl rain gutter hangers
  • K-type vinyl end caps
  • Hand saw
  • Stud finder (my favorite stud finder!)
  • Level
  • Long straight edge – yardstick or pine board
  • #8 – 1 ½” screws
  • Pencil
  • Sandpaper
  • Tape measure
  • Drill

Instructions:

Step 1 – Start by deciding the length of the bookshelves you want and cut the rain gutters to size with a hand saw. (For my project I cut two 40″ bookshelves to fit under a window.) Sand all the rough edges.

How to install rain gutter bookshelves

Step 2 –Find the studs in the wall using the stud finder and mark them with pencil. (Don’t have a stud finder? Here are 5 Ways to find Studs without one.) Wall studs are typically 16″ apart, so for the 40″ shelves I anchored two anchors at 32″ apart. For shelves longer than 48″ you might need more hangars.

How to install rain gutter bookshelves

Step 3 – Use a level mounted onto a straight edge while you mark the locations for the hangars. This will insure straight shelves.

How to install rain gutter bookshelves

Step 4 –  Install the hangers using the 1 ½” screws.  The screws should go in at an angle. Make sure the tip of the screw is positioned on the spot you marked when  you start to drive the screw in. It is important to anchor the hangers to studs. Unfortunately, you cannot use anchors because of the angle the screws go into the wall.

How to install rain gutter bookshelves

(I found that about 15″ spacing between the bookshelves is sufficient height to accommodate most picture books.)

How to install rain gutter bookshelves

Step 5 – Carefully slide the rain gutter through the hangers.

Step 6 – Install the end caps. They can be a bit tricky to get on and may need a little “persuasion”. Once you get them on, they should stay on nice and tight.

How to install rain gutter bookshelves

That’s it! Here are the installed rain gutter bookshelves:

How to install rain gutter bookshelves

Behold, an inviting wall full of colorful books. Instant fuel for lots of reading!

How to install rain gutter bookshelves

I am off to add more fun details to our reading nook. I have an accent wall planned along with some more unique projects. Be sure to follow along at Anika’s DIY Life to see how this space evolves.

Until next time!

Read More of Anika’s Tutorials ~