Tag Archive for: wood projects

Easy two-tiered plant stand made from scrap wood

Easy two-tiered plant stand made from scrap wood

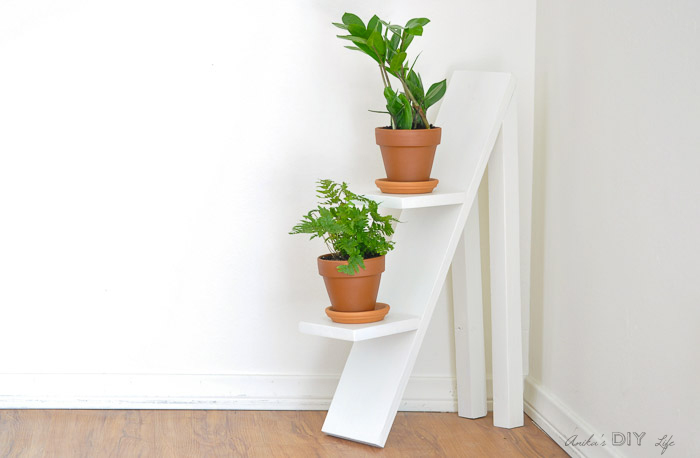
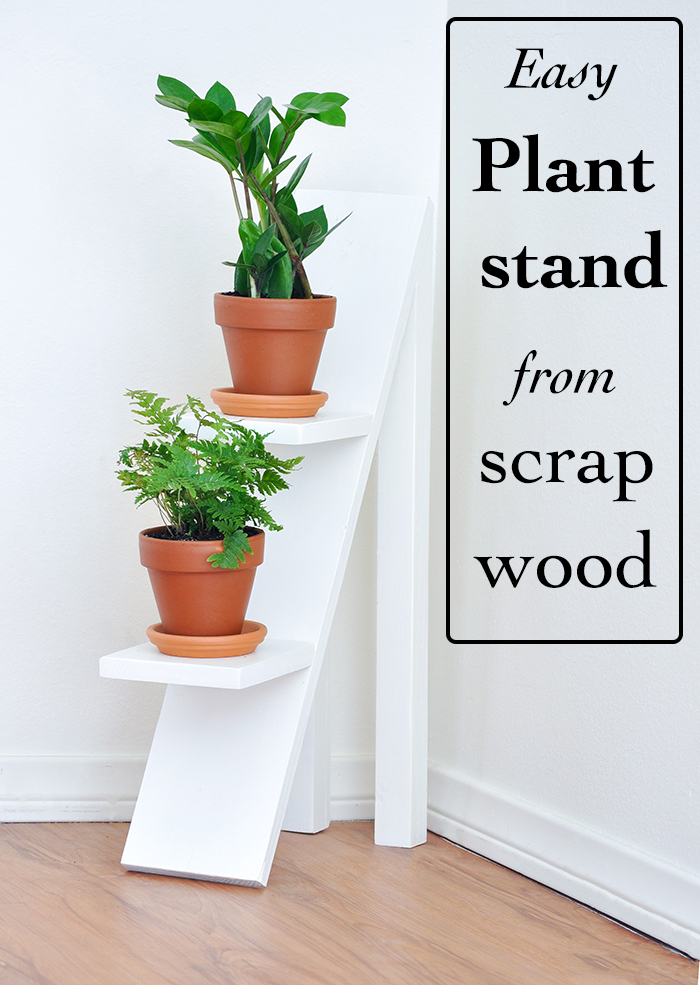
Hi, guys! Anika here again from Anika’s DIY Life. I have a scrap wood problem—if you do any amount of woodworking, I am sure you can relate. I hate throwing away even the smallest of pieces, but every time I build a piece of furniture my scrap pile explodes. Consequently, I used some of my scraps to create a two-tiered plant stand.

Easy two-tiered plant stand made from scrap wood

Recently, I completed my biggest build to date and my scrap wood pile has almost tripled! You can safely bet I am going to be making quite a few scrap wood projects for the next few months! But today I will show you how to make this two-tiered plant stand. It is super simple and makes a great beginner woodworking project.

Materials:

(I’ve included affiliate links for your convenience. I earn a small percentage from a purchase using these links. There is no additional cost to you. You can read more about affiliate links here.)

Instruction:

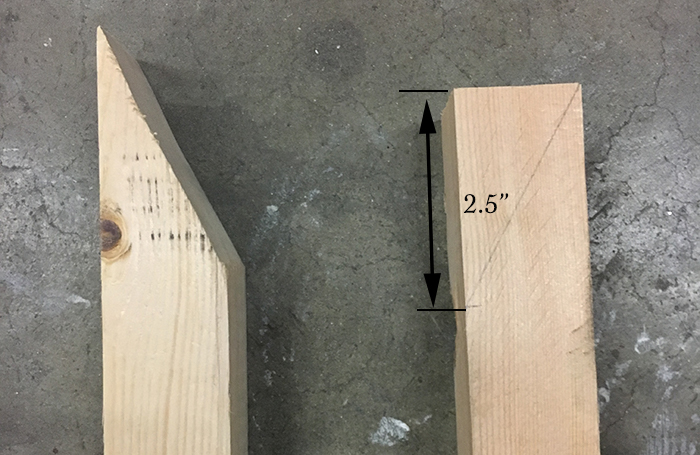
Step 1 – Start by making the cuts. For the 2″ x 2″ boards, make a mark 2½” from the edge and draw a line from the opposite corner. Remove this triangle with your jigsaw.

Easy two-tiered plant stand made from scrap wood

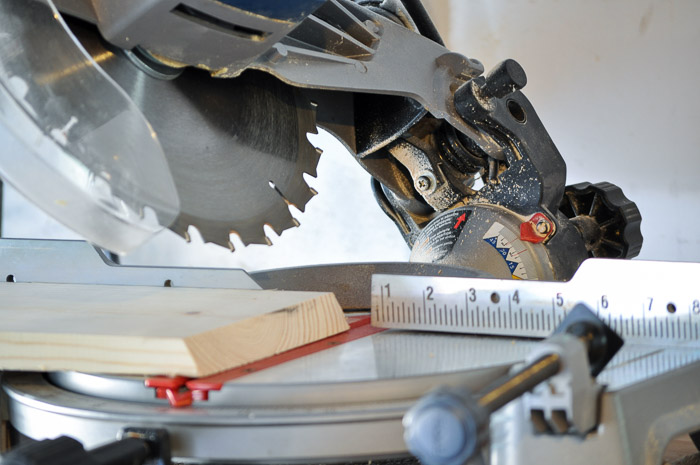
Step 2 – On the 1″ x 6″ x 6″ boards, cut one end of each at a 30 degrees with your miter saw.

Easy two-tiered plant stand made from scrap wood

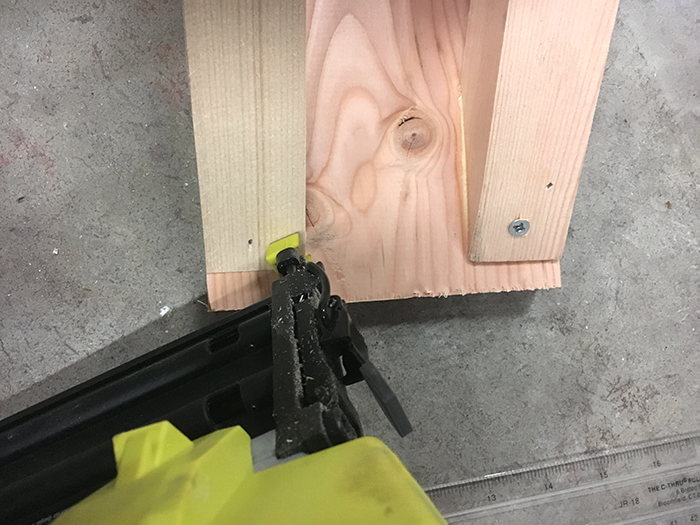
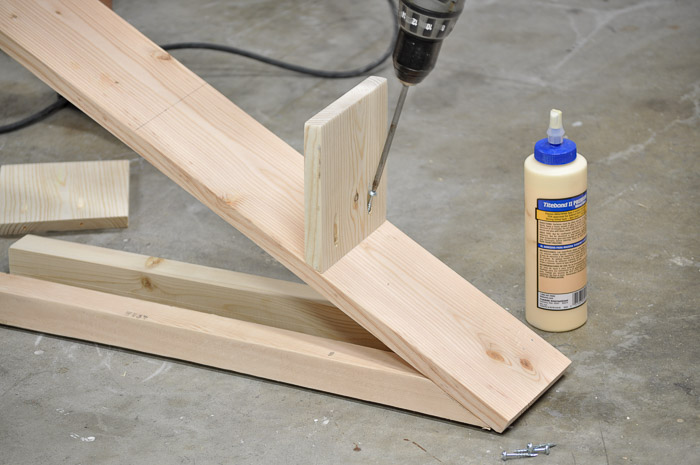
Step 3 -Before attaching the legs, find a spot that is thick enough to attach a screw. Attach the angled cut end of the legs to the 1″ x 6″ x 27″ front board using wood glue and 1 ¼” Spax screws. You can hold the legs tightly in place as you attach with screws or use a finish nail first to hold it in place.

Easy two-tiered plant stand made from scrap wood

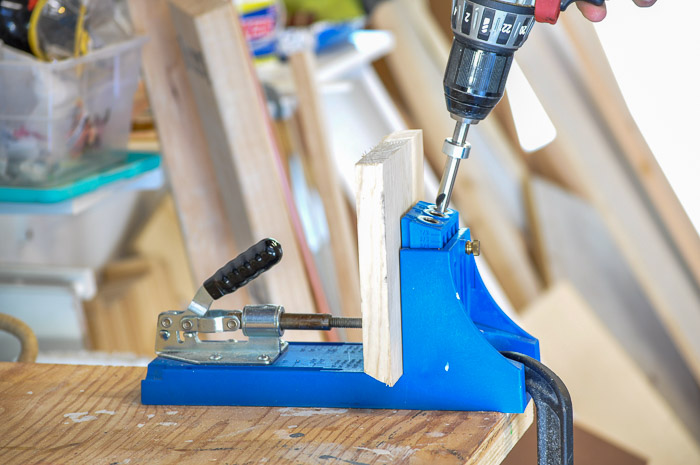
Step 4 – Make two pocket holes in each 6″ shelf. The long end of the cut will be facing you as you drill the 3/4″ pocket holes.

Easy two-tiered plant stand made from scrap wood

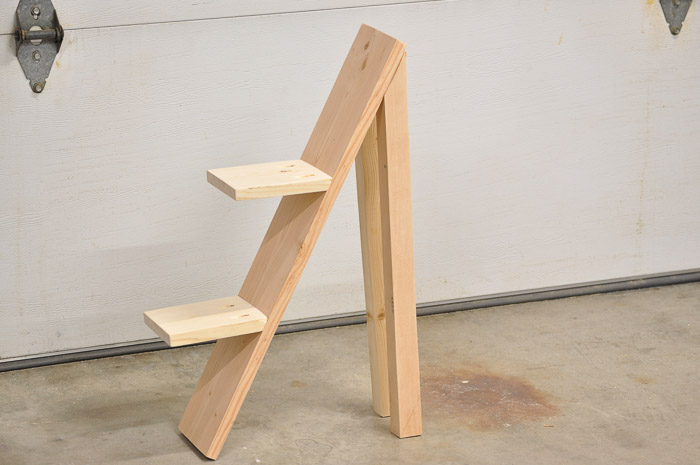
Step 5 – Attach the shelves to the front board using 1 ¼” pocket hole screws. The first shelf should be 8″ from the top and the second shelf should attach 8″ from the first shelf.

Easy two-tiered plant stand made from scrap wood

Your shelf is built!

Easy two-tiered plant stand made from scrap wood

Fill the pocket holes with wood filler, sand, and finish with paint or stain. If you paint your shelf be sure to prime first.

Easy two-tiered plant stand made from scrap wood

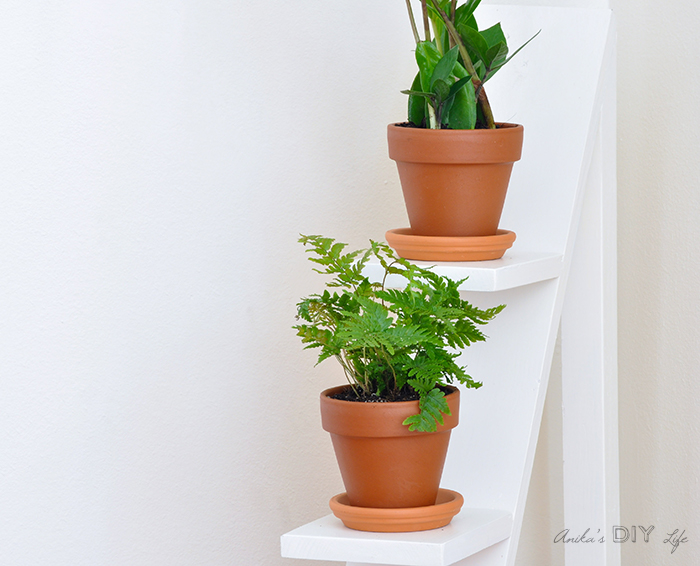
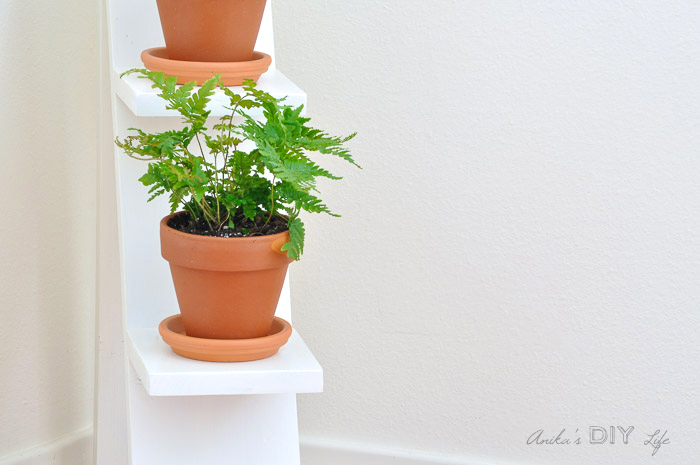
Here is a secret: I don’t have a very green thumb and usually manage to kill all plants (even succulents) in the past! I do have a pothos plant that has survived for 10 years. This year I decided to work on my thumb green when I got an orchid plant as a gift. I thought I had killed it, but it is slowly coming back to life with a bit of care. I think I am ready for more plants, so I got these baby plants . . .

two-tiered-plant-stand-close-up-1.jpg two-tiered-plant-stand-close-up-orig-1.jpg

. . . I will keep you updated on their progress in the future!

That’s how to build a two-tiered plant stand from scrap wood. It barely put a dent in my scrap pile, but I have to come up with quite a few more projects to really get it under control. If you have a scrap wood problem too, you’ll appreciate that I have a whole bunch of projects using scrap wood. I even built a scrap wood organizer using scrap wood! Follow along on my blog so you don’t miss them!

Until next time!

Read More of Anika’s Tutorials ~

DIY Rolling Plant Caddy by Brittany Goldwyn-1

DIY Rolling Plant Caddy by Brittany Goldwyn-1

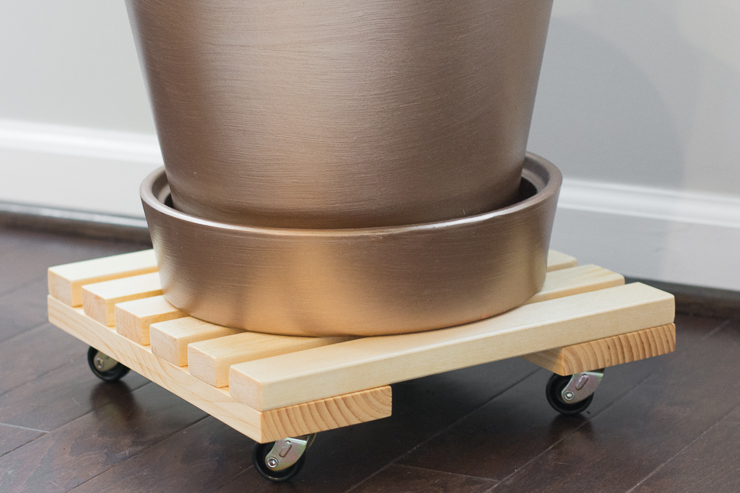
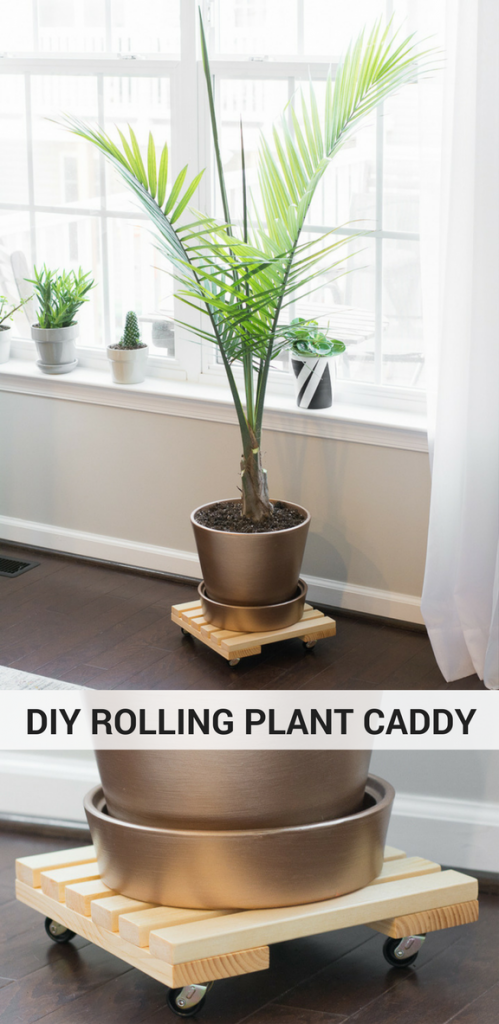
Hello everyone! I’m Brittany from by Brittany Goldwyn, and I’m back to bring you another easy and stylish tutorial! Last month I shared a tutorial on how to frame out a mirror using wood. This month I’m working with wood again to build a plant caddy.

One look at my Instagram feed and you’ll see that we probably have too many plants for our house, but plants make me happy, and I find that they are just the easiest way to decorate without spending a ton of money. We have quite a few big plants and moving them can be a beast. That’s where a rolling plant caddy comes in handy. Luckily, they are pretty easy to make. I made mine out of scrap wood that was left over from previous projects. I hate letting things go to waste, so I love a good scrap wood project!

If you’d like to learn how to make a rolling plant caddy, read on.

Materials

(I’ve included affiliate links for your convenience. I earn a small percentage from a purchase using these links. There is no additional cost to you. You can read more about affiliate links here.)

Lumber:

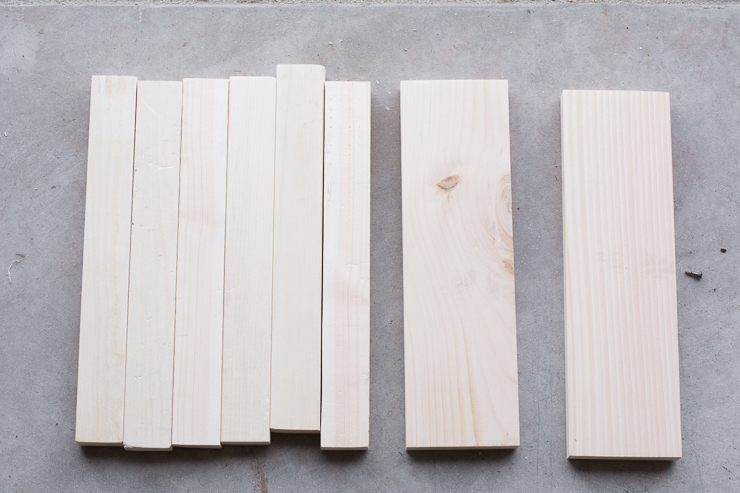
  • (6) 1×2 pieces cut to 12 inches each
  • (2) 1×4 pieces cut to 12 inches each

Tools and hardware:

Other:

Instructions:

Step 1: Cut and polish your pieces.

Use your saw to cut (8) pieces of lumber: (6) pieces of 1″ x 2″ cut to 12 inches each and (2) pieces of 1″ x 4″ cut to 12 inches each. I used pine for my plant caddy, but you can use any type of lumber you like. Cedar would be a good option if you plan to use your plant caddy outdoors.

DIY Rolling Plant Caddy by Brittany Goldwyn-1

Use medium or fine grit sandpaper to smooth out any rough edges on your pieces. Give each piece a good sanding to ensure it is polished.

Step 2: Stain the wood.

I have a lot of unfinished pine furniture and decor in my house, so I chose Minwax “Natural” stain. Feel free to choose the stain color you like. (For great instructions on how to stain and finish wood, check out this detailed post.)

Step 3: Assemble the caddy.

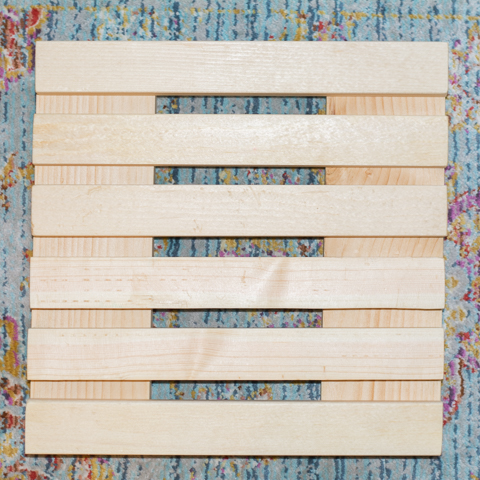
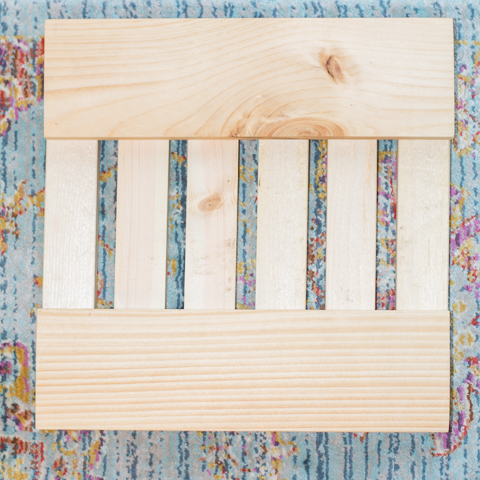
Once the pieces are dry, use wood glue to glue the 1″ x 2″ pieces to the 1″ x 4″ pieces as shown below.

View of the top:

DIY Rolling Plant Caddy by Brittany Goldwyn-1

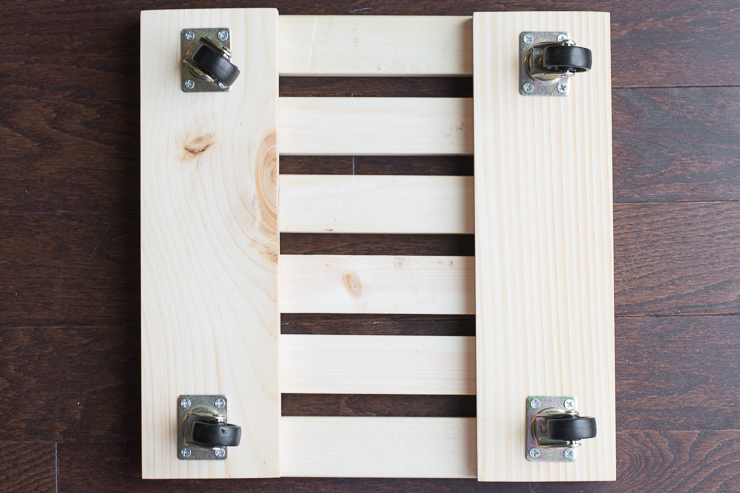
View of the bottom (the side you’ll attach the caster wheels to):

DIY Rolling Plant Caddy by Brittany Goldwyn-1

Add just a bit of glue for the side of each piece. Don’t use too much glue, or it will ooze out the sides when you assemble the caddy. Allow the glue to dry completely.

Step 4: Attach caster wheels. 

Flip the caddy over and screw a caster wheel in each corner. Make sure to buy caster wheels that are graded for the weight you’ll need. (I used (4) casters rated at 20 lbs each.)

DIY Rolling Plant Caddy by Brittany Goldwyn-1

Step 5: Finish with polyurethane spray.

Use Minwax polyurethane spray to finish off the caddy and protect the wood from any water spills. This is actually my first time using an aerosol can of polyurethane, it’s much easier than brushing on the polyurethane and worrying about getting into the nooks and crannies of the caddy.

You can see the bit of added sheen in this photo:

DIY Rolling Plant Caddy by Brittany Goldwyn-1

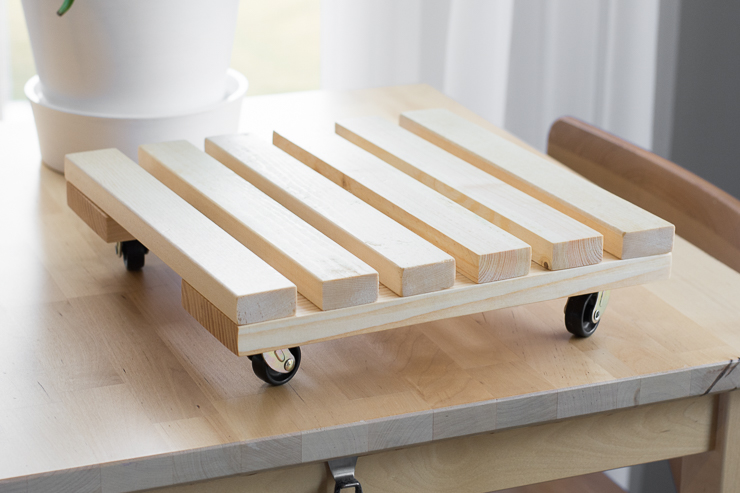
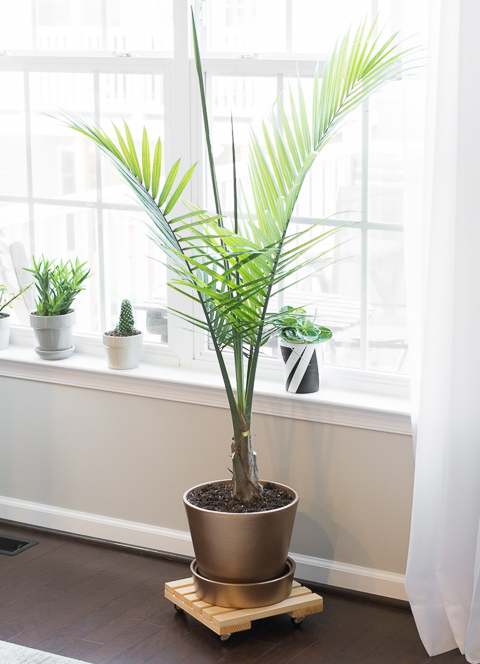
After the polyurethane is completely dry, place your plant on the caddy and enjoy being able to move your plant easily!

DIY Rolling Plant Caddy by Brittany Goldwyn-1

DIY Rolling Plant Caddy by Brittany Goldwyn-1

If you liked this project, you might like my tree stump side table, my indoor succulent care tips, my teacup planters, and my hanging indoor garden! I’ll see you next month but in the meantime, you can always visit  me on my blog to see what I’m up to. Until next time!

Read More of Brittany Goldwyn’s Tutorials ~


Pin for later!

DIY Rolling Plant Caddy Tutorial | Pretty Handy Girl

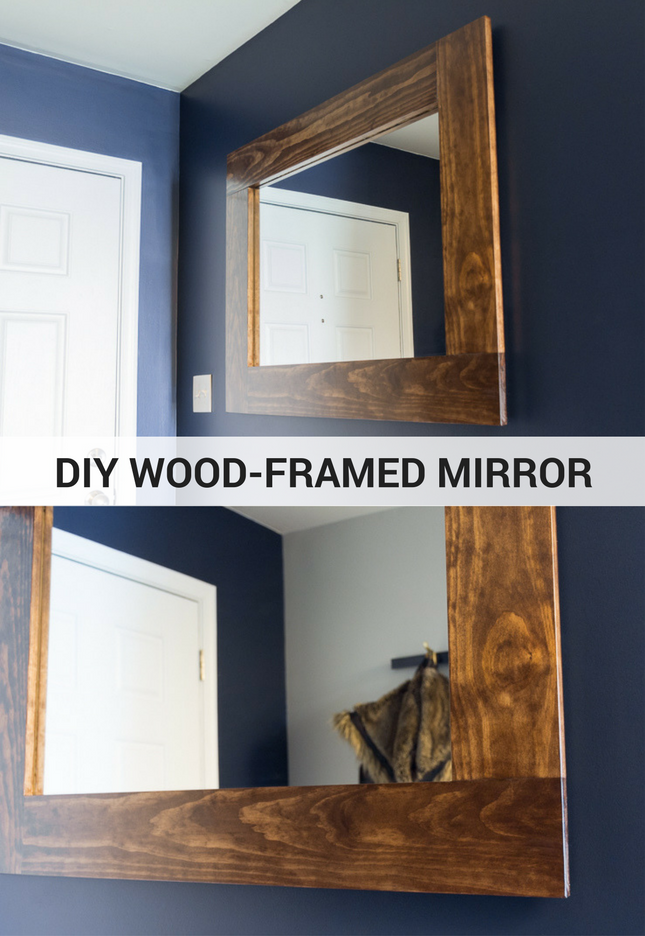
DIY Wood-Framed Mirror Tutorial

DIY Wood-Framed Mirror Tutorial

Hello everyone! I’m Brittany—the creative behind by Brittany Goldwyn, the weirdest cat person you’ll ever meet, and the newest monthly contributor for Pretty Handy Girl! As a long-time Pretty Handy Girl reader myself, I’m so excited for this opportunity to work with Brittany (should I call us Brit 1 and Brit 2?) to share my projects and connect with all of you. I hope we’ll get to know each other more, but in the meantime, here are a few things about me: My dad is a licensed contractor and has taught me most of my building, home improvement, and general DIY skills—you might even occasionally see him pop in to some of my tutorial photos when he’s helping with a project. My husband and I just bought our first home—a lovely townhouse—and we’re hard at work making it our own.  My style tends to be modern. I love decorating with neutrals and plants.

Wood-Framed Mirror Tutorial

Right now on my blog I am working on a series of entryway makeover posts: first I painted, and then I built a shoe cubby (grab the free build plans here). Today I’m sharing the next step in my entryway makeover: a tutorial for building a wooden mirror frame. This was my first time framing a mirror, so I’ll also be sharing some tips and tricks from along the way. Shall we get started?

Wood-Framed Mirror Tutorial Materials:

(I’ve included affiliate links for your convenience. I earn a small percentage from a purchase using these links. There is no additional cost to you. You can read more about affiliate links here.)

Frugal Tip: Save some cash by replacing the frame on an existing mirror or by picking up a cheap mirror at a thrift shop. Most frames are attached using staples. Simply remove the frame by using pliers to pull out the staples and any other backing that is preventing you from accessing the mirror.
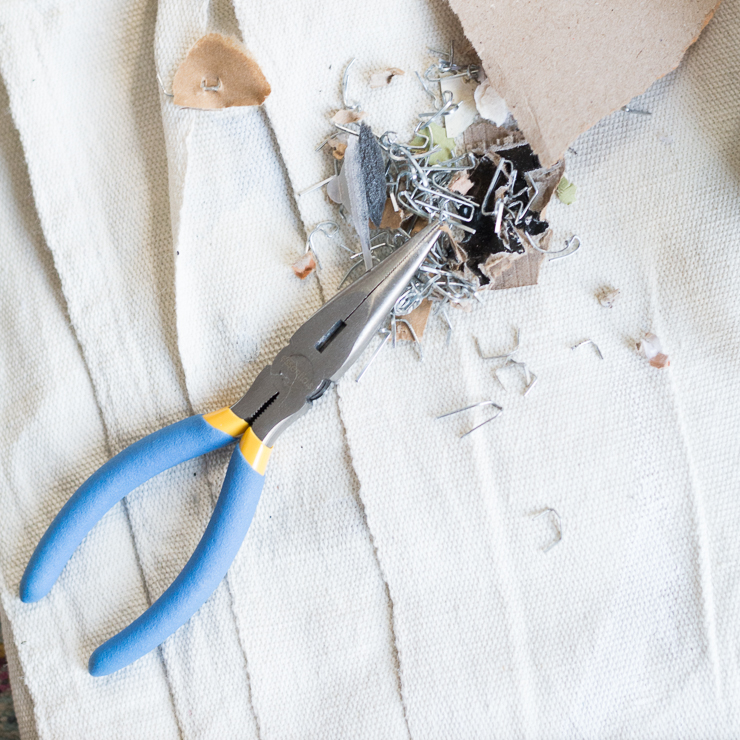
DIY Wood-Framed Mirror Tutorial

Wood-Framed Mirror Tutorial Instructions:

Step 1: Cut pine pieces to fit your mirror. 

The measurements will depend on your mirror size and how you want to frame it out. You can chose to cut mitered corners if you like. Or straight corners (like I did) for a super modern look.

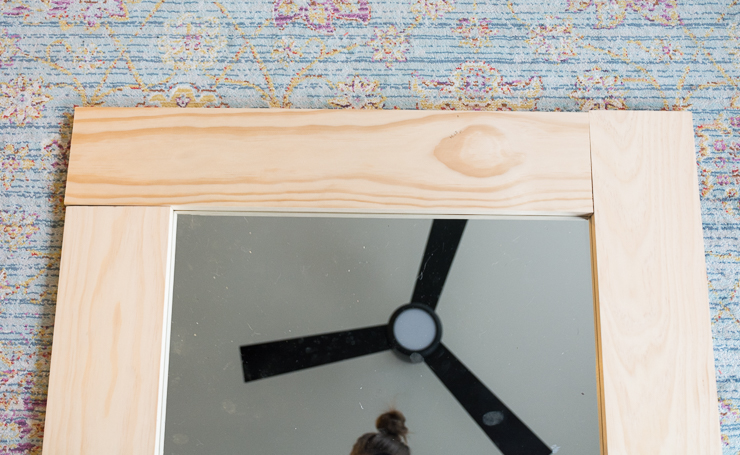
Lay your 1″ x 6″ pieces onto the mirror. Mark and cut each frame side to fit.
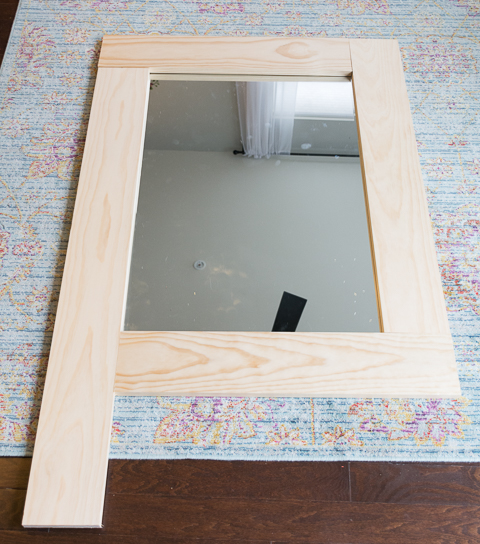
DIY Wood-Framed Mirror Tutorial

Dry fit the pieces over your mirror.

DIY Wood-Framed Mirror Tutorial

Step 2: Drill pocket holes at one end of each piece.

This is how you’ll join the frame pieces and finish your frame. If you’ve never used a pocket hole jig before, check out Brittany’s tutorial for how to use a Kreg Jig.

Tip: Use a pencil or pen to mark where the pocket holes will go. This is especially important if some pieces line up better with specific pieces or if you prefer the wood grain on one side of a board. Things can get confusing when you head to your Kreg Jig and all of the pieces suddenly look the same.
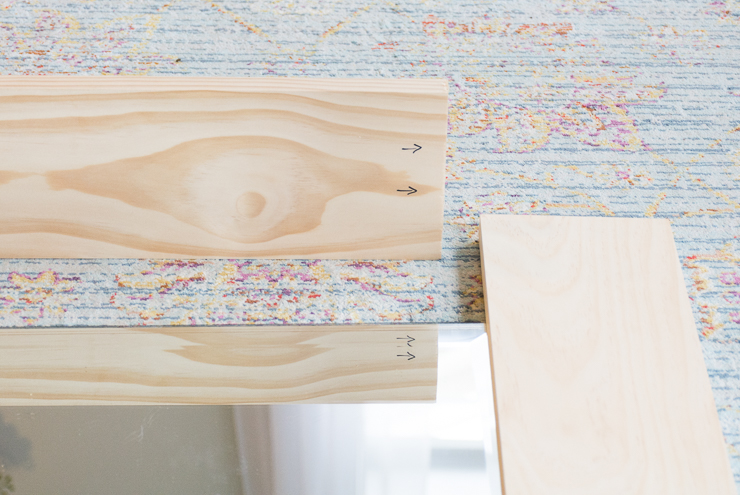
DIY Wood-Framed Mirror Tutorial

Step 3: Assemble the frame.

Use 1 ¼” pocket hole screws to join each side of the frame together.
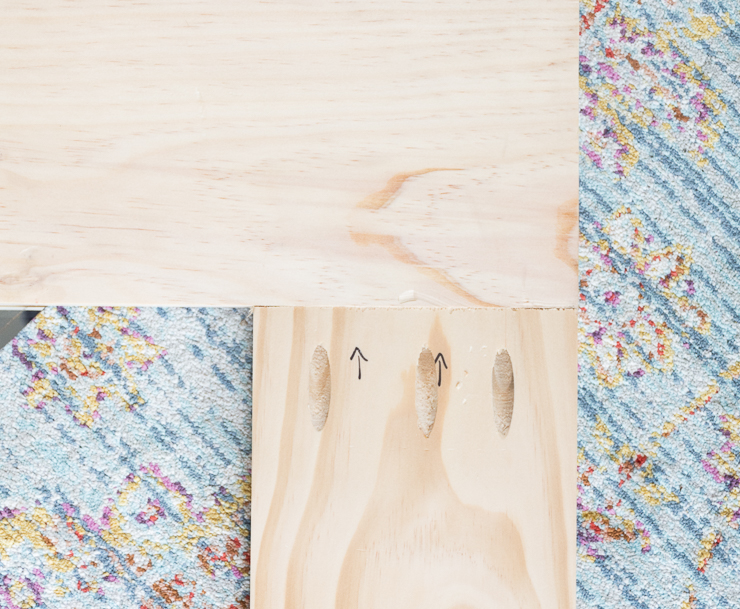
DIY Wood-Framed Mirror Tutorial

Tip: If you don’t have a partner to help you hold your pieces, use clamps to hold the frame pieces on your workbench while you assemble the frame with screws.

Here is the front of the assembled frame:
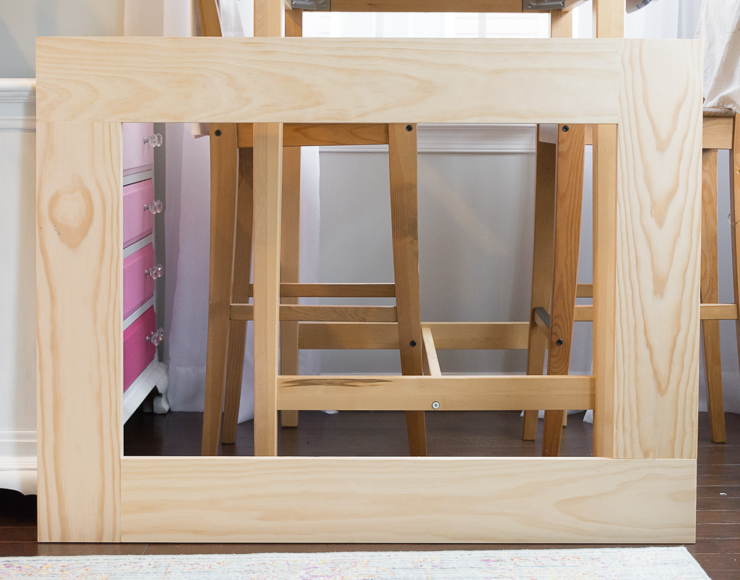
DIY Wood-Framed Mirror Tutorial

And the back so that you can see how the pocket holes look. The corner with four pocket holes was my mistake, but that corner is super strong now. 😉
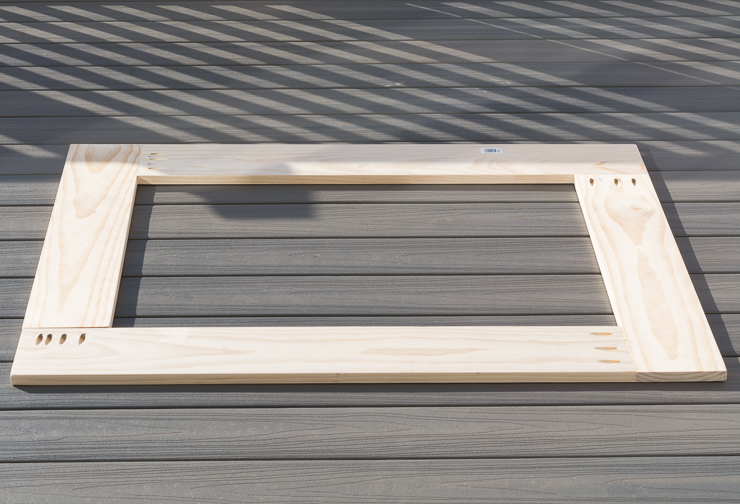
DIY Wood-Framed Mirror Tutorial

Step 4: Polish and finish the frame.

Once assembled, use fine-grit sandpaper to polish the frame, smooth out rough spots, and break down any edges. Before staining, it’s helpful to set your frame on painter’s pyramids to elevate the frame off your surface.
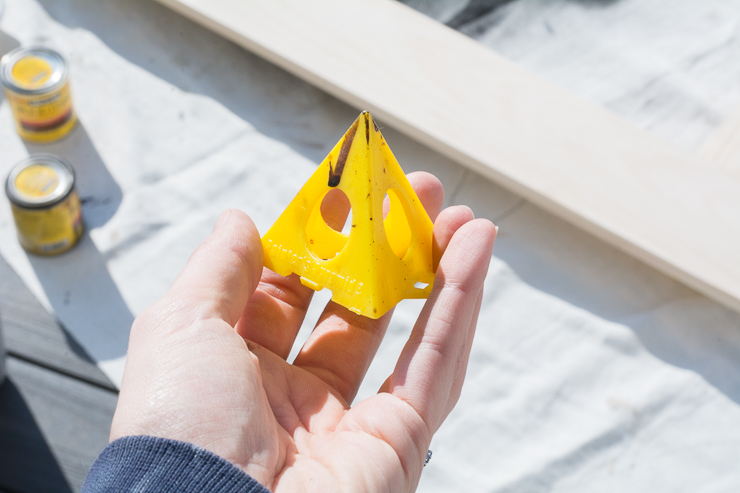
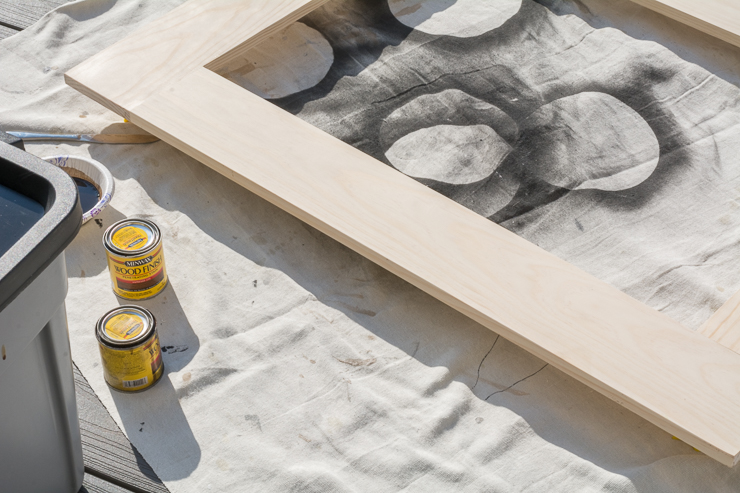
DIY Wood-Framed Mirror Tutorial

DIY Wood-Framed Mirror Tutorial

Stain and finish the frame to your liking. (I used Minwax Special Walnut and two coats of semi-gloss polyurethane.)
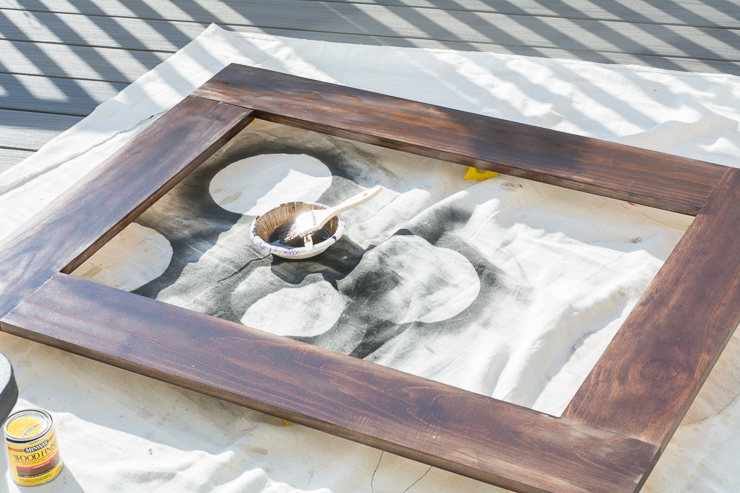
DIY Wood-Framed Mirror Tutorial

Need some tips on how-to stain and finish wood?  You can check out my tips and tutorial for wood staining here if you’re not familiar with how to finish wood.
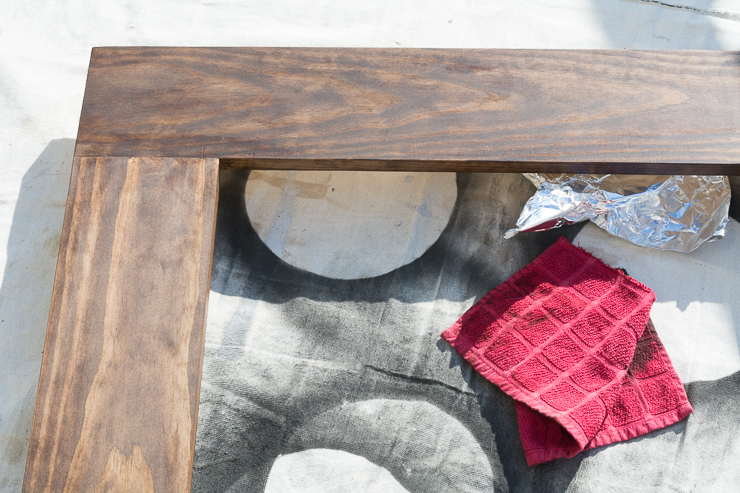
DIY Wood-Framed Mirror Tutorial

Step 5: Cut the plywood backing.

Cut the plywood piece about ½” smaller than the frame on each side. This prevents plywood edge from peeking out from behind your frame, but it will still provide plenty of support. You can also stain the edges of the plywood backing to match your frame.
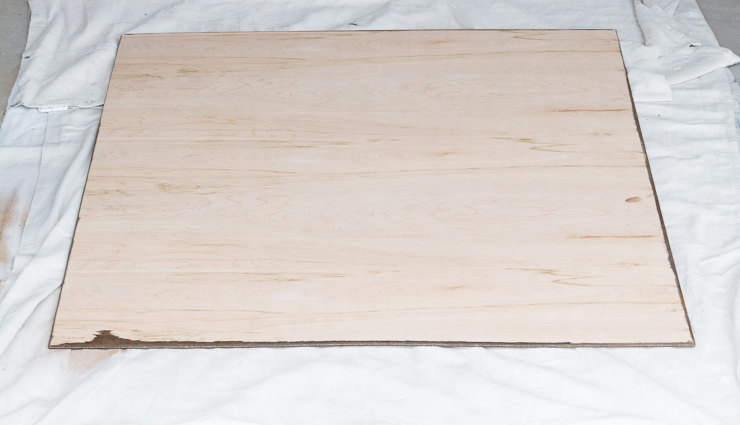
DIY Wood-Framed Mirror Tutorial

Step 6: Attach the mirror to the backing.

Before adhering your mirror to the plywood backing, dry fit the frame, mirror and backing to ensure everything lines up.

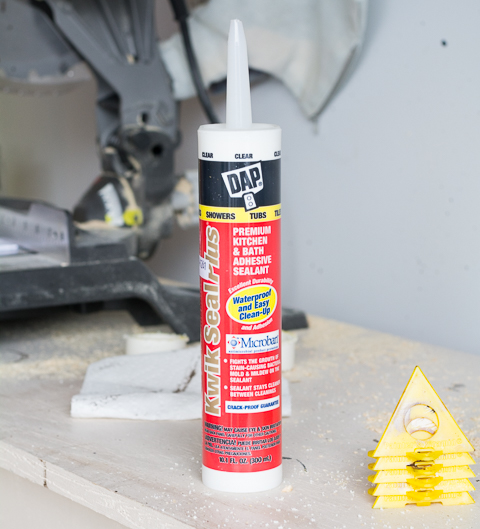
Apply clear silicone adhesive to the center of the plywood backing. (Do not use standard construction adhesive as it will mess with your mirror’s reflective side.)
DIY Wood-Framed Mirror Tutorial

Mine looks quite messy because the tube literally exploded on me, and I ended up mashing the adhesive around like finger paint. Sometimes you just have to go with it, right?
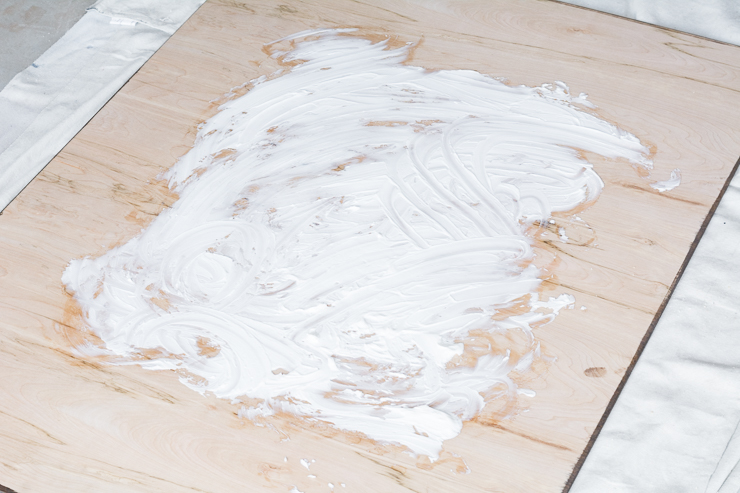
DIY Wood-Framed Mirror Tutorial

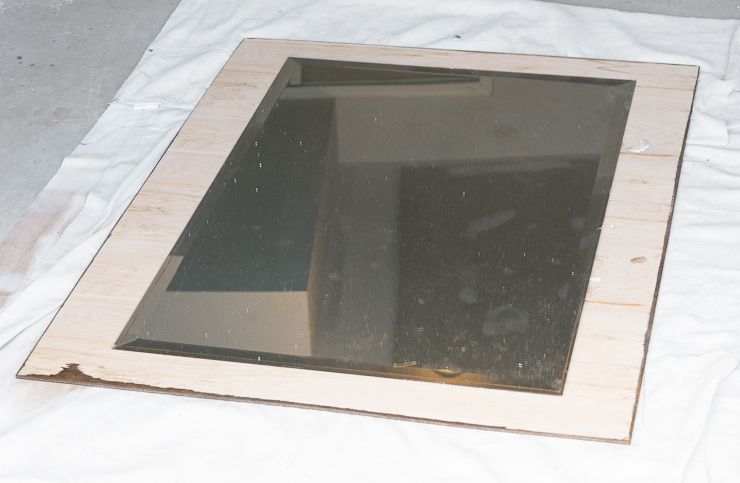
Center the mirror onto the plywood backing.
DIY Wood-Framed Mirror Tutorial

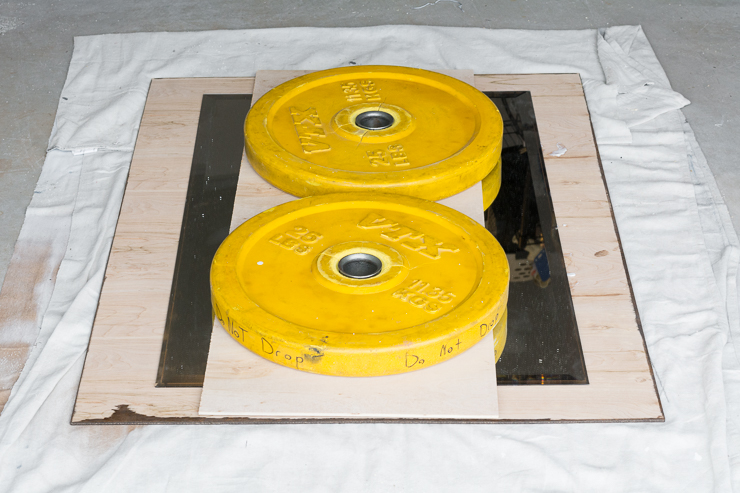
Apply weight evenly to ensure the mirror adheres well. Here’s where my husband’s garage gym actually isn’t a pain in my butt. His weights worked perfectly, and a piece of extra plywood helps to protect the mirror and distribute the weight. Let dry according to the adhesive instructions.
DIY Wood-Framed Mirror Tutorial

Step 7: Attach the frame to the mirror and backing.

Use Heavy Duty Liquid Nails to attach the frame to the backing, and then use a brad nail gun to drive nails around the backing and into the back of the frame.

But wait!

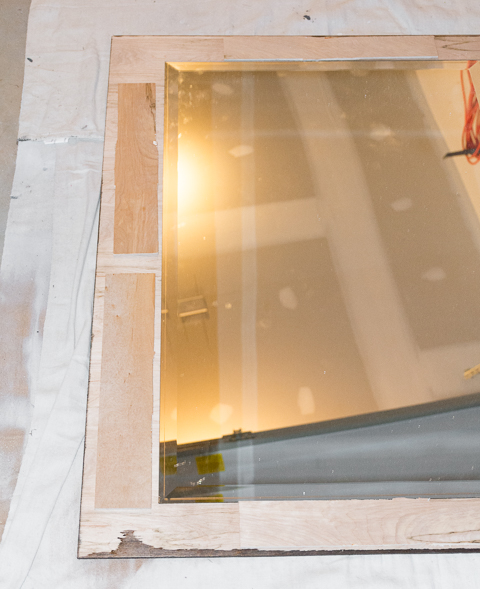
For full disclosure, here’s where I hid a snag, so I didn’t do step 7 as described. I had calculated my frame piece measurements so that the finished frame would cover the beveled edge that ran about 1″ around the mirror. That means that when I set my frame on top of the mirror and backing, there was a small gap between the backing and the frame, which foiled my plans to simply use Liquid Nails and a nail gun to attach the frame to the backing. Ugh! You can avoid this by making sure your frame fits snugly around your mirror and doesn’t sit on top of it. If you do that, just skip to step 8!

To fill the gap, cut pieces of scrap 1/4″ plywood to act as spacers around the mirror.
DIY Wood-Framed Mirror Tutorial

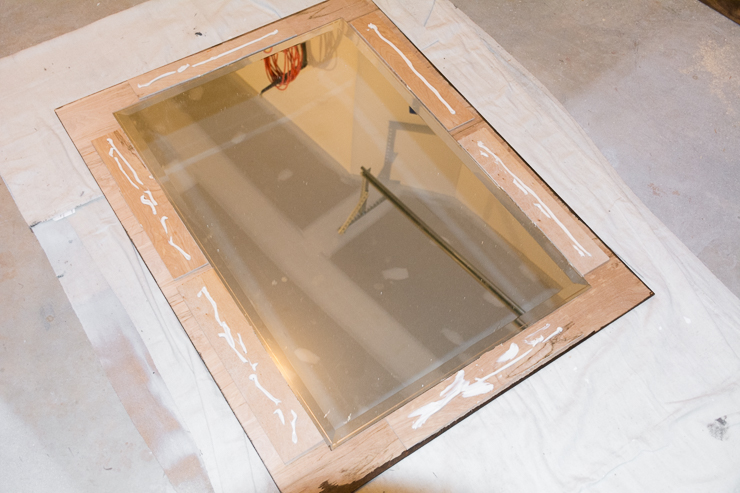
Then glue the scrap pieces down using Liquid Nails Heavy Duty Construction Adhesive. Add more Liquid Nails on top of the spacers, and carefully place your frame on top of the spacers.
DIY Wood-Framed Mirror Tutorial

After making sure your positioning is correct, use weights to apply pressure all around the frame. (Put scrap wood between the weights and the frame to protect it.)

DIY Wood-Framed Mirror Tutorial

Once the adhesive has cured, flip the entire framed mirror over and drive a few screws through the backing and into those glued scrap plywood pieces.

Step 8: Screw your D-rings to the back of the mirror and hang. 

If your mirror is anything like mine, you’ll need to give the frame and mirror a good cleaning after hanging it. It’s been through a lot.
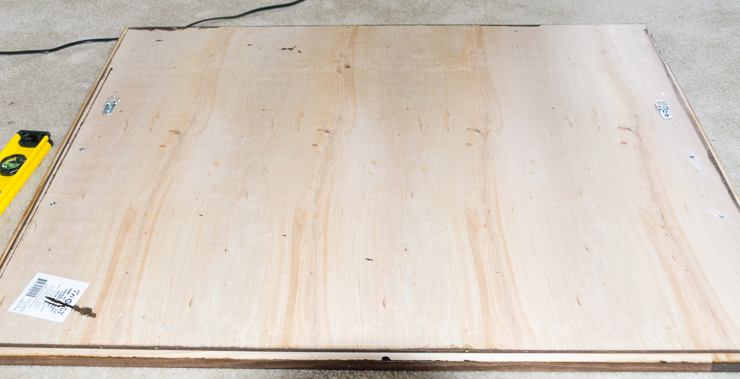
DIY Wood-Framed Mirror Tutorial

Tip: Remember to hang the mirror on screws that are driven into wall studs or use drywall anchors rated for a weight that can handle your mirror.
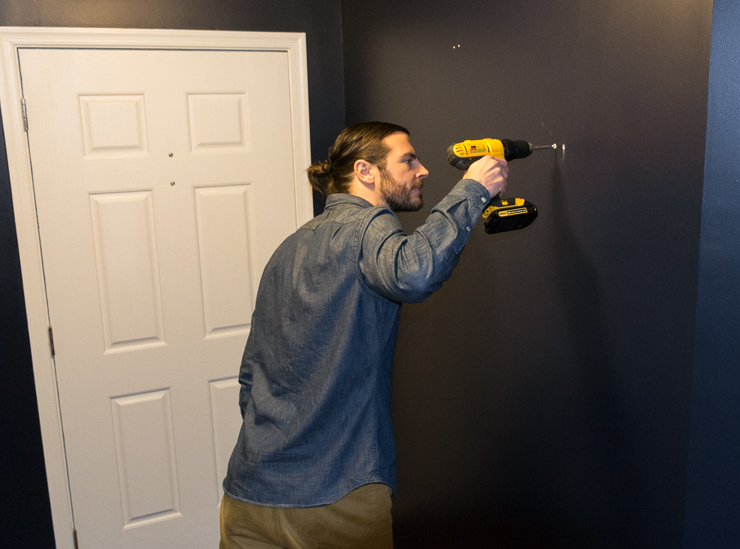
DIY Wood-Framed Mirror Tutorial

I’m really happy with how it turned out.
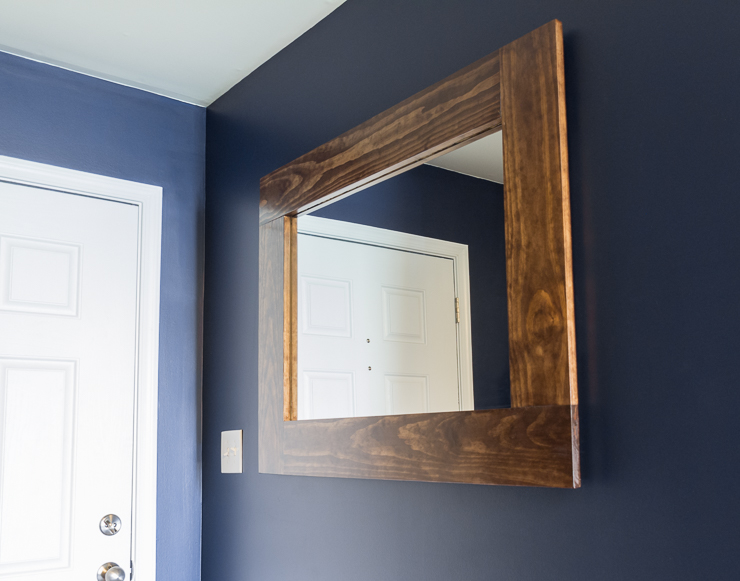
DIY Wood-Framed Mirror Tutorial

What do you think? I think it adds some more dimension to a room that was in desperate need of something extra.
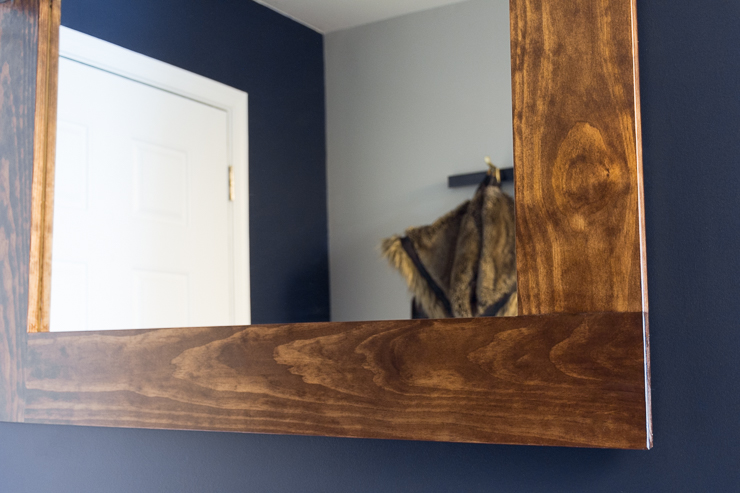
DIY Wood-Framed Mirror Tutorial

I’ll see you next month here on Pretty Handy Girl, but in the meantime, I’d love to have you visit my blog by Brittany Goldwyn to my entryway! I’ve painted, shared free build plans for a shoe storage cubby, and revealed the final space.
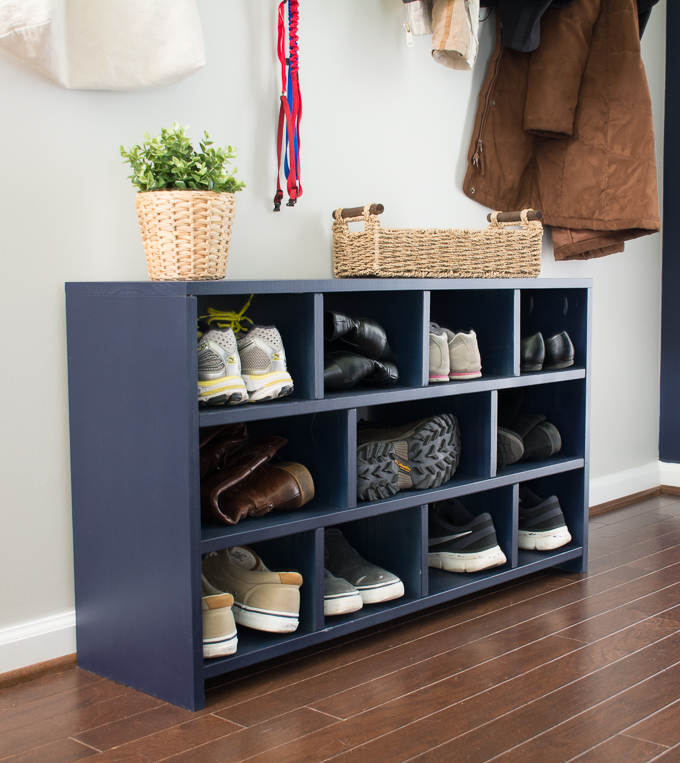
DIY shoe cubby build plans

Oh, and I’m finishing up a $100 powder room makeover next week, because apparently 2017 is the year I don’t sit still. Until next time!

Wood-Framed Mirror TutorialRead More of Brittany Goldwyn’s Tutorials ~
wood cake stand

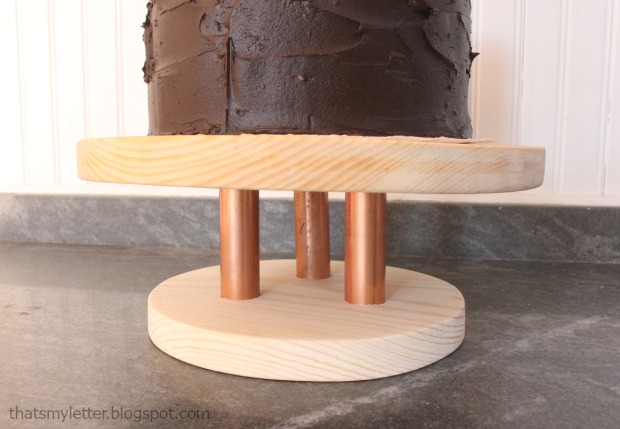
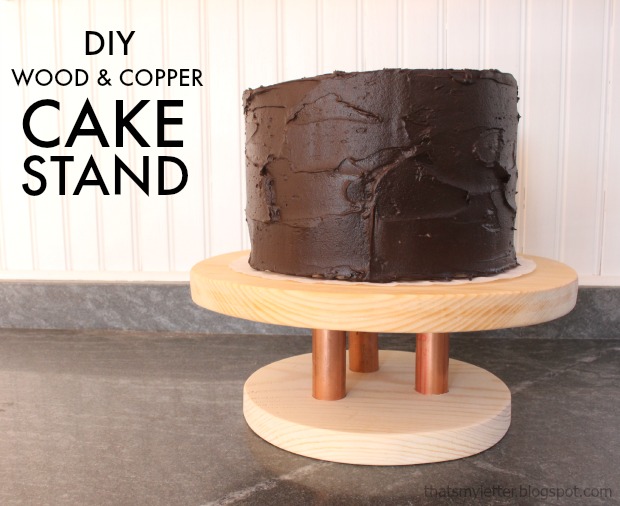
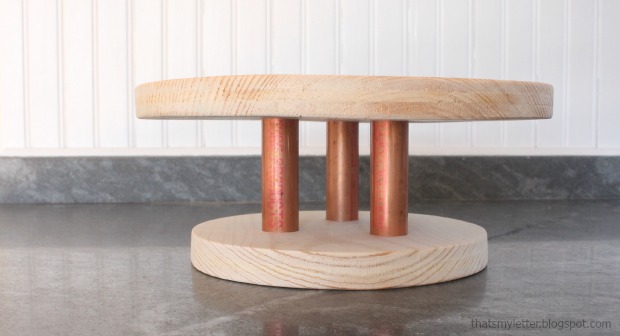
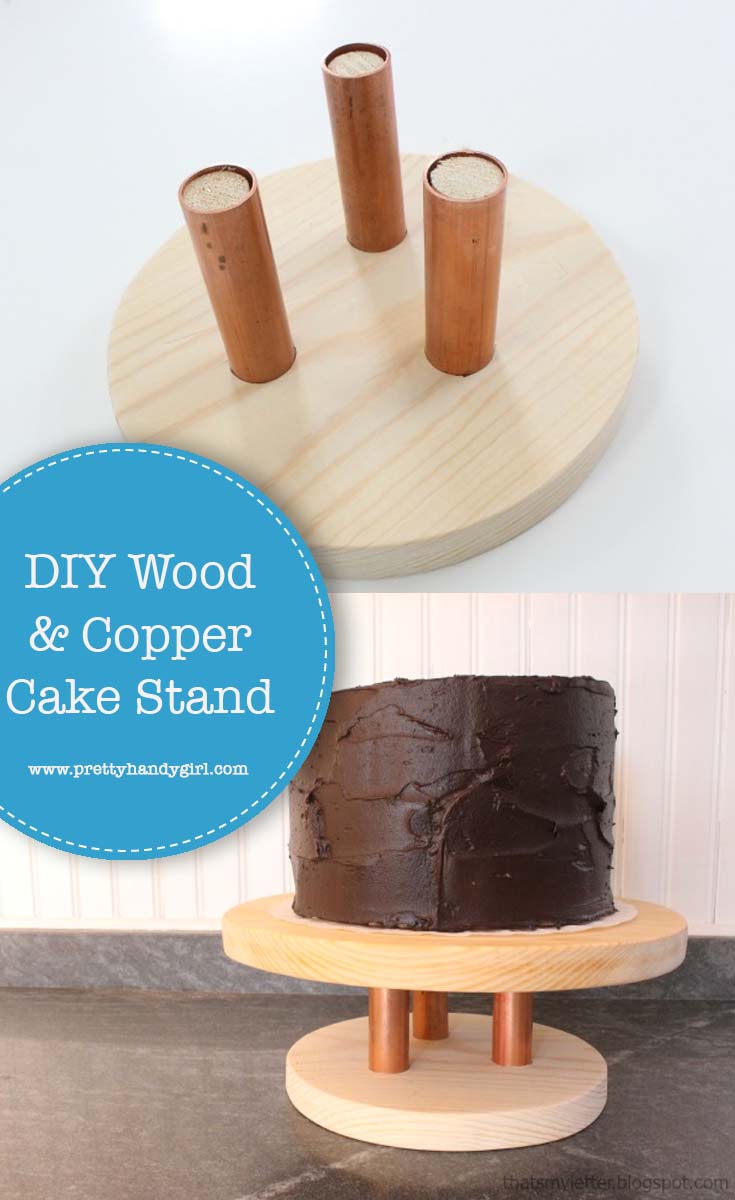
Hello Pretty Handy Readers – Jaime here today from That’s My Letter to share a diy project that combines two of my favorite materials: wood and copper. I’m sharing how to make this wood and copper cake stand.

This is a fairly simple project that could be tailored to fit your style with paint or stain.  I choose to leave the wood natural, only sealing it with clear polyurethane, because I love the contrast of the wood against the chocolate frosting (and most cakes around our house are made with chocolate frosting!).

wood cake stand 2

The warm shiny copper is the star of the show here and can easily be found at any hardware store.

wood cake stand 1


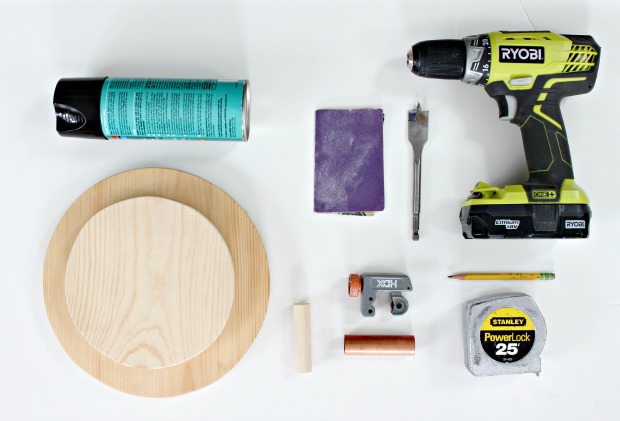
Supplies:

wood cake stand supplies

  • 1×12 pine board scrap @ 10″l
  • 1×8 pine board scrap @ 7 1 /4″l
  • 3/4″ copper piping @ 12″
  • 3/4″ wood dowel @ 12″
  • pipe cutter
  • jigsaw
  • finish nailer & 1 1/4″nails
  • drill & 7/8″ spade bit
  • measuring tape
  • pencil
  • sandpaper
  • clear satin spray polyurethane

Instructions:

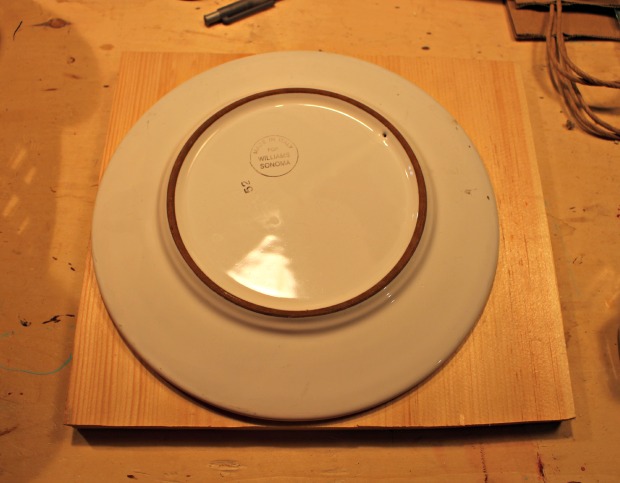
Step 1: Use a plate or other 10″ circular object to trace a circle shape onto 1×12 scrap.

wood cake stand step 1

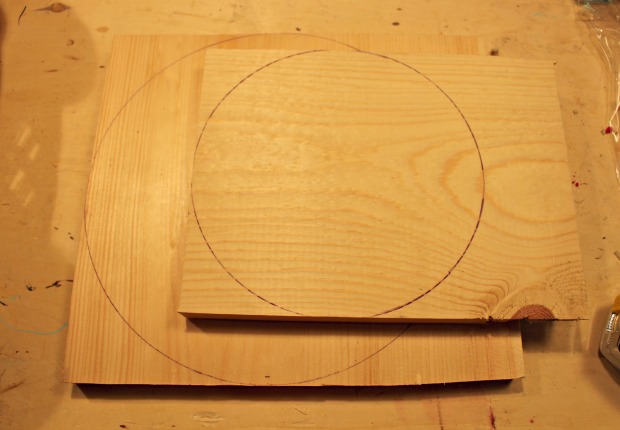
Step 2: Trace both a large circle shape onto the 1×12 and a smaller circle shape onto the 1×8.  Then cut out circles using a jigsaw and sand edges well.  Spray with clear satin polyurethane before assembly.

wood cake stand step 2

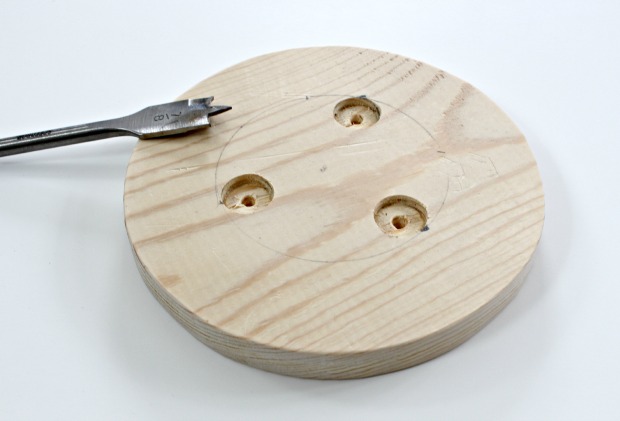
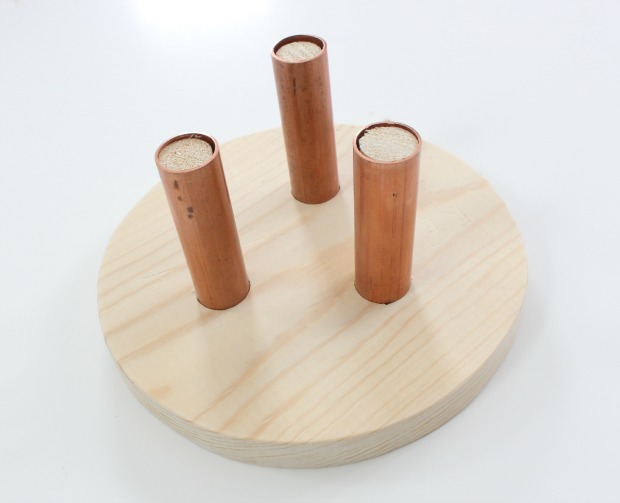
Step 3: On the smaller circle draw another even smaller circle (about 4″ in diameter).  Make 3 equidistant holes with 7/8″ spade bit drilling only partially down into wood.

wood cake stand step 3

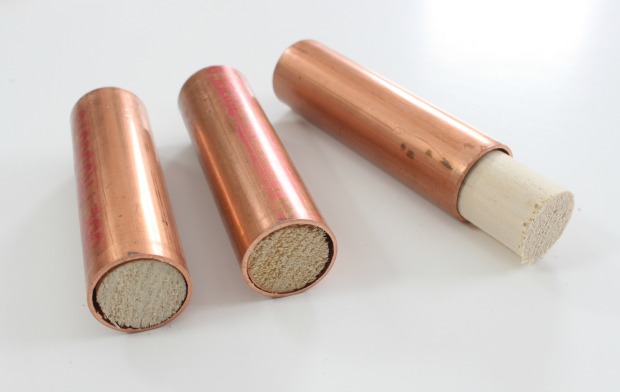
Step 4: Cut copper using pipe cutter into 4″ lengths.  Cut wood dowel to 4″ lengths and shove inside copper pipe.

wood cake stand step 4

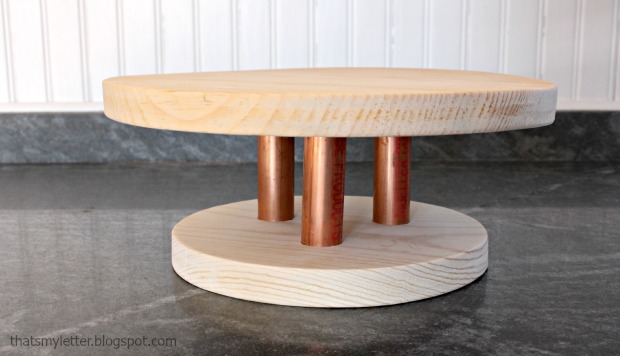
Step 5: Place copper & wood sections into pre-drilled holes in smaller wood circle.  You can use some glue here. I chose to secure with a finish nail from the bottom as well.  Now center the larger wood circle on top and trace the copper pipes with a pencil.  Pre-drill holes into the underside of the top larger wood circle and attach the top (use glue if desired).

wood cake stand step 5

My copper pipes are very snug in the holes but I did use a little glue to be sure the wood doesn’t come off.

wood cake stand step 6

Maybe your next party needs a simple cake stand?  Good luck with all your diy projects.

Jaime signature


~learn more about Jaime~


Pin for later!

This wood and copper cake stand from Pretty Handy Girl is a fairly simple project that can be tailored to fit your style with paint or stain! | DIY cake stand | DIY wood projects #prettyhandygirl #DIYcakestand #DIYwoodproject

personalized wall shelf

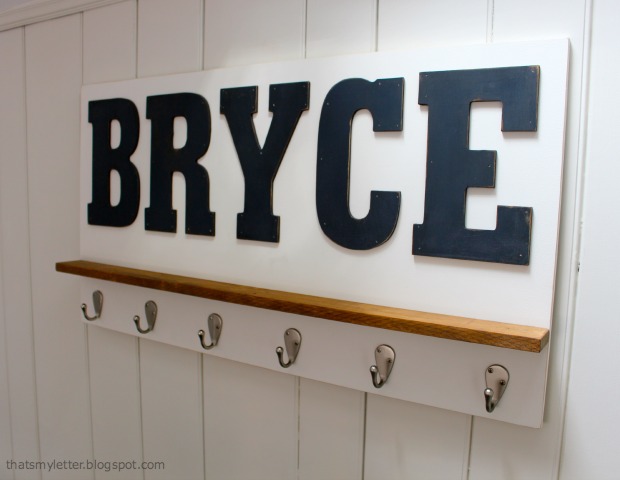
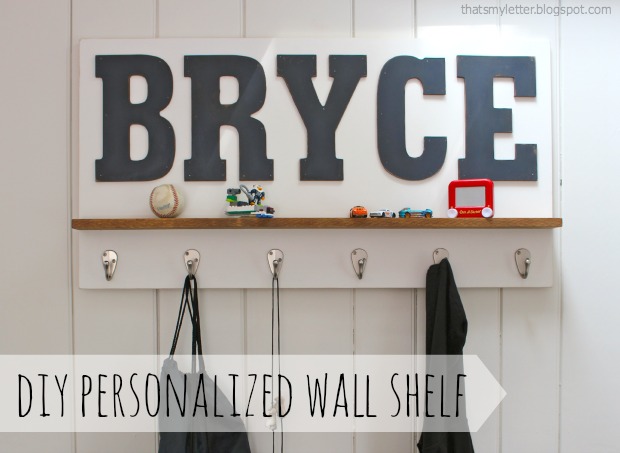
Happy Wednesday Pretty Handy Readers!  Today’s project is a DIY personalized wall shelf and I’ll show you how to make it.  I’m Jaime from That’s My Letter, a fellow DIY blogger who builds, paints and sews.  I made this wall shelf as a gift for Bryce’s birthday, it makes a great statement AND it’s useful too!

personalized wall shelf 1

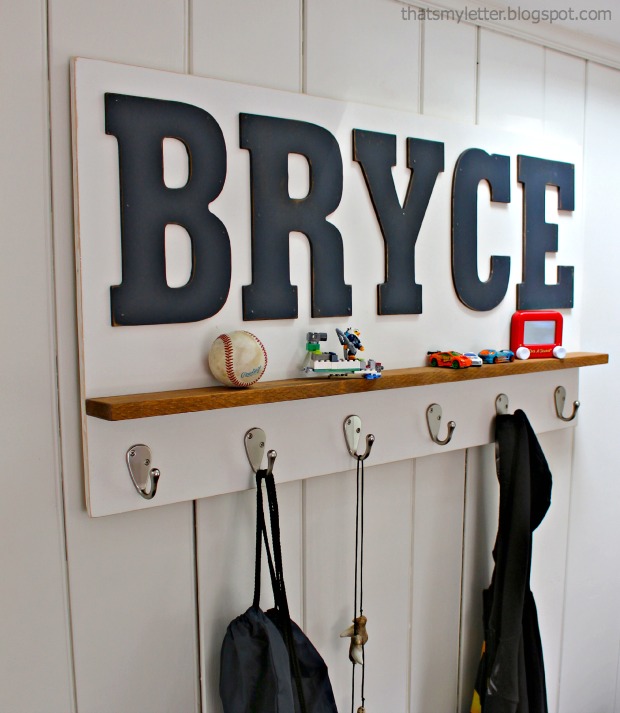
Just a bit of painting and assembly to make this awesome, personalized wall shelf.  And of course you can adjust the paint colors to fit your scheme.  Bryce happens to have navy painted walls in his bedroom so I know this wall shelf will really pop once hung in his space.

personalized wall shelf 2

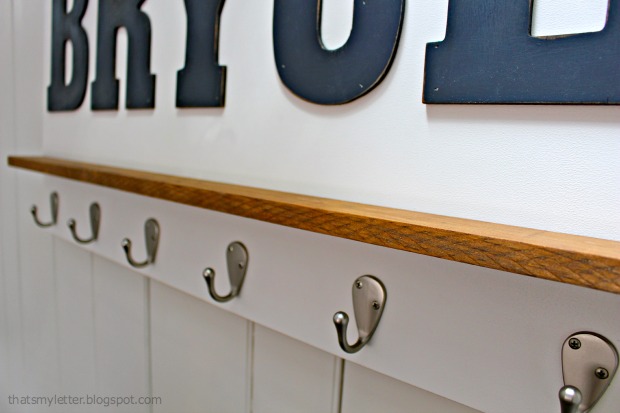
The stained wood shelf adds just a touch of warmth and coordinates well with the hardwood floors.  For a deeper shelf, use a wider board. I used a 1×3 but you could use a 1×4 or larger.

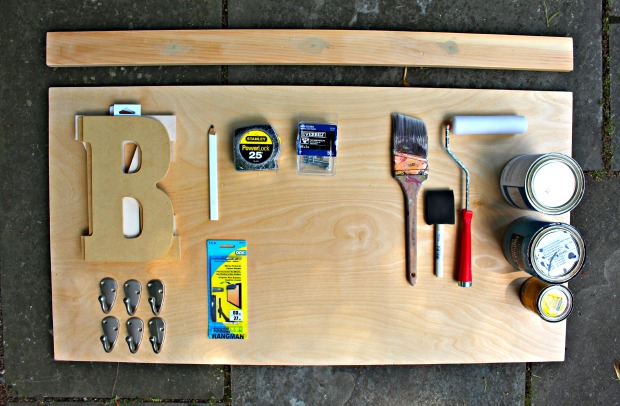
Materials:
(Amazon affiliate links included)

personalized wall shelf supplies

  • 1/2″ or 3/4″ plywood cut to desired size (approx. 2′ x 4′)
  • scrap piece of 1/2″ plywood approx. 4″ x 36″
  • 1×3 pine board cut to width of plywood
  • 9″ MDF Pre-cut letters
  • Single robe hooks
  • French cleat kit
  • paint, roller & brush
  • stain & foam brush
  • sandpaper
  • tape measure
  • pencil
  • wood glue
  • 2″ wood screws
  • 3/4″ wood screws
  • drill & bits
  • nailer & finish nails

Instructions:

Before beginning, layout your letters onto plywood and cut the plywood to size based on the length of the name.

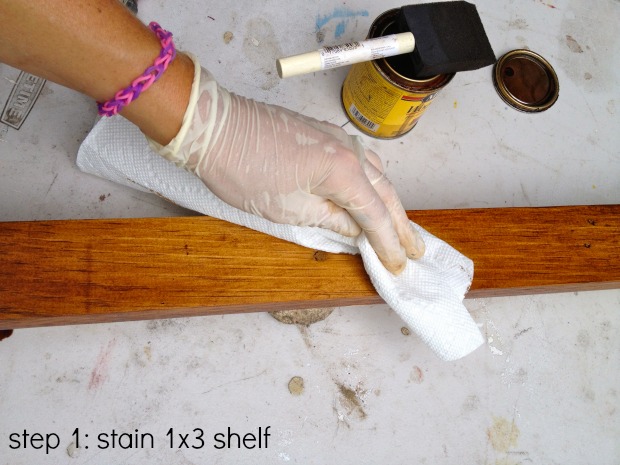
Step 1: Apply stain to the 1×3 shelf piece on all sides using a foam brush. Wipe off the excess.  Set the shelf aside and let it dry.

personalized wall shelf step 1

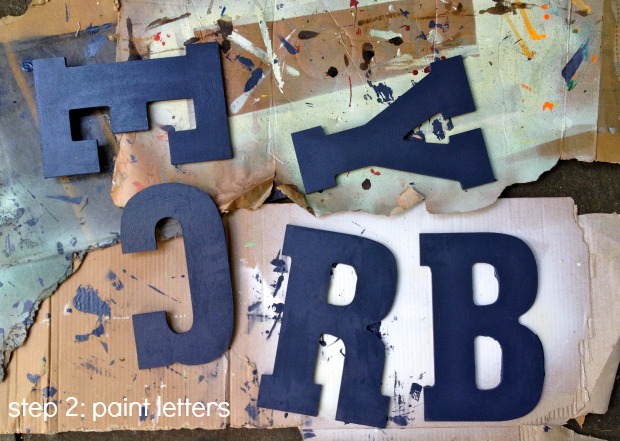
Step 2: Paint your letters.  Paint your plywood back (not shown).

personalized wall shelf step 2

Step 3: Distress the edges of the letters using sandpaper. Read more