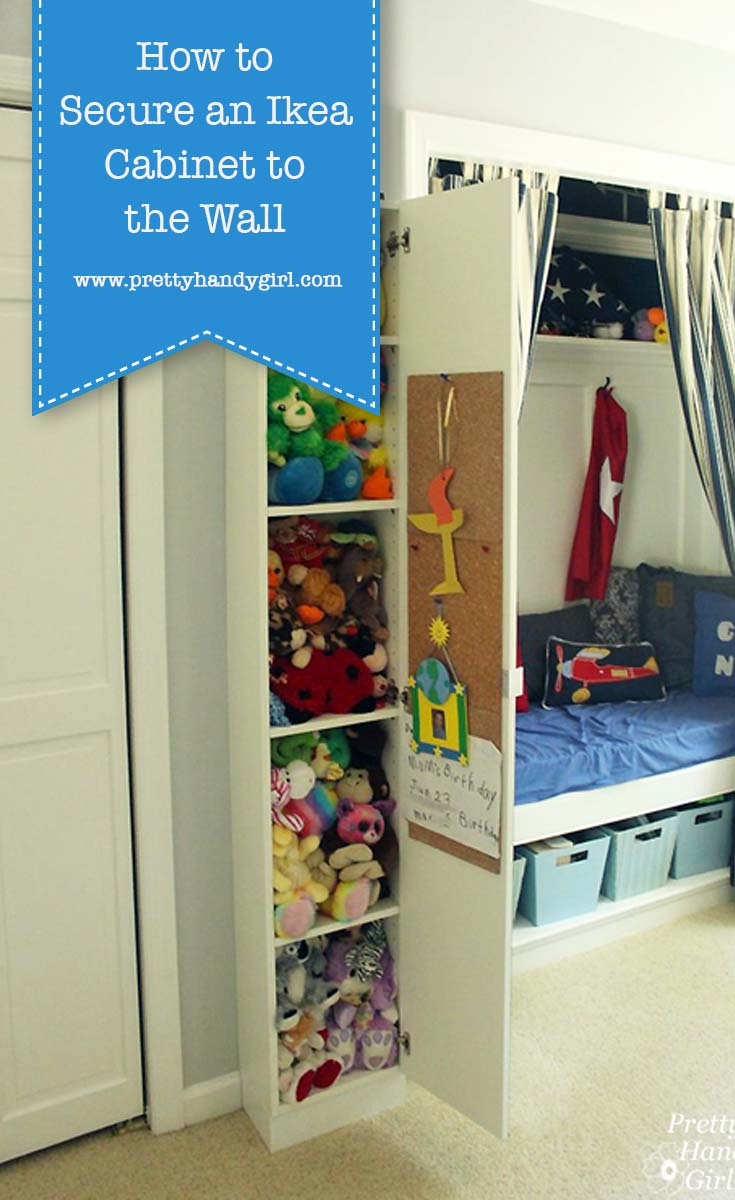
Securing an IKEA LILLÅNGEN Mirrored Cabinet to the Wall (with an outlet cutout)
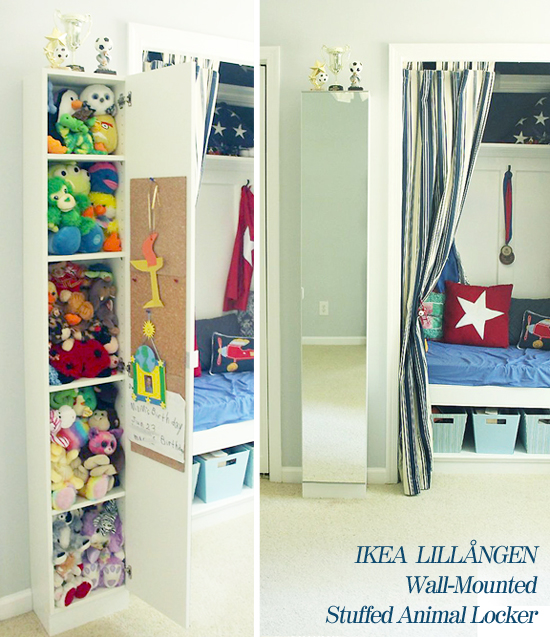
Have you ever shopped the “As Is” section at IKEA? There are some deals to be found there! Like this IKEA LILLÅNGEN Mirrored Cabinet. The cabinet had a small bent piece at the bottom and was therefore marked down to $60 from $100! Score! I easily bent the metal back in place with pliers once I got home. Then I decided to use it as a wall-mounted mirror locker for my son’s stuffed animals. Hang out for a few minutes and I’ll show you how to safely mount this cabinet AND move an outlet into the cabinet.
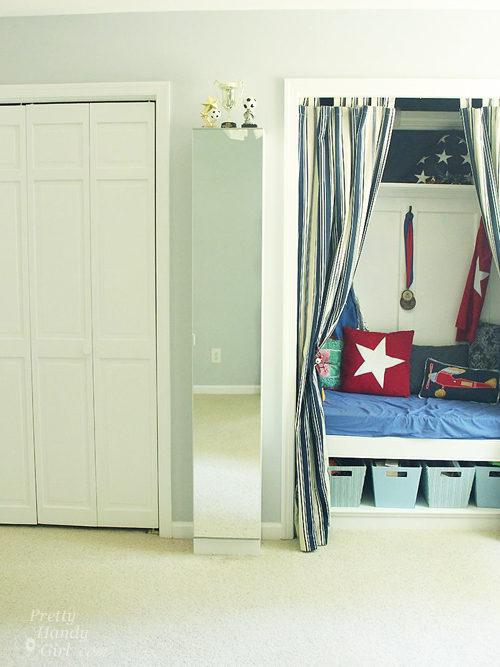
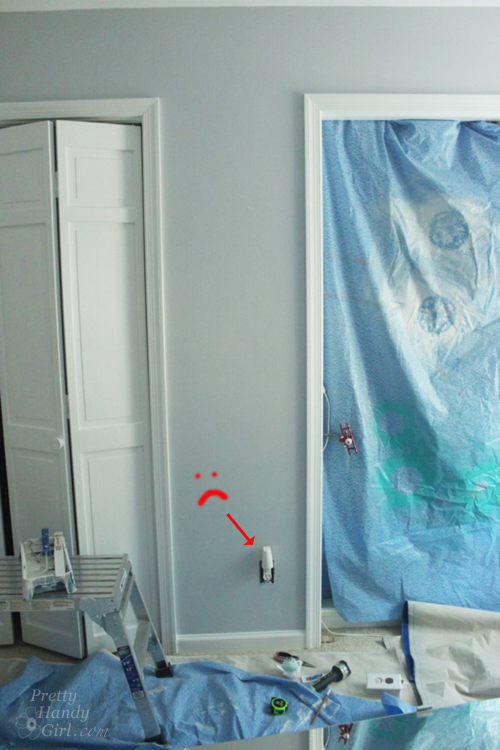
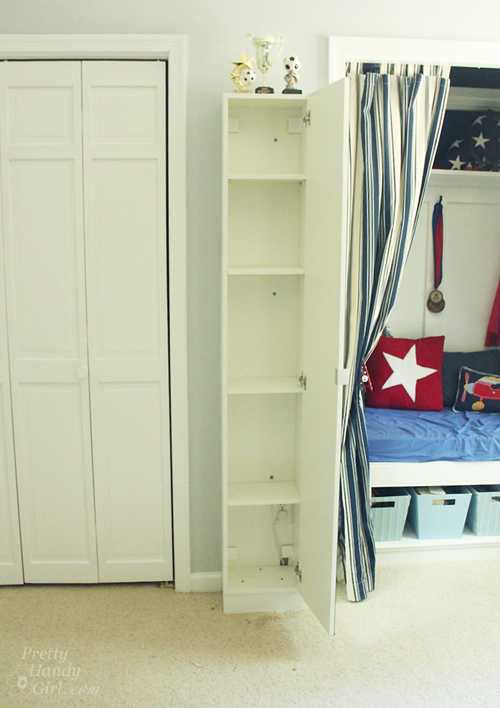
Handy Boy #2 had a narrow spot between his closet and reading nook that I knew would be perfect for this cabinet. The idea was to give him some storage for his ever multiplying stuffed animals. (They are seriously like rabbits! It never ends. I might need to look into a forced sterilization program.) Knowing my son and his antics (have I told you how he can climb his way around the room without setting foot on the floor. It’s amazing, albeit scary to watch. I’ll have to video him sometime.) I knew that I needed to secure this locker to the wall. But, there was an outlet in my way. And this is the outlet that gives power to the copper wall sconce in his reading nook. Therefore, I had to have access to the outlet. Plus, when he gets older he could charge his electronics in the locker.
(I should note that I neglected to buy the optional base for this cabinet. Instead, I built a quick one using 2×4’s and 1×4’s.)
Materials:
- Drill
- Quilting pin
- Measuring tape
- Pencil
- Outlet extender
- Multi-purpose tool
- Toothpaste
- Screwdriver
Instructions:
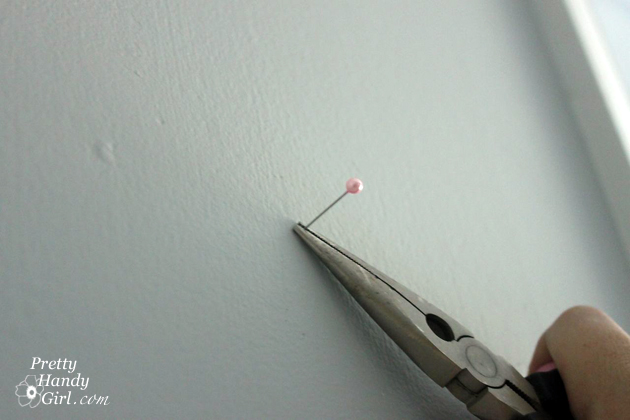
First I located the stud in the center of the wall. Locating studs is easy by using a quilting pin.
Next, you need to transfer the location of the outlet onto the back of the cabinet. I usually use red lipstick, but Sandra the Sawdust Girl had the idea to use toothpaste. It worked great!
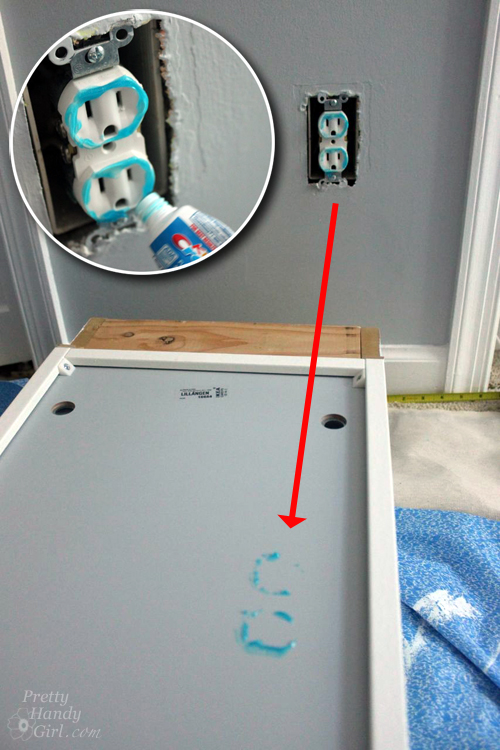
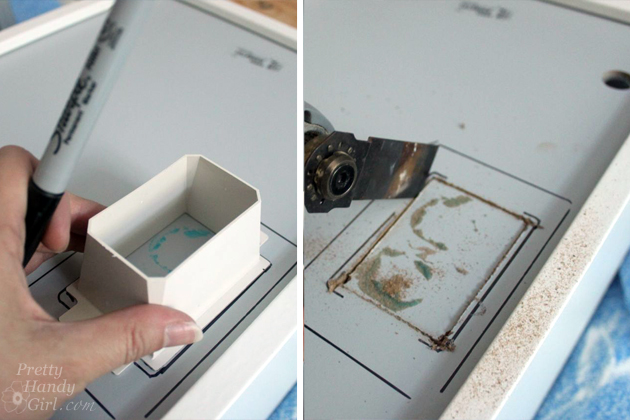
I traced the outlet extender around the outlet marks. And also traced the outlet cover to make sure it would cover the hole completely. Then cut out the inner hole.
Turn off the power before the next step.
Clean off the toothpaste. Then unscrew the outlet.

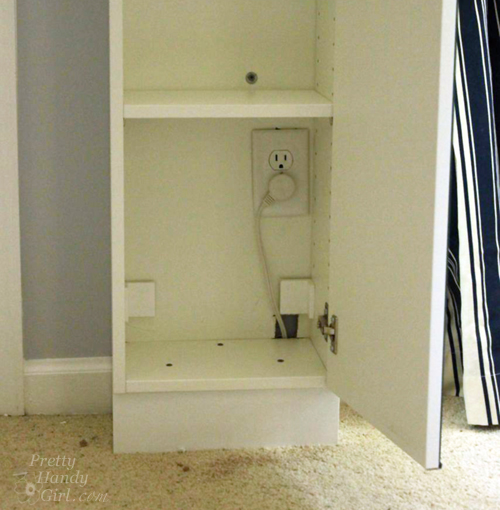
Lift the cabinet up and position it over the outlet hole. Check the location of the stud you found earlier. Measure in from the inside of the cabinet to the location of the stud. Secure the cabinet by inserting a screw through the back of the cabinet and into the stud.

Add another two screws to secure the cabinet to the stud.

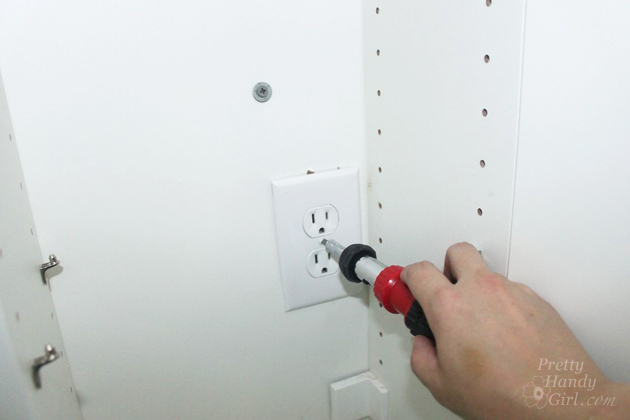
Put the outlet extender around the outlet.
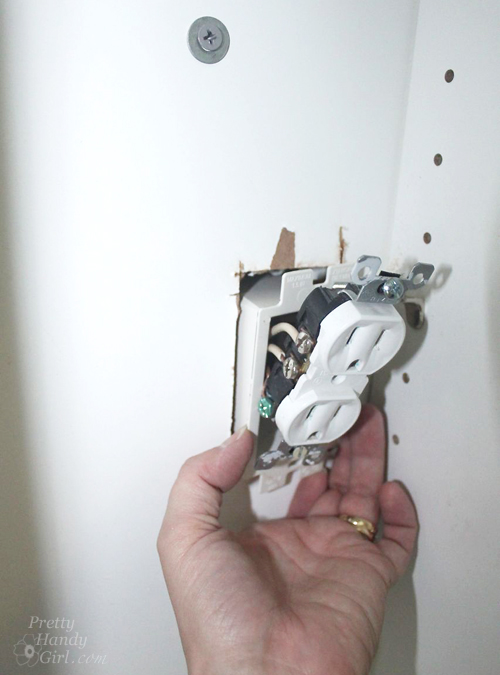
Re-attach the outlet to the outlet box. Replace the outlet cover.
To run the sconce power cord, I notched out the bottom of the cabinet to feed the cord through.
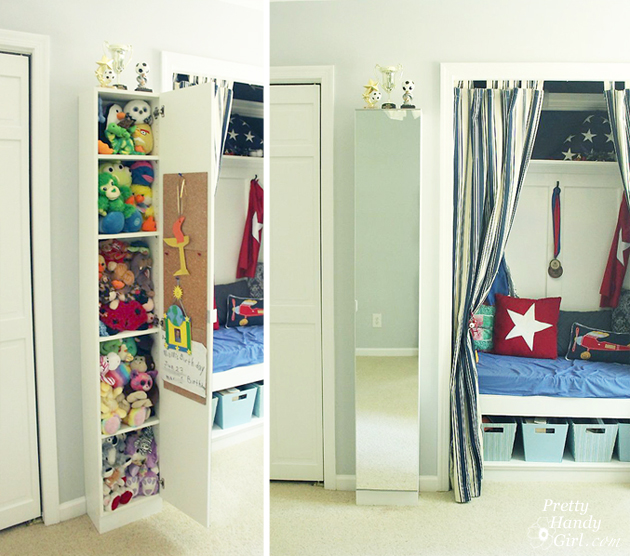
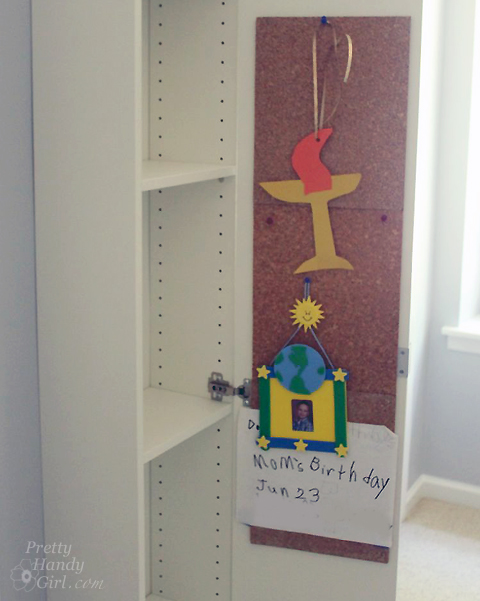
The locker got another upgrade. I attached cork bulletin board pieces to the inside of the door using double stick tape.

Now my son can hang his papers and miscellaneous art projects.
All we need now is to fill it up!
And…consider it full! Maybe if they are “locked up” they can’t continue to procreate.
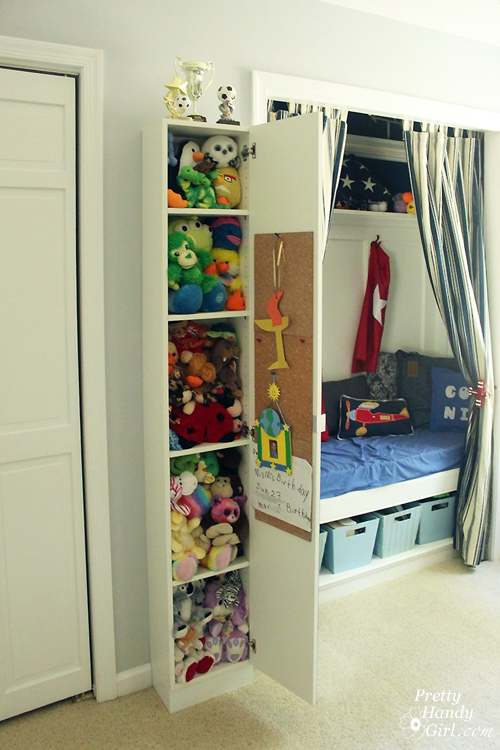
Until I figure out how to control the population, at least they can be out of sight, out of mind.
Now you see them…now you don’t. Anyone else have extreme breeding problems with stuffed animals? Any advice? Let it be known that I do not buy them more stuffed animals on a regular basis. The kids do have an allowance, but they seem to have a weakness for small furry things.
Stay tuned for the full room reveal coming up later this week!
![]()
Pin for later!


I think the toothpaste idea is great! I am concerned about the stuffed animals being stuffed right up against the electrical outlet. I have heard of fires starting that way when the electricity comes out of the outlet during an electrical storm. (I guess the house had been struck.) You might check with an electrician.
wow I am so looking forward to the full room reveal. the teasers have been pretty outstanding.\lucky young man
That was a score for that cabinet! I certainly could use this in a few small spaces of my own. The look is so clean & what a great place for his animals. I forgot all about that stud finder trick. I must remember this handy trick. Thanks again for enlightening my day!