Painting an Antique Wash Stand
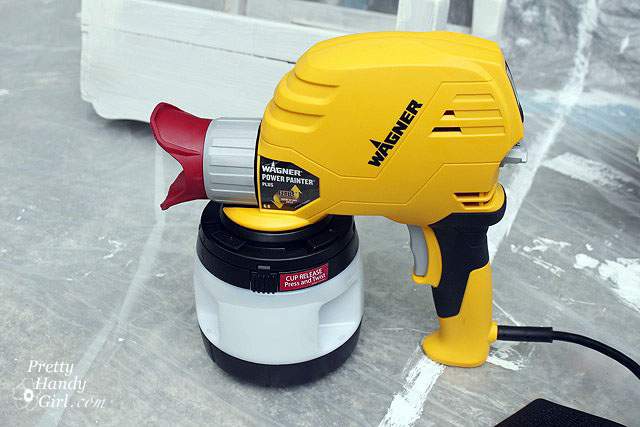
I have amassed quite a collection of “project” furniture and objects waiting for a future date with my creative magic sessions. I worry that some of this behavior is bordering on packratness (I don’t think that is a word, at least my spell check says it isn’t. But, you get my drift, right?!) So, when a Wagner rep contacted me about trying one of their paint sprayers, I couldn’t reply “YES!” fast enough. I had visions of setting up all those projects and spraying them down in a line-up fashion. But, I reined in my “glass half-overflowing” mentality and decided to tackle one project at a time. Good thing too, because although the Wagner Power Painter Plus with EZ Tilt (affiliate link) did spray at lightning fast speed, there were a few drawbacks.
But, I don’t want to get ahead of myself. I still want to give you a bonafide tutorial on how to fix, prep, paint and finish a wobbly yard sale find for yourself.
(I’ve included affiliate links for your convenience. I earn a small percentage from a purchase using these links. There is no additional cost to you. You can read more about affiliate links here.)
- Sanding Blocks – 60, 100 and 220 grit
- Gorilla Glue
- Clamps or rope to secure glued joints*
- Finish Nails (or brads)
- Baby Wipe or wet rags
- Paint Brush
- Primer (I used KILZ Clean Start)
- Acrylic Paint (semi-gloss or gloss preferred)
- Paint Sprayer*
- Power sander
- Wipe on polyurethane
*These items are purely optional. You don’t NEED them, but they help.
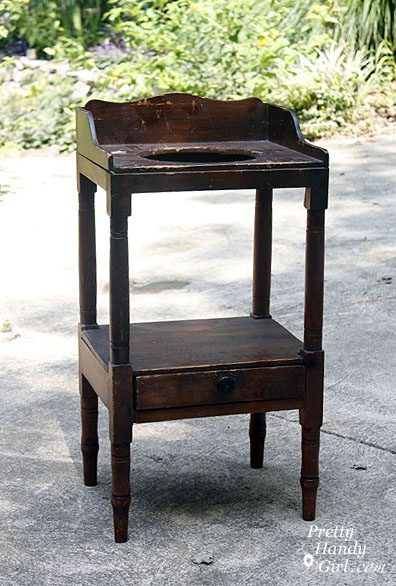
This wash stand had a $5 price tag on it. But, my neighbor gave it to me for $3. Is that robbery to talk someone into less than $5 for this antique?! In self defense, the stand was in pretty poor shape. It was VERY wobbly and had some big scratches on it. Can you forgive me?
Here is what you do when you find yourself as the new owner of a “this really should be trashed” purchase. Take it apart and rebuild it from the ground up. Having done this before with Daisy the Discarded Chair, I was prepared to tear this wash stand down to the ground. But, luckily it had some better joints than I had anticipated. So, I basically pulled apart anything that was not tightly joined.
The shelf over the drawer came off super easy.
As did a few joints.
I wiped the whole wash stand down with a wet rag.
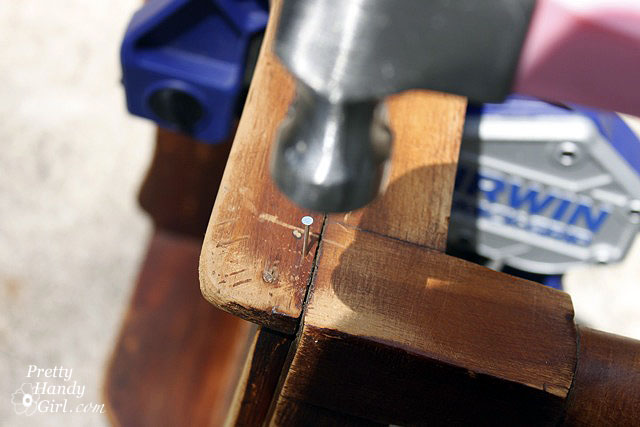
Then, the side of the stand got some new glue and a few finish nails.
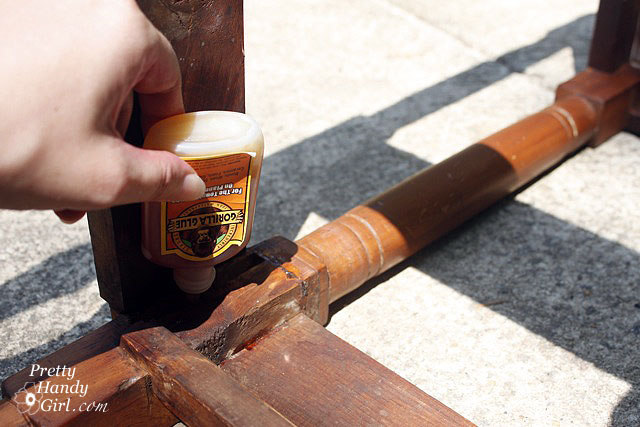
The joints got some Gorilla Glue and were set back together. And, I added a thin bead of glue and some finish nails to re-secure the shelf.
Next I sanded down the whole piece of furniture with these two 3M sanding blocks. I like to call them Tweedle Dee and Tweedle Dum because they are super easy to use. Even an idiot can’t screw up.
They work great for around spindly legs because they can bend and flex (I wish I could bend and flex like that!)
After wiping off all the sawdust, my wash stand looked like this:
Almost too pretty to paint, but it had some serious gouges, so I took a picture and said goodbye to the beautiful wood.
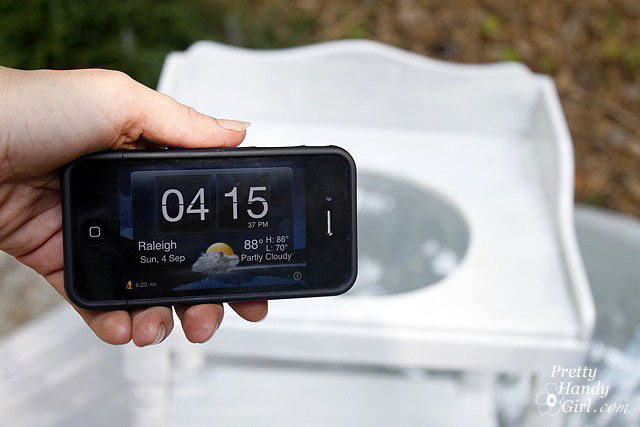
Here is where the race began. I decided to time myself painting on the primer with a brush. Then time myself using the sprayer for the first coat of paint.
Start your engine….paint brush and KILZ Clean Start Primer…GO!

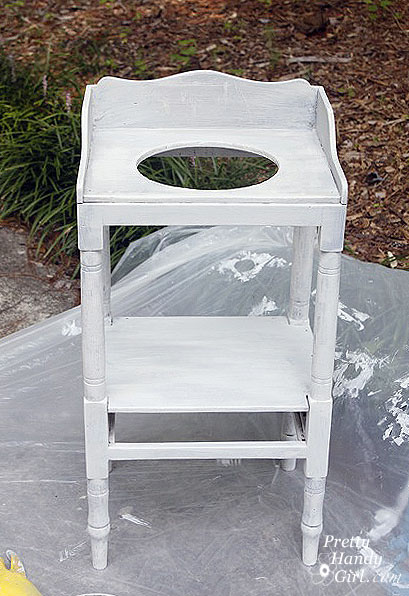
After 30 minutes I had primed the entire stand from top to bottom.
After the primer dried, I gave the stand a quick, light sanding with a 220 grit sanding block and wiped it down with a damp rag.
I set up the sprayer, read all the directions (very important!) Then I filled the quart size reservoir and attached it to the sprayer. The Wagner Power Painter Plus doesn’t require a compressor, just a good old fashioned extension cord plugged into your household outlet.
Start your engine…Wagner Power Painter Plus…GO!
VROOOOOOM! The sprayer let out the loudest and most obnoxious noise I had ever heard (Note to self to wear ear protection next time.) I thought the sprayer was going to self destruct, so I let go of the trigger. Then I pulled it again and the noise returned, only to abate after a few seconds once the paint started to come through the nozzle. Phew, that scared me.
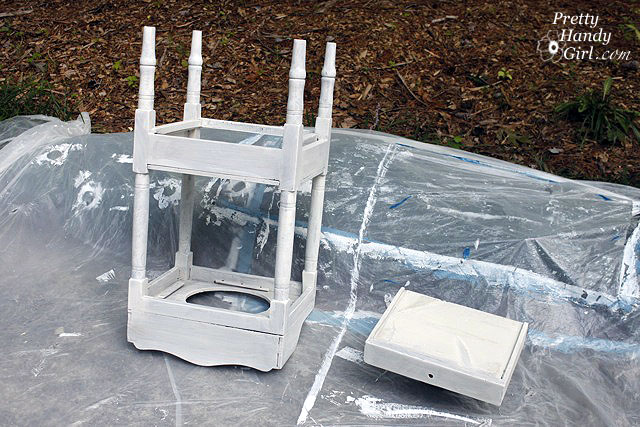
I breezed through painting the entire wash stand from top to bottom. I started with it upside down and quickly flipped it while it was still wet (I left a finger print underneath, but no one will know about that unless you squeal.)
And I was done. Then I looked at my timer and WHAT?!!! 5 MINUTES! Holy Cannoli! I had no idea a sprayer could shave that much time off a paint job.
I left the wash stand outside, while I took apart the paint sprayer.
To avoid emptying the paint canister, I covered the container with saran wrap and a rubber band.
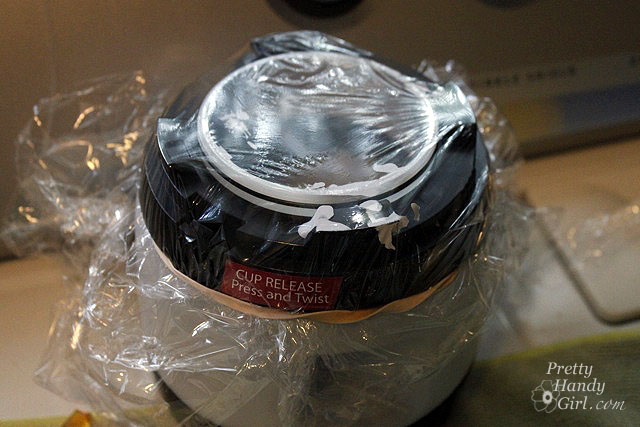
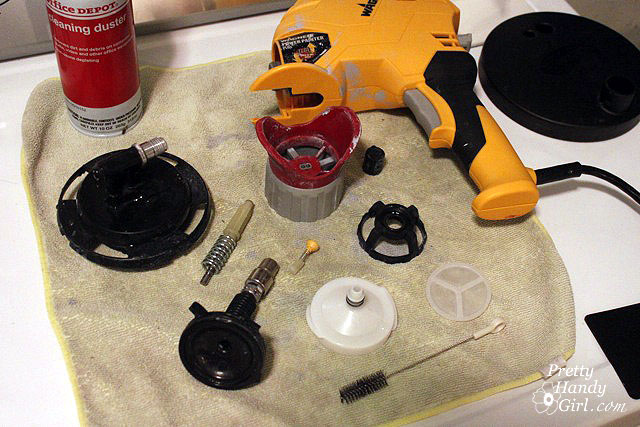
Then I took apart the ENTIRE sprayer and cleaned out all the parts. It is soooo important to clean the sprayer thoroughly or you risk paint drying in your machine and ruining it. This is a look at the sprayer disassembled.
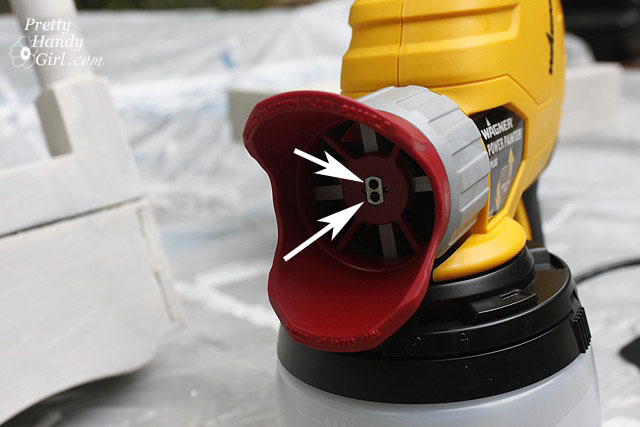
It is paramount to clean the tiny dual spray tips on the machine. They are small slits that can clog easily if the paint is allowed to dry in them.
After the wash stand had dried. I put the sprayer back together and screwed the paint container back onto the gun.
I was all pumped and excited to be done in 5 minutes! With dusk still 30 minutes away, I had no fear. BIG MISTAKE!
What was to ensue was a stressful 45 minutes of paint globbing, paint sputtering, my cursing, and frantic cleaning of the sprayer again. I finished spraying, but I had to use a different top coat color because I ran out of the first paint color. (Which ended up being one of those happy mistakes. You’ll see.)
I wiped off the big globs of paint and decided to give those areas a little “extra” distress in the morning.
After stepping back from the project, doing some research and having a twitter conversation with Shaunna (the furniture painting guru), here is what I concluded from my disasterouos 2nd attempt:
- The paint sprayer MUST have a full paint cup in order to work properly. When the reservoir gets down to less than 1/4 full any air that gets into the paint suction tube will cause the sprayer to sputter and discharge big globs of paint, instead of a nice even spray.
- The sprayer dispenses an INSANE amount of paint in 5 minutes and when it runs low #1 happens. I used a half gallon of paint on the first coat of paint on this small wash stand. Whereas, I normally would have used maybe half a quart to brush on two coats total. The drop cloth was so heavy with paint when I cleaned up, that I realized the majority of the paint was wasted in overspray.
- The Plus does not have a low paint level indicator. Therefore, it is very difficult to determine when you are getting low on paint until the sprayer starts to sputter and shoot out globs of paint onto your project.
- In the same vein, the paint canister only holds a quart of paint, and 1/4 of that isn’t useable unless you like Jackson Pollock style painting.
The next morning, I took out my power sander and gave the sink some character by distressing it.
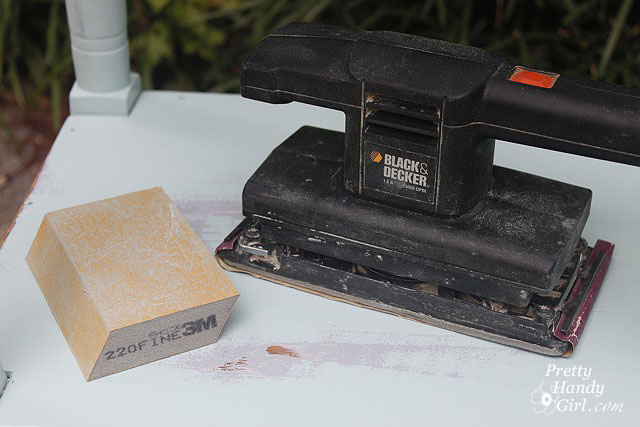
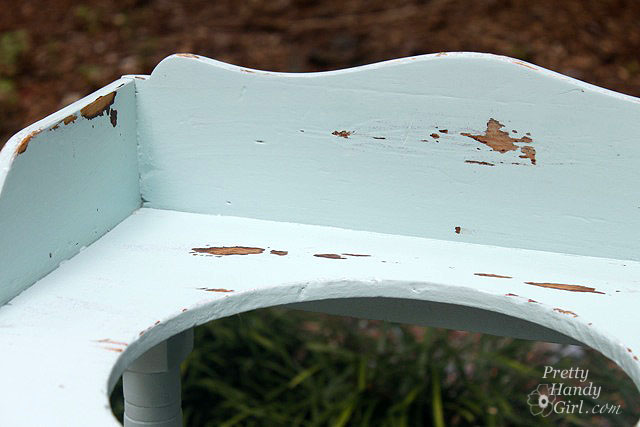
This is where the happy accident occured. Because I had to use an aqua blue as the top coat on my sink, you could see the blue gray color peeking out! Which I think makes it look sweet, shabby and old.
Once I was happy with the amount of distressing, I sanded any chipping paint and rough spots with the 220 grit sanding block. Then, I cleaned off the wash stand with a damp rag. To protect the sink, I used Minwax wipe-on Polyurethane. I like the wipe-on Poly for speed. But, it doesn’t leave as thick a coat as the traditionally brush on kind. So, if you really want to protect a piece of furniture, use the brush on kind instead.
I added a cute little crystal cheap acrylic knob to the drawer.
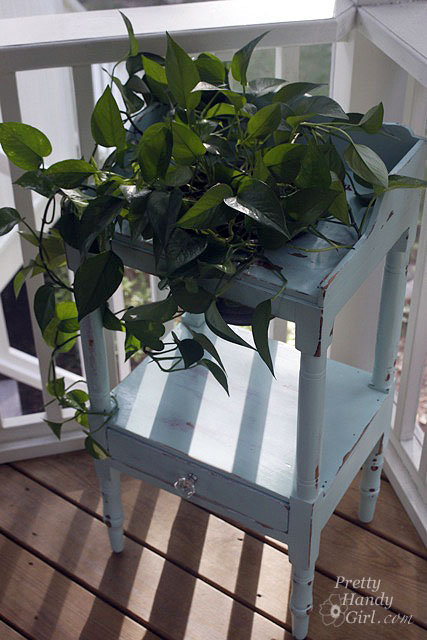
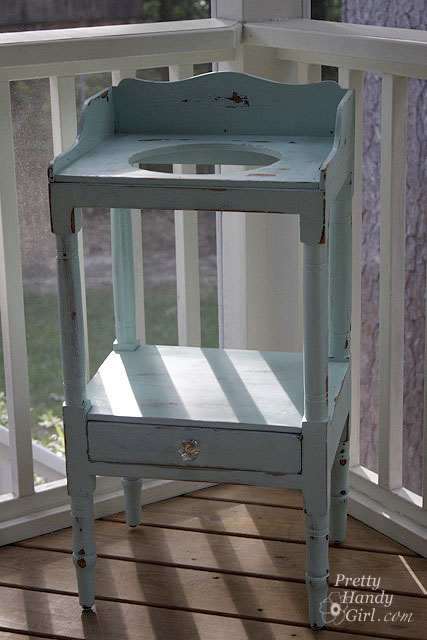
And my new/old dry sink looks right at home in the corner of my porch! Although, it needed something…hmmmm….
…how about a plant! I dropped in a plastic pot with NO holes in the bottom. I filled the bottom 1/4 with rocks for drainage. And my pothos plant. I used to have a chippy pedestal that sat there, but sadly I had to get rid of it. I’ll fill you in on the details next week. It is a sad story ;-(.
Here is my summary of working with the Wagner Power Painter Plus model:
- Pros – Saves time. $100 price tag. No compressor needed.
- Cons – Small Paint Cup, No Flow Speed Selector, No Low Paint Level Indicator, Lots of overspray and wasted paint.
I will definitely try the sprayer again. When I do I might add Floetrol to my paint, which is supposed to help your paint even out and give you a smoother finish. (Especially if it globs on you.)
- Wagner Power Painter Max has a two speed selector AND a paint level indicator. This model runs under $100. Have a great weekend and see you next week with some more DIY goodies.













Would love to use it to spray paint the lattice trellis we have been putting off painting. Thanks!
My deck is in desperate need of new stain, so the Deck Mate would make the job a piece of cake. I’ve been wanted to paint my ugly. dark 70’s kitchen cabinets cashmere white for ages and the Wagner Power Plus could get it done in no time
Wahoo!! I hope to win and I’m glad that I am a new follower! I have an arsenal of things I need to repaint…ie hopefully hide the ugliness of my husbands stuff that we have to keep! :p
This tutorial is WONDERFUL! Thank you for doing it : )
If I won this sprayer, I would FINALLY finish up some projects I’ve been putting off for a very long time now. The first one being paint a kitchen table I bought for 5 dollars at a yard sale!!
Oh my, this would be excellent to win because during the 5 1/2 years we’ve been in this house we haven’t touched up the deck’s stain or the front porch’s paint — this would remove a huge obstacle for us in getting this done.
Thanks for the tutorial! I have several furniture pieces I am looking to spiff up including a large dresser and a china cabinet.
This was really interesting. Thanks for the info.
If I won your giveaway, I’d use it to paint the outdoor kitty shelter I want to build for our neighborhood strays.
Despite the hiccups, your wash stand came out pretty!
I have a curio cabinet that I have wanted to paint for quite a while and this would be great! I bet that deck mate would come in handy, too!
I’ve been putting off restaining my deck but I’m now motivated and think this product would make the job much easier therefore I would love to win it!
Brittany — Your blog is one of 5 I follow religiously (even though you don’t need to be a follower — just wanted to give you a thumbs up)!
I am really wanting to change the colors of my shutters and front door on my house by painting them a darker color. I think that the previous owners did a quick, uneven job of it to sell the house…and they just kind of blend in with the siding.
I have a bench out in our back yard that I bought paint for and want to strip and repaint it. THis would make that so much eaiser!
Your little project turned out great… I was a little nervous for ya but like always you pull through! I have a couple of things that are needing a bit of TLC (two end tables and a coffee table). Winning this sprayer just might help me out! Thanks for your honestly and for sharing your real life experiences. AJ – queenofmynest(at)gmail(dot)com
My daughter & I are just starting to redo old furniture and we’re loving every minute of it! This tutorial was super helpful & informative! I would love to win this awesome sprayer & use it to paint the furniture pieces with lots of detail in the wood. Seems like this would be the perfect solution 😉
Thanks so much for your honest assessment of the sprayer. I’m looking to buy a house really soon so both of these products would come in handy for all the projects I’m sure I’ll be doing. I would like to paint my bedroom furniture & I’m not looking forward to brushing an almost 8ft armoire lol.
I love how your plant stand turned out! I also love your blog (I tell you that all the time) 🙂 When it comes to giving tutorials you don’t skimp. For a newbie like me that is soooo important! I also like how you tell it like it is – you’re not a sell out. In saying all that, man o man, would I ever love to win one (esp the deck painter) ours needs it so bad! And yes, with all my new “knowledge” I can see the beauty in old beat up pieces *thanks to you* and would love to refurbish them – Still in that learning curve. My hubby says I am turning into a hoarder! 🙂