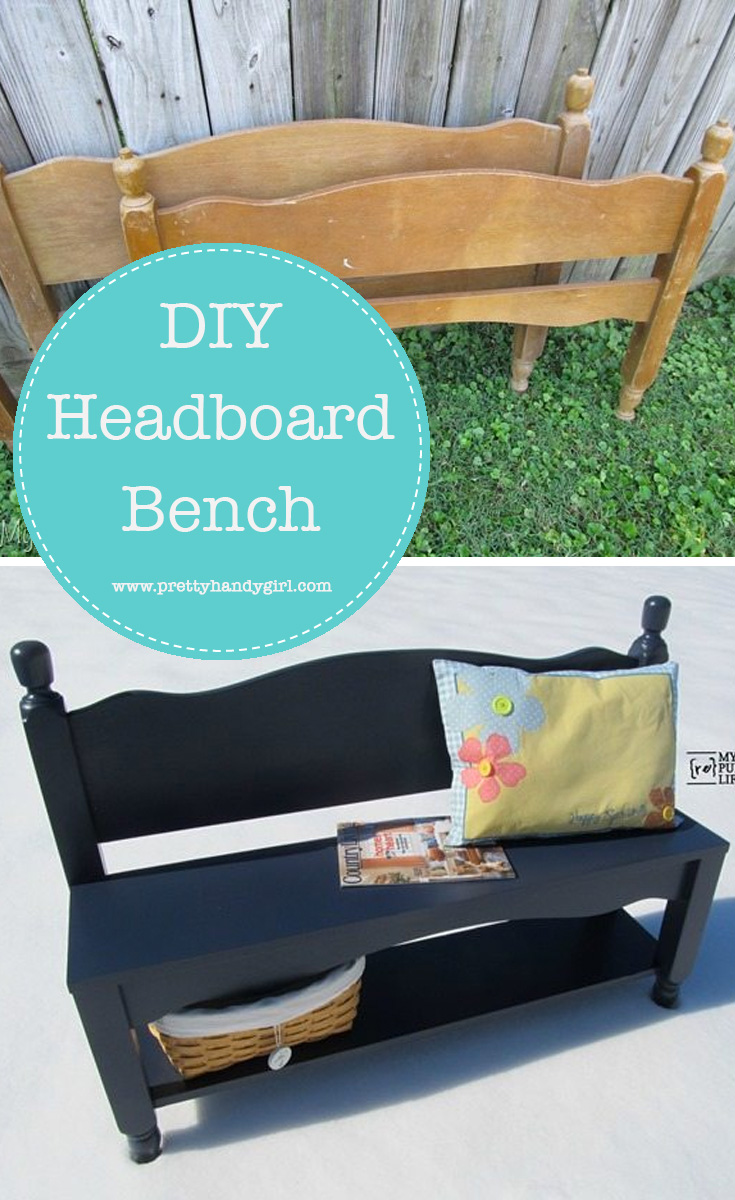
How to Make a Headboard Bench

Today’s Rockstar is one of the bloggers that I aspired to be when I started blogging. This gal truly paved the way for DIY Bloggers. Gail is here to show us how to make a headboard bench. Watch closely as she deftly converts an old headboard into a cozy entryway bench.

Gail is the rockstar behind the wildly famous My Repurposed Life! She has the ability to see beyond the ugly junk and trashed items on the curb. She has a way of seeing the beauty in all of it!

I hear the sounds of hammering, Gail is ready to take the stage! Give it up for this rockstar!
![]()
Hi there Pretty Handy Girl readers. I am so happy to be here, because I’m a huge fan of Brittany. I’ve followed her blog for a long, long, time.
I’m Gail from My Repurposed Life. If you don’t know me, the blog name sort of gives it away. I mostly blog about repurposing items; saving them from the landfill; and giving them a new purpose in life. Many people who find me through Google, do so by looking for headboard benches. It’s pretty much what I’m known for. Today, I’m going to share one of my all-time favorite headboard benches with you.

A supply and tool list is at the bottom for your reference.

I got two sets of these bunk beds for a steal at a thrift store. They’re not typical of the headboards I normally pick up—I prefer larger headboards.
You can see the piece in the back is slightly larger than the one in the front. That identifies it as the headboard.

You can see the headboard is in tact, but the foot board was cut on the miter saw right above the brace, leaving the top half of the foot board for another project. At this point you decide how deep you want the seat of your bench to be.

I used scrap 1×4’s for the side that connects the headboard to the foot board. All of my boards are secured using a Kreg Jig and pocket hole screws.

See how easy? the bench is already formed with a few simple steps, you could stop right here and add a seat. However, I knew I wanted to do a little something extra for this petite bench.

I wanted to add a bottom shelf. I had never done that before (or since). I used another 1×10 notched out with a jigsaw to fit around the legs of the bunk bed. More pocket holes make it easy to attach the shelf to the legs.

It was nice that I was able to attach the lower shelf to the squared portion of the bunk bed legs.

Because it was such a tight fit, I used a ratcheting screw driver instead of a cordless drill to secure the pocket hole screws.

Now, to get rid of the pesky knobs that allowed this headboard to be a bunk bed. I used a Dremel Multi Max to do a flush cut.

After a little sanding, you can barely tell it was ever there. It’s the extra steps you take that will make your bench stand out and look a little less like a bed.

Voila! It’s a small bench with a lower shelf for storage.
I used my nail gun and Gorilla wood glue to attach the seat to the frame.

I mixed up a batch of my DIY chalky paint that I use as a primer in 99% of all of my furniture projects. This paint is very flat and doesn’t require you to do a lot of sanding or prep for your project.

After 2 light coats of the DIY chalky paint primer, I did 2 light coats of Naval In Behr semi-gloss.
I love how this bench turned out, I think it’s perfect for an entryway, or at the end of the bed.
Below is the list of things I used to make this easy headboard bench with storage shelf. (affiliate links)
- Kreg Jig
- Kreg Jig pocket hole screws
- Jig Saw
- Dremel Multi Max
- Miter Saw
- Ratcheting screw driver
- nail gun
- Gorilla wood glue
- 1×10 (8 ft)
- 1×4 (scraps)
You could use L brackets if you don’t have a Kreg Jig, but I highly recommend purchasing one, it really makes building fun and easy. If you don’t have power tools, you could use a hand saw instead of a miter saw. Each bed is different, so your bench and lumber list may vary. Good luck and have fun. Please share with me if you are inspired to make your own entryway or end of bed bench.
I would love to have you stop by My Repurposed Life to see some of my projects. If you love repurposing, here’s a great place to start:

250+ Repurposed Projects from My Repurposed Life
Thank you Brittany for allowing me to share my project with your friends! Hoping to hang out with you all sometime in the near future.
-gail
p.s. Let’s connect on social media Facebook, Twitter, and Pinterest
![]()
What did I tell you! She’s amazing, isn’t she! A huge round of applause for Gail. That completes our Rockstar DIY Series. I hope you enjoyed the performances.

Pin for later!
My husband recently made me a bench from a headboard. My question is do I need to use a chalk paint? I want the bench to look antiqued in an off white color. I’ve painted it in a flat off white color and then used a dark antiquing glaze over it. I don’t really like the look. Do you have any suggestions?
Thank you,
Coleen, have you tried sanding it to distress it more? You don’t have to use chalk paint. I do recommend using a dark paint or stain under the white paint then distress it.
Super tutorial, loved the different take on using the footboard as the front of the bench and the bottom shelf as well!
She is indeed one of a kind, paving the road to this diy movement. It takes a lot of vision and courage to turn junk into treasure. I also enjoyed the step by step tutorial, as it features all the information required for getting the job done.
This is great! I’ve been saving a headboard for just this purpose; I don’t have the footboard so I’ll have to figure out a way around that though.
Brittany,
Thanks so much for allowing me a spot on the “stage”. How much fun to hang out with everyone!
I look forward to your returning to your own rockstar status very soon!!!
gail