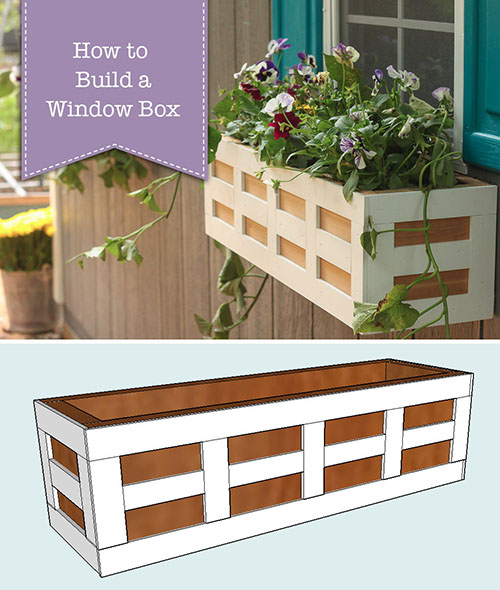
Learn how to build charming lattice window boxes to boost your curb appeal. This easy DIY guide uses simple materials with beautiful results!
Window boxes have always been on my “want to do” list for my house. But, I put it off because I didn’t want to build seven for our house.
When I built the shed, I knew I could dress it up with two flower window boxes.
Today I’ll show you how to Build Lattice Window Boxes to give your shed or house that beautiful cottage touch and improve the curb appeal.
How to Build Lattice Window Boxes
If you have a house that needs a little charm and character, adding window boxes is an easy way to add architectural style and curb appeal to your outdoor spaces.
But why settle for standard sizes of off-the-shelf window boxes when you can make your own window boxes that have beautiful lattice details in the size that you need!
Plus, you dictate the size of your rectangular planter, which gives them that custom look.
Stick around and learn how to build custom window boxes today and dress up your windows tomorrow.
Materials:
The variety of materialslisted below are for one window box. (I’ve included affiliate links for your convenience. I earn a small percentage from a purchase using these links. There is no additional cost to you. You can read more about affiliate links here.)
1″ x 8″ x 8′ (7 ½” actual width) cedar planks
2 – 1 ½” x 10′ white vinyl strips (in window and door trim aisle)
(*A note about window box sizing: The measurements below are the ones I used for my shed window boxes. I’d suggest measuring your own windows first and add at least 2″ beyond each side of your window frame to get custom sizes. I added 3″ to each side of my window boxes.)
2 – 1 x 7 ½” x 26″
2 – 1 x 7 ½” x 6″
1 – 1 x 6″ x 24″ (you’ll need to rip one of the 7 ½ boards to 6″ wide)
Instructions:
Lay out your wood pieces on a flat surface.
Apply wood glue to the perimeter of the bottom piece (shown in center above.)
Set the front, back and side pieces in place.
Clamp the pieces around the base to form your box shape. Use 1½” finish nails to secure the front and back pieces to the sides and the base.
For more strength, wood screws will be added next.
Pre-drill three holes into the bottom and two holes into the sides using 1/8″ drill bit.
Then drive screws into the pre-drilled holes to add additional support to the window box construction.
Repeat for the opposite side.
Flip the window box over and drill 7/8″ holes into the bottom of the window box for drainage.
Time to dress up your plain Jane box. Measure and cut the vinyl pieces to fit around the perimeter of each panel.
I suggest making the horizontal pieces full length. Then cut the vertical pieces to fit.
Nail lattice pieces in place with 3/4″ finish nails.
Measure and cut vertical lattice pieces for the box. Space the pieces evenly and secure to the front and two sides of your window box with finish nails.
For more detail cut and secure horizontal pieces to the centers of each framed square.
Fill the nail holes with caulk.
To keep potting soil from pouring out of the holes, staple weed fabric inside the window boxes.
Easy installation
Your window box is complete and can now be hung. Drill and secure your window box into studs or wood supports with exterior wood screws.
Fill with potting soil and flowers and enjoy your gorgeous garden decor.
Water your plants regularly as they will dry out faster in window boxes.
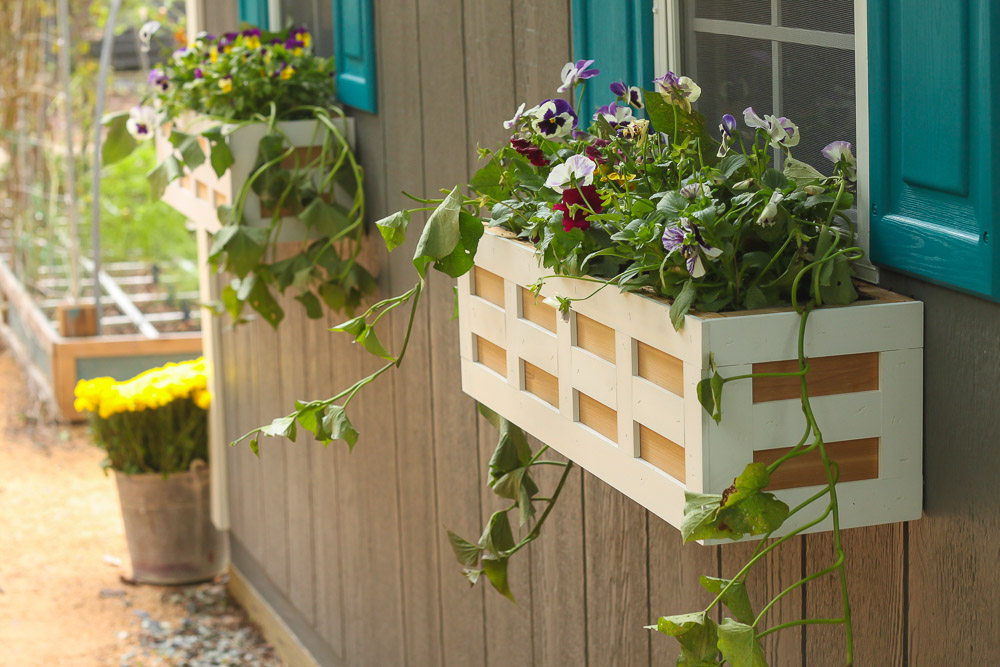
Enjoy the instant charm and character you just added to your windows with an elegant window box that you built yourself!
These wood window boxes provide an elegant touch, with a beautiful design aesthetic, similar to iron window boxes without the expense.
Pathways around your home can be functional (protecting grass, your feet, or creating a smooth surface to walk on.) Paths can be whimsical, natural, utilitarian, or decorative. Today I’ll share 10 creative concrete-free walkway ideas for your home and gardens.
Alternatives to Concrete Walkways
Spring is around the corner and that means more time spent outside. If you’re looking to improve your landscaped pathways, you’ll want to check out these lasting alternatives to concrete walkways. Many are DIY-friendly and can be accomplished in a weekend. Others might require a professional landscaping crew.
Concrete is the most commonly chosen material for a front sidewalk. It is quick and simple to install. Plus, cement can last for a long time barring any damage from frost heaving and improper installation. Paths to the front door are usually straight forward and easy to navigate. (Imagine if your movers had to navigate a bumpy or uneven path into your home.) But, concrete cement isn’t the only option available to homeowners. Feel free to do something a little different from the Joneses. Here are a few of the many options for creating lasting pathways in your landscaping (not just the front entryway.)
Exposed Aggregate
A slightly more decorative pathway than your traditional cement sidewalk. This path has smooth pebbles that are embedded in the concrete and exposed (after hosing off) on the top layer for a durable and texturally appealing walkway. Exposed aggregate should last as long as a concrete and sometimes longer if an epoxy resin method is used.
Concrete Pavers
The Europeans have many beautiful romantic cobblestone streets. But, walking on them could be a little like balancing on a tightrope. Modern advances have developed pavers that look like cobblestones but are a lot less likely to cause you to roll your ankle. Pavers are available in a wide variety of shapes, styles, and colors. There are even concrete pavers that look like bricks. Because they are manufactured, concrete pavers are uniform in size making them easy to install. Another advantage of using pavers is if damaged, a section can be removed and re-installed.
Concrete Paver-Edged Pathways
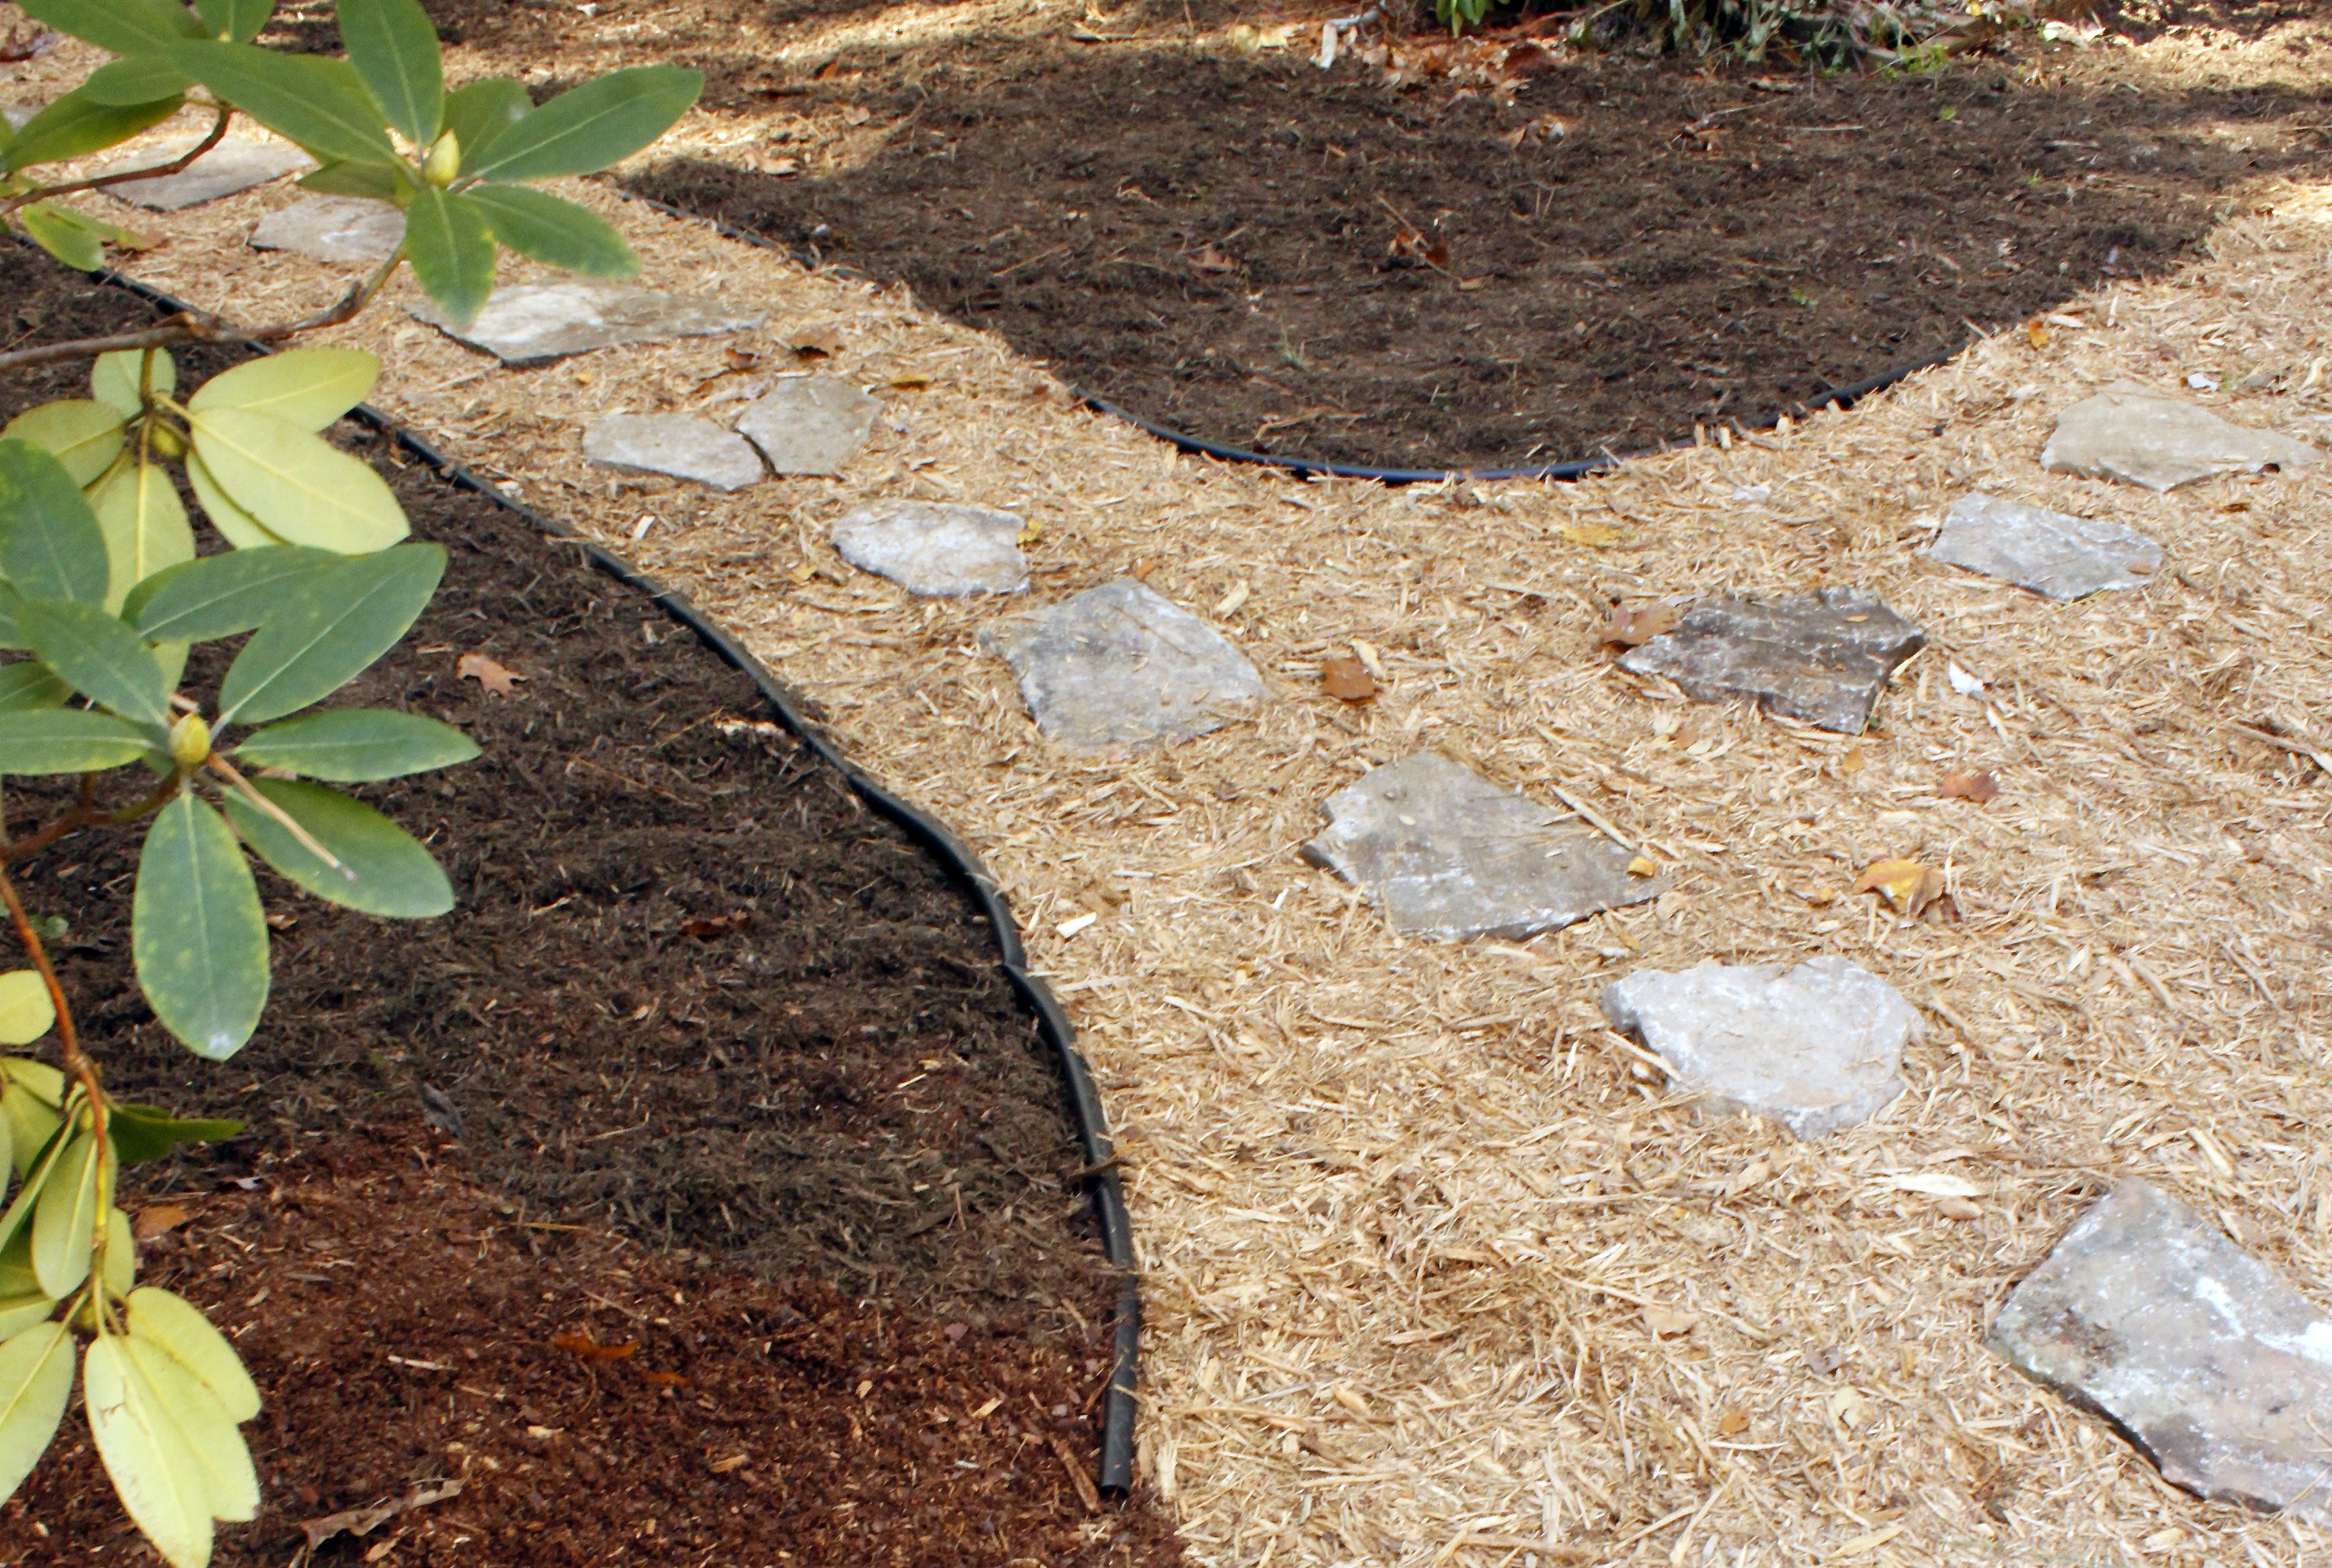
Create lasting borders, but save some money and effort on laying a full paver pathway, you’ll appreciate a concrete paver edged path. Use pavers as the edgings but then fill your path with any material you like. Crushed limestone or granite make excellent pathway bases. But, you can also use inexpensive mulch or pine straw. Here’s a great tutorial on laying your own concrete paver edging.
Brick Pavers
A long pathway of bricks harkens back to colonial times. Believe it or not, bricks are produced in a variety of colors and textures. If you like the old antique look, buy some tumbled bricks that have rounded corners. Even more fun than picking the style is picking a pattern. Brick patterns are almost infinite. Herringbone, running bond, basket weave, and jack on jack are just some of the patterns you can create with bricks. Similar to the concrete pavers, damage can be fixed fairly easily. But, be forewarned, if you don’t lay your brick pathway correctly, it will begin to change shape over time.
Natural Stone
Bluestone, Cantera, Flagstone, Granite, Limestone, Marble, Porphyry, Sandstone, Slate and Travertine are all stone slabs that can be used for stone pavers. These flat slabs of rock make them ideal for wider pathways and patios. The beauty of using stone is that no two are identical because they are all-natural from the earth. If you’re looking to create your own, this is a good starting tutorial.
Crushed Stone
Crushed stone, decomposed granite, and a hybrid of crushed stone and polymer are inexpensive alternatives to an expansive pathway. Typically found in bridal paths, this material is a good choice for controlling dust and mud. To contain the material, consider using stones, landscape edging, or pavers to create a lasting border.
Permeable Pavers
Honeycomb and grid-like pavers are often seen where water runoff is discouraged. Grass, moss, or small gravel can be inserted between the pavers for more color. The large holes in this path allow water to permeate back into the earth. They are very environmentally friendly and graphically pleasing to the eye. But, they are also sturdy enough for a car to drive over.
Boardwalk Decking
This type of pathway is usually built over wet, soggy, or sandy expanses. Most often seen in coastal or modern architecture, this material can last for years if pressure-treated lumber or composite decking material is chosen. To build your own lasting boardwalk decking, follow this tutorial. Real wood will require staining or sealing to keep the wood from rotting.
Stepping Stones
Bring yourself back to your childhood with a fun stepping stone path. This pathway is a fun and quirky trail to walk on. There are a multitude of materials that can be used for stepping stones. Any large stones and/or pavers can be set on the ground and then surrounded by pea gravel, mulch, grass or left natural. But don’t limit yourself to stones in this application. Hardwood tree stumps can also stand in for stepping stones. The tree stumps will deteriorate over time, but you can slow the process by sealing them with an exterior varnish and/or allow proper drainage around them.
We’ve come full circle back to concrete. There are so many ways to jazz up a regular concrete path. Consider stamped and/or stained concrete to add some color and to fool the eye. Stamped patterns are numerous with styles that look like bricks, slate, cobblestone and even cracked earth! For more personalized options, choose any color combination to stain your concrete.
As you can see, you can create a variety of looks for the paths in your yard. Many are DIY-friendly and some may require professional installation. What were your favorites? Do you have ideas for lasting alternatives to a concrete walkway?
Ready to improve the look of your outdoor area with pathways around your home or garden? These are some great step-by-step tutorials for DIY walkways:
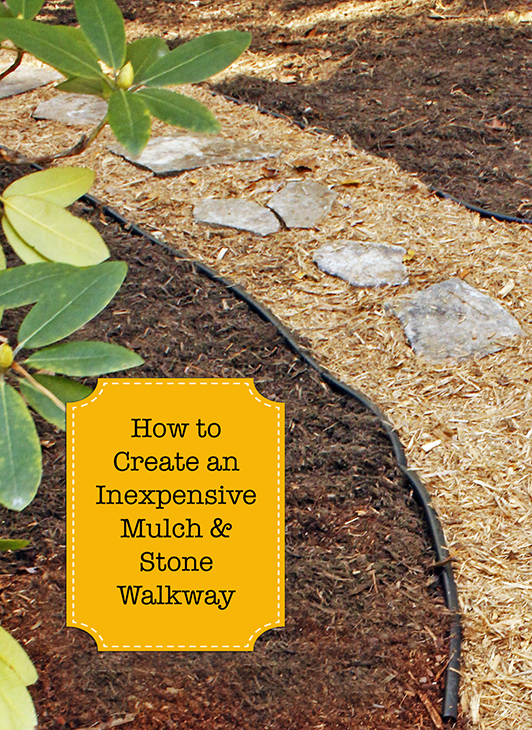
https://prettyhandygirl.com/wp-content/uploads/2025/02/10-concrete-free-walkway-ideas-for-home-garden-feature-image.jpg778995Brittany Baileyhttps://prettyhandygirl.com/wp-content/uploads/2021/07/PHG-logo-tagline-2020-1030x211-R.jpgBrittany Bailey2025-02-14 07:26:042025-05-07 16:47:4210 Creative Concrete-Free Walkway Ideas for Your Home
Learn my tips and tricks to create a beautiful thriving garden bed in no time.
The SureFire Way to Create a Thriving Flower Garden Bed
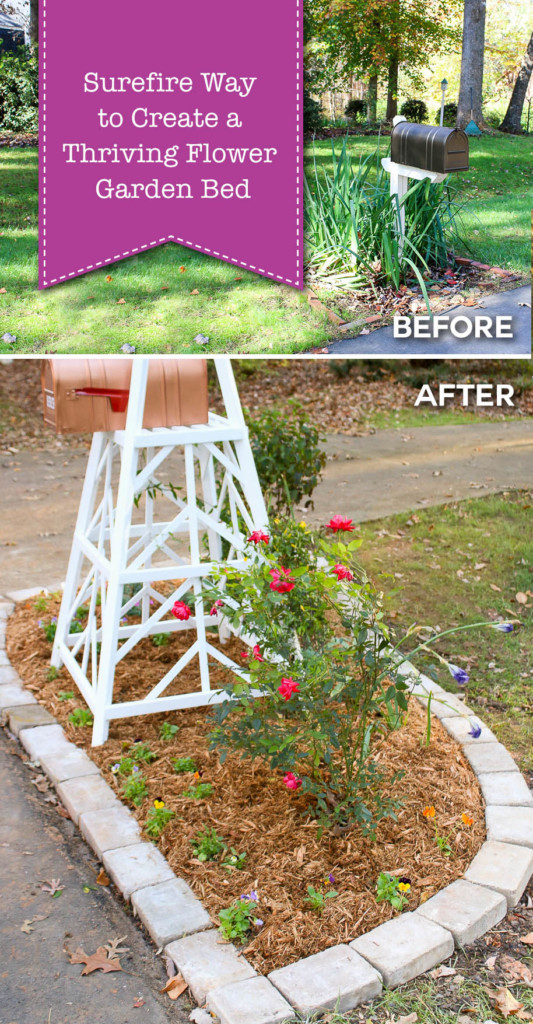
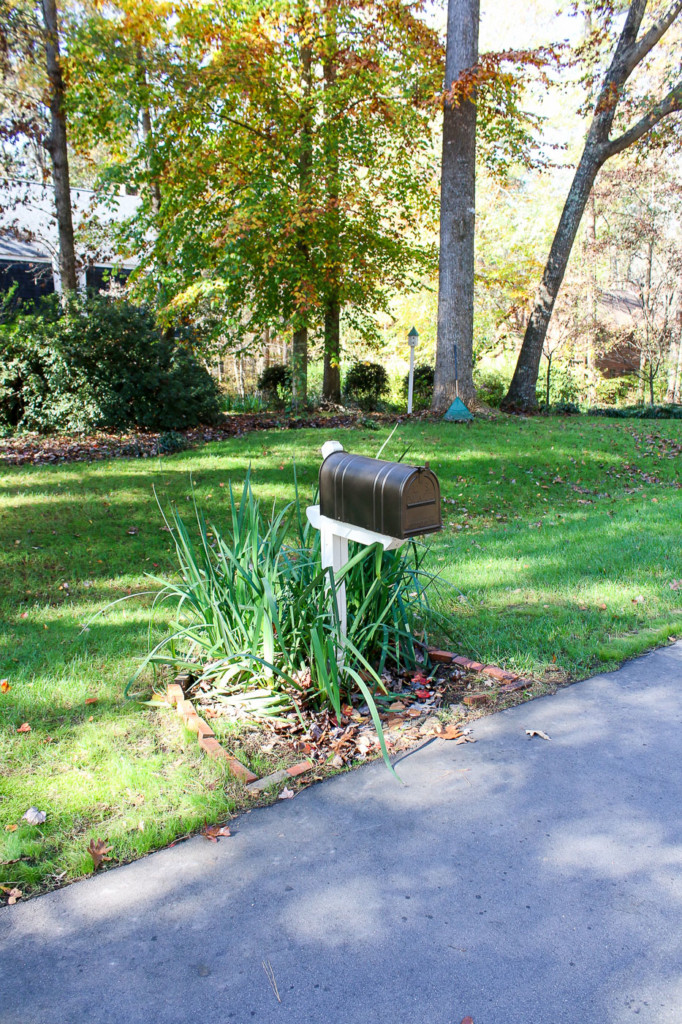
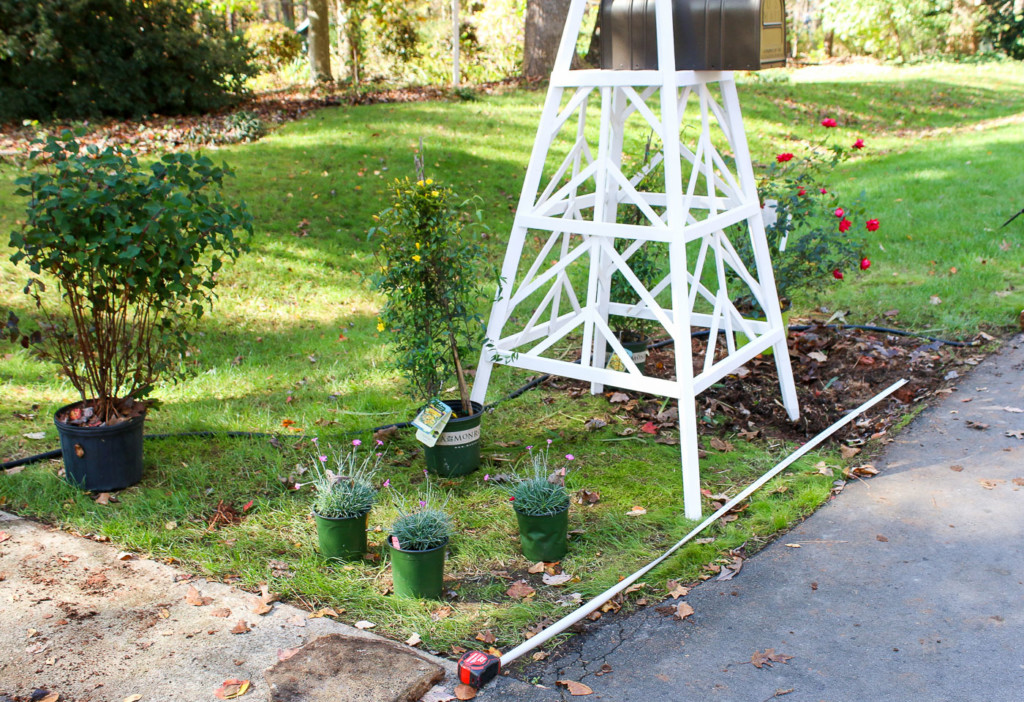
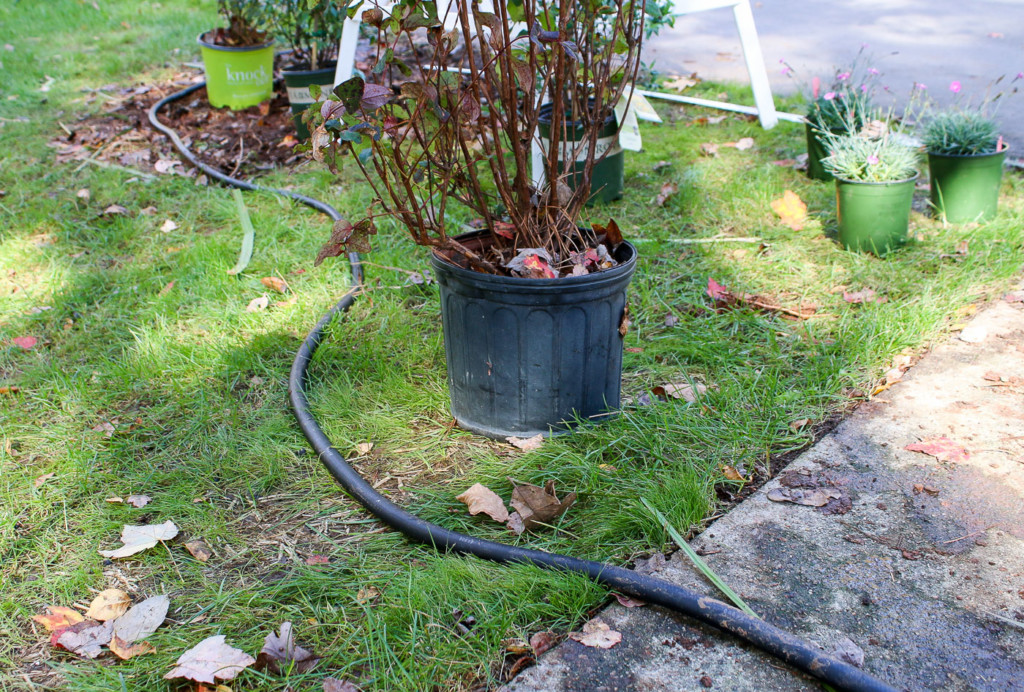
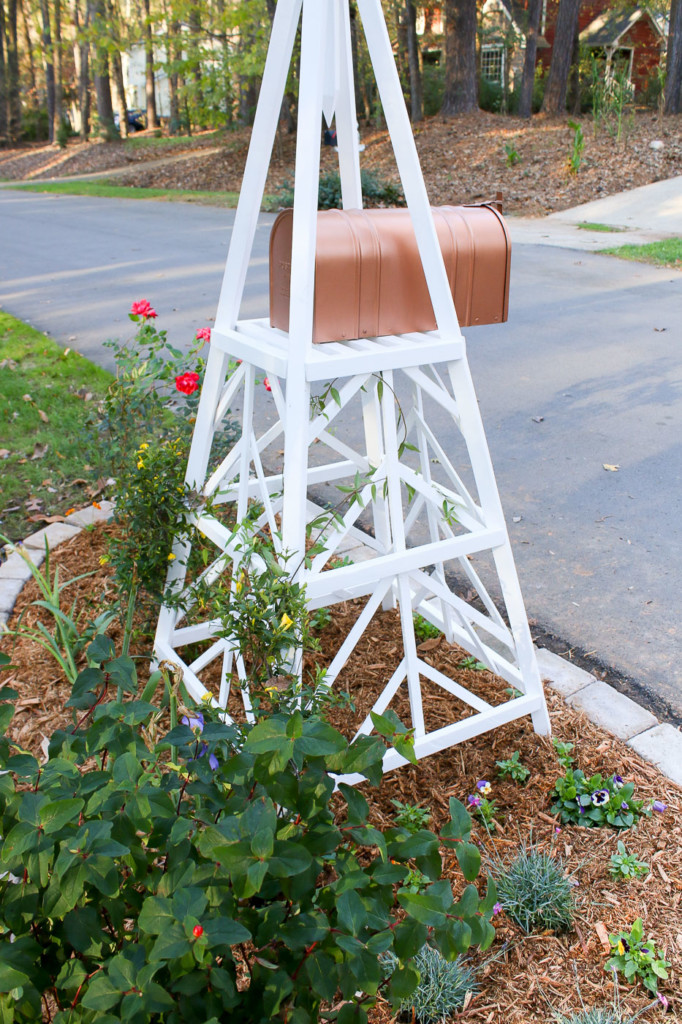
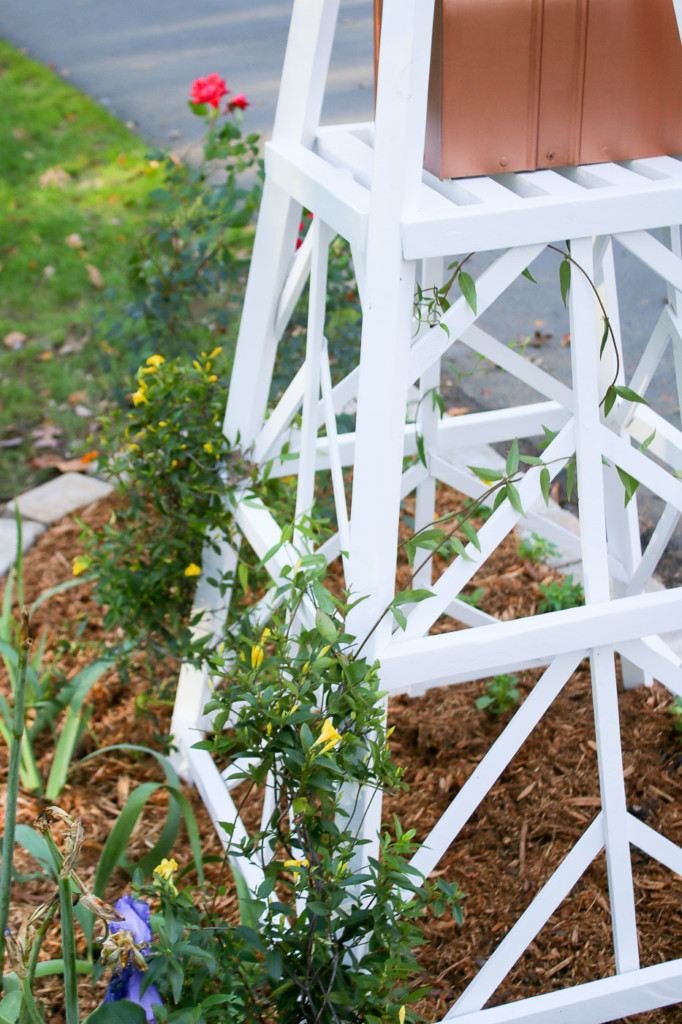
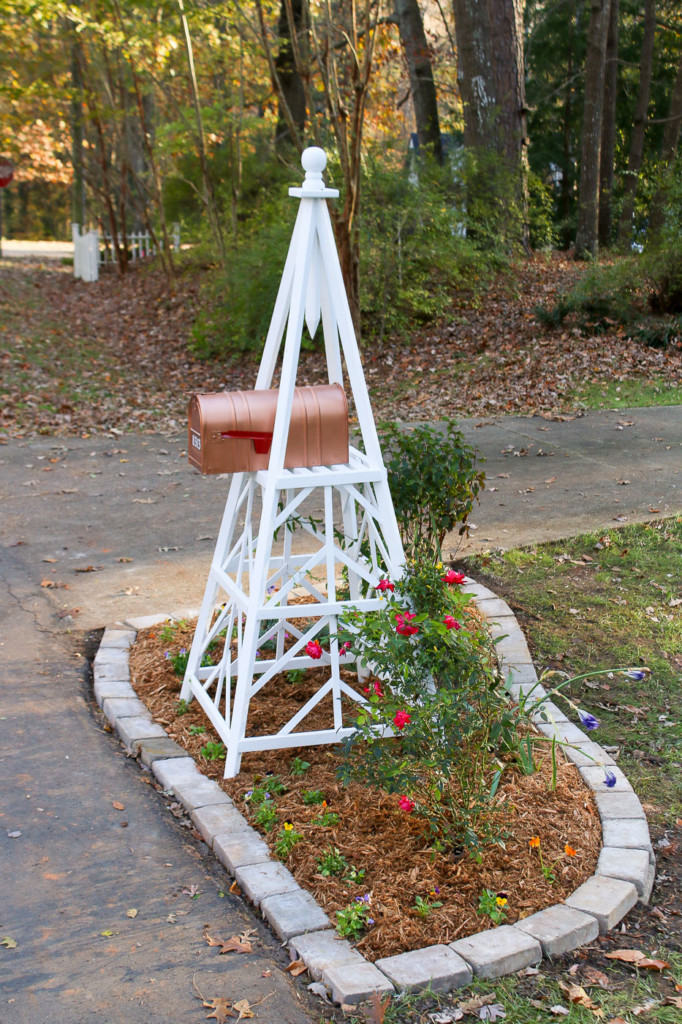
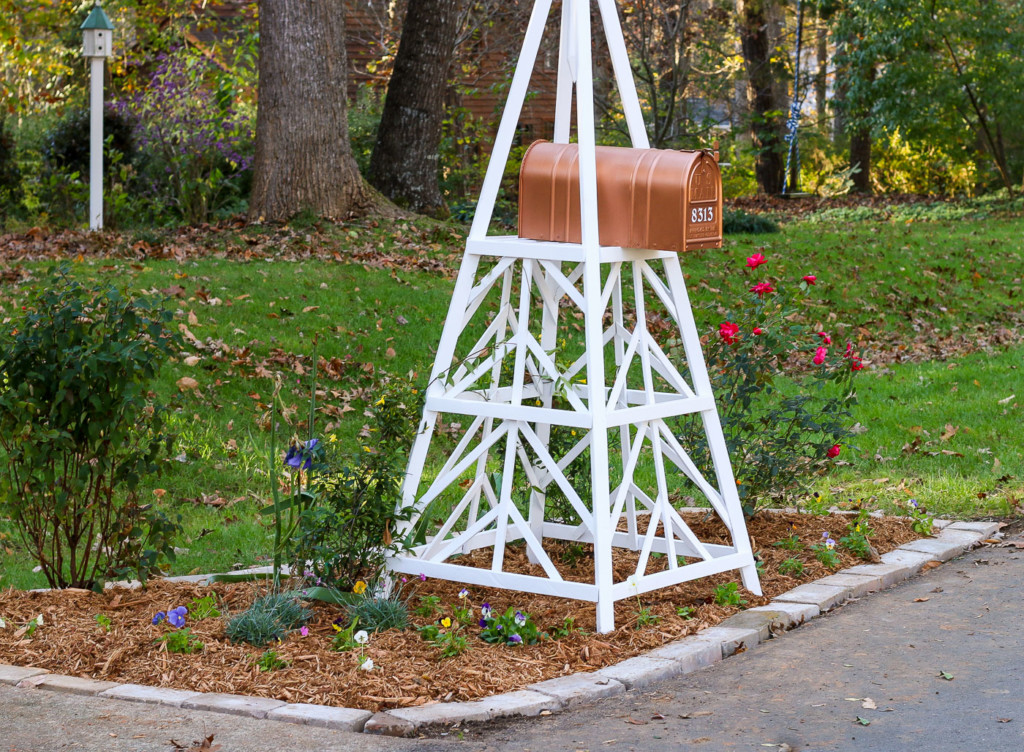
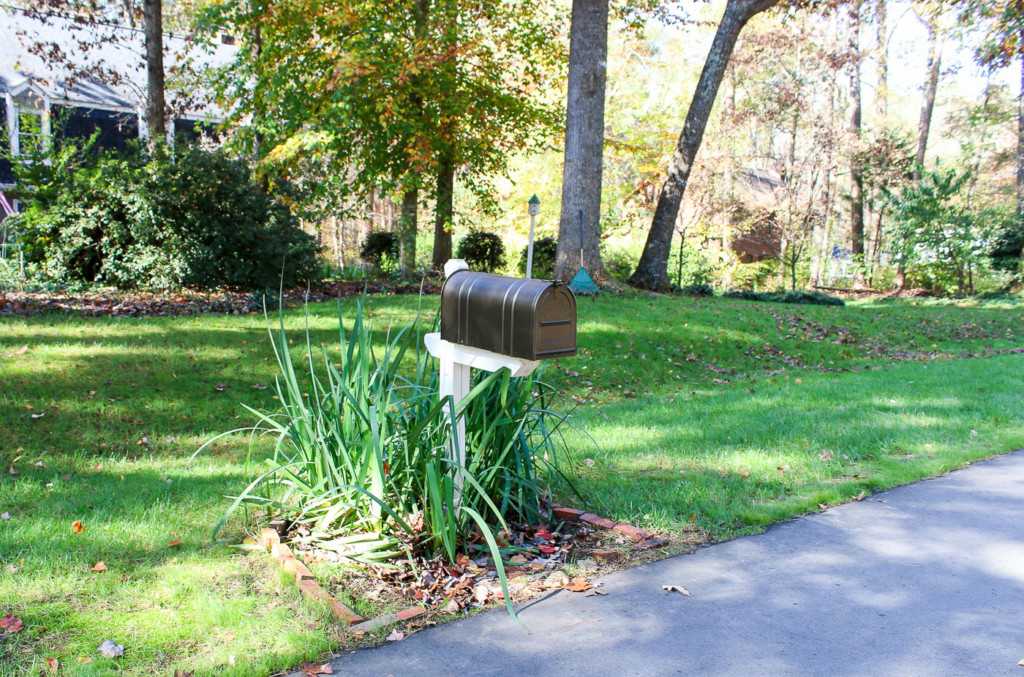
We live on a beautiful tree-filled lot in North Carolina. I love all our trees, but sometimes I crave a spot for beautiful sun-loving flowers. The area near our mailbox is one of the only places that gets enough sun for a full-sun flower garden. Unfortunately, that spot by the mailbox wasn’t really thriving.
Back when I first created that flower bed, I was an inexperienced gardener. I didn’t condition the soil, and the only thing that really seemed to be happy there were a few transplanted iris tubers from our backyard. They never bloomed in the backyard, so I figured they’d be happy in a sunnier spot.
Each year I anxiously awaited some pretty iris blooms, but every summer I was disappointed. This Spring something unfortunate happened, that was actually a blessing in disguise. Our mailbox got hit and it split the mailbox post in half. At the time I was too busy to deal with it, so I put a few screws into the post and left it alone through the spring and the summer.
Now that Fall is here, it’s the opportune time to amend that area and plant a thriving sunny flower bed!
Why Fall is the Best Time to Plant a New Garden Bed?
Summer can be a formidable environment here in North Carolina. The hot weather quickly dries up any moisture in the soil and the sun can scorch tender shoots from new plantings. But, once Fall arrives, the temperatures are milder and not as harmful to those tender new plants. While it might seem like the plant isn’t growing when planted in cooler weather, under the soil those roots are growing and getting established. When Spring arrives, the plant will be more established and ready to send out new shoots and flowers.
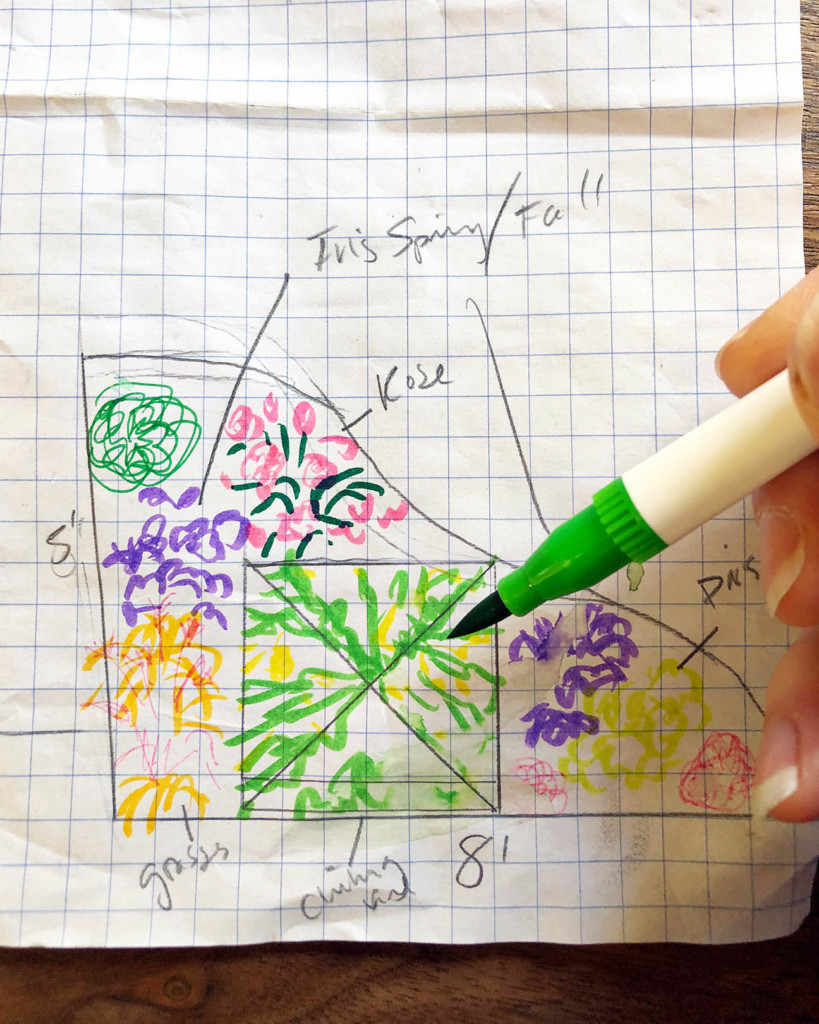
How to Decide Between a Straight or Curved Bed?
It may seem daunting trying to decide a shape for your flower bed. Unless you have hardscapes that dictate your shape, look at your house style to help decide.
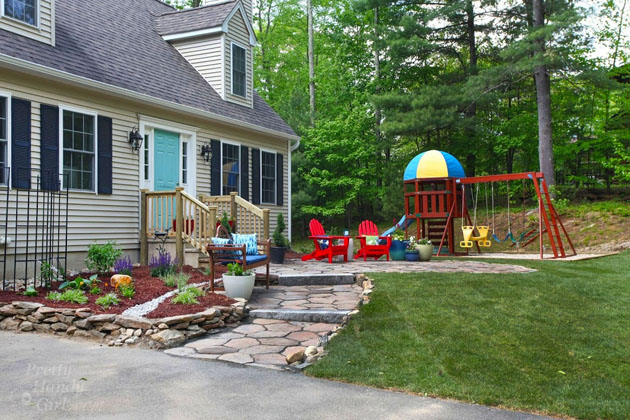
This right-angle styled backyard looks great against a large transitional coastal home.
Meanwhile, in Massachusetts, this Cape Cod style house looks right at home surrounded by loose curving beds.
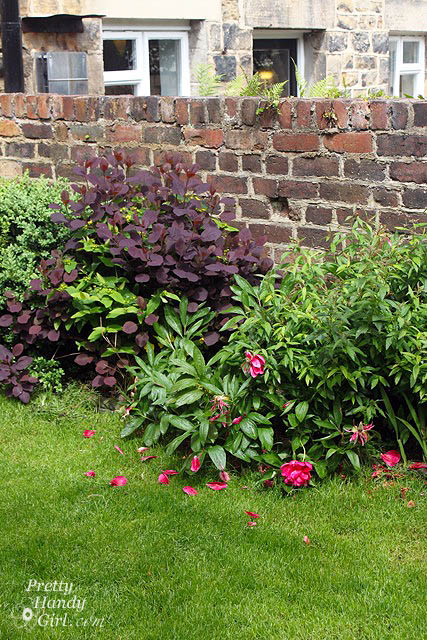
An English countryside row house is perfect for informal plantings that hug the brick wall but spill into grassy areas.
In the city, where planting areas may be small, a few neatly planted foundation plantings look perfect.
Of course, these aren’t rules that can’t be broken. Ultimately, it’s your yard, so make it a reflection of what you love!
Planning Your Flower Bed:
Interesting flower beds have a variety of colors, shapes, sizes, and textures. Create a sketch for your ideal garden bed before heading to the nursery. In your plans, position taller plants at the back of your bed and shorter plants in the front. Make sure you leave enough room between plants as they fill out and mature.
Although your plans might change once you reach the plant nursery, at least you have a general idea for what you want before being overwhelmed (or underwhelmed) by the choices.
Perennials or Annuals:
Perrenials are plants that grow and return every year. They are the “plant it and be done” way of gardening. By contrast, annuals are plants that typically bloom once and then die. Some annuals will deposit seeds to start new plants next year, but typically they don’t return in full force like the parent plant. Although they don’t last, annuals are a great way to inject new colors and style into your existing flower bed (especially while you are waiting for perennial plants to fill out.
When combined, perennials and annuals can create a beautiful flower bed. Personally, I like to plant mostly perennials in a flowering bed because I’m lazy and I still get beautiful new flowers every year. Annuals are usually reserved for my planter pots. (You can learn how I create knock out container gardens in this article!)
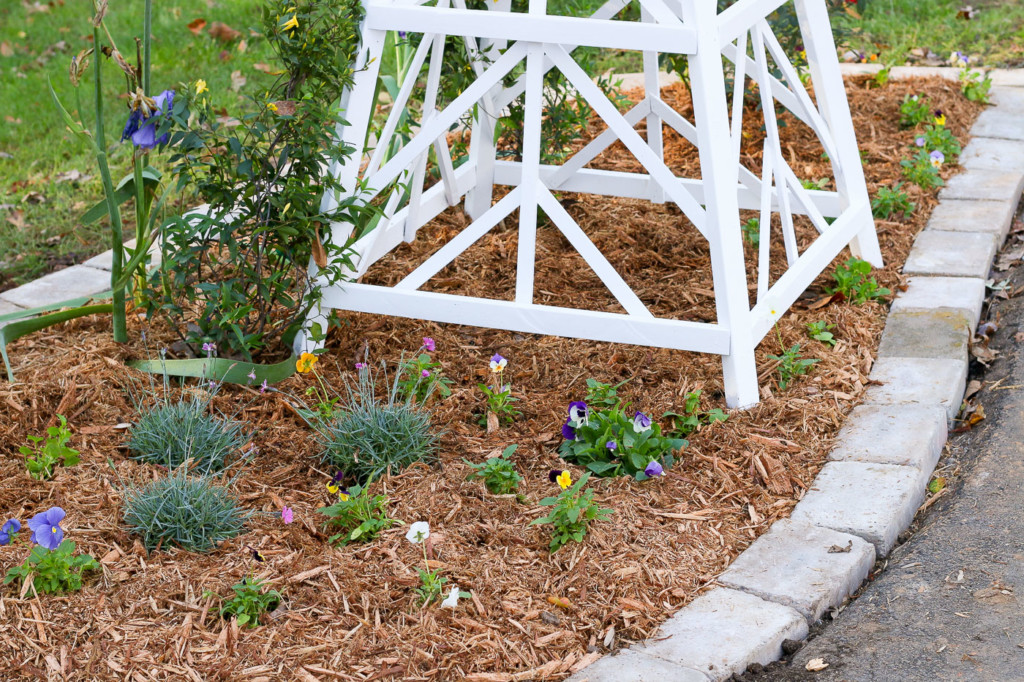
However, to give some much-needed color to my new flower bed, I added some annuals (specifically some pansies). Our climate is usually mild enough that they will bloom once again in the Spring before dying. Then I’ll swap them out with seasonal perennials in full bloom. Buying plants in the Fall and Spring will give you a better idea of how the mature bed will look throughout the year.
What Exactly is Full Sun, Part Sun, Part Shade, and Shade Conditions?
Plants each need a certain amount of sun, but those amounts and types are varied. To successfully determine the amount of sun your property receives, create a sun map by observing your yard throughout the day. (Tip: Don’t create your map in the winter or early spring before the trees have all their leaves out or you may be surprised when that sunny area is mostly shaded in the summer.)
Full Sun – Plants with a full sun denoted on their label need a minimum of 6 hours of direct sun to thrive.
Part Sun – Plants in the part sun category must receive 3-6 hours of direct sun to be happy. But they require some protective shade or dappled shade the rest of the time.
Part Shade – Plants in the part shade category can also handle 3-6 hours a day, but they like early morning or dappled shade as opposed to receiving their sun in the mid-day when the sun is at its hottest.
Shade – These plants love nothing more than a good shady spot under a tree or shaded by a structure all day. They can handle a little morning or dappled sun, as long as they get to stay cool the rest of the day.
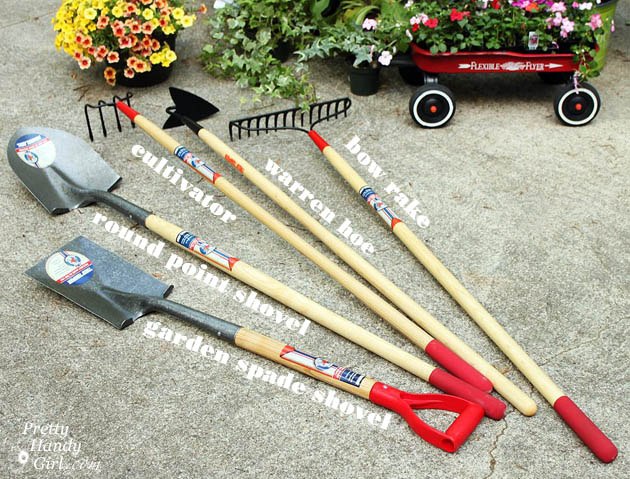
Tools & Materials to Create a Successful Flowering Garden Bed:
(I’ve included affiliate links for your convenience. I earn a small percentage from a purchase using these links. There is no additional cost to you. You can read more about affiliate links here.)
Materials and Manual Garden Tools:
To create a new flower bed, you’ll need a few supplies.
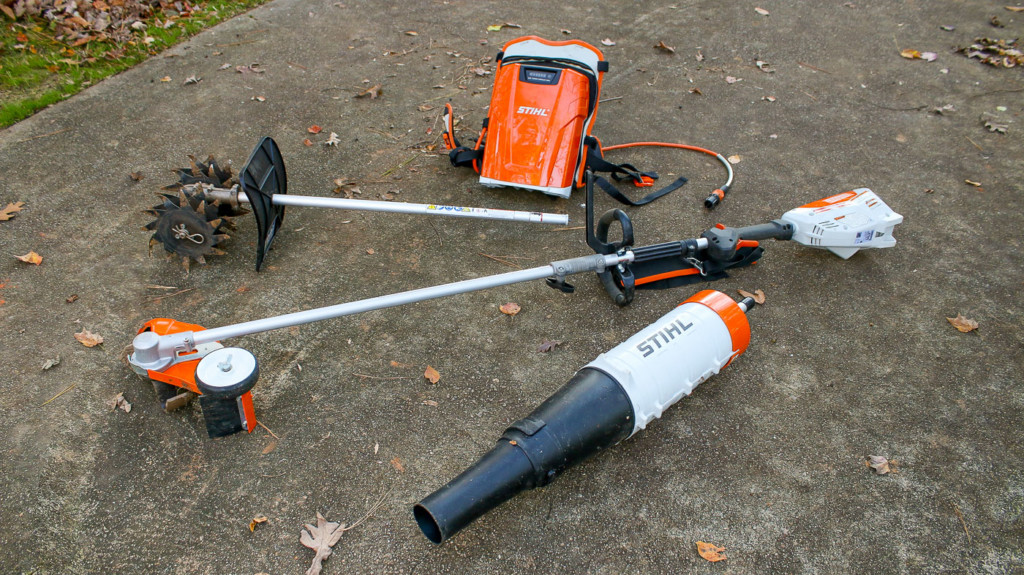
Although you can create a flower bed by hand, having power tools at your disposal will not only save you time, but they can save you from an aching back and sore muscles. I can tell you first hand, breaking up tough red clay and compact soil can be one of the most sole-crushing activities if you don’t have a power cultivator! While creating my new garden bed, I fell in love with the power and versatility of the STIHL Battery-Powered KombiSystem.
Here’s where I need to let you know this post has been sponsored by STIHL. If you’ve been around for a while, you know I absolutely love the quality and power behind the STIHL name. For this project, my friends at STIHL sent me the battery-powered KombiSystem and some attachments to try out.
What’s so Great about the STIHL KombiSystem?
If you’re like the majority of homeowners, you don’t have a lot of storage in your garage or shed for yard tools. Although I built this cute garden shed a few years ago, it’s become the default storage for everything from yard tools, to bikes, and beach gear. We’re running out of space in there, which is why I love that the KombiSytem consists of one powerhead that powers a wide variety of attachment tools. This will save you tons of space in your yard storage area and allow you to acquire new tools as you need them without buying a new machine for each landscaping task.
While you are saving space, there’s no lack of power with the KombiSystem powerhead! The powerhead are available in a battery-powered unit or several gas-powered ones. Personally, once you go battery-powered you never go back! Several years ago, STIHL convinced me to try one of their battery-powered mowers. I thought for sure it would fail to keep up with our 2/3 acre of lawn. Boy was I wrong. Since then, we’ve slowly replaced our gas tools with battery-powered STIHL tools. What I like most about the battery power versus gas, is finishing all our landscaping tasks without smelling like a gas station!
Lest you think battery-powered landscaping tools are only for neat little postage-stamp-sized yards, we live on a heavily-wooded lot. Our landscaping is a constant battle against nature therefore, there’s no room in our yard storage area for wimpy landscaping tools.
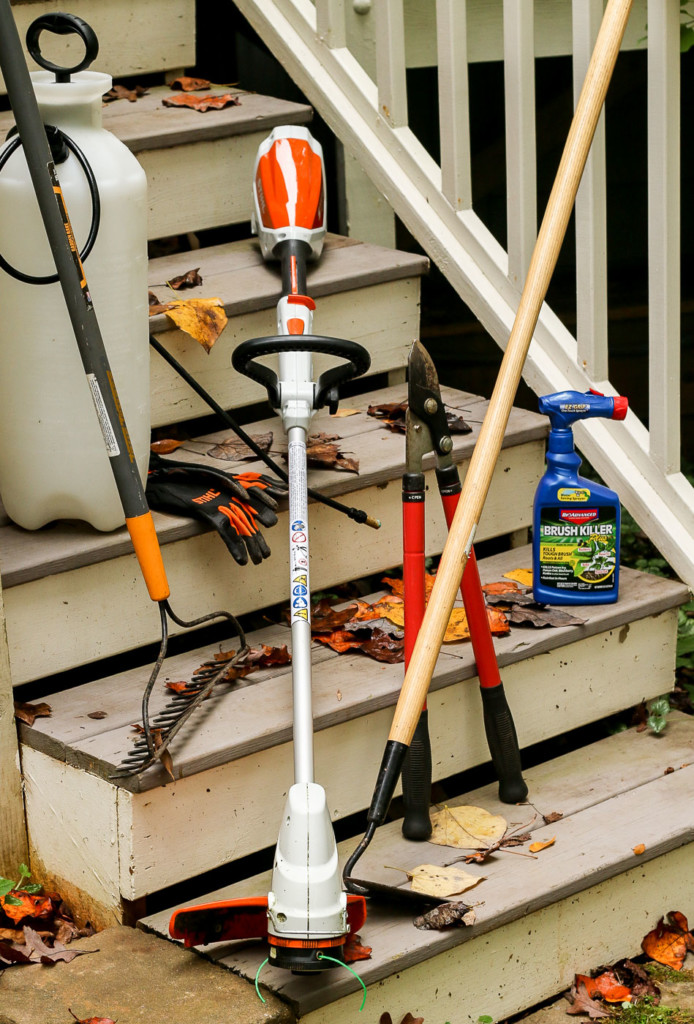
Personal Protective Equipment:
When using power tools, it’s imperative to wear appropriate protective gear. When creating your new flower bed, you’ll need to have these on hand:
How to Create a Thriving Flower Garden Bed in No Time
When you’re starting from scratch, creating a new garden bed can seem like a daunting task. But, I’ll show you the quickest and most effective way to create a thriving flower garden bed in no time! As I mentioned above, you can use manual hand tools, but you’ll soon find yourself fighting against hard-packed earth and wish you had power at your disposal.
Laying Out Your Border:
If your new flower bed consists of straight lines, use stakes and string (or long pieces of pipe or lumber) to layout your bed. But, if you want beautiful curves, you can’t beat a garden hose. The hose won’t easily create sharp bends, which means it will keep your lines smooth and aesthetically pleasing. Plus, it will hold its shape long enough to let you outline the bed with spray paint.
Once your bed outline is defined, set your plants and any objects into the bed and make adjustments to your bed perimeter as needed.
Outline your bed shape with spray paint and then it’s time to dig in that dirt! I created a video so you can learn the quickest way to create a new flower garden bed. (Hope you get a good laugh at my husband’s commentary.)
If you’ve ever dug a hole in a new spot and planted something only to find it dead a few weeks later, you now know how important it is to condition the soil before planting. New plants need soft and nutrient-rich soil to thrive. Think about how tiny and tender new roots are? They aren’t strong enough to push through tough red clay or compact soil. Plus, they need soil rich in minerals and nutrients to support healthy growth. To condition the soil, mix some native dirt with good quality topsoil and compost (if you have some.)
Composting: Black Gold for Your Garden and Flower Beds
If you haven’t started a compost pile, what are you waiting for?
Potted plants can have roots that have outgrown the pot. When this has happened, they will grow around the inside edge of the pot creating a root-bound situation.
It’s important to cut into the perimeter of the root ball and free the roots to encourage them to grow out into the new soil.
Planting for Optimal Success:
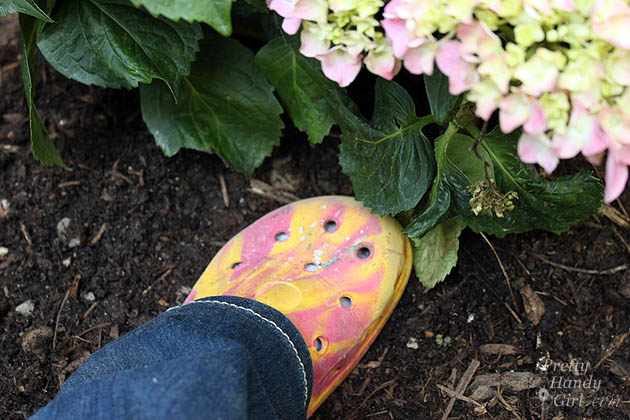
Now that you have your good soil and a plant ready to spread its roots, it’s time to plant. For the best chance at survival, dig a hole twice as wide as your plant’s root ball. Add several inches of quality topsoil and compost into the base. Then put your plant in the hole. Fill the sides around the rootball with more topsoil and compost material. Then gently step around the plant to compact the soil against the root ball. Doing this will get rid of any air pockets around the roots.
Types of Mulch:
Mulch is an important addition to any flower garden. It helps retain moisture so your plants don’t need to be watered as often. Mulch also acts as a weed barrier. And finally, it acts like a blanket protecting new root systems from a sudden cold snap.
Shredded Hardwood Mulch: Shredded mulch is my preferred choice of mulch. It’s easy to acquire, organically breaks down adding nutrients to the soil, tends to stay put, and adds a nice dark brown color letting the colorful flowers really shine. The faster decomposition is the only negative to this choice because you need to re-apply yearly.
Pine Nuggets: Pine nuggets tend to last a little longer than shredded mulch. It also adds a nice dark color around flowers. But, pine nuggets are lightweight and tend to float or blow out of the bed easier than shredded mulch.
Pine Straw: Pine straw is an easy mulch to get your hands on. It’s sold in bales and is lightweight and easy to spread. If you have lots of pine trees, you probably have plenty of free pine straw. Unfortunately, when first spread, pine stray doesn’t retain moisture as much as other types of mulch. It also decomposes quickly. Finally, a strong wind can blow pine straw out of your flower beds.
Rubber mulch: A while ago, someone discovered old tires could be turned into mulch by shredding and coloring it. This seemed like an environmentally-friendly idea at the time (because how many discarded tires can we reuse for creative projects)? Ultimately, using rubber mulch has several downsides. It’s been highly popular under playground equipment because it offers a little cushion. But, colored mulch easily stains clothing. When heated by the sun, it emits a rubber odor. Rubber mulch can also burn, and heaven forbid it catches fire, it will spread toxic fumes into the air. Finally, although it doesn’t break down as quickly as natural mulches, it will eventually break down and leach chemicals into your soil (not good for your garden!) Let’s all agree to stick to natural materials for mulch, okay?
Watering:
New plants need more water than established plants. Water the soil until damp daily for two weeks. Skip watering if you have rain in your forecast. Too much water can cause a host of problems, so try to water deeply once a day until the soil is wet, but not soggy.
After two weeks, you can lighten up on watering and only water if you haven’t had rain in a while.
What to Do if Plants Die?
The first rule of gardening is to learn from your mistakes and don’t give up. If your plant dies, try to determine why. Did it get too much water, was the soil not conditioned? Was it getting too much sun or too much shade? Do you have deer or animals that ate it or perhaps you had a harsh winter that killed your plant. It’s also possible the plant wasn’t healthy when you bought it. (Many nurseries have a warranty of new plants, check with them to find out how long they will guarantee your plant.)
Regardless of how a plant died, don’t beat yourself up about it, go ahead and dig it up and put something else in the spot. Every gardener learns from their mistakes. Over the years they learn which plants thrive for them and how to make some plants happier.
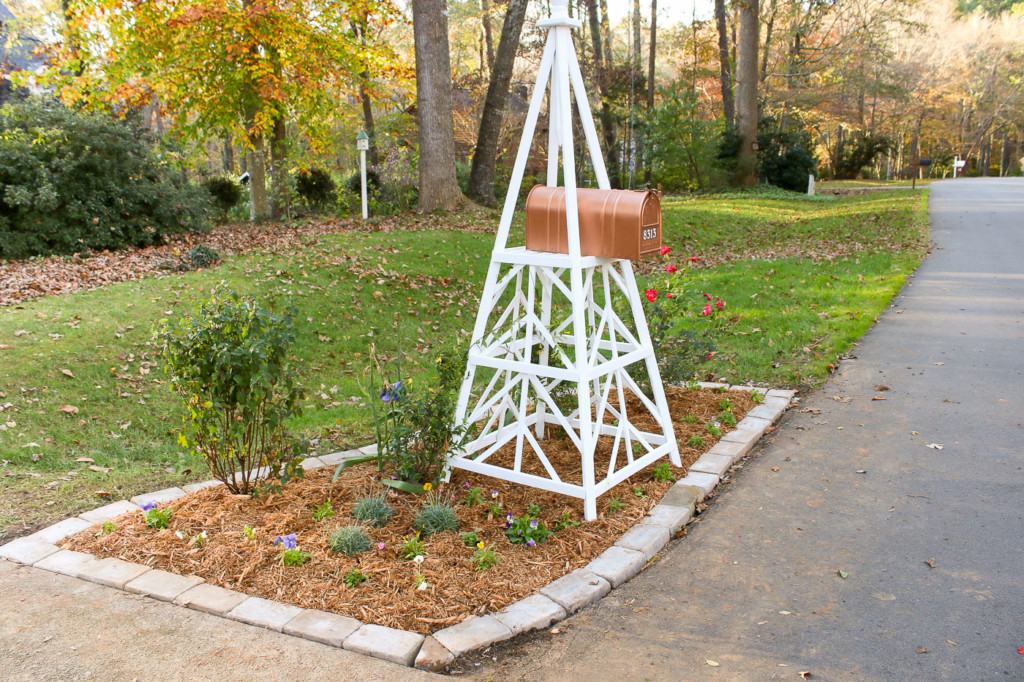
I leave you with some pictures of my new flower garden around the mailbox! When you plant your new flower bed I’d love to have you share them with me!
If you like our new mailbox obelisk, I’ll share plans for you to build your own soon.
I think I’m going to love a sunny spot for more flowers this year!
Disclosure: This is a sponsored post for STIHL™. I was honored to work with them on this project and was given complimentary products. All words and opinions are my own. I have not been told what to say. As always I am very particular about the sponsors I work with and you will be told if you are reading a post that has been sponsored or in which materials were provided.
Now that you’ve created a thriving flower bed, maybe you want to try your hands at creating the Ultimate Raised Garden Beds with Arched Trellis! This is a plan I designed with a desire to have a garden that wouldn’t become a critter buffet and a garden I could water less (or not at all for a week or two.)
https://prettyhandygirl.com/wp-content/uploads/2020/11/back-view-garden-bed-around-mailbox-full-english-cottage-style-flowers.jpg8891400Brittany Baileyhttps://prettyhandygirl.com/wp-content/uploads/2021/07/PHG-logo-tagline-2020-1030x211-R.jpgBrittany Bailey2020-12-04 07:00:002025-05-27 08:11:17The Surefire Way to Create a Thriving Flower Garden Bed
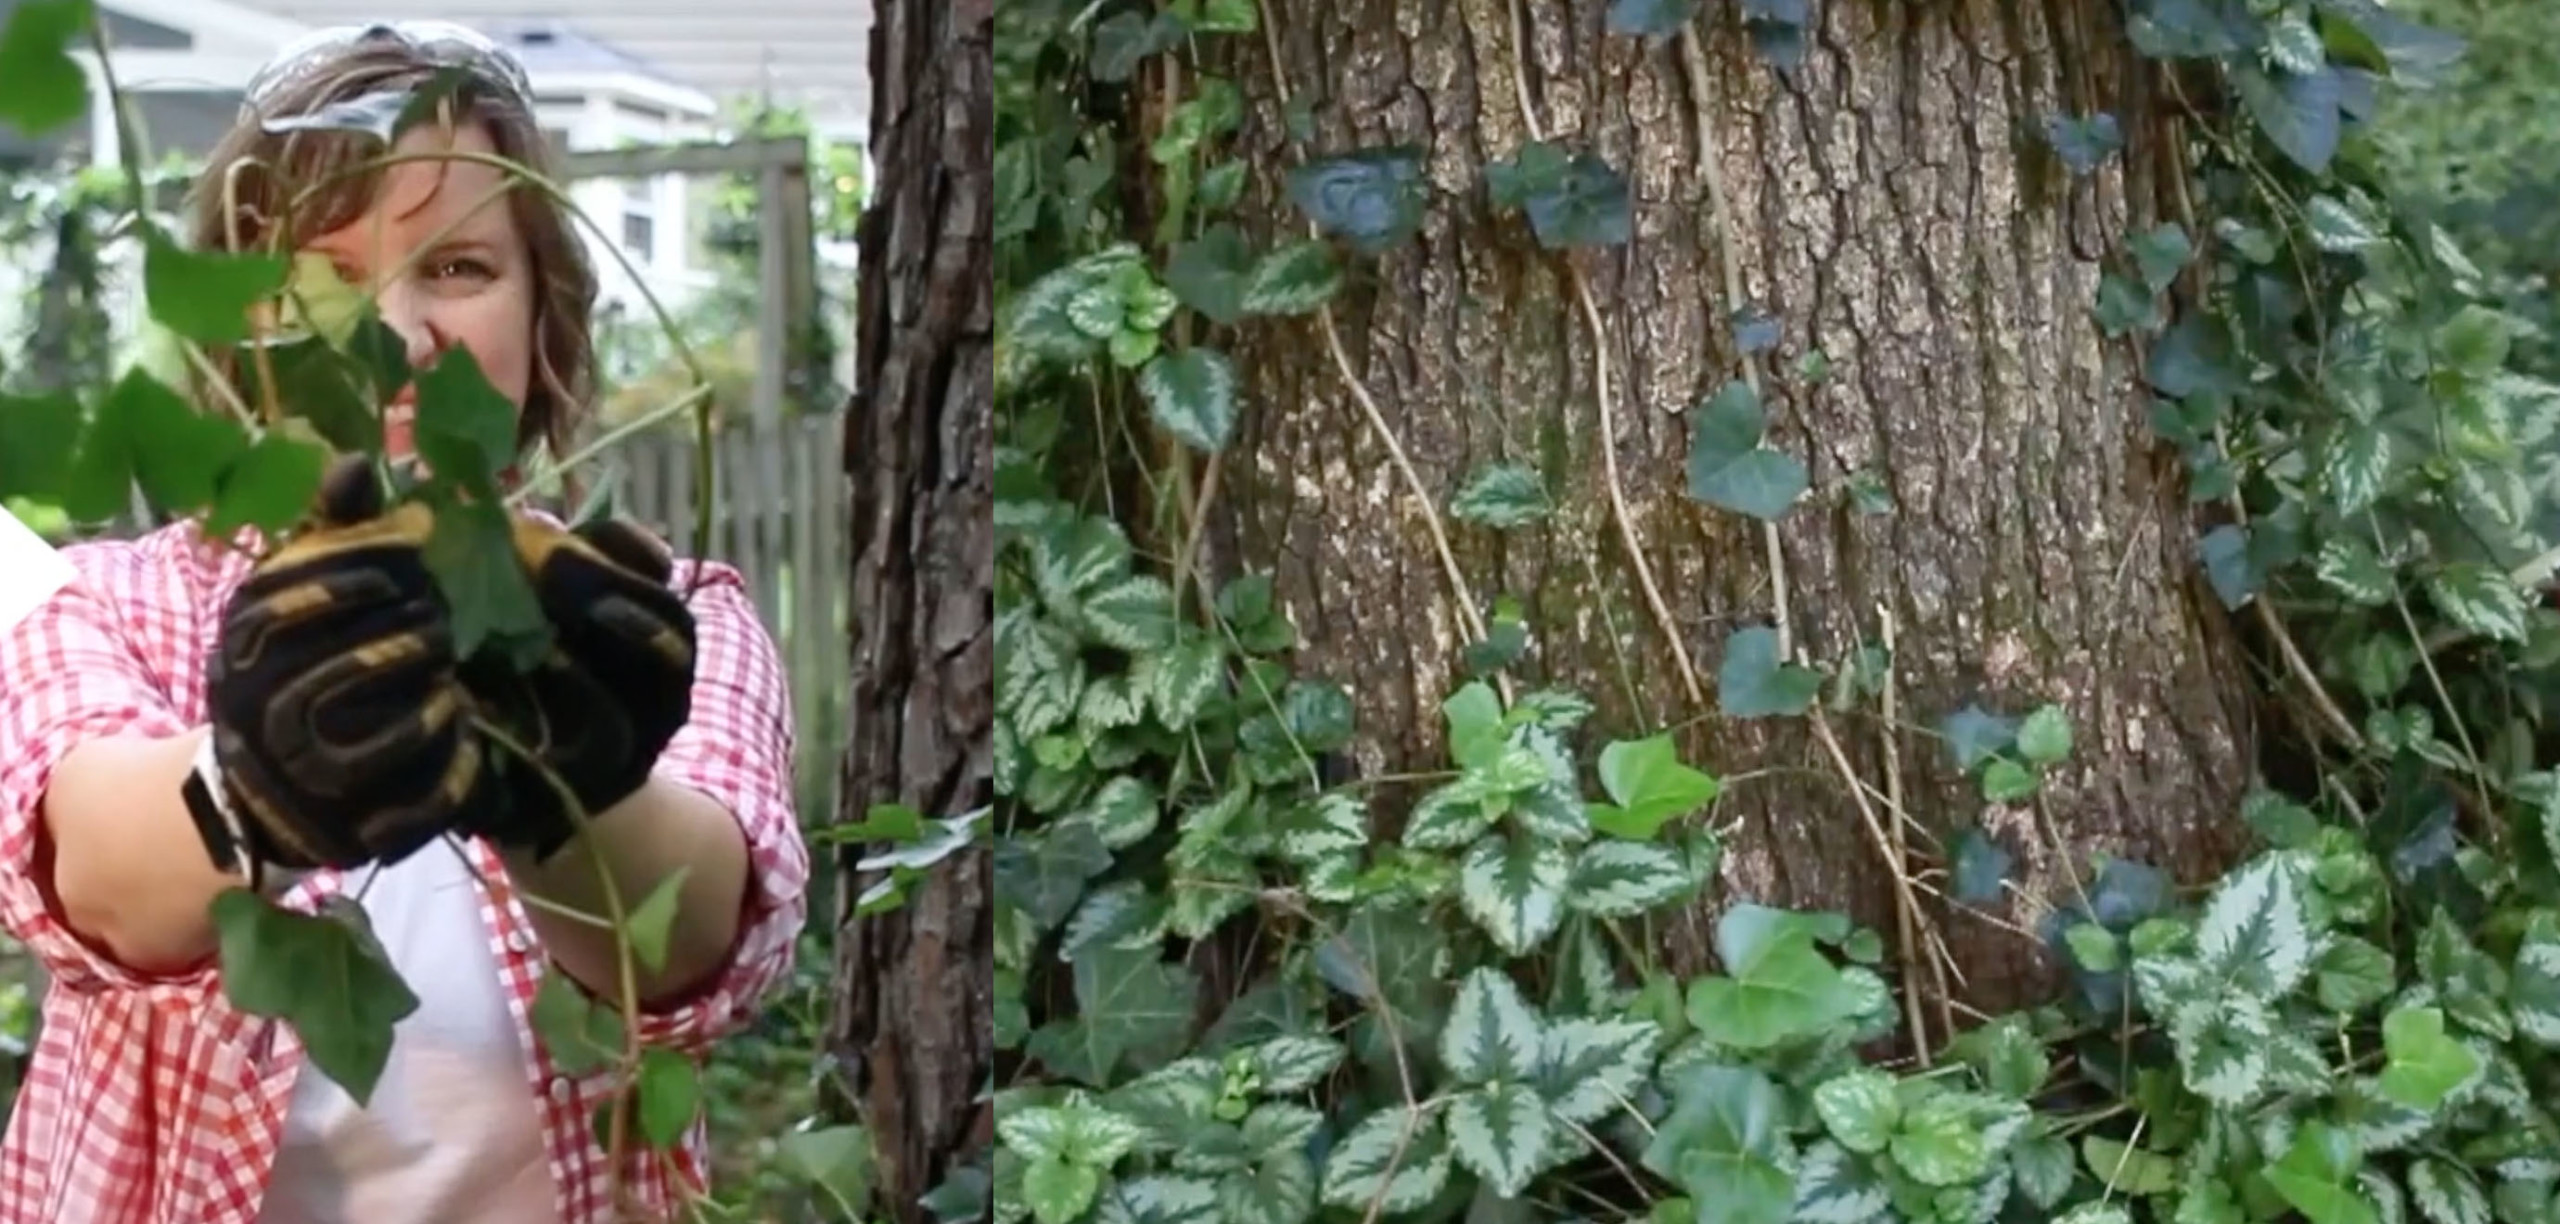
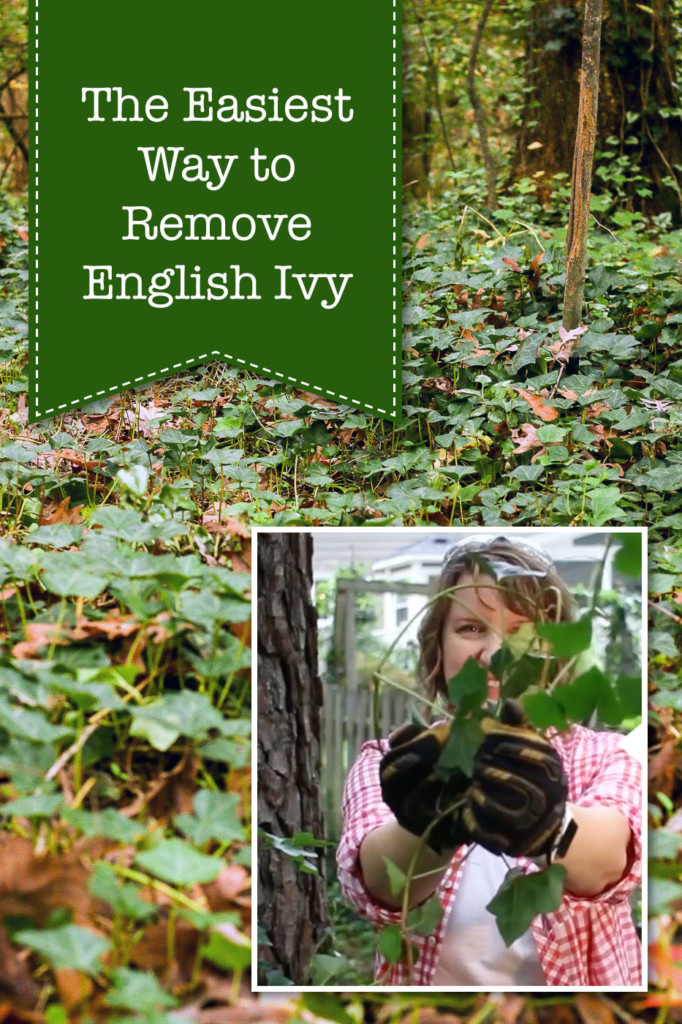
In the two decades we’ve lived in Raleigh, we’ve learned the Absolute Easiest Way to Get Rid of English Ivy. No back-breaking pulling or bending over. This is truly the best way to remove English ivy.
Easiest Way to Get Rid of English Ivy for Good
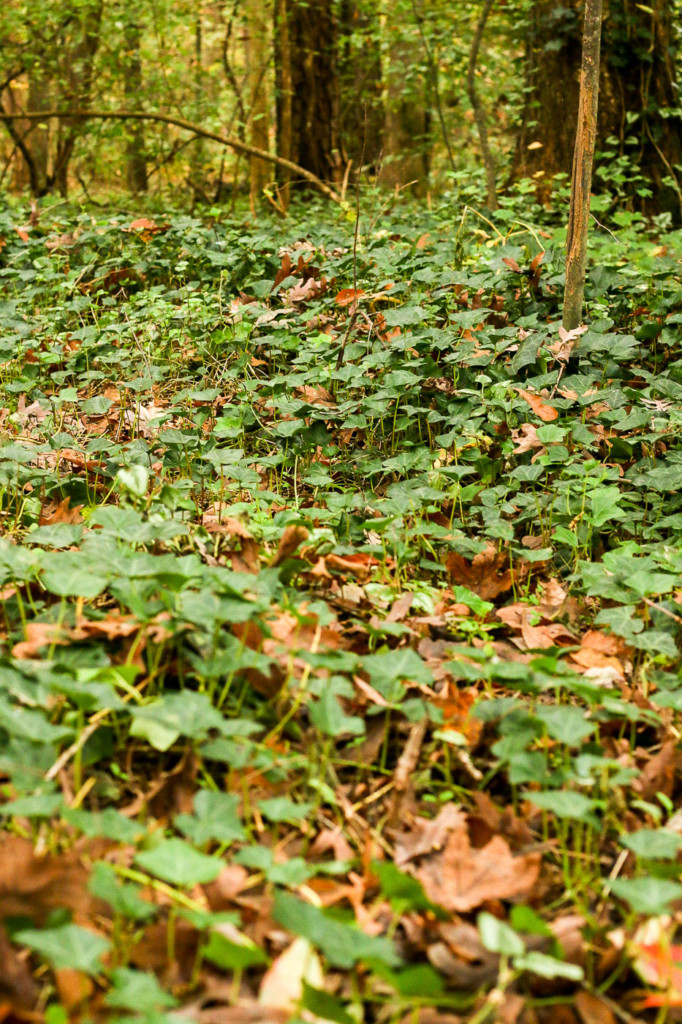
We are fortunate to have a beautiful yard that backs up to a forest of trees and a creek. We love the greenery and nature at arms reach, but we also have a beast that’s been spreading its destruction and darkness in the woods and recently it was spotted in our yard again.
This predator creates a safe haven for rats, mice, spiders (non-venomous and venomous), mosquitoes, termites, and snakes (yes, we’ve found several copperheads hiding in it)! What is this awful horror-inspiring thing? Hedera helix or more commonly referred to as English ivy.
If you haven’t learned the dangers of this plant, let me give you an ivy league education in the dangers of uncontrolled English ivy. If you live in the Pacific Northwest, California, or southeastern states (including the Carolinas, Mississippi, Tennessee, and Virginia), English ivy is considered an invasive species because of how quickly it grows and how difficult it is to control.
Dangers of Planting English Ivy
Homeowners mistakenly plant English ivy and let it run wild thinking it’s a great ground cover. But, little do they realize when not contained in a pot, this plant can soon cause serious problems if left unchecked. When grown in the yard, this plant can cover the ground not allowing native species to thrive. It is a real problem when it reaches the trees. The vines can strangle the roots of a tree and can cause damage to the bark, plus it adds excess weight to the tree.
Once ivy reaches a mature age, it sends out flowers and berries. Ingestion of berries or leaf material in may cause mild gastrointestinal issues in small doses. Eating larger amounts of the plant can cause breathing difficulties, muscle weakness, coordination problems, fever, hallucinations, and even coma.
Once berries form, birds will eat the berries and deposit seeds in their droppings. That’s all it takes for more ivy to grow. Think about the issues this causes when English ivy begins to grow unchecked in a state park, national forest, or wooded yards?
That small patch of ivy you planted as ground cover could cause far-reaching issues!
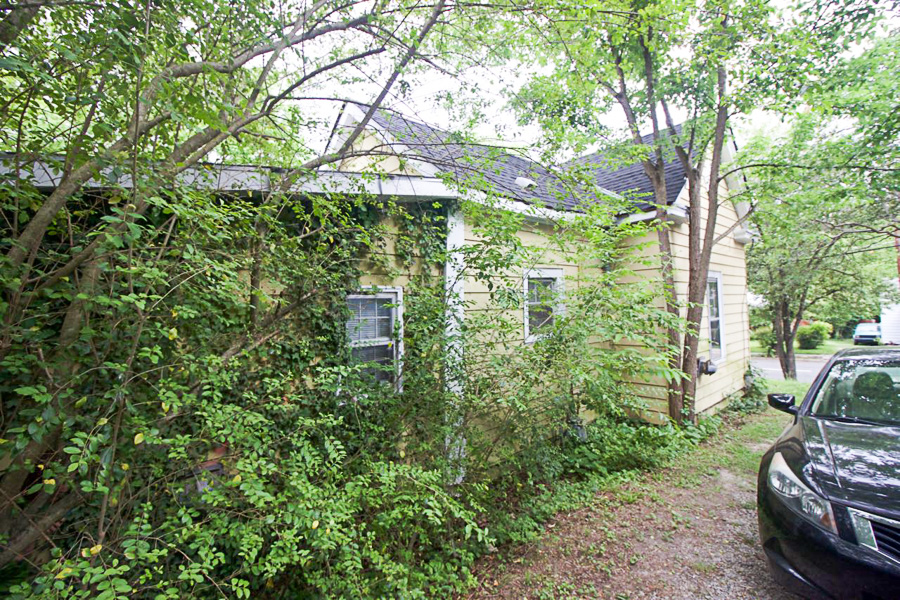
But, Ivy Covered Houses are So Pretty!
What happens if you want to decorate your brick house with ivy? Believe it or not, English ivy can cause property damage as well. Although it looks pretty on the surface, underneath it’s hiding an ugly secret. The roots of the ivy dig into the softer mortar of your brick wall and weaken it. This allows moisture to get into and behind the brick. Ivy shoots can easily grow bigger in these weak spots and will worm their way into windows and under siding. As ivy stems grow thicker, it expands and causes more damage.
Have I given you enough evidence to keep you from planting English ivy in your yard? If you already have English ivy, I hope I’ve convinced you to remove it permanently!
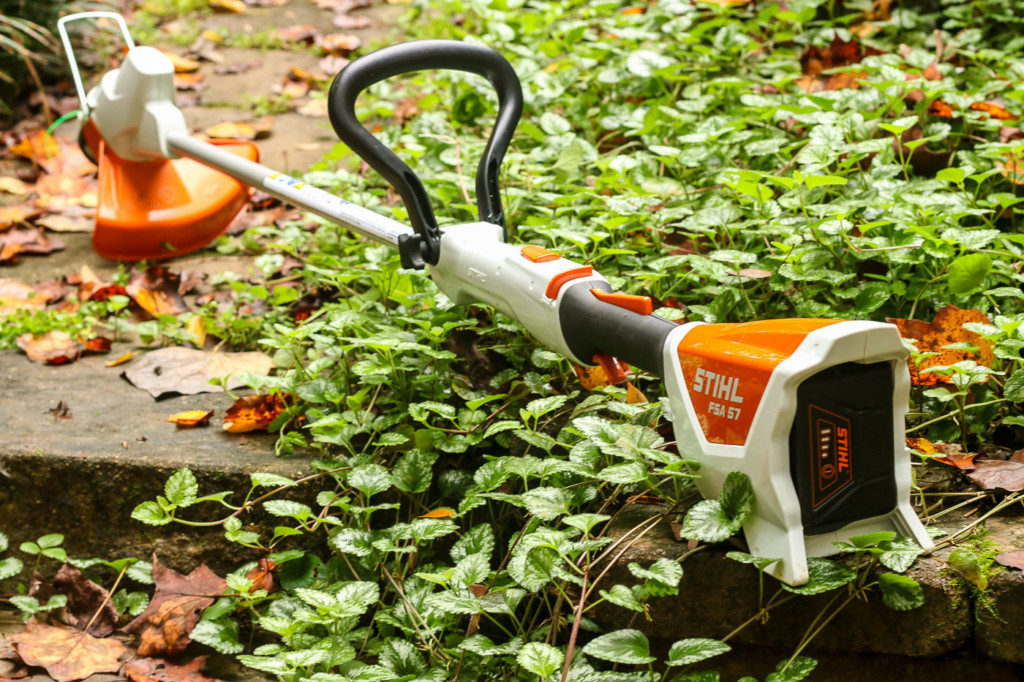
Today I’m fighting against ivy to protect my trees, my house, my kids, my dog, and my property! I’m taking matters into my own hands and I’m breaking out the big guns.
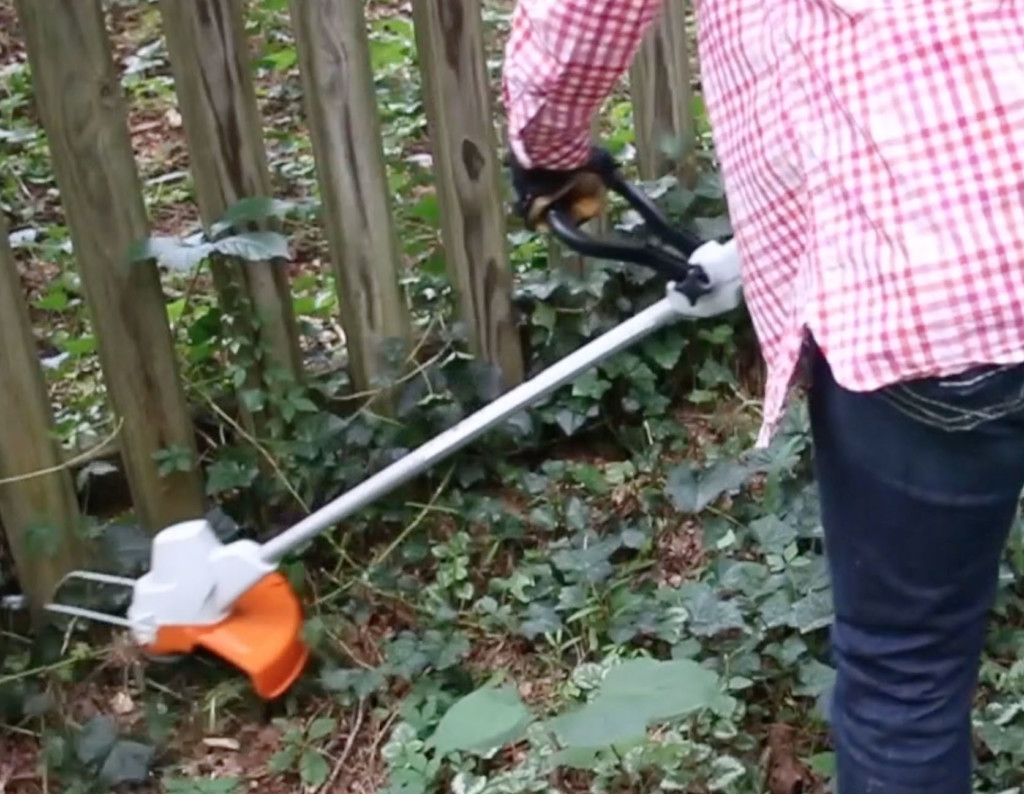
The STIHL FSA 57 battery-powered string trimmer is the perfect tool to fight back against invasive English ivy. It may look big, but weighing in at only 7.5 pounds, this string trimmer is very comfortable to use.
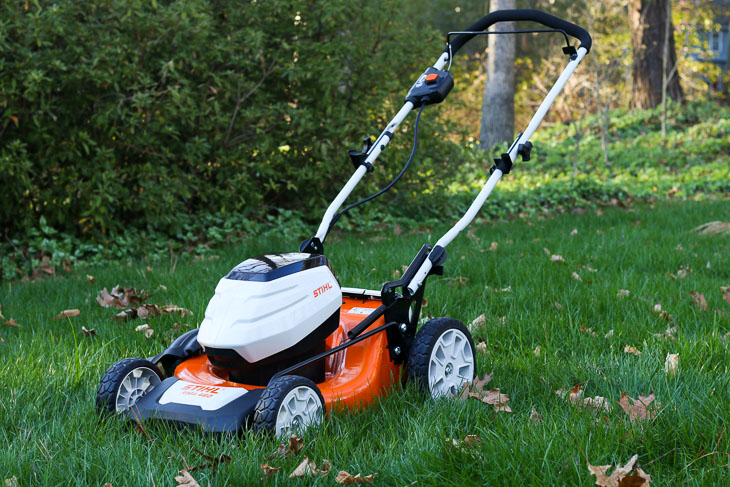
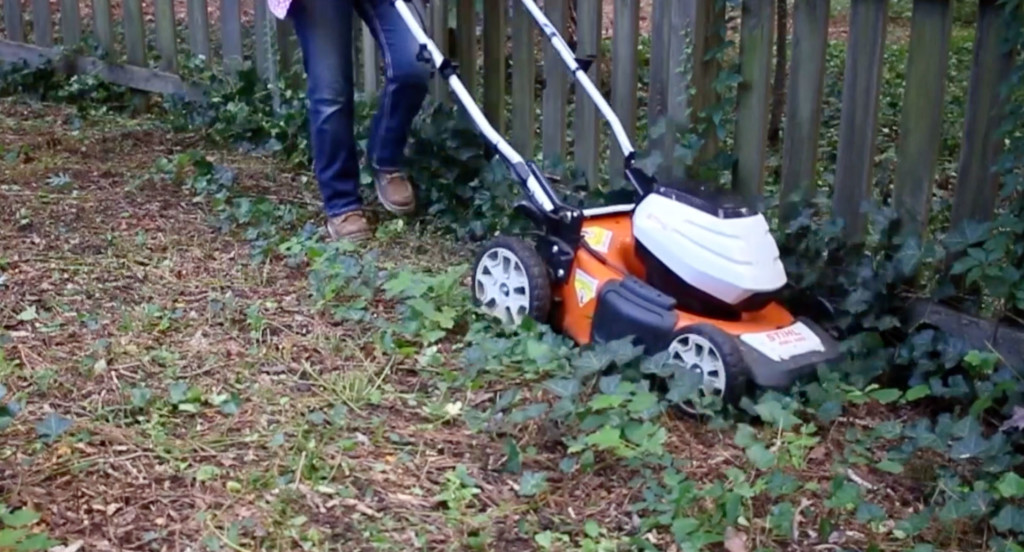
If you have a flat area that doesn’t have any dangers underneath like rocks, sticks, or logs you can speed the task by using a mower like the RMA 460 battery-powered mower. I’ve previously written my review about the RMA 460 mower, and I stand by every word I wrote. It’s still our favorite mower.
Besides the string trimmer and the mower, I’m actually in love with their entire line of AK battery-powered tools.
Easiest Way to Get Rid of English Ivy FOREVER:
To help you get started on the right foot, I’ve put together this video tutorial to show you the easiest way to eradicate English ivy. We’ve learned from experience that pulling it at the roots can be time-consuming and a real back-breaking chore. But, I hope you’ll learn from our experience that it doesn’t have to be a physically exhausting chore.
Protective Equipment for Fighting Ivy:
Let me first start by saying, this battle is a tough one, and you’ll need to gear up before going to battle. Remember what I said about the ivy being a haven for spiders, snakes, and rodents? Need I say more? This is the protective gear you should wear before starting this landscaping task.
(I’ve included affiliate links for your convenience. I earn a small percentage from a purchase using these links. There is no additional cost to you. You can read more about affiliate links here.)
(This is a tutorial on removing English ivy, you don’t want to use the same method for poison ivy as cutting it will spread the poison ivy sap and could cause a hazardous reaction.)
Ivy has a waxy leaf that is highly resistant to herbicides, therefore it’s best to score or cut the ivy before applying your choice of an herbicide or vinegar. You can use a string trimmer to cut the leaves off the ivy. This will create an open would and allow the plant to absorb the herbicide more easily.
To speed the task of cutting, you can use a lawnmower on flat areas as long as you don’t have any hazards underneath the ivy (like rocks, large limbs, or dips in the ground.)
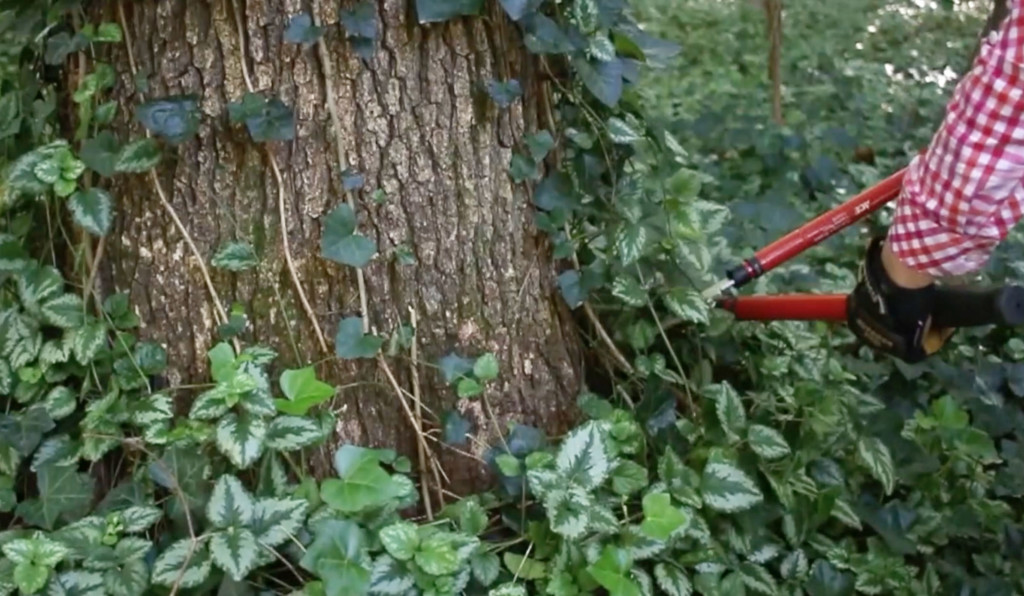
Handling Ivy Growing on Trees:
Ivy growing on trees requires a few more steps. Sever the ivy around the tree trunk using loppers or pruning shears. Then pull the ivy several feet away from the trunk of the tree. Inspect the larger roots at the base of the trunk and look for ivy growing over the roots. If you spot any, cut it to prevent the ivy from strangling the tree roots.
Resist the urge to pull the vines off the tree because it can damage the bark. Once the ivy dies the greenery will turn brown and will eventually fall off.
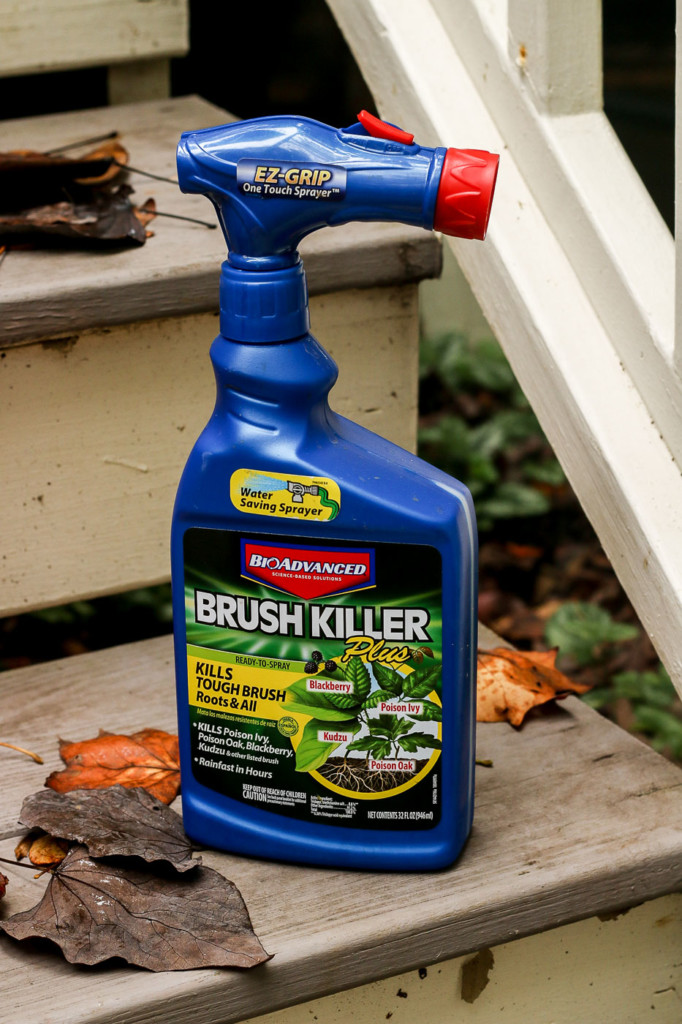
Herbicide vs. Vinegar to Kill English Ivy:
After you cut the ivy, you’ll want to follow up with an herbicide to kill English ivy.
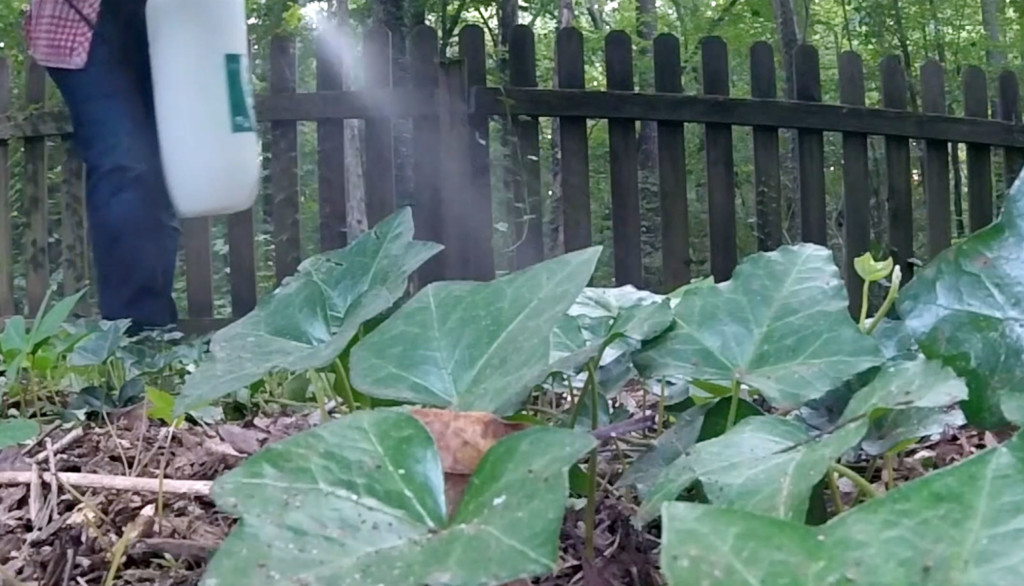
You can choose your poison (so to speak.) I’ve used herbacides specifically designed to kill ivy to eradicate the English ivy in our yard. The herbicide should contain glyphosate, triclopyr, imazapyr, or a combination of the three. This path is a little more forgiving if you get some on nearby plants or trees. But, if you want to go natural, you can use one gallon of white vinegar mixed with a teaspoon of dish soap, just be very careful not to get this mixture on any plants or trees you want to keep.
Pour the mixture in a garden sprayer and saturate the ivy. Then wait a week.
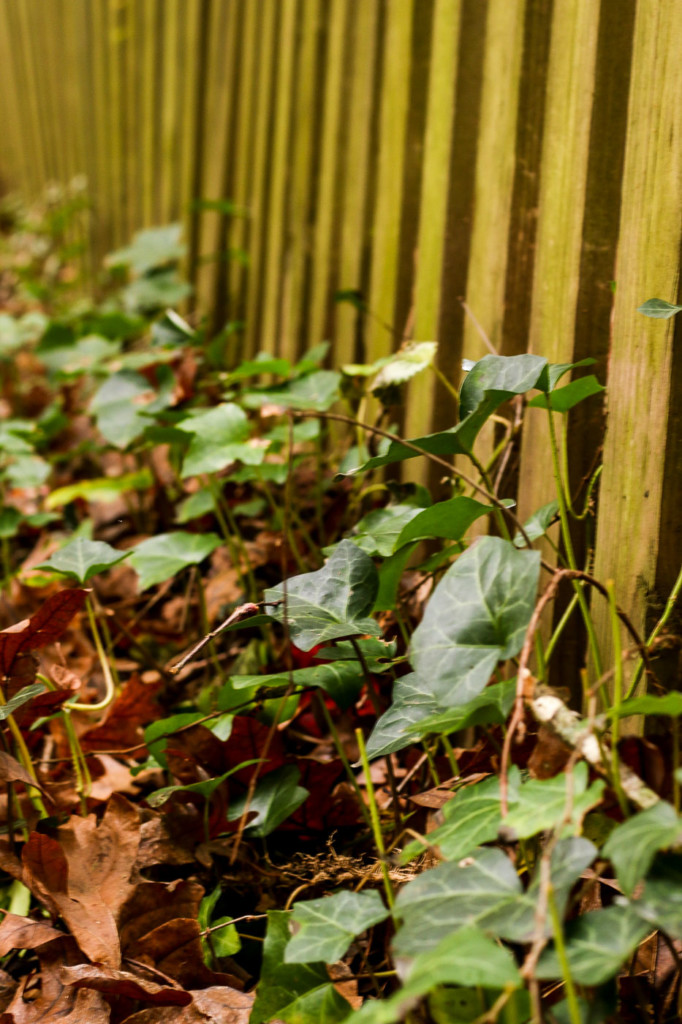
Removing the Ivy:
After a week or so, the ivy should start to die and will loosen its grip on the ground. Use a garden rake to remove the ivy strands from the ground. If any roots resist raking, use a hoe to dig the roots out. This process will be much easier after a rainy day as the ground will be softer.
Tips for Removing Ivy Forever:
Depending on the amount of ivy in your yard, this may be a multi-year battle. But each year the amount of ivy will be less and less. You can do a few things to help make this battle easier:
Cut and spray the ivy on a sunny day. And choose a day with no rain in the forecast for at least 24 hours.
Follow up within a few weeks with your raking (don’t just spray and leave the roots.)
Rake on a day after it’s rained as the ground will be much softer.
Pull the ivy out of the ground. Then put the ivy in trash bags or let it dry out on a pallet, cardboard, tarp, or anything but the dirt.
Next season, remove any small ivy shoots immediately before they start to spread.
Okay, it’s time for confessions. Have you planted English ivy? Did it take over? Or have you thought it was a pretty element in your landscaping?
Disclosure: This is a sponsored post for STIHL™. I was honored to work with them on this project and was given complimentary products. All words and opinions are my own. I have not been told what to say. As always I am very particular about the sponsors I work with and you will be told if you are reading a post that has been sponsored or in which materials were provided.
https://prettyhandygirl.com/wp-content/uploads/2020/11/easiest-way-remove-english-ivy-feature-scaled.jpg12242560Brittany Baileyhttps://prettyhandygirl.com/wp-content/uploads/2021/07/PHG-logo-tagline-2020-1030x211-R.jpgBrittany Bailey2020-11-02 07:00:002020-11-02 18:48:41Easiest Way to Get Rid of English Ivy for Good
I’ve heard so many stories from people who’ve been scammed by tree contractors. In fact, we’ve had our own negative experience with one, but luckily I had enough information and experience to not get scammed. With over two decades of wisdom and expertise, I’m happy to share and help you avoid any mistakes when hiring a tree service.
11 Things You Should Always Do Before Hiring a Tree Service
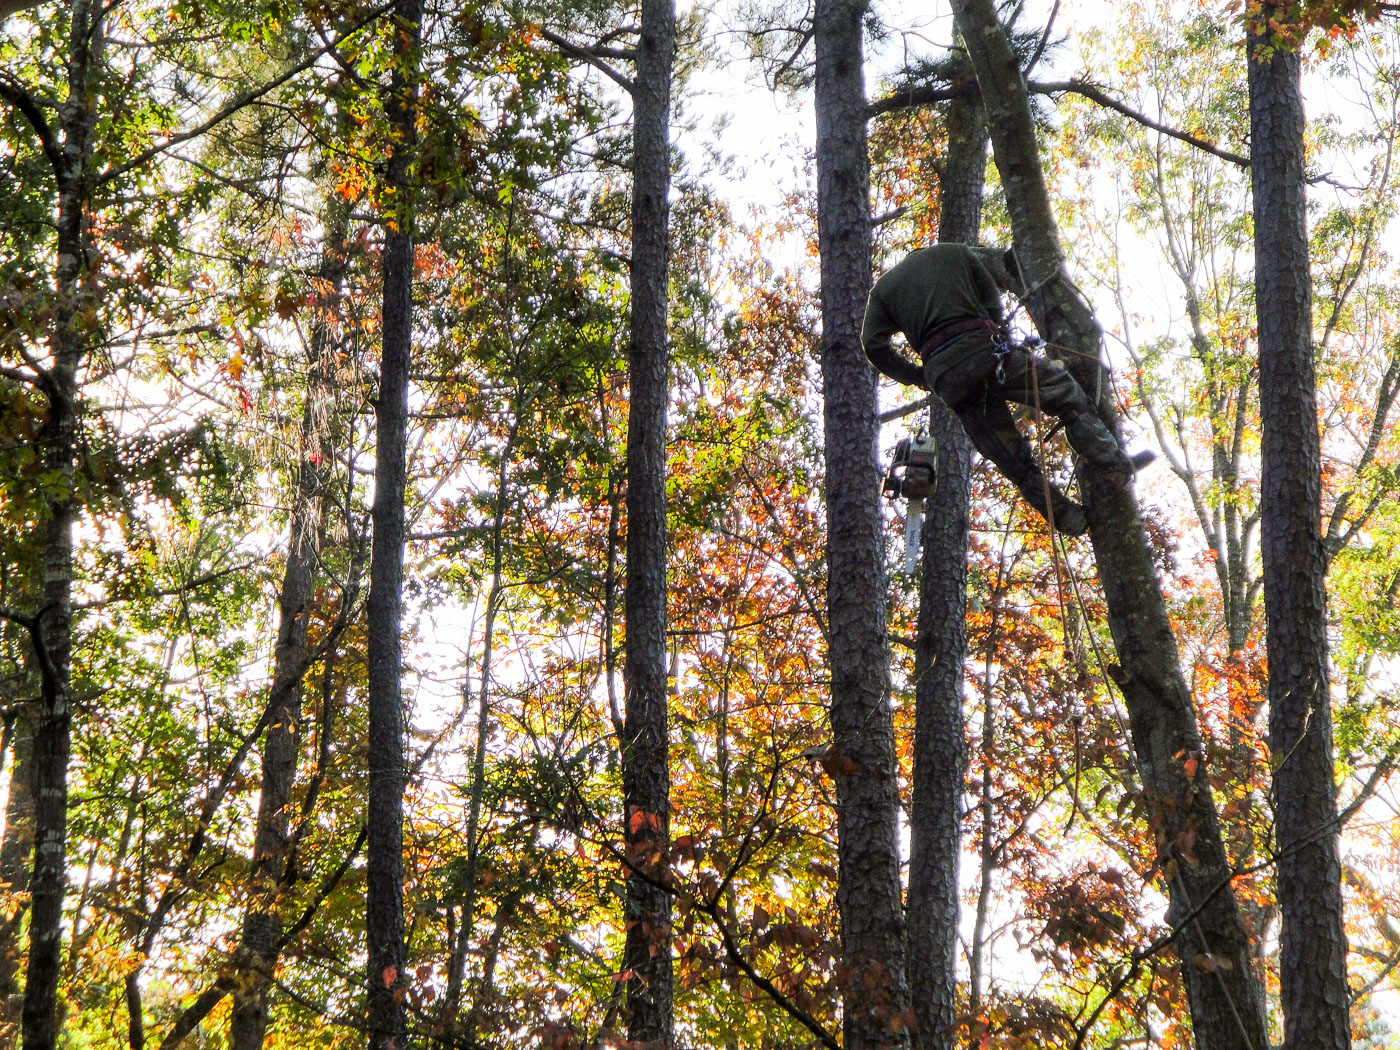
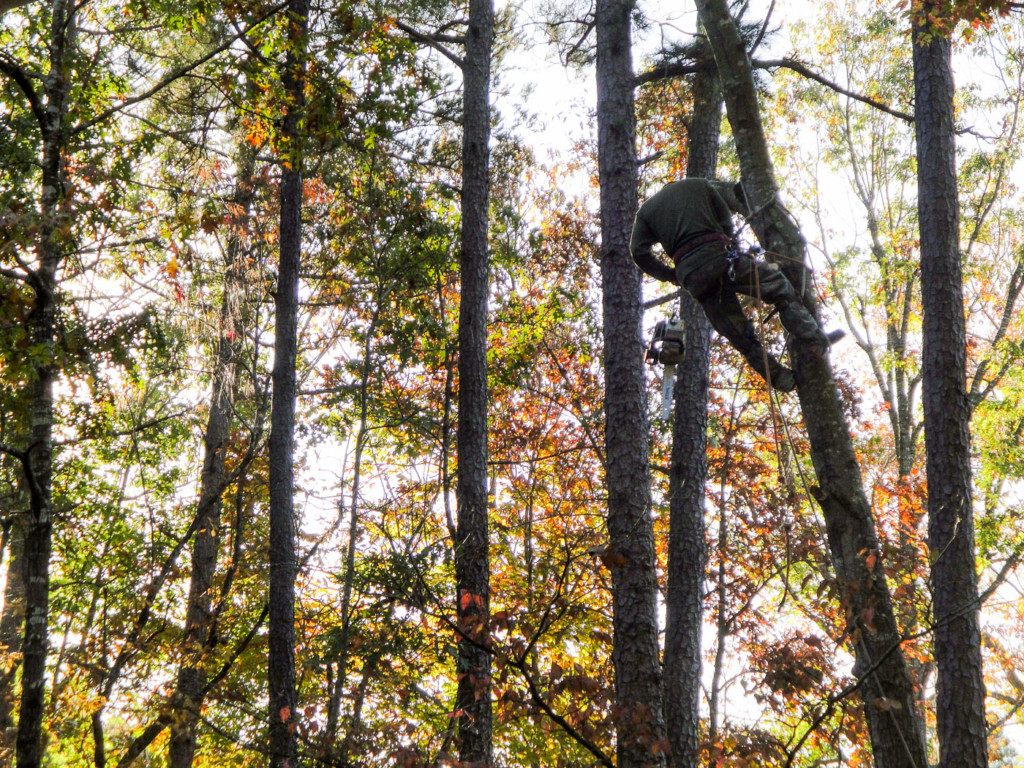
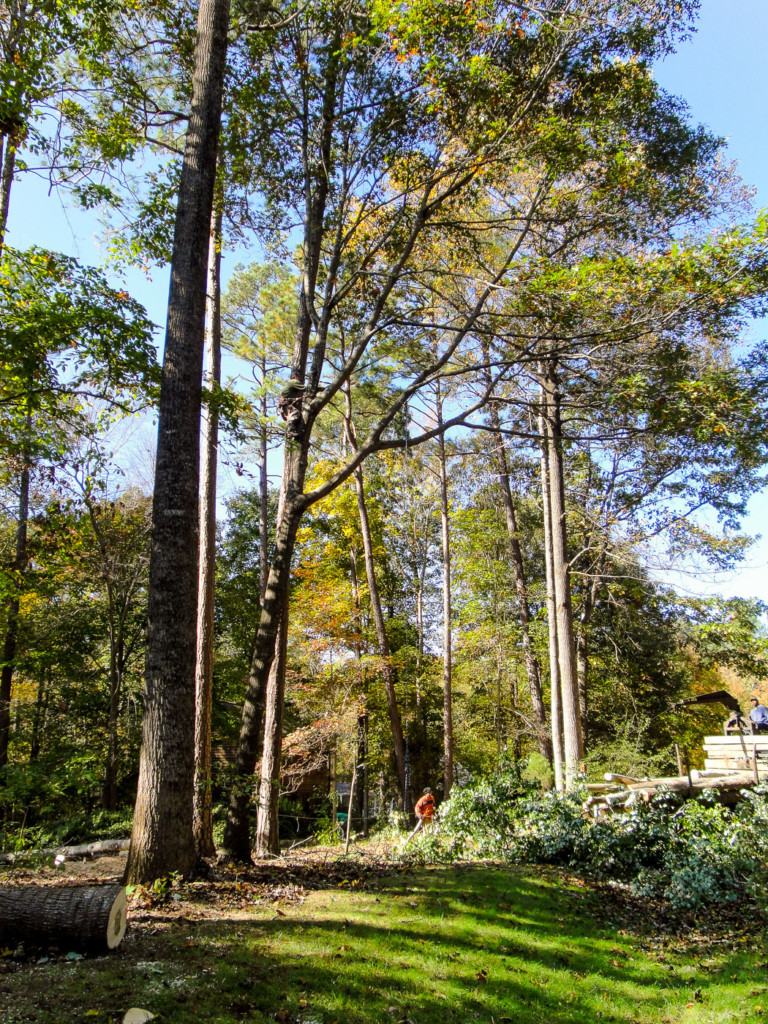
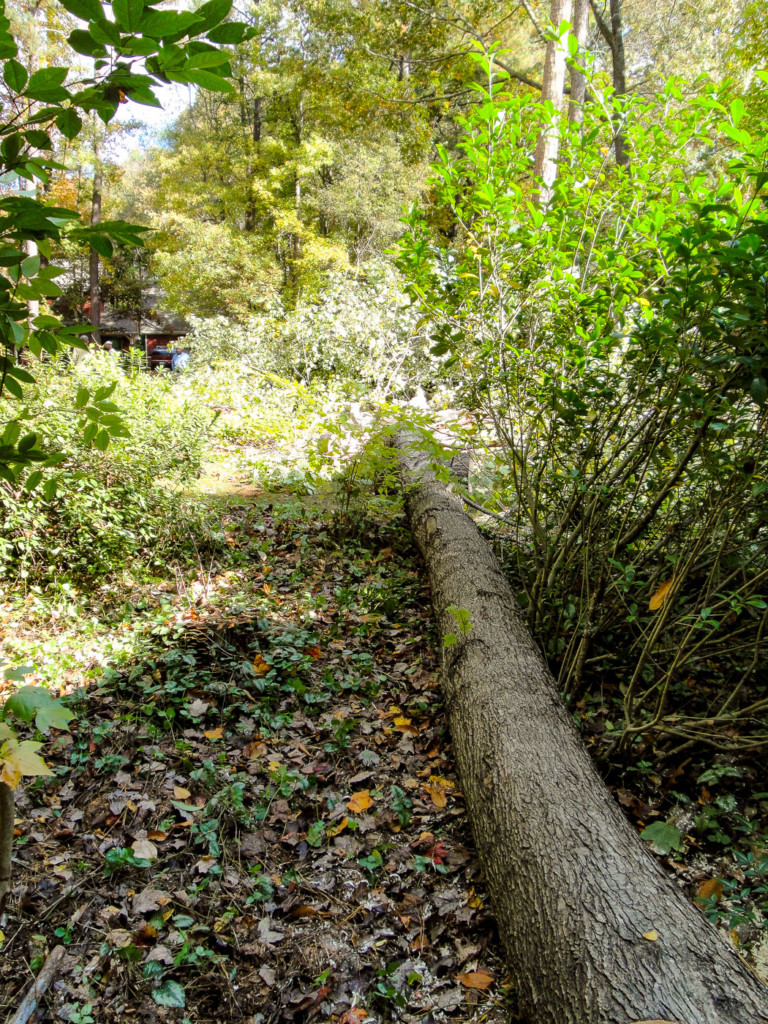
Fall is fast approaching, and most people begin looking up at their trees to assess if they will pose a threat come winter. We live in a beautiful neighborhood with lots of trees. Unlike newer communities, when our neighborhood was developed, the builders left many of the mature trees in place. Hooray!
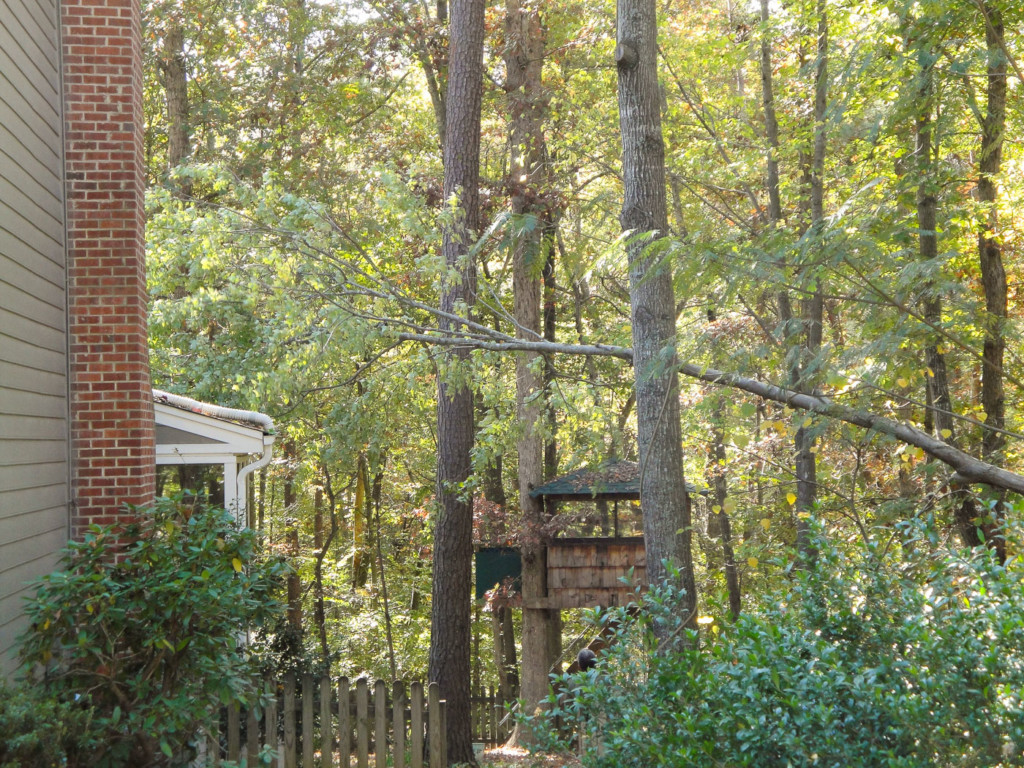
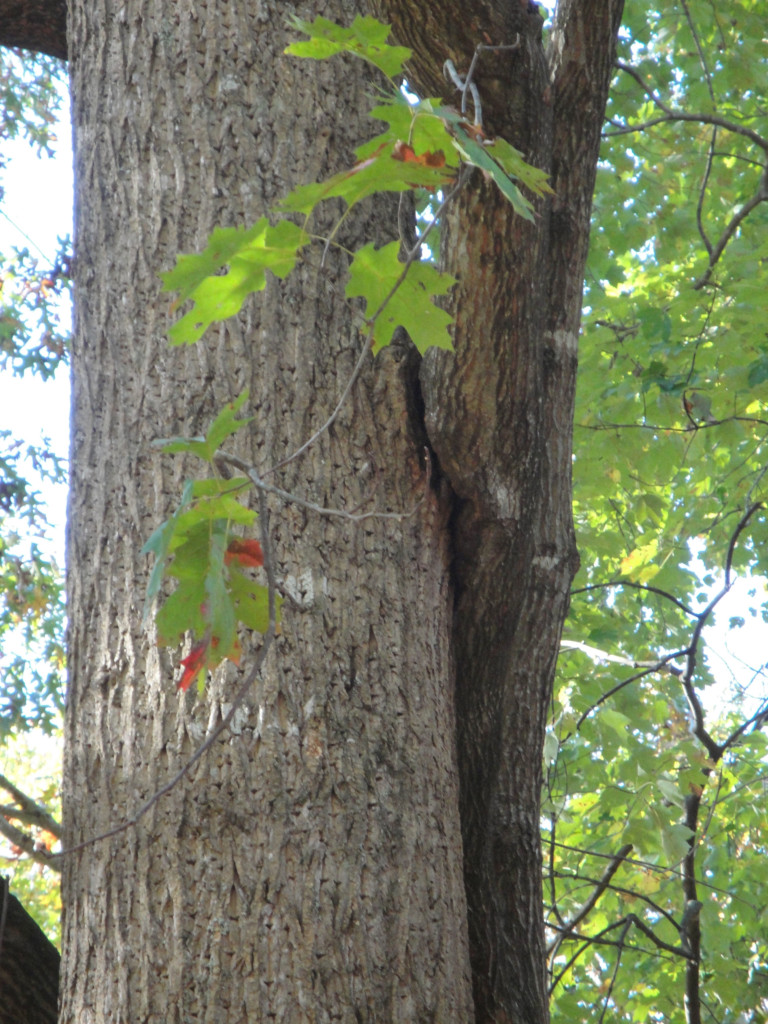
Although we love all the big trees, it’s our responsibility to keep an eye on the health of them and occasionally we have to remove a few trees if they pose a threat to our house, if they show signs of rot (or disease), or if a tree is compromising the health of a larger tree. (See if you can spot that issue below. Look closely and you’ll see one tree has rubbed into a nearby tree creating a big wound.) Although it saddens us to take down a tree, we learned the hard way what happens when a tree falls on your house.
Let’s get to that list of 11 Things You Should Always Do Before Hiring a Tree Service! Ready to learn?
1. Hire an Arborist First
If you’re in doubt or don’t know the health of your trees, hire an independent arborist to assess the trees on your property. It’s important that this person is not affiliated with the tree company. You don’t want him (or her) to have any financial gain by recommending you take a tree down. Many tree companies have arborists on staff, but I prefer to contact an independent arborist.
2. Get More than One Quote
Never settle for just one quote. I like to get three quotes from different companies. I also make sure they come to my property and look at the trees and any potential issues they may have to contend with. When you do get the quotes back, don’t be afraid to haggle on price, especially if you are taking down more than one tree. Over the years, I have learned that it’s not always best to hire the cheapest contractor. Oftentimes, that decision could leave you with a mess in the end.
3. Mark the Trees to be Removed
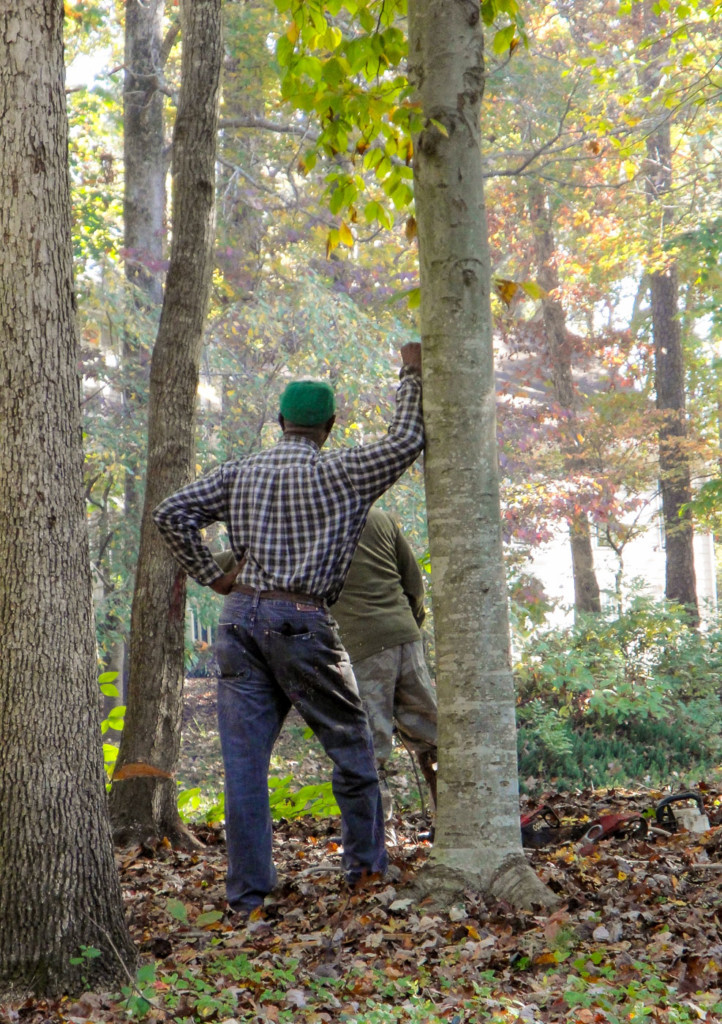
When it’s time to remove a tree or two, be sure to mark all the trees you need to remove with a colorful ribbon or spray paint. Don’t take any chances and risk having a tree taken out that you wanted to keep.
4. Get Current References
Ask for a list of current references for jobs completed in the last three to six months. Contact all of them. I wrote an article about how to hire great contractors and included a list of questions that can help weed out poor contractors. My favorite question is “If they made any mistakes, how were the mistakes handled.”
5. Get Proof of Insurance
I can not believe how many people don’t get proof of insurance from their tree service contractors! You should never be ashamed or scared to ask for proof of insurance. If the company is reputable, they will have general liability and a workman’s comp policy. Ask to have their insurance company provide the proof of insurance directly to you. If something goes wrong (and the contractor runs off), you can file a claim with the insurance company. Worse yet, if someone is injured or killed on your property and the contractor doesn’t have insurance, you could be held liable.
6. Do They Have Any Specialty Equipment?
Not all tree service companies have all the equipment necessary to complete the job or handle tricky removals safely. Ask if your tree contractor has a stump grinder, a crane, wood chipper, etc. Ask if your trees need to be removed by crane, or ask how they intend to take them down safely. When the tree that fell on our house was removed, the insurance company sent a company that uses a crane (and I was thankful they did).
7. Will There Be Any Impact to Your Landscaping
It’s a good idea to ask if there’s anything on your property that will be impacted by the tree work and if there is anything they can do to minimize damage. When the trees are dropped, what landscaping could potentially be damaged and how will they minimize the risk. For example, our tree contractor removed our mailbox when they were dropping a tree near it to prevent any damage. Some tree contractors will put down plywood to protect your lawn if they have to use any heavy machinery. Finally, ask if they have to remove any sections of the fence or ask them to explain how they will get to the backyard if removing trees in the back. You don’t want any surprises.
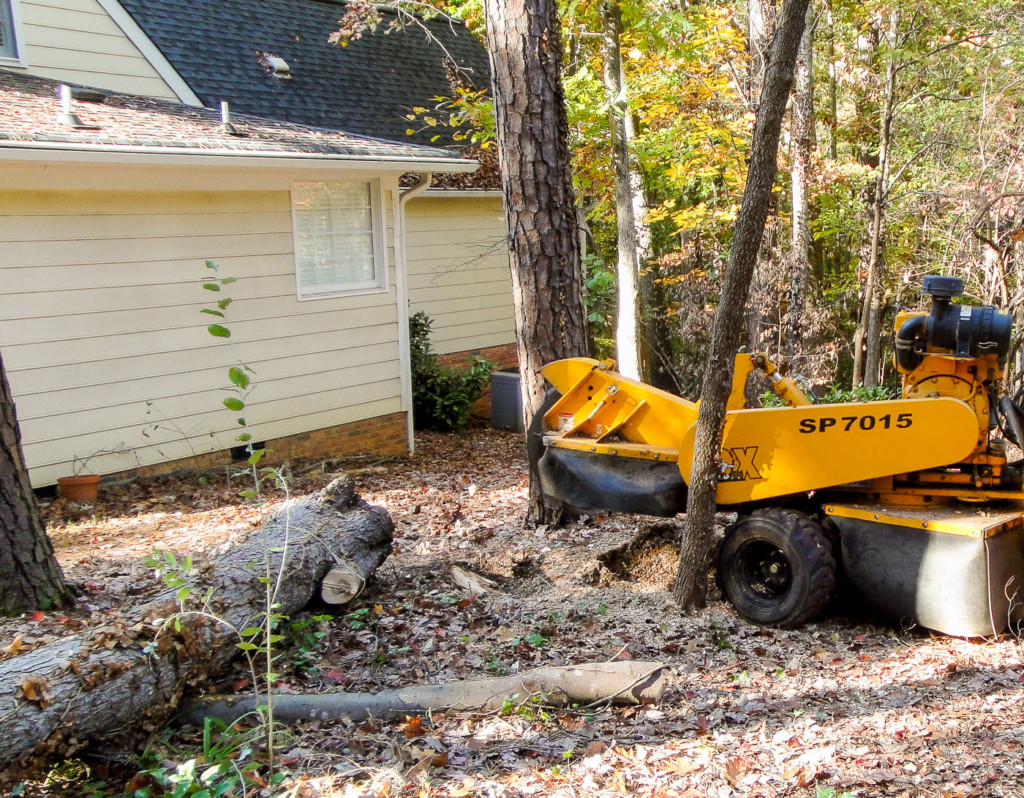
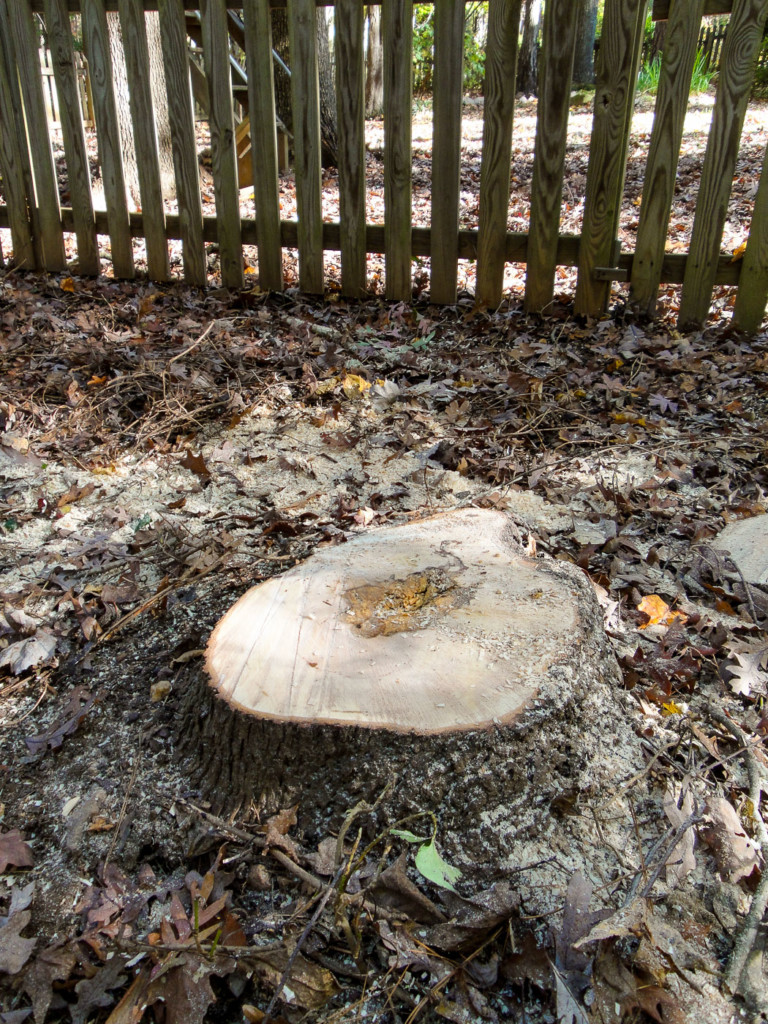
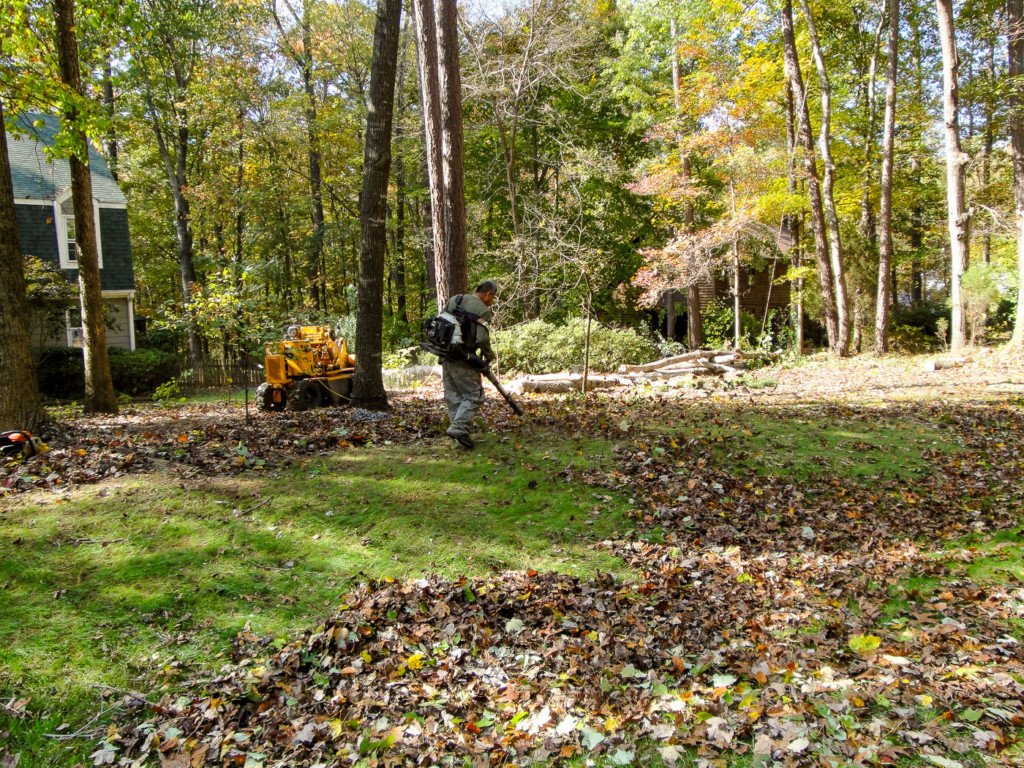
8. Will the Stumps Be Ground?
You’d be surprised how many tree services will remove trees but leave you with unsightly stumps in the void. Personally, I hire a tree contractor that also grinds the stumps after the trees are removed. Occasionally I’ll save some money by not having the stumps ground if they are in the woods or we decide to make the stump into something (like a fire pit seat.)
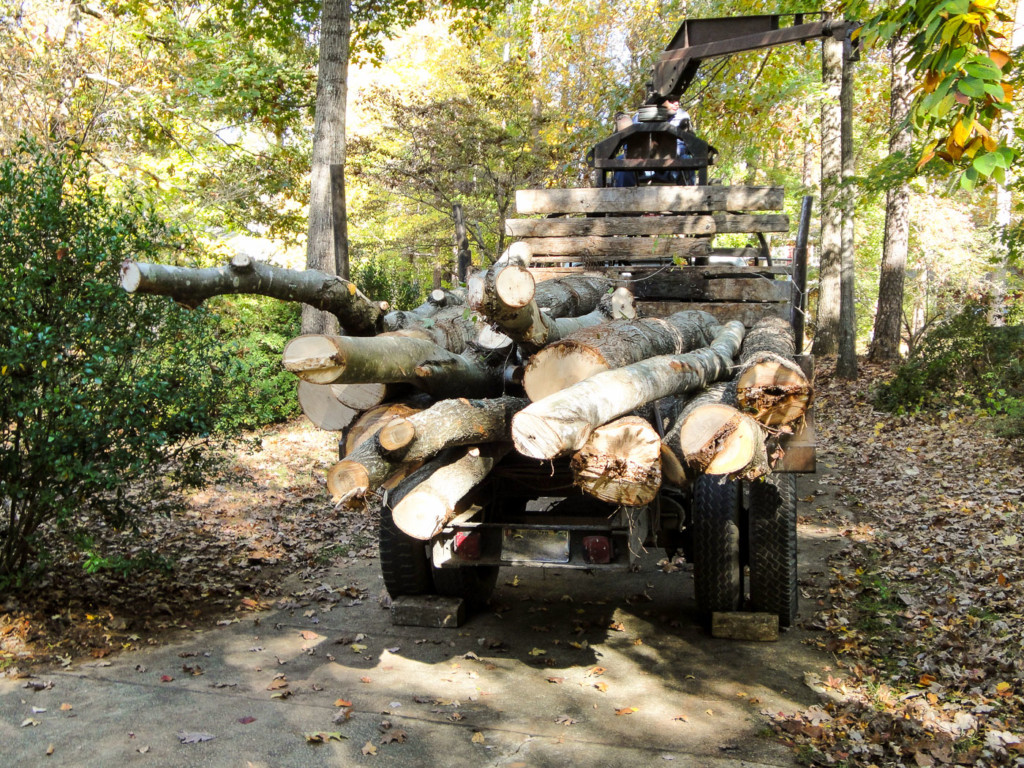
9. Will the Debris be Hauled Away?
Removing a tree (even a relatively small one) comes with lots of branches, wood chips, leaves, and logs. Make sure you know what will be hauled away and what (if anything) will be left behind. Will the company leave you logs for firewood? Are they going to grind up the limbs into chips? If so, do you really want the wood chips? (Be forewarned, fresh wood chips pull a lot of nitrogen out of the soil. You should wait about a year to use them around plants and trees.)
10. Create a Contract
It’s a good idea to have a detailed contract with all the things listed that you’ve discussed. Items on the list can be (but are not limited to):
How many trees (and which trees) are being taken out
Date and timeframe work will be completed
Will the trees be hauled away
Will the stumps be ground
Will tree debris be blown or raked up
Will they leave wood chips
When will final payment will be made (at completion)
Is a deposit being made (for a very large job, some services may require a deposit to hold your spot, but normally you shouldn’t need to put a deposit down.)
It’s important to make sure you both agree on everything in the contract. Then both sign it.
Finally, the most important thing you should always (or should I say never do), is:
11. Do Not Pay until the Job is 100% Complete
Don’t let a tree contractor give you a sob story about how he needs to pay his guys. If he runs a reputable business, your job is not the only source of income he has. I’ve seen far too many people pay a tree contractor before completion and then they are left with a mess in their yard and unreturned phone calls. Always hold the final payment until the job is finished and you are satisfied.
Why You Shouldn’t Cut Down Your Trees:
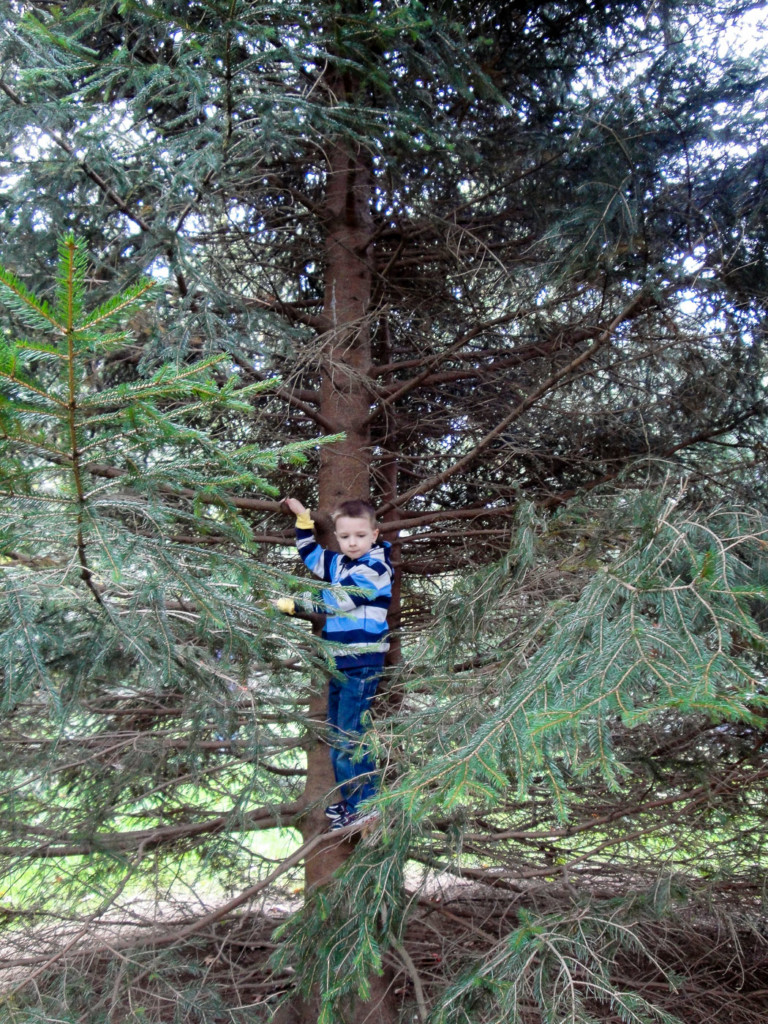
I want to leave you with some words of wisdom about trees. Healthy trees are an asset to your property.
They are important to support wildlife habitats
They protect your home from cold in the winter by blocking wind
Keeps your home cooler in the summer by providing shade
They prevent water and soil runoff.
They provide plenty of oxygen
Mature trees are desirable landscaping features
They can increase the value of your home if you have attractive and well-maintained trees
They provide privacy
And finally, let’s not forget they can be fun to climb
I hope this article helps prevent you from being scammed by a tree service and helps you maintain a safe and healthy home. I’d love to hear if you think I left anything out or if you have any tree service horror stories.
https://prettyhandygirl.com/wp-content/uploads/2020/09/tree-climber.jpg10501400Brittany Baileyhttps://prettyhandygirl.com/wp-content/uploads/2021/07/PHG-logo-tagline-2020-1030x211-R.jpgBrittany Bailey2020-09-11 07:00:002020-09-11 15:53:1311 Things You Should Always Do Before Hiring a Tree Service