Welcome back to another Tool Tutorial Friday! I hope you enjoyed some time off last week. Today I want to share with you a power tool that can cut long straight lines and it can cut curved lines with ease. This tool is also my “go to” tool when I need to cut plexiglass. I’m introducing you to a band saw.

Although the band saw is big and may seem intimidating, it actually isn’t very scary. The blade is usually a mere 1/4″ wide and the cutting action is not super loud and it doesn’t usually throw wood back at you. So, cutting with this power saw really gives you a lot of control and can help eliminate the intimidation factor.

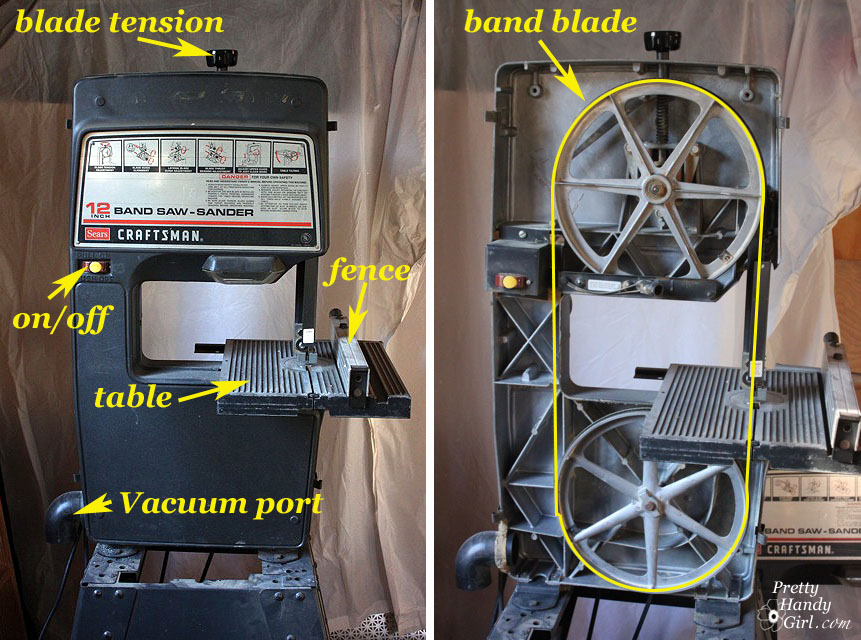
The band saw I have it old, but it still gets the job done. If you were to buy a new band saw, the mechanics are basically the same and not much has changed over the years. The size of the band saw (usually 9″, 10″, 12″ or 14″) refers to the distance between the blade and the neck or side column of the saw. Prices for a new band saw vary from about $125 – $600. I would definitely recommend buying a band saw used unless you are running a business that puts out tons of wood projects. Also, make sure that your band saw comes with a detachable rip fence or you will need to purchase one to fit your saw. This is important for making straight cuts.

A band saw has a circular one piece band shaped blade. The blade rotates around the two wheels at a high speed and allows for precise cuts.

There are several blades available for a bandsaw. In addition you could buy a sanding band for sanding intricate cuts. Band saw blades have a TPI (teeth per inch) number. In general, the more teeth per inch the tighter the cuts and more intricate details it can handle. However, that blade will flex more and cannot cut harder stock wood as efficiently. For straight cuts and thicker stock, a lower TPI number is desired. For a more detailed explanation of band saw parts and blades, check out WoodworkingHistory.com’s bandsaw syllabus.

The ONLY saw that I know of that will make more precise cuts than a band saw is a scroll saw. And when I talk precise, I mean making doll furniture type precise. A band saw is used for ripping, cross cutting, curved cuts, circles, you name it! So, why would you need anything else if this saw does it all? Well, sometimes speed is a factor, the band saw is not super fast when ripping a piece of plywood. Plus, you are limited by the width of your bandsaw. You have to work with a board that will fit in between the blade and the neck of the saw (this is specific inch size of your saw.)

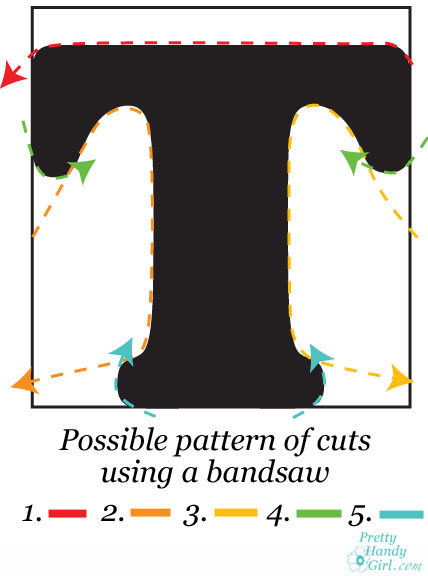
Personally, I prefer using the band saw for smaller projects and cutting plexiglass, thin metal, or intricate shapes. It is a staple for anyone who wants to cut letters out of wood! When making intricate cuts, you will need to plan your cutting paths. In other words, you can’t put your wood in and cut around like you would scissors in a piece of paper. Here is an example of what I’m talking about:

To cut the letter “T” out of a piece of wood, you’ll likely have to make several cuts into the wood, making your cuts meet at tight angles or corners.

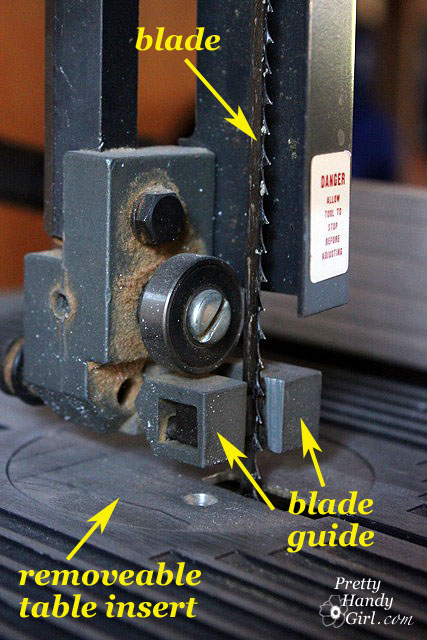
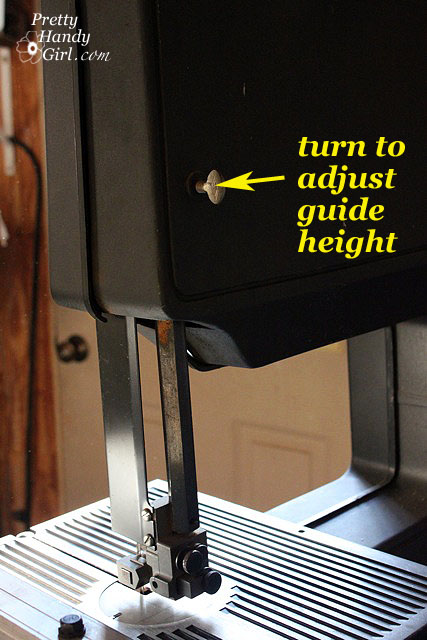
Before making any cut using a band saw, you need to make sure that your guide is set for the proper depth. You want the guide to ride just above your board. There should be approximately a 1/16″ space between the wood and the guide so the board doesn’t get pinched between the guide and the work table. On my band saw the adjustment is made by loosening a screw at the back of the machine, raising the guide, and re-tightening the screw.

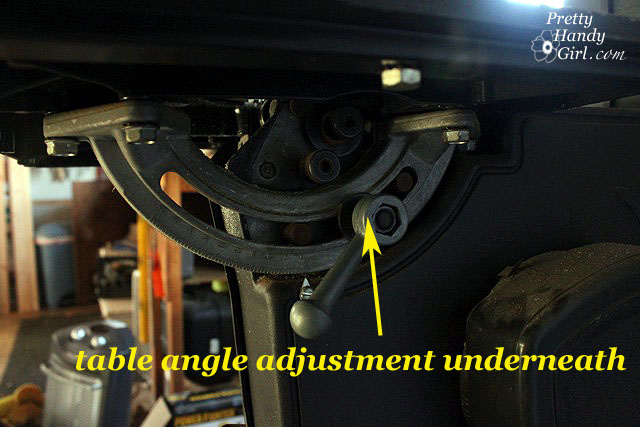
My band saw also has a work table tilt lever for making bevel cuts. Honestly I’ve only used this feature once, but it is nice to have. Simply turn the lever to loosen the bolt holding the table in place. Then tilt the table to the desired angle and re-tighten the bolt.

That’s basically it for setting up the band saw. Before cutting be sure to wear safety glasses. Ear protection is a good idea, but I’ve been known to skip it since this saw doesn’t bust my ear drums as much as some of my other power tools.

As I’ve said before, keep in mind your safety is in your own hands:

DISCLAIMER

The viewer assumes all responsibility and liability associated with the hazards of woodworking. Pretty Handy Girl is not responsible for any errors or omissions that may be present in this tutorial. She also assumes no liability for any action or inaction of a viewer.

Please use extreme caution when using power tools. Read your tool manual thoroughly and wear protective safety gear. Take your time familiarizing yourself with a tool before using it. (If you are missing the manual, you can easily find it online by going to the manufacturer’s website or google your saw’s make and model + manual.)

Please recognize that I have tried to put together a basic band saw usage tutorial to get you started. I have tried my best to show the safest way to use a band saw. That being said, I am not a professional (I only play one on this blog ;-) .)

And here is the video tutorial:

Okay, time once again to let me know what you think about this tutorial; ask any questions; or simply beg to win. When you do so, you will be entered to win this cutie!

Don’t let her pink attire fool you. This lovely lady packs a punch that will knock out any “boy’s” hammer! So limber up those fingers and leave me a note. Your comment will automatically enter you into the 13 oz. Tomboy Tools magnetic hammer giveaway. Good luck!

Sharing with these link parties:

Weekend Bloggy Reading

Welcome back to another Tool Tutorial Friday. I have a secret to tell you, this is one of the two power tools I own that I fear the most (the other is my router.) However, everytime I use my table saw I get a little more comfortable. Regardless, I will always keep that “healthy fear” so I won’t forget to use caution when using this power tool.

If you are just getting used to power tools, I would use a jigsaw or miter saw before tackling this big bad boy! That being said, I believe in all of you and know you can use a table saw, so let’s get to it!

A table saw is a great tool for ripping long pieces of wood. Unlike the miter saw which is limited to a certain width stock, the table saw can handle long sheets of 4′ x 8′ plywood.

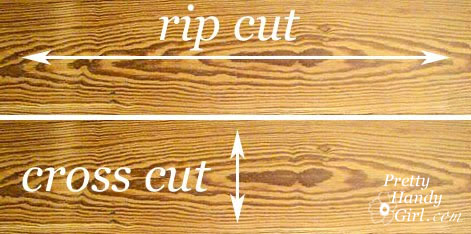
Explanation of a cross cut vs. a rip cut:

  • Rip – ripping a board is cutting with the grain along the length of a board. This is usually done with a table saw, but can be done with a circular saw and a straight edge.
  • Cross cut – a type of cut that is perpendicular to the grain or along the width of your board. Cross cuts are usually made with a miter saw or circular saw, but can also be made with a hand saw. (I’ve been known to make this cut using my band saw before I had either a miter or table saw.)

We bought our table saw when we laid the wood floors in our living room. I knew that we’d probably have to rip a board or two once we reached the end. Well, wouldn’t you know that our living room ended up being the perfect size for all full width boards. I kept the table saw anyway knowing that I’d use it (and I have used it a fair amount.)

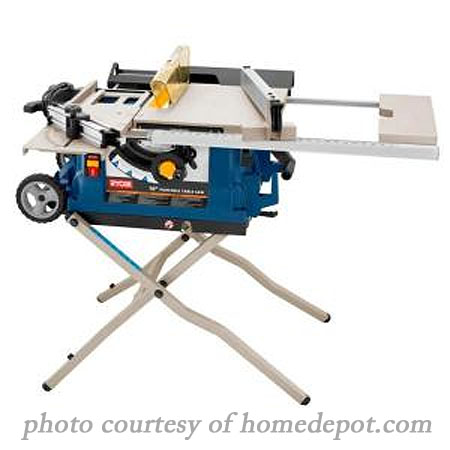
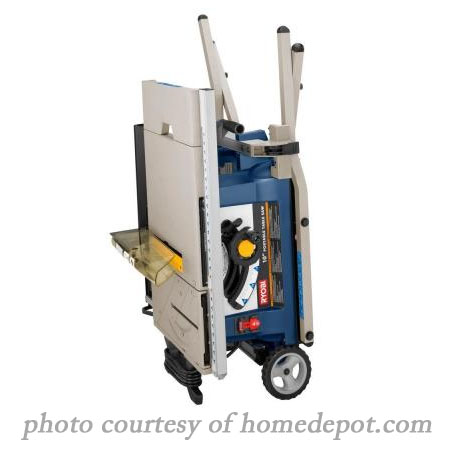
Table saws come in either a stationary or a portable style. I prefer the portability of my table saw. I can roll it out into the driveway (to keep the sawdust outside.) And, because the stand is built-in, I can fold it up on its side, roll it back into the garage and store it away when not in use.

Table saws cost anywhere from $120 up to $1,000 or more. The Ryobi 10 inch table saw with transportable stand that I use costs $300 at Home Depot.

I highly recommend wearing ear protection, safety googles and a dust mask when using a table saw. Hooking your table saw up to shop vac will greatly reduce the amount of saw dust that is discharged (and it spits out a lot of sawdust!)

Two common dangers of using a table saw are kickback (the board being thrown back toward the user) and hand injuries from forcing material through or feeding the wood with the hand too close to the saw. Kickback will happen if the wood is pinched too tight between the rip fence and the blade. When making a cross cut with a table saw, DO NOT use the rip fence! This can cause kickback to occur.

Table Saw Features:

Safety features are super important on a table saw. A blade cover is essential to keep hands away from the blade. And for that reason a table saw should never be used without the guard in place. For even more protection from hand injuries, there is a table saw that is manufactured under the name Stop Saw, that retracts in a split second if it detects flesh against the blade.

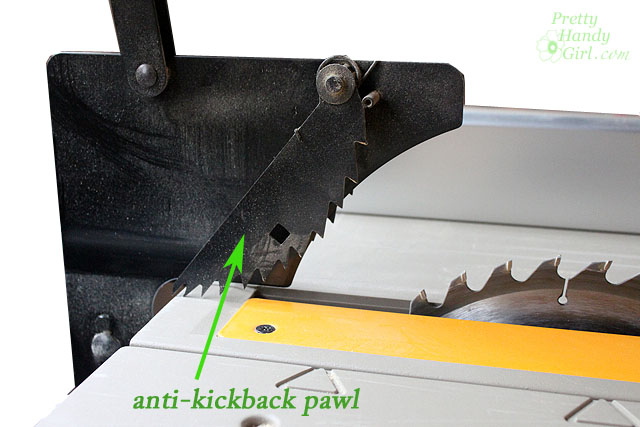
Behind the blade on my table saw are anti-kickback pawls. This is a close up view of this safety mechanism. They are basically teeth that will dig into the wood should the blade start to “kick back” the material toward the user.


The rip fence is used to setting the width of a cut and keeping the board straight when making a rip cut. Never use the rip fence when making a cross cut. My saw has a miter fence for making angled miter cuts. I honestly haven’t used that feature yet.

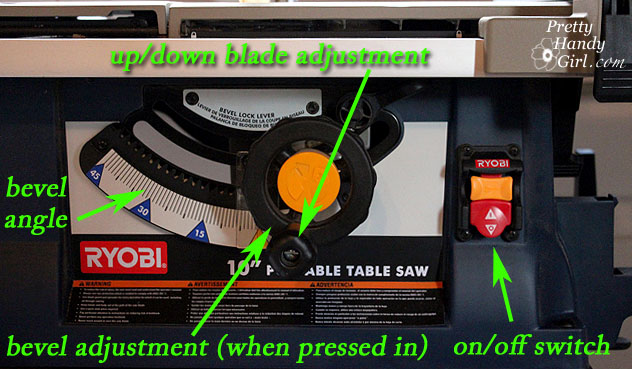
The blade depth adjustment and bevel adjustment knob are one and the same on the Ryobi. To adjust the bevel, push the knob in and then turn it.

The material support and the sawdust chute are located on the back of my table saw.


When using a table saw, be sure to have a clear work area. Set up supports or have someone help you to support large pieces of wood after they exit the saw. Use a push stick to assist when making a narrow cut. Do not wear any loose clothing or jewelry that could catch on the machine. Always use a table saw when you are well fed, alert, and are not in a hurry. This is a serious power tool and requires all your focus to use it.

DISCLAIMER

The viewer assumes all responsibility and liability associated with the hazards of woodworking. Pretty Handy Girl is not responsible for any errors or omissions that may be present in this tutorial. She also assumes no liability for any action or inaction of a viewer.

Please use extreme caution when using power tools. Read your tool manual thoroughly and wear protective safety gear. Take your time familiarizing yourself with a tool before using it. (If you are missing the manual, you can easily find it online by going to the manufacturer’s website or google your saw’s make and model + manual.)

Please recognize that I have tried to put together a basic table saw usage tutorial to get you started. I have tried my best to show the safest way to use a table saw. That being said, I am not a professional (I only play one on this blog ;-) .)

If I haven’t scared the sawdust out of you, here is the video tutorial for using a table saw:

I hope I have empowered you to use a table saw at some point. It is a good saw to have in your shop. Especially if you need to lay wood flooring, install beadboard wainscoting and many other projects that require you to rip a board.


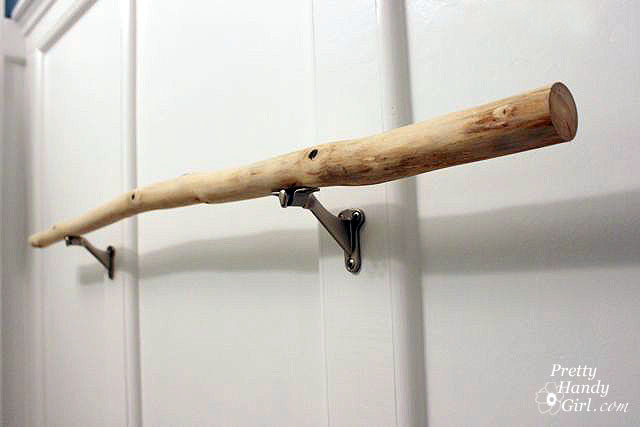
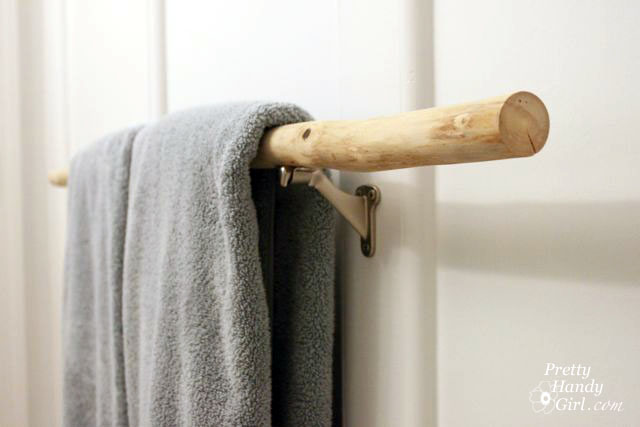
We’ve moved several times and each time I’ve packed one special tree branch with us. I have had this branch so long that I can’t remember where I found it. I do know that I picked it up on one of our camping trips. Whether it was Yellowstone, Acadia, Nova Scotia or somewhere else I’ll never know. What I do know is that I kept it because I thought I could do something really special with it someday. Well, that day has arrived. I decided to turn the branch into a towel bar for my sons’ bathroom.

(This post contains affiliate links. To learn more about affiliate links, you can read my disclosure page.)

Materials:


  • Tree branch stripped of bark and branches
  • Coping saw or other hand saw
  • Sandpaper (80, 120, & 180 grits)
  • Pencil
  • Scissors
  • Power sander
  • Gloves
  • Dust mask
  • Safety glasses


Tutorial:
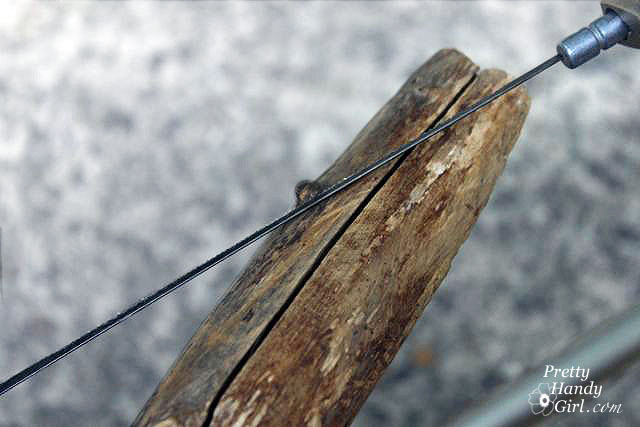
Start by sawing off any nubs, knots and sticks using a coping saw.

Pull out the sandpaper and power sander. 3M just sent me these color coded sandpaper sheets. I think the idea of color coding them is brilliant! It really helps you grab the right grit quickly. I give them two gloved thumbs up.

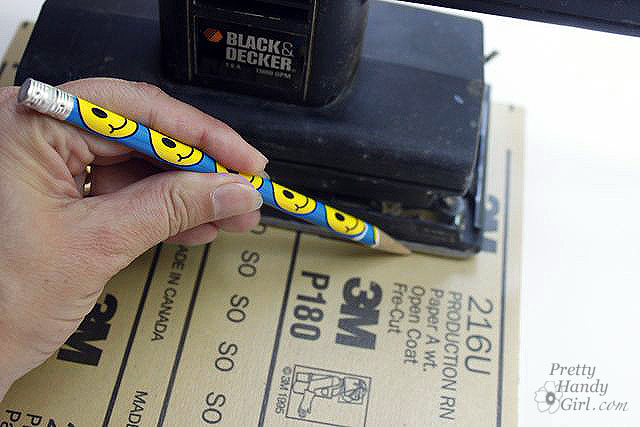
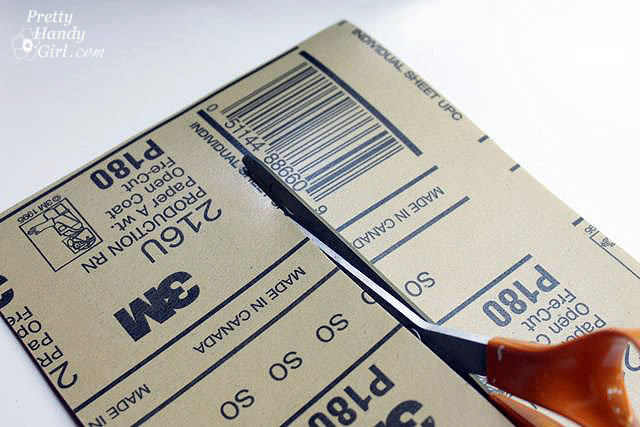
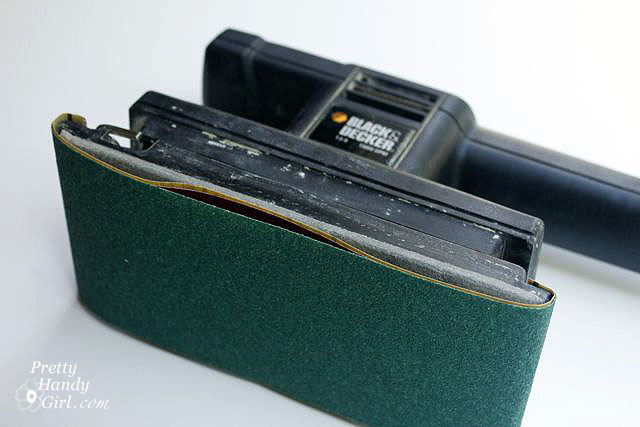
Stack your sandpaper sheets. Lay the sander along one edge of the papers and trace a line along the edge of the sander with a pencil. Be sure to leave excess on both ends to attach under the clips of your sander.

Cut the papers along the pencil line.

Load all three pieces of sandpaper into the sander (if possible). The coarsest grit (80 grit) should be on the outside, followed by the 120 grit and finally the 180 grit sandpaper.

Now you are ready to start sanding!

Here is a video tutorial on sanding the branch down. I’ve upped my level of professionalism, so I hope you enjoy my efforts.

Coming up next. Installing and finishing the branch towel bar.


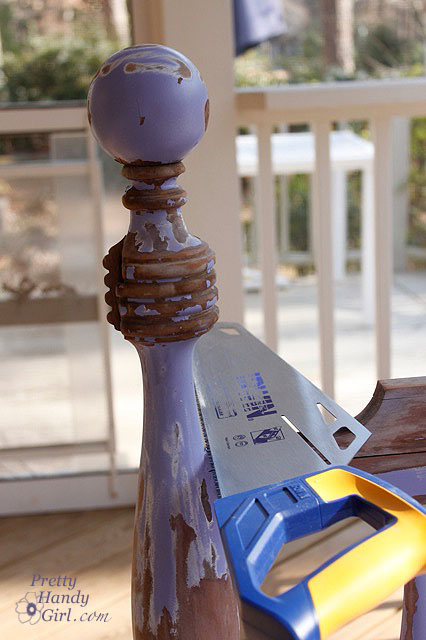
While sanding down my garden bench, I decided to make a design change. I chose to saw off the ball finial posts that are at the end of the armrests. I felt they were too tall and since I’m moving my bench onto our screen porch I didn’t want them obstructing the view if I was sitting with friends and chatting. So, I decided “Off with their heads!”

It was also the perfect opportunity to try out a new handsaw that Irwin sent me to test. They claimed that it is up to 3x faster than a traditional handsaw. Honestly I didn’t believe the claim. I mean – come on – a handsaw is a handsaw.

So, I decided to put their claim to the test with a good old fashioned match up.

The competition:
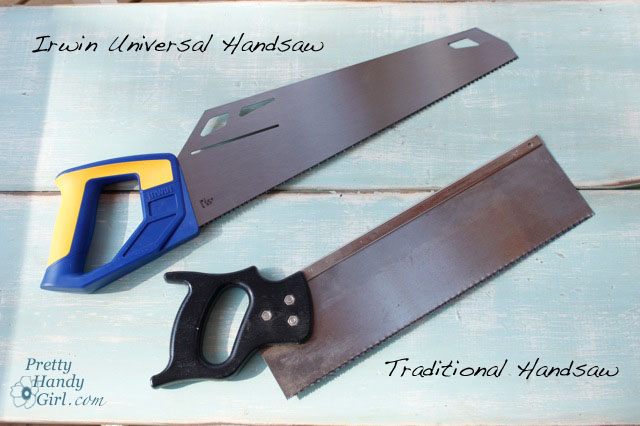
In this corner we have the challenger: the 15″ Irwin Universal Handsaw.

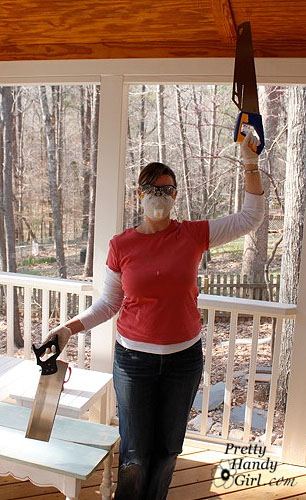
And the reining champion in this corner is my trusty handsaw.

Let me back up and tell you that I have a like/hate relationship with that traditional handsaw. I bought it a long time ago before I could afford a compound miter saw (power tool). So, I bought an el cheapo plastic miter box to use with it when I wanted to cut perfect angles. It took me about a dozen times before I learned how to properly use the hand saw. The key is to let the saw do the sawing (well, duh, right?!) Trust me, it isn’t as easy as it sounds. It is so tempting to press into the wood. But, if you put any force or pressure on the saw, it will skip and bind. Instead you have to gently push and pull the saw back and forth a gazillion times until the saw works its way through the wood. It can be  a brutally slow process.

So, back to the match up. I started with my traditional handsaw and started the timer.

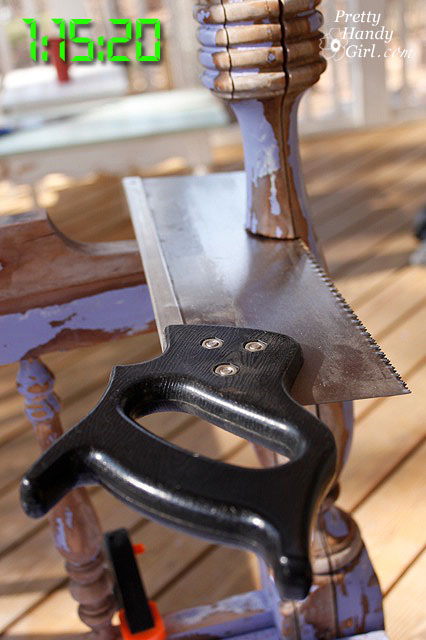
About halfway through I had to take a break (and a picture). I gulped down some more coffee and continued sawing. (I stopped the clock at 1:15:20 when I took a break and restarted it when I began sawing again.)

Finally at 2 minutes and 32 seconds the ball finial met it’s demise and toppled to the ground. I wanted to topple down with it, exhausted.

I resisted the urge to go grab one of my power tools for the other side, but instead picked up the Irwin Universal Handsaw.

The angled handle felt a little strange in my hand (not bad, just different from the traditional one I was used to.)

I set the blade against the base of the post and began to saw. It cut through the wood easily and within 32 seconds it had lopped of the head of the other post. I was amazed. I double checked my timer, but it was working. Only 32 seconds and I was barely breathing heavy!

AND THE WINNER IS:

The Irwin 15″ Universal Handsaw by a longshot!

Here are a few details about the saw: It has a triple-ground tooth design, I’m guessing this has something to do with its speed. And the unique angled handle combined with the tooth design is supposed to eliminate binding. I had no binding, so it appears to work.

There are 45º and 90º angle markers built into the blade. I’m not sure that I would use them instead of my carpenter’s square, but I suppose they are convenient to have in a pinch. With a retail price of $18.99, the 15″ Irwin Universal Handsaw is a great and economic addition to your toolbox. (Especially if you can’t afford a power miter saw).

I’ve decided to send my traditional handsaw packing to make room for the Irwin Universal handsaw in my toolbox. Anyone want a gently used traditional handsaw for cheap?

Disclaimer: I was not paid for this review. I was sent the Irwin Handsaw at no charge, but the opinions and testing were my own and were not influenced by Irwin or anyone else. For more information you can view my disclosure statement HERE.

This weekend I’m competing in the Ms. Safe-T DIY Pageant for 2011. What? You never heard of it? Well, let me tell you the competition is fierce. I’m up against 7 other beautifully safe women for the title.

The final 8 contestants are (click on their photos to view their Safe-T profiles):

Sandra from Sawdust and Paper Scraps

Michelle from Dream Home DIY

Katy from Mom and Her Drill

Erin from Erin’s Creative Energy

Tanja from Postmodern Hostess

Jaime from That’s My Letter

Pink Toes and Power Tools

And of course, there is me! Don’t you think I nailed the runway walk? I’m a muddy shoe-in to win! (Snort, snort, I crack myself up.)

Brittany from Pretty Handy Girl

In all seriousness, Sandra is hosting the Strut Your Safety Gear Link Party to get the word out about wearing the appropriate safety gear when working on your DIY project. And if you hop to it and comment by Sunday night (tonight) you can enter to win a $100 Amazon gift card. Whoo-weee.

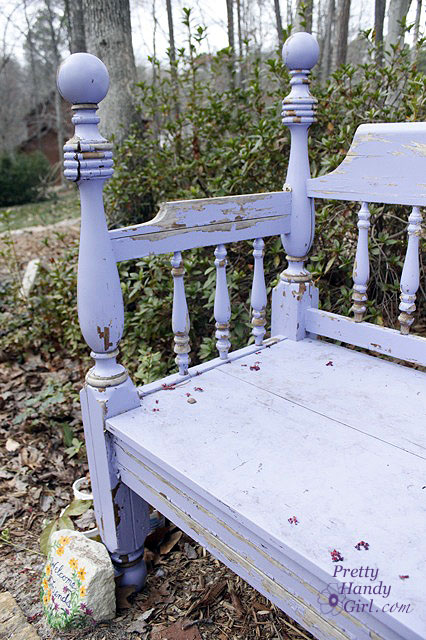
Today, I geared up to scrape and sand my garden bench. Sadly the paint didn’t weather the year in the rain, sleet and snow. The bench is still structurally sound, so I’m going to repaint it (the right way) and and share with you the details at a later date.

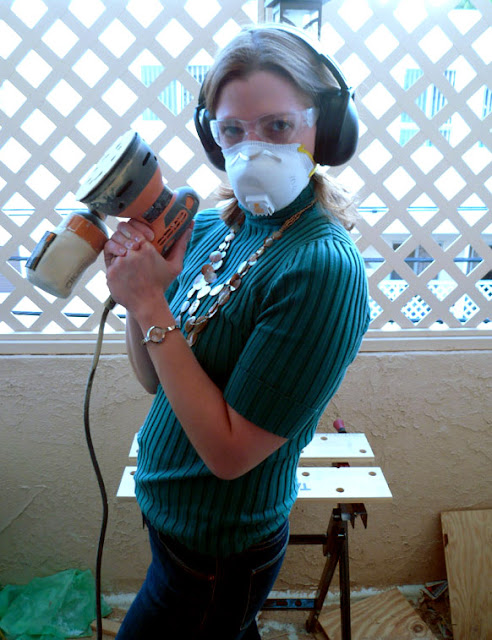
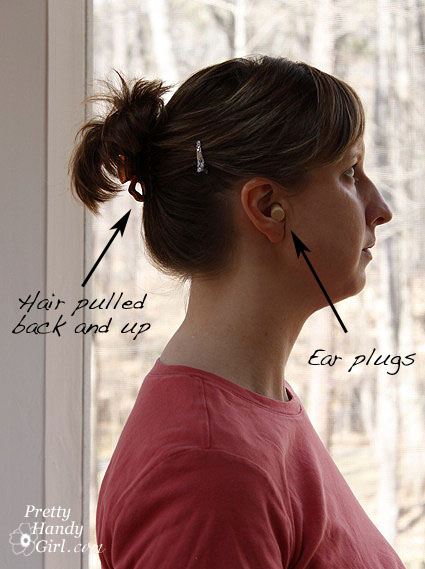
I needed to use my power sander, so I pulled my hair back and put in my ear plugs.

99% of the time, when I’m working on a DIY project, I put on my paint spattered shirt and ripped blue jeans. The 1% of the time that I don’t do that I end up ruining those clothes. Safety goggles are a must when working with any power tool. (I just ordered some new molded goggles that seal on your face to help keep the dust out next time. Sandra turned me on to them HERE!)

Sanding is a messy job. It is a good idea to tarp anything you don’t want covered in sawdust. The particles go EVERYWHERE. That is why it is important to wear a dust mask and gloves.

The gloves also keep my hands from getting rough.

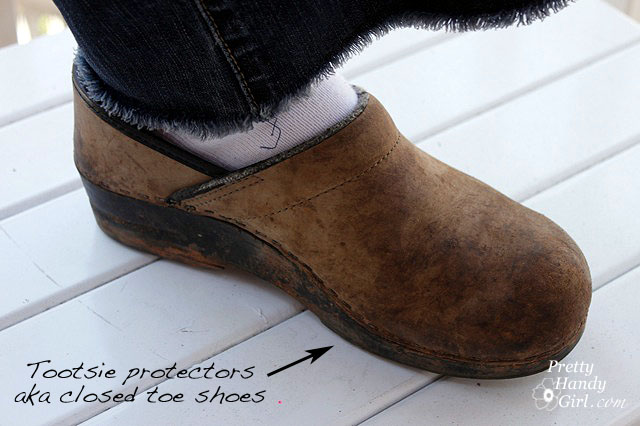
And finally, I wear closed toe shoes to protect my piggy wigglies from a dropped power sander. OUCH!

Be sure to wear appropriate safety gear next time you take on your own DIY project. Check out Sandra’s post for more information on safety gear HERE! She even gives you the links to purchase your own. Now that is my kind of shopping!