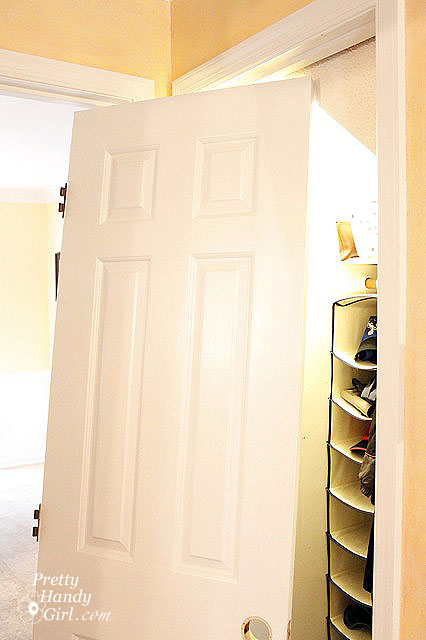
Removing a door’s hardware (knobs, latch assembly, hinges) is really a piece of cake if you know what you are doing.

There are several reasons you might need to remove a door from its hinges:

  1. The lock is broken and you can’t open the door.
  2. You want to replace your door.
  3. You want to replace the hinges.
  4. Your six year old was warned that if he slams his door one more time he will lose the door (true story).
  5. You want to repaint the door.

When I decided to give my downstairs half bathroom a makeover, I knew I needed to paint the door as well. The easiest way to repaint a door is to remove it from the hinges, remove all the hardware, and lay it flat on sawhorses and paint horizontally.

Before I show you how to paint the door, I will share with you how to remove the door, hinges, and the door knobs (or locksets if it has a key hole). How to remove the locksets is a helpful skill to learn should you wish to replace your door knobs, deadbolts or locksets.

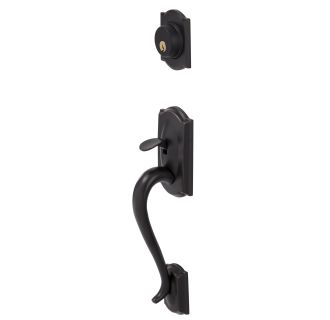
Letting you in on a little secret: Speaking of replacing locksets, did you know that if your house has several different locks you can have them rekeyed to just one key as long as they are all the same brand? When we moved into our home we had three different locks (2 Schlage and 1 Kwikset) and keys to only ONE lock! Arrggghhhh!  Unfortunately, I didn’t have the keys for either Schlage locks.) But, I really wanted to change the locks for the whole house. When I got a quote from a locksmith, I nearly passed out. $250 to get all our locks to match and to cut a few spare keys!

I thanked them and hung up. So, here is what I did. I bought one new Schlage lockset (handles and deadbolt set) for the Kwikset door. Then I took the locksets off the other two doors and brought them to a local locksmith (Busse’s Lock Service in Raleigh.) They were able to rekey both locks using my new Schlage key. The cost was under $50!

Photo courtesy of Handlesets.com

Later when the old lock on our front door broke, I ordered new ones from Handlesets.com (they sell all types of door hardware) and the customer service rep helped me enter the code from our master key when I placed the order. That way my new locks would match the rest of our house. Best of all they didn’t charge extra to for that service!

Sorry for the diversion, but I really wanted to let you in on that little secret.

Removing the Door Handles and Latch Assembly:

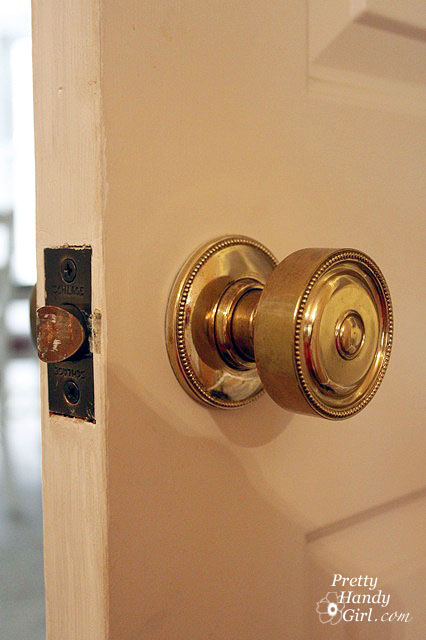
There are several types of door handles, you will need to inspect yours to determine how to remove it. Most door handles have screws on the interior side (for safety reasons, you definitely want them on the interior) that you unscrew to release the handles. Our door handles are a little different, but almost as easy to remove.

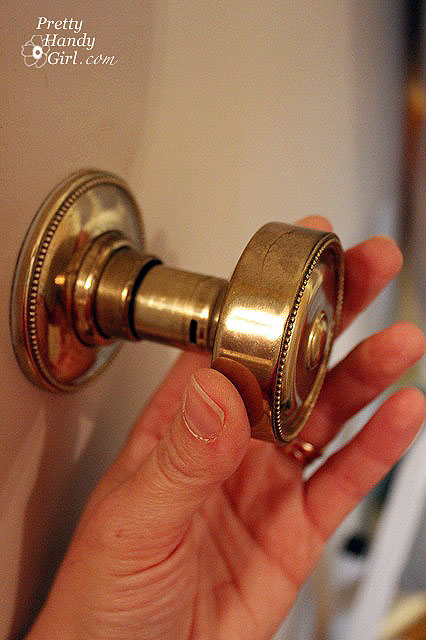
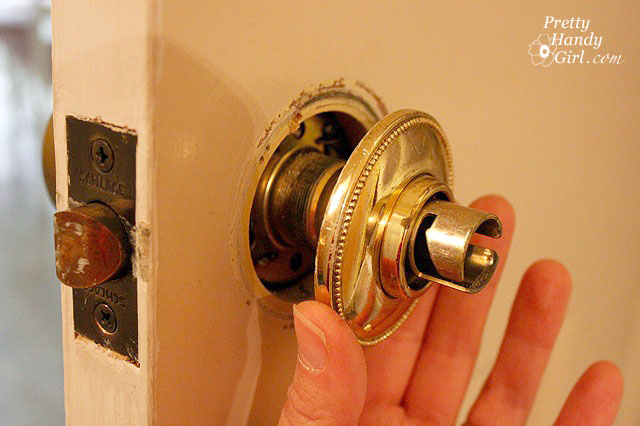
Insert a flat head screwdriver into the little slot on the side of the handle.
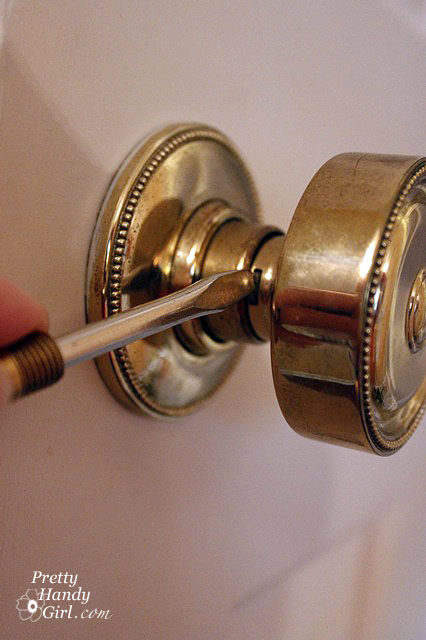
Pull the handle out and away from the door until it releases.

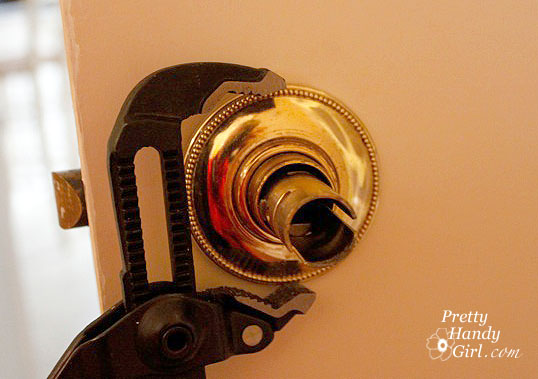
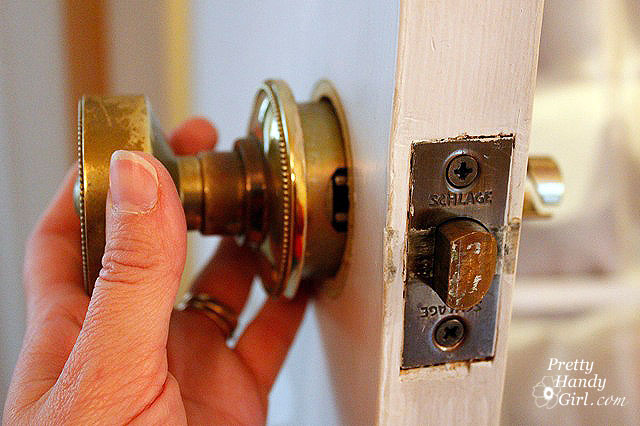
Unscrew the collar (also called a trim piece or escutcheon – yup, there is that word again!) that is up against the door until it comes off. You might need to use pliers to coax it free.

When it releases from the threads, remove the collar (ring, trim piece, escutcheon, WHATEVER.)

Gently pull the other handle off.

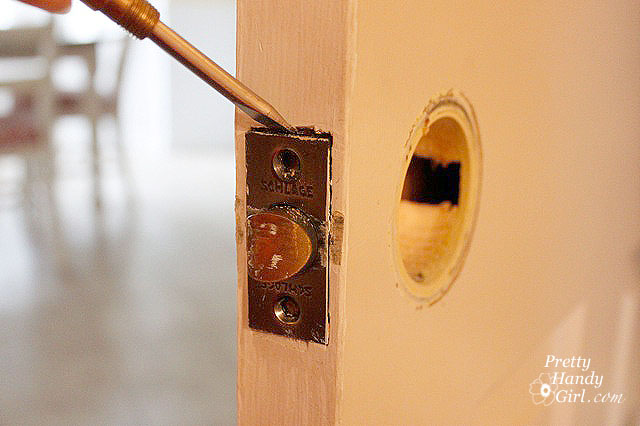
To remove the latch assembly, unscrew the two screws above and below the latch.

Gently pry the latch assembly out.

And remove it being sure to keep the screws with the latch.

Removing the hinges:

If you have the type of door hinges that the pin can be removed from, follow these instructions. If not, you will have to unscrew the hinges from your door (but don’t worry, I’ll show you how to do that in a minute.)

Removing the hinge pin is a snap. I use a flat head screwdriver and a hammer. Set the screwdriver just below the head of the pin and tap it lightly with the hammer until the screwdriver can fit below the head. If you can’t get the screwdriver under the head of the pin, insert the screwdriver into the bottom of the hinge and tap the bottom of the pin up slightly. Then angle the screwdriver end up and the handle down. Continue to tap on the screwdriver handle with the hammer until you can release the pin*.

*Oh, and before you remove all the pins, you may want to ask someone help hold the door while you remove the pins from the other hinges. Not that I’ve ever made that mistake (uh, okay, maybe I did.)

Remove the other two hinge pins and gently pull the door off the hinges.

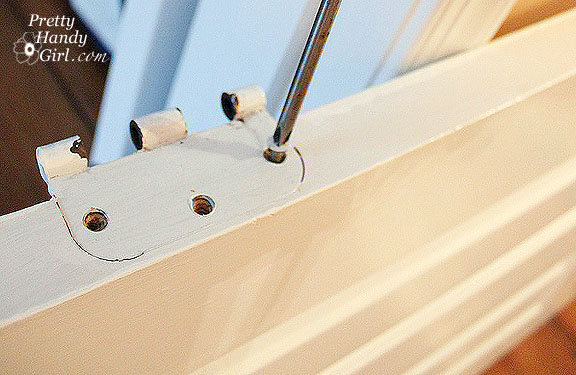
Use a screwdriver or cordless drill with a screwdriver bit to remove the hinges from the door and door frame if you are painting the trim as well.

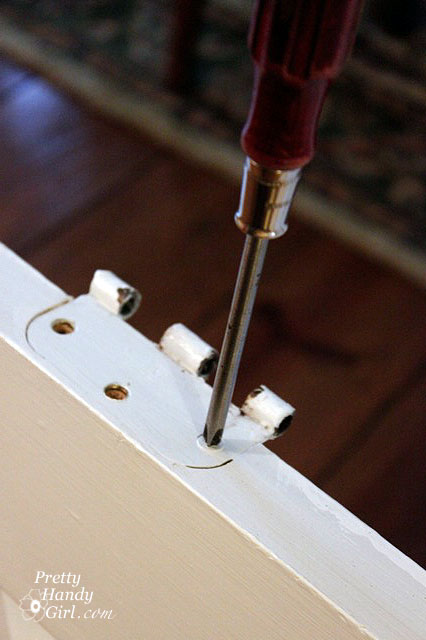
I ran into a few painted over screws that I couldn’t turn. Here is how to deal with those little buggers.

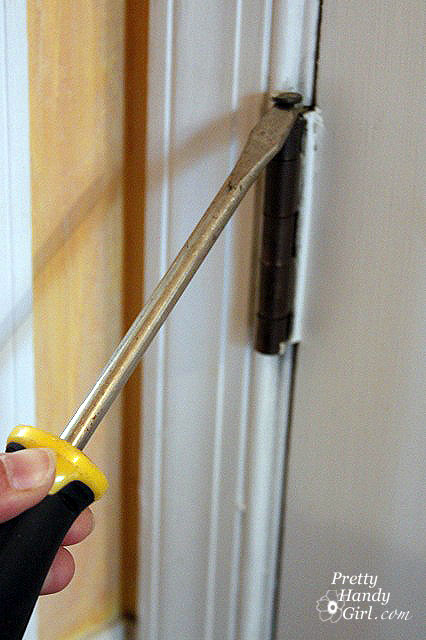
Lay your door on it’s side with the hinge facing up. Fit a screwdriver into the screw slots as best you can.

Then use a hammer to bang on the other end of the screwdriver.
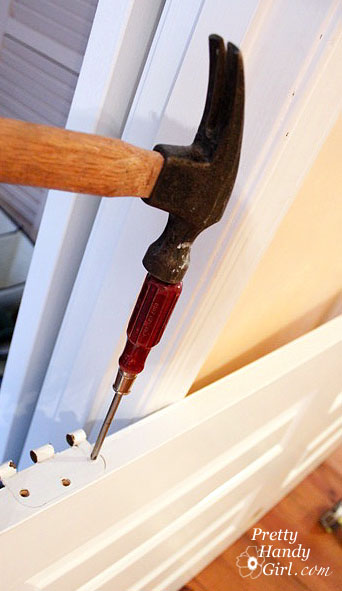
This will either crack the paint or make enough of an indentation that you can turn the screw.

Be sure to keep all your hinges and screws in a separate bowl or bag.

Now you are ready to paint your door or paint your hardware (Like Beckie at Infarrantly Creative did HERE) or both! More tutorials to come.

Okay, so I know you all think I’ve gone off my rocker. I bought a bunch of silverware (err, excuse me flatware) from Goodwill recently. I made some Fork Photo Holders (which I absolutely adore!) And had been thinking of some cool projects to do with the knives.

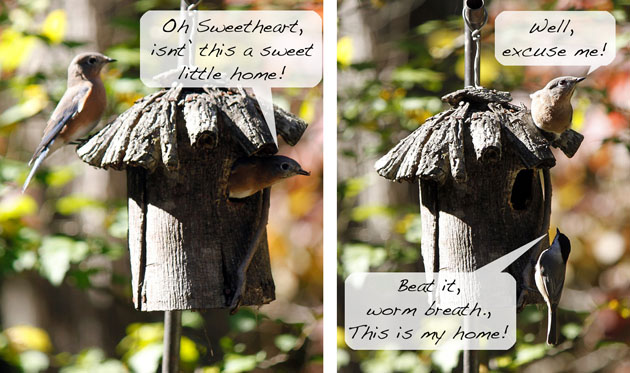
Inspiration hit when my chickadee’s birdhouse roof caved in. I knew I had to act quickly and build a new birdhouse for my repeat nesters! Here is a look at the dynamics surrounding the chickadee’s annual nest location.

I had no idea that the little chickadees could continually defend their bird house from the larger birds, but they do. Every year!

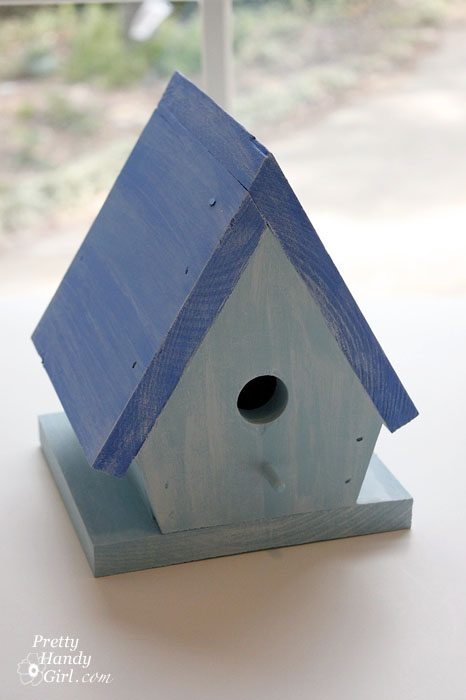
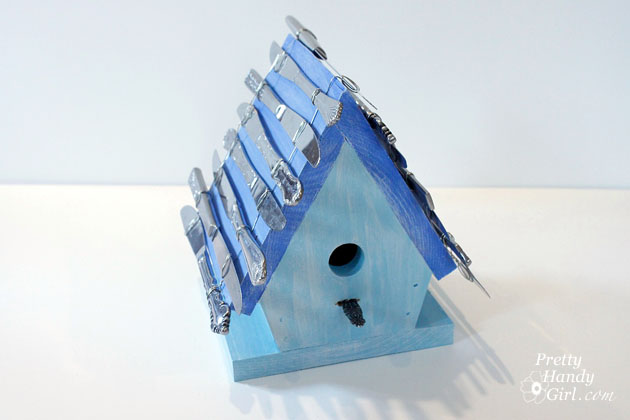
I bought this $3 unpainted birdhouse at AC Moore and painted it a pretty blue;  gave it a white wash; and put a few coats of protective polyurethane on it.

Then, because I can’t leave well enough alone, I decided that the birdhouse needed something extra. Knives!!! Of course, right?!

So, here is what I did:

Materials:

Painted and Polyurethaned Birdhouse
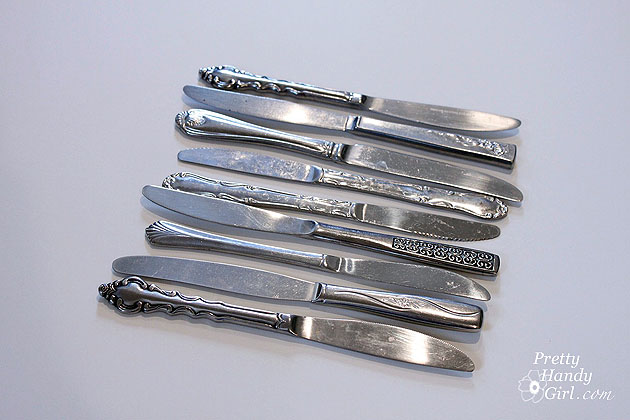
Knives (about 14)
Wire
Wire cutters
Staple Gun
1/4″ Staples
1 Spoon or Fork Handle
Dremel power tool (with metal cutting disc, drill bit, and engraving tool)

Instructions:

Begin by removing the standard perch (yes, I really can’t leave well enough alone!)

I used my Dremel 8000 that I got for Christmas. Love it!

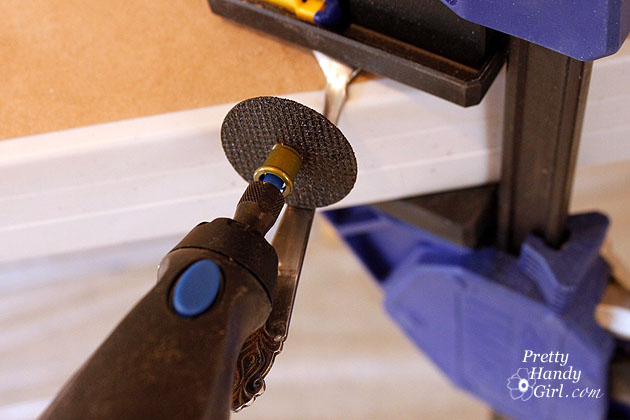
Then clamp the spoon or fork to a work surface and use a metal cutting wheel attachment on the Dremel to cut off the handle (those sparks will fly, so be sure to use safety goggles and keep the work area clear.)


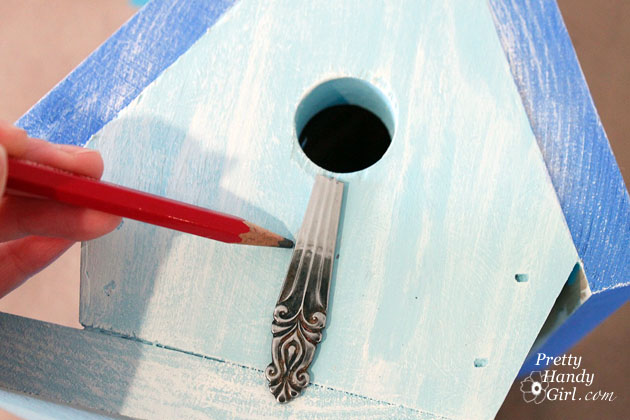
Mark the width of the handle on the birdhouse.

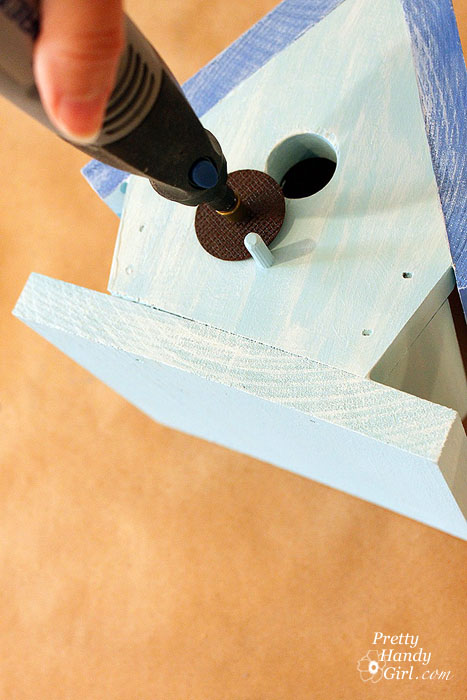
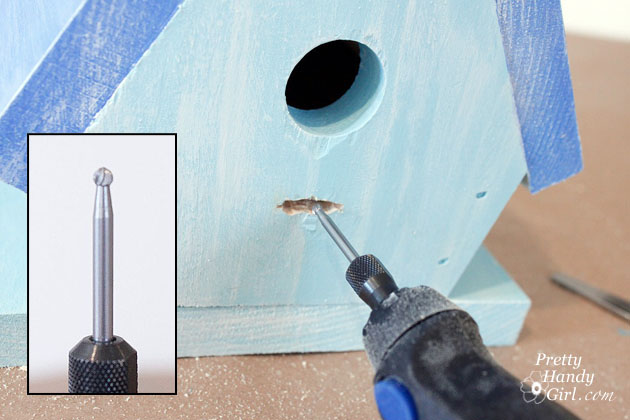
Use a drill bit attachment to drill a series of holes to fit the spoon handle (perch) into.

I got tired of drilling holes and eventually cleared out the leftover material with the engraving tip. (If anyone is a Dremel expert and has a recommendation for a better bit to use, I’m all ears!)

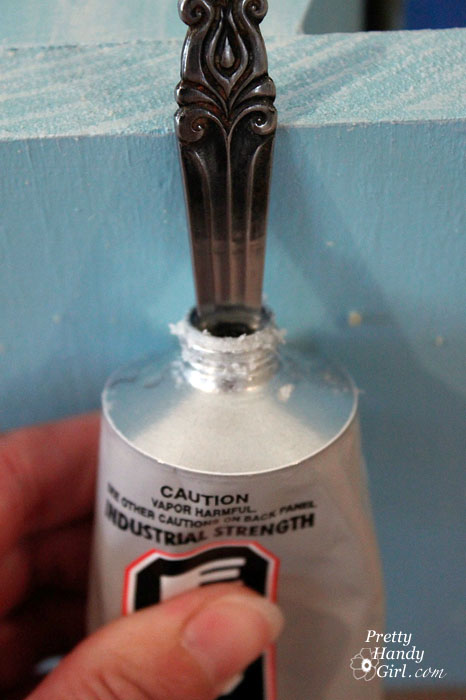
Dip your handle (perch) in the E-6000,

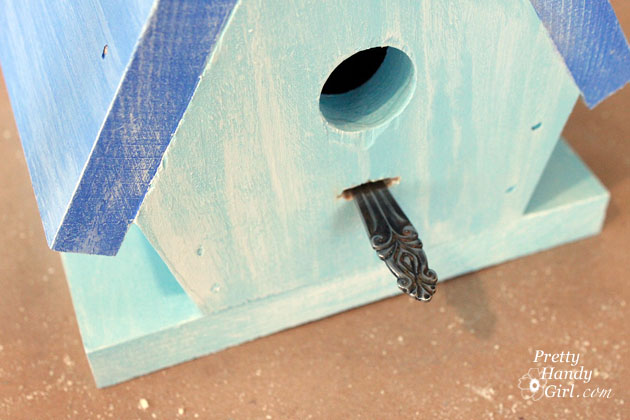
and insert it into the slot you made in the birdhouse.

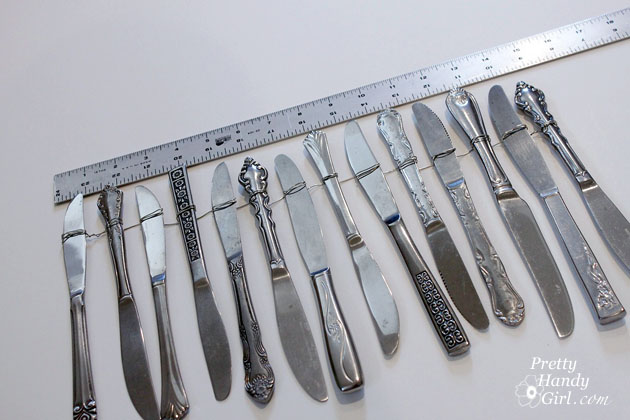
Now, time to play with the knives! Oooo, that sounds so sadistic! Measure the height of your birdhouse roof and then line up your knives to double that length (to cover both sides of the roof.)

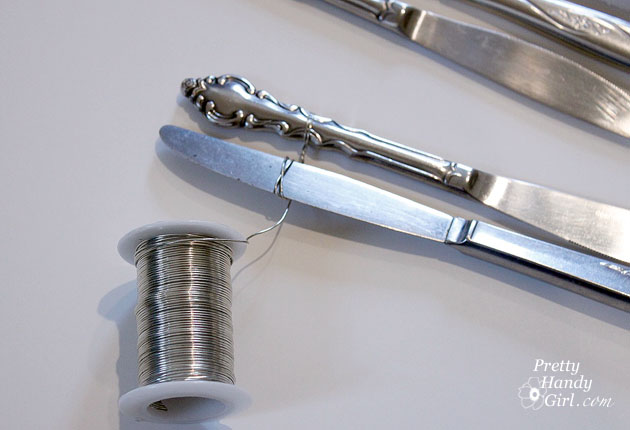
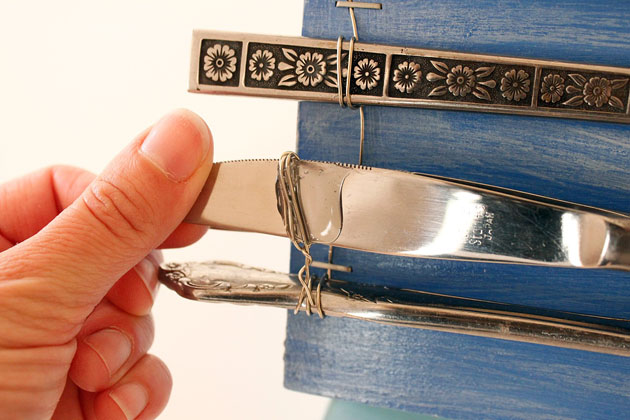
Wrap a wire around the first knife a few times, then wrap it around the second knife a few times to connect them.

Continue connecting the knives together until you reach the double height length of the roof.

Repeat tying the knives together on the opposite side.

Drape the knives over the birdhouse roof and adjust any that have fallen out or are not lined up.

If some of the knives want to fall out, add a drop of E-6000 to the underside to secure the wire to the knife.

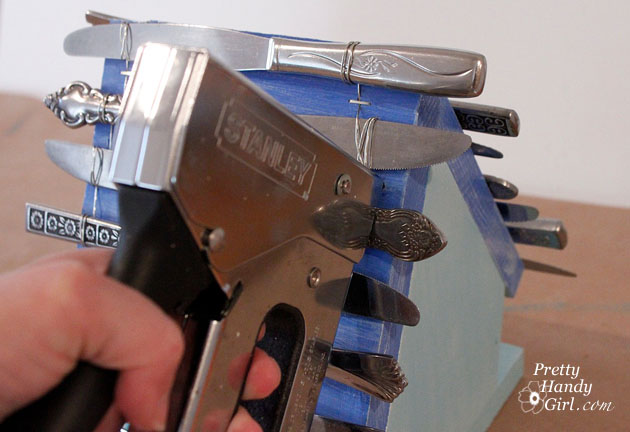
Load your staple gun with 1/4″ staples and staple the wire to the roof. Tap any that didn’t sink into the wood with a hammer.

Finally, add a hook to the top of your birdhouse and hang it up outside! I hope the chickadees appreciate their new home.

Note: At first I wanted to use more knives so that you couldn’t see any space between the knives, but those suckers were so heavy that I had to modify my plans.

PHGFancySign

Recently I was asked what my favorite tool is. My Ryobi 12 volt Lithium Ion battery cordless drill was the first thing to pop into my head. Barely a week passes that I don’t reach for my drill to assist with a few loose screws (not that I personally have any of those.) For a homeowner or DIYer, this tool is indispensable. It allows you to drill holes, remove or drive screws and – well – just look like you know what you are doing.

I don’t just like this power tool, I love my cordless drill! Shhhh, don’t tell Pretty Handsome Guy, he might be offended. My drill is my right hand man, helping me breeze through projects with power and speed.

About 15 years ago my father-in-law asked what I wanted for Christmas, and I boldly told him that I wanted a cordless drill. He kind of chuckled and said, “Heh heh. Okay.” You see we didn’t own a house at that time, and I was still a young woman in my 20’s. But, I had big DIY dreams and I knew I wanted a power tool.

Christmas morning I opened a present to reveal a brand new 18 volt Ryobi Cordless Drill. It had loads of power, two torque settings and the whizzing whir that made me feel like I was one mean carpenter! Plus, it came with a flashlight attachment that would make any nighttime lurker look like a deer caught in the headlights.

I have owned two more Ryobi cordless drills since that Christmas present. The first one had to be replaced when the battery no longer held a charge (and buying a new battery cost almost as much as a new drill.) The second one met its demise when I accidentally drove a screw right up against a fence post and didn’t notice that the chuck was winding the opposite way until the collar was stuck wide open.

So, it was back to my super box home improvement store to shop for a new drill.

As I was checking out the drills and learning about the merits of the lithium ion batteries, I asked about the voltage difference since I had been using a 14.4 volt drill. The salesman at the “Big Orange” told me that I wouldn’t notice the difference between a 12 volt and a 14.4 volt. Pisshwah! I did notice a difference, especially when trying to drive screws into hardwoods! (My DIY abilities are sometimes underestimated by a few.) But, the salesman was correct, under normal daily use I don’t notice the difference.

Two things that I DO really love about this new Ryobi 12 volt Lithium Ion drill:  

1. Battery Life: Yes, yes, yes! What you have heard is true. The battery does last much longer. I’ve told you how much I use my drill, and I have only charged the battery on this drill three times since January 2010. That is 11 mos. of use including laying a sub-floor in our living room. The only downside to the lithium ion battery (but also could be considered an upside) is that the drill doesn’t slow or lose power until a few seconds before the battery is dead. Therefore there is very little warning that the battery is about to give up. At least this drill comes with a spare battery, so I always keep it charged.

2. Size and weight: 3.5 lbs. of cordless drill made me feel like I had some serious power in my hands! That is how much the old 18 volt Ryobi weighed. When I held the new 12 volt Ryobi drill, I embraced the lightness of its lithe 1.8 lbs! I can really appreciate the difference when reaching overhead to use the drill. Plus, this new drill with its smaller size and smaller grip fits perfectly in my hand.

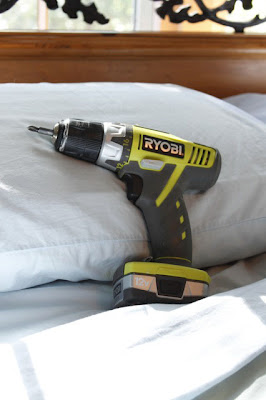
As you can see below, my drill shows signs of being loved used frequently. But, it still works like the day I lifted it out of the box.

Some other features about this little green mean machine: 

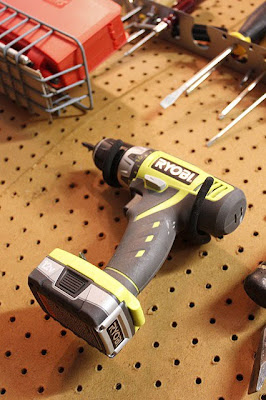
It comes with a charger, extra battery, a phillips and flat head bit. There is a magnetic bit shelf right above the battery. And a canvas storage case. But, my drill doesn’t get that much time stored away. It usually rests right here…

…ready to leap into action at a moments notice.

If you don’t own a cordless drill, I implore you to add this DIY essential to your holiday wishlist!

(I was not paid or compensated to write this post. This is my honest opinion and true feelings about my beloved cordless drill!)

I spent the weekend in Norfolk, VA with my two wonderful sisters (Alana and Caitlin) and Alana’s boyfriend, Eddie. We had fun kicking some DIY butt! Who knew you could have so much fun installing cabinet knobs!

Most of the projects were centered around Alana’s kitchen. The kitchen was remodeled a few years ago, but it was never really finished. Our mission this weekend was try to complete some of those unfinished projects.

One of the tasks we accomplished was installing cabinet knobs on the kitchen cabinets. Another was touching up paint on the walls (but that is another post for another day.)


Caitlin made a template out of cardboard that made it a snap to install the knobs.

First she measured the corner square on the cabinets. It was 1.5″ square.

Then she made a hole in a piece of cardboard 3/4″ from two edges of the template. So, this way we knew our hole would be centered in the square every time! And she marked the outside corner with a little arrow.

Making sure the arrow was pointed at the outside corner, I lined up the template at the corner of the cabinet. (We used the edge of the raised panel, instead of the actual corner of the cabinet.)

Then, I used my drill to make a mark where the hole would go.

After that, I removed the template and slipped a piece of scrap wood behind where the hole was being drilled.

Then I drilled into the cabinet until I felt it enter the scrap wood.

Can you name my facial expression? a) I just got a whiff of old yeasty bread. b) I’m really concentration on my drilling. c) I’m trying not to laugh at my sister taking my picture.

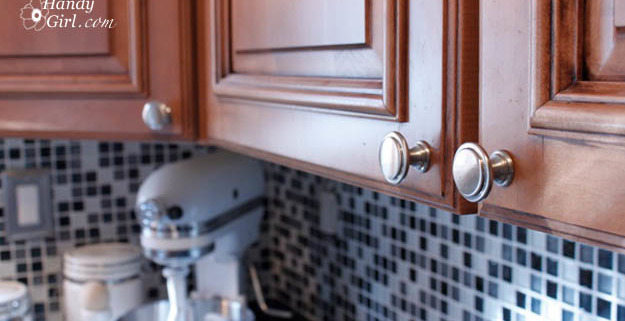
Then Caitlin threaded the bolt through and screwed on the knobs. Perfectly beautiful and those of us with fat fingers and short fingernails can get into the cupboards now. Who knew you could have so much fun installing cabinet knobs!

For your viewing pleasure, I thought you might get a laugh out of one of the outtakes of our  Charlie’s Angels inspired picture. We were doing our best at making a sexy face. Caitlin said  “sexy facial expressions” must not run in the family. Not sure what’s with that fish face I’m sporting. So much for my sexy look.

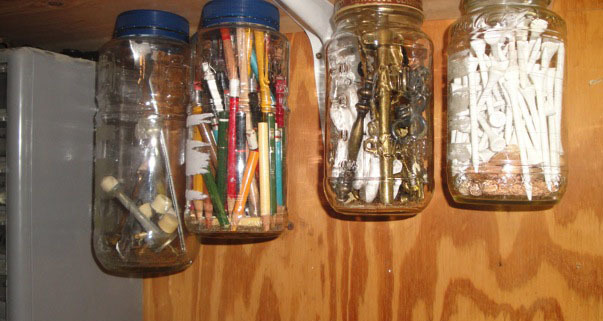
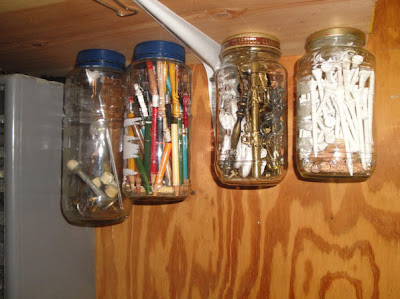
Over the weekend I finally cleaned up our garage. This is our multi-purpose space, so it had multi-multi-multi items strewn everywhere. Check out this cool Hanging Jar Storage.

Because our garage is small (fits 1.5 cars) space is a premium and I knew where I could find more space. One place I found space is under the shelves. Another place was inside my workbench (but, I’ll show you that in another post.)

I had been saving jars and lids (which I had to fish out of the trash a few times. Ewww!) for storage of odds and ends in the workshop/garage.

This project turned out to be a super easy and quick project (unlike taming the wild multi-beast our garage had become.
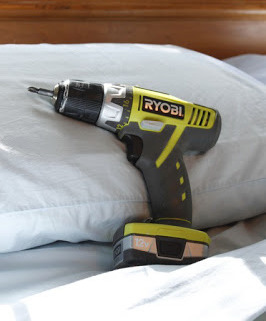
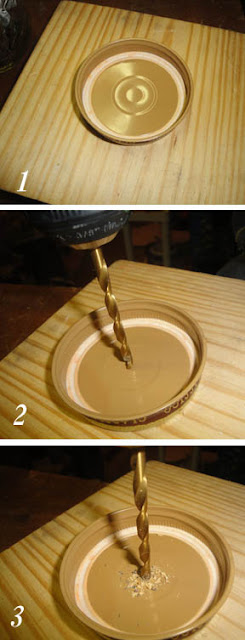
1) First I put the jar lid on top of a scrap piece of wood. 2) Then I centered my drill. 3) And drilled through the lid (check the size of your screw to make sure you choose a drill bit that equals the diameter of the screw, but not large enough for the screw head to go through.

Then I used a screwdriver and attached the lid to the underside of my shelf.

Then simply screwed the jar into the lid! Repeated that process three more times and filled the jars with the odds and ends that needed a place to be stored.

Ultimately, I finished cleaning the garage so I have room to set up a spray tent and start working on this sad little chair I found on the curb. Look here to see her transformation! I have to tell you, it is going to be quite a job. I took her completely apart, but I can rebuild her. I have the technology. Better, stronger, faster than before! (oops, The Six Million Dollar Man started playing in my head.)

Update: I was feeling pretty embarrassed after showing you my messy garage. So, here is proof that I really did clean it up. We still have a lot of stuff to fit in a small area, but at least I can walk around and find things now!