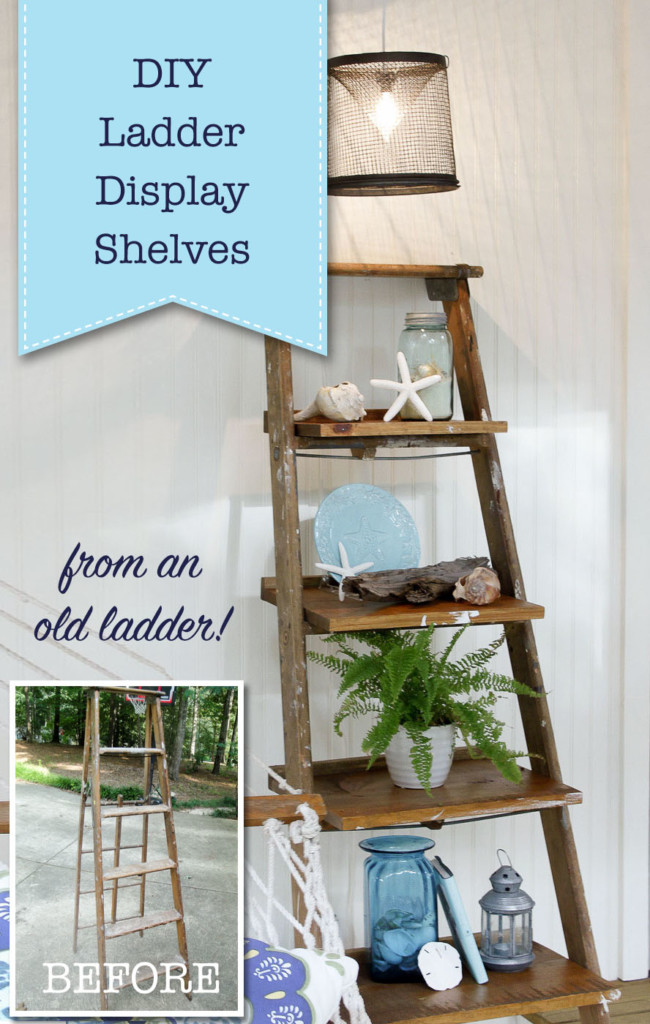
DIY Ladder Display Shelves
One of the easiest storage solutions is to create your own DIY ladder display shelves using an old ladder for the frame. Not only will you save time, but the money saved makes this project a winner in my book!
DIY Ladder Display Shelves
If you’ve been around for a while, you know these ladder display shelves start at $99 and go up depending on size. But, today’s tutorial shouldn’t cost you much and the result will be more personalized to your style (depending on how you finish it.)
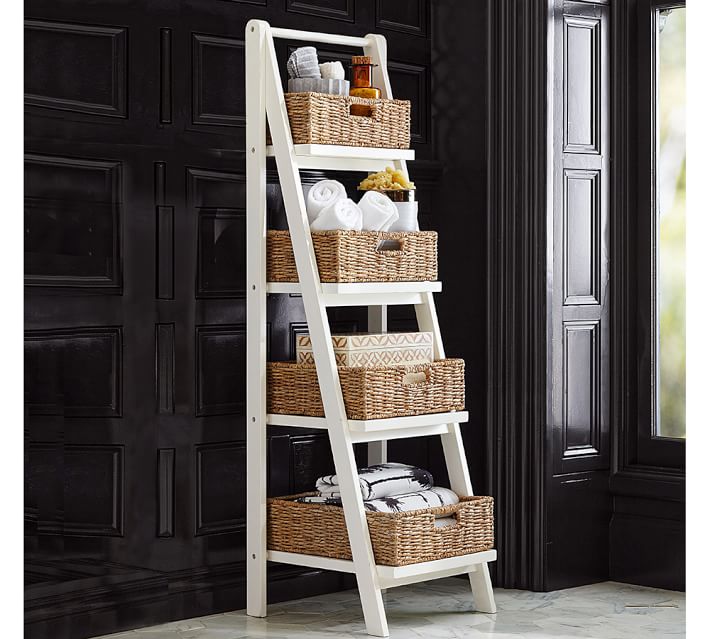
I know you’ve seen them, those adorable ladder display shelves, I really wanted one. But, the price tags were enough to send me running from the store with my purse gripped tightly in my hands. I mean, really? The one above from Pottery Barn costs $229! I don’t know about you, but I really don’t like spending more than $50 on something I can build myself.
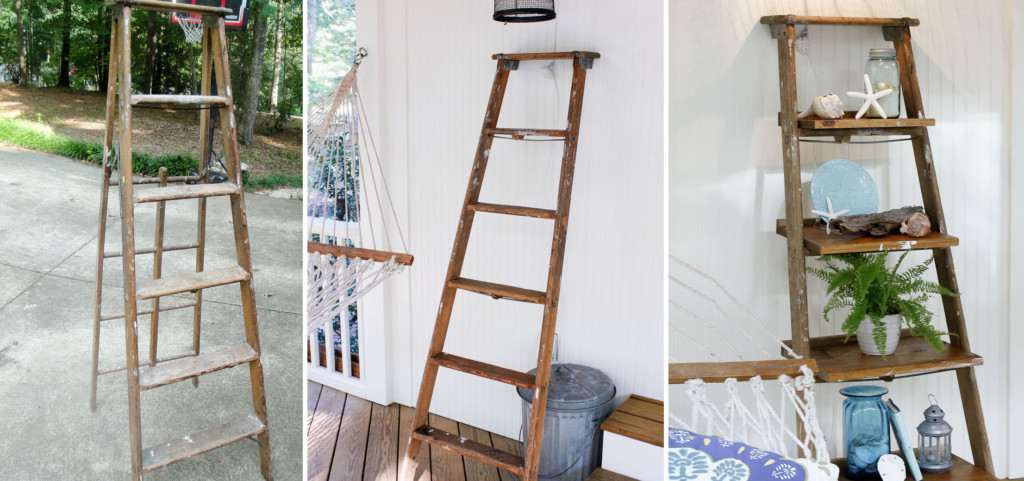
Fast forward a few weeks, and when I saw this ladder at the Habitat ReStore for $15, I knew it had the potential to fulfill my ladder display shelf dreams.
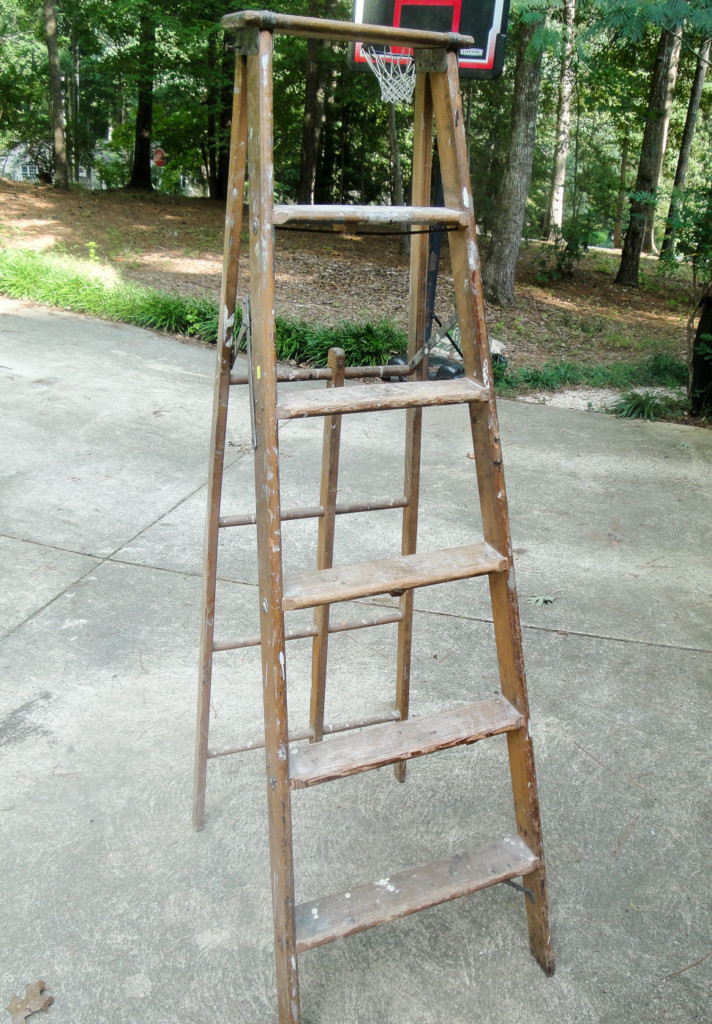
The skeptical cashier tried to persuade me not to buy the ladder, warning me not to climb on it because it was too rickety. But, who cares about rickety, I was in love with the paint splashes all over it!
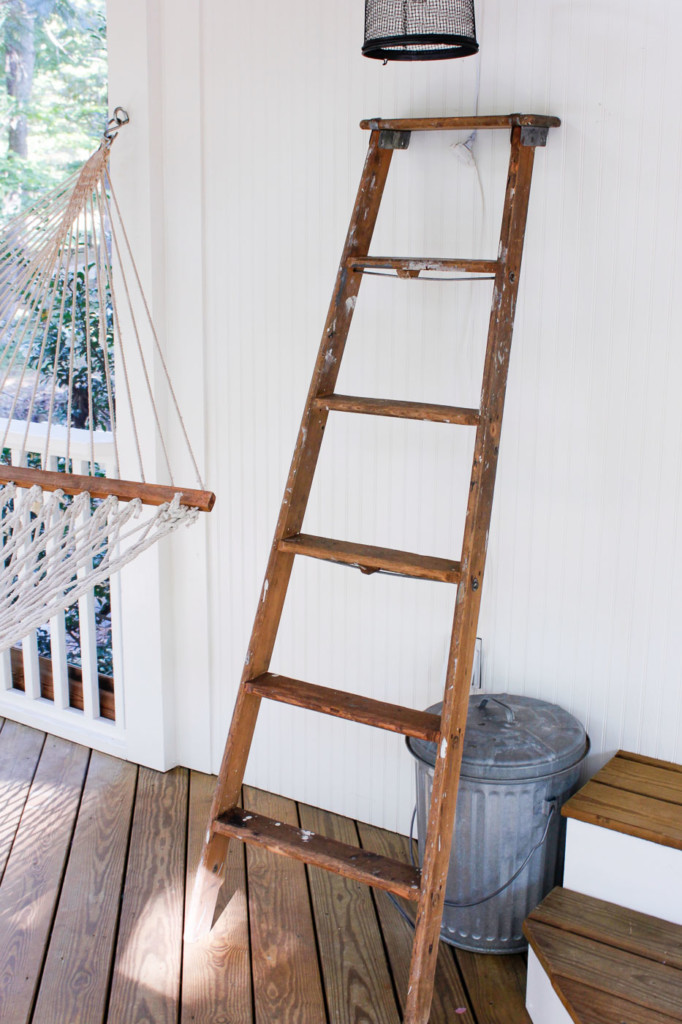
So, I hauled the old ladder home (and received funny looks along the way because it was hanging several feet out the back of my car.) Little did they know that I was about to transform that old ladder.
Materials:
(I’ve included affiliate links for your convenience. I earn a small percentage from a purchase using these links. There is no additional cost to you. You can read more about affiliate links here.)
- Drill
- Drill bits
- Wood Glue
- Tape Measure
- 1 5/8″ Wood screws
- Combination Square
- Miter Saw
- Brad Nailer (optional)
- Clamp (optional)
- Paint or Stain to finish
- 1″ x 12″ boards
- 1″ x 2″ trim pieces
Instructions for Building DIY Ladder Display Shelves:
For this project, you can leave the back of the ladder intact, or pry off the top rivets to separate the front from the back. This gave me the ability to make two things from one ladder. (Be sure to read to the end to find out what I made with the backside!)
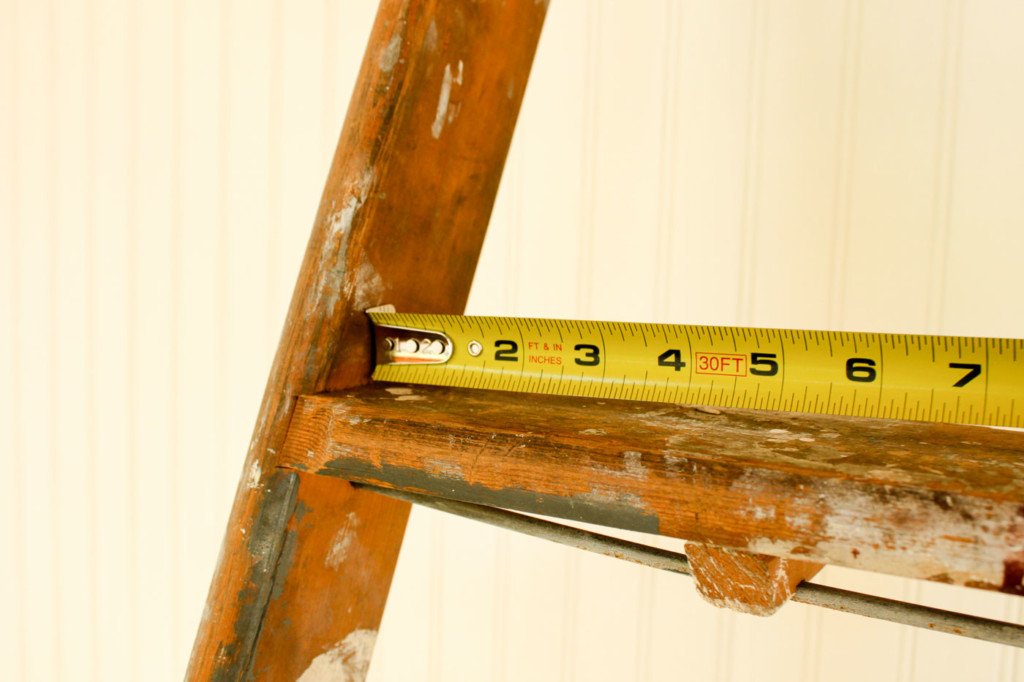
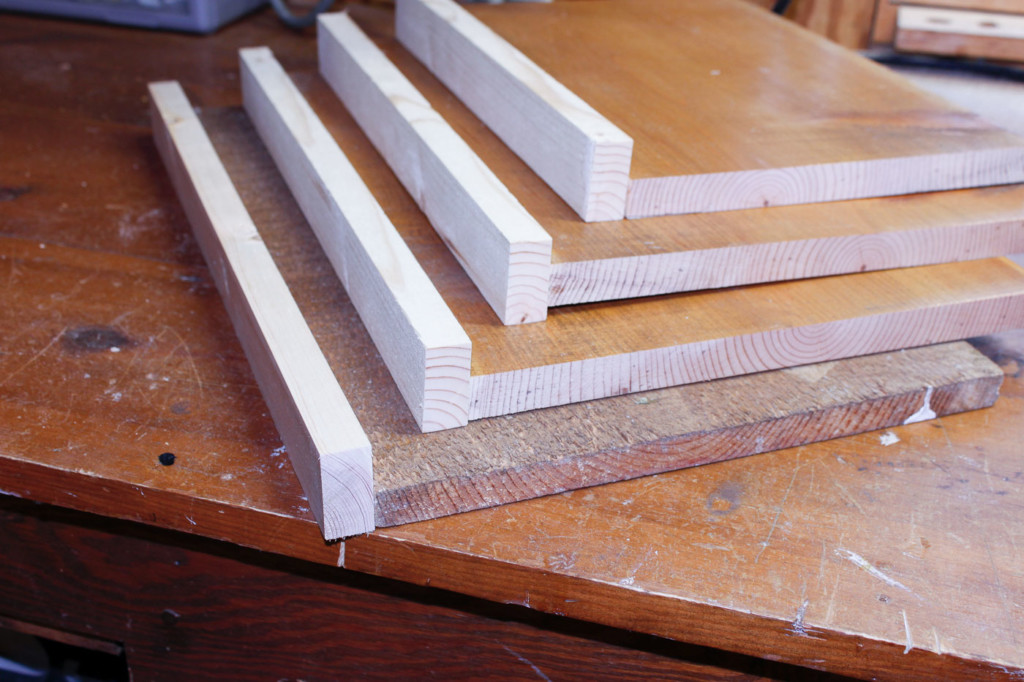
Start by measuring the width of each step (and subtract 1/8″ to account for the slant of the ladder.)
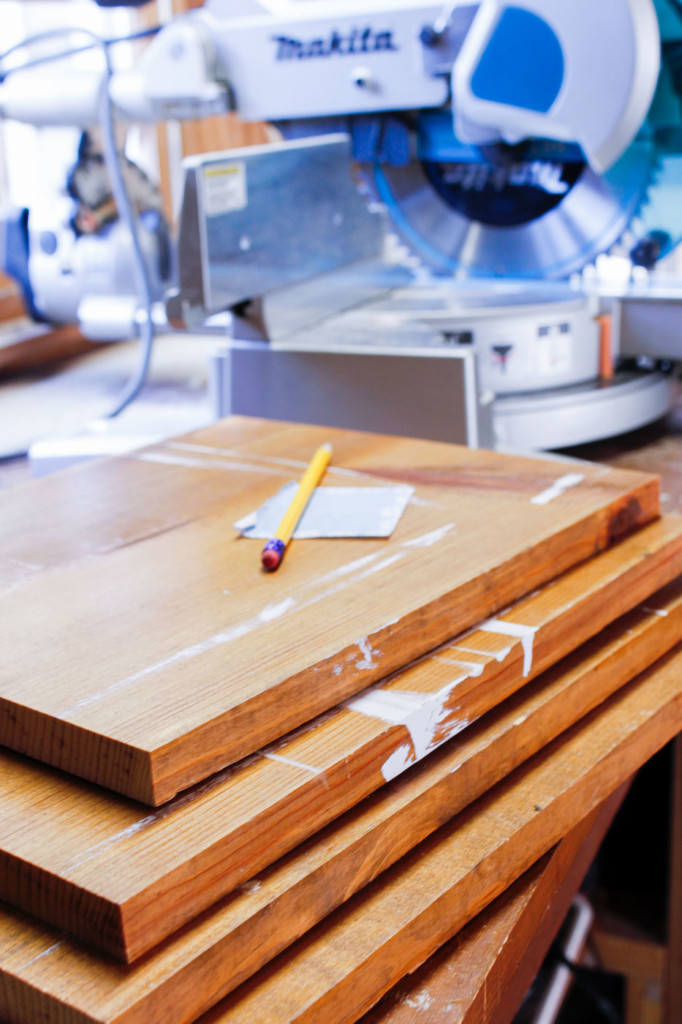
Use 1″ x 12″ pine boards or any size you choose. (I had some leftover shelving material I bought from a yard sale, so it was already pre-finished.)
Cut the boards to the appropriate width on a miter saw or ask the lumber store to cut them for you. Yes, it was a total coincidence that my boards were covered in paint splotches too!
Dry fit the boards to make sure they fit your ladder. My heart was thumping now because I could really see the project taking shape!
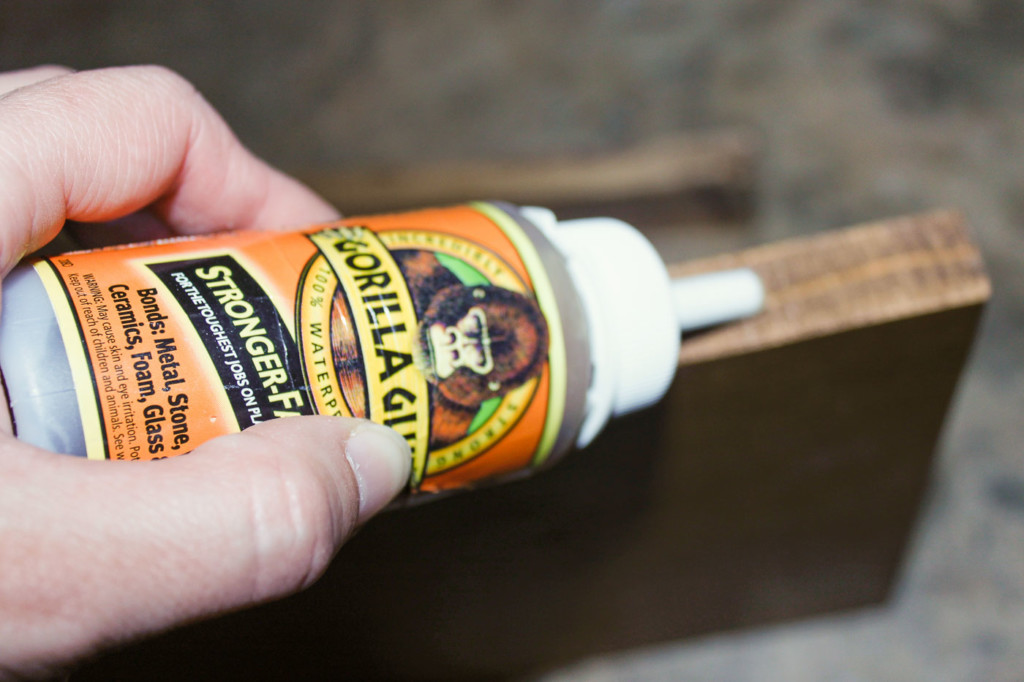
Next cut some 1″ x 2″ strips the same width as each shelf. These are for the backs of your shelves. If necessary stain your shelves or paint them to match your ladder. Or paint the entire ladder and shelves with chalk paint or a paint plus primer.
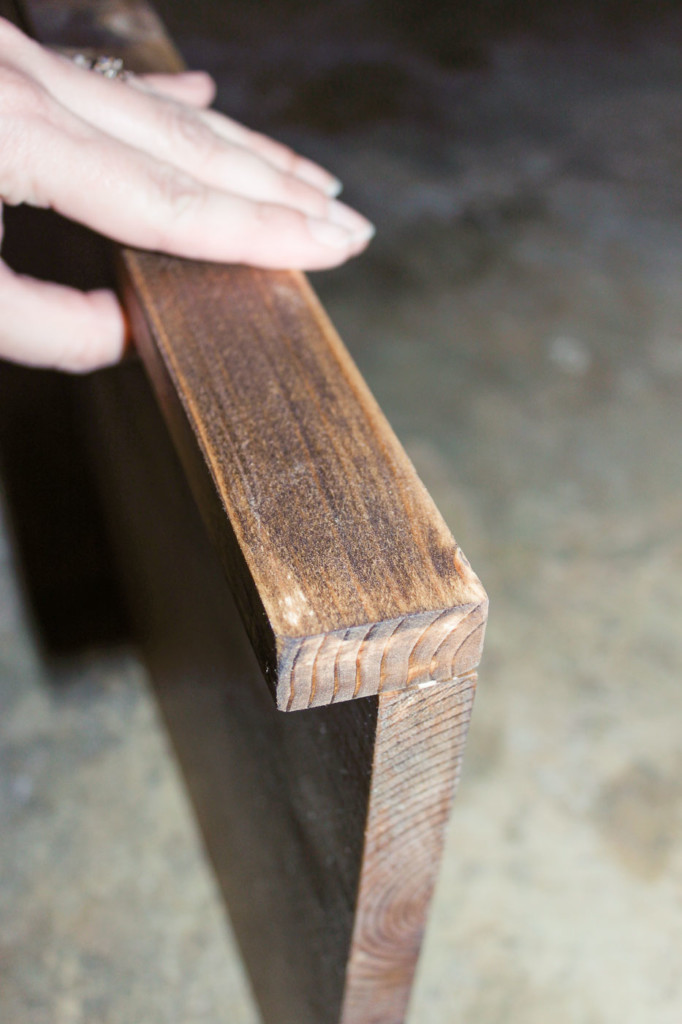
Attach the 1×2 strips to the back of the shelves, using wood glue.
Hold until the glue has gripped the trim piece.
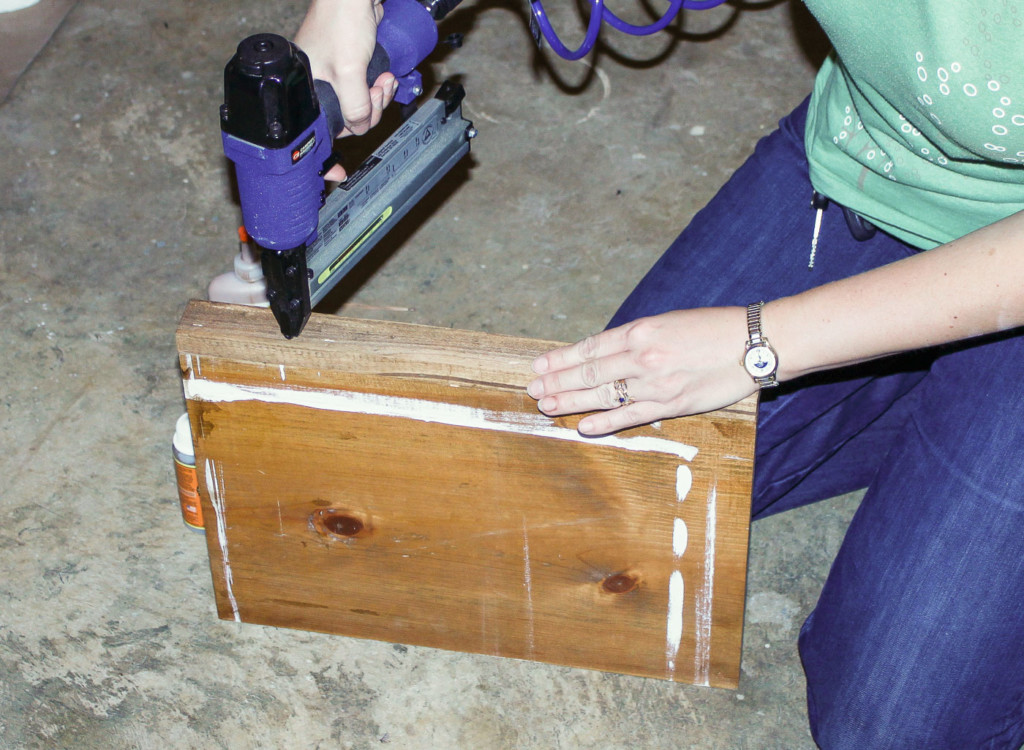
Or nail the 1″x2″ pieces to the shelves.
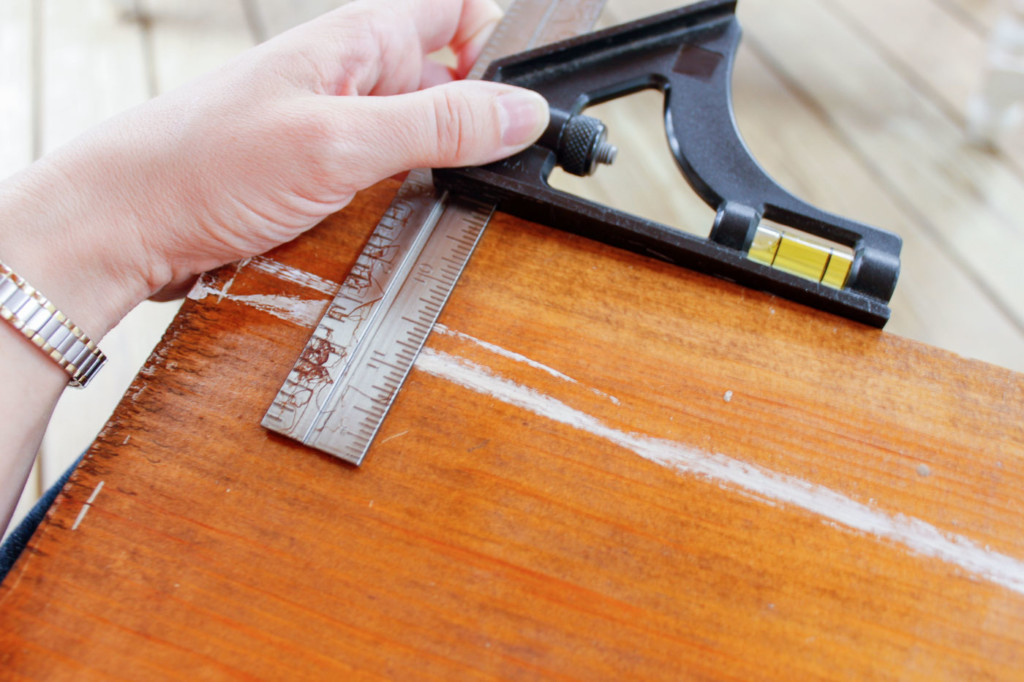
Choose how far back you want your shelves to rest on the ladder steps. Using a combination square or ruler, mark a line on all the shelves. (I chose a 3″ setback.)
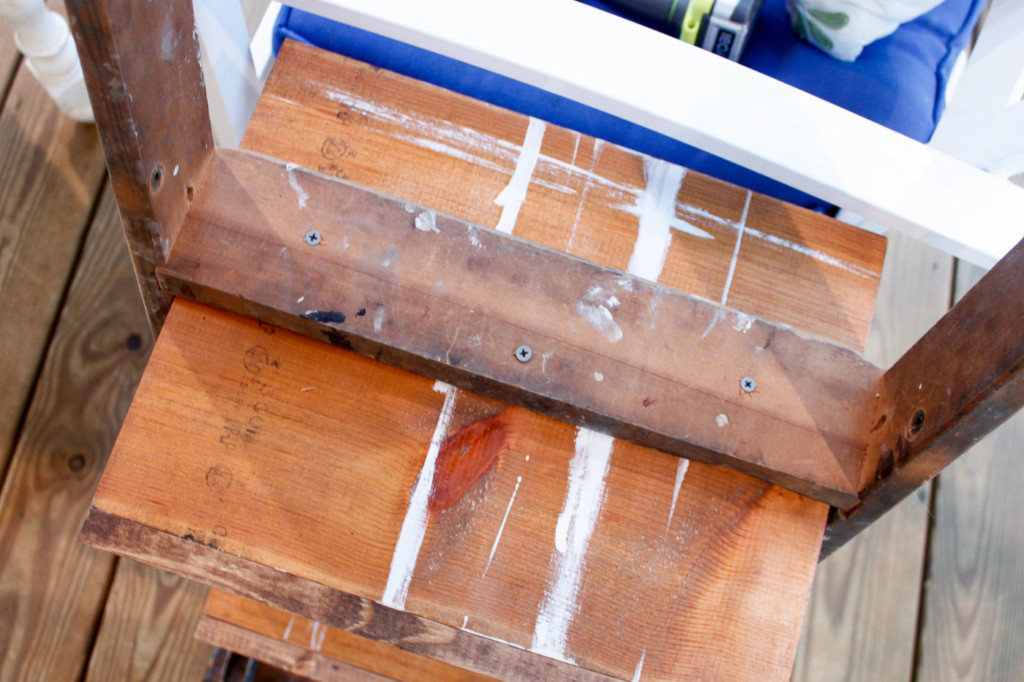
Pre-drill the location for the screws on each ladder step. Turn your ladder upside down and set the screws inside the holes. Line up your pencil lines on the shelf to your ladder step.
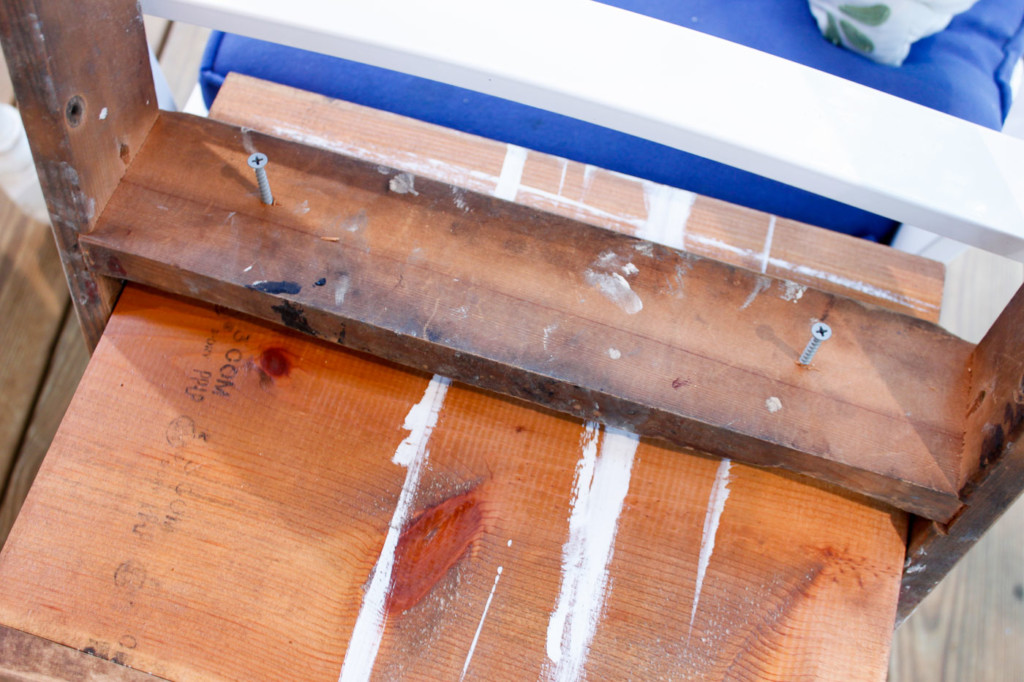
Clamp the shelf, or get a buddy to hold the shelf as you drive the screws into the bottom of each. Repeat the process for all the shelves.
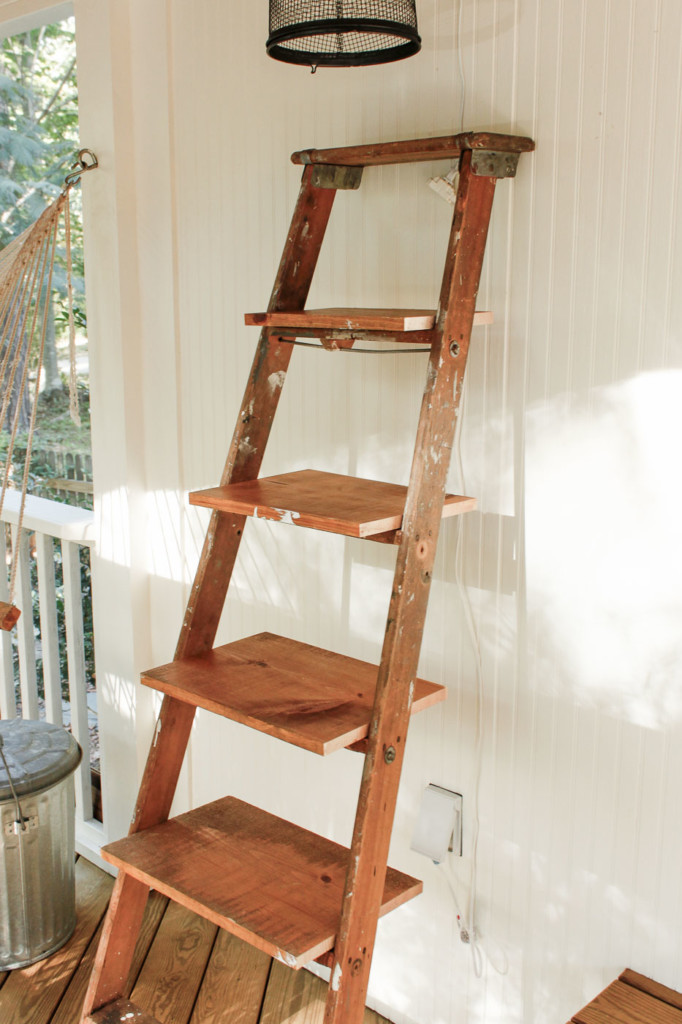
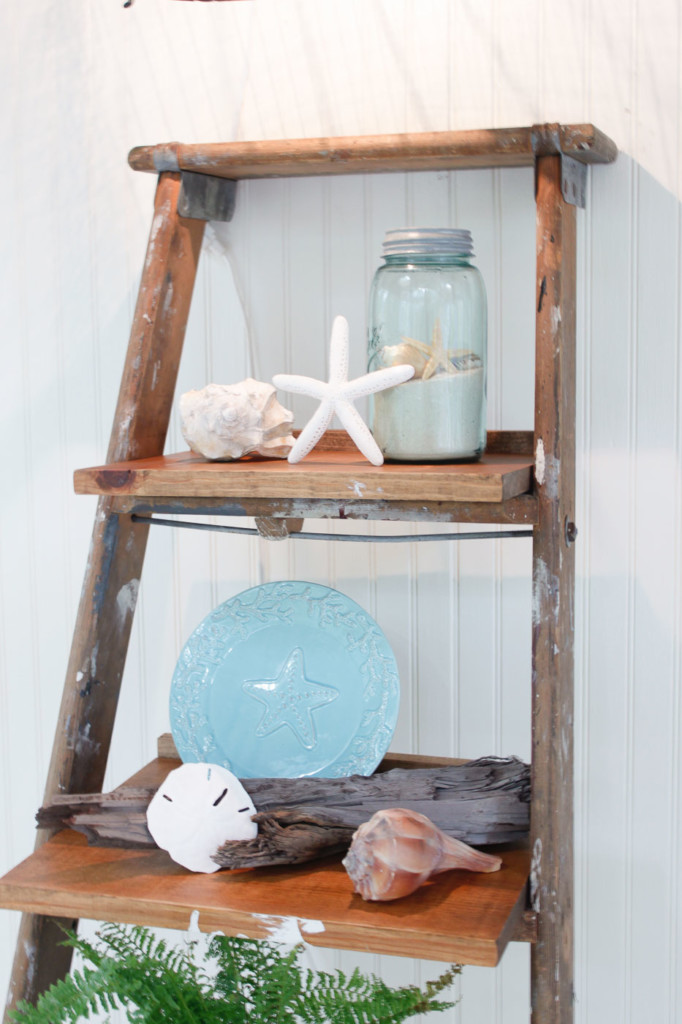
Then flip the ladder back over and admire! My total cost was $15 because I had the other materials on hand. But, even if you have to buy the screws and lumber, it should cost a lot less than a Pottery Barn shelving unit at $299!
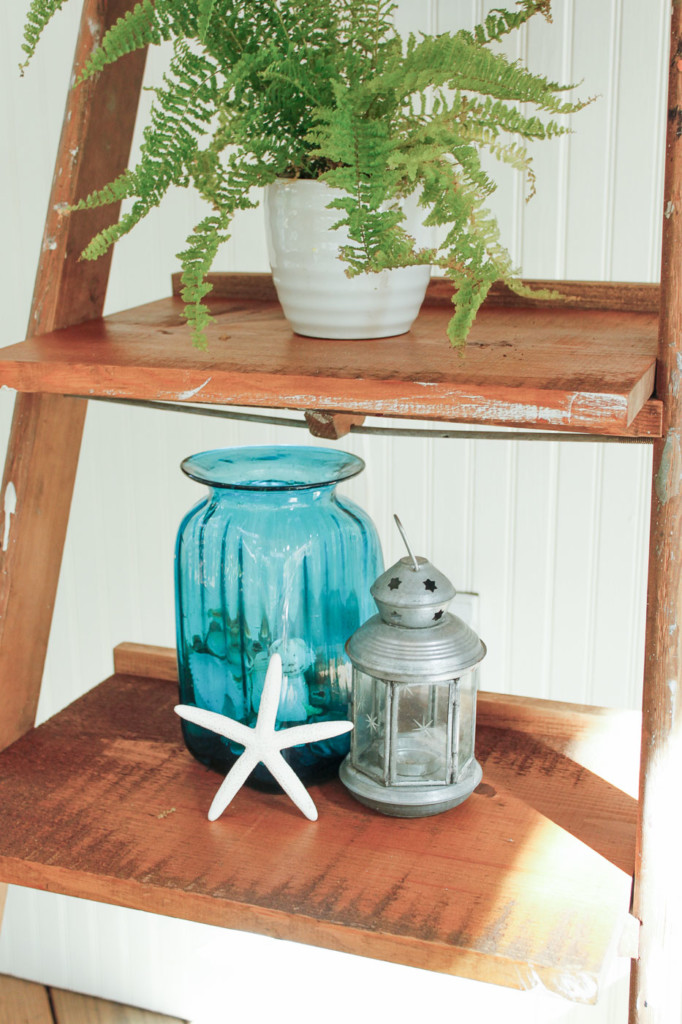
My favorite part about this shelf is the paint splashes.
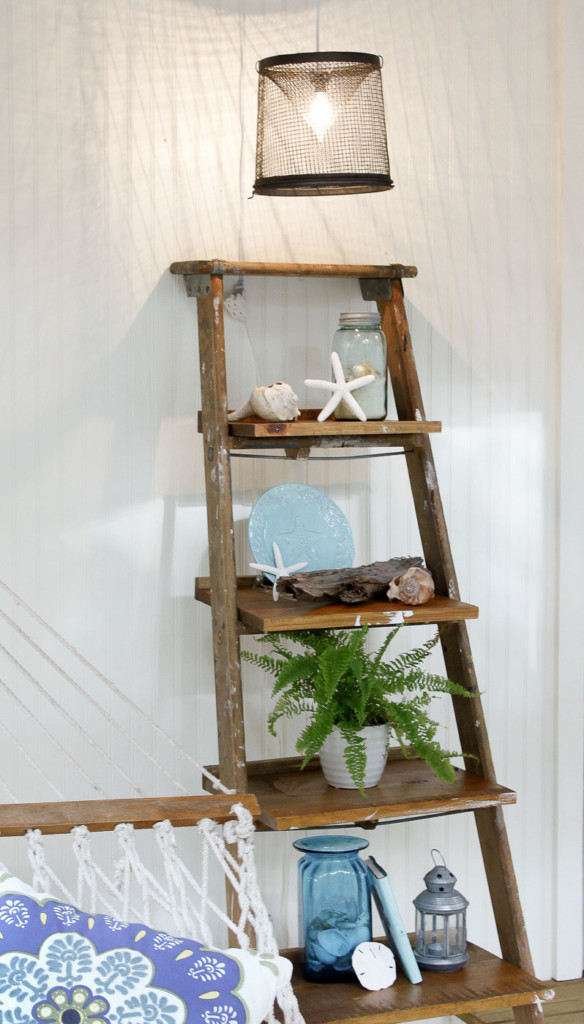
This DIY Ladder Display Shelf sits on our screen porch. But, this beauty would look good anywhere in your home.
I’m contemplating making one for my new master bathroom.
The minnow trap hanging pendant light is also an easy DIY project.
So what do you think? Do you like it? I bet you could build one of these ladder display shelves for yourself in an hour or two.
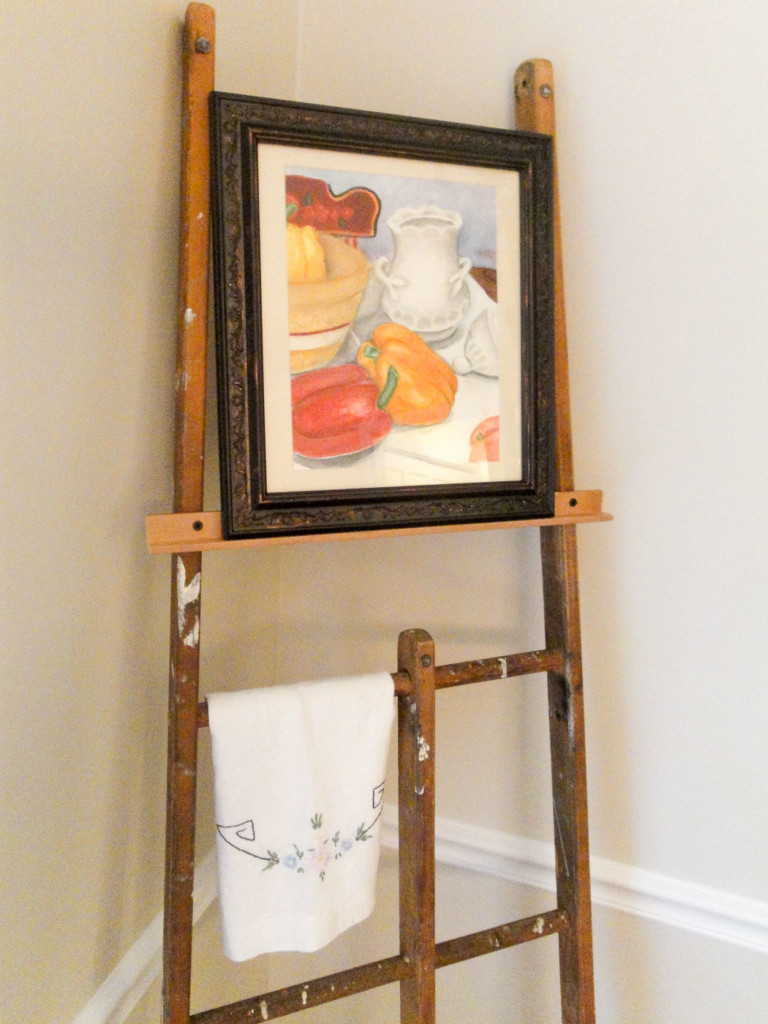
Oh, I almost forgot, if you are wondering what I did with the back of the ladder. You can see how I gave it a quick makeover turning it into a display easel.
Have a great week and I’ll see you soon.

Pin this project to save it or share with a friend!

We have the identical ladder but, I am stuck trying to figure out how to remove the hardware attaching the steps section from the back support. How did you do that part of the project? Thanks
I pried the rivets out with a hammer and pry bar. You might have to try a hacksaw with a metal blade if that doesn’t work.
Love the look and I have an old ladder left outside for years that will make a fine shelf, but I just don’t understand how it stands up?? If it is just leaning against the wall I imagine it will fall over when bumped… is it attached to the wall? Thanks
I was going to use an “L” bracket to secure to the wall. But, once I leaned it against the wall and put a few things on it, I found it stood up on it’s own.
Hello! I love this post and am planning on doing this to an old ladder of mine. My only question is how you removed the smaller back piece from the ladder without cutting it off. Thanks!
I pried it off with a hammer and pry bar. But, the ladder was very rickety. You can see how I did it here. : https://prettyhandygirl.com/ladder-stepping-up-to-stashbusting/
I have been in love with these sorts of shelves for so long. Thanks for sharing a great tutorial!
Erin
I came over from OMF and I’m glad I did! I got a ladder from Freecycle intending to hang antique linens on it to display, but my asthma is mad at me, so no such dust holders now. Your shelf tut was a perfect answer. Check out my blog?
Janet
Your ladder looks fantastic! I was going to make one using a piece of old extension ladder. But it has round rungs and I’ve realized it’ll be much harder to balance the shelves on the rungs. Do you have any suggestions? Thank you.
you could attach your shelves using a plumbing bracket, meant to go around pipes, etc and screw into a wall. looks like a U with arms off the top
I always love to visit this site for new creative ideas. We always think for costly furniture for interior but amazed to see a ladder can prove to be a same as buying furniture, just need some willing effort.
Love how you changed up this ladder. Very cool. Also love your beachy style!
I love this! Love what you did with an old ladder 🙂 Would you mind if I featured this project on my current Old 2 New series? 🙂
A great site. I find myself with a host of projects to be done at home and very little time to complete them efficiently. Information and advice that’s friendly to the lay person can be hard to find. Your site gives me hope and motivation.
I have looked at a number of DIY sites and found yours to be excellent.
Regards
Lisa
I’m so inspired. You are amazing. Beautiful job on this, just beautiful.
That is super cute. I would love to try that if I can find a ladder. Good job!
I’m so jealous that you went to Scotland. It’s a magical place. You ladder idea is great. I’m going to have to try one for my patio.
i love everything you have done…you have taught me well, master. um…i’m just like a few other people here and wonder about the sliding prevention issue. i see where it would stay put on carpet, but on a wood or tile floor…this baby would slide right about from under its contents. at least it would seem to me. i can’t wait to find out the answer to this one, then i’m all over it. thank you for such GREAT projects and teaching! btw: i LOVED edinburgh…LOVED it! too bad you didn’t get there when they perform the tattoo in september. THAT was phenomenal!
Edinburgh was amazing, as was the countryside! Wish we were going to be there for the big international festival coming up. They were building the stands near the castle while we were there.
The ladder is not anchored to the wall. It leans against it and because the foot lays flat against the floor. It doesn’t slide or tip. Although, if you have small children, I highly recommend that you use an “L” bracket to attach the top step to t
What size screws did you use to attach your shelves considering the size boards you used if I follow this plan exactly. BTW….I have my grandpa’s old ladder 😉
Donna, I don’t remember exactly, but set your screws up next to the width of the steps on the ladder and your shelf board. The screw length should go through your ladders step and about halfway through your shelf board. Make sense?
What a beautiful place to visit. I remember taking the train through the country to Edinburgh. I was a student and stayed in hostels (the one in Edinburgh had bed bugs). The people were amazing and totally made the trip for me. So glad you could travel with hubby.
Like Tami, I am wondering about securing to the wall.
The ladder is not anchored to the wall. It leans against it and because the foot lays flat against the floor. It doesn’t slide or tip. Although, if you have small children, I highly recommend that you use an “L” bracket to attach the top step to t
This is beautiful…
QUESTION: is it just leaning on the wall? Or do you have it secured to the wall? If not how are you preventing it from sliding?
I always wanted one but the price is an issue for me…but I love to do this project…can’t wait to hear your response & start this project…thank you!
Tami, the ladder is not anchored to the wall. It leans against it and because the foot lays flat against the floor. It doesn’t slide or tip. Although, if you have small children, I highly recommend that you use an “L” bracket to attach the top step to the wall.
Not sure if this thread still works but I have a ladder bookshelf made from iron and timber and it is sliding down the wall how can I keep it in one place?
Nicola, you could attach it to the wall using an “L” bracket. Or try putting rubber feet under the bottom legs.
And we LOVE Edinburgh!! Isn’t it lovely? We cannot wait to go back!
I love this!! Now I just need to find an old ladder! (I’ve been looking forever.) 🙂
That turned out great! When I first started looking at the pictures, I thought there is no way that old boring ladder would turn out anything like the inspiration. I was sort of right because it is BETTER than the inspiration! Thanks for sharing.
I think I saw an old ladder in my dad’s garage. I need to go grab it.
Great idea!
Beautiful ladder shelves! What a great job recycling an old ladder!
Nessie? Loch Ness Monster. Sounds like you’ve been to Scotland! My son and his friend are planning a trip there next summer! I’d love to go!
Ding, ding, ding, ding, ding! You guessed it! Scotland is very beautiful. I highly recommend a day in Edinburgh and then hopefully he can get out to tour the country side. We drove up to Ben Lawers through Stirling and then circled around and back to Edinburgh through Perth. I am still awe struck by the beauty!
That’s so awesome! You are just to creative! 🙂 Thanks for sharing. Chris
You are welcome and glad you liked the tutorial.
Nice I love this one! Can’t wait to hear about your vacay!
Thanks Jess. I just got back. Had a wonderful trip. Now to sort through the over 1500 pictures! Yes, it was that beautiful!
I’ve been admiring ladder display shelves for years!!!! I LOVE YOURS!! Thanks for the tips – now I’ll have an idea of how I can finish an old one if I’m lucky enough to find one 😉
Best of luck finding one. Maybe a yard sale or flea market?