We have a great mudroom area in our house, but when we moved in we didn’t have anywhere to store our shoes, and all we had to hang our coats on were a few peg hooks behind the door. Not very efficient or attractive in my opinion. (Especially when my toddler filled the pegs with shoes. Do you think he was trying to tell me something? Let’s talk about this Coat Rack made from an Old Door.

But, soon, we had more storage for coats and shoes! Let’s take a look at how I built this beauty:

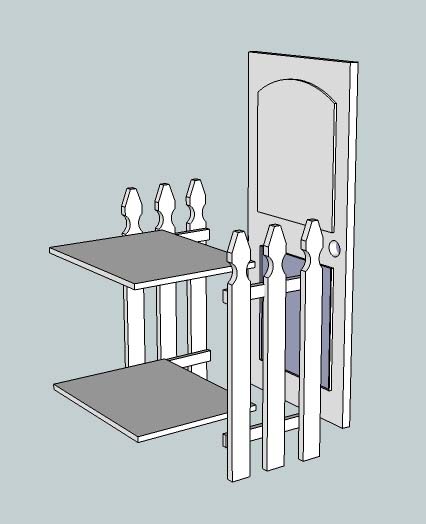
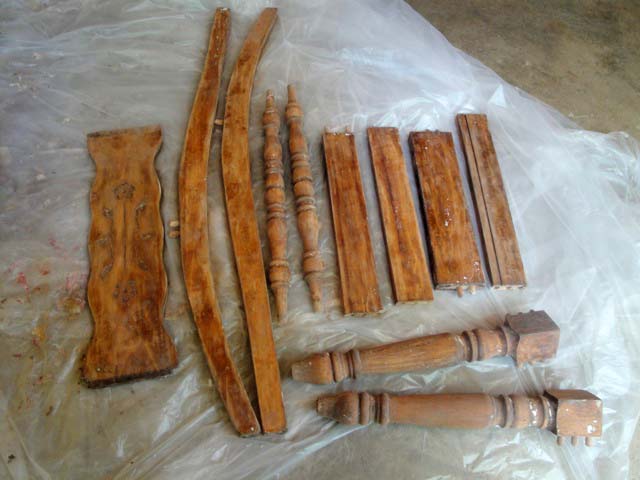
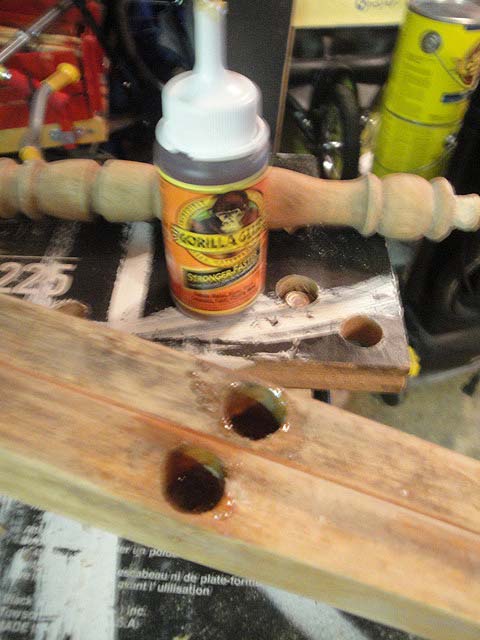
I started planning out the storage bench and coat rack at the same time. The coat rack was definitely the less involved project. Below is a picture as I was laying out the project.

I started with a beautiful old antique door that had recessed panels. I cut the panels out with my jigsaw (if you have never cut out an interior shape, you always start by drilling a hole large enough to fit your jig saw blade in. Drill your hole in a corner, then insert your jigsaw and cut the rest of your shape.

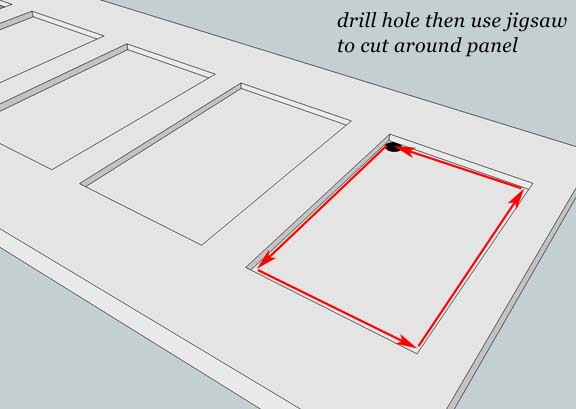
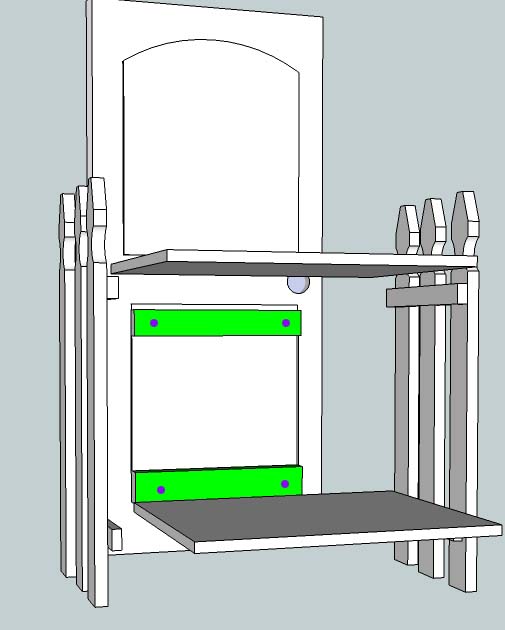
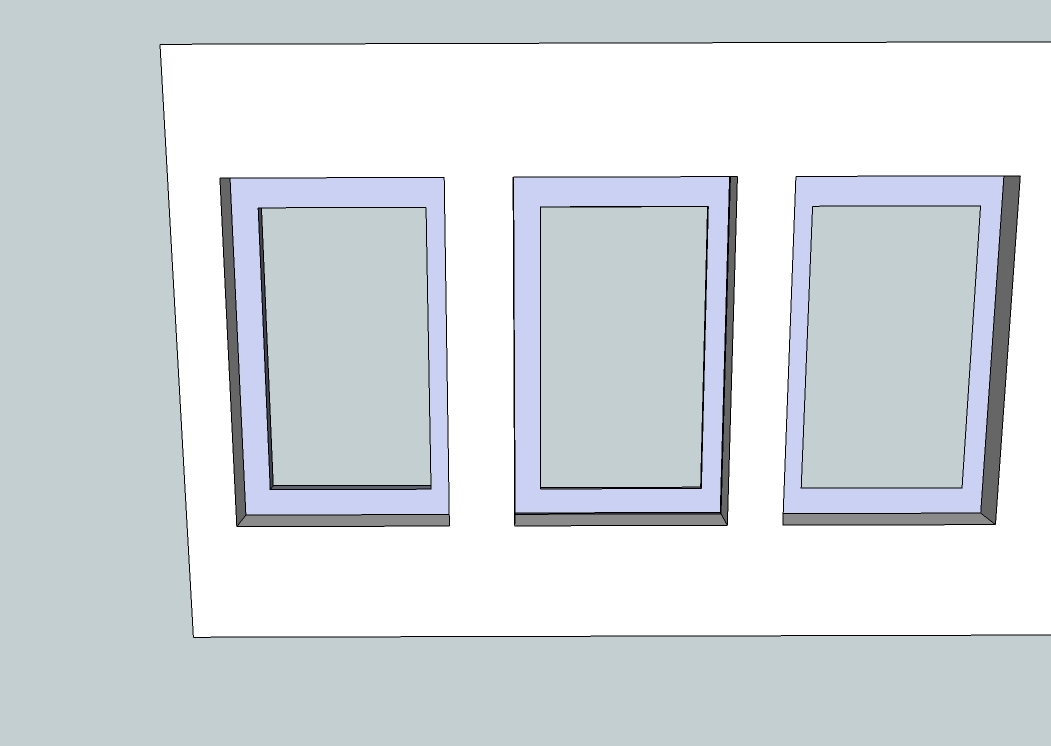
Next, I used my router to get rid of the edge of the recessed panels on the back side. As you can see in the Sketch Up drawing below, I left the edge on the front side to support the mirror.

Then I could measure my opening and cut the mirror pieces to fit into the panels. I have a great resource for inexpensive mirror glass. I buy those cheap full length mirrors at discount stores like Target, Kmart or Walmart. Then I rip off the thin plastic frame and the paper backing. Use a glass cutter to score the front of the mirror and then snap the mirror in two pieces.  Then continue to cut until it is down to the size needed.

If you have never cut glass before, here is a short 1 minute video tutorial:

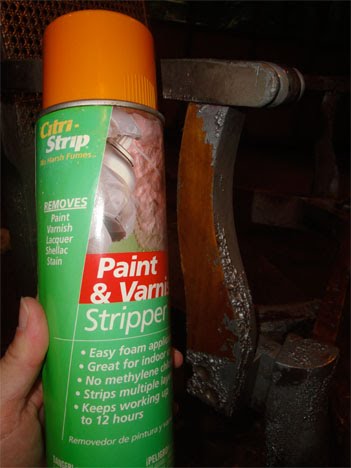
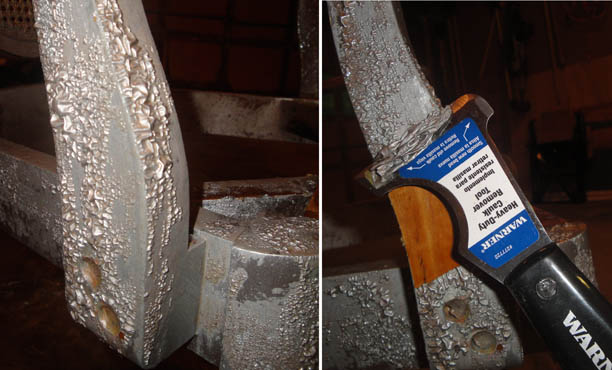
Next I sanded some of the silver off the back of the mirror to try to distress it. It took a while to do, and I’m not exactly thrilled with the distressing. Recently I stumbled across a few posts where paint stripper was used to distress mirrors. I would definitely use this route next time.

After all the mirror panels were cut to size, I laid them in the recess panel holes from the back and then used a thick bead of caulk around the edges to hold the mirror in place.

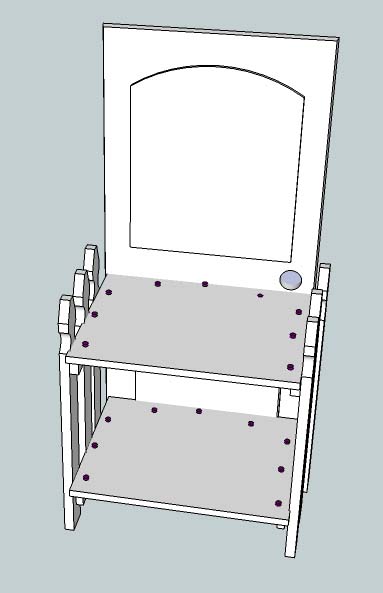
Next I had to build the shelf that the door would rest on. I recently bought two wall shelfs and brackets from a yard sale. I used one 7″ deep shelf for the vertical edge (or backer board for the hooks to attach to.) I ripped the other shelf down to 5″ inches (on a table saw) and used that to rest on top of the other shelf. To attach the two I simply screwed down through the horizontal shelf and into the backer board every 2 feet or more.

Then I added some decorative moulding using finish nails to secure them. You can see the different pieces on the edge.

I scoured eBay for a week until I found the perfect antique coat hooks. They are adorable and can hold many coats with the three prongs.

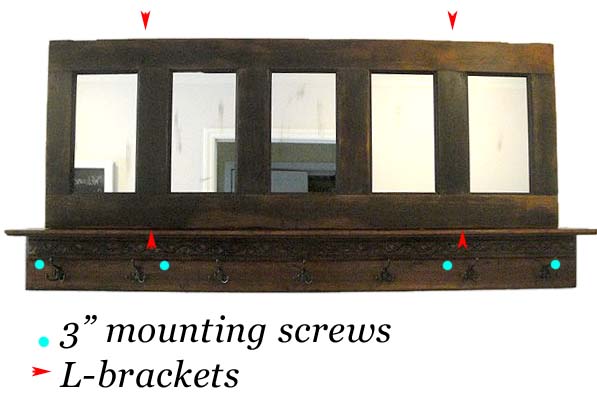
After everything was assembled, I located the studs in our mudroom wall and drilled holes into the backer board, then drove 3″ screws into the wall studs.

The antique door rests slightly on the shelf, but it is also held secure by four L brackets that are mounted on the top and bottom.

Be sure that your coat rack is safely secured to the wall for safety reasons.
For this project I don’t recommend using wall anchors.
Take the time to find the studs, you will thank me four years from now when your coat rack is still holding up to children who can and will climb on anything!

I used Minwax Brazillian Rosewood gel stain to stain the bench and shelves. This was the stain color that matched the color of the antique door.

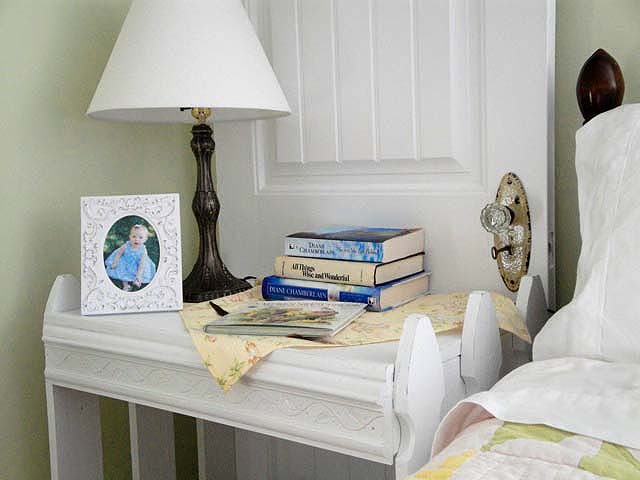
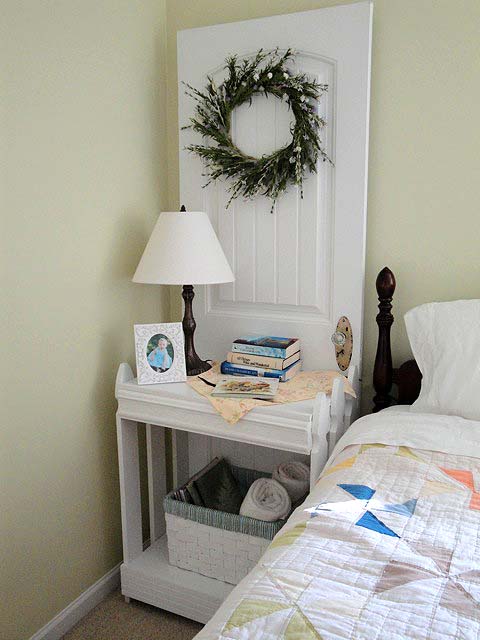
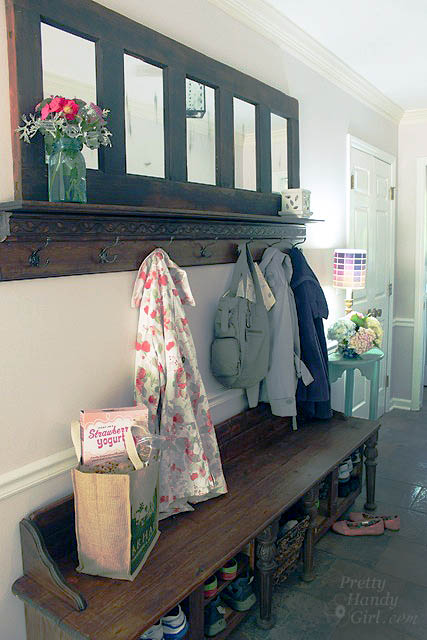
And there you have it! An antique coat rack to match my shoe storage bench.

I just love these eBay hooks! And the detailed moulding makes me happy.
Plus, they allow space for decorating during the holidays!
Holiday Home Tour 2016 | Pretty Handy Girl

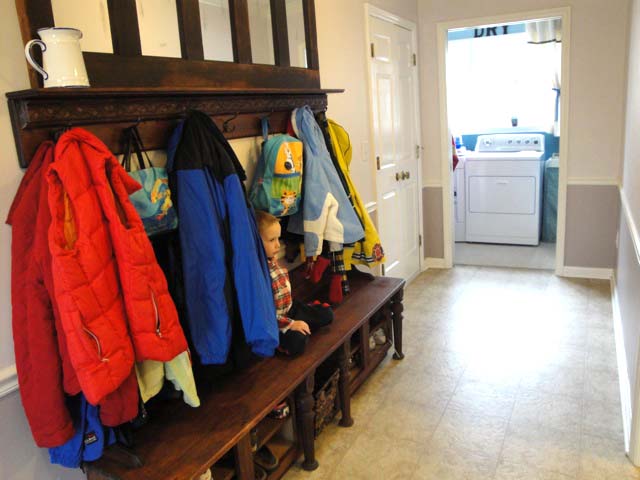
Plenty of storage for coats for a family of four or more!

Learn how to build the mudroom shoe storage bench here.


My best friend from elementary school will be flying in today from New York. I have a sweet little retreat all made up for her in our guest room. I promise to post pictures of the whole room in the near future (when the sun – and sons – cooperate with me.)
 
Our guest room is full of discarded treasures: a rebuilt curbside chair, an upholstered bench, a full size bed, and a little curved desk. But, one of the focal pieces in the guest room is a night stand made from a discarded door and leftover picket fence pieces.

 Isn’t it fabulous?!

So, here is the tutorial for you. I hope you will excuse my first attempt at using Google Sketch Up. These sketches should give you a pretty good idea how to construct the night stand.

I started by cutting two boards for the shelves. They were cut to the width of the door and the depth of the picket fence sections.

I cut two cleats out of 2″ x 4″ boards (shown in green).

And screwed them to the door (purple circles), making sure that the top of the cleats were level with the top of the horizontal cross boards on the picket fence.

I braced the picket fence pieces to the door using L-brackets.

I laid the two shelves on top of the cleats and cross boards. And drove screws down to hold it in place (purple circles).

Next, I cut some face boards (shown in aqua below) to the same width as the nightstand front.

I used finish nails to nail them to the front, then added some decorative moulding to the face boards.

I used wood putty to fill all the screw and nail holes, and caulk to smooth the seams of the moulding (see here for more details on caulking and filling nail holes.)

Then I painted the nightstand white and accessorized it. I’m still deciding whether I should distress and glaze the nightstand. Feel free to give me your opinion. I am all ears.

Here is my door & picket fence nightstand, all ready for our first guest since re-decorating the guest room.

Glass knob and door plate was purchased at NoFo in Raleigh.
If you are ever in the Raleigh, NC area, you MUST eat at NoFo,
then shop upstairs after your meal. 
 
Some books written by my favorite author, Diane Chamberlain.
A goodwill lamp and a picture of my niece who lives too far away!*

*(bold comment solely for the purpose of guilting my sister into moving closer.)
Fresh towels and my Country Living magazines.

All beautified and ready for our visitor!

Sharing with the CSI Project White Challenge:

Visit thecsiproject.com

I have a serious problem. I can’t bear to see a piece of furniture being thrown away. It could be the ugliest, most broken down chair and I still feel the need to save it from Mt. Trashmore. That was the case with “Daisy” this poor ugly chair that I found on the curb awaiting the trash trucks a few weeks ago. I threw her in the back of my car and brought it home.

Two missing parts

Only when I got home did I assess her condition. Moldy seat, chipping and peeling paint, structurally falling apart, cobwebs, missing parts…

GROSS! Stained and moldy seat.

…and then a dead roach dropped out! Ewwww! I must be insane.  But, I still saw potential through all the disrepair.

This chair had some serious structural issues. I knew it was a case of tear her down and rebuild. This intro kept playing in my head the during the whole process:

I pulled apart the chair (mostly with my bare hands and then with some assistance from a hammer.)

Until I was left with a skeleton of a chair.

I stripped the paint layers off the chair using the same technique as I did for this chair (see details here.) Unfortunately this chair had 5 layers of paint, therefore it took several hours and several re-applications of Citri-strip to get down to the wood.

If you remember, there were several missing parts on this chair. I had a lightbulb moment when I realized that I could used the spindles from the chair back for the missing parts to connect the legs.

I removed the back spindles.
Almost a perfect size and I had two of them!

I cut down the spindles on the miter saw (but these could easily be cut with a hand saw).

And then notched the ends so they would fit into the holes on the legs. (I did have to enlarge the holes on the legs slightly using my drill and a 3/4″ spade bit.)

Notching the spindles. Cut around the diameter, then cut from the end in towards the first cut. Repeat on all sides.

After dry fitting all the pieces back together, I used Gorilla glue to glue the chair back together.

I clamped the chair tight by using rope to wrap around the chair.

Daisy had also lost one of her decorative corner finials. So, I bought two new finials at Home Depot for $5.

In order to screw on the new finials in, I had to plug the hole with wood. (As promised: a tutorial on filling holes in wood.)

I also filled the holes where the spindles used to be with wood putty.

Next, I primed Daisy. Just a side note here, one reason the original five coats of paint on Daisy were peeling and flaking is that the proper prep work wasn’t done. No sanding to scuff up the glossy polyurethane and no primer. It is so important to sand (rough up your surface) and use a primer. If you cut corners here, you might as well kiss your beautiful finish goodbye in a few years. Especially if the chair is exposed to the elements.)

Finally, I added two coats of white paint (sanding lightly between coats.)

The chair seat was in really bad shape. Therefore I decided to cut a new one out of plywood using my jigsaw.

Trace old seat on plywood, use ruler to make straight lines, cut out seat using jigsaw.

I checked my fit and then re-upholstered my chair. Check out this post to see how to re-upholster a chair seat.

Then for the finishing touches or the frosting on the cake. You can definitely do this step! The inset carving controls your brush for you. Kind of like bowling with bumpers.

And my chair is finished. Isn’t she beautiful!

Hard to believe that 48 hours ago this chair was definitely worthy of Mt. Trashmore.

The chair is super solid now, and doesn’t move at all thanks to the Gorilla Glue.

How about one last look at the before and after pictures?

Want to see more furniture in my guest room? Take the tour here!

On Wednesday, I had the morning to myself since the kids were in summer camp.  I decided not to work since it was my birthday. Most people would probably take the free morning to get a massage, or a pedicure, or go shopping. I chose the later. But, the shopping mall wasn’t calling me. My destination was far from the marble floors and glittering displays. I was headed to the industrial part of town where warehouses and construction equipment rental stores reside. I visited my local Habitat for Humanity ReStore.

I am always amazed by the things that are donated to the ReStore. When I enter those doors, my mind begins to whirr. Before me are shelves and aisles of discarded items. Each one calling to me to transform him or her from an ugly frog into a beautiful prince or princess. I happen to possess the magical powers to do just that! It starts with the ability to see into the future (well, maybe just a vision of what could be.) Then it takes some concentration and before you know it…bippity boppity boo! There before me stands a beautiful object and no one can guess at its humble beginnings.

I’d like to give you a look at some of the visions I had.  Won’t you join me on my tour?

First I headed down the furniture aisle. This little knotty pine night stand whispered to me, “Psst, look at my beautiful handles!” She had only been at the ReStore for a few days, so her price was a little steep. But, her drawers were solid and on gliders. Structurally she was solid.

I closed my eyes and when I opened them, I saw this beautiful off white dresser. Freshly painted a crisp white and her handles had a satin black finish. Beautiful!

Then I heard the sounds of water splashing on a classic marble sink. I turned the corner and saw this builder’s special white vanity with brand new brushed nickel faucet.

It didn’t take much to invision this gentleman with a black tuxedo coating of paint and brushed nickle knobs and handles. At $75, he is a diamond in the rough. The sink set alone would cost that!

But, the best is yet to come. Continuing down the cabinet aisle, I see this poor late 70’s kitchen cabinet set. Her handles are charming and exotic. She has some nice curves and pretty lines.

I squint my eyes and begin to see a miraculous transformation! Antique gold handles pop out. Legs grow at her base and a table top sprouts on her head. Oh she will be the belle of the ball as a sideboard in anyone’s dining room.

The next cabinet can not be ignored with a $5 price tag. He begs for someone to take him home.

Imagine a built in cabinet and window seat in a dormer window. Fresh white paint and slate blue trim with black handles.

It doesn’t take too much imagination to see these old newel posts cut down and fitted onto a plain jane desk to add more curvaceous legs:

Now it’s your turn. Imagine these items transforming before you very eyes:

I have a friend who has an old set of lockers by her door. It is her upright family organization center. Each child has a locker and he/she can store shoes, book bag, etc. inside.

I can just see this set of red lacquer cabinets in a retro modern dining room or living room:

A little black paint on the shelves and some feet. Maybe a black marble or granite top?

The ReStore has a large selection of donated lights. Chandeliers twinkle in the light above your head. Envision the shiny gold fading to a beautiful oil rubbed bronze. Another friend shared this link with me detailing such a transformation with Krylon spray paint.

The ReStore staff actually has a display model that someone has transformed into a shiny black chandelier with crystals dripping off her arms.

With an $8 price tag, it is hard to walk away from these beauties. But, I’m seeking something in particular. A new hanging fixture for our foyer.

I find these two potential hanging lights.

At $5 a piece I should bring them both home. But, I decided I prefer the one on the right with his open base and seedy glass. Check out the transformation here!

This glass globe used to be a large exterior hanging light fixture!

Can’t you just see it as a cloche in your garden? At $35, her price was a bit steep for me, but maybe she will still be there in a few weeks with a lower price tag. (Update: I went back to buy this exterior light and the second lantern above, but they were both gone. My loss, but hopefully someone else’s gain.)

As I gather my treasures (the hanging light, an old rickety ladder, some decorative moulding and a copper wall sconce) I am nearly bowled over by the detail on this solid armoire. At $450, it would be a nice addition in someone’s bedroom, but alas our rooms are too small for this towering king.

I hope you enjoyed the tour and check back soon to see the magic I am going to perform on the treasures I bought: copper sconce, decorative moulding, ladder, and hanging lantern.

In the meantime, I have a busy weekend ahead building a built in reading bench with storage in my youngest son’s extra closet.

Extreme Makeover for a Wooden Rattan Backed Chair

This week I finally got around to giving my $5 yard sale chair a face-lift. My poor chair was covered in silver paint and a horribly stained green velvet seat. I won’t even mention the glass beads that were epoxied on her. Luckily, I rescued her and offered her a new life as my desk chair.

The makeover was a bit more involved than I initially anticipated, but the results were well worth the work. Because there were different procedures for each step, I will break this transformation into a few posts. Care to see the transformation? Then read on…

1. Takin’ It All Off! aka paint stripping

Normally if furniture is painted and the paint is in good condition, (the paint is well adhered to the furniture and CAN’T be scratched off with a fingernail) I leave it! If it was in good shape, I would scuff up the surface with some sandpaper and maybe use primer if I’m not sure why type of paint was used. But, for this baby, I could scratch the paint off easily with my fingernails.

My preferred paint stripper has been the less toxic Citri-strip. Purchase it in your local hardware store. There are a few other brands that make these less-toxic products. So, feel free to substitute. (More tips on paint stripping at CentsationalGirl.com.)

Materials:

– Rubber gloves (I said less-toxic, you still need to protect your skin)
– Face mask (if you aren’t working in a well ventilated area)
– Small wire brush for detail work
– Multi-edge scraper (also called caulk removal tool)
– Sandpaper or sanding block
– Brillo pad or steel wool
– Plastic throw-away tarp (Dollar store plastic table covers work great for this!)
– Bucket with a little dish soap, water and a sponge for clean up

Instructions:

Coat the areas that you want to strip with the foamy Citri-Strip spray and let it sit for 30 minutes. As soon as the paint is bubbled up, you can start to scrape and strip. This is such a satisfying step as you easily clear away the abusive paint.

The scraper tool I have works well for about 90% of the surfaces on the chair. For the other 10% you’ll need to use your small wire brush. You may need to re-coat any areas that won’t come off easily with the Citri-strip.

Next you need to wash off the chemicals left on the chair. Use the soap, water and sponge to wash the chair. Let your chair dry. (I sped up this process by aiming a fan at the chair.)

Now it is time to smooth your chair. Use the Brillo pad to get any small spots left and to prep for sanding. Then you can take your sandpaper and/or sanding block and make that chair as smooth as a baby’s bottom! The wood on this old chair was so beautiful with age that I almost grabbed the polyurethane and applied two coats. But, I had bigger plans for this chair. You will notice that I left the paint on the rattan back of the chair. This will all be covered up by the upholstery. I hope you will stick with me for the next step in this chair makeover.